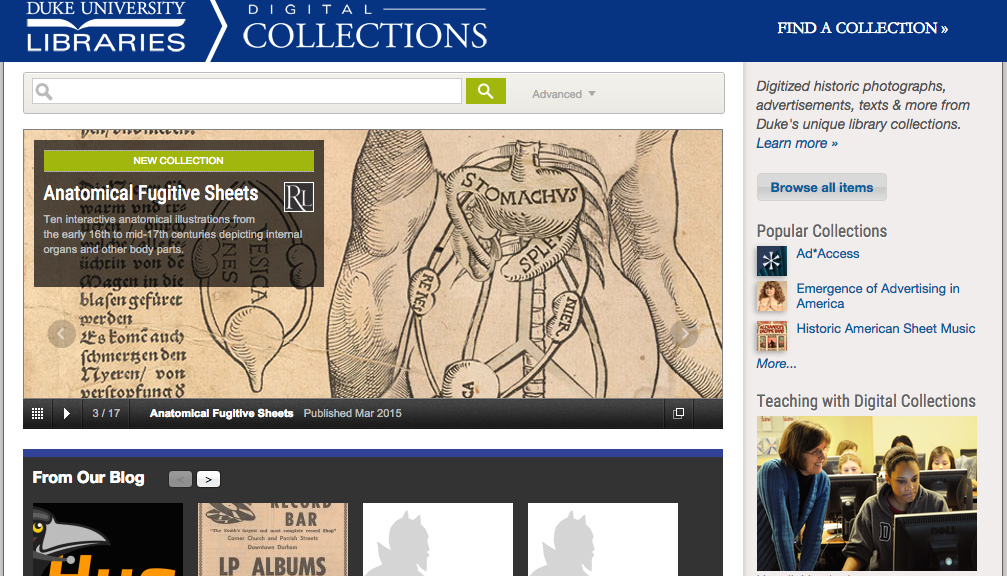
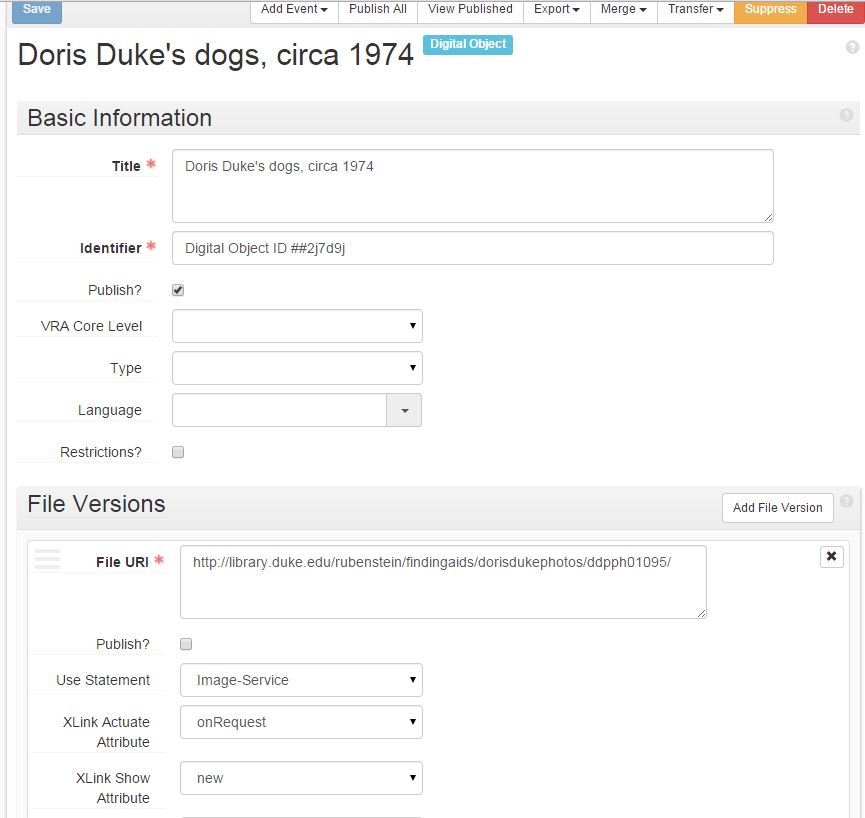
The Library’s Digital Projects Services department has been working with Digital Repository Services on a software project that will eventually replace our existing Digital Collections platform. There will be future posts announcing the new way of discovering and accessing Duke’s Digital Collections, but I want to use this post to reflect on the tools and practices we’ve been using to build this new application.
There are a few important differences between this not yet released new application and our current system. One is that Digital Collections will be part of the library’s Digital Repository, which includes a much broader range of digital items and collections. The second is that since the repository is being developed using Project Hydra, we’re using a component of the Hydra stack, Project Blacklight, as the discovery and access layer for Digital Collections.
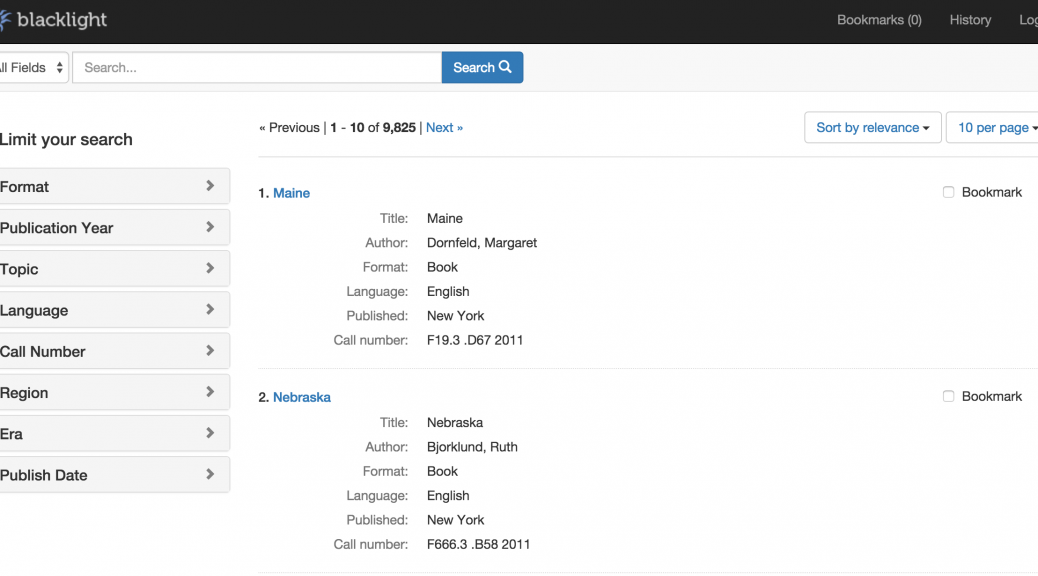
Blacklight is an open source, Ruby on Rails Engine that provides a basic discovery interface for searching an Apache Solr index, and provides search box, facet constraints, stable document urls, etc., all of which is customizable via Rails (templating) mechanisms.
The Blacklight Development Google Group has posts going back to 2009, and the GitHub repository has commits back to 2009 as well. So, the project’s been actively developed and used for a while. The Project Blacklight website maintains a list of different implementations of the software, where you can see the range of interfaces it has been used to develop.
One of the benefits of using a widely adopted open source platform is access to a community of developers who use the same software. I was able to solve many problems just by searching the Blacklight Development Google Group for answers. Blacklight made it easy to get a basic interface up and running quickly and provided a platform to add local customizations. Because the basics were already in place we were able to spend our time on more specialized features and local requirements. For example, specifying which search filters should appear for a collection and what metadata fields should be included in search were as easy as adding a few lines of configuration code to the application.
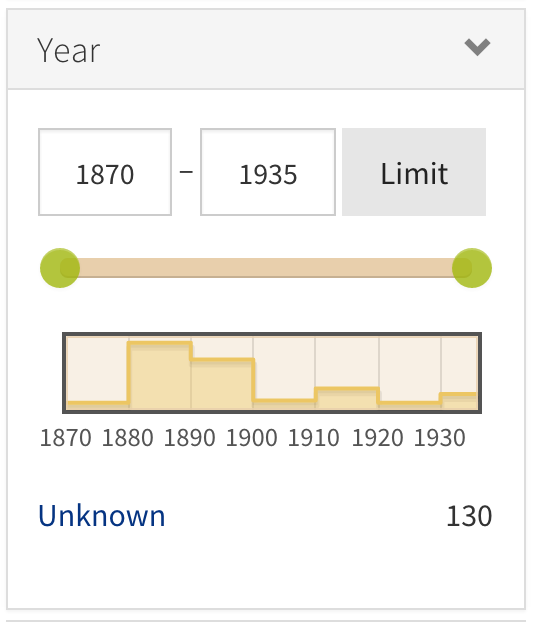
Even for some of the more specialized features, we’ve relied as much as possible on available add-ons and tools to add features to Blacklight. Because of this we’ve been able to add advanced features to the new application that did not require a large amount of development time. For example, we’re using the Blacklight Range Limit Ruby Gem to add a visual date picker with a histogram for searching the collections by year.
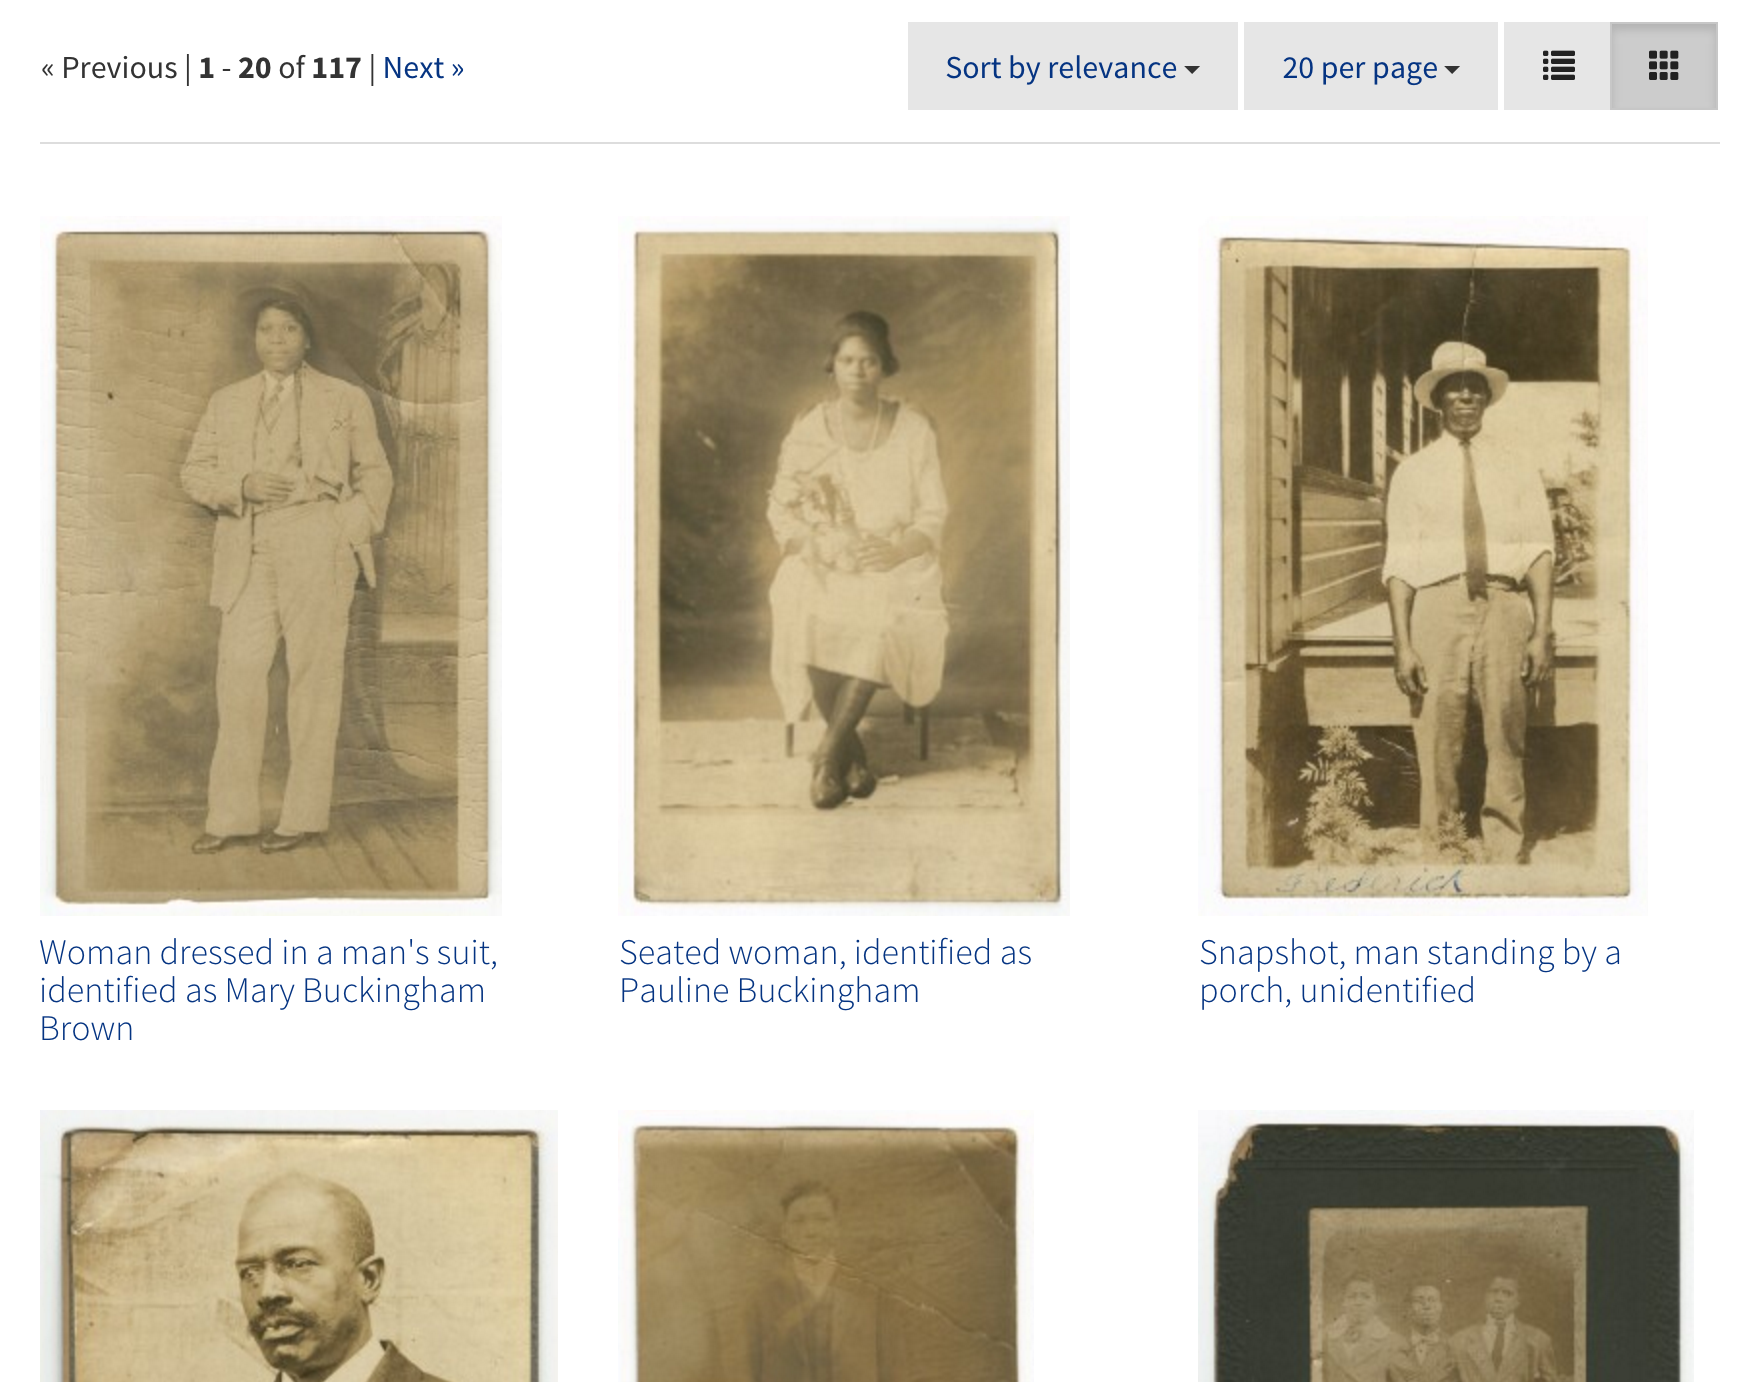
We also used the Blacklight Gallery Ruby Gem to add an option to view search results as a gallery with larger thumbnails.
Both of these features were relatively easy to implement because we were able to make use of plugins shared with the Blacklight community.
Another new (to us) tool we’re using is the IIPImage server for serving images to the application. Because the image server automatically creates and then returns the right size image based on parameters sent in a request, we don’t have to pre-generate thumbnails of various sizes to support different displays in the application. The image server can even crop images. Because the image server stores the images as Pyramid TIFFs, we’re able to provide very smooth and fast in-browser pan and zoom of images, which works similarly to Google maps. To get a better idea of what this means for exploring high resolution images in your browser, you can explore some of the examples on the IIPImage site.
To manage this project we’ve been following Agile project management techniques, which for us meant taking an iterative approach to designing and building features of the application in two week sprints. At the beginning of each sprint we decide what we’re going to work on from a backlog of user stories, and our goal by the end of the two weeks is to have a version of the code that is working and deployed with these features implemented. Each day we have a 15-minute stand-up meeting during which each person reviews what they worked on yesterday, explains what they’re going to work on today, and then notes anything that’s blocking their progress. These quick, daily meetings have helped keep the project moving by increasing communication and helping to focus our work.
We’re still putting some pieces in place, so our new platform for publishing Digital Collections isn’t available yet, but look for it soon along with more information about the project and its first published collection.
How We Got Here: A terribly simplistic history of library metadata
Managing the description of library collections (especially “special” collections) is an increasingly complex task. In the days of yore, we bought books and other things, typed up or purchased catalog cards describing those things (metadata), and filed the cards away. It was tedious work, but fairly straightforward. If you wanted to know something about anything in the library’s collection, you went to the card catalog. Simple.
Some time in the 1970s or 1980s we migrated all (well, most) of that card catalog description to the ILS (Integrated Library System). If you wanted to describe something in the library, you made a MARC record in the ILS. Patrons searched those MARC records in the OPAC (the public-facing view of the ILS). Still pretty simple. Sure, we maintained other paper-based tools for managing description of manuscript and archival collections (printed finding aids, registers, etc.), but until somewhat recently, the ILS was really the only “system” in use in the library.
Duke Online Catalog, 1980s
From the 1990s on things got complicated. We started making EAD and MARC records for archival collections. We started digitizing parts of those collections and creating Dublin Core records and sometimes TEI for the digital objects. We created and stored library metadata in relational databases (MySQL), METS, MODS, and even flat HTML. As library metadata standards proliferated, so too did the systems we used the create, manage, and store that metadata.
Now, we have an ILS for managing MARC-based catalog records, ArchivesSpace for managing more detailed descriptions of manuscript collections, a Fedora (Hydra) repository for managing digital objects, CONTENTdm for managing some other digital objects, and lots of little intermediary descriptive tools (spreadsheets, databases, etc.). Each of these systems stores library metadata in a different format and in varying levels of detail.
So what’s the problem and what are we doing about it?
The variety of metadata standards and systems isn’t the problem. What is the problem–a very painful and time-consuming problem–is having to maintain and reconcile description of the same thing (a manuscript, a folder of letters, an image, an audio file, etc.) across all these disparate metadata formats and systems. It’s a metadata synchronization problem and it’s a big one.
For the past four months or so, a group of archivists and developers here in the library have been meeting regularly to brainstorm ways to solve or at least help alleviate some of our metadata synchronization problems. We’ve been calling our group “The Synchronizers.”
What have The Synchronizers been up to? Well, so far we’ve been trying to tackle two pieces of the synchronization conundrum:
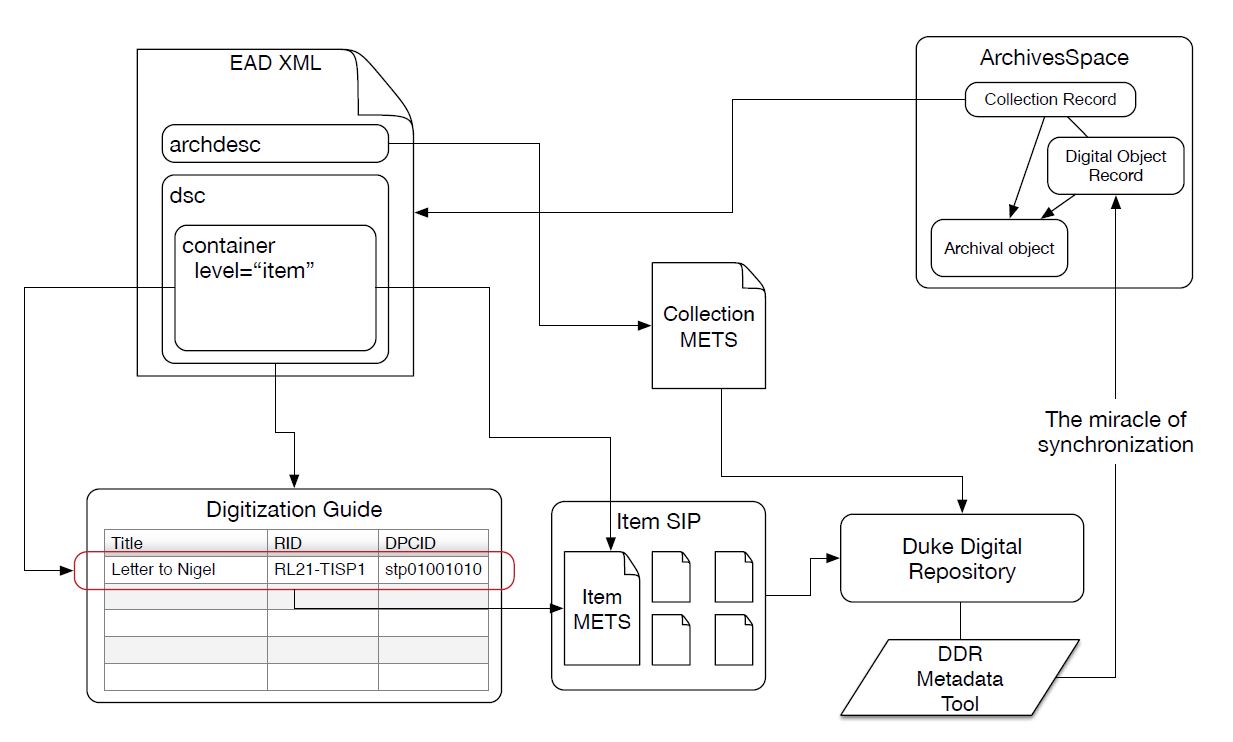
Problem 1 (the big one): Keeping metadata for special collections materials in sync across ArchivesSpace, the digitization process, and our Hydra repository.
Ideally, we’d like to re-purpose metadata from ArchivesSpace to facilitate the digitization process and also keep that metadata in sync as items are digitized, described more fully, and ingested into our Hydra repository. Fortunately, we’re not the only library trying to tackle this problem. For more on AS/Hydra integration, see the work of the Hydra Archivists Interest Group.
Below are a couple of rough sketches we drafted to start thinking about this problem at Duke.
Hydra / ArchivesSpace Integration Sketch, take 1Hydra / ArchivesSpace Integration Sketch, take 2
In addition to these systems integration diagrams, I’ve been working on some basic tools (scripts) that address two small pieces of this larger problem:
A script to auto-generate digitization guides by extracting metadata from ArchivesSpace-generated EAD files (digitization guides are simply spreadsheets we use to keep track of what we digitize and to assign identifiers to digital objects and files during the digitization process).
A script that uses a completed digitization guide to batch-create digital object records in ArchivesSpace and at the same time link those digital objects to the descriptions of the physical items (the archival object records in ArchivesSpace-speak). Special thanks to Dallas Pillen at the University of Michigan for doing most of the heavy lifting on this script.
Problem 2 (the smaller one): Using ArchivesSpace to produce MARC records for archival collections (or, stopping all that cutting and pasting).
In the past, we’ve had two completely separate workflows in special collections for creating archival description in EAD and creating collection-level MARC records for those same collections. Archivists churned out detailed EAD finding aids and catalogers took those finding aids, and cut-and-pasted relevant sections into collection-level MARC records. It’s quite silly, really, and we need a better solution that saves time and keeps metadata consistent across platforms.
While we haven’t done much work in this area yet, we have formed a small working group of archivists/catalogers and developed the following work plan:
Examine default ArchivesSpace MARC exports and compare those exports to current MARC cataloging practices (document differences).
Examine differences between ArchivesSpace MARC and “native” MARC and decide which current practices are worth maintaining keeping in mind we’ll need to modify default ArchivesSpace MARC exports to meet current MARC authoring practices.
Develop cross-walking scripts or modify the ArchivesSpace MARC exporter to generate usable MARC data from ArchivesSpace.
Develop and document an efficient workflow for pushing or harvesting MARC data from ArchivesSpace to both OCLC and our local ILS.
If possible, develop, test, and document tools and workflows for re-purposing container (instance) information in ArchivesSpace in order to batch-create item records in the ILS for archival containers (boxes, folders, etc).
Develop training for staff on new ArchivesSpace to MARC workflows.
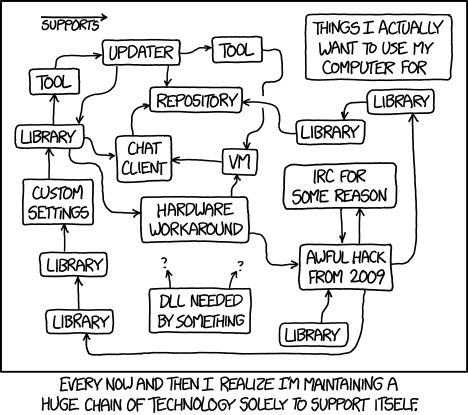
courtesy of xkcd.com
Conclusion
So far we’ve only taken baby steps towards our dream of TOTAL METADATA SYNCHRONIZATION, but we’re making progress. Please let us know if you’re working on similar projects at your institution. We’d love to hear from you.
Google Images search for Yahoo Pipes. I tried to screenshot some of ours, but they’re no longer viewable.
Six or seven years ago, we discovered a handy new data mashup service from Yahoo! called Yahoo! Pipes. It had a slick drag-n-drop visual programming interface that made it easy to grab data from a bunch of different live sources, then combine, reshape, and conditionally change it into a new dynamic feed modeled however we happened to need it. “Pipes” was a perfect name, a nod to the | (pipe) character used in Unix to chain command-line inputs and outputs, and evocative of the blue pipes you would drag to connect modules in the Pipes UI to funnel data from one to another. It was—quite literally—a series of tubes.
Over the years, we grew to rely on Yahoo! Pipes’ data-mashing wizardry for several features central to the presentation of information on our library website. If you’ve read Bitstreams in the past, you probably have followed a link that was shuttled through Pipes before ultimately being rendered on the website.
Here’s are some of the things we had done in the library website that Pipes made possible:
New Additions. Create media-rich RSS feeds of New Additions (by category) to the library catalog by mashing raw XML into MediaRSS.
Blogs. Combine RSS feeds from ten or more library blogs into one shared feed.
Jobs. Create a shared RSS feed of library job postings matching any of four job types.
Imagine our dismay in June, when Yahoo! announced it was pulling the plug on Pipes, shutting it down for good in September. In our scramble to find a suitable replacement, we saw Huginn as the best alternative.
Huginn
The amazing Huginn logo, from https://github.com/cantino/huginn/blob/master/README.md
Cleverly named after a raven in Norse mythology, Huginn is an open-source data mashup application. It can do a lot of the things Yahoo! Pipes could, but it’s also quite different.
Similarities to Yahoo! Pipes
Collect data from various sources on the web and transform it
Combine disparate data into a single stream
Emit a new customized feed at a URL for other services to access
Differences from Pipes
No visual editor; instead, you hand-code JSON to configure
Open source rather than hosted; you have to run it yourself
Constantly being improved by developers worldwide
A Ruby on Rails app; can be forked/customized as needed
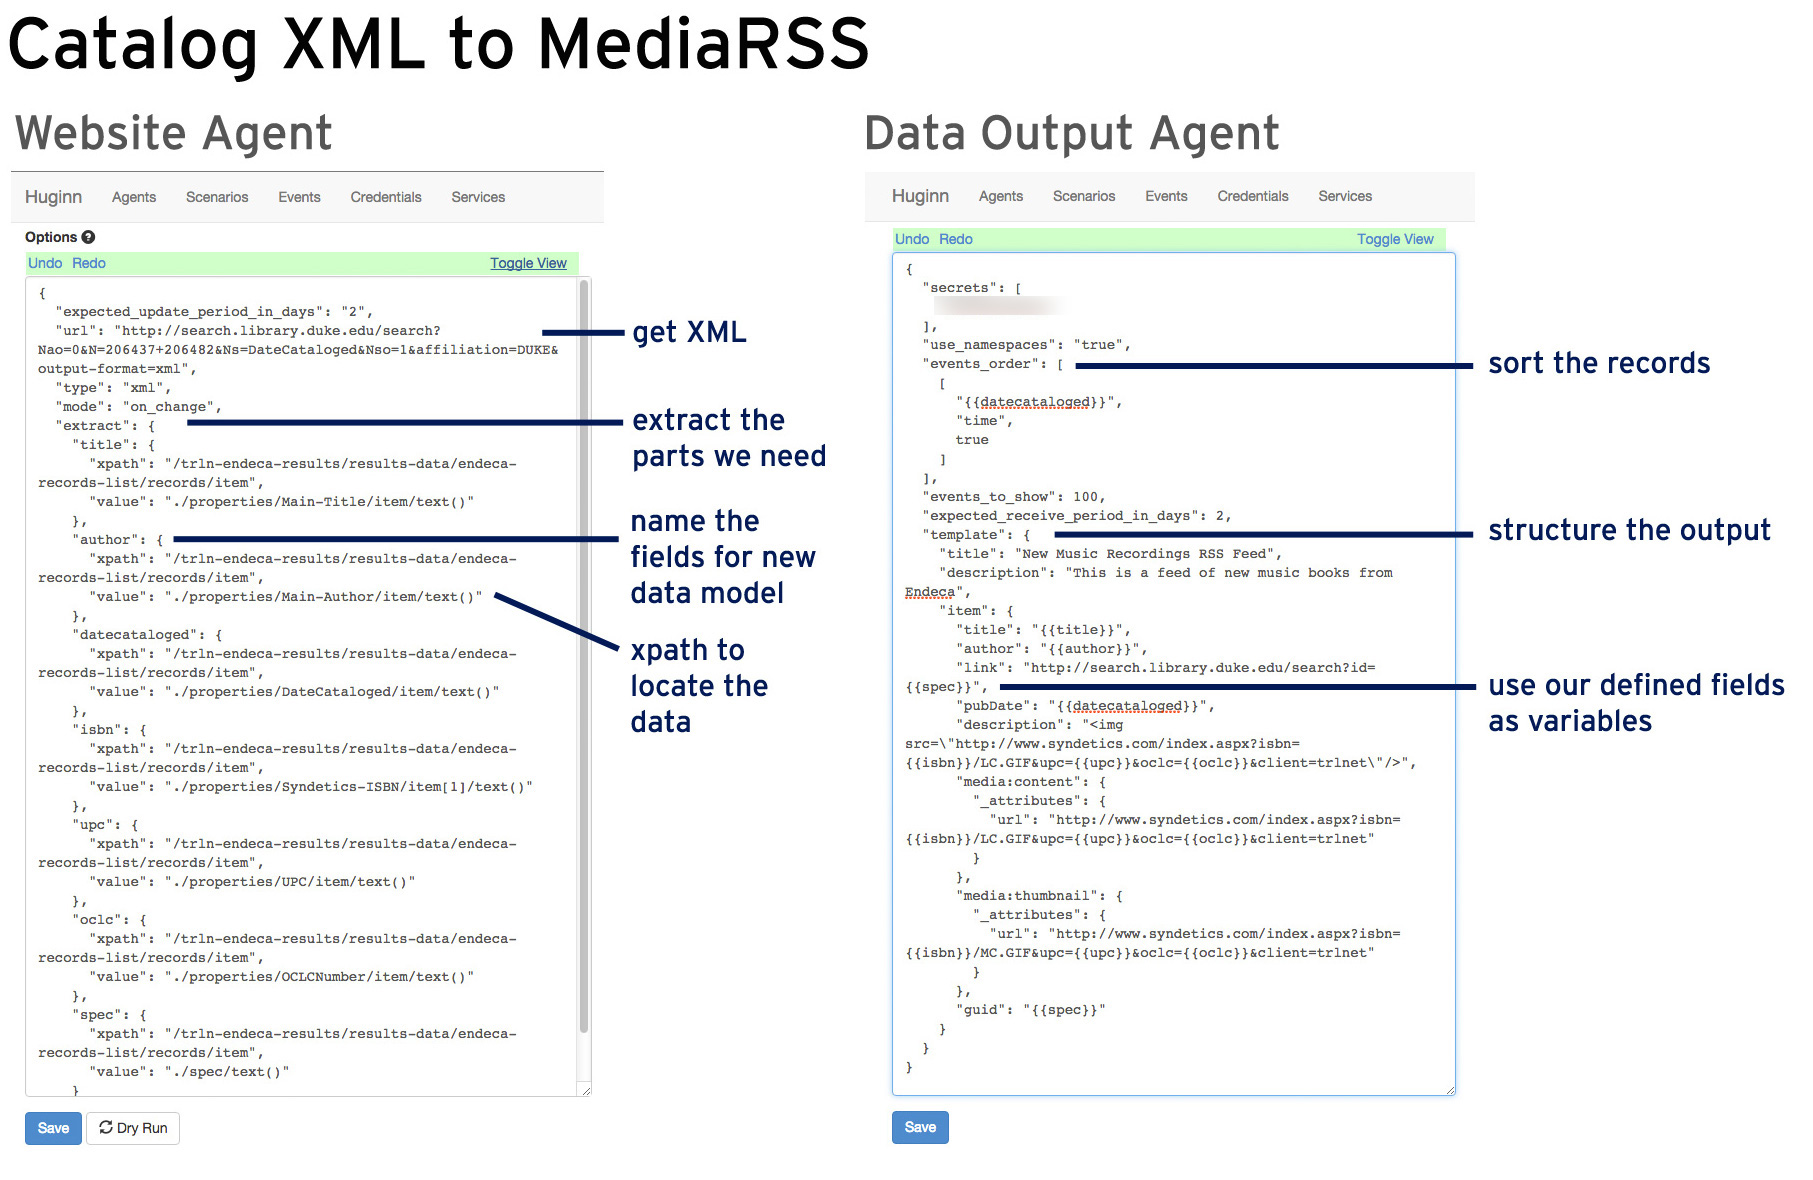
To recreate each feed we’d built in Pipes, we had to build two kinds of Huginn Agents: one or more “Website Agents” to gather and extract the data we need, then a “Data Output Agent” to publish a new customized feed. Agents are set up by writing some configuration rules structured as JSON.
Huginn description: “The Website Agent scrapes a website, XML document, or JSON feed and creates Events based on the results.”
With a Website Agent, we’re gathering data from a source (for us, typically RSS or raw XML). We specify a URL, then start structuring what elements we want to extract using XPath expressions.
Data Output Agent
Huginn description: The Data Output Agent outputs received events as either RSS or JSON. Use it to output a public or private stream of Huginn data.
The Data Output Agent uses one or more Website Agents as data sources. We configure some rules about what to expose and can further refine the data in the output using Liquid Templating. In the case of New Additions to the catalog, it’s here where we make a <media:content> element in our feed and assemble a URL to a cover image from bits of data extracted from the raw XML.
Examples
Huginn Agents for converting catalog data to a media-rich RSS feed for New Additions widgets.
Huginn Data Output Agent to publish a single RSS feed from several contributing feeds.
Looking Ahead
So far, so good. Huginn is now successfully powering most of the feeds that we had previously managed through Yahoo! Pipes. We look forward to seeing what kinds of features are added by the developer community.
Shoutouts to Cory Lown & Michael Daul for all their work in helping make the transition from Pipes to Huginn.
Many of my Bitstreams posts have featured old-school audio formats (wax cylinder, cassette and open reel tape, Minidisc) and discussed how we go about digitizing these obsolete media to bring them to present-day library users at the click of a mouse. In this post, I will take a different tack and show how this sound technology was represented and marketed during its heyday. The images used here are taken from one of our very own digital collections–the Duke Chronicle of the 1960s.
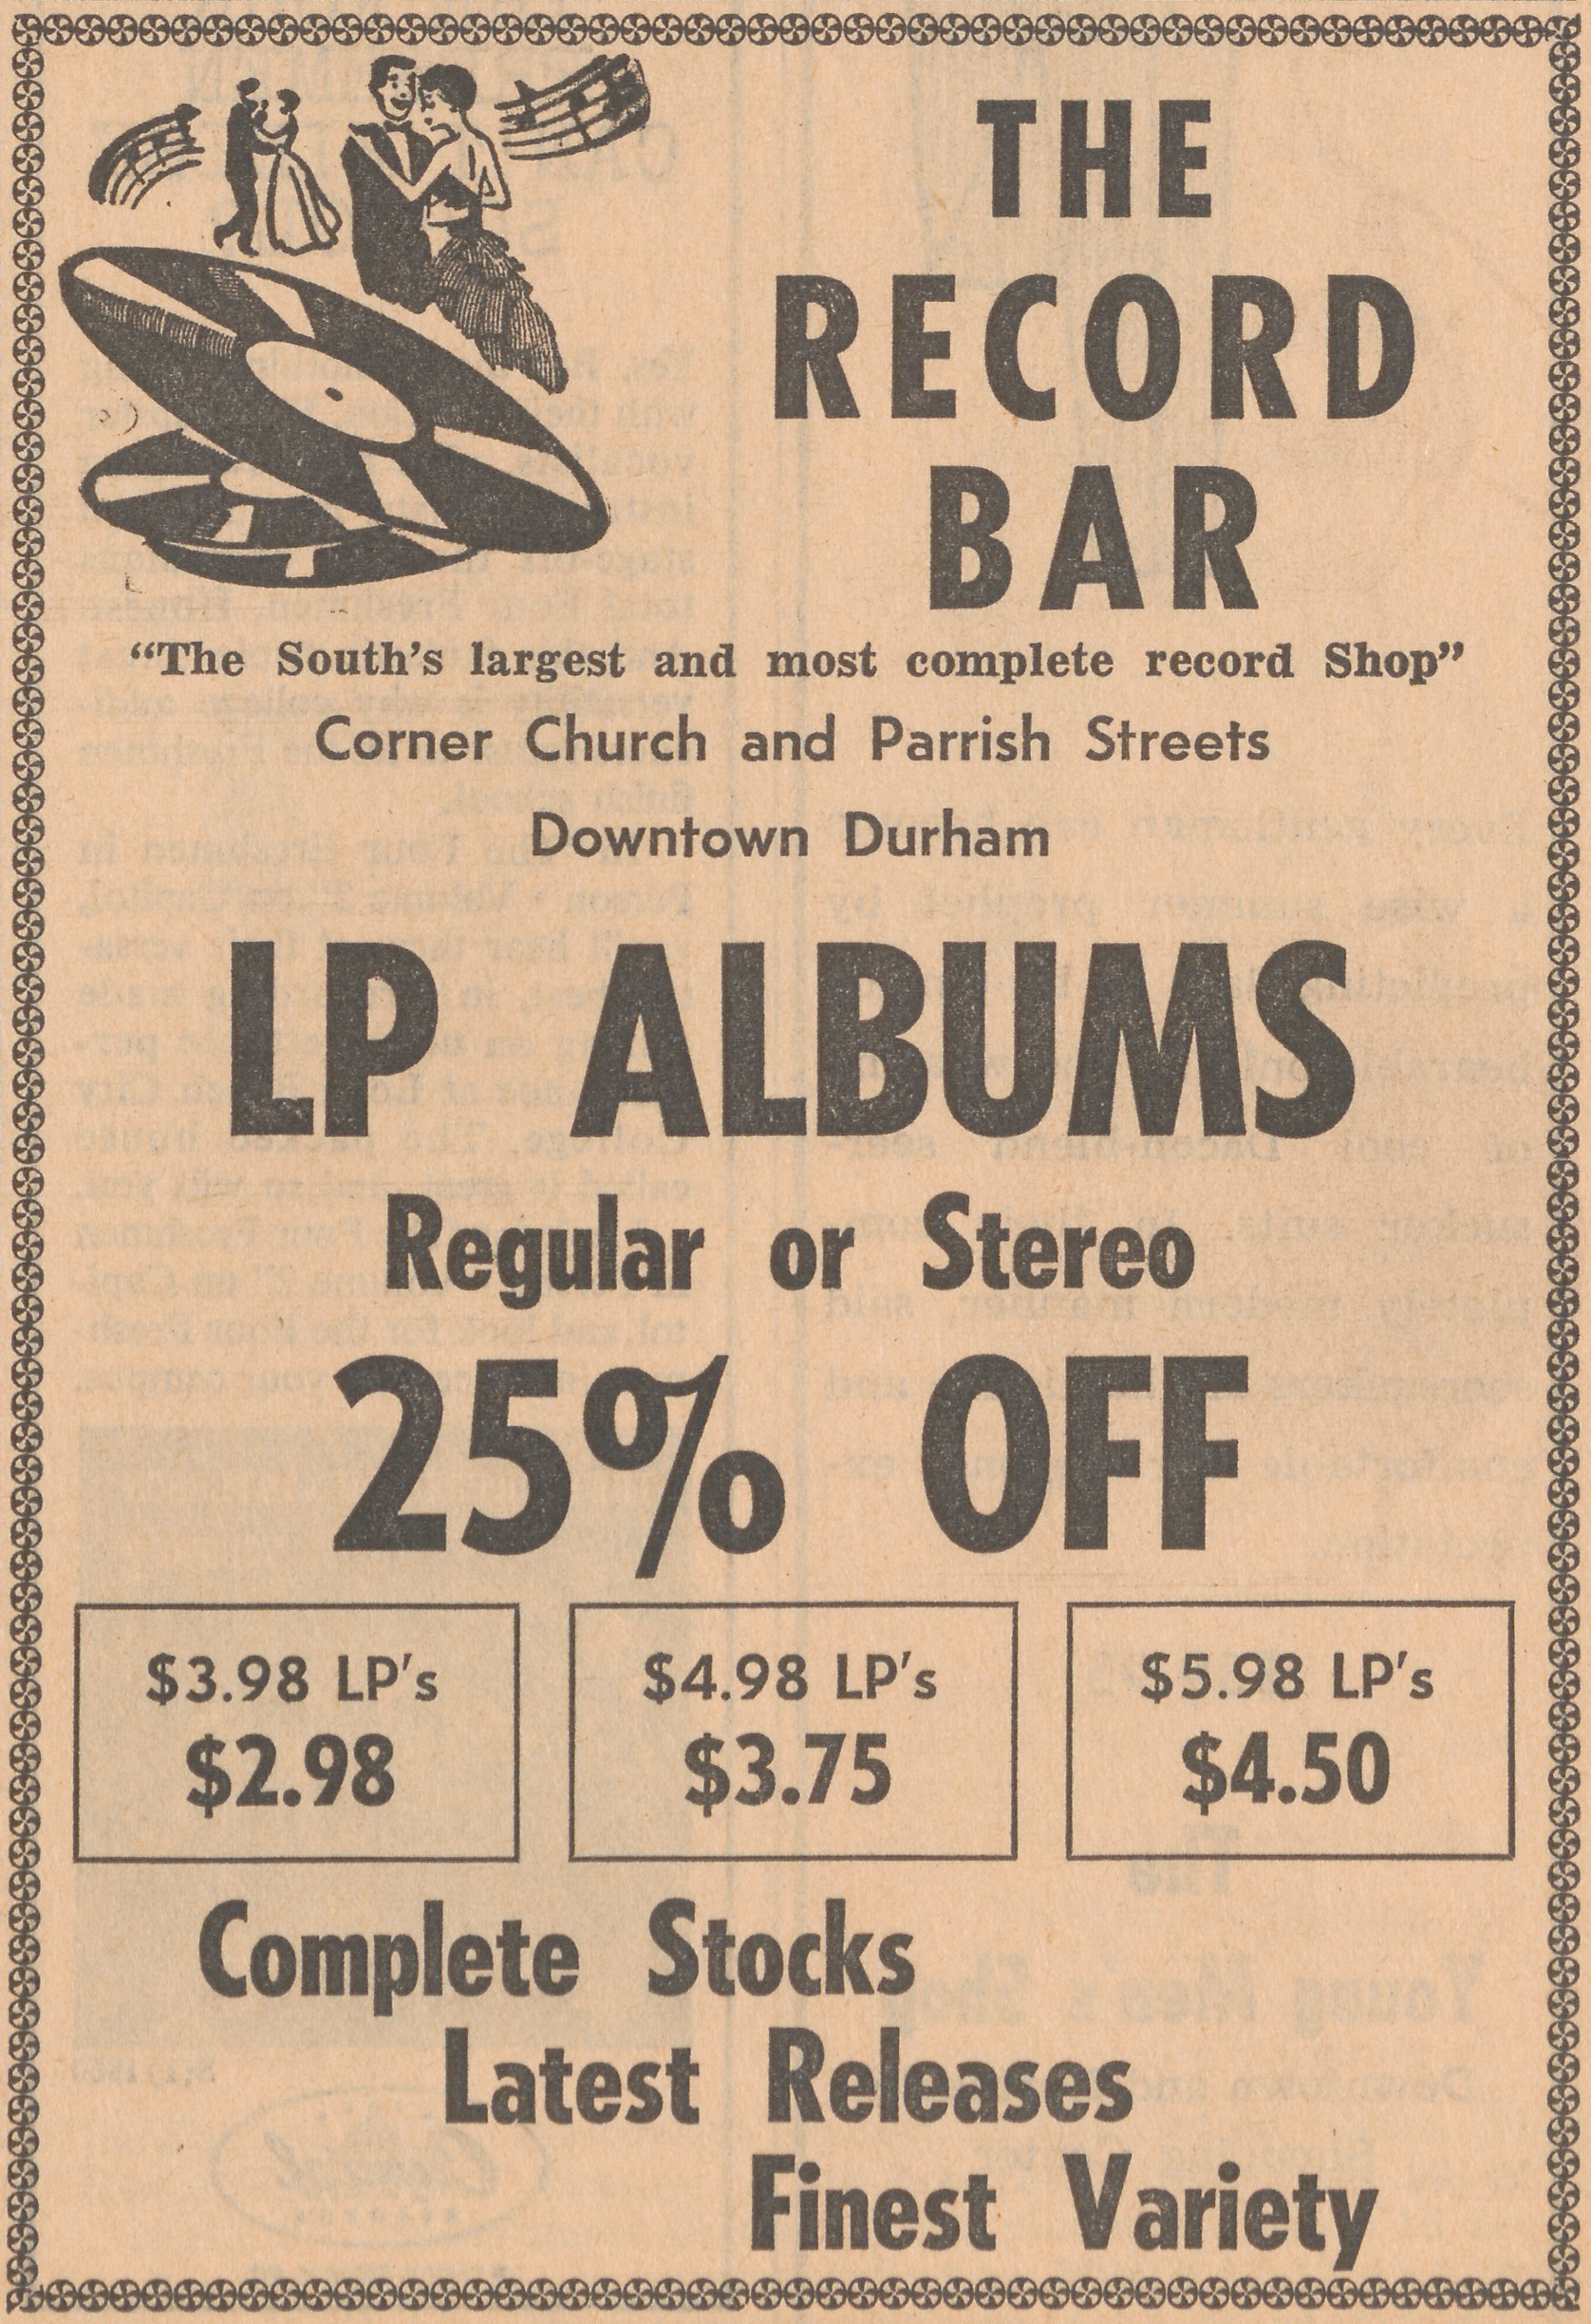
Students of that era would have primarily listened to music on vinyl records purchased directly from a local retailer. The advertisement above boasts of “complete stocks, latest releases, finest variety” with sale albums going for as little as $2.98 apiece. This is a far cry from the current music industry landscape where people consume most of their media via instant download and streaming from iTunes or Spotify and find new artists and songs via blogs, Youtube videos, or social media. The curious listener of the 1960’s may have instead discovered a new band though word of mouth, radio, or print advertising. If they were lucky, the local record shop would have the LP in stock and they could bring it home to play on their hi-fi phonograph (like the one shown below). Notice that this small “portable” model takes up nearly the whole tabletop.
Duke students of the 1960s would have also used magnetic tape-based media for recording and playing back sound. The advertisement above uses Space Age imagery and claims that the recorder (“small enough to fit in the palm of your hand”) was used by astronauts on lunar missions. Other advertisements suggest more grounded uses for the technology: recording classroom lectures, practicing public speaking, improving foreign language comprehension and pronunciation, and “adding fun to parties, hayrides, and trips.”
Creative uses of the technology are also suggested. The “Add-A-Track” system allows you to record multiple layers of sound to create your own unique spoken word or musical composition. You can even use your tape machine to record a special message for your Valentine (“the next best thing to you personally”). Amplifier kits are also available for the ambitious electronics do-it-yourselfer to build at home.
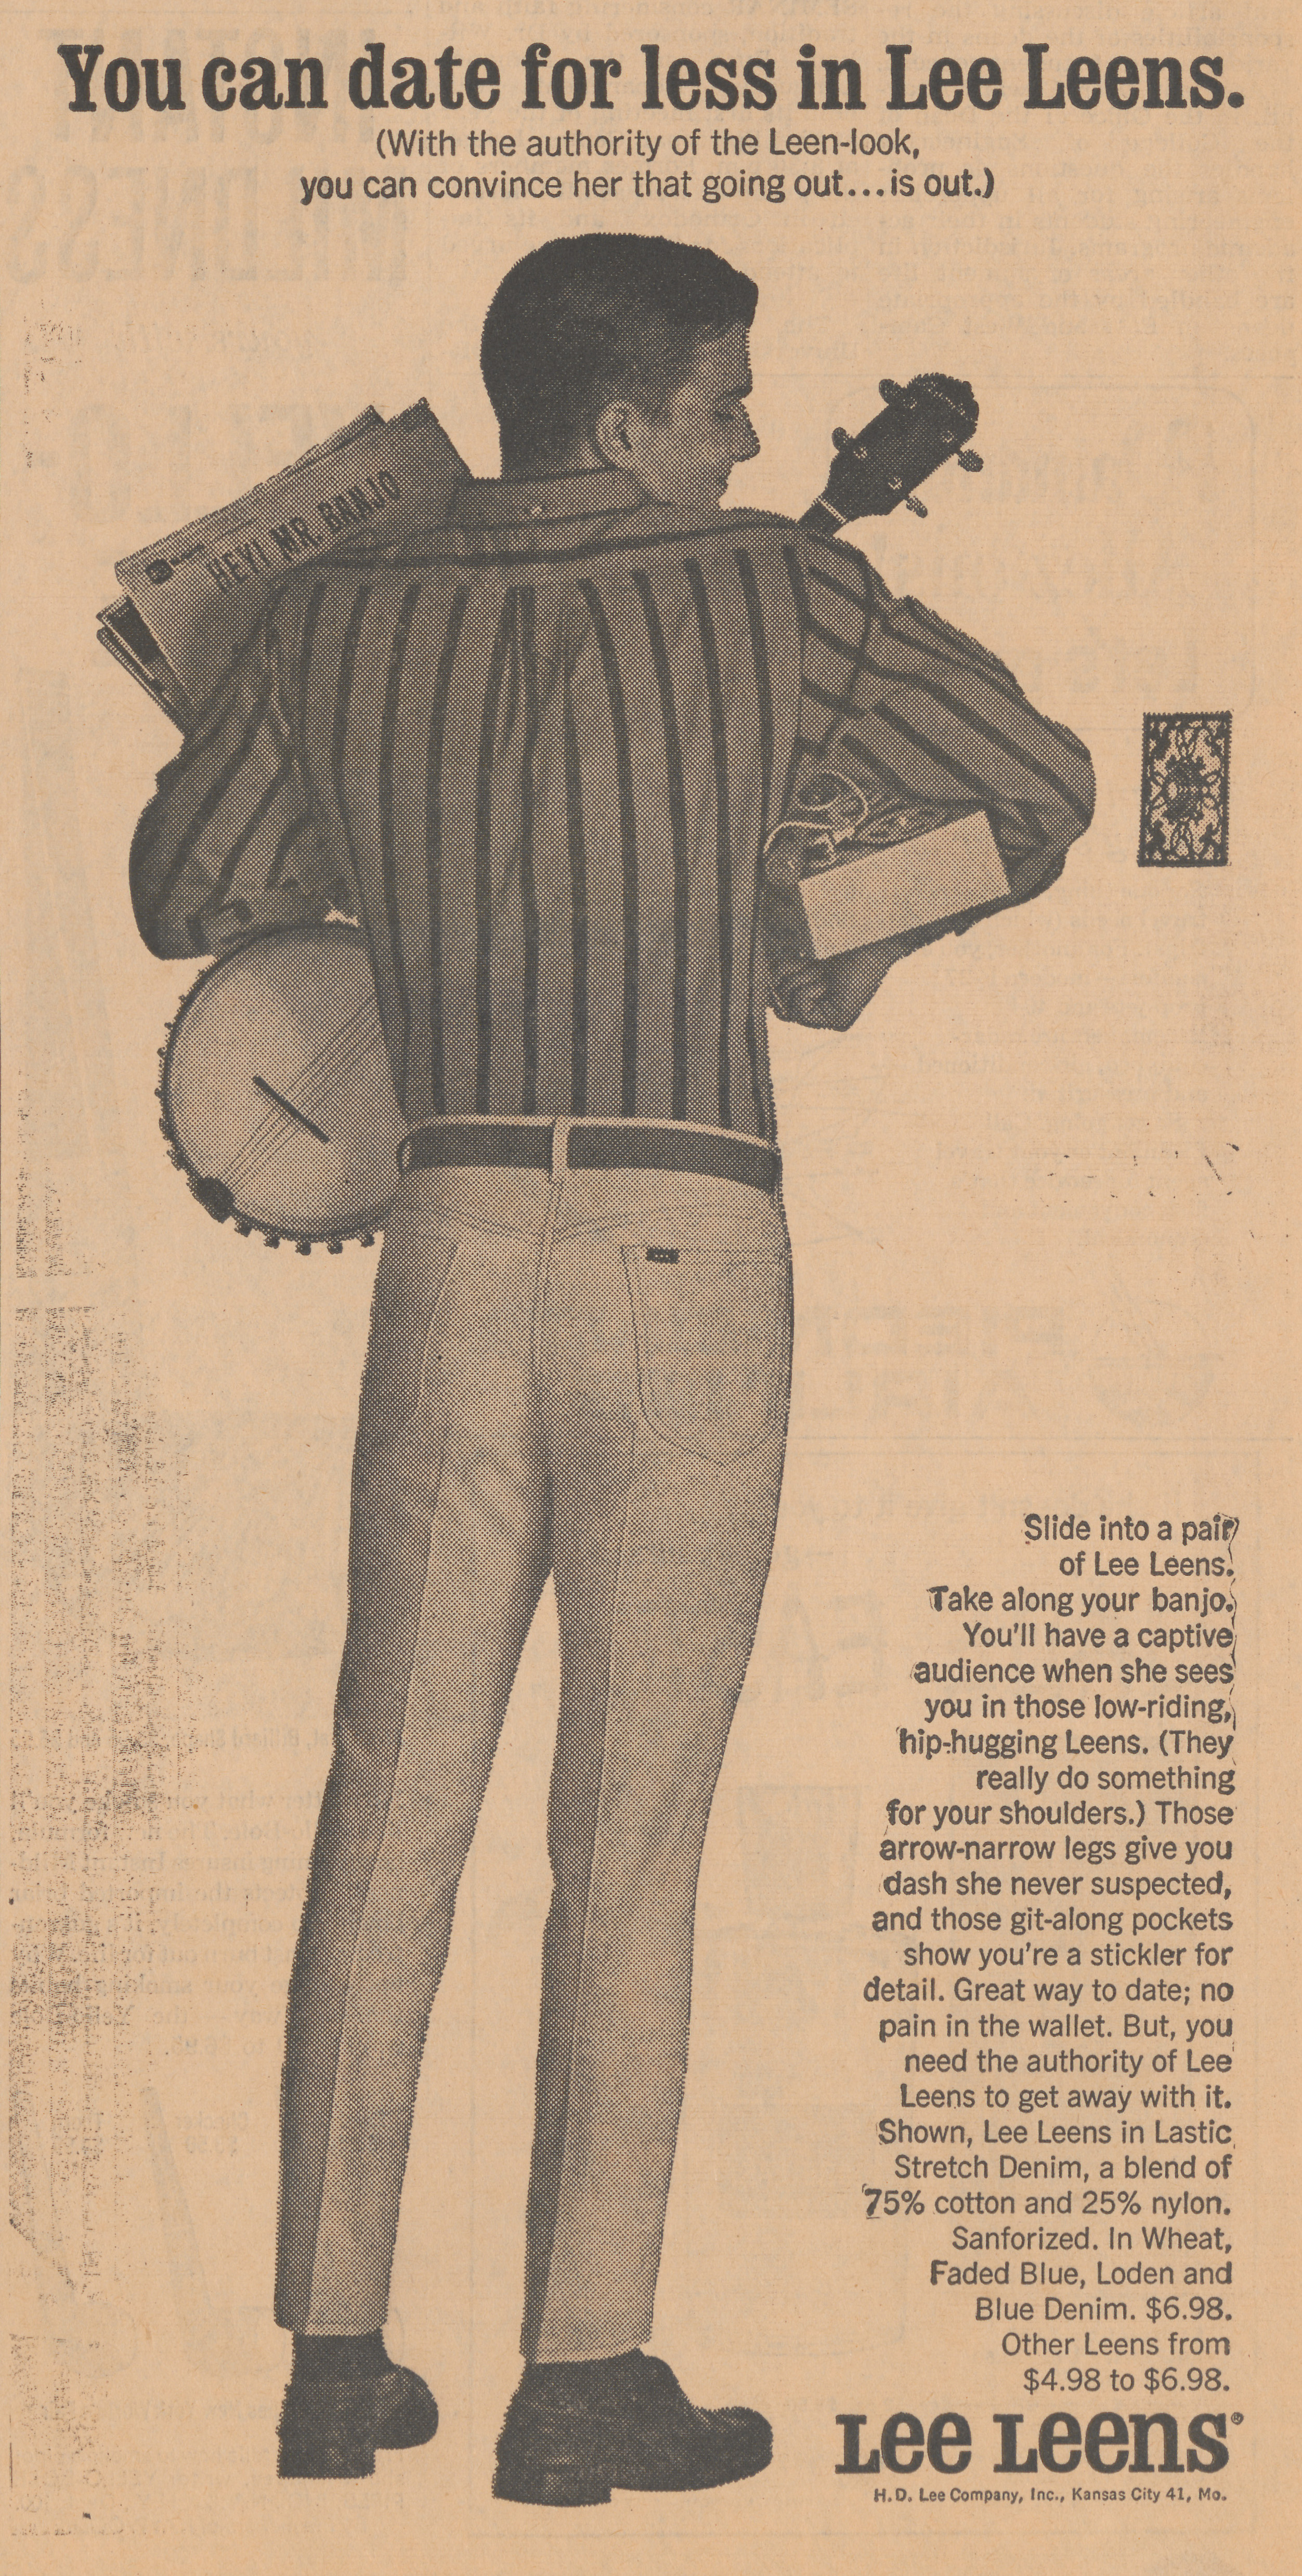
These newspaper ads demonstrate just how much audio technology and our relationship to it have changed over the past 50 years. Everything is smaller, faster, and more “connected” now. Despite these seismic shifts, one thing hasn’t changed. As the following ad shows, the banjo never goes out of style.
We experience a number of different cycles in the Digital Projects and Production Services Department (DPPS). There is of course the project lifecycle, that mysterious abstraction by which we try to find commonalities in work processes that can seem unique for every case. We follow the academic calendar, learn our fate through the annual budget cycle, and attend weekly, monthly, and quarterly meetings.
The annual reporting cycle at Duke University Libraries usually falls to departments in August, with those reports informing a master library report completed later. Because of the activities and commitments around the opening of the Rubenstein Library, the departments were let off the hook for their individual reports this year. Nevertheless, I thought I would use my turn in the Bitstreams rotation to review some highlights from our 2014-15 cycle.
Today we will take a detailed look at how the Duke Chronicle, the university’s beloved newspaper for over 100 years, is digitized. Since our scope of digitization spans nine decades (1905-1989), it is an ongoing project the Digital Production Center (DPC), part of Digital Projects and Production Services (DPPS) and Duke University Libraries’ Digital Collections Program, has been chipping away at. Scanning and digitizing may seem straightforward to many – place an item on a scanner and press scan, for goodness sake! – but we at the DPC want to shed light on our own processes to give you a sense of what we do behind the scenes. It seems like an easy-peasy process of scanning and uploading images online, but there is much more that goes into it than that. Digitizing a large collection of newspapers is not always a fun-filled endeavor, and the physical act of scanning thousands of news pages is done by many dedicated (and patient!) student workers, staff members, and me, the King Intern for Digital Collections.
Pre-Scanning Procedures
Large format 1940s Chronicles in over-sized archival box
Many steps in the digitization process do not actually occur in the DPC, but among other teams or departments within the library. Though I focus mainly on the DPC’s responsibilities, I will briefly explain the steps others perform in this digital projects tango…or maybe it’s a waltz?
Each proposed project must first be approved by the Advisory Council for Digital Collections (ACDC), a team that reviews each project for its strategic value. Then it is passed on to the Digital Collections Implementation Team (DCIT) to perform a feasibility study that examines the project’s strengths and weaknesses (see Thomas Crichlow’s post for an overview of these teams). The DCIT then helps guide the project to fruition. After clearing these hoops back in 2013, the Duke Chronicle project started its journey toward digital glory.
We pull 10 years’ worth of newspapers at a time from the University Archives in Rubenstein Library. Only one decade at a time is processed to make the 80+ years of Chronicle publications more manageable. The first stop is Conservation. To make sure the materials are stable enough to withstand digitizing, Conservation must inspect the condition of the paper prior to giving the DPC the go-ahead. Because newspapers since the mid-19th century were printed on cheap and very acidic wood pulp paper, the pages can become brittle over time and may warrant extensive repairs. Senior Conservator, Erin Hammeke, has done great work mending tears and brittle edges of many Chronicle pages since the start of this project. As we embark on digitizing the older decades, from the 1940s and earlier, Erin’s expertise will be indispensable. We rely on her not only to repair brittle pages but to guide the DPC’s strategy when deciding the best and safest way to digitize such fragile materials. Also, several volumes of the Chronicle have been bound, and to gain the best digital image scan these must be removed from their binding. Erin to the rescue!
Conservation repair on a 1940s Chronicle pageConservation repair to a torn 1940s Chronicle ad
1950s Duke Chronicle digitization guide
Now that Conservation has assessed the condition and given the DPC the green light, preliminary prep work must still be done before the scanner comes into play. A digitization guide is created in Microsoft Excel to list each Chronicle issue along with its descriptive metadata (more information about this process can be found in my metadata blog post). This spreadsheet acts as a guide in the digitization process (hence its name, digitization guide!) to keep track of each analog newspaper issue and, once scanned, its corresponding digital image. In this process, each Chronicle issue is inspected to collect the necessary metadata. At this time, a unique identifier is assigned to every issue based on the DPC’s naming conventions. This identifier stays with each item for the duration of its digital life and allows for easy identification of one among thousands of Chronicle issues. At the completion of the digitization guide, the Chronicle is now ready for the scanner.
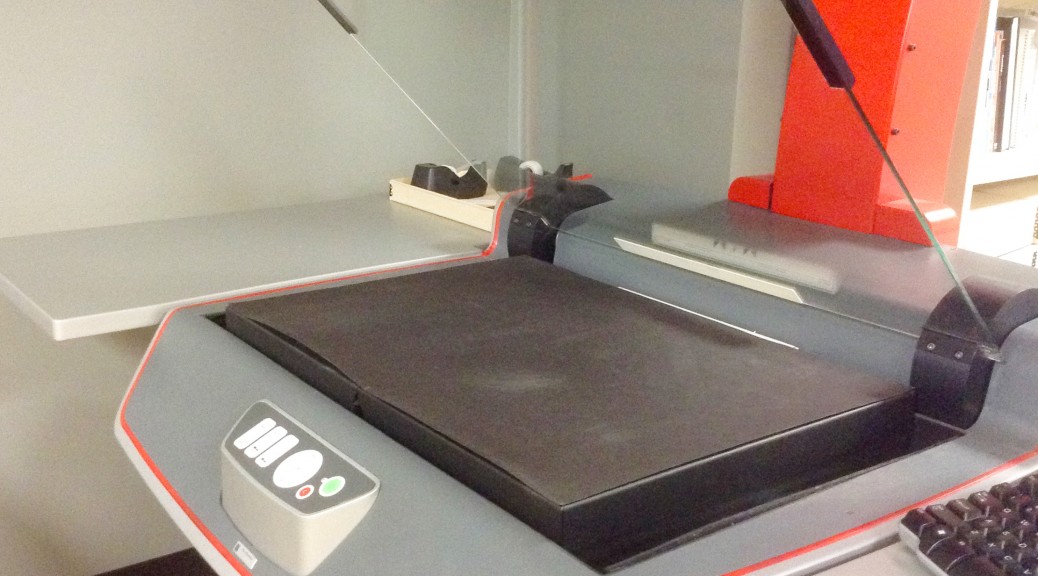
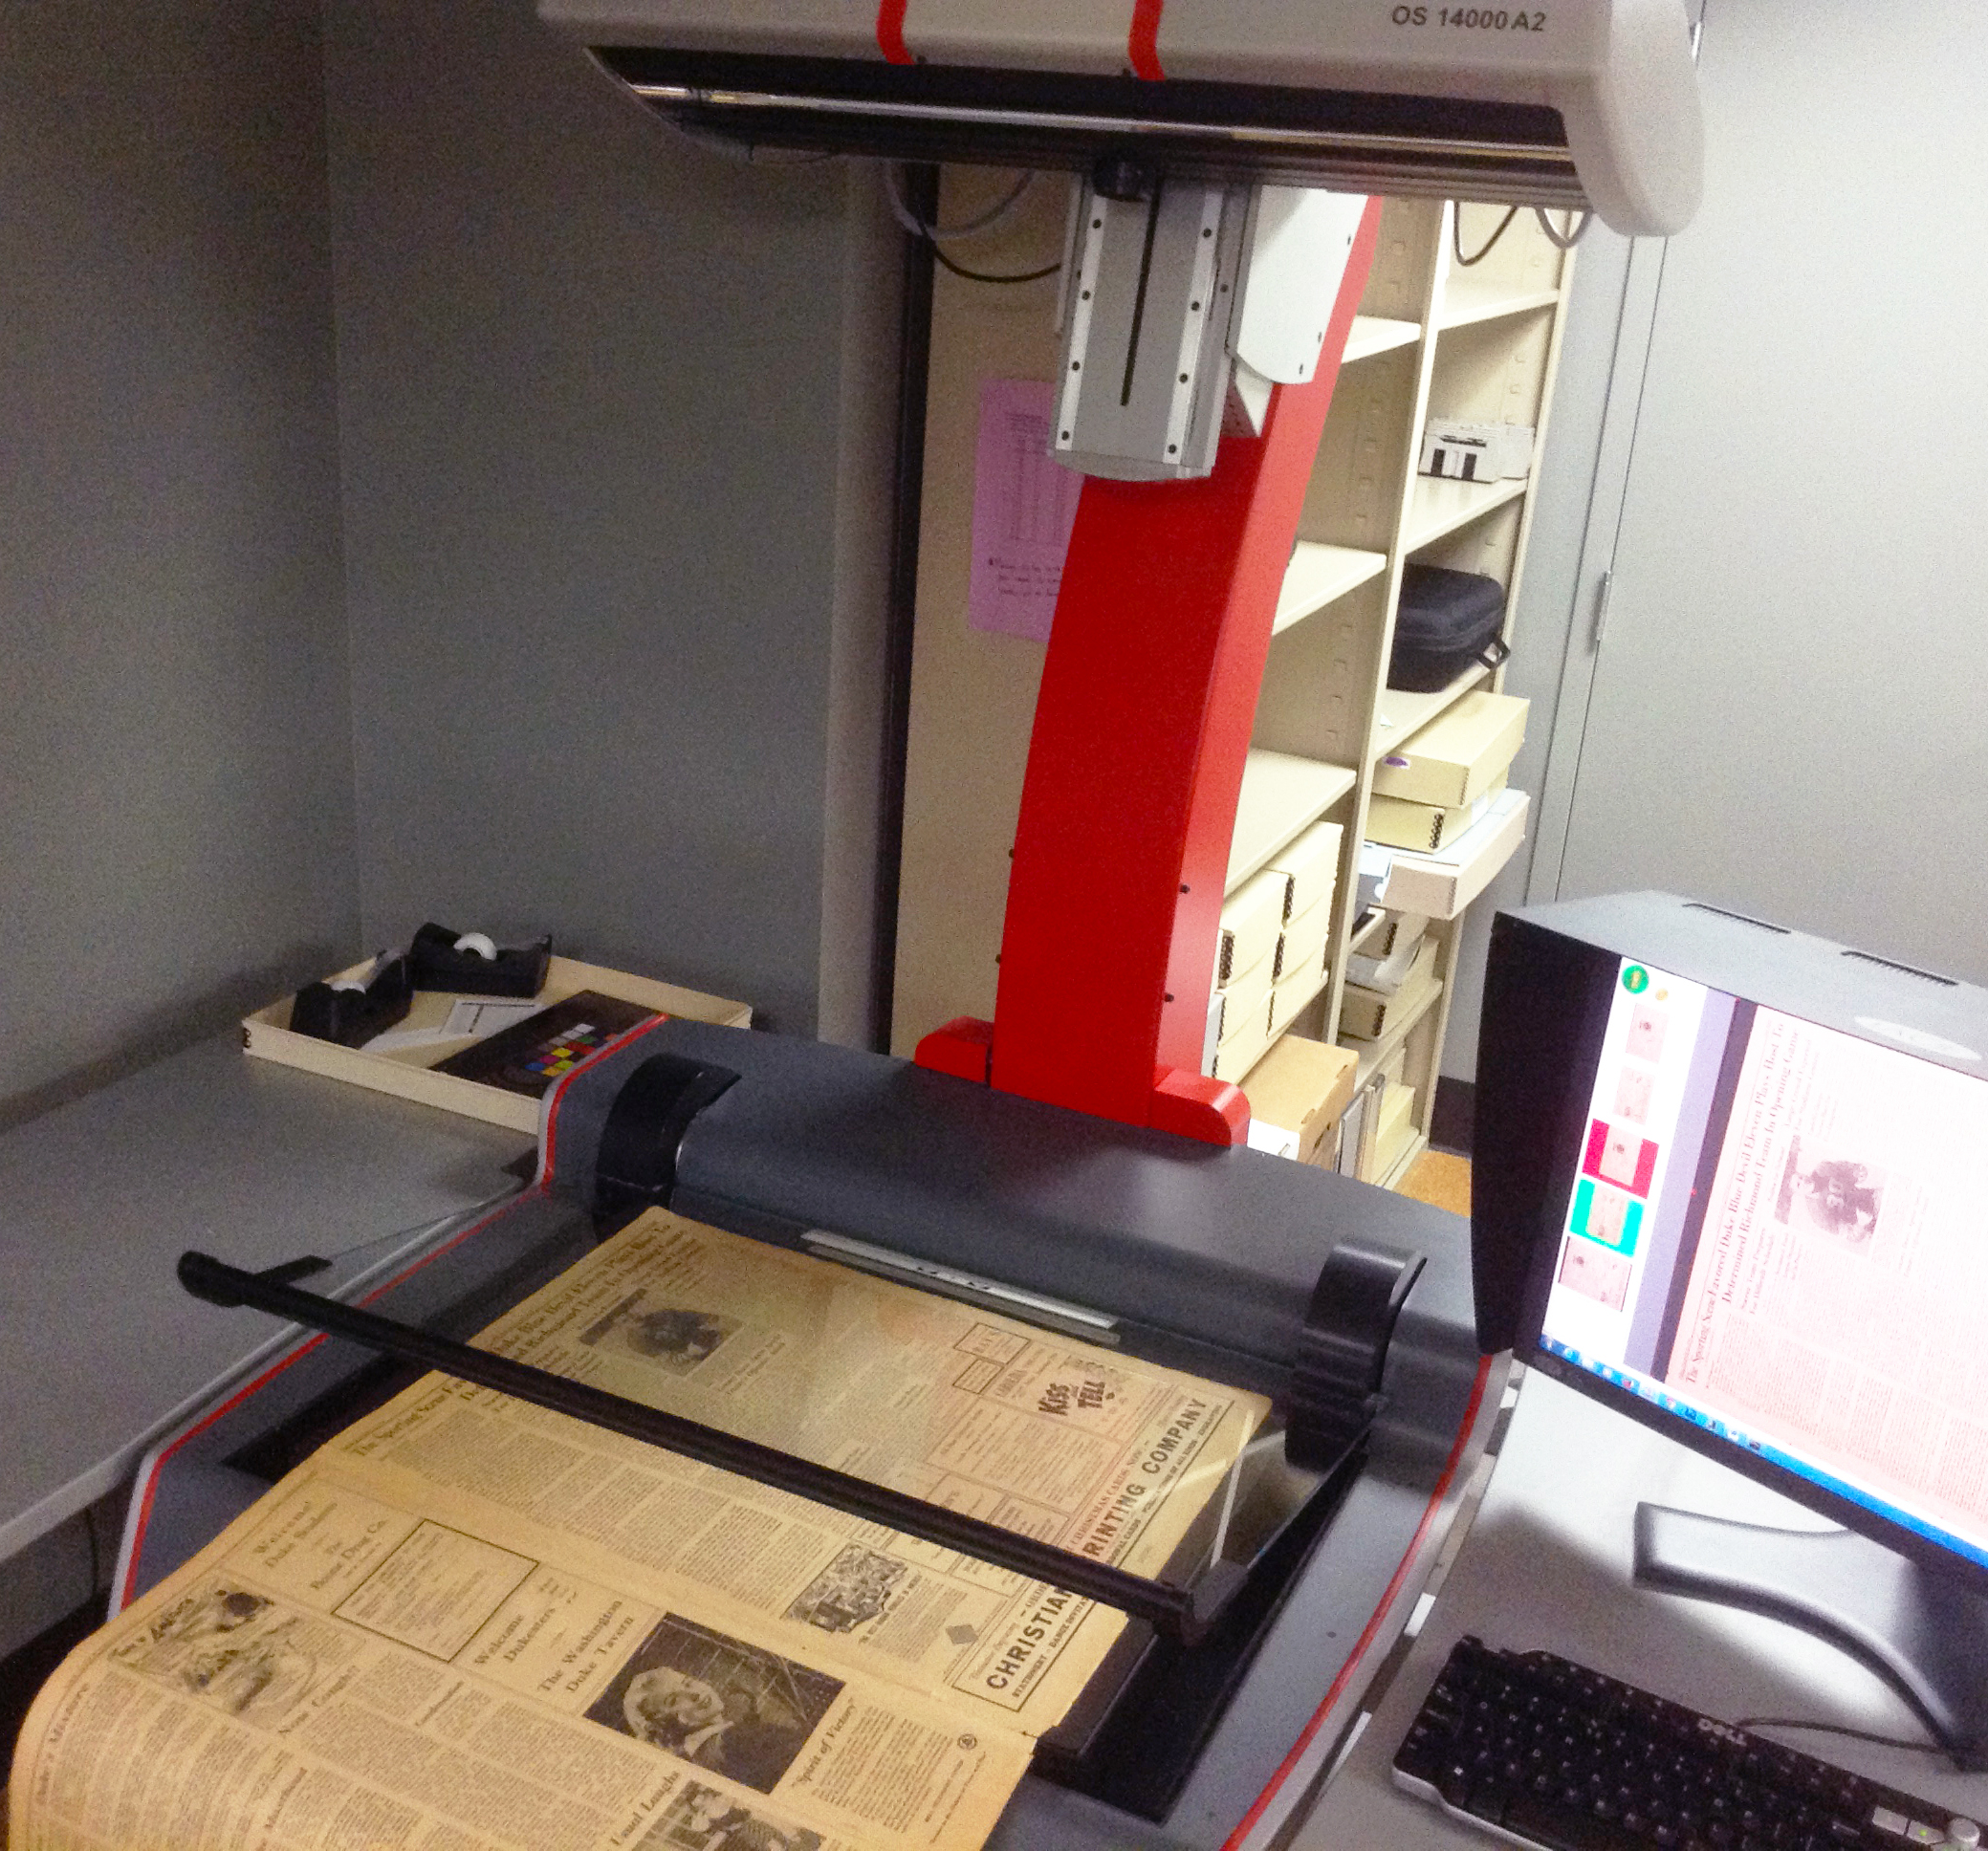
The DPC’s Zeutschel OS 14000 A2
The Scanning Process
With all loose unbound issues, the Zeutschel is our go-to scanner because it allows for large format items to be imaged on a flat surface. This is less invasive and less damaging to the pages, and is quicker than other scanning methods. The Zeutschel can handle items up to 25 x 18 inches, which accommodates the larger sized formats of the Chronicle used in the 1940s and 1950s. If bound issues must be digitized, due to the absence of a loose copy or the inability to safely dis-bound a volume, the Phase One digital camera system is used as it can better capture large bound pages that may not necessarily lay flat.
Folders each containing multiple page images of one Chronicle issue
For every scanning session, we need the digitization guide handy as it tells what to name the image files using the previously assigned unique identifier. Each issue of the newspaper is scanned as a separate folder of images, with one image representing one page of the newspaper. This system of organization allows for each issue to become its own compound object – multiple files bound together with an XML structure – once published to the website. The Zeutschel’s scanning software helps organize these image files into properly named folders. Of course, no digitization session would be complete without the initial target scan that checks for color calibration (See Mike Adamo’s post for a color calibration crash course).
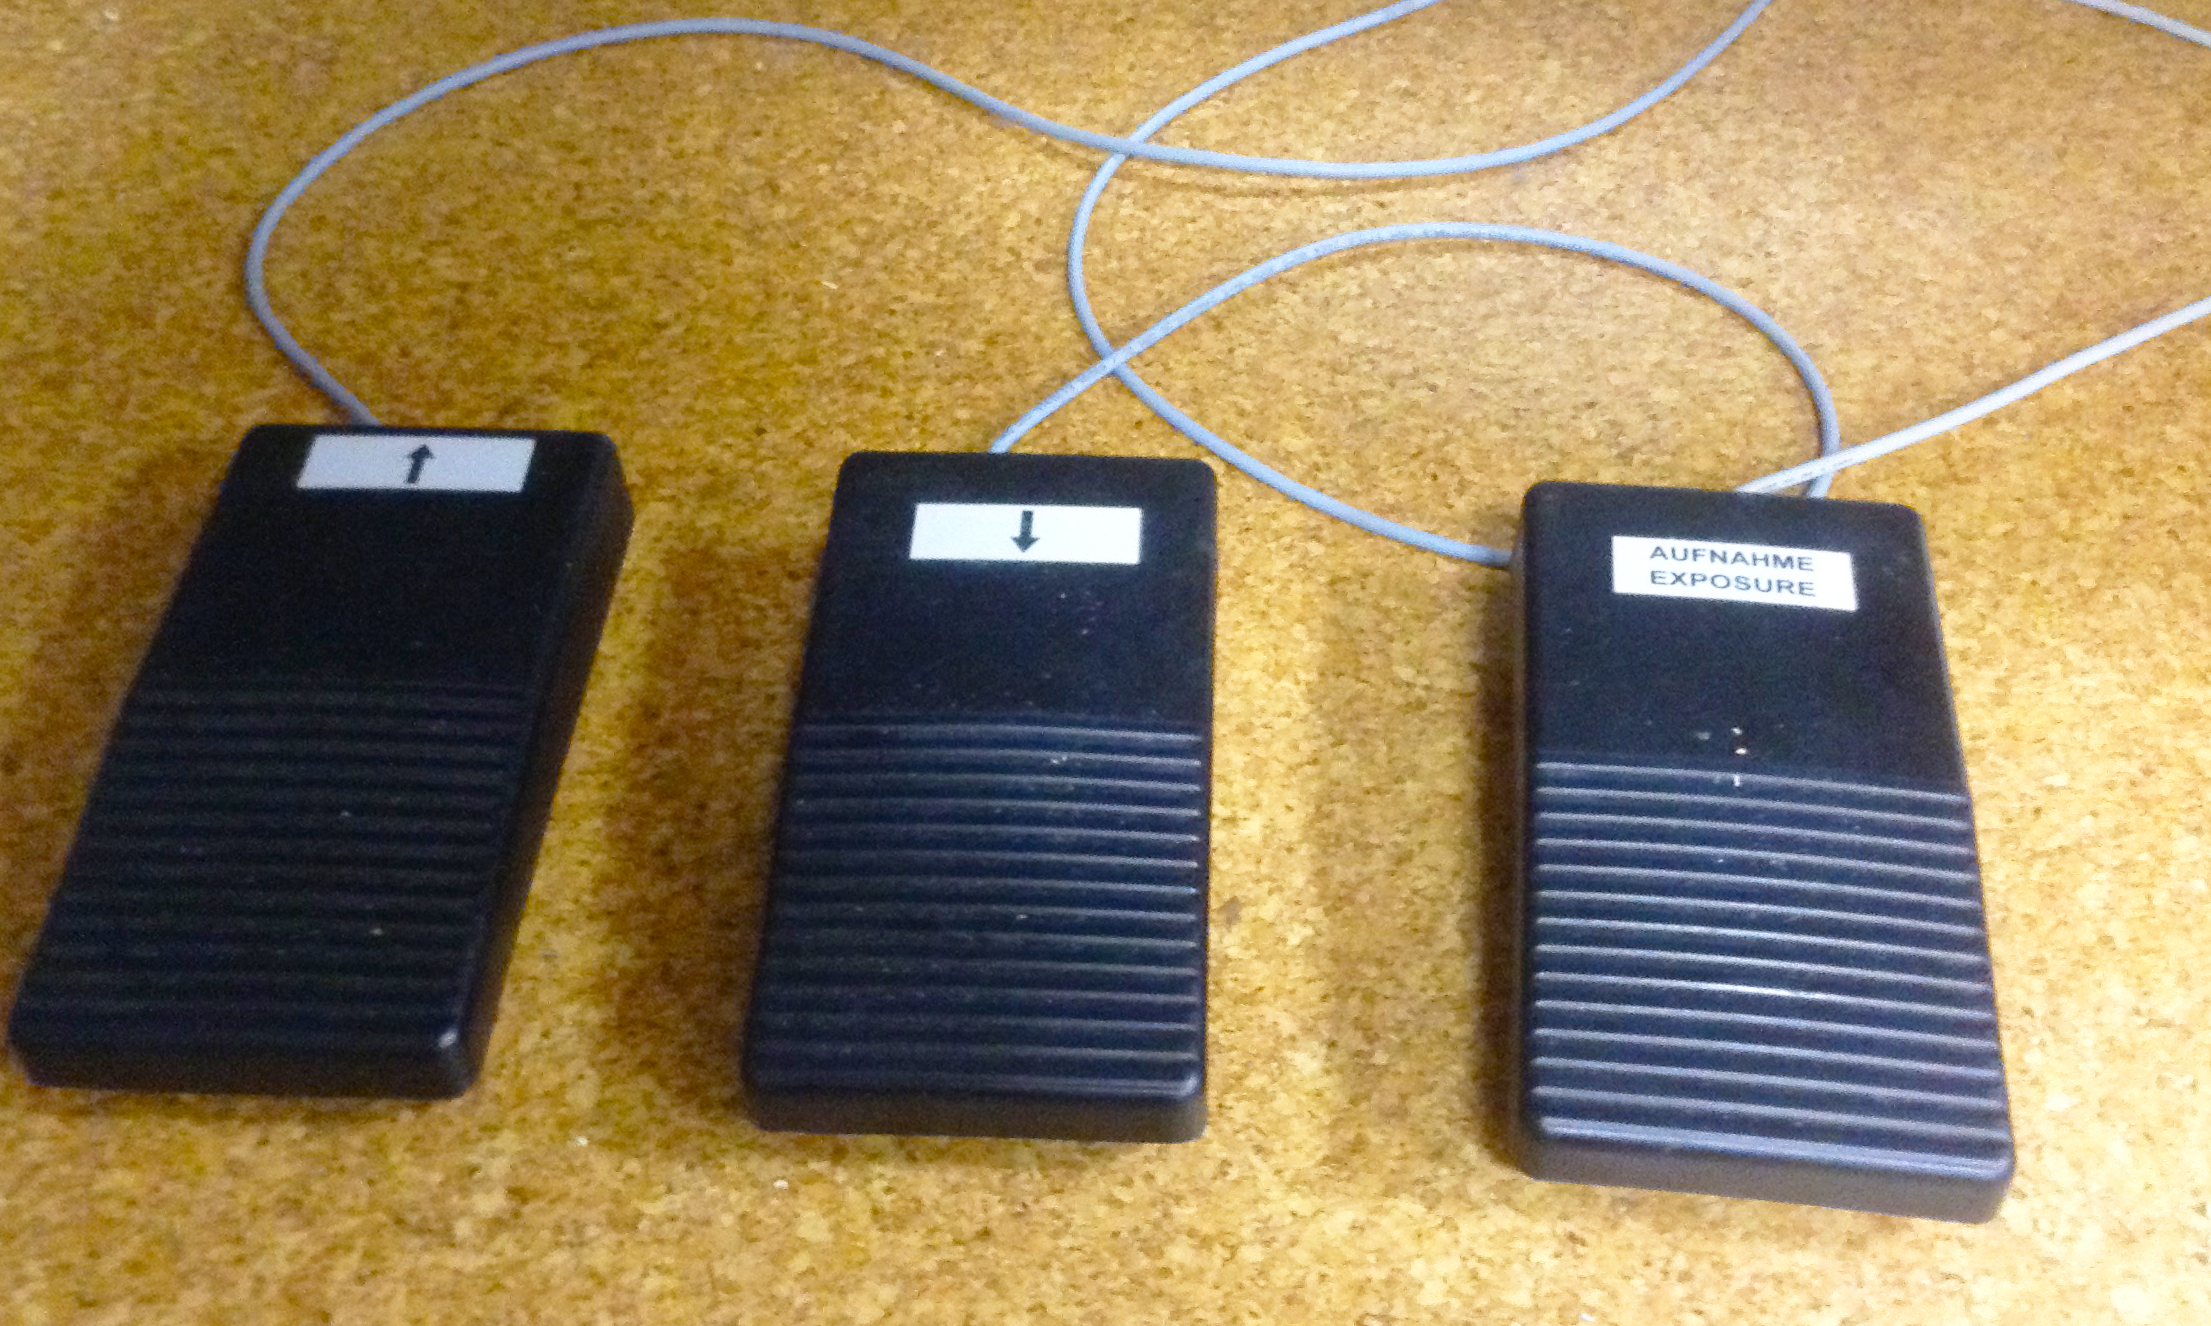
The Zeutschel’s control panel of buttonsThe Zeutschel’s optional foot pedals
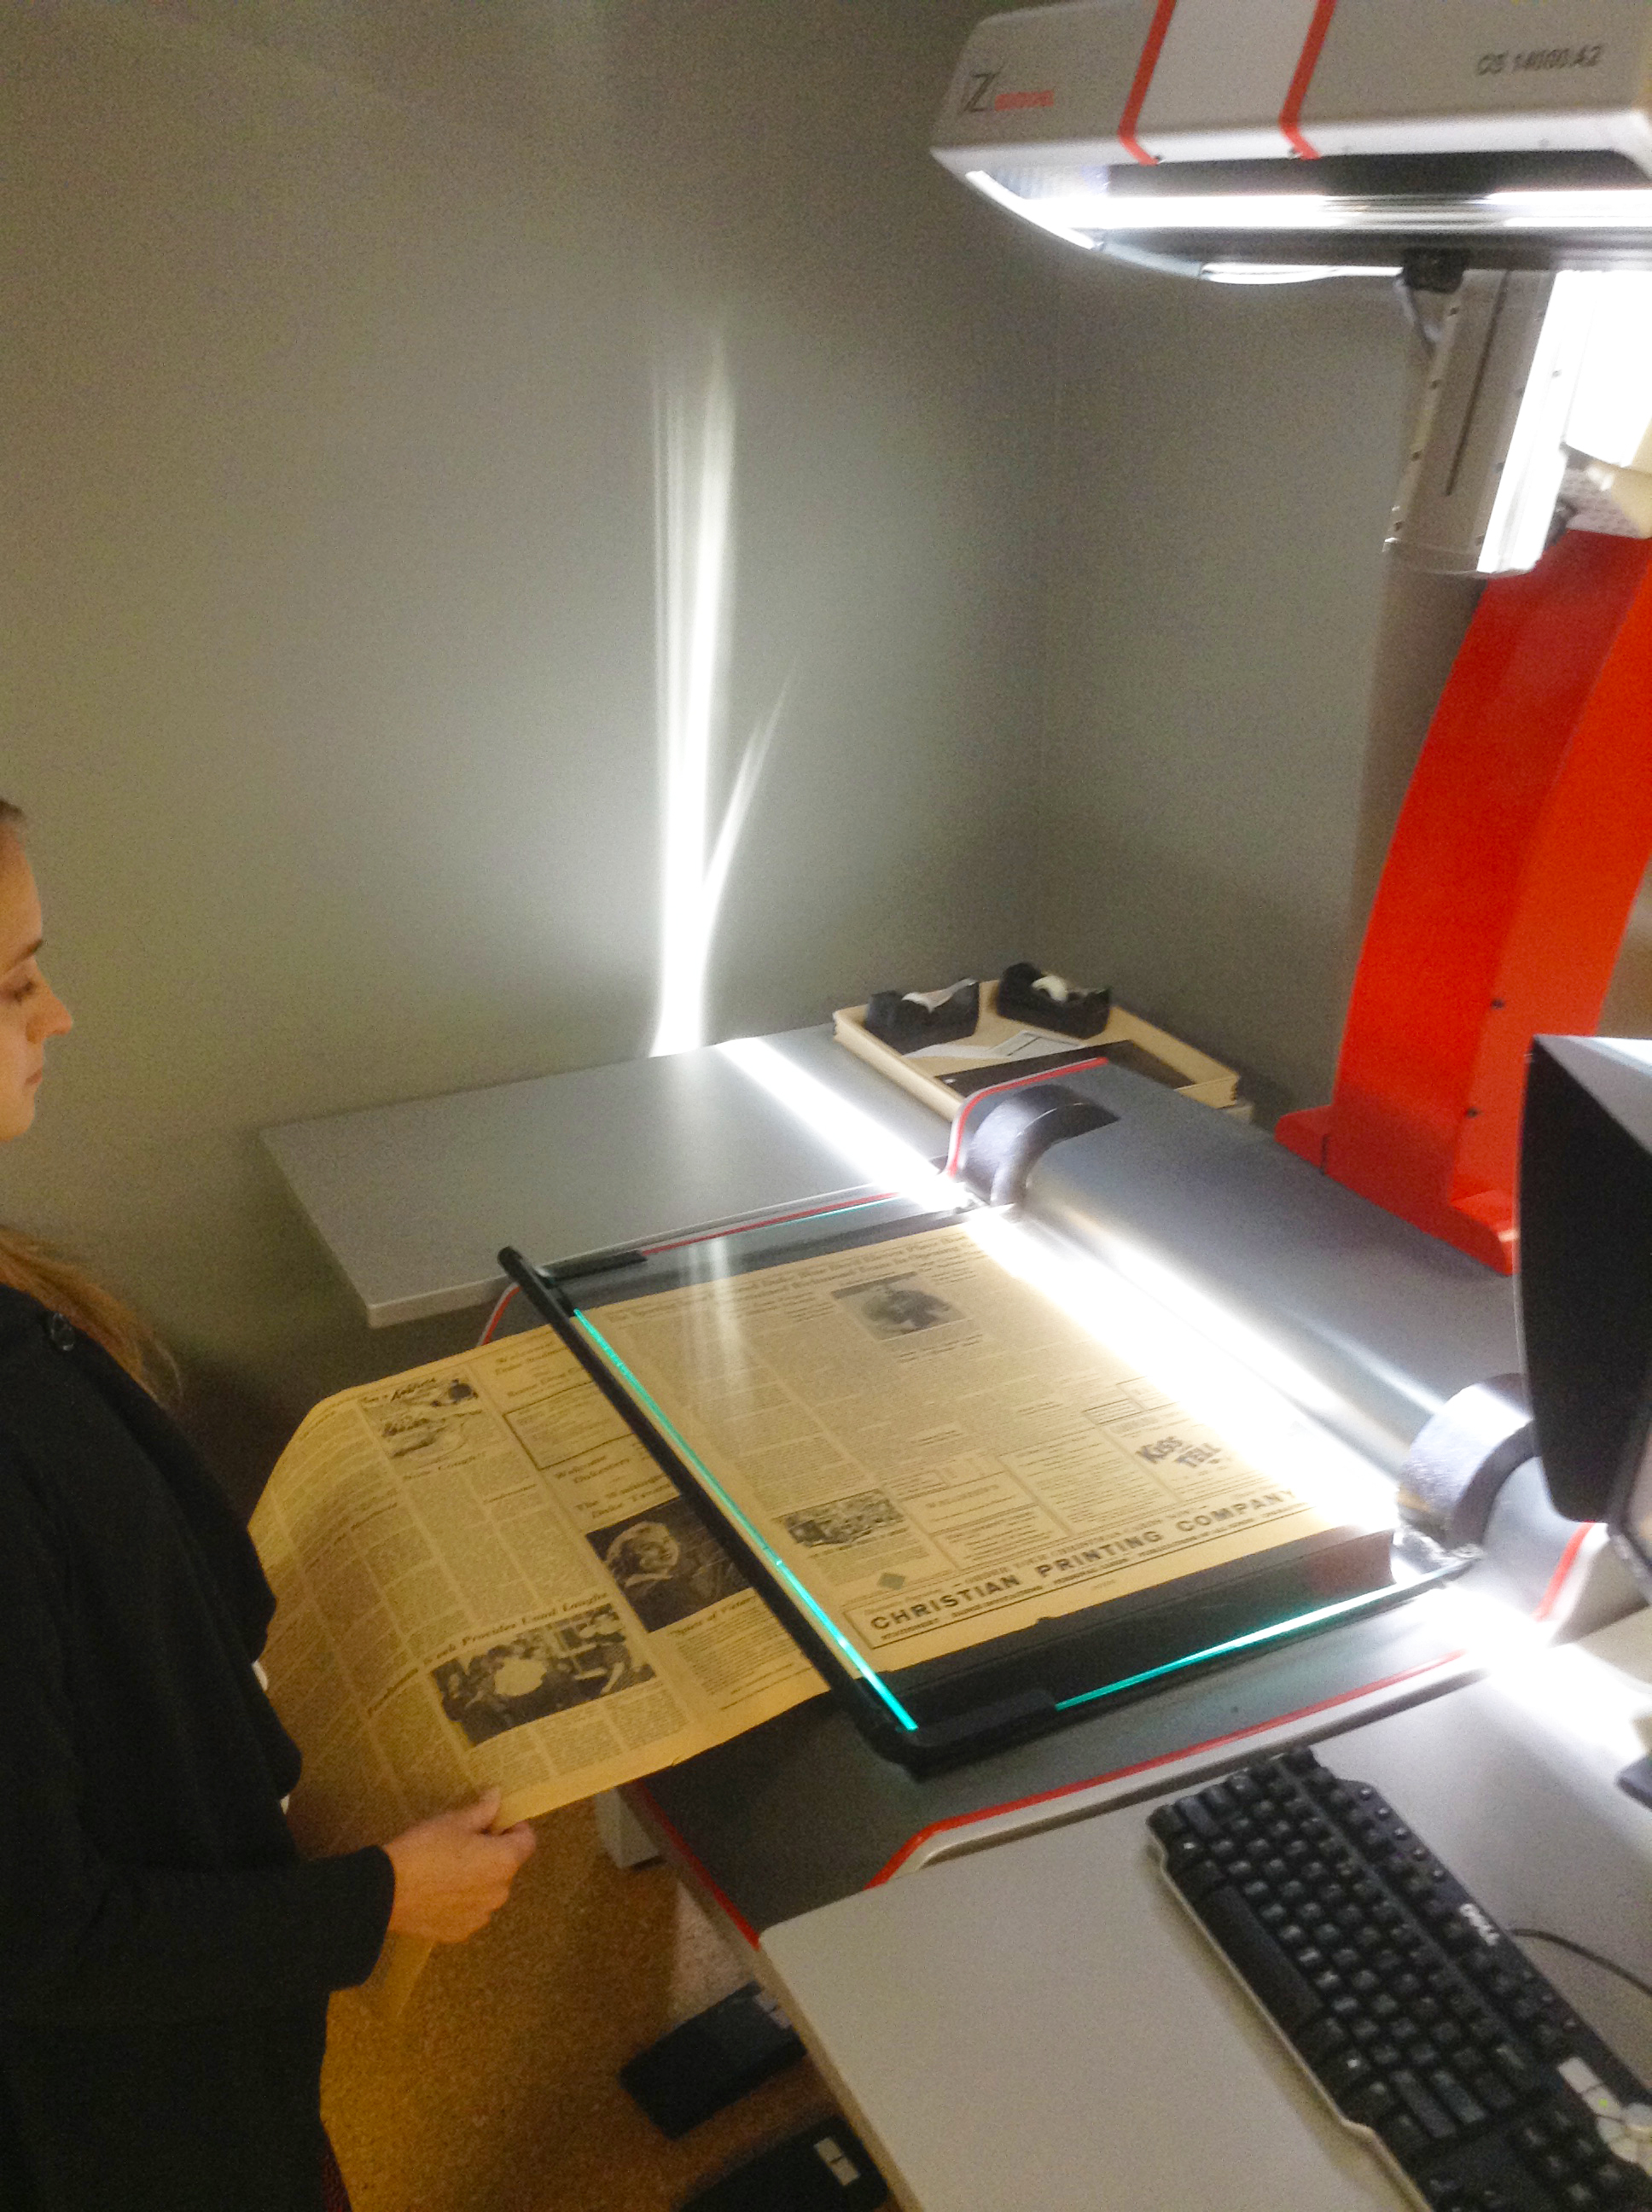
The scanner’s plate glass can now be raised with the push of a button (or the tap of a foot pedal) and the Chronicle issue is placed on the flatbed. Lowering the plate glass down, the pages are flattened for a better scan result. Now comes the excitement… we can finally press SCAN. For each page, the plate glass is raised, lowered, and the scan button is pressed. Chronicle issues can have anywhere from 2 to 30 or more pages, so you can image this process can become monotonous – or even mesmerizing – at times. Luckily, with the smaller format decades, like the 1970s and 1980s, the inner pages can be scanned two at a time and the Zeutschel software separates them into two images, which cuts down on the scan time. As for the larger formats, the pages are so big you can only fit one on the flatbed. That means each page is a separate scan, but older years tended to publish less issues, so it’s a trade-off. To put the volume of this work into perspective, the 1,408 issues of the 1980s Chronicle took 28,089 scans to complete, while the 1950s Chronicle of about 482 issues took around 3,700 scans to complete.
A 1940s Chronicle page is placed on the flatbed for scanning
Scanning in progress of the 1940s Chronicle pageTarget image opened in Adobe Photoshop for color calibration
Every scanned image that pops up on the screen is also checked for alignment and cropping errors that may require a re-scan. Once all the pages in an issue are digitized and checked for errors, clicking the software’s Finalize button will compile the images in the designated folder. We now return to our digitization guide to enter in metadata pertaining to the scanning of that issue, including capture person, capture date, capture device, and what target image relates to this session (subsequent issues do not need a new target scanned, as long as the scanning takes place in the same session).
Now, with the next issue, rinse and repeat: set the software settings and name the folder, scan the issue, finalize, and fill out the digitization guide. You get the gist.
Post-Scanning Procedures
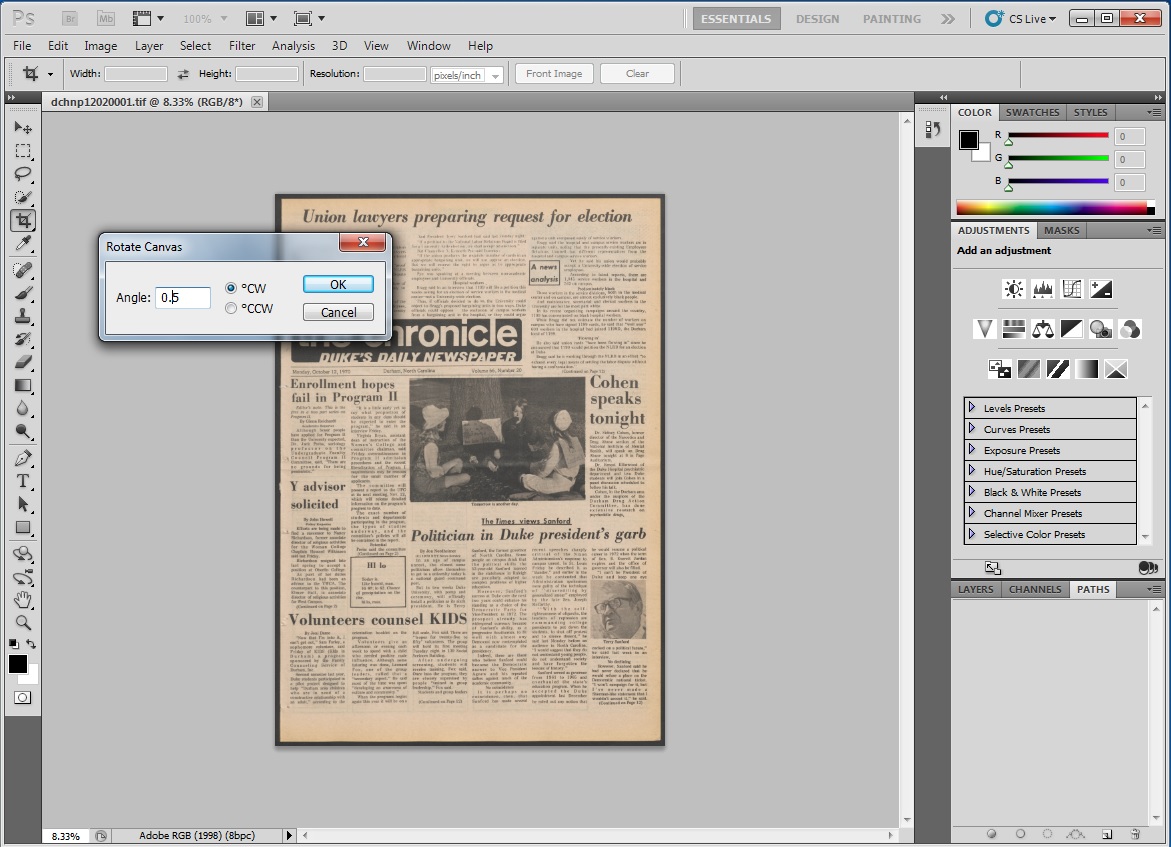
Rotating an image in Adobe Photoshop
We now find ourselves with a slue of folders filled with digitized Chronicle images. The next phase of the process is quality control (QC). Once every issue from the decade is scanned, the first round of QC checks all images for excess borders to be cropped, crooked images to be squared, and any other minute discrepancy that may have resulted from the scanning process. This could be missing images, pages out of order, or even images scanned upside down. This stage of QC is often performed by student workers who diligently inspect image after image using Adobe Photoshop. The second round of QC is performed by our Digital Production Specialist Zeke Graves who gives every item a final pass.
At this stage, derivatives of the original preservation-quality images are created. The originals are archived in dark storage, while the smaller-sized derivatives are used in the CONTENTdm ingest process. CONTENTdm is the digital collection management software we use that collates the digital images with their appropriate descriptive metadata from our digitization guide, and creates one compound object for each Chronicle issue. It also generates the layer of Optical Character Recognition (OCR) data that makes the Chronicle text searchable, and provides an online interface for users to discover the collection once published on the website. The images and metadata are ingested into CONTENTdm’s Project Client in small batches (1 to 3 years of Chronicle issues) to reduce the chance of upload errors. Once ingested into CONTENTdm, the items are then spot-checked to make sure the metadata paired up with the correct image. During this step, other metadata is added that is specific to CONTENTdm fields, including the ingest person’s initials. Then, another ingest must run to push the files and data from the Project Client to the CONTENTdm server. A third step after this ingest finishes is to approve the items in the CONTENTdm administrative interface. This gives the go-ahead to publish the material online.
Hold on, we aren’t done yet. The project is now passed along to our developers in DPPS who must add this material to our digital collections platform for online discovery and access (they are currently developing Tripod3 to replace the previous Tripod2 platform, which is more eloquently described in Will Sexton’s post back in April). Not only does this improve discoverability, but it makes all of the library’s digital collections look more uniform in their online presentation.
Then, FINALLY, the collection goes live on the web. Now, just repeat the process for every decade of the Duke Chronicle, and you can see how this can become a rather time-heavy and laborious process. A labor of love, that is.
I could have narrowly stuck with describing to you the scanning process and the wonders of the Zeutschel, but I felt that I’d be shortchanging you. Active scanning is only a part of the whole digitization process which warrants a much broader narrative than just “push scan.” Along this journey to digitize the Duke Chronicle, we’ve collectively learned many things. The quirks and trials of each decade inform our process for the next, giving us the chance to improve along the way (to learn how we reflect upon each digital project after completion, go to Molly Bragg’s blog post on post-mortem reports).
If your curiosity is piqued as to how the Duke Chronicle looks online, the Fall 1959-Spring 1970 and January 1980-February 1989 issues are already available to view in our digital collections. The 1970s Chronicle is the next decade slated for publication, followed by the 1950s. Though this isn’t a comprehensive detailed account of the digitization process, I hope it provides you with a clearer picture of how we bring a collection, like the Duke Chronicle, into digital existence.
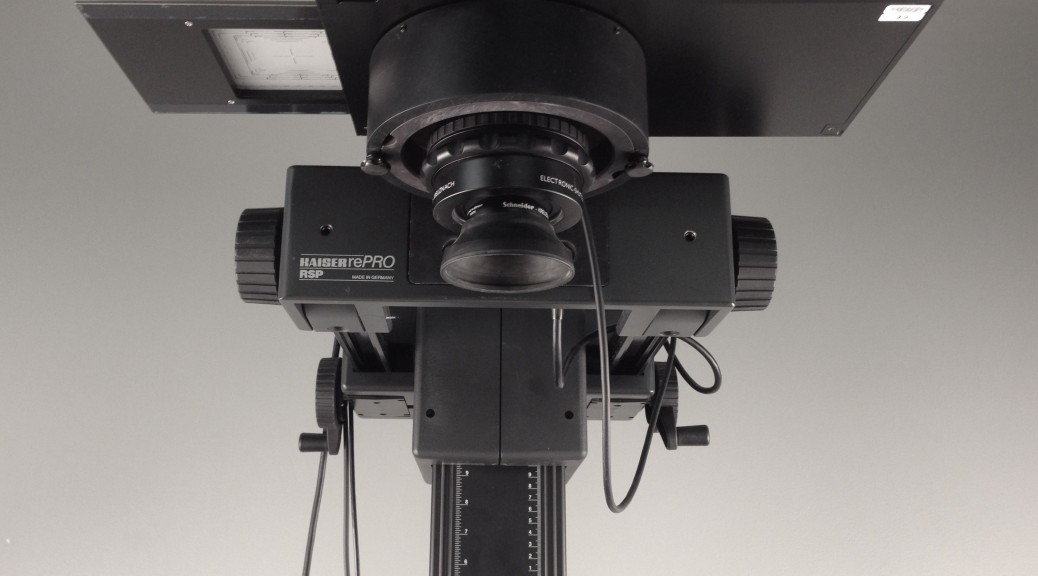
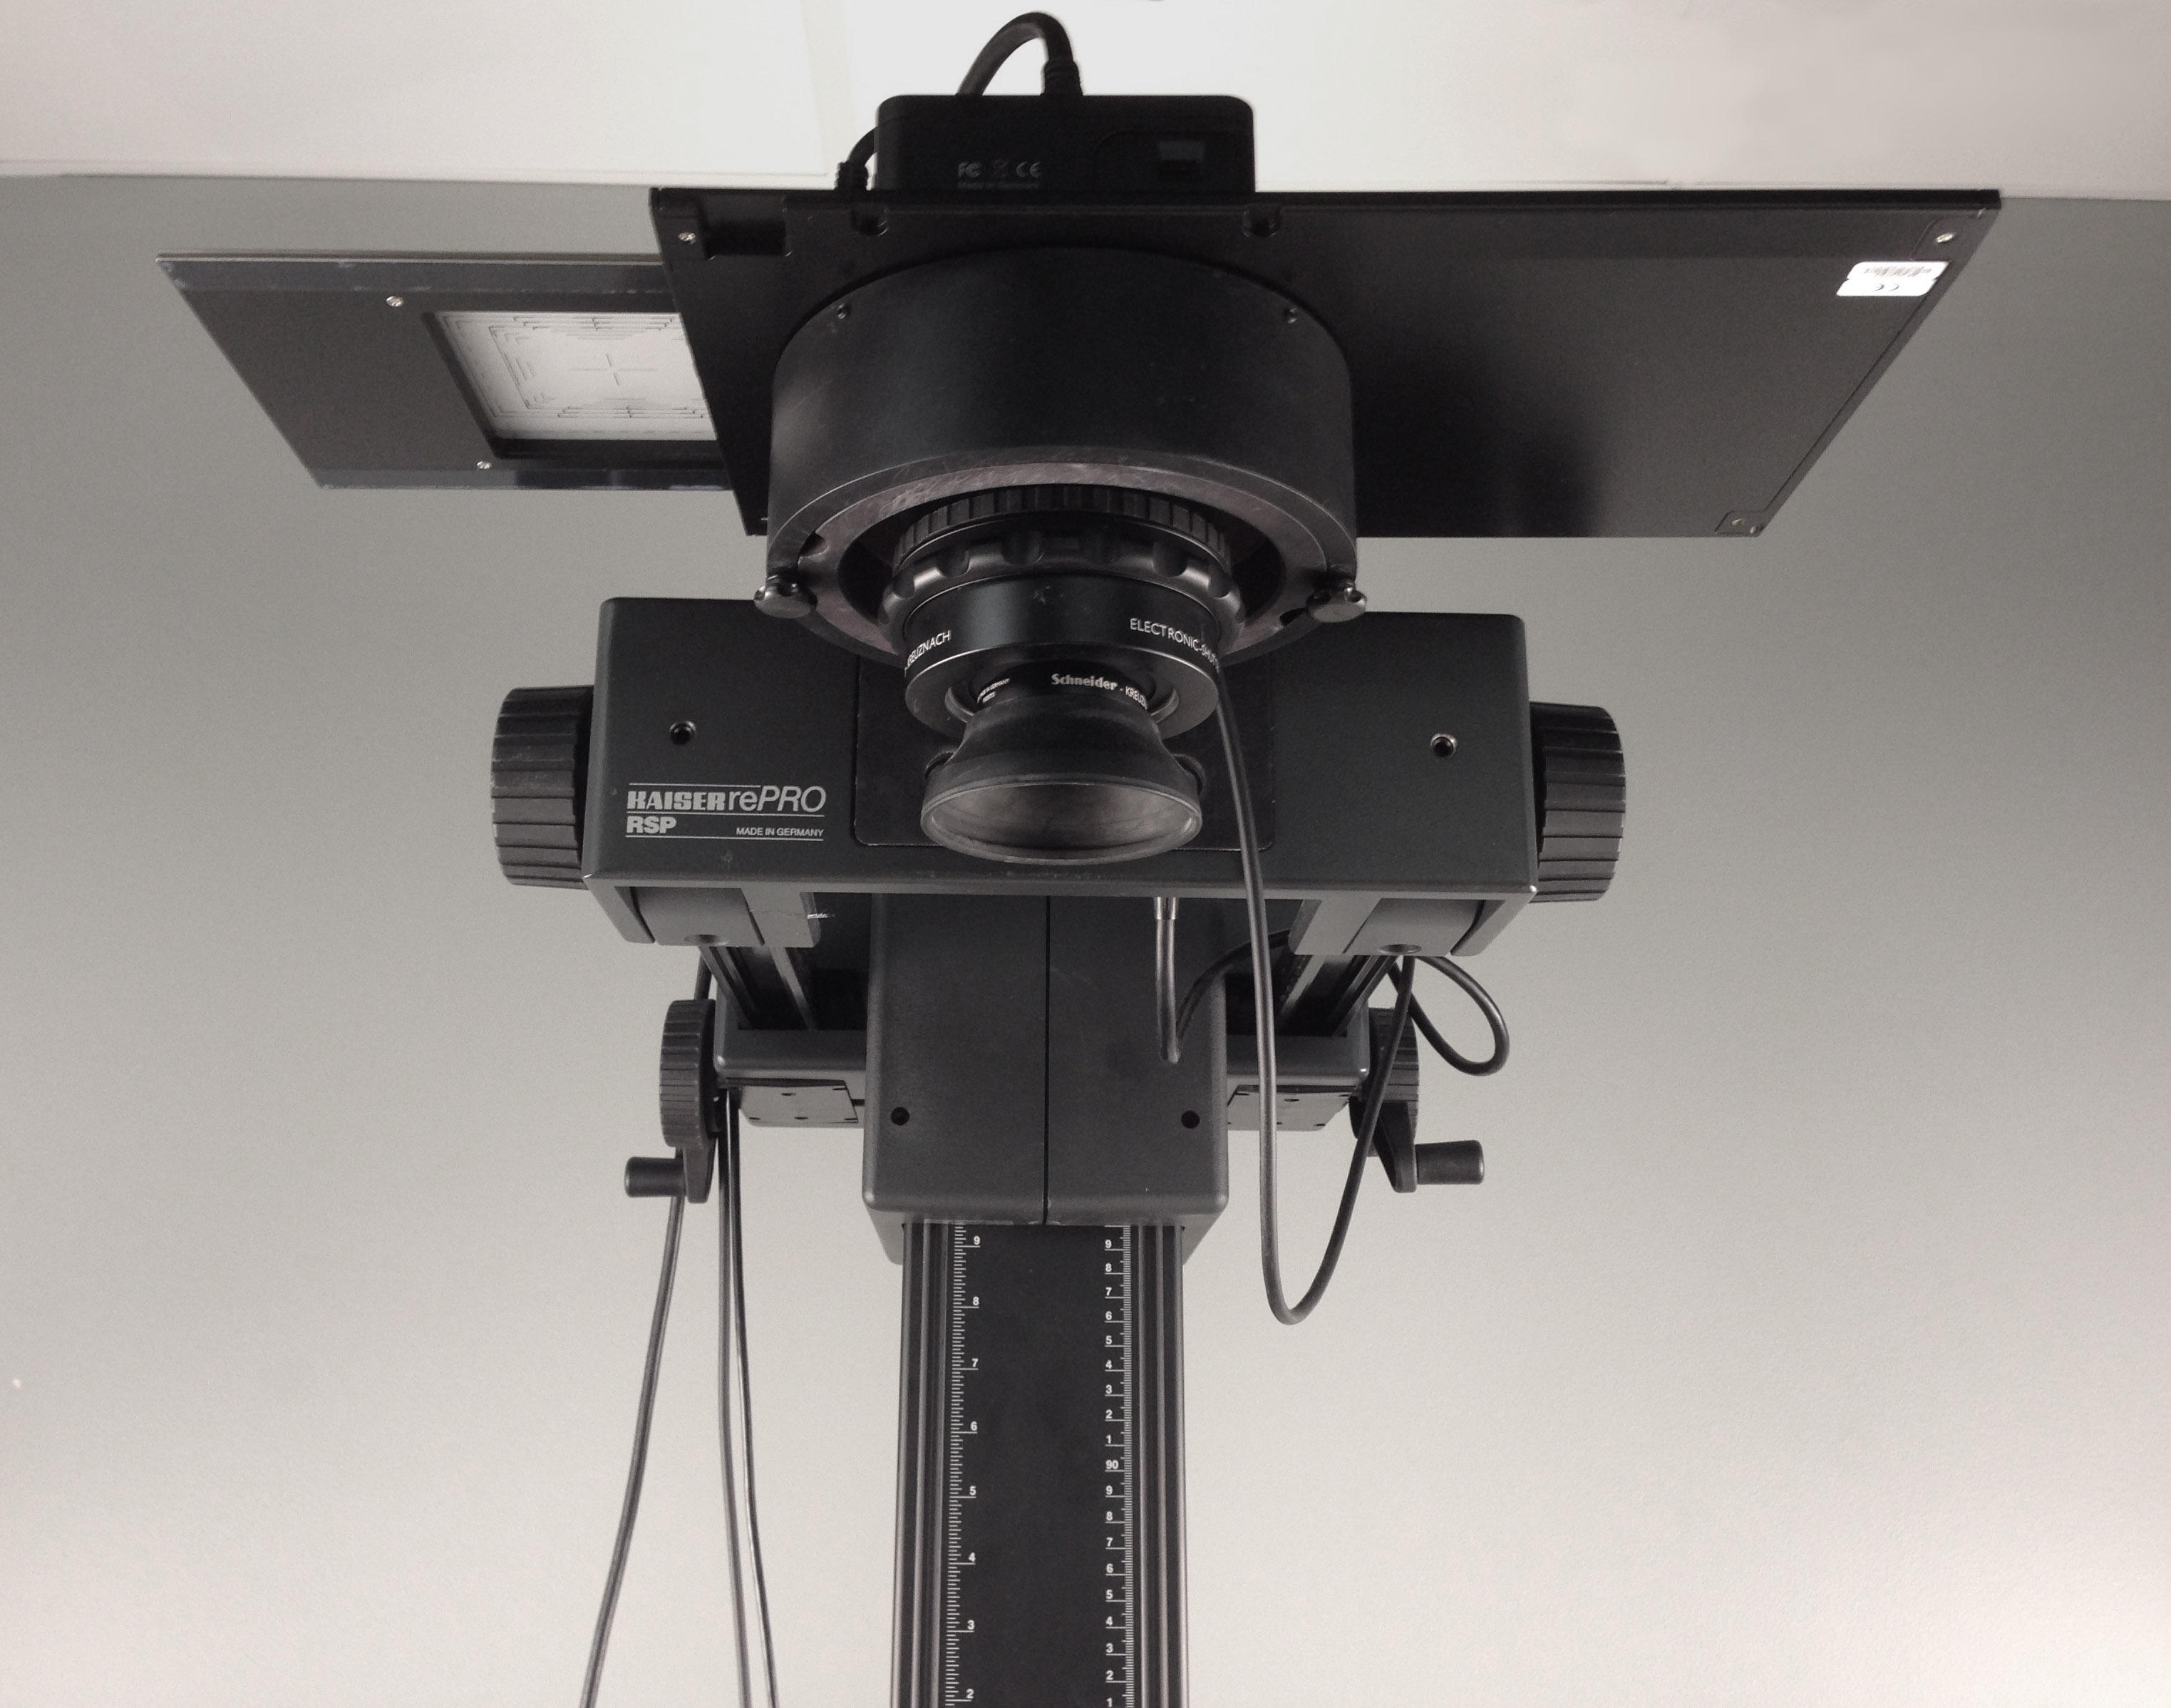
One of the most tedious and time-consuming tasks we do in the Digital Production Center is cropping and straightening still image files. Hired students spend hours sitting at our computers, meticulously straightening and cropping extraneous background space out of hundreds of thousands of photographed images, using Adobe Photoshop. This process is neccessary in order to present a clean, concise image for our digital collections, but it causes delays in the completion of our projects, and requires a lot of student labor. Auto cropping software has long been sought after in digital imaging, but few developers have been able to make it work efficiently, for all materials. The Digital Production Center’s Zeutschel overhead scanner utilizes auto cropping software, but the scanner can only be used with completely flat media, due to its limited depth of field. Thicker and more fragile materials must be photographed using our Phase One digital camera system, shown above.
Capture One’s Cultural Heritage software includes the auto crop feature.
Recently, Digital Transitions, who is the supplier of Phase One and it’s accompanying Capture One software, announced an update to the software which includes an auto crop and straightening feature. The new software is called Capture One Cultural Heritage, and is specifically designed for use in libraries and archival institutions. The auto crop feature, previously unavailable in Capture One, is a real breakthrough, and there are several options for how to use it.
First of all, the user can choose to auto crop “On Capture” or “On Crop.” That is, the software can auto crop instantly, right after a photograph has been taken (On Capture), or it can be applied to the image, or batch of images, at a later time (On Crop). You can also choose between auto cropping at a fixed size, or by the edge of the material. For instance, if you are photographing a collection of posters that are all sized 18” x 24,” you would choose “Fixed Size” and set the primary crop to “18 x 24,” or slightly larger if you want your images to have an outer border. The software recognizes the rectangular shape, and applies the crop. If you are photographing a collection of materials that are a variety of different sizes, you would choose “Generic,” which tells the software to crop wherever it sees a difference between the edge of the material and the background. “Padding” can be used to give those images a border.
The Digital Production Center’s Phase One camera system.
Because Capture One utilizes raw files, the auto crops are non-destructive edits. One benefit of this is that if your background color is close to the color of your material, you can temporarily adjust the contrast of the photograph in order to darken the edges of the object, thus enhancing the delineation between object and background. Next apply the auto crop, which will be more successful due to it’s ability to recognize the newly-defined edges of the material. After the crops are applied, you can reverse the contrast adjustment, thus returning the images to their original state, while still keeping the newly-generated crops.
Temporarily increasing the contrast of your images can help the auto crop feature find the edges of the object.
Like a lot of technological advances, reliable auto cropping seemed like a fantasy just a few years ago, but is now a reality. It doesn’t work perfectly every time, and quality control is still necessary to uncover errors, but it’s a big step forward. The only thing disconcerting is the larger question facing our society. How long will it be before our work is completely automated, and humans are left behind?
Over the last few months, we’ve been doing some behind-the-scenes re-engineering of “the way” we publish digital objects in finding aids (aka “collection guides”). We made these changes in response to two main developments:
The transition to ArchivesSpace for managing description of archival collections and the production of finding aids
A growing need to handle new types, or classes, of digital objects in our finding aid interface (especially born-digitalelectronic records)
Background
While the majority of items found in Duke Digital Collections are published and accessible through our primary digital collections interface (codename Tripod), we have a growing number of digital objects that are published (and sometimes embedded) in finding aids.
Finding aids describe the contents of manuscript and archival collections, and in many cases, we’ve digitized all or portions of these collections. Some collections may contain material that we acquired in digital form. For a variety of reasons that I won’t describe here, we’ve decided that embedding digital objects directly in finding aids can be a suitable, often low-barrier alternative to publishing them in our primary digital collections platform. You can read more on that decision here.
Screenshot showing digital objects embedded in the Alexander H. Stephens Papers finding aid
EAD, ArchivesSpace, and the <dao>
At Duke, we’ve been creating finding aids in EAD (Encoded Archival Description) since the late 1990s. Prior to implementing ArchivesSpace (June 2015) and its predecessor Archivists Toolkit (2012), we created EAD through some combination of an XML editor (NoteTab, Oxygen), Excel spreadsheets, custom scripts, templates, and macros. Not surprisingly, the evolution of EAD authoring tools led to a good deal of inconsistent encoding across our EAD corpus. These inconsistencies were particularly apparent when it came to information encoded in the <dao> element, the EAD element used to describe “digital archival objects” in a collection.
As part of our ArchivesSpace implementation plan, we decided to get better control over the <dao>–both its content and its structure. We wrote some local best practice guidelines for formatting the data contained in the <dao> element and we wrote some scripts to normalize our existing data before migrating it to ArchivesSpace.
Classifying digital objects with the “use statement.”
In June 2015, we migrated all of our finding aids and other descriptive data to ArchivesSpace. In total, we now have about 3400 finding aids (resource records) and over 9,000 associated digital objects described in ArchivesSpace. Among these 9,000 digital objects, there are high-res master images, low-res use copies, audio files, video files, disk image files, and many other kinds of digital content. Further, the digital files are stored in several different locations–some accessible to the public and some restricted to staff.
In order for our finding aid interface to display each type of digital object properly, we developed a classification system of sorts that 1) clearly identifies each class of digital object and 2) describes the desired display behavior for that type of object in our finding aid interface.
In ArchivesSpace, we store that information consistently in the ‘Use Statement’ field of each Digital Object record. We’ve developed a core set of use statement values that we can easily maintain in a controlled value list in the ArchivesSpace application. In turn, when ArchivesSpace generates or exports an EAD file for any given collection that contains digital objects, these use statement values are output in the DAO role attribute. Actually, a minor bug in the ArchivesSpace application currently prevents the use statement information from appearing in the <dao>. I fixed this by customizing the ArchivesSpace EAD serializer in a local plugin.
Screenshot from ArchivesSpace showing digital object record, file version, and use statement
Snippet of EAD generated from ArchivesSpace showing <dao> encoding
Every object its viewer/player
The values in the DAO role attribute tell our display interface how to render a digital object in the finding aid. For example, when the display interface encounters a DAO with role=”video-streaming” it knows to queue up our embedded streaming video player. We have custom viewers and players for audio, batches of image files, PDFs, and many other content types.
Here are links to some finding aids with different classes of embedded digital objects, each with its own associated use statement and viewer/player.
The last example above illustrates the curious case of electronic records. The term “electronic records” can describe a wide range of materials but may include things like email archives, disk images, and other formats that are not immediately accessible on our website, but must be used by patrons in the reading room on a secure machine. In these cases, we want to store information about these files in ArchivesSpace and provide a convenient way for patrons to request access to them in the finding aid interface.
Within the next few weeks, we plan to implement some improvements to the way we handle the description of and access to electronic records in finding aids. Eventually, patrons will be able to view detailed information about the electronic records by hovering over a link in the finding aid. Clicking on the link will automatically generate a request for those records in Aeon, the Rubenstein Library’s request management system. Staff can then review and process those requests and, if necessary, prepare the electronic records for viewing on the reading room desktop.
Conclusion
While we continue to tweak our finding aid interface and learn our way around ArchivesSpace, we think we’ve developed a fairly sustainable and flexible way to publish digital objects in finding aids that both preserves the archival context of the items and provides an engaging user-experience for interacting with the objects. As always, we’d love to hear how other libraries may have tackled this same problem. Please share your comments or experiences with handling digital objects in finding aids!
[Credit to Lynn Holdzkom at UNC-Chapel Hill for coining the phrase “The Tao of the DAO”]
My last several posts have focused on endangered–some would say obsolete–audio formats: open reel tape, compact cassette, DAT, and Minidisc. In this installment, we travel back to the dawn of recorded sound and the 20th Century to investigate some of the earliest commercial recording media. Unlike the formats above, which operate on post-WW2 magnetic and optical technology, these systems carved sound waves into stone (or, more accurately, wax) behind strictly acousto-mechanical principles.
Thomas Edison is credited as inventing the first phonograph (“soundwriter”) on July 18, 1877. It consisted of tinfoil wrapped around a hand-cranked metal cylinder. Sound waves would be funneled through a horn, causing a stylus to vibrate and indent a groove around the outside of the cylinder. The cylinder could be played by reversing the procedure: By retracing the groove with the stylus, the sound would be amplified back through the horn and heard as a rough approximation of the original sound.
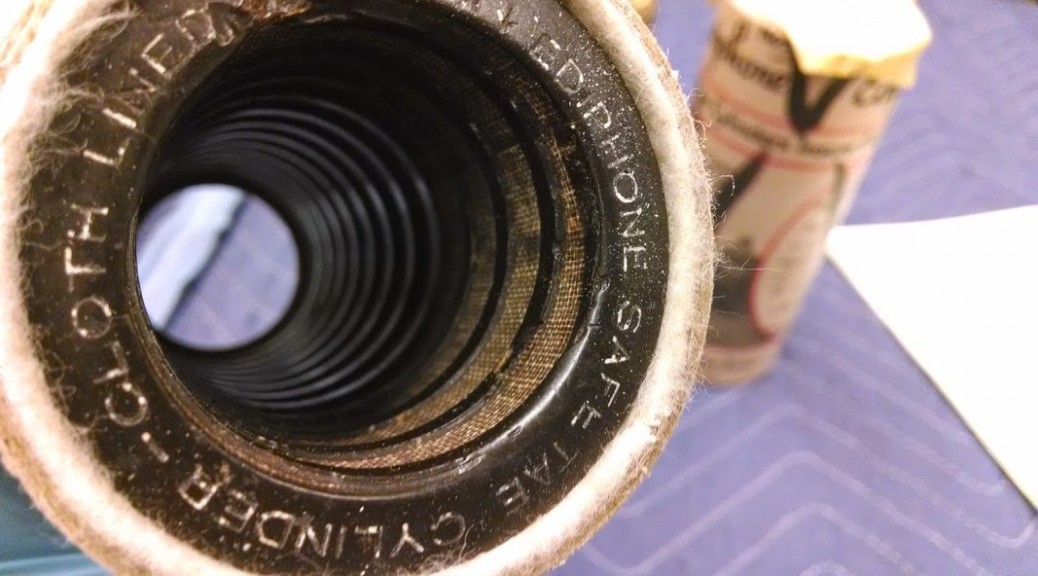
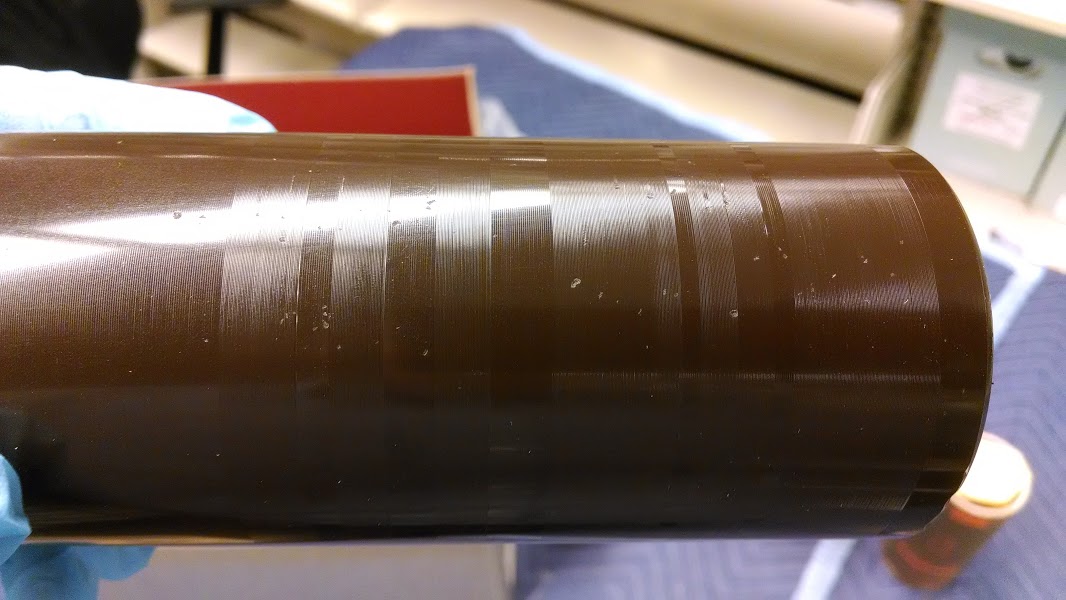
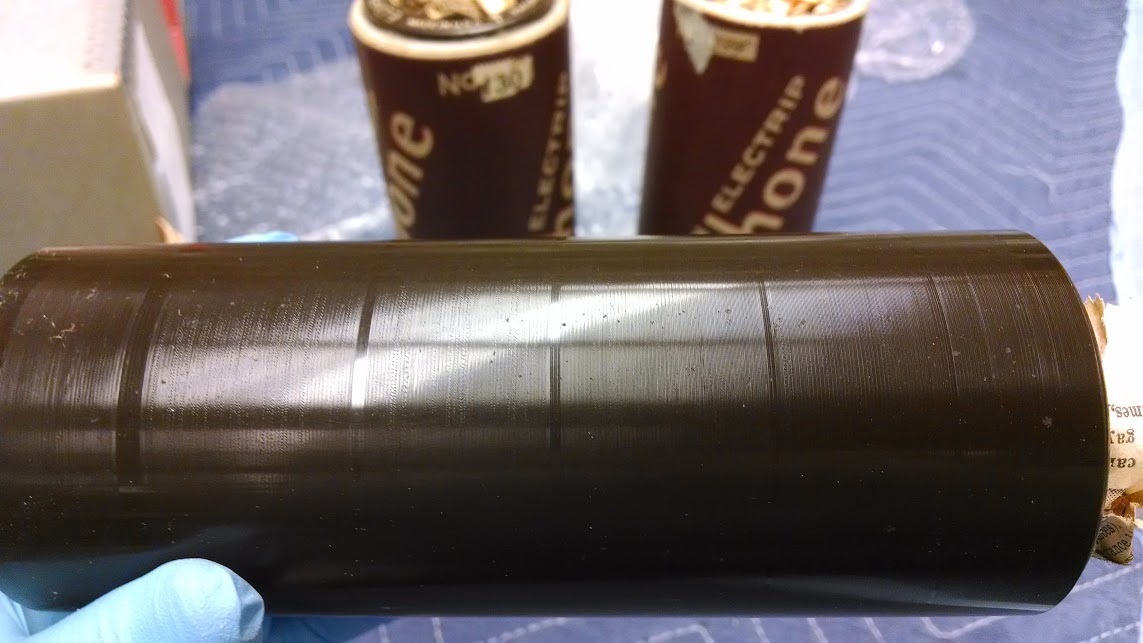
Alexander Graham Bell quickly improved the innovation by introducing wax as a superior material for the cylinders and using a needle to scratch the sound waves into their surface. He called his device the “Graphophone”. By 1888, Edison had also adopted wax as the preferred medium for recorded cylinders and a patent-sharing agreement was signed. In 1889, the wax cylinder because the first commercially marketed audio medium.
Initially, the cylinders were installed in the ancestors of jukeboxes in public places. Drop a coin into the slot, and the machine would magically dispense a song, monologue, or comedy routine. The technology was soon adapted for home use. Consumers could purchase prerecorded cylinders to play on their machines. Perhaps more amazingly, they could buy a home recording attachment and cut their own content onto the wax.
[PAUSE—shift from PLAY to RECORD mode]
Biographical and Historical Note
Frank Clyde Brown (1870-1943) served as a Professor of English at Trinity College, Duke University, from 1909 until his death. A native of Virginia, he received his Ph.D. at the University of Chicago in 1908. While at Duke University he served in many capacities, including being chairman of his department, University Marshal, and Comptroller of the University during its initial construction. These aspects of his life are chronicled in his papers held by the Duke University Archives.
This collection of materials, however, is concerned with activities to which he devoted equal time and energy, the organization of the North Carolina Folklore Society in 1913 and his personal effort to gather and record the nuances and culture of “folk” of North Carolina and its near neighbors, which occupied him from 1912 until his death. Under the impetus of a 1912 mailing from John A. Lomax, then President of the American Folklore Society, Brown as well as other faculty members and other citizens in North Carolina, became interested in folklore and organized the North Carolina Folklore Society in 1913, with Brown as secretary-treasurer. As secretary-treasurer of this organization from its inception until his death, he provided the organizational impetus behind the Society. Through his course in folklore at Duke, he also sent class after class out to gather the folklore of their locales, both during their studies and afterward. And virtually every summer he could be found in the most remote parts of the state, with notebook and recorder — first a dictaphone employing cylinders, and later a machine employing aluminum discs provided for his use by the University. The result, by 1943, was a collection of about 38,000 written notes on lore, 650 musical scores, 1400 songs vocally recorded, and numerous magazine articles, student theses, books, lists, and other items related to this study. The material originated in at least 84 North Carolina counties, with about 5 percent original in 20 other states and Canada, and came from the efforts of 650 other contributors besides Brown himself.
[STOP]
[POWER OFF]
Thanks to our Audiovisual Archivist, Craig Breaden, for the excellent photos and unused title suggestion (“The Needle and the Damage Done”). Future posts will include updates on work with the Frank C. Brown Collection, other audio collections at Duke, and the history of sound recording and reproduction.
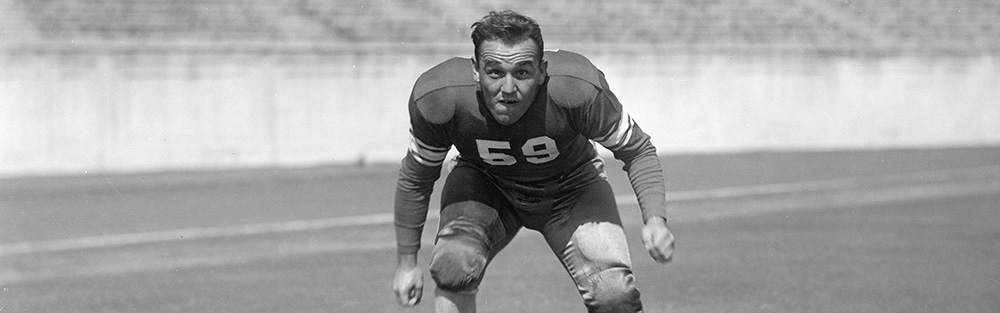
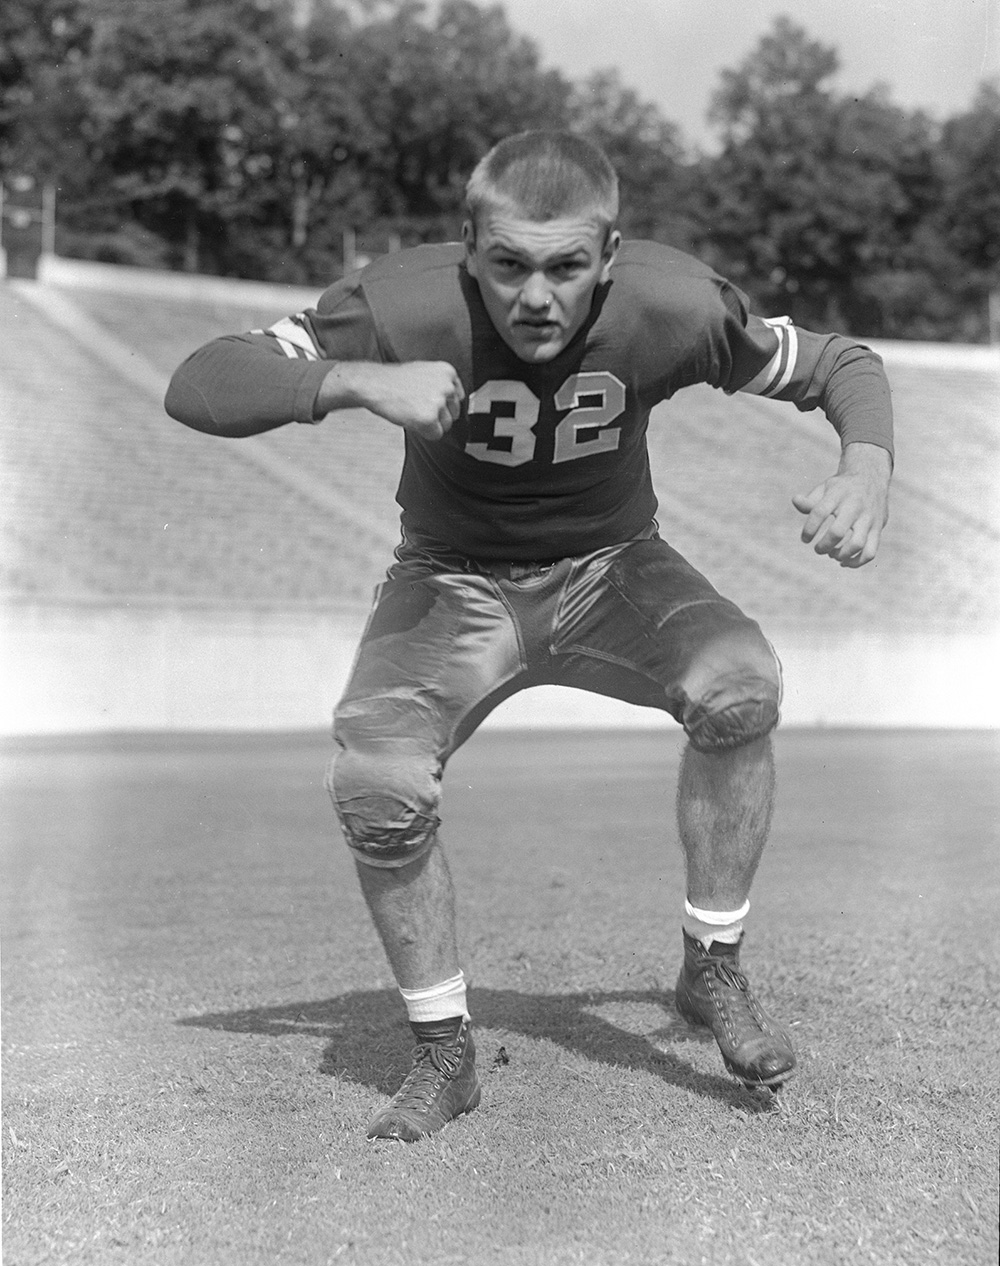
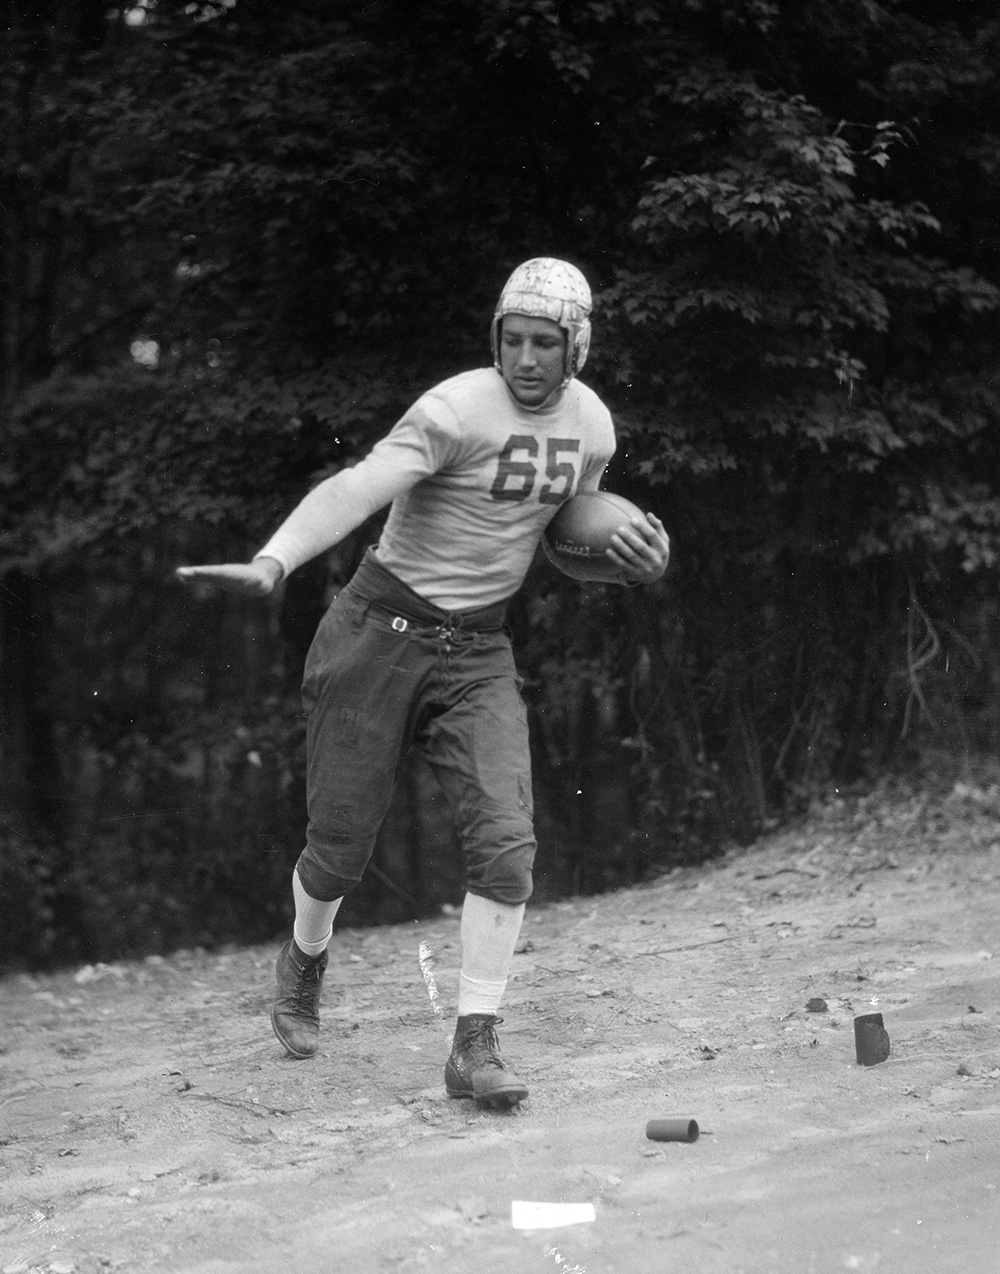
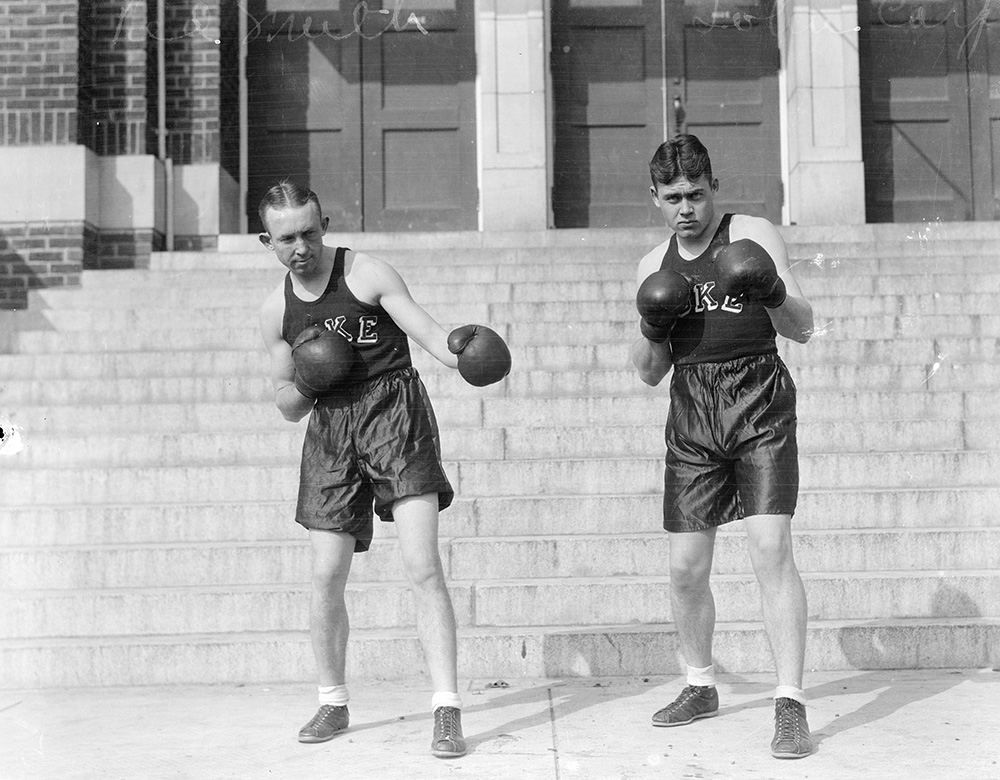
We all probably remember having to pose for an annual class photograph in primary school. If you made the mistake of telling your mother about the looming photograph beforehand you probably had to wear something “nice” and had your hair plastered to your head by your mother while she informed you of the trouble you’d be in if you made a funny face. Everyone looks a little awkward in these photographs and only a few of us wanted to have the picture taken in the first place. Frankly, I’m amazed that they got us all to sit still long enough to take the photograph. Some of us also had similar photographs taken while participating in team sports which also led to some interesting photographs.
These are some of the memories that have been popping up this past month as I digitize nitrate negatives from the Sports Information Office: Photographic Negatives collection circa 1924-1992, 1995 and undated. The collection contains photographic negatives related to sports at Duke. I’ve digitized about half of the negatives and seen images from mostly football, basketball, baseball and boxing. The majority of these photographs are of individuals but there are also team shots, group shots and coaches. While you may have to wait a bit for the publication of these negatives through the Digital Collections website I had to share some of these gems with you.
Some of the images strike me as funny for the expressions, some for the pose and others for the totally out of context background. It makes me wonder what the photographer’s intention/ instruction was.
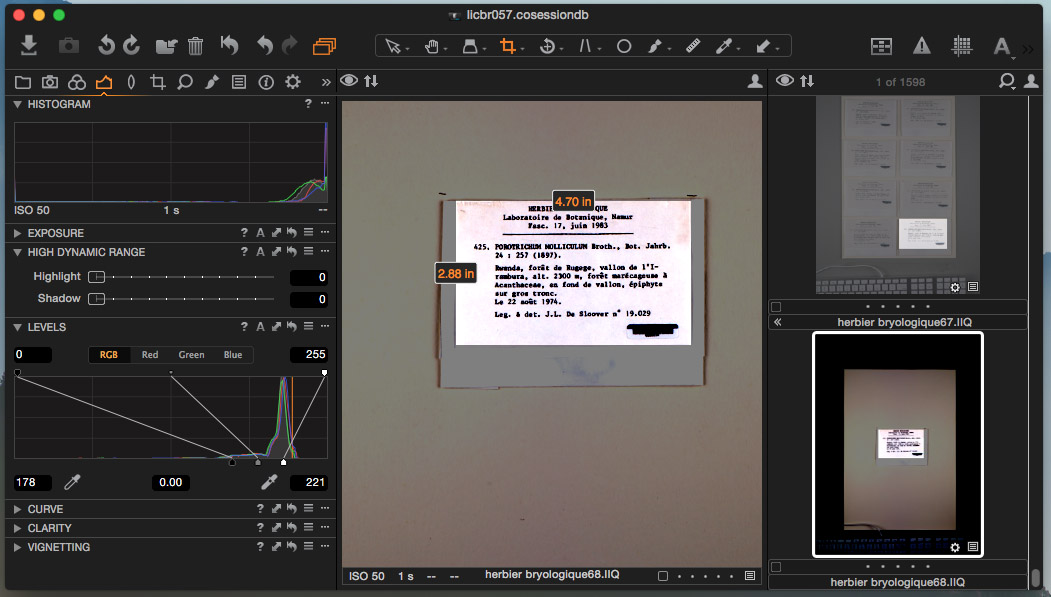
To capture these wonderful images we are using a recently purchased Hasselblad FlexTight X5. The Hasselblad is a dedicated high-end film scanner that uses glassless drum scanning technology. Glassless drum scanning takes advantage of all the benefits of a classic drum scanner (high resolution, sharpness, better D-max/ D-min) without all the disadvantages (wet mounting messiness, newton rings, time consuming, price, speed). This device produces extremely sharp reproductions of which the film grain in the digital image can be seen. A few more important factors about this scanner are: a wide variety of standard film sizes can be digitized along with custom sizes and it captures in a raw file format. This is significant because negatives contain a significant amount of tonal information that printed photographs do not. Once this information is captured we have to adjust each digital image as if we were printing the negative in a traditional dark room. When using image editing software to adjust an image an algorithm is at work making decisions about compressing, expanding, keeping or discarding tonal information in the digital image. This type of adjustment causes data loss. Because we are following archival imaging standards, retaining the largest amount of data is important. Sometimes the data loss is not visible to the naked eye but making adjustments renders the image data “thin”. The more adjustments to an image the less data there is to work with.
A histogram is a visual representation of tonal data in an image. This is a histogram of an image before and after an adjustment.
It kind of reminds me of the scene in Shawshank Redemption (spoiler alert) where the warden is in Andy Dufresne’s (Tim Robbins) cell after discovering he has escaped. The warden throws a rock at a poster on the wall in anger only to find there is a hole in the wall behind the poster. An adjusted digital image is similar in that the image looks normal and solid but there is no depth to it. This becomes a problem if anyone, after digitization, wants to reuse the image in some other context where they will need to make adjustments to suit their purposes. They won’t have a whole lot of latitude to make adjustments before digital artifacts start appearing. By using the Hasselblad RAW file format and capturing in 16 bit RGB we are able to make adjustments to the raw file without data loss. This enables us to create a robust file that will be more useful in the future.
I’m sure there will be many uses for the negatives in this collection. Who wouldn’t want a picture of a former Duke athlete in an odd pose in an out of context environment with a funny look on their face? Right?
Notes from the Duke University Libraries Digital Projects Team