To end preservation week we are going on a field trip to pick up materials and process them into our workflows. Our first stop is the library’s shelving unit where the staff have set aside damaged materials for us.
Pickup from shelving unit
Our next stop is Circulation on the first floor. Front line workers are often the first to see damaged books.
Picking up damaged books from Circulation
When we get back to the lab, we scan items into our library tracking system called Alma. When we scan an item in, it changes the location and availability so that everyone knows where the book is in case it is requested by a patron. We scan items when they come in, and when they leave the lab.
Scanning items into Alma
Shipping brings us materials from the East Campus Libraries and from Collections Services. We evaluate each item’s needs and sort them into our workflow by type of repair or housing they need.
Sorting scores and other small items into the pamphlet binding workflow.Sorting a couple items from Circulation into the book repair workflows.The best conservation flag this week. This will get an enclosure for sure. We want to keep these items together.
When work is finished, we often have to order shelf labels from Collections Services. When they arrive, we carefully match the barcode on the label with the barcode on the item.
Applying shelf labels
Once everything is labeled, we sort the finished materials by location and send them out.
Sorting material by shelving location. Don’t forget to record your stats!
A week in the life of Conservation is rarely boring. I hope you enjoyed coming along with us on our Preservation Week journey!
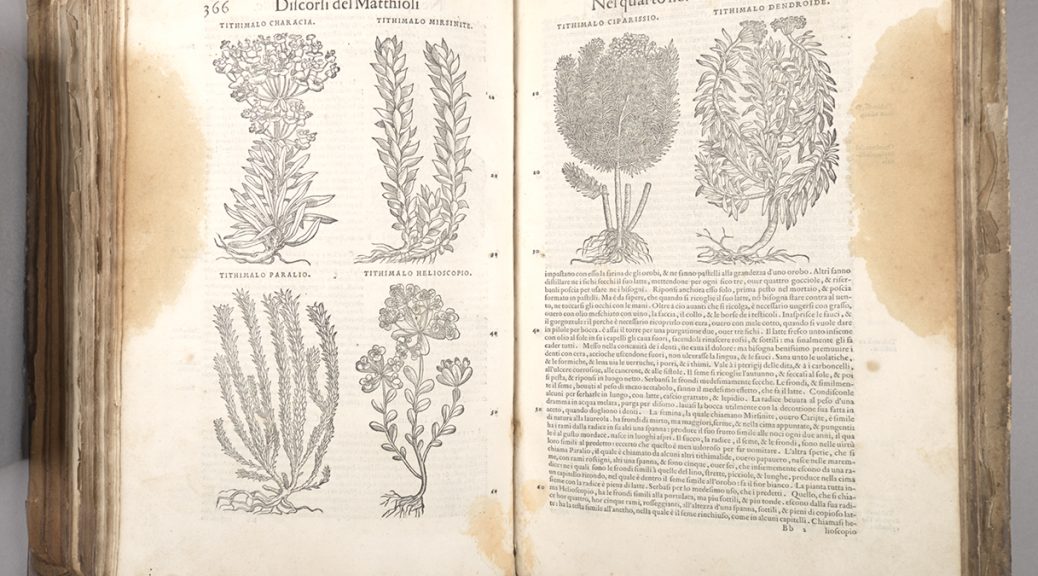
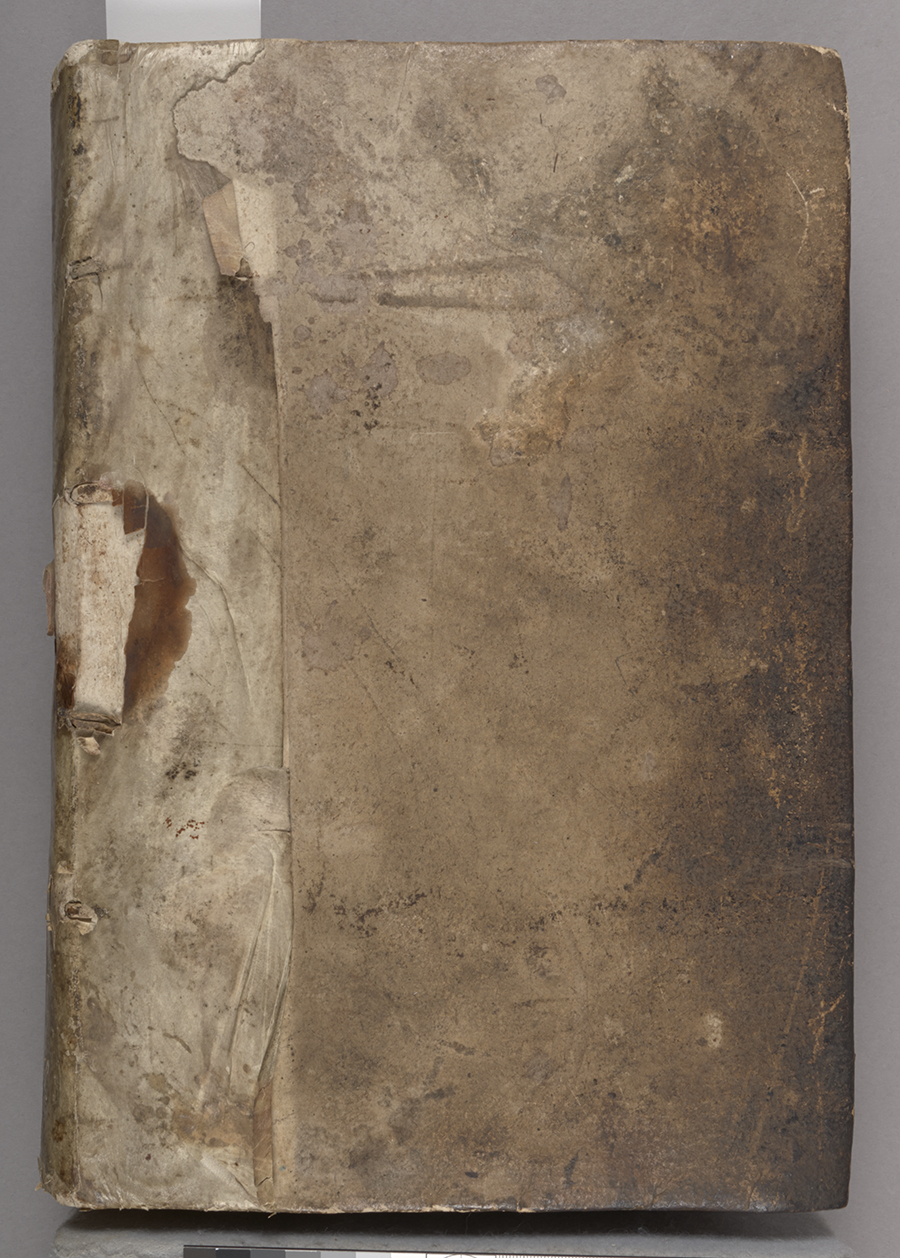
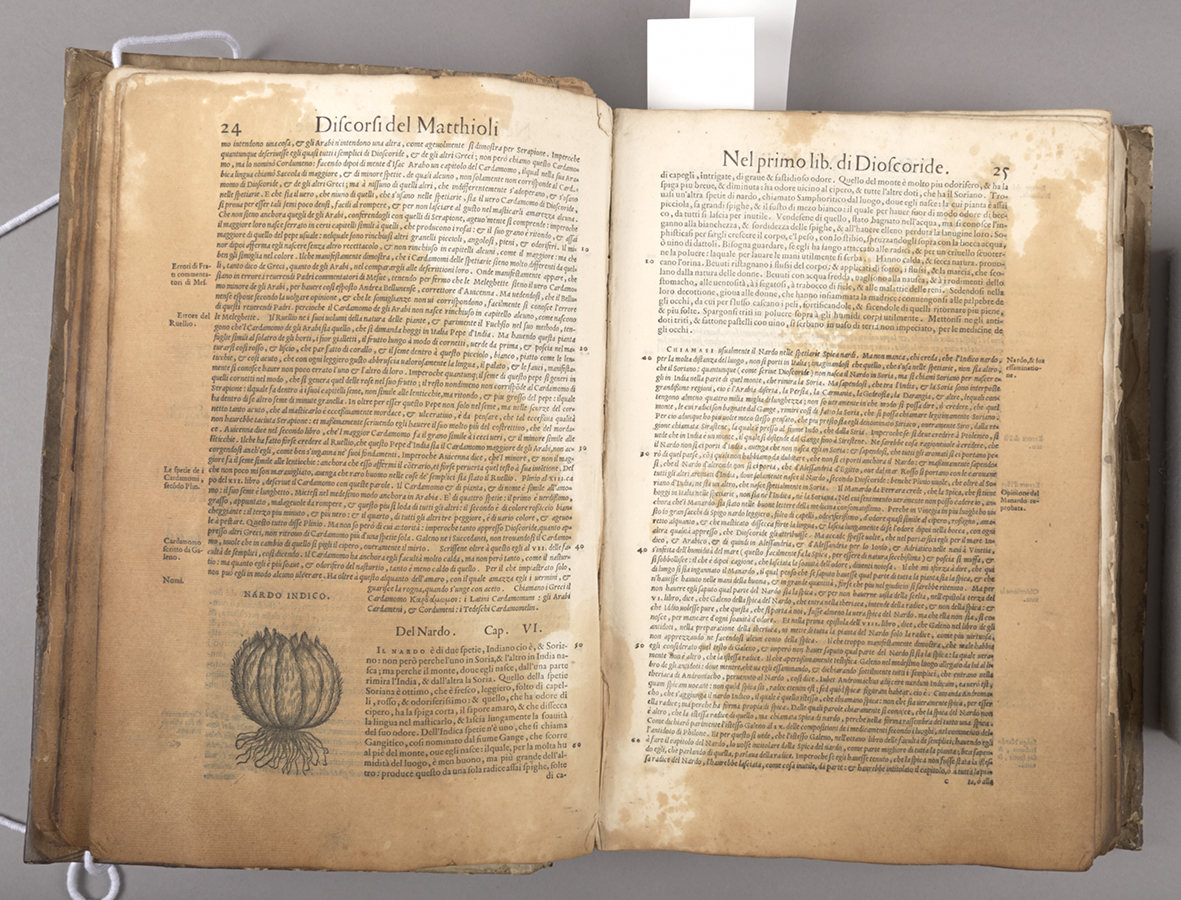
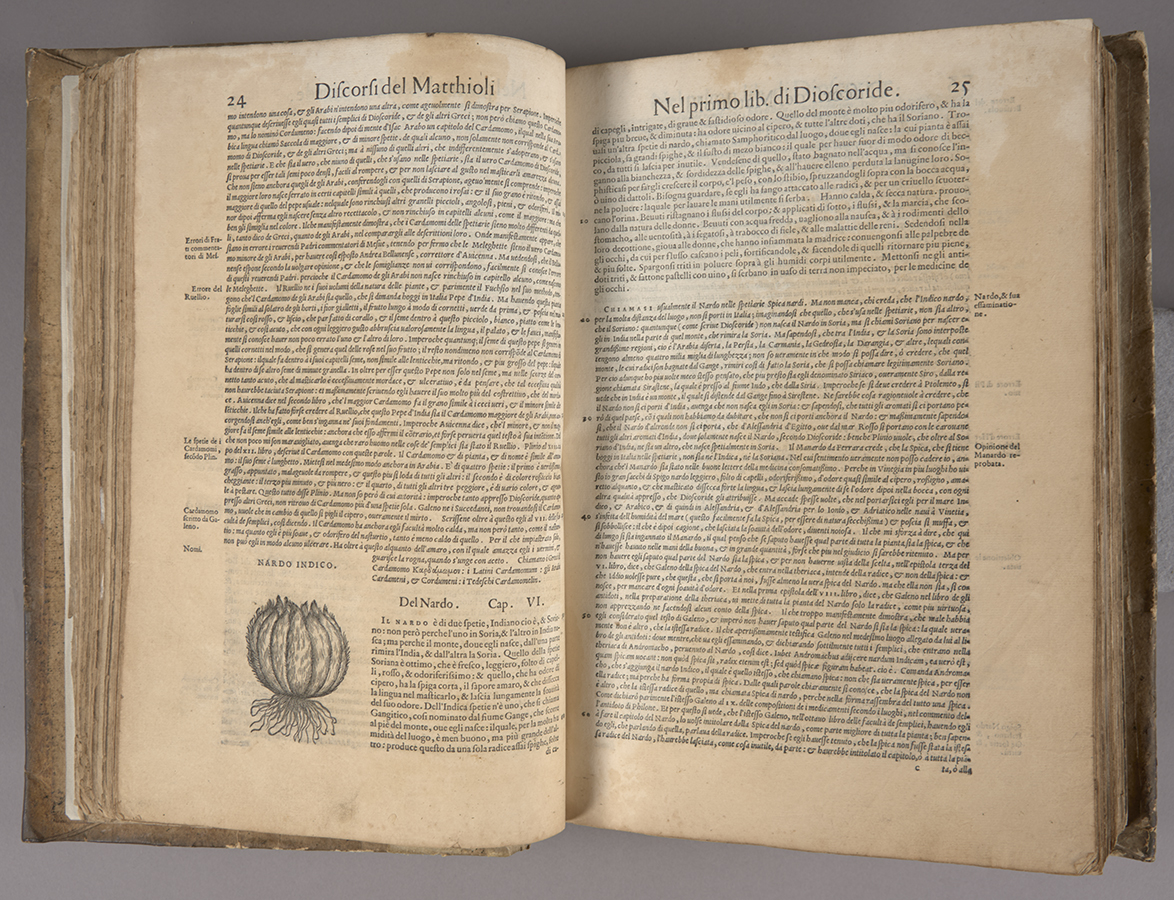
We’re preparing to launch another batch of treatment documentation in the CDA, and the process has reminded me of one of the most complicated, and ultimately, one of my favorite treatments from over the years. I discorsi di M. Pietro Andrea Matthioli, medico senese, … is an early Italian natural medicine text, printed in Venice in 1557. It contains lovely woodcut illustrations of animal and plant species that offered medicinal remedies. Rubenstein Libraries’ copy was acquired for the History of Medicine Collection in 2016 from a family in the Piedmont region of North Carolina.
Title page, before treatmentBinding, before treatmentPartial staining and plant images, before treatment
When we acquired it, about one quarter of the text and a portion of the early paper binding had long been saturated with oil, and there was less severe oil staining throughout. It was so soaked with oil that the pages were slightly transparentized and were becoming stiff and blocking together. This video demonstrates the condition and handling challenges it presented when we first received it [SOUND ON].
The text was bound in an early paper binding with a parchment spine overlay. The sewing was broken in places and pages were coming loose. Initial testing found that the oil was soluble in a couple of different solvents but I found that of the few I tested, ethanol moved only the oil but not the printing ink. With this information and considering other factors, the curators and I agreed that it was appropriate to disbind the text and to use solvent baths to remove as much of the oil from the paper as possible.
Working in our fume hood, I treated the most oil-stained sections of the text with multiple ethanol baths, which significantly drew out oily residues and moderately reduced the staining, a result that the curators were ultimately pretty happy with. These solvent baths were followed by water baths and then resizing, since the previous immersions removed most of the original sizing.
Saving some of the residual oil in ethanol, I was able to analyze it with Fourier Transform Infrared Spectroscopy (FTIR) at the SMIF facility on campus. Conservation scientists in at the Winterthur Museum in Delaware were able to identify the residue as palm oil, along with an unknown plasticizer. These results ultimately didn’t impact the conservation treatment, but the information does present another interesting detail in understanding the curious life of this item. After treating the text, I mended it and resewed it, and was able to rebind it in the original binding.
Staining before treatmentAfter solvent treatment
I Discorsi… is likely to be on display in an upcoming exhibit on early botanical texts. You can also see further images and details of this treatment in the CDA, here. Many thanks to Dr. Mark Walters, Dr. Chris Petersen, and Dr. Jocelyn Alcantara-Garcia for their assistance in oil analysis and identification.
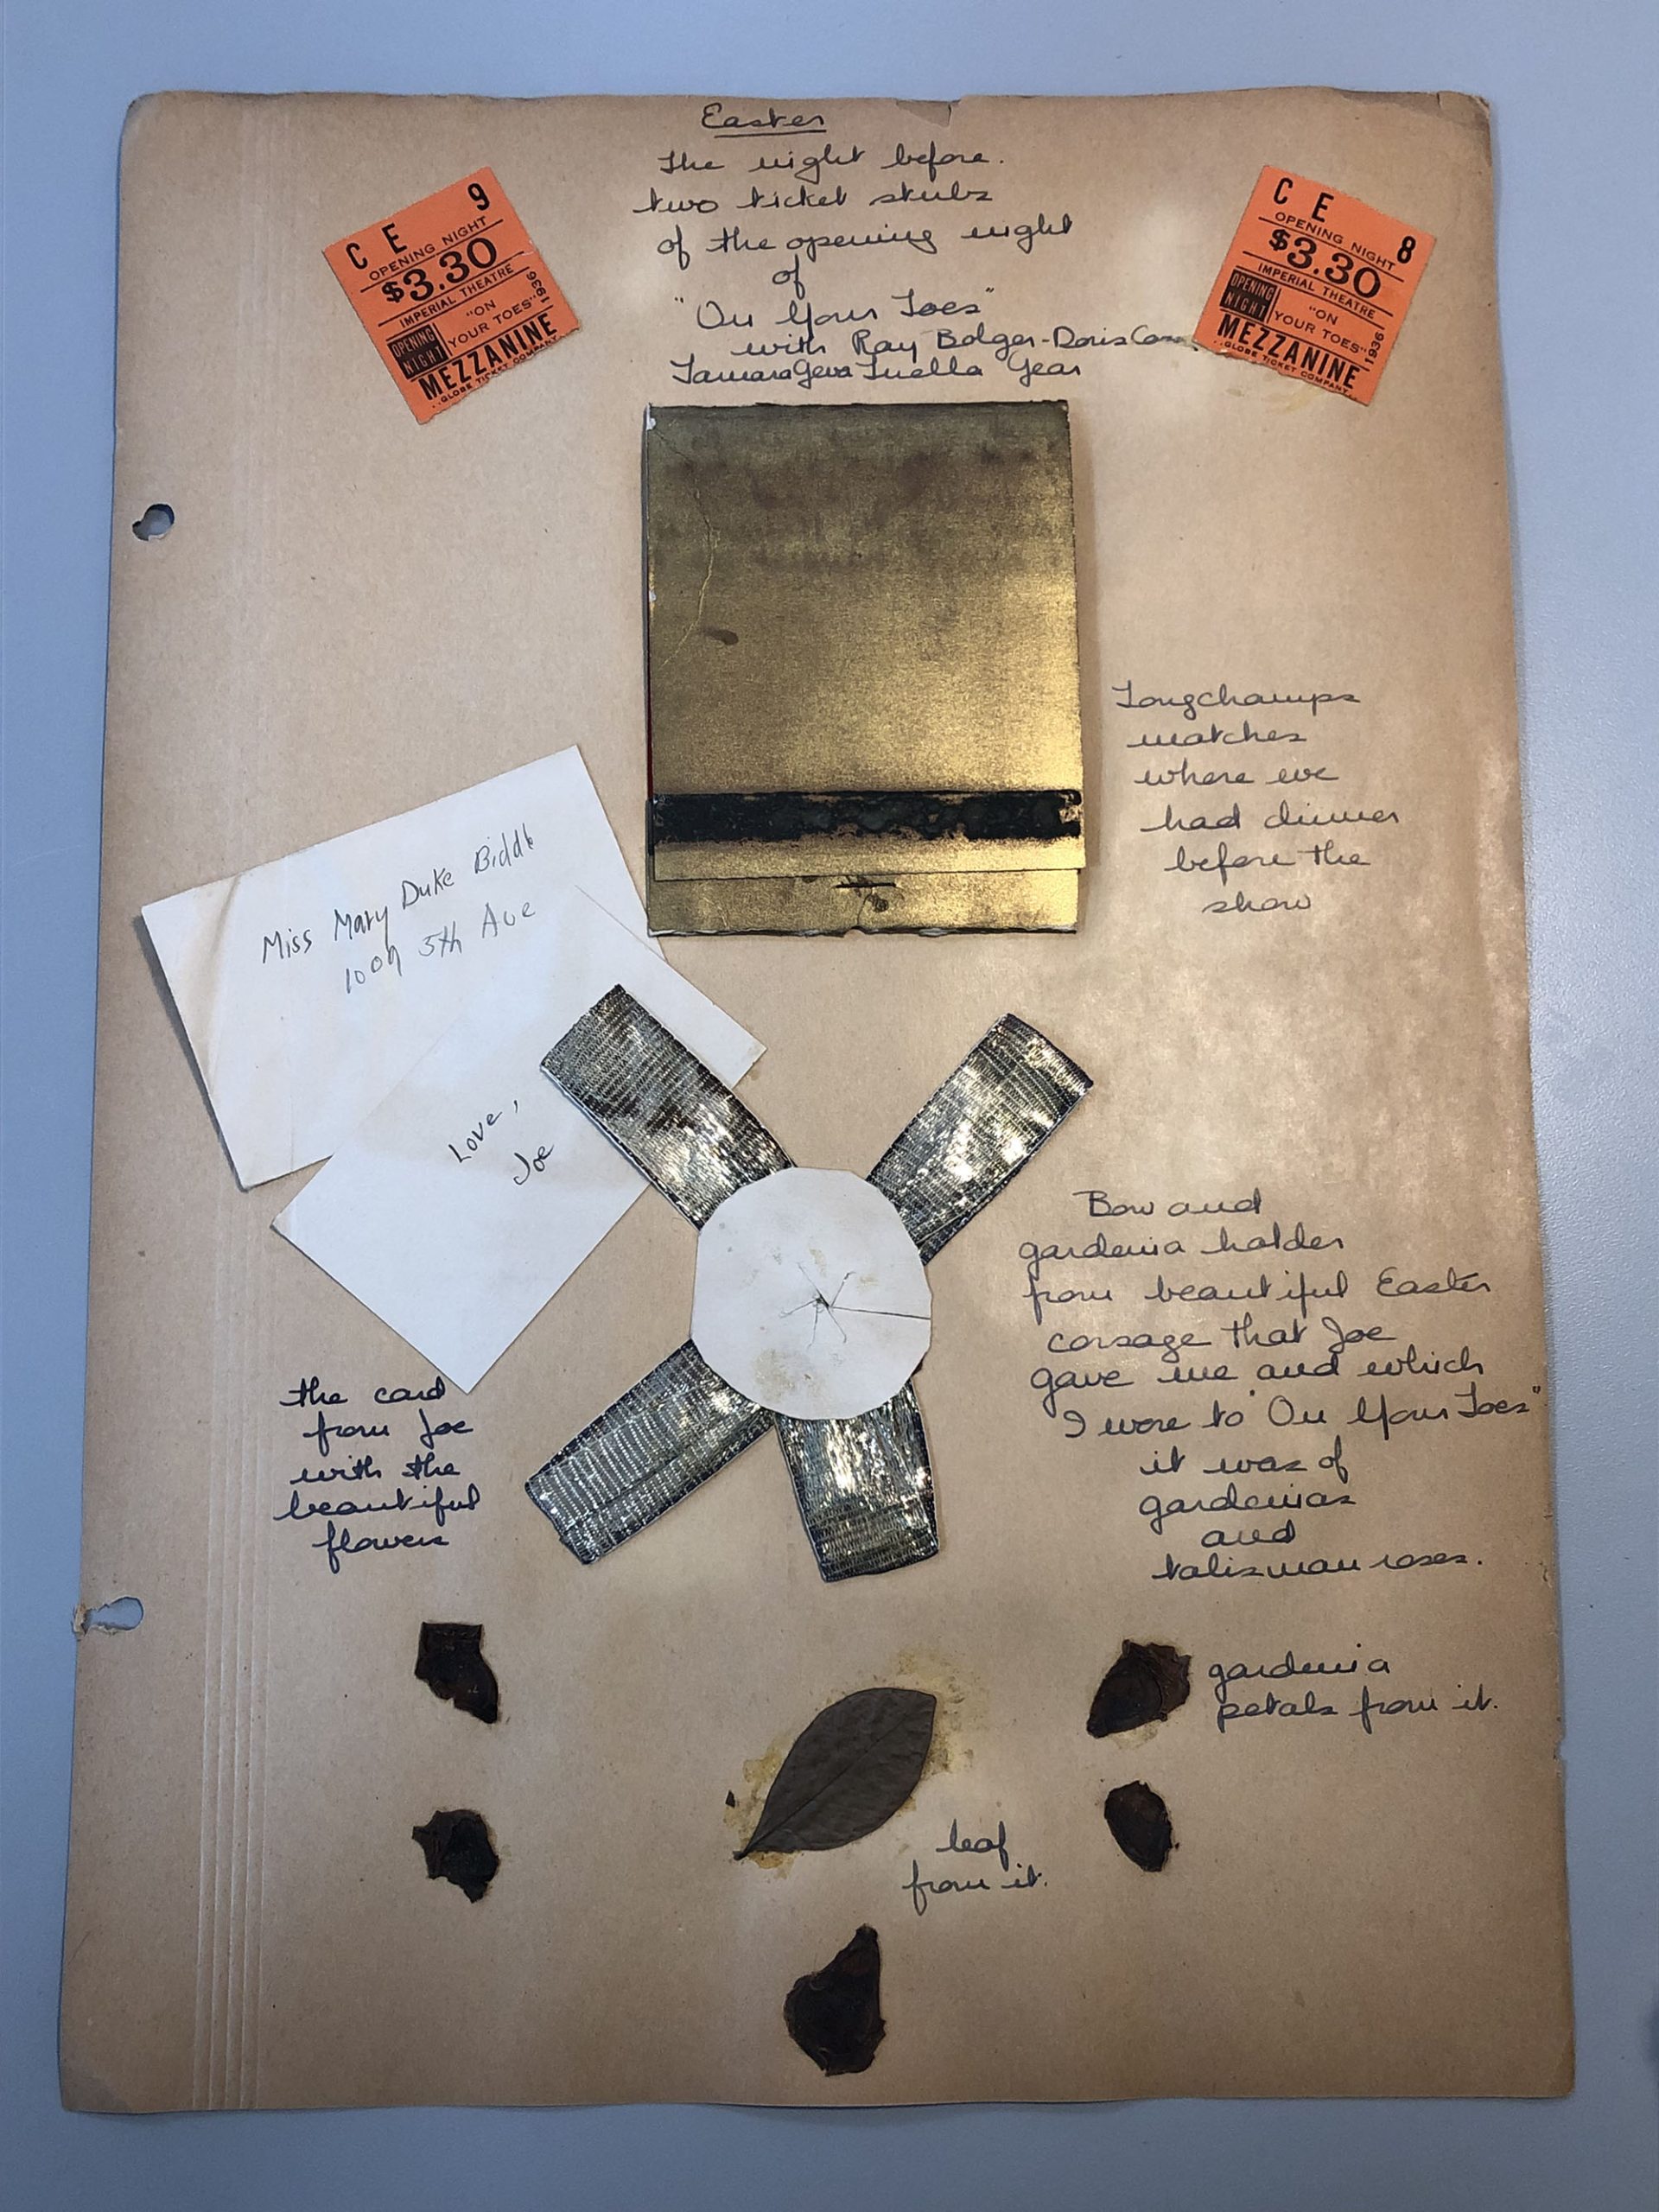
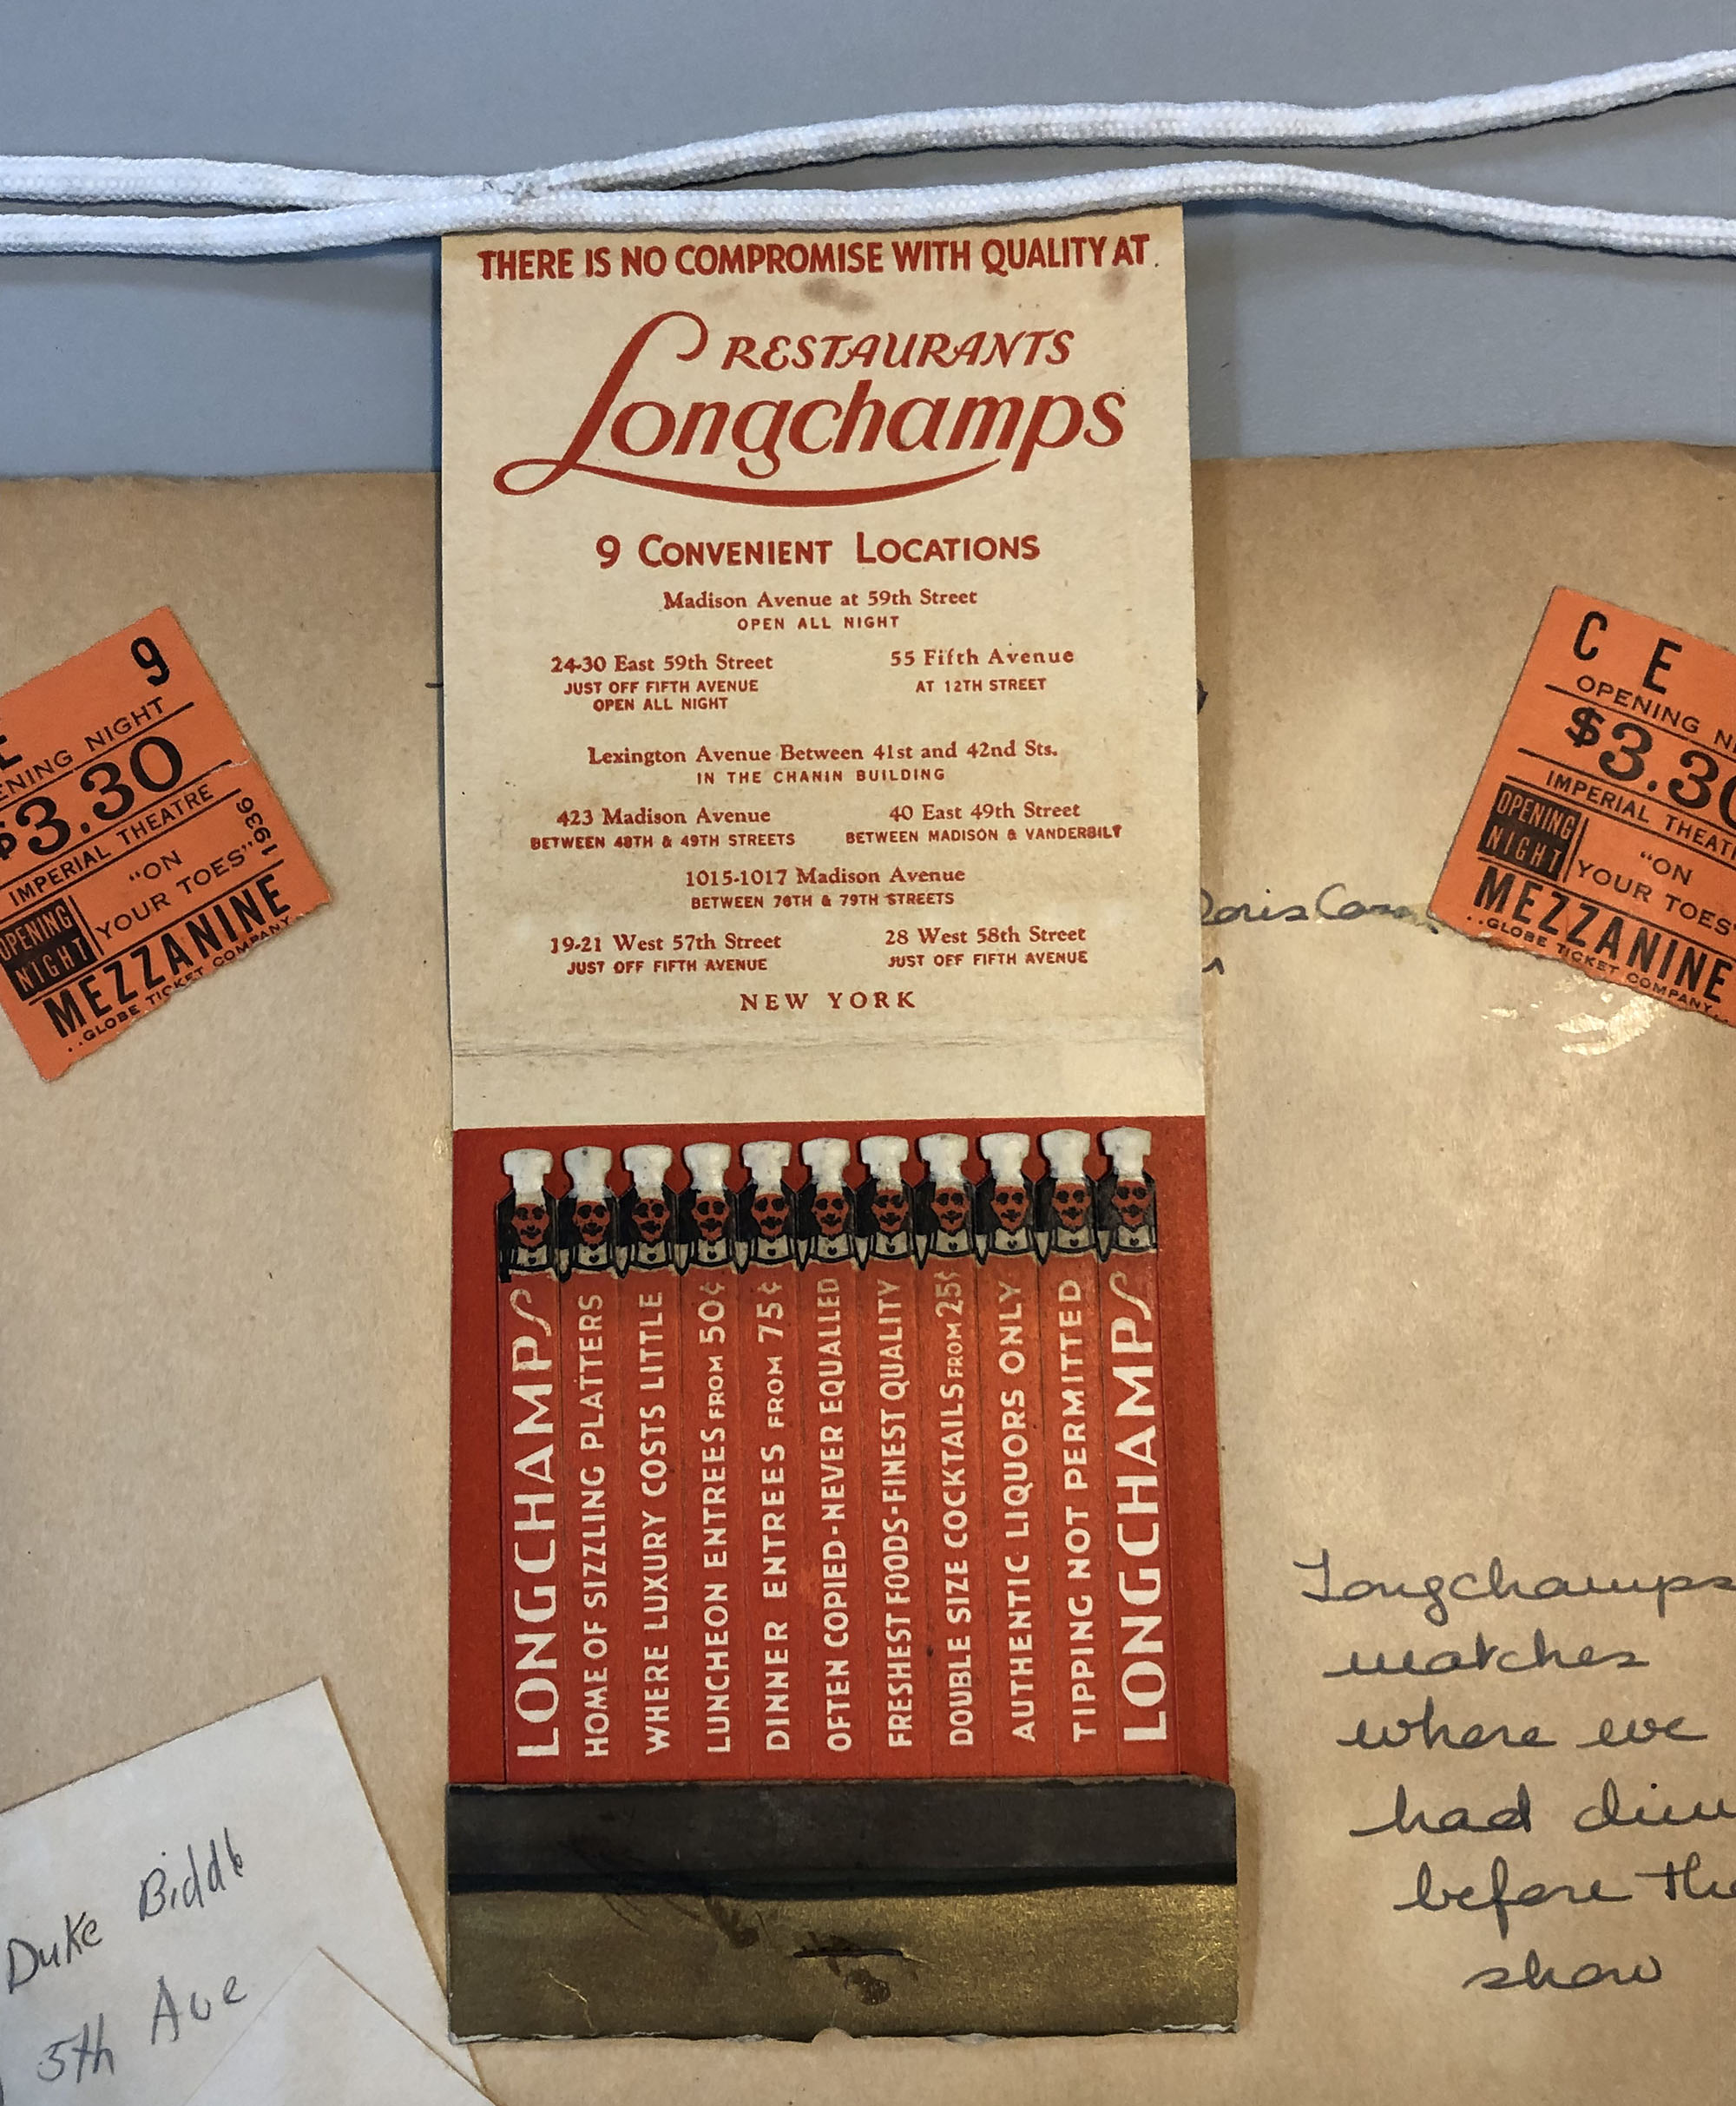
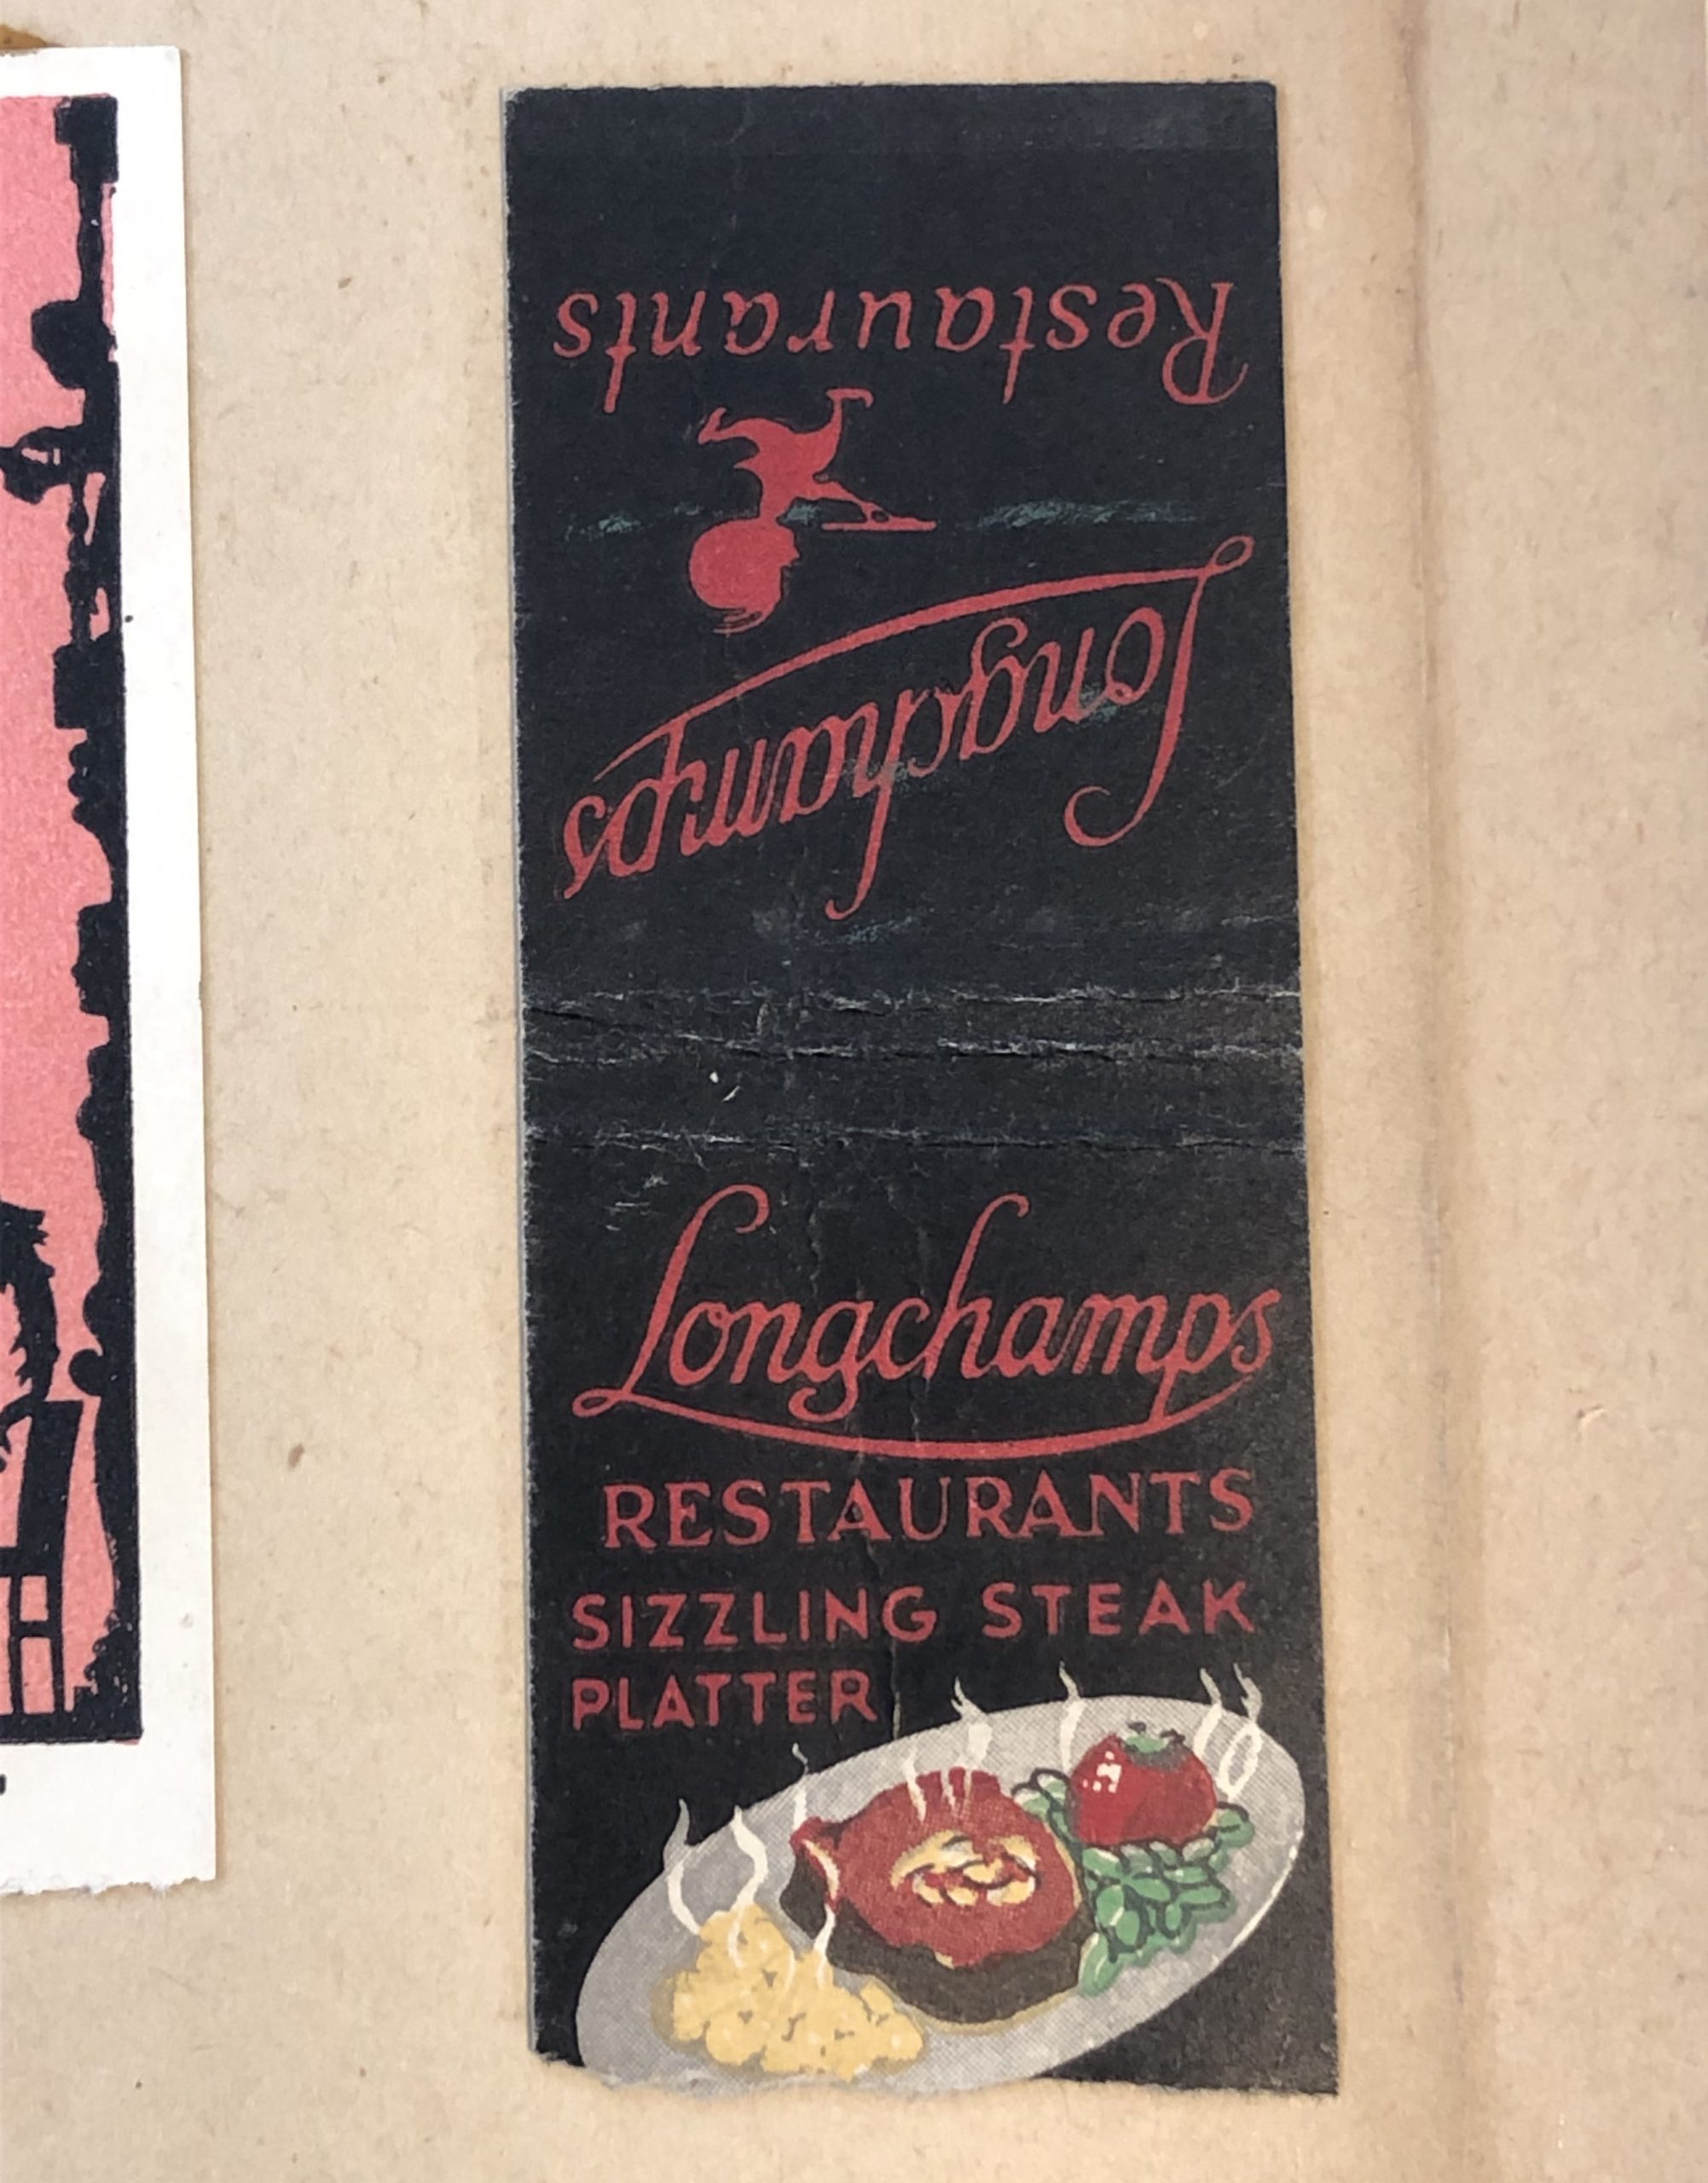
Several of the scrapbook pages have paper matchbooks mounted to them. Much like the ticket stubs that appear alongside, the printed matchbook is a keepsake to remember a special occasion. These matches come from a Longchamps restaurant, where Mary dined before attending a show. The exterior of this matchbook is a metallic gold, but the real design highlight appears inside.
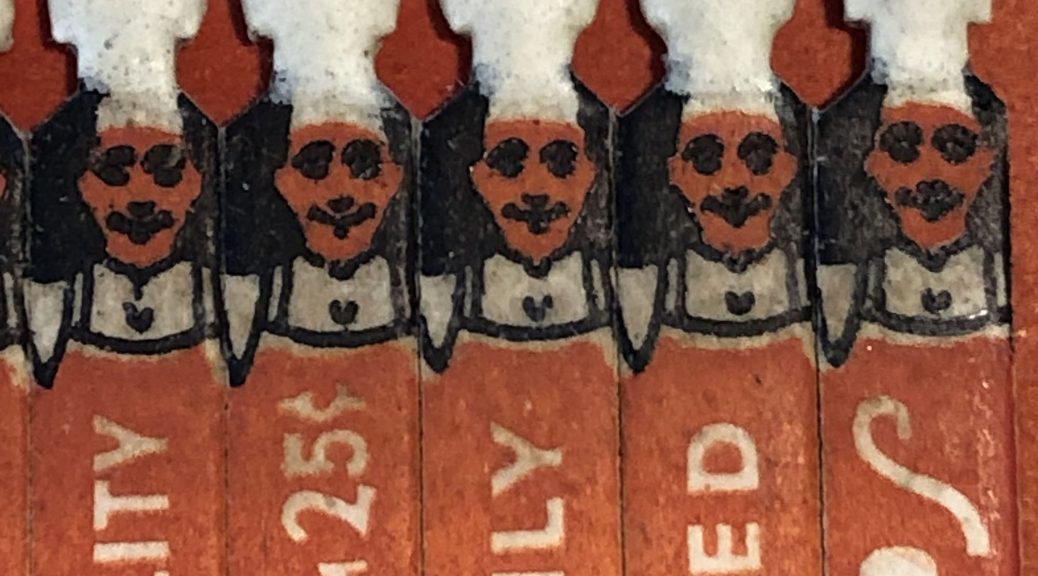
The matches are shaped and printed to look like rows of little chefs!
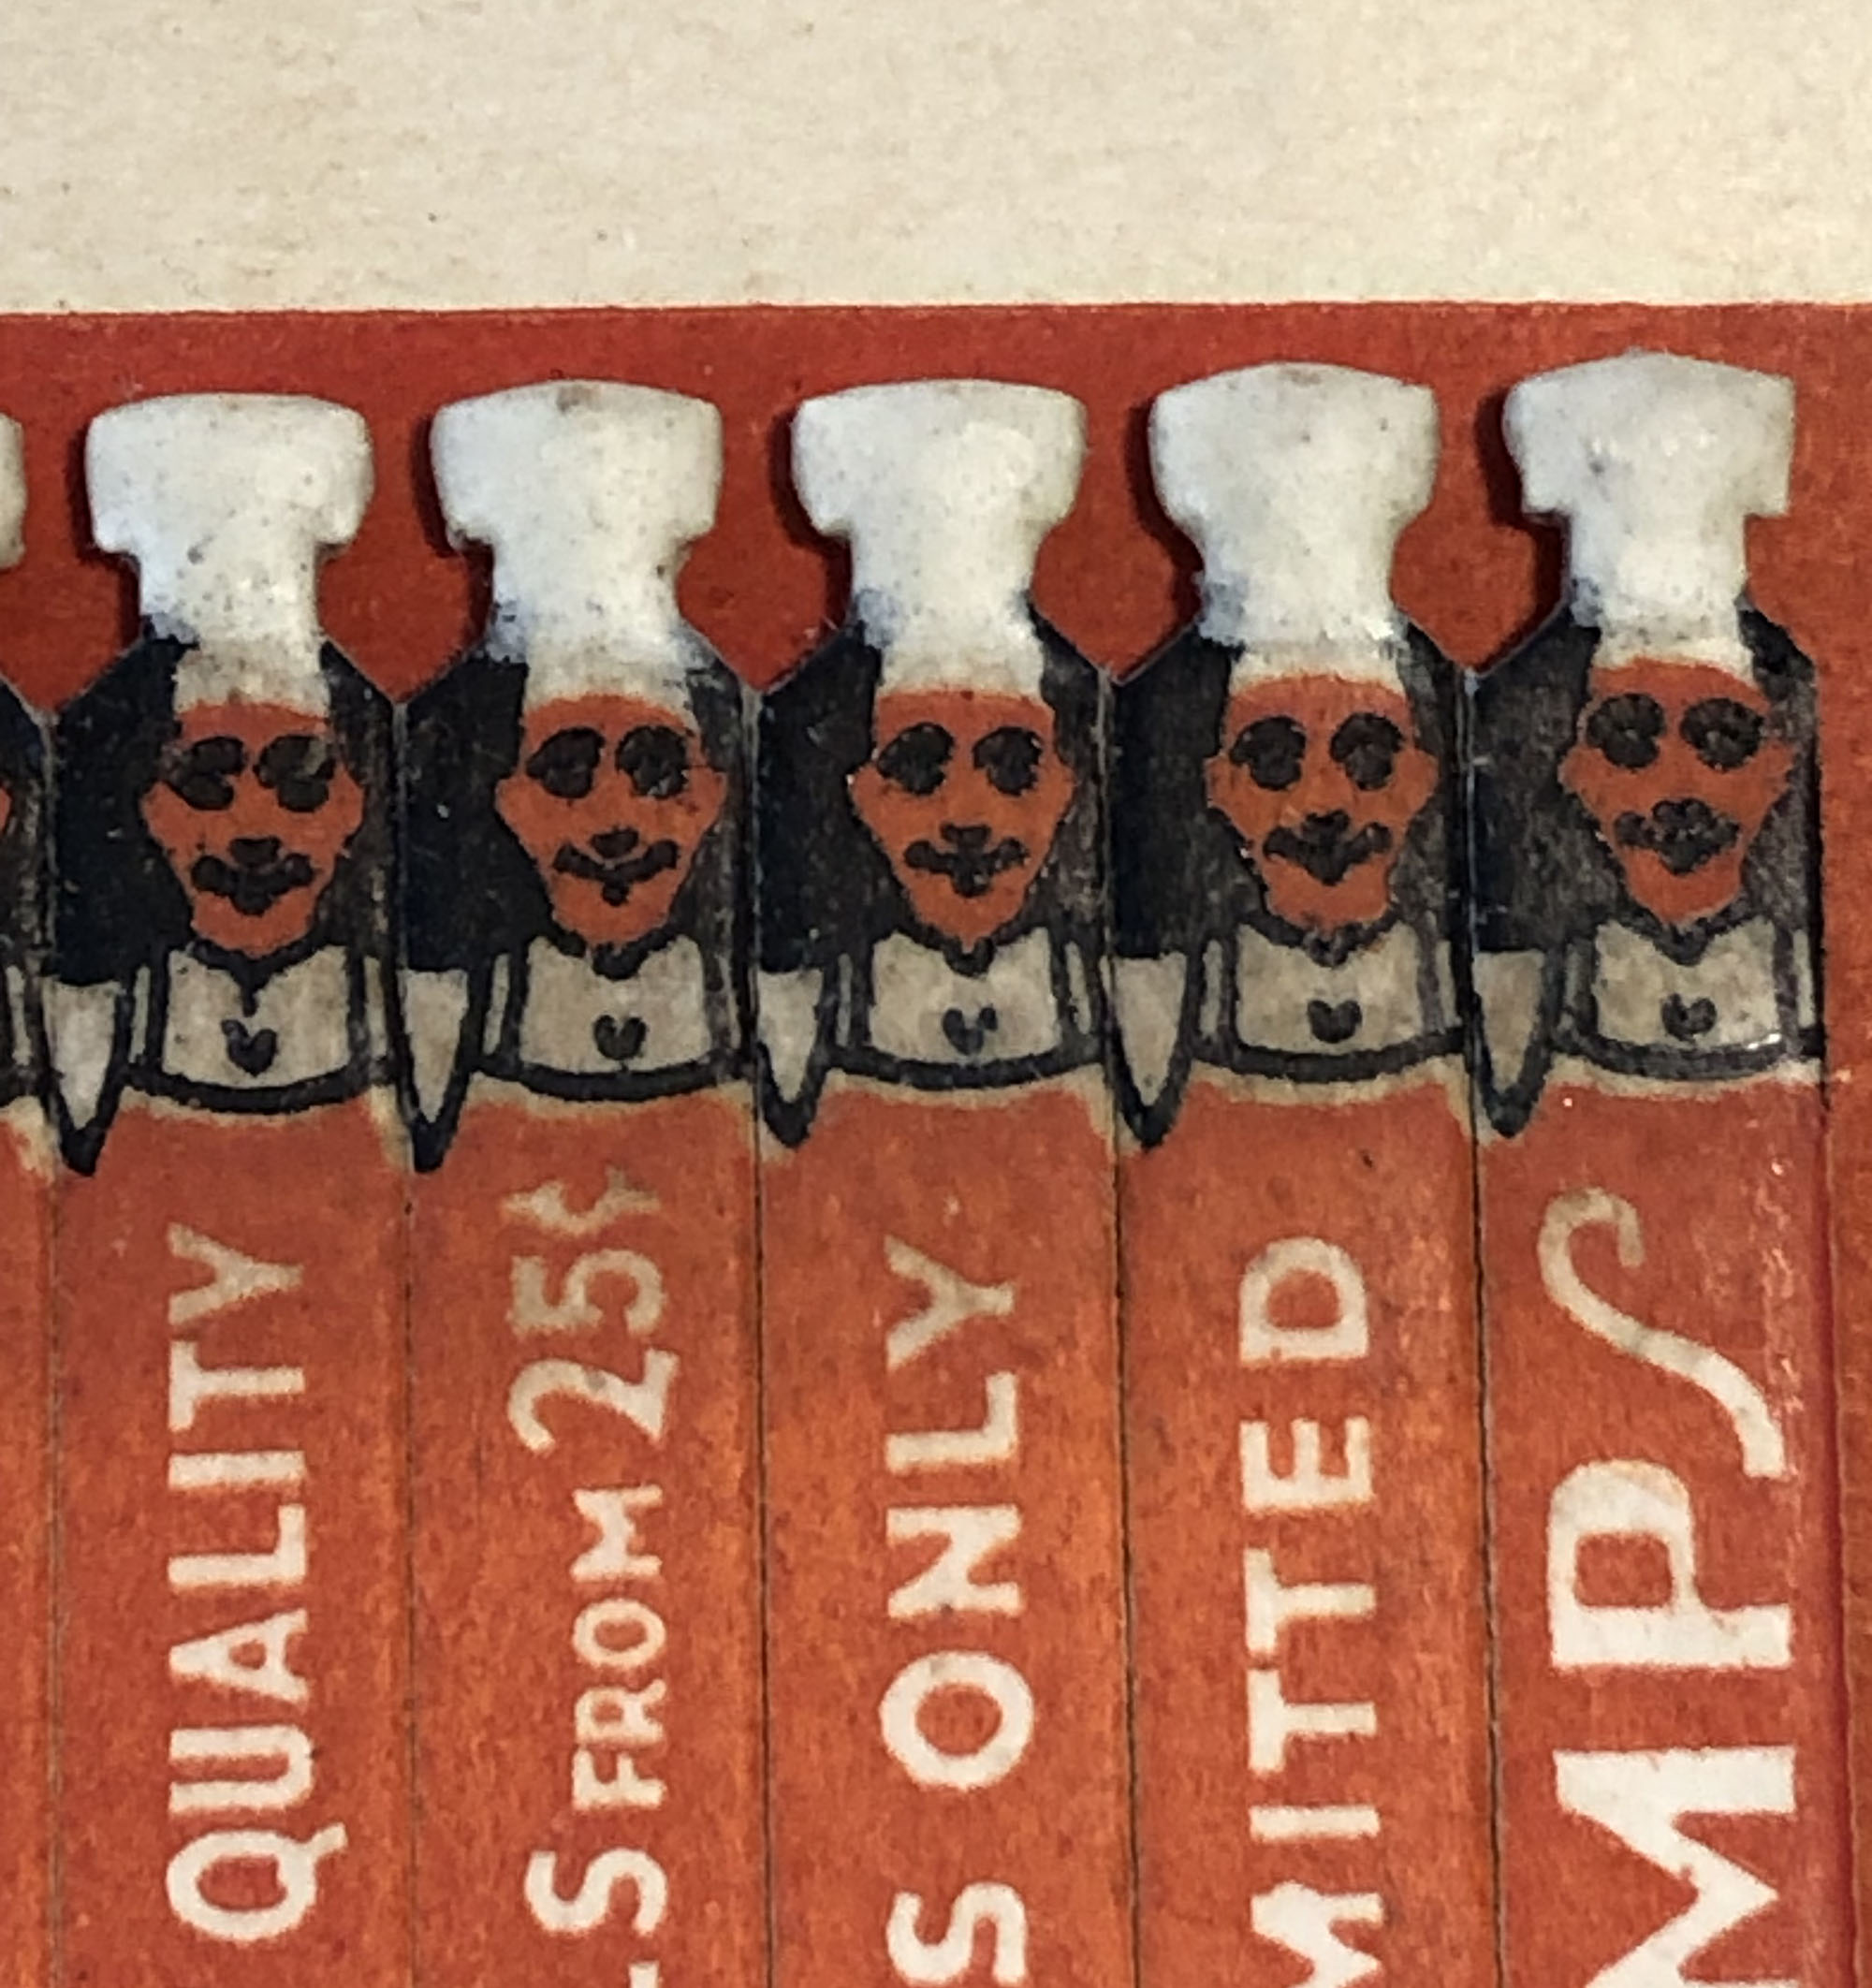
This scrapbook dates from the 1930s, so these are probably “safety matches” – meaning they cannot ignite without the contacting the striking strip on the cover of the matchbook. They are also quite old at this point, and may not even light using the strip. There is still a risk to the collection, however, so Rachel Penniman did some research to determine the best way to make them safe before rehousing the scrapbook.
There are a couple of options for dealing with matches in a collection. The quickest solution is to physically remove the matches. In another example from the same scrapbook (pictured above), the bottom of the matchbook and all the individual matches were torn off before mounting. If all of the matchbooks were treated this way, then we wouldn’t have to worry, but a lot of information would be lost.
One of the individual matches (already used) is also taped to this page, so we can see that Longchamps used more than one chef design in their matchbooks.
Clipping off just the match head could also be a good solution for removing the potential for ignition while retaining more of the original material. If the matches in these books were more of a plain design, that could be a viable option here, but we just couldn’t bring ourselves to decapitate the little chefs. Luckily, there was another way.
Our colleagues at Northwestern University have developed a method for coating the match heads to prevent lighting. To treat the match heads, Rachel applied three coatings of a matte acrylic medium: one dilute layer to penetrate and then two coatings of undiluted acrylic to form a protective layer. After the coating had cured, the scrapbook was ready to be boxed and returned to the stacks. The acrylic medium is not tacky when dry, so it will not stick to the matchbook cover or facing scrapbook pages when the book is closed.
One of the major challenges of caring for a large research collection is the wide variety of objects and materials that are contained within it. When confronted with potentially harmful items like these matchbooks, it is so helpful to read about how other conservators have dealt with them.
Some treatments require a lot of coordination with our colleagues over in special collections to ensure that that they have a good permanent home in the stacks. We construct custom housing to meet the specific needs of the item for storage, but we also need to be sure that the enclosure we design will actually fit on a shelf and can moved from the stacks to the reading room. Sometimes the description and shelving location in the catalog also need to be updated if the item changes size during treatment.
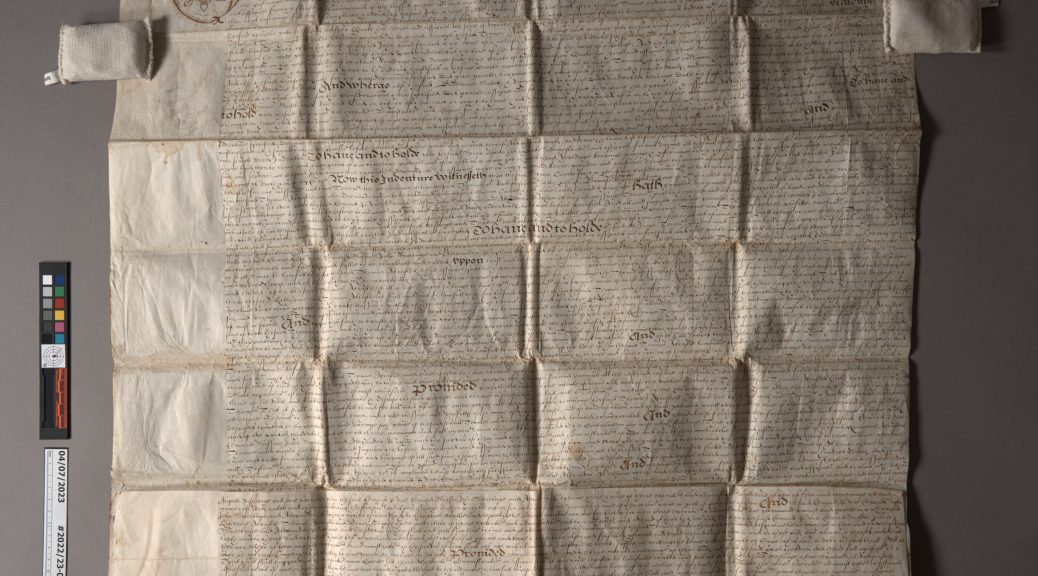
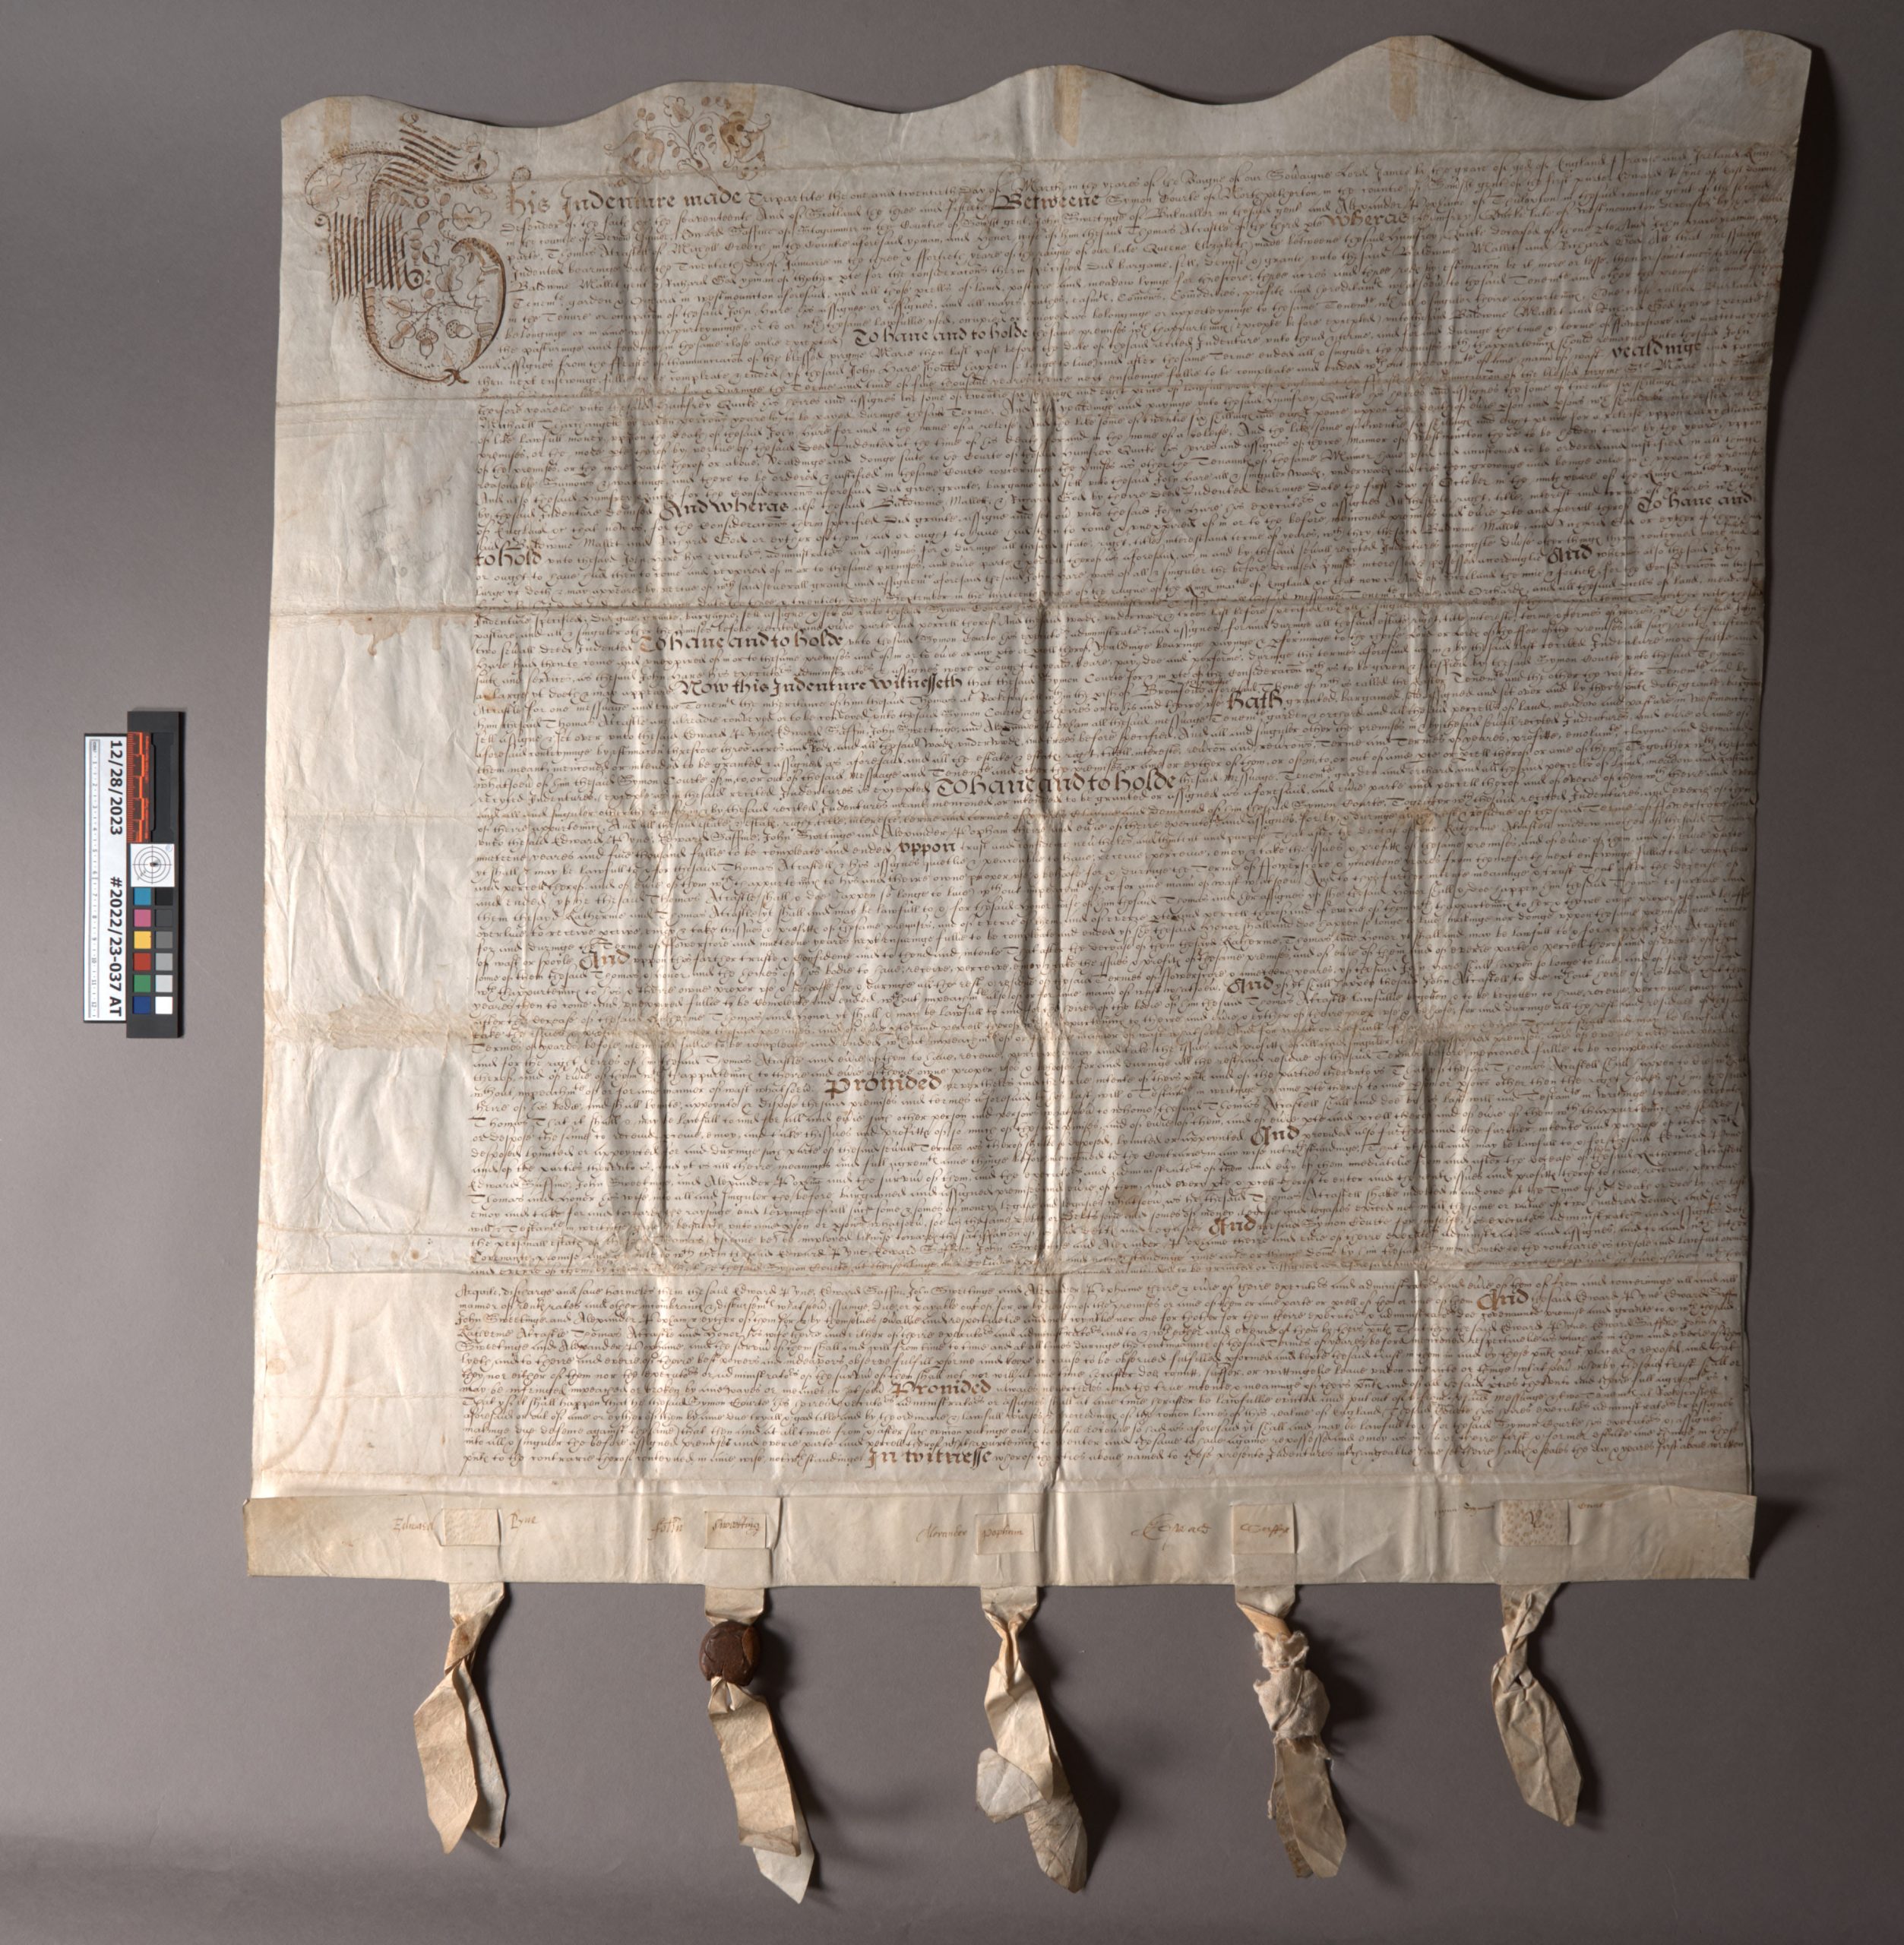
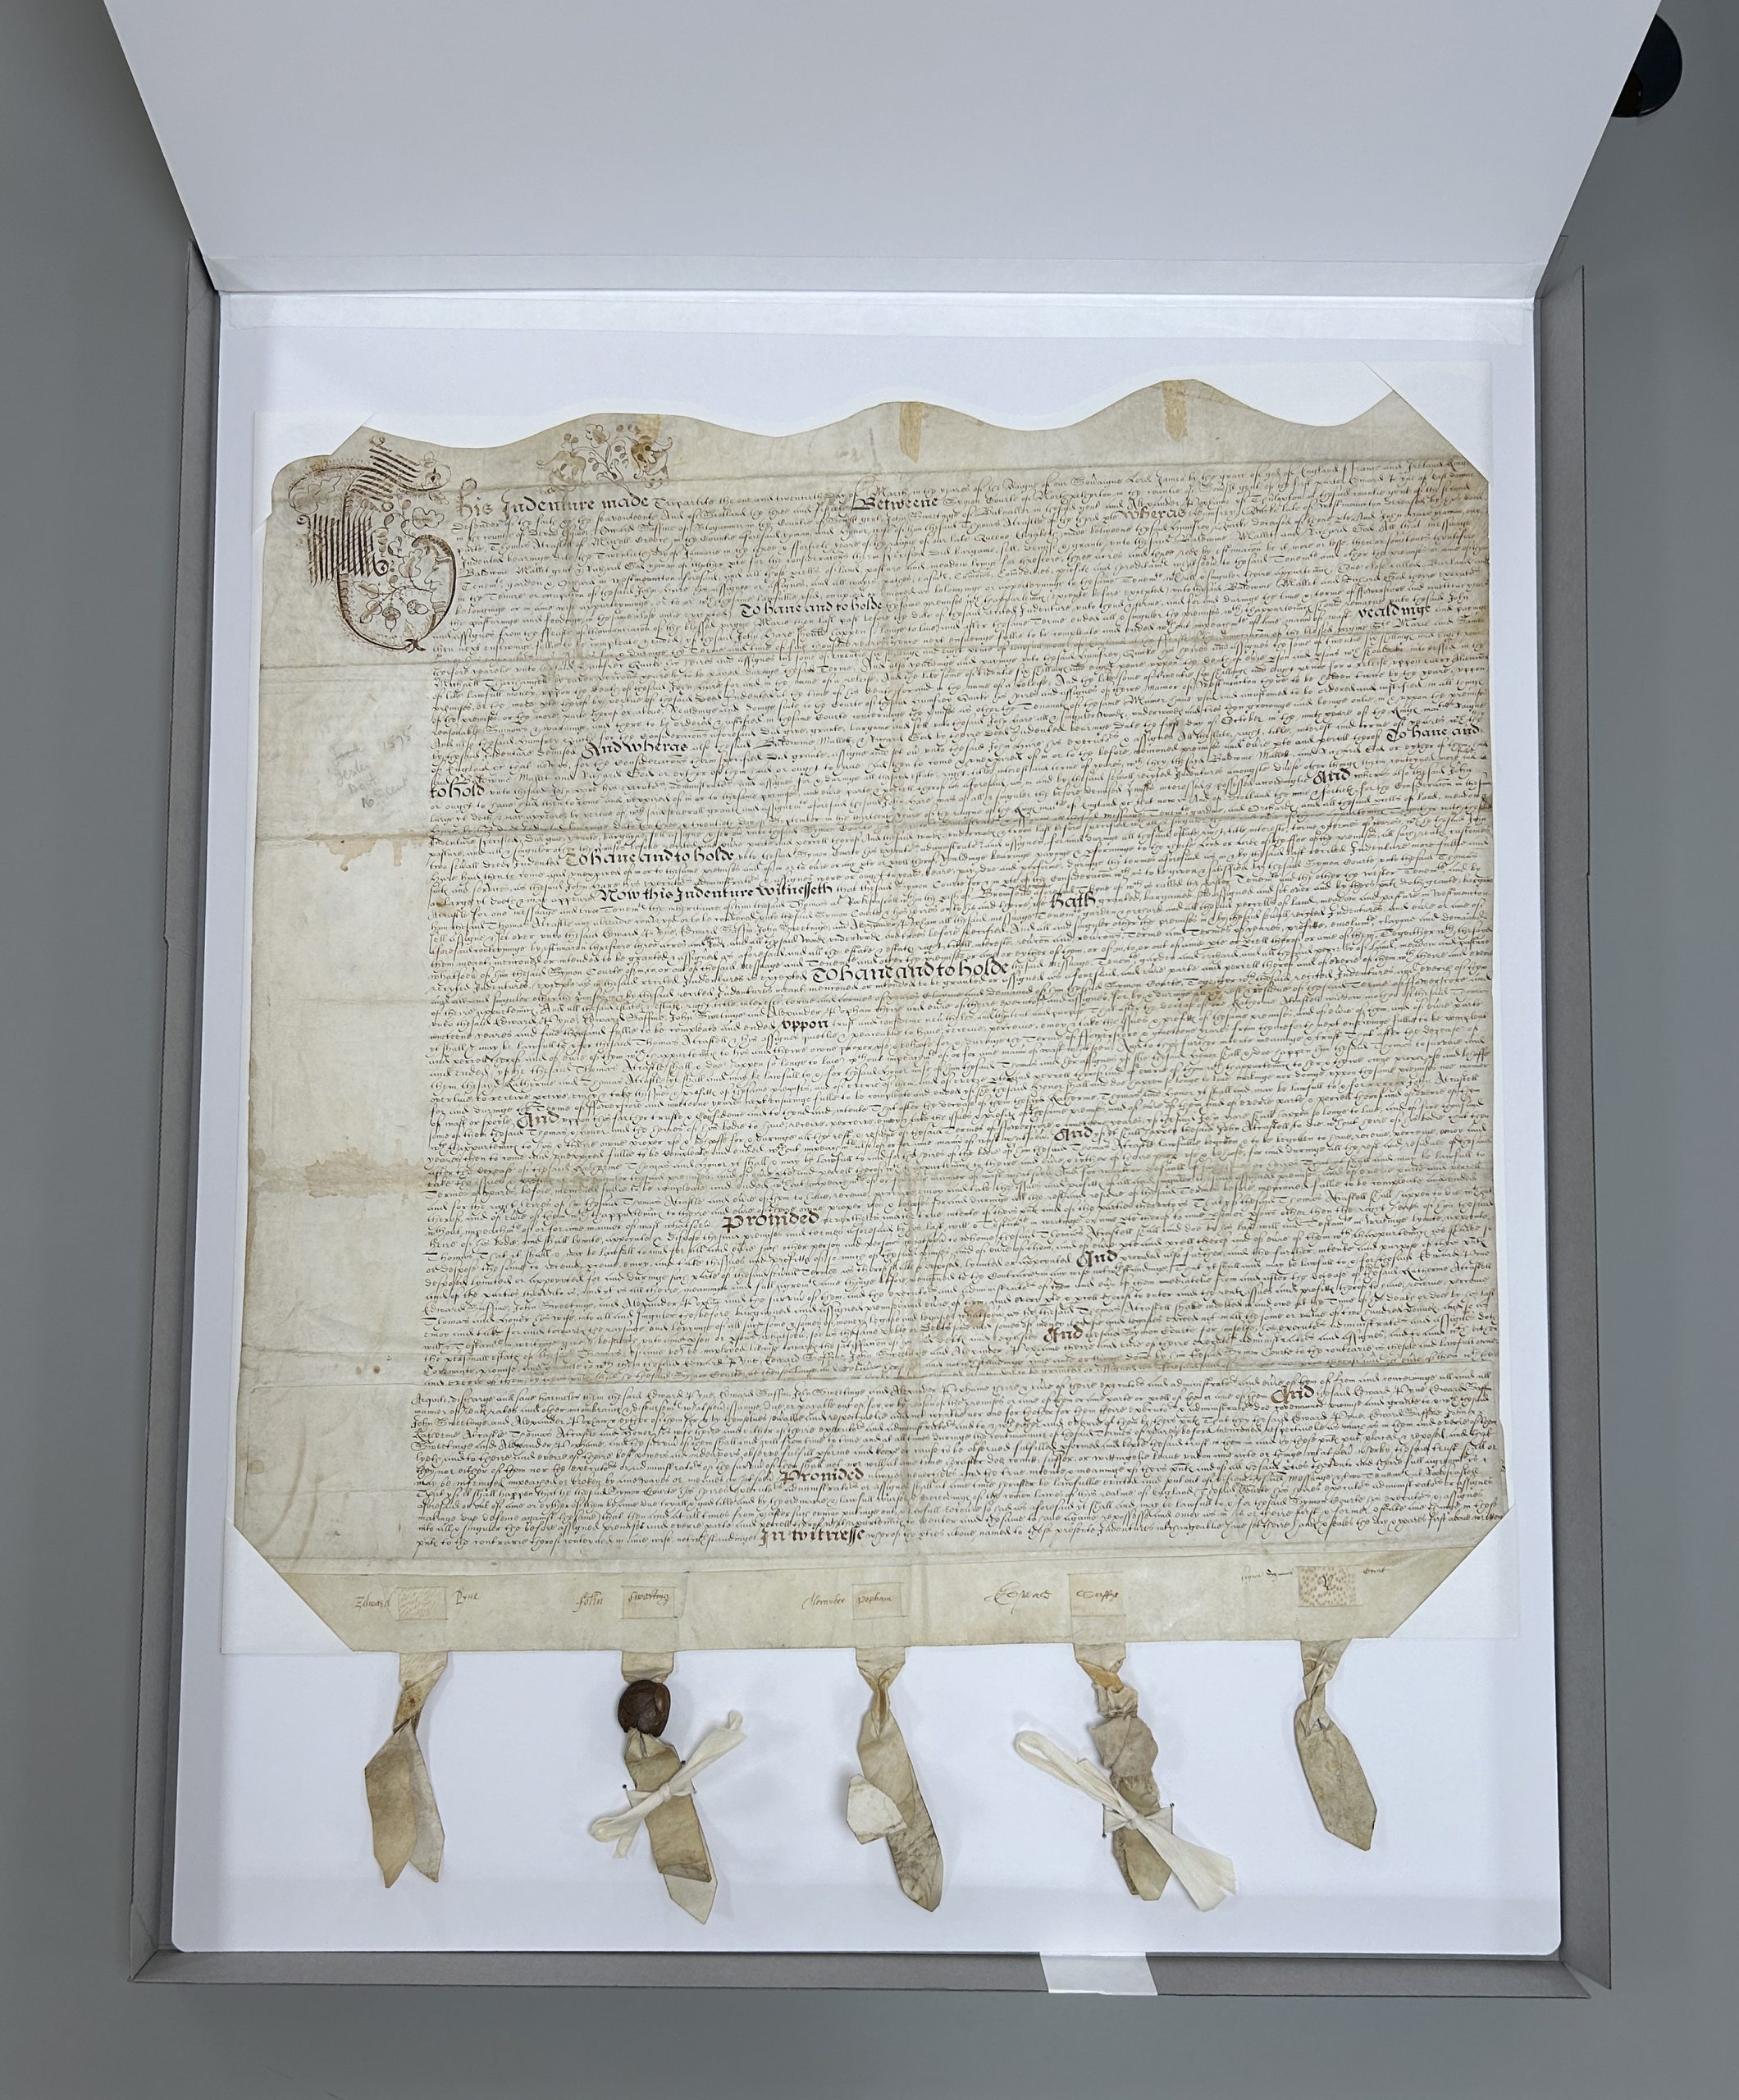
This 17th century English indenture and deed is a recent example that left the lab much larger than it arrived. It came to us folded up in a relatively small package, measuring around 7″ square. It unfolded into a pretty large (20″ x 30″) manuscript legal document, written in ink on parchment with the remains of five parchment strips and wax seals along the bottom. The earliest text dates from 1620, with five individuals (Symon Courte, Edward Pyne, Thomas Alcastle, Humfree Quicke, and yeoman John Hare) granting property rights in West Monkton to two people (Baldwine Wallet and yeoman Richard God). Additional text on the back dated 57 years later grants further inheritance of property rights to Robert Alcastle (Thomas Alcastle’s grandson and executor of his father’s estate).
Before treatment, photographed in raking light to emphasize the folds.
The bottom edge of the parchment is folded over so that the five parchment strips can lace through two layers and be held securely in place. The parchment strips were twisted together and rough balls of red wax were affixed to stop the strips from being removed. Some of the signatories wrote their names across both the document’s folded lower edge and the visible square of the parchment strip as an authentication or security measure.
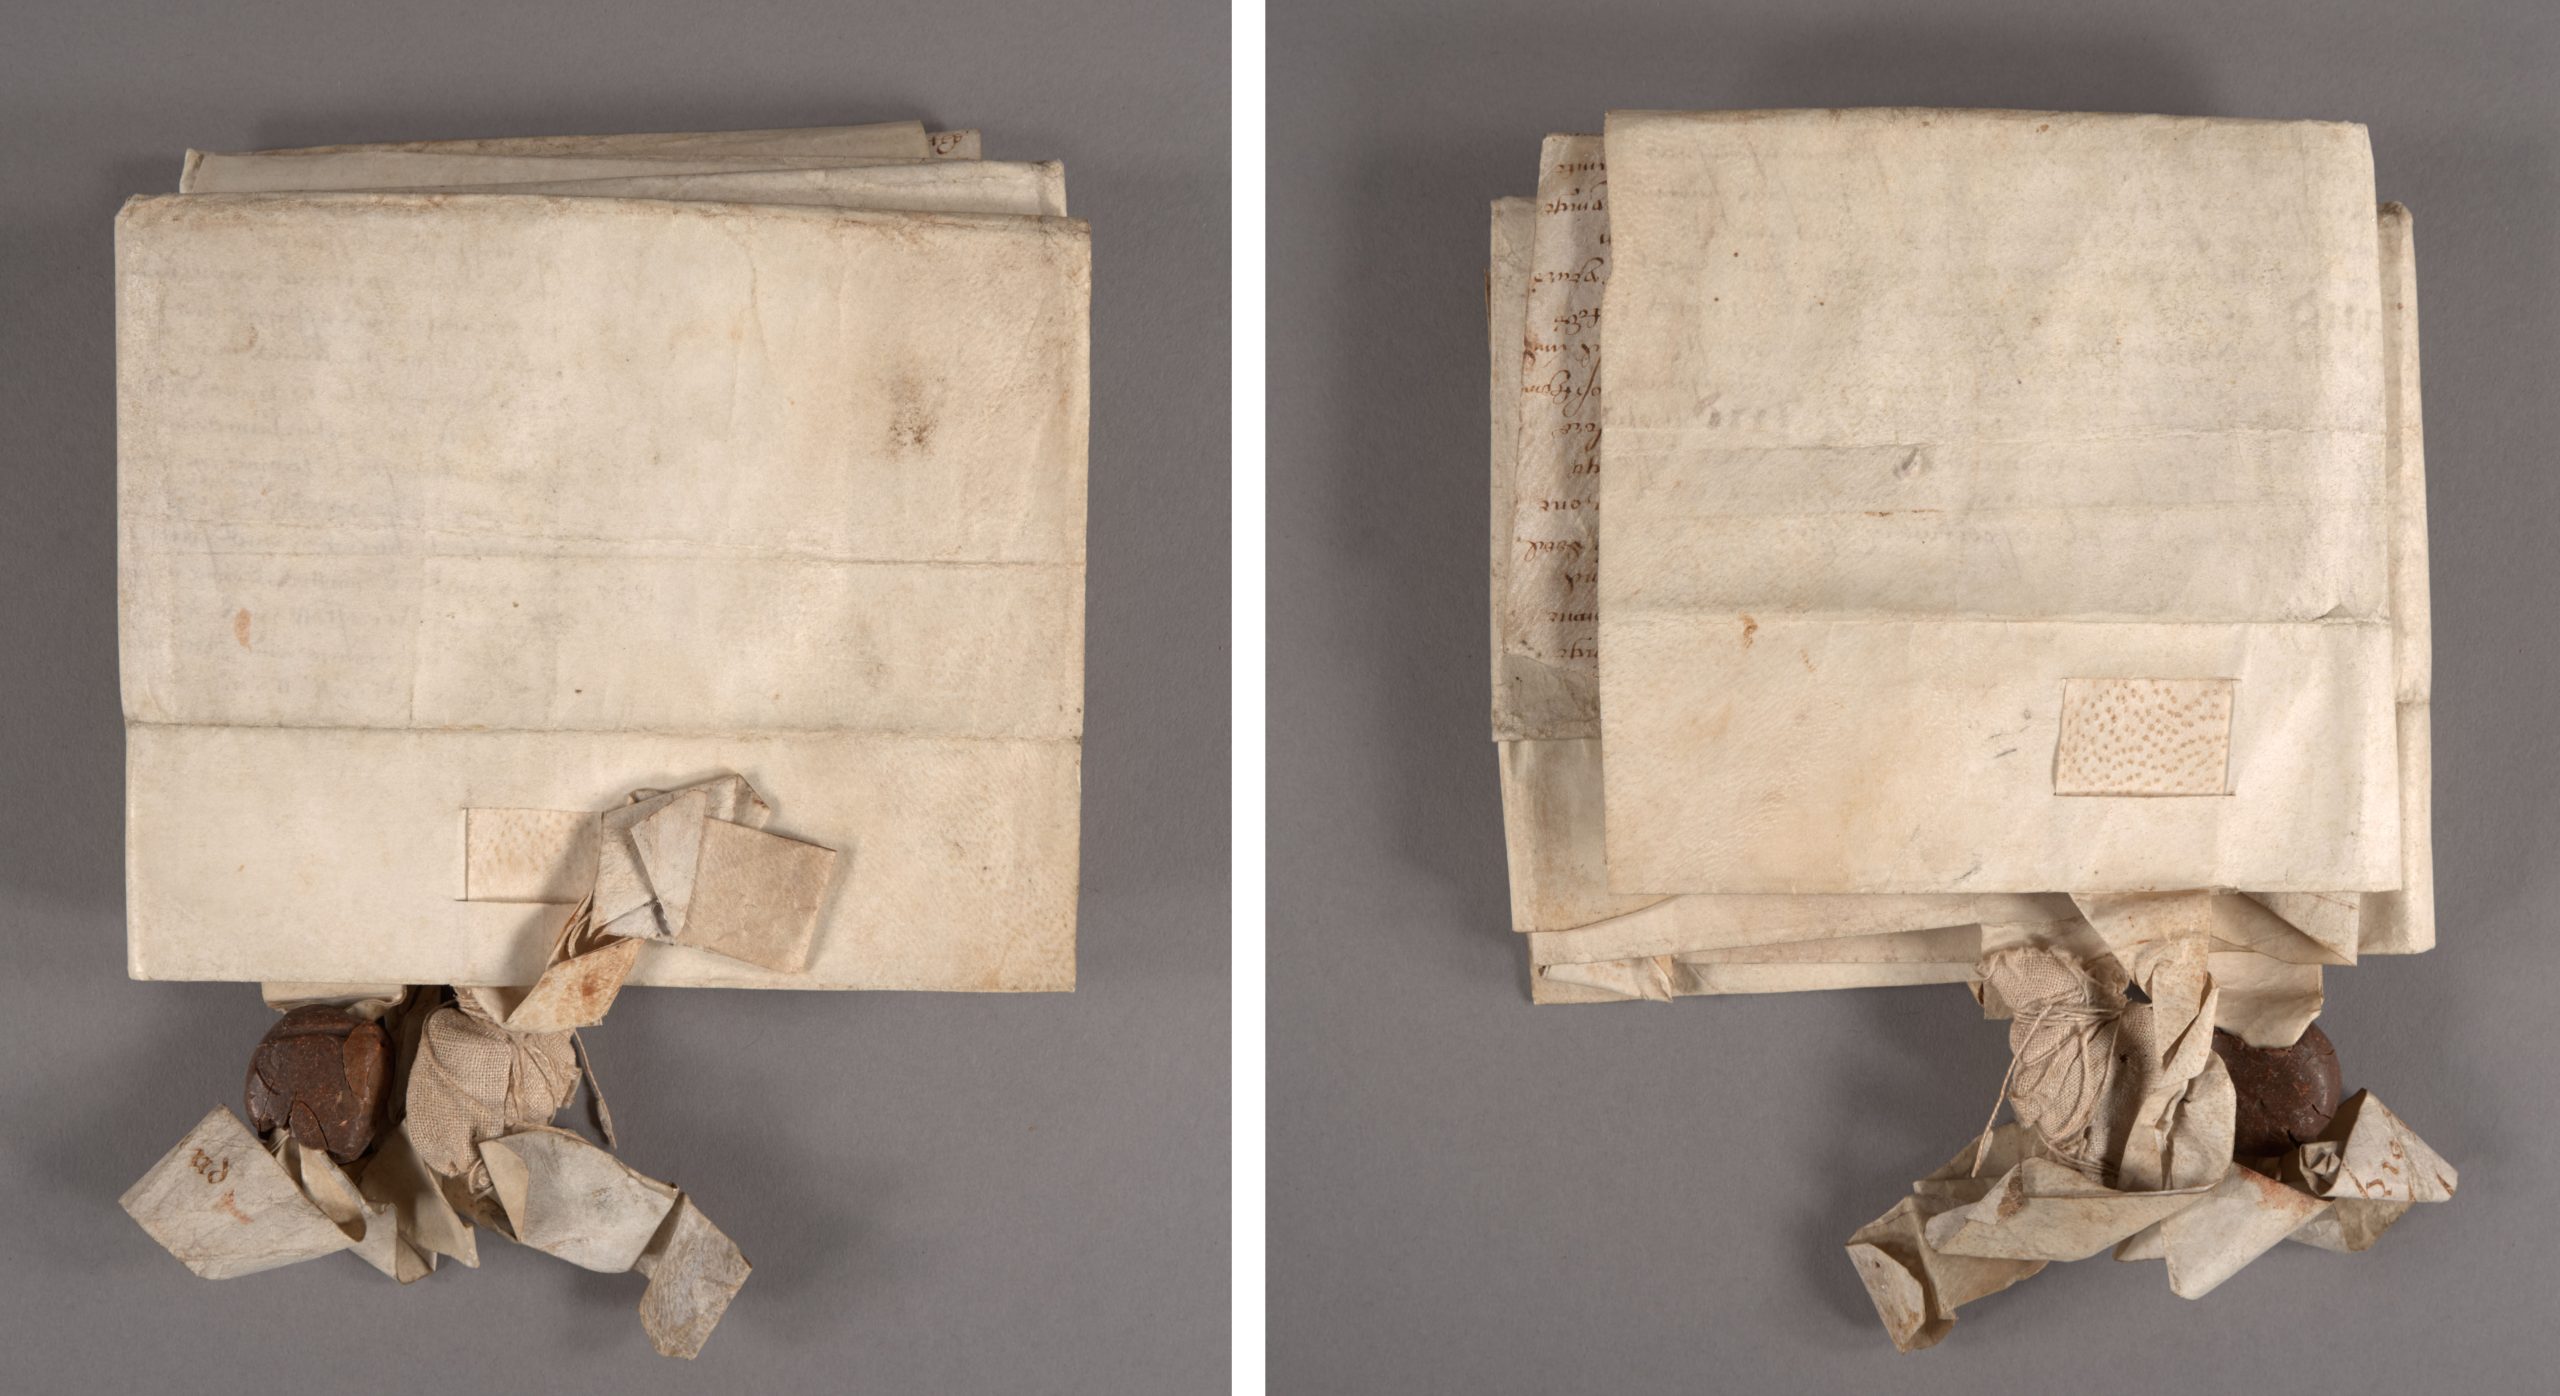
The document was folded both vertically and horizontally several times to make storage easier, but it made opening and reading the document quite a challenge. The parchment has a strong memory and will fold back onto itself without being weighted down. Yellowed adhesive residue from pressure sensitive tape was visible along the top edge – maybe used as a previous mounting solution. The wax seals had also became quite banged up over the years, so only one of the wax balls remained intact. The broken remains of another had been wrapped in a thin textile and tied onto the parchment strip with string. Little bits of red wax would sometimes fall out of the pouch when handled.
After treatment, photographed in raking light.
After dry cleaning the front and back of the parchment and removing as much of the tape residue as I could, I performed some minor flattening of the parchment sheet. My goal was to flatten it enough that the document would lay open on its own, while still retaining the evidence of how it was folded up for storage. I didn’t want any more fragments of the broken wax seal to be lost, so I took the remains out of the textile pouch and wrapped them in a little pleated package of soft Japanese paper, adhered closed with wheat starch paste. This seamed like a better solution than sealing them in some kind of stable plastic, like polyethylene, since the paper doesn’t crinkle so loudly. I tucked the package back inside the textile wrapping and secured it closed with some small stitches thin linen thread, toned to match.
My goal for the enclosure design was to protect all the different parts of the document, and also to help hold it flat should there be any changes in relative humidity. Boxes for parchment covered books often use of a restraining flap, so I thought something similar could be employed here with a rigid portfolio.
I knew this enclosure would be stored flat on the shelf, but I still didn’t want the document to move around too much inside – to protect the surface from abrasion, but also so as not to risk further damage to the parchment strips and wax. I cut a sheet of paper just a bit bigger than the dimensions of the document, then affixed wide paper corners to hold it in place. This was mounted to a sheet of matboard, which also had a sheet of E-flute corrugated board laminated to the back. This makes the matboard stiffer without adding much weight. Soft twill tape was laced through the board around where the two remaining wax seals were hanging, so they could be tied down and would not bounce around inside the box when it is served to a patron in the reading room.
The portfolio top flap is also made of laminated sheets of matboard and blue corrugated, with a Tyvek tape hinge along the top edge that attaches it to the bottom board. All of the corners were rounded and the bottom edge of the top flap’s matboard was sanded to take off the hard edge.
The custom sized portfolio ended up being larger than any of our standard metal edge boxes, so I created a custom fit telescoping lid box out of corrugated to hold it. Unfortunately we also don’t stock corrugated sheets large enough – so I had to join two sheets together with tyvek tape to make either the base or the lid. A third piece of corrugated was glued to the outside of both the lid and the base to stop the tape join from flexing when the box was lifted or tilted. The enclosure got a photo label at the bottom corner to help with identifying it on the shelf.
Removing the document from this enclosure to examine both front and back is fairly easy. After untying the twill tape, the parchment can be gently lifted out from under two of the paper corners, and then you can fully slide the document out. It actually requires two people to flip it over, since it is so large. While making this enclosure, I made sure to check that it wasn’t too large for the bigger shelves in the stacks and that it could fit through a standard-width door while resting on a cart.
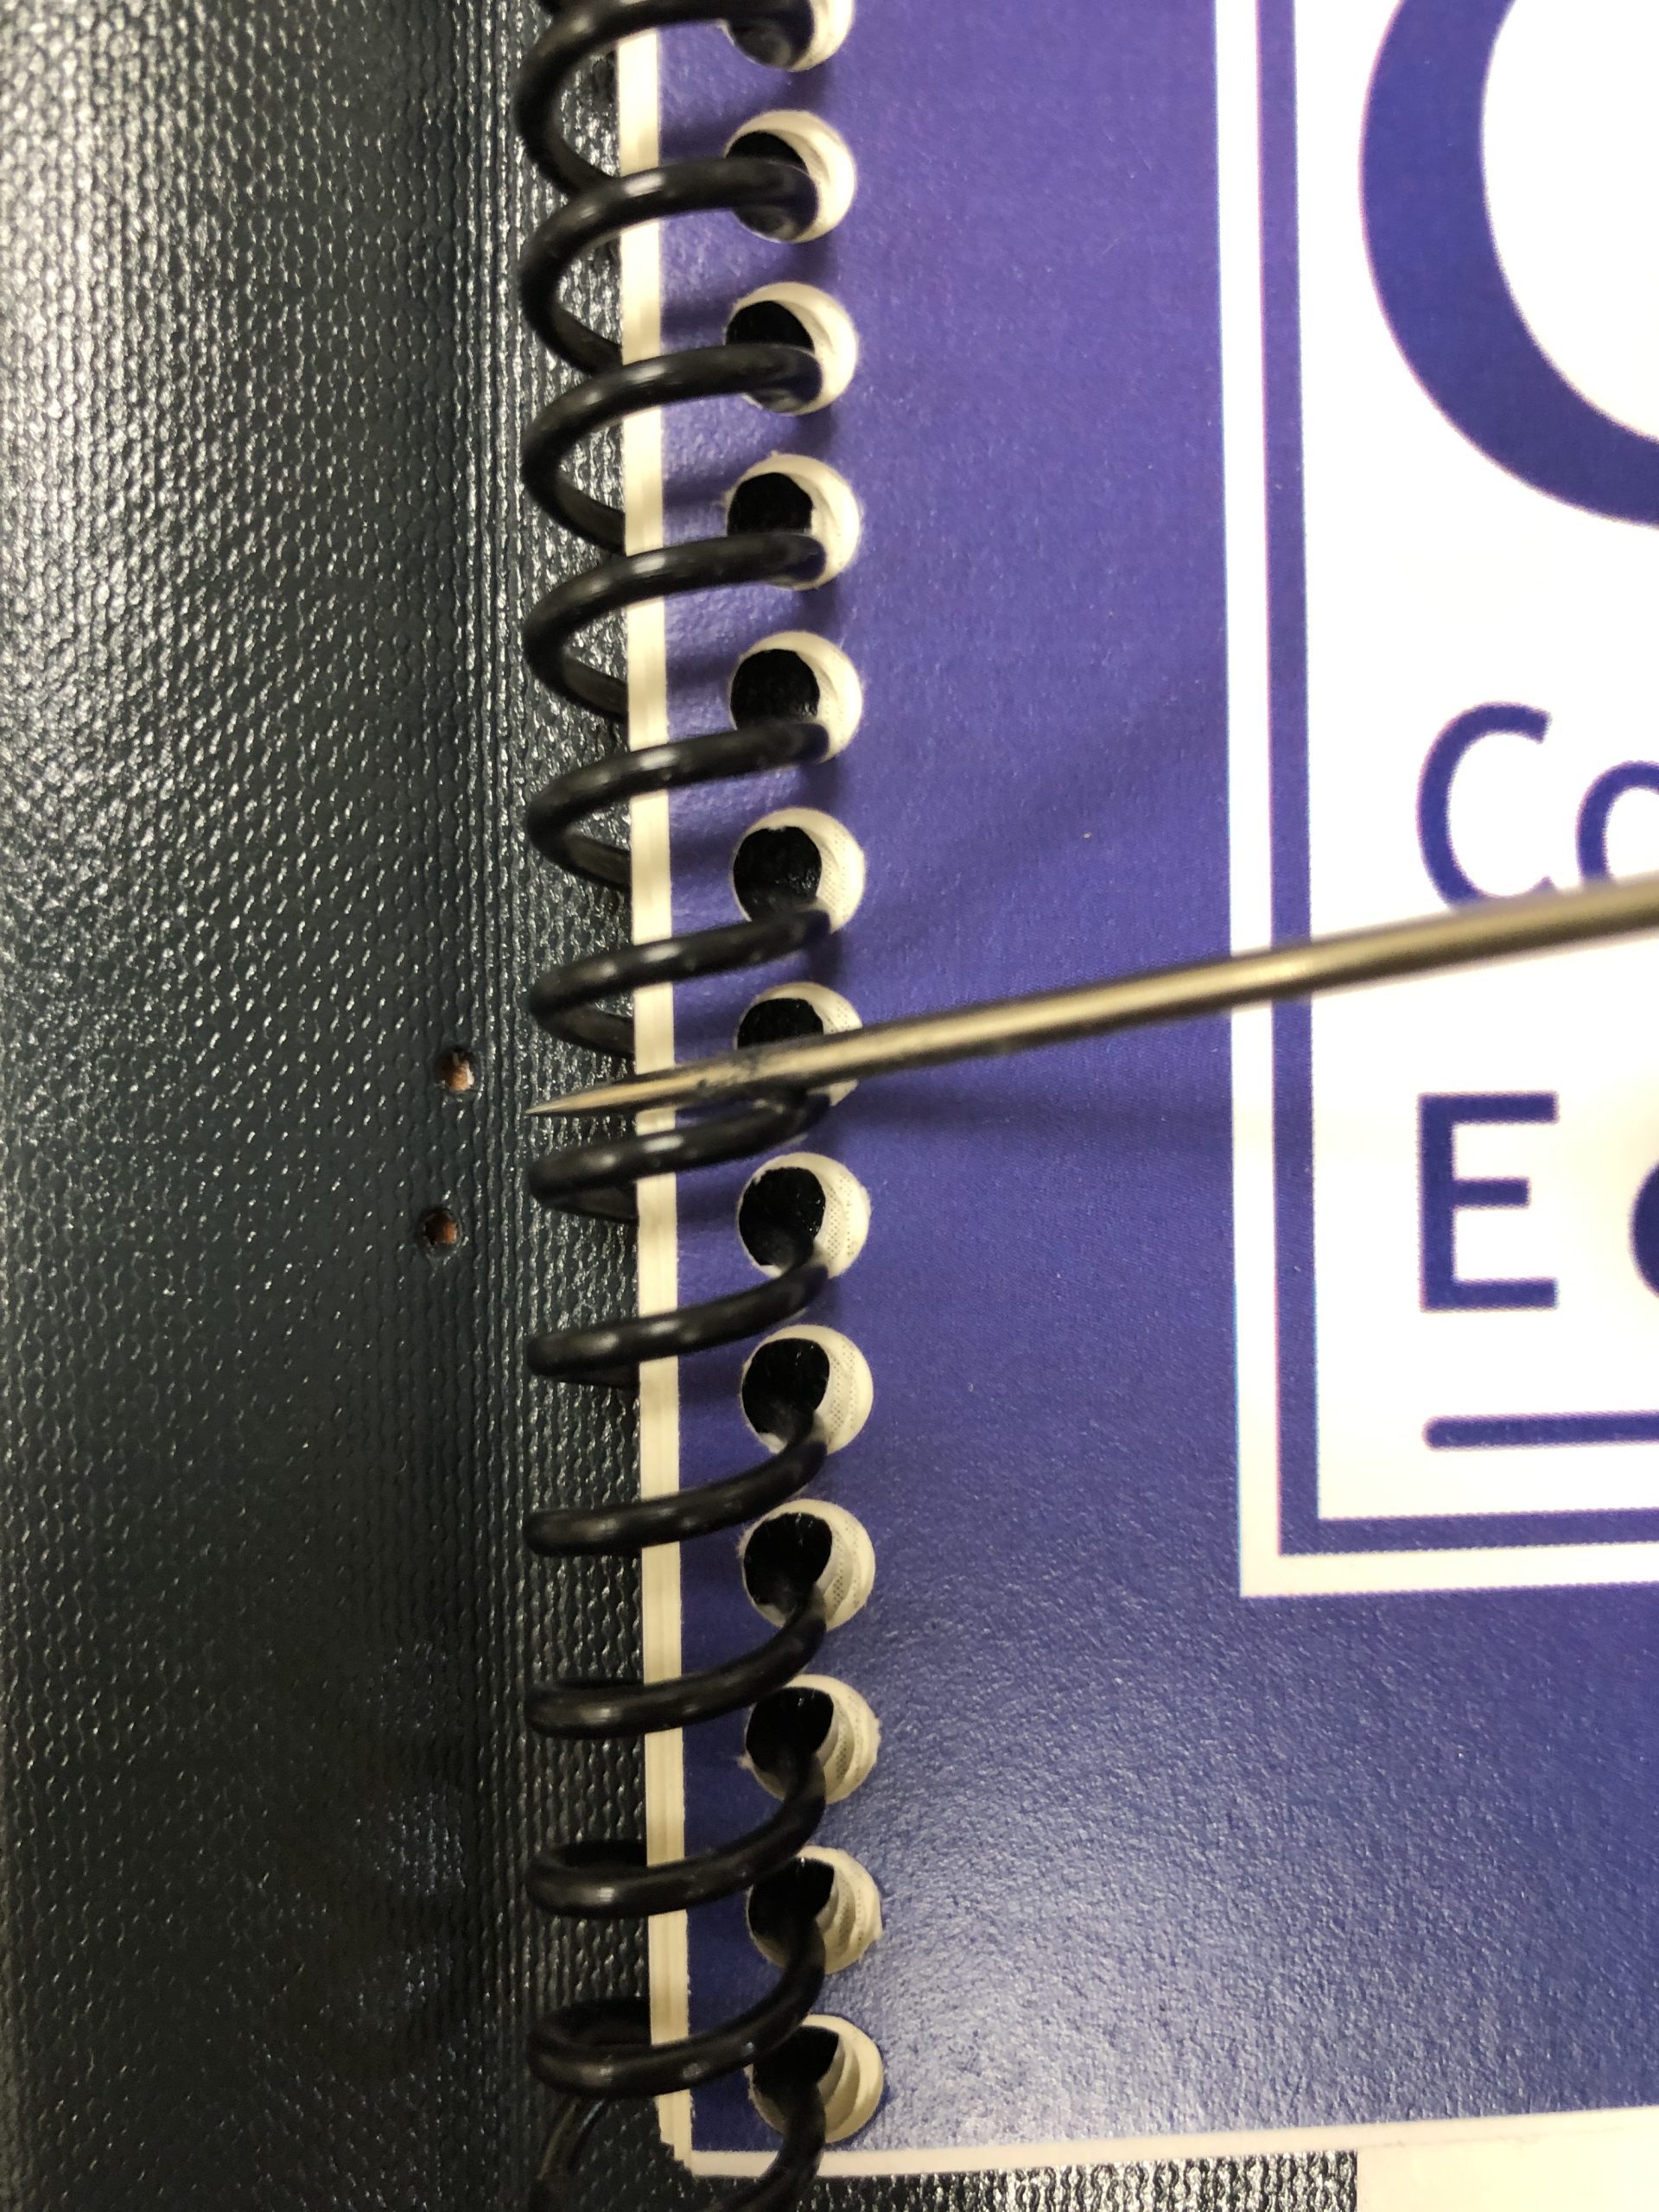
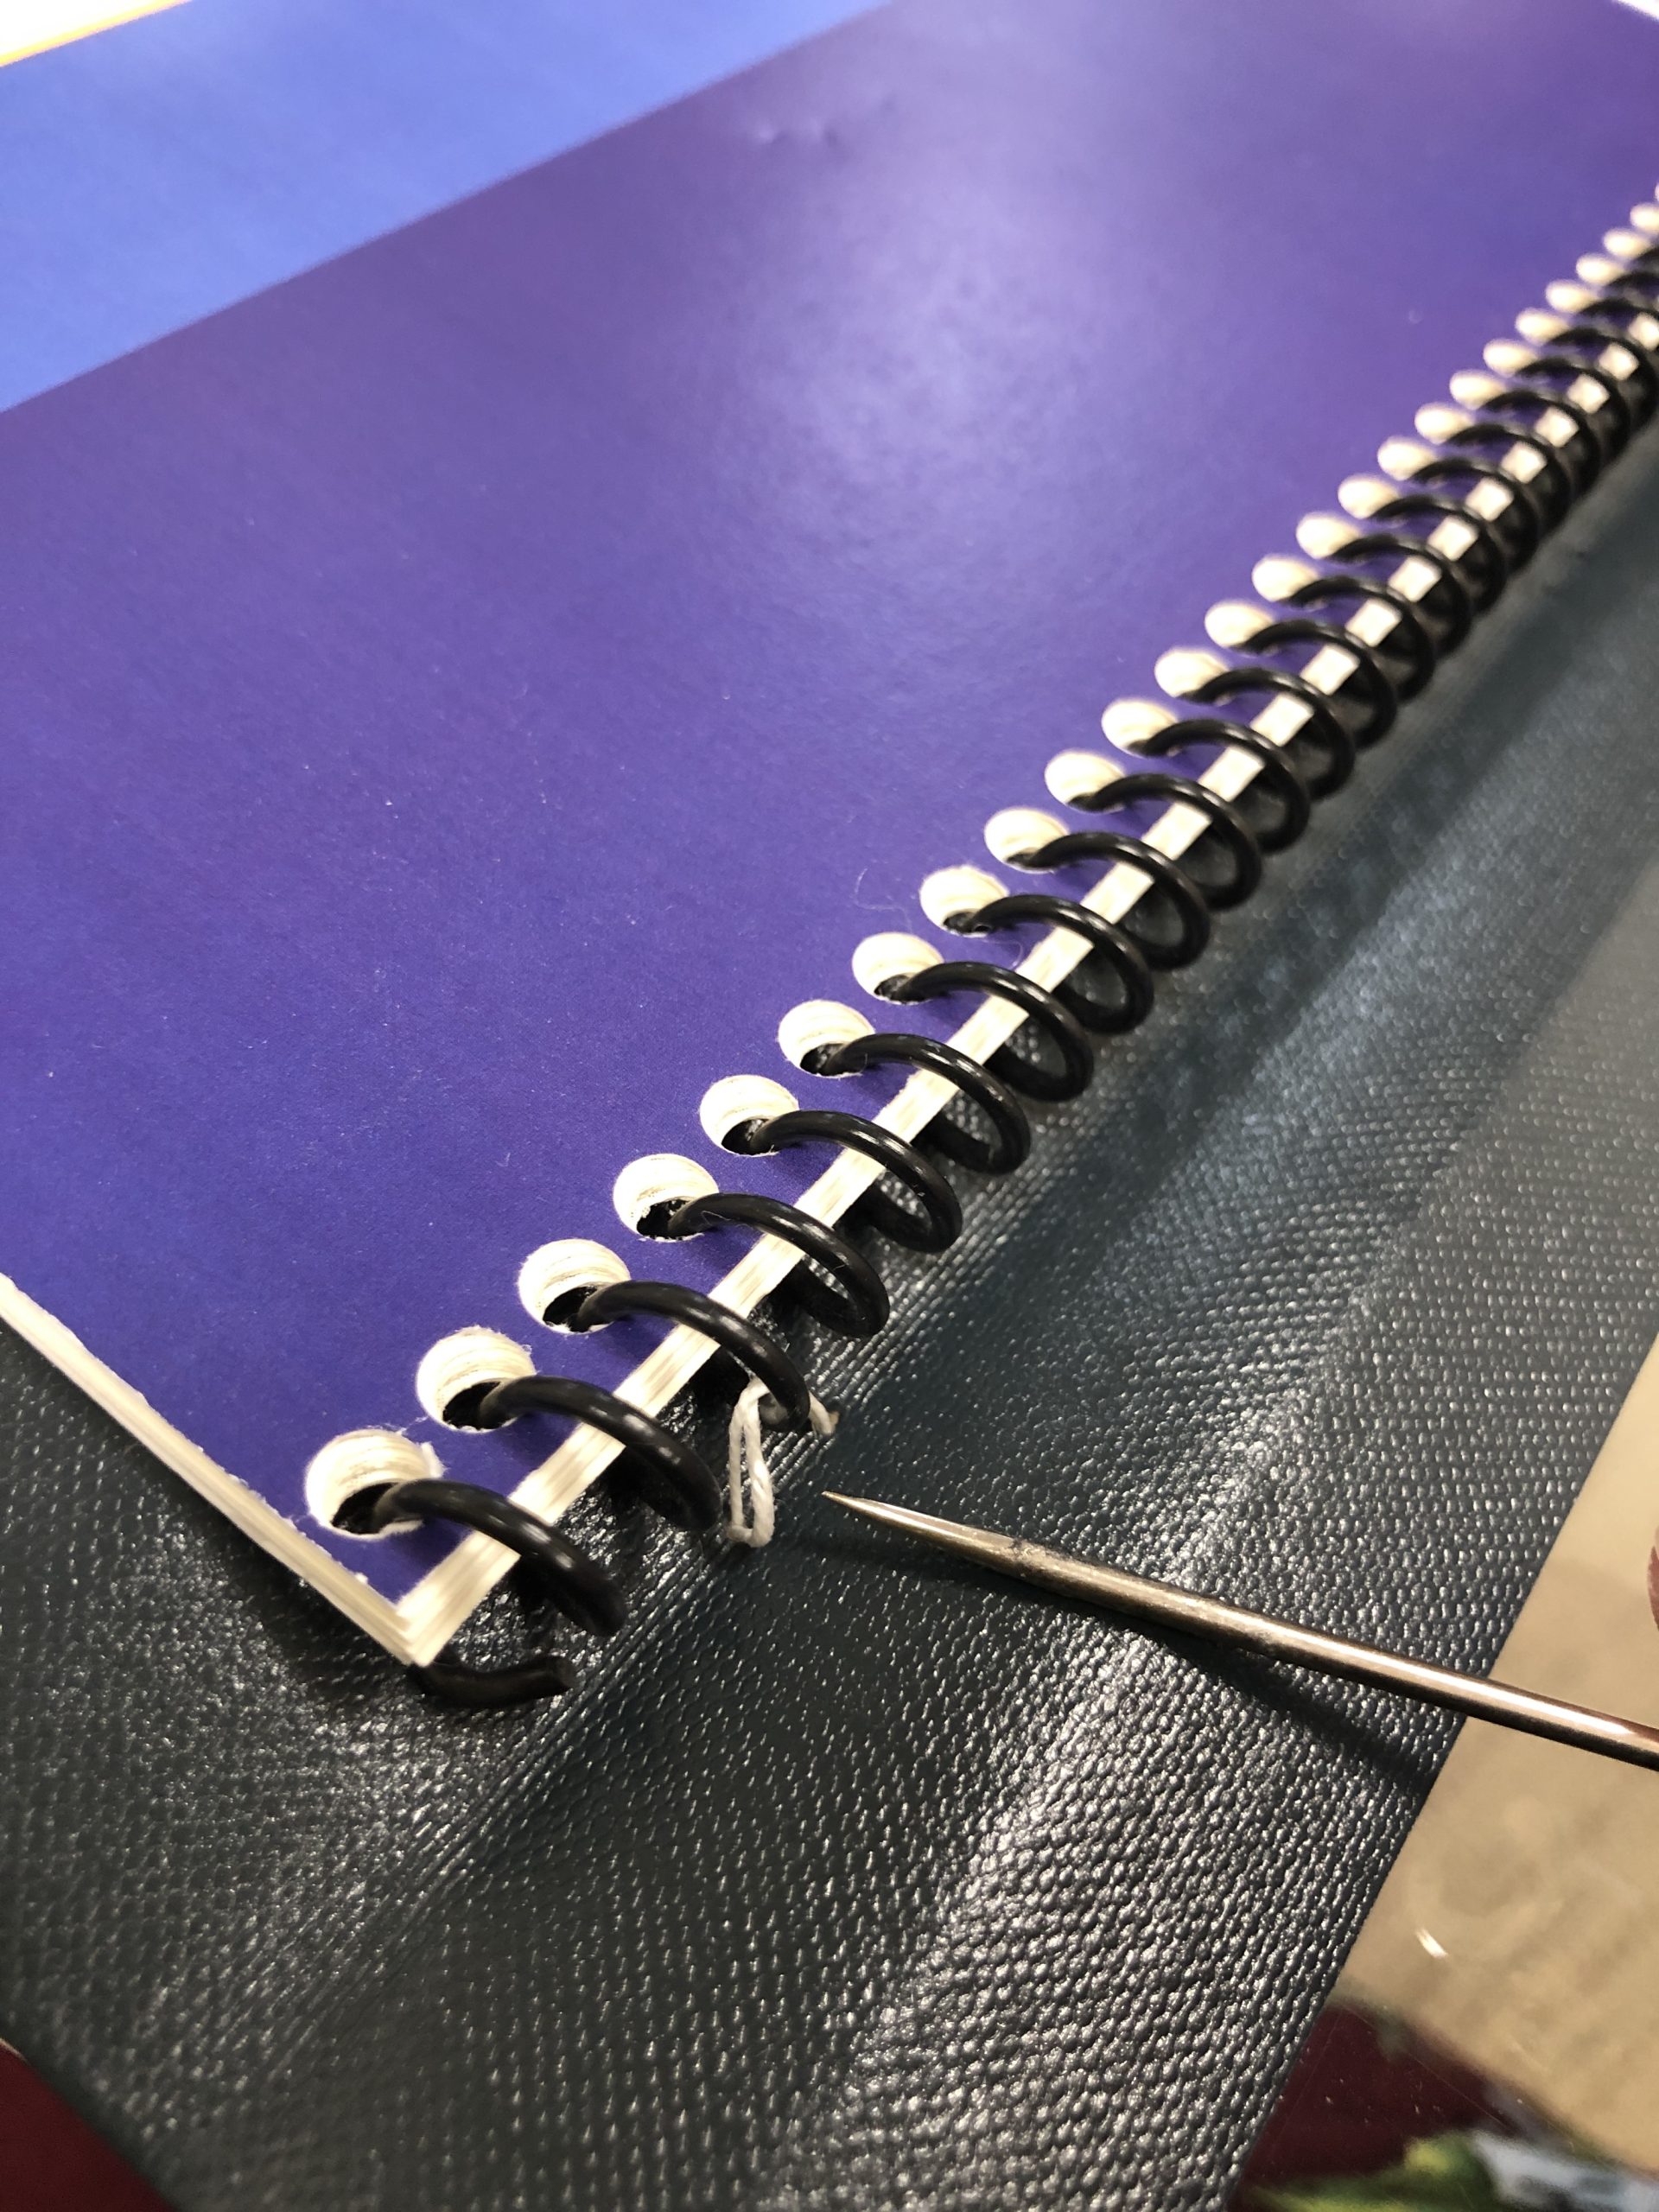
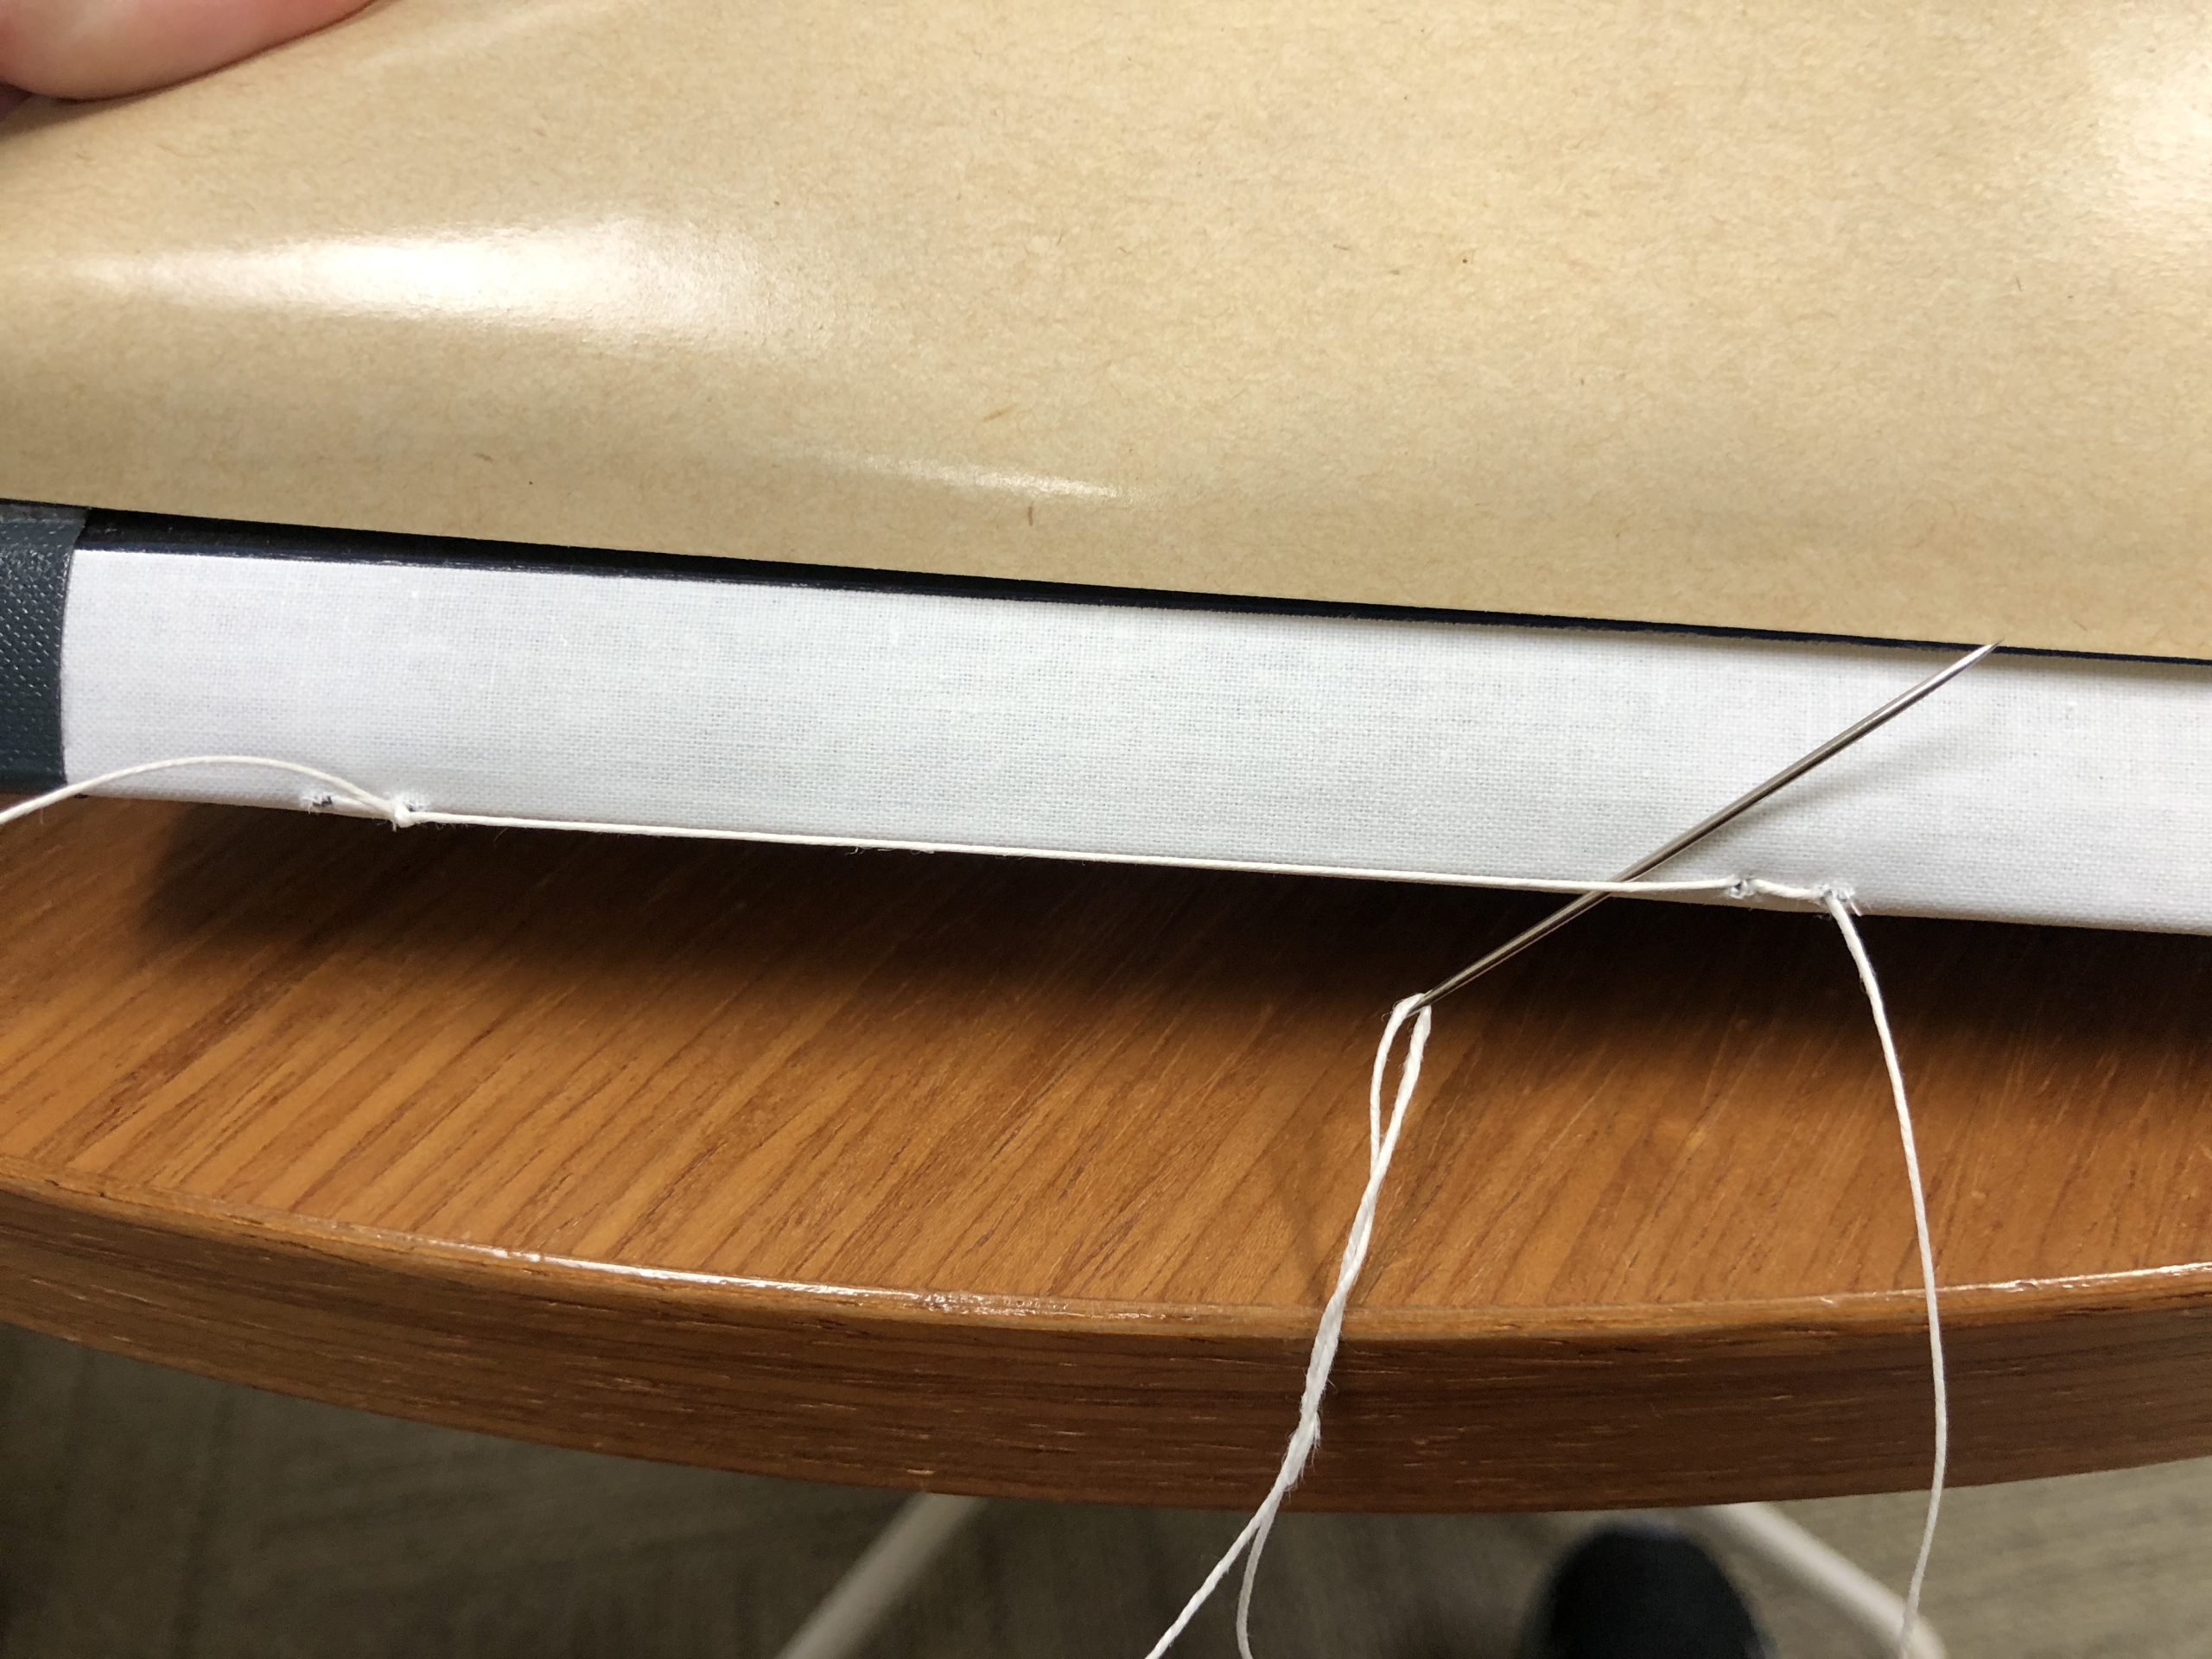
People asked if we had instructions, which of course has been on my to-do list for a while. So I created this short video demonstrating how we sew these. There is no narration, only ambient noise. Some day I will write up the instructions, but until then, hopefully you can use this video and the quick explanation below to see our method. Once you do three or four, you get the hang of it and it goes really quickly. At the 05:40 mark you can see the “shake test.” These are firmly attached as long as your sewing is tight, and you have the full function of the spiral.
The quick explanation:
With an awl, punch sewing stations. Each station consists of two holes, one on either side of a wire. 3-5 stations is adequate unless your pamphlet is very large.
Starting at the top, go in through the back and through a wire loop. Go out and back in again, wrapping the wire twice.
Pull tight, and tie a square knot. Go to the next sewing station and do the same, wrapping the wire twice. Loop the needle under the thread at the spine to create leverage when tightening, and continue along until the end.
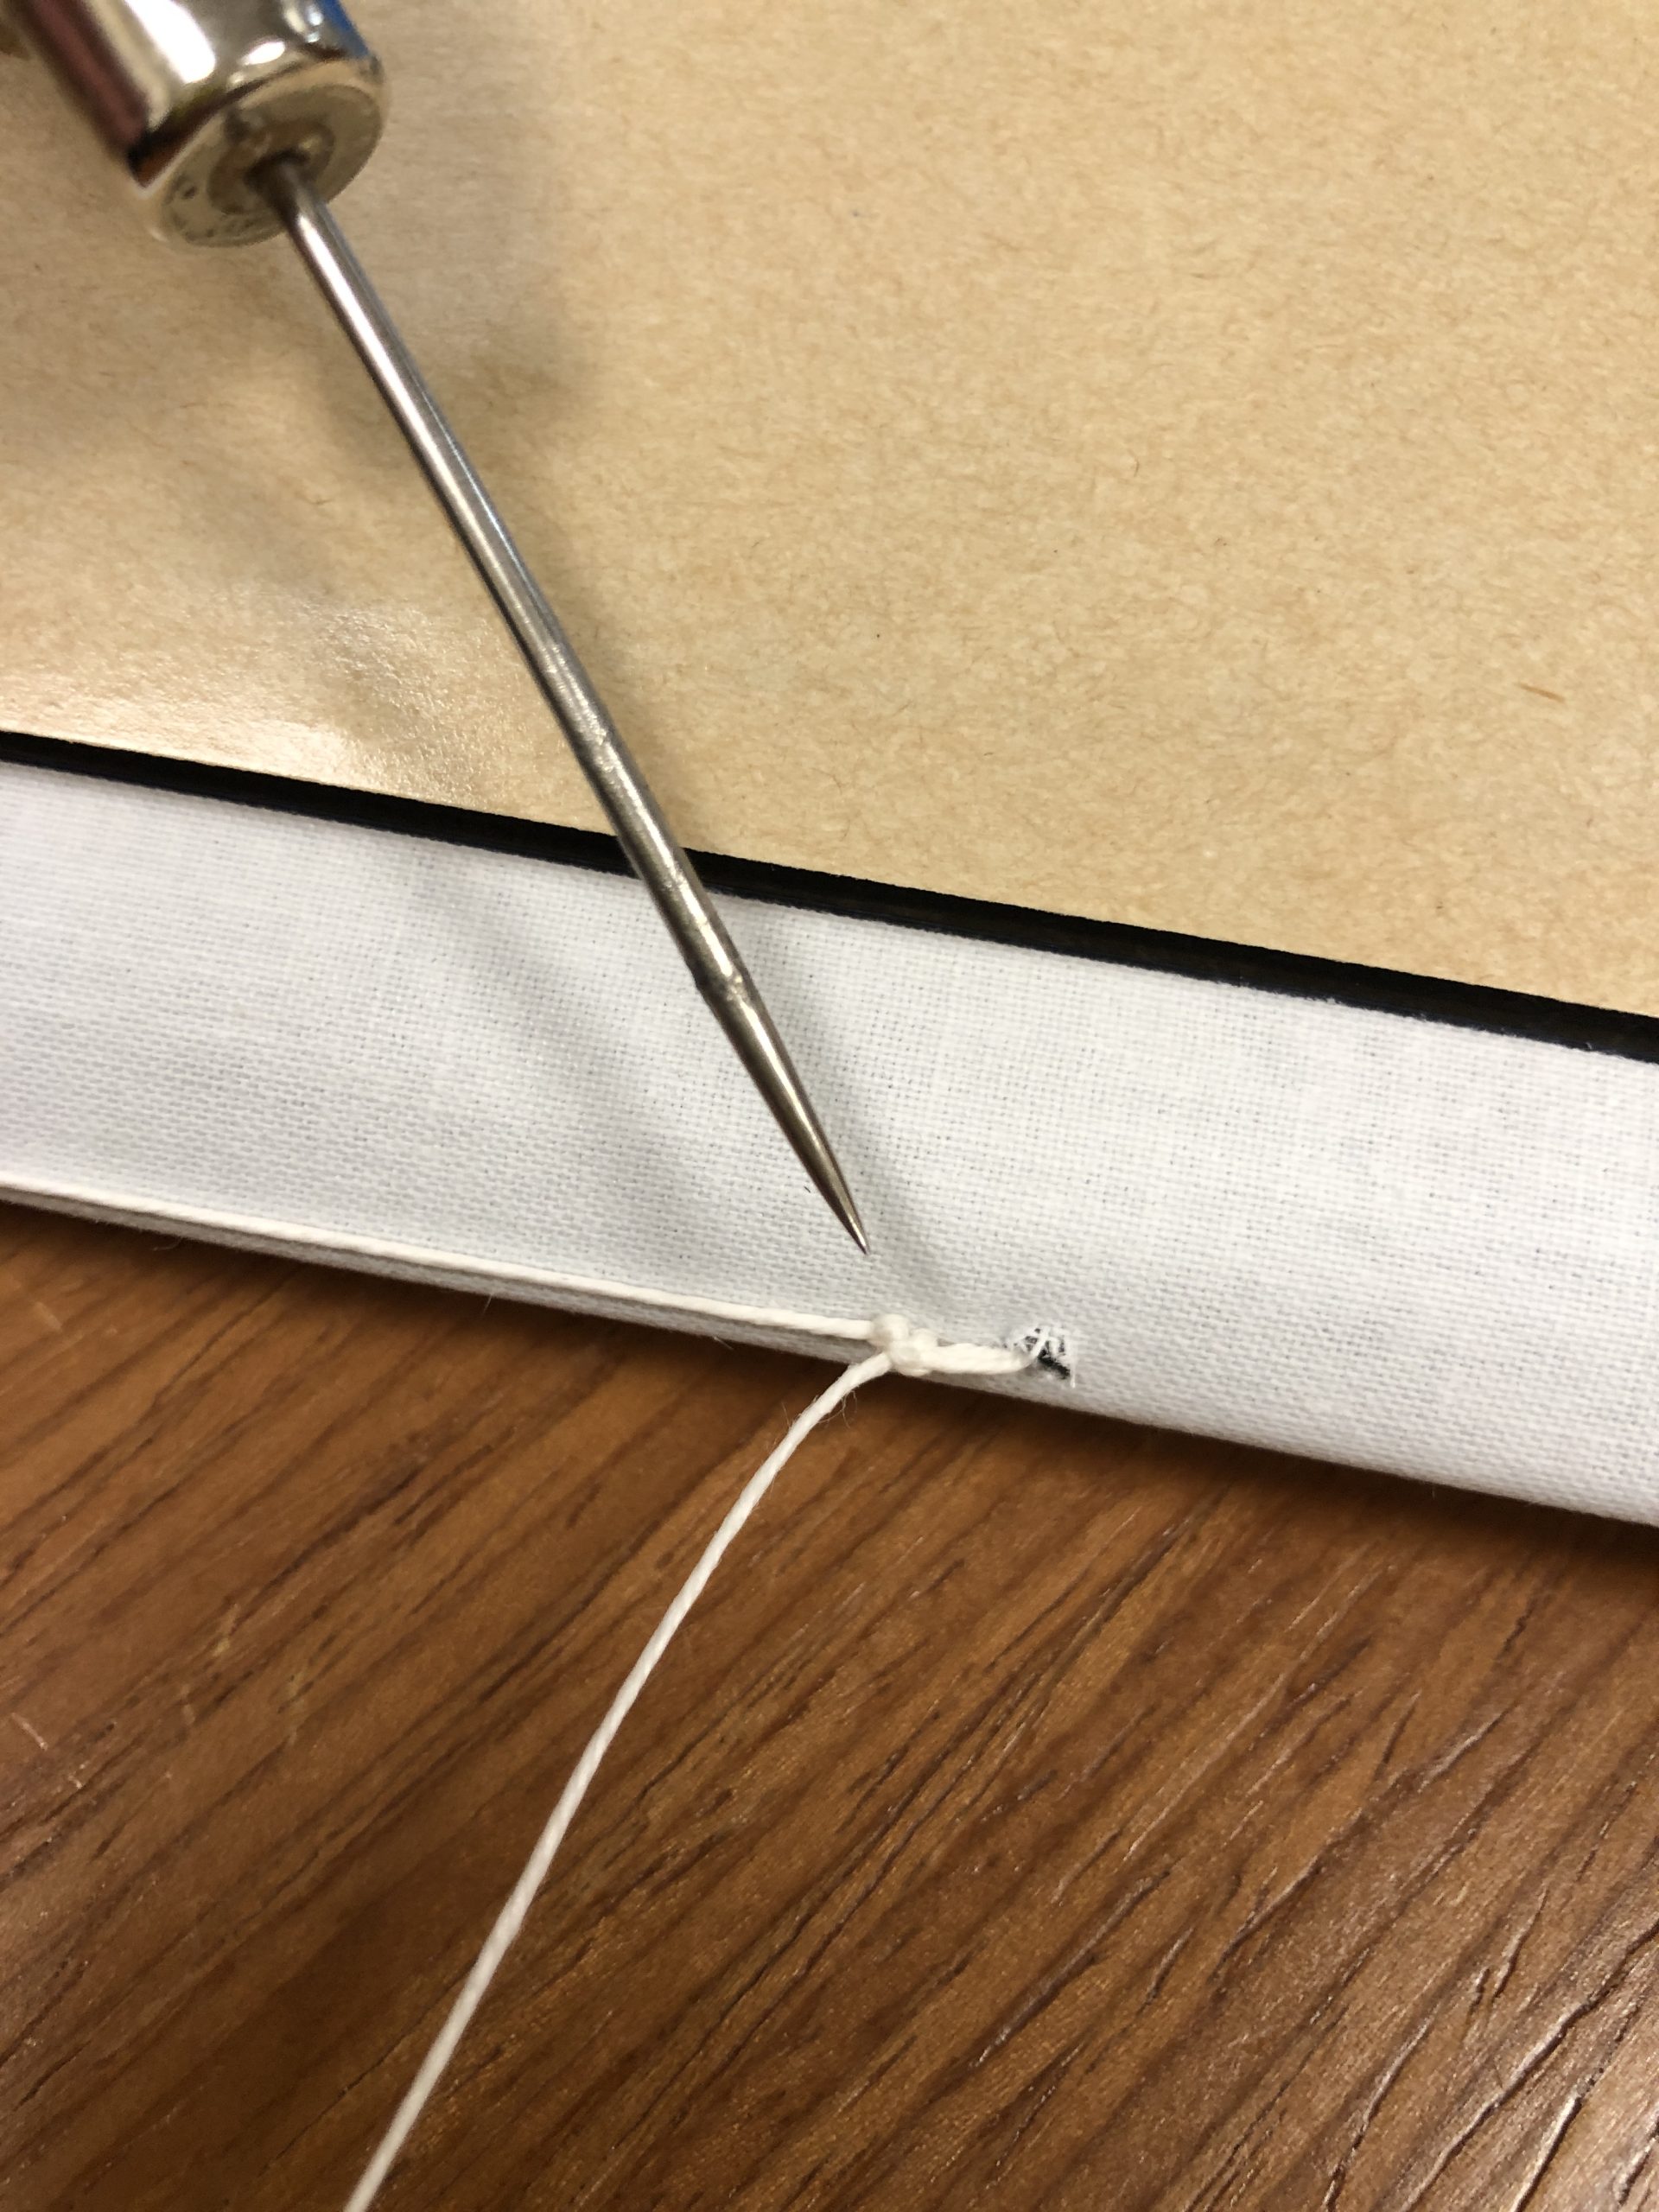
At the end, once you have looped the wire twice and tightened the thread, loop the needle under the thread above and tie a square knot.
Finish the pamphlet by removing the paper and wrapping the spine around neatly. Remove the protective blue film. Voila!
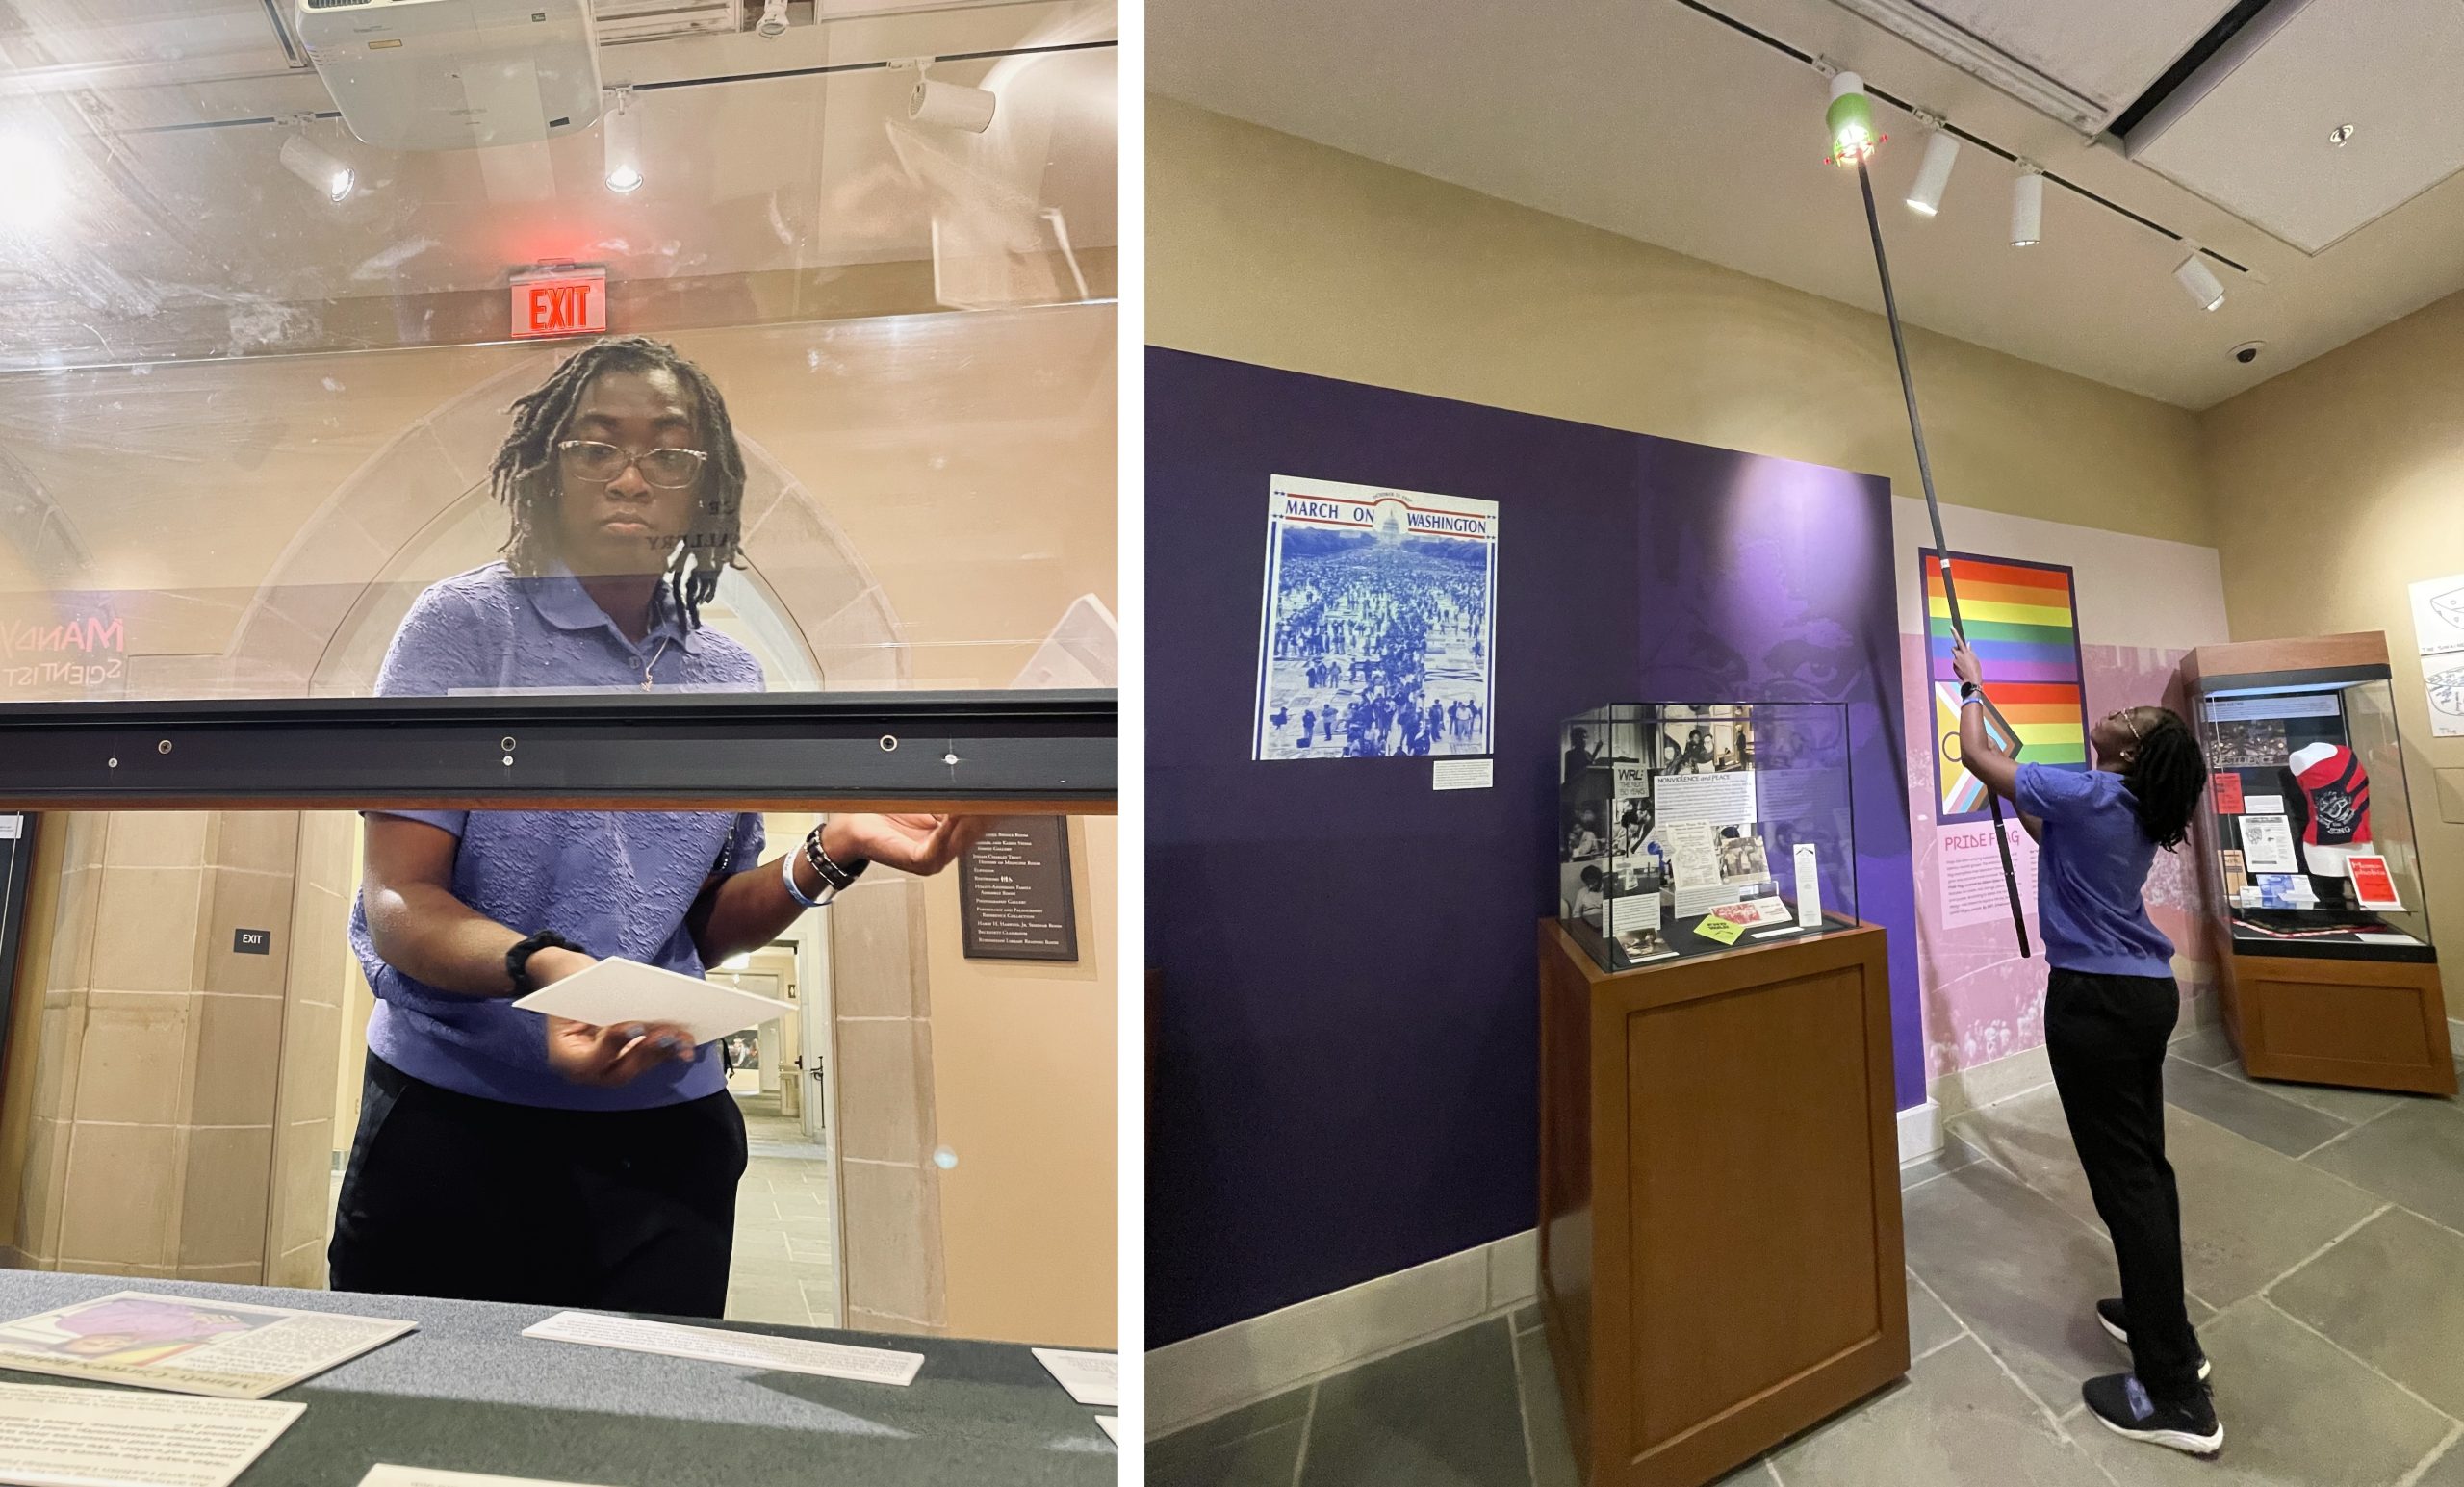
We are delighted to welcome our sixth HBCU Library Alliance intern, Angela Nettles, to Duke Libraries. Angela is a rising senior at Bennett College where she is studying Africana Women’s Studies. She is also one of eight students studying preservation this summer through the University of Delware/HBCU-LA internship program. As a part of the program, she will spend four weeks with us learning everything from binding pamphlets to conducting condition surveys.
After two years of presenting this program online, it’s refreshing to have our intern onsite again. So far, this first week has been a busy one. In addition to her bi-weekly cohort meetings, Angela has dived right into work here at Perkins Library.
From left to right: Meg Brown (Head of Exhibition Services), Angela Nettles, and Yoon Kim (Senior Library Exhibition Technician) after working on the Mandy Carter exhibitPlacing case labels and adjusting exhibit lights.
As you can imagine, there was a lot to be done. Regardless, Angela was up to the many tasks at hand. From sanding the walls to setting up exhibit cases, she eagerly took part in every step of the process.
Left: Sanding the walls to prep them for the new Phototex graphics that were going up. Right: Meg Brown showing Angela how they measure light in exhibitions for preservation purposes.
Additionally, the second half of the week was spent introducing Angela to my work in the conservation lab. She learned about how we make treatment decisions for general collections, and has already started doing treatments herself.
Angela finishing her first pocket (left) and binding music scores into pamphlet binders (right).
So far she is a quick study and has already picked up how to do tip-ins, pockets, and pamphlet bindings.
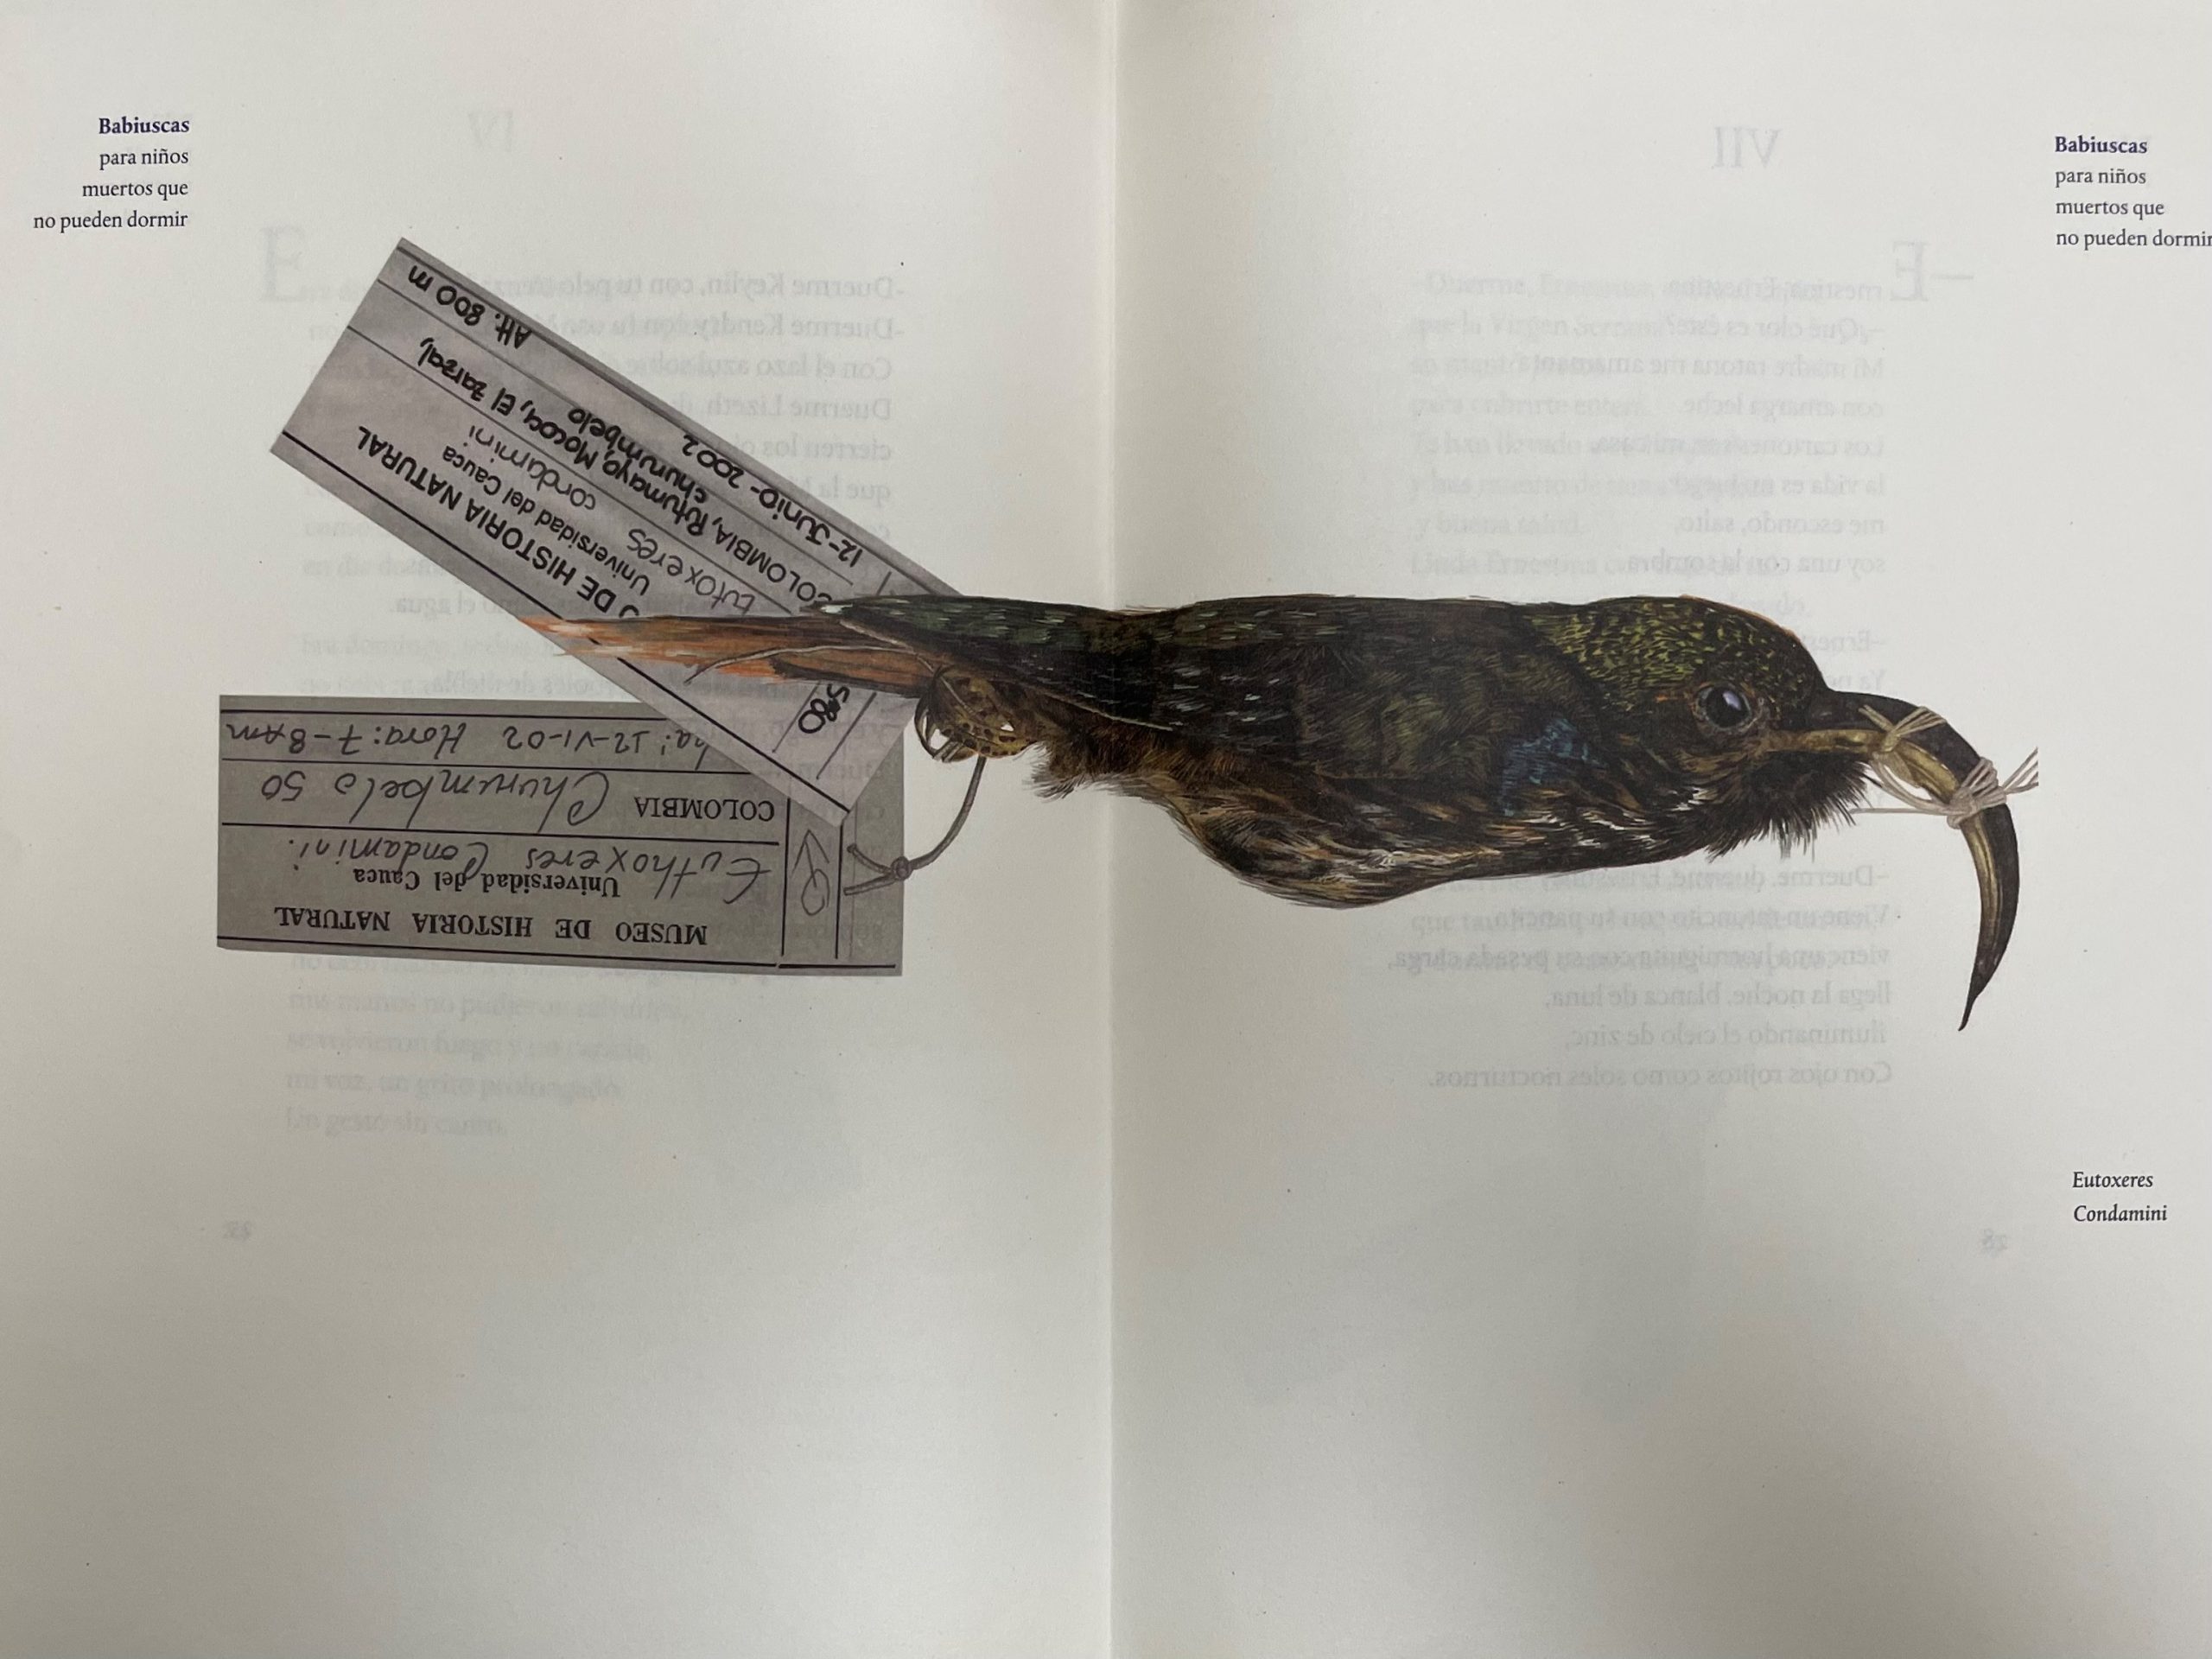
Spanish is not my native language. Luckily, I can read it well enough to appreciate this compelling and solemn work by the Columbian poet Francia Elena Goenaga. The cover image does not reveal much about the nature of the book. However, the title reads “Babiuscas Para Niños Muertos Que No Pueden Dormir”, which translates to “Lullabies For Dead Children That Can’t Sleep”.
The title sets a tone that is quite somber. This is further highlighted by the subheading on the title page, which reads “Para los niños Colombianos que han sufrido violencia y sus madres”. This translates to “For the Colombian children who have suffered from violence and their mothers”. As dedications go, this is a specific and sentimental one. It inspires one to be pensive as they delve deeper into the book and read the poetry within.
Accompanying said poetry are a set of 14 illustrations that create an intriguing juxtaposition with the text.
Colorful studies of various dead birds appear throughout the book in striking detail. There is something to be said about comparing the visual of something dead to something sleeping. And since this is a book of “lullabies” in the form of poems, I find the choice to combine them with these illustrations remarkably provoking.
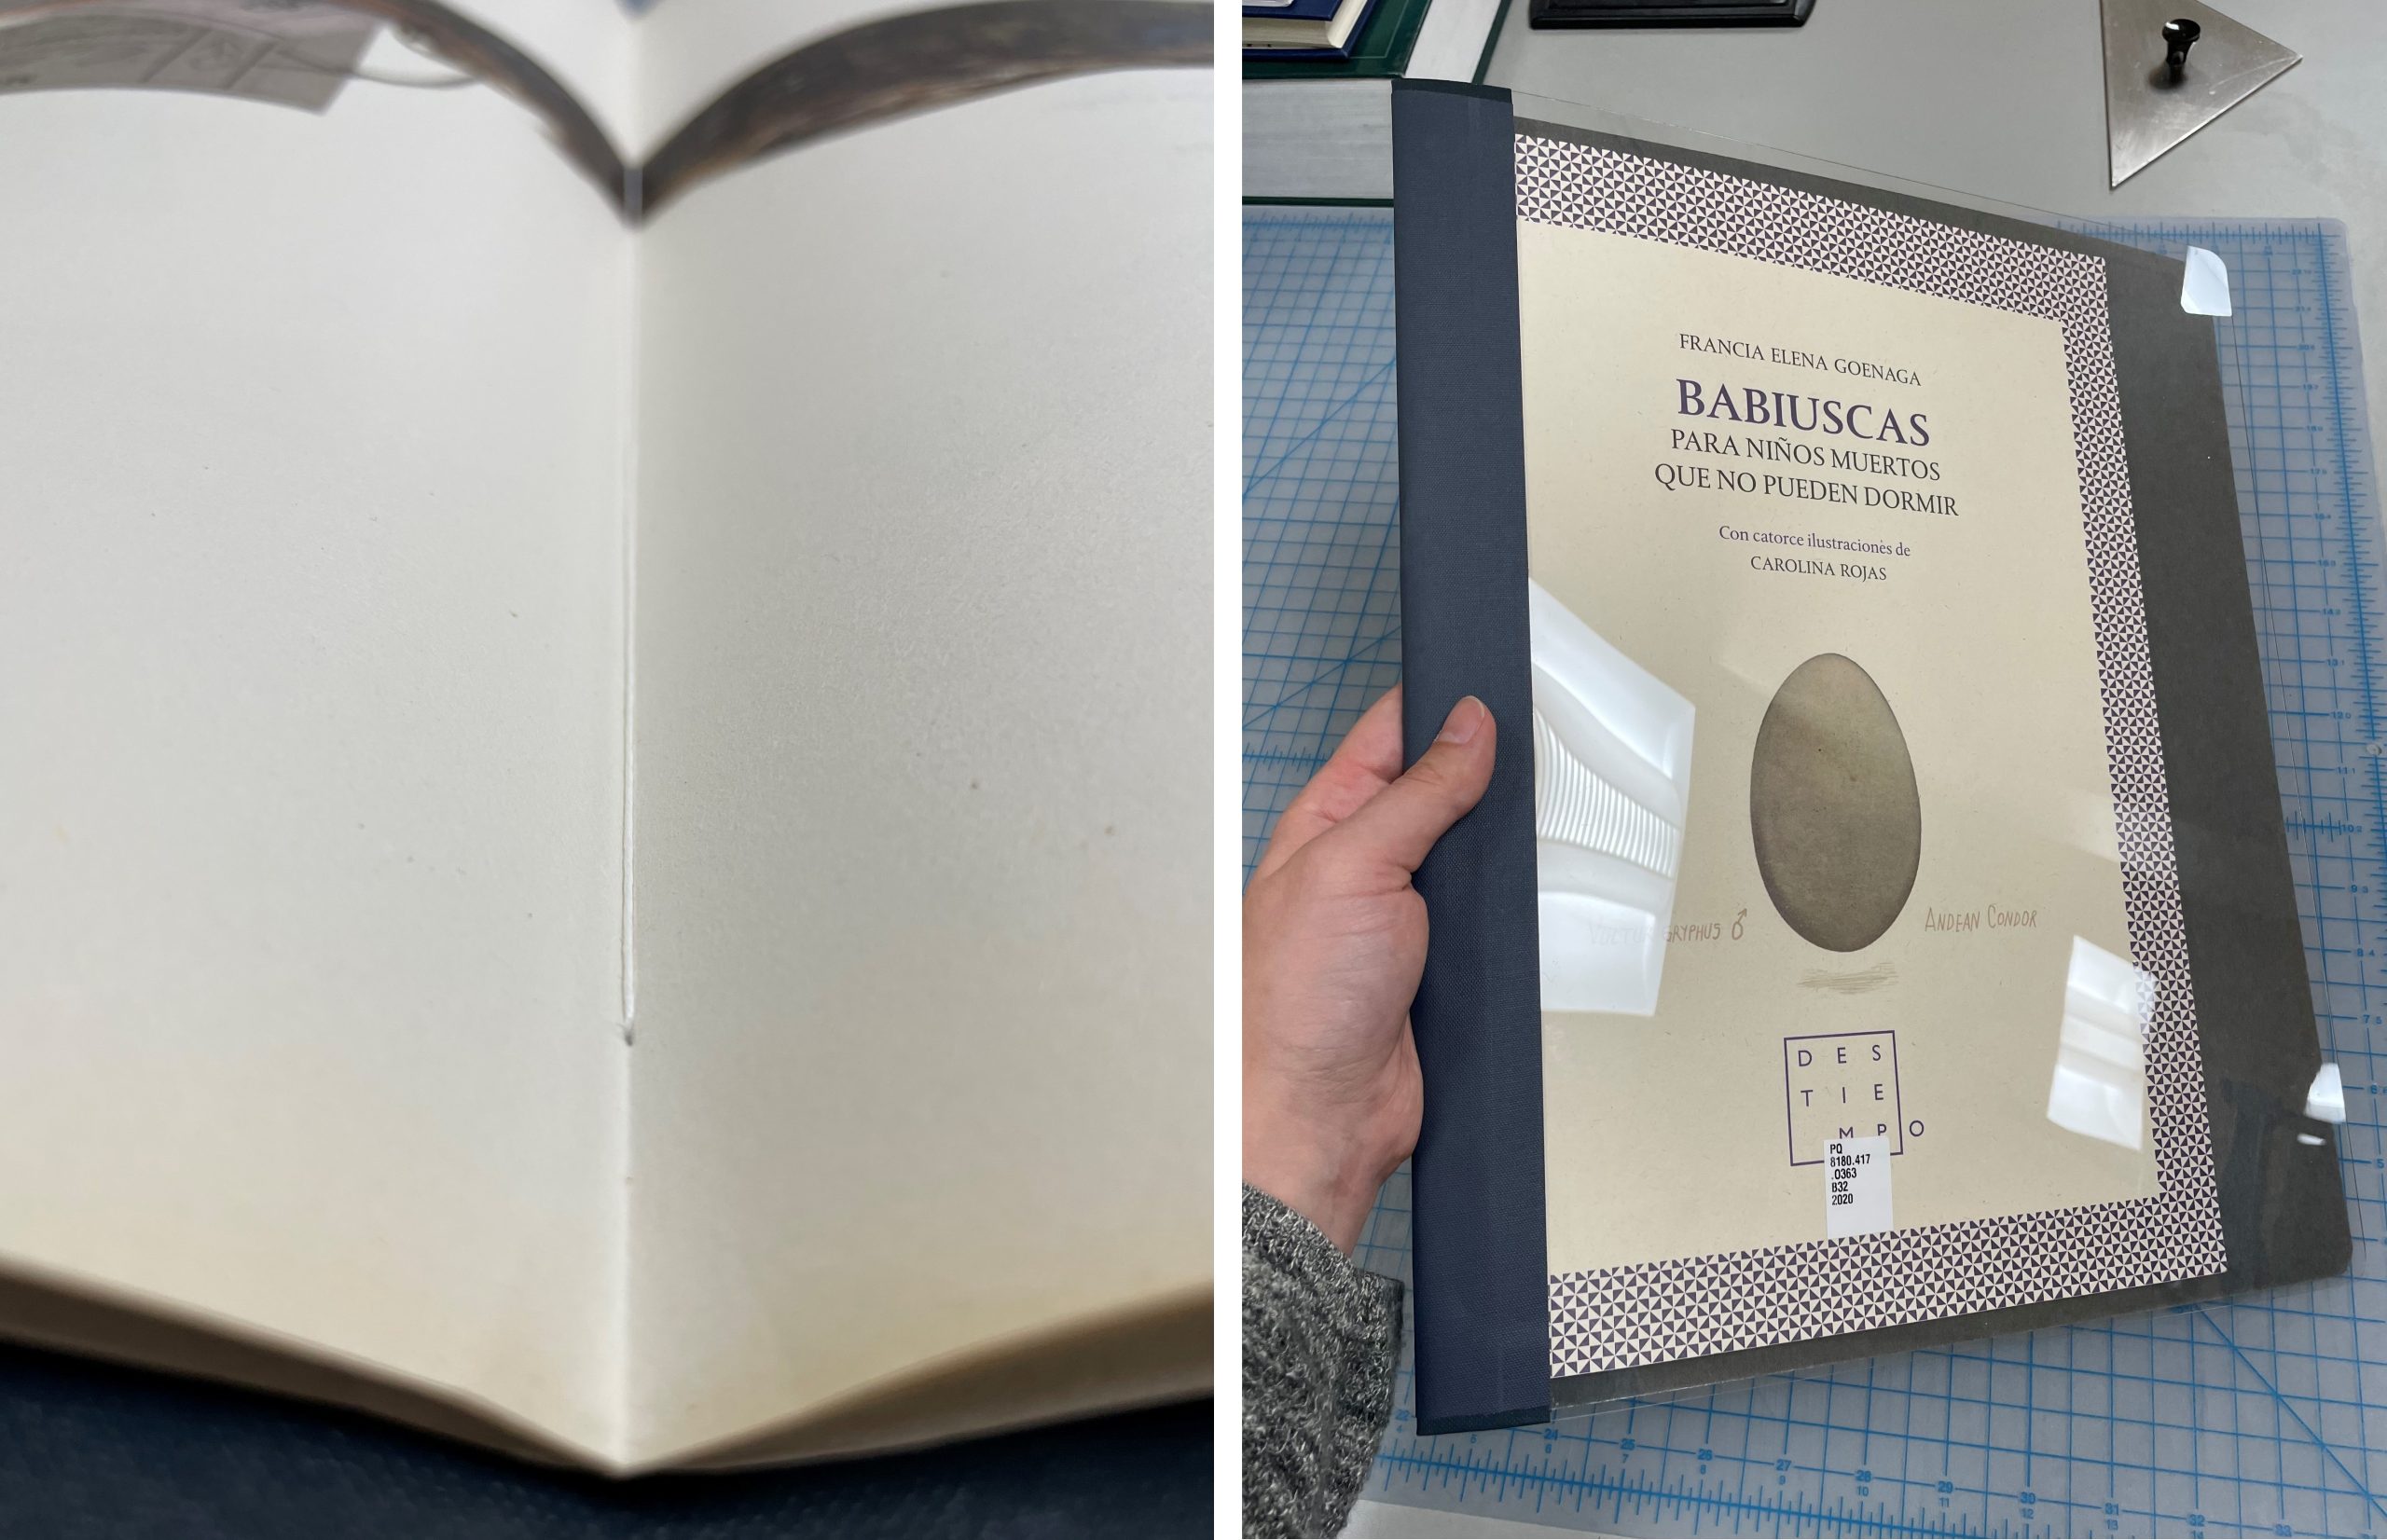
When a book this delicate and artistic come across my bench, I want to treat it delicately as well. As you may have noticed, this book was not originally bound.
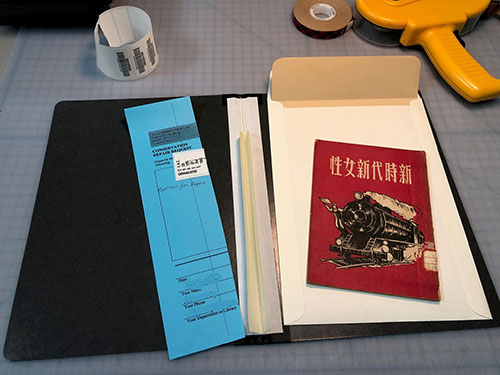
It is too risky to send a book like this to the stacks since pages could be lost. The best solution for a book like this is to sew it into a pamphlet binder. Now our patrons can request this book and enjoy its artistry safely.
A close up on the sewing inside and the final product.
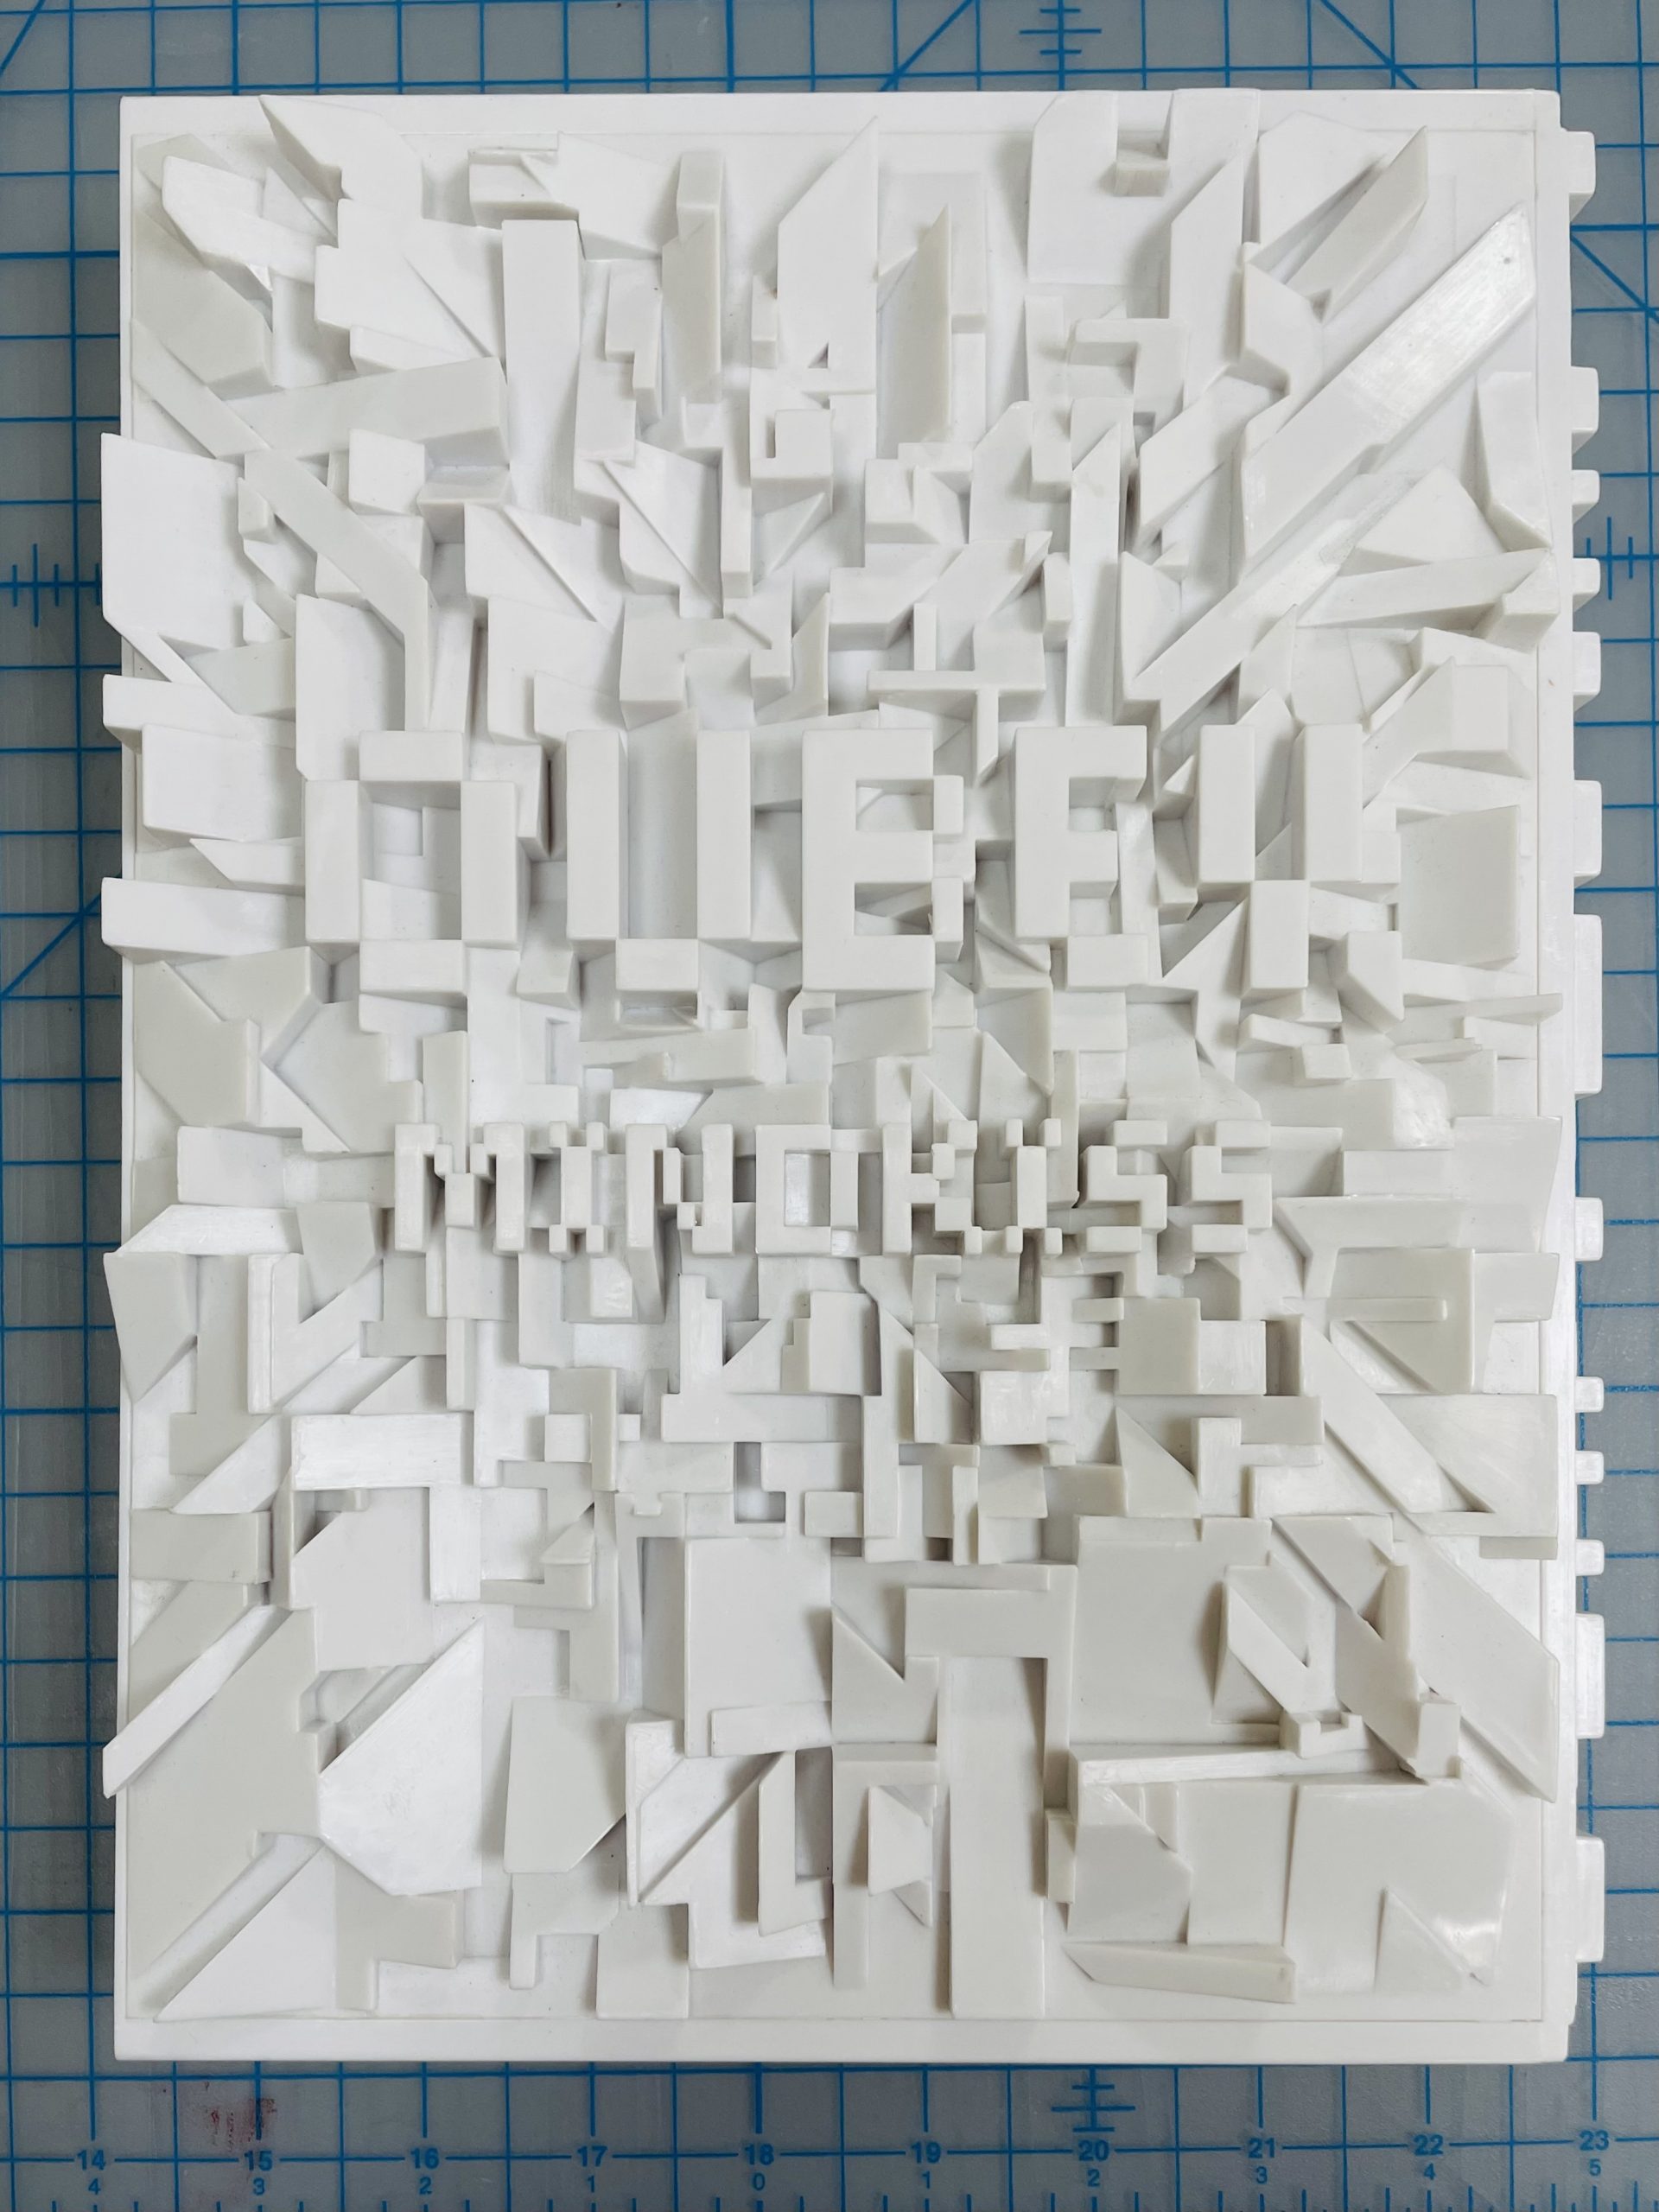
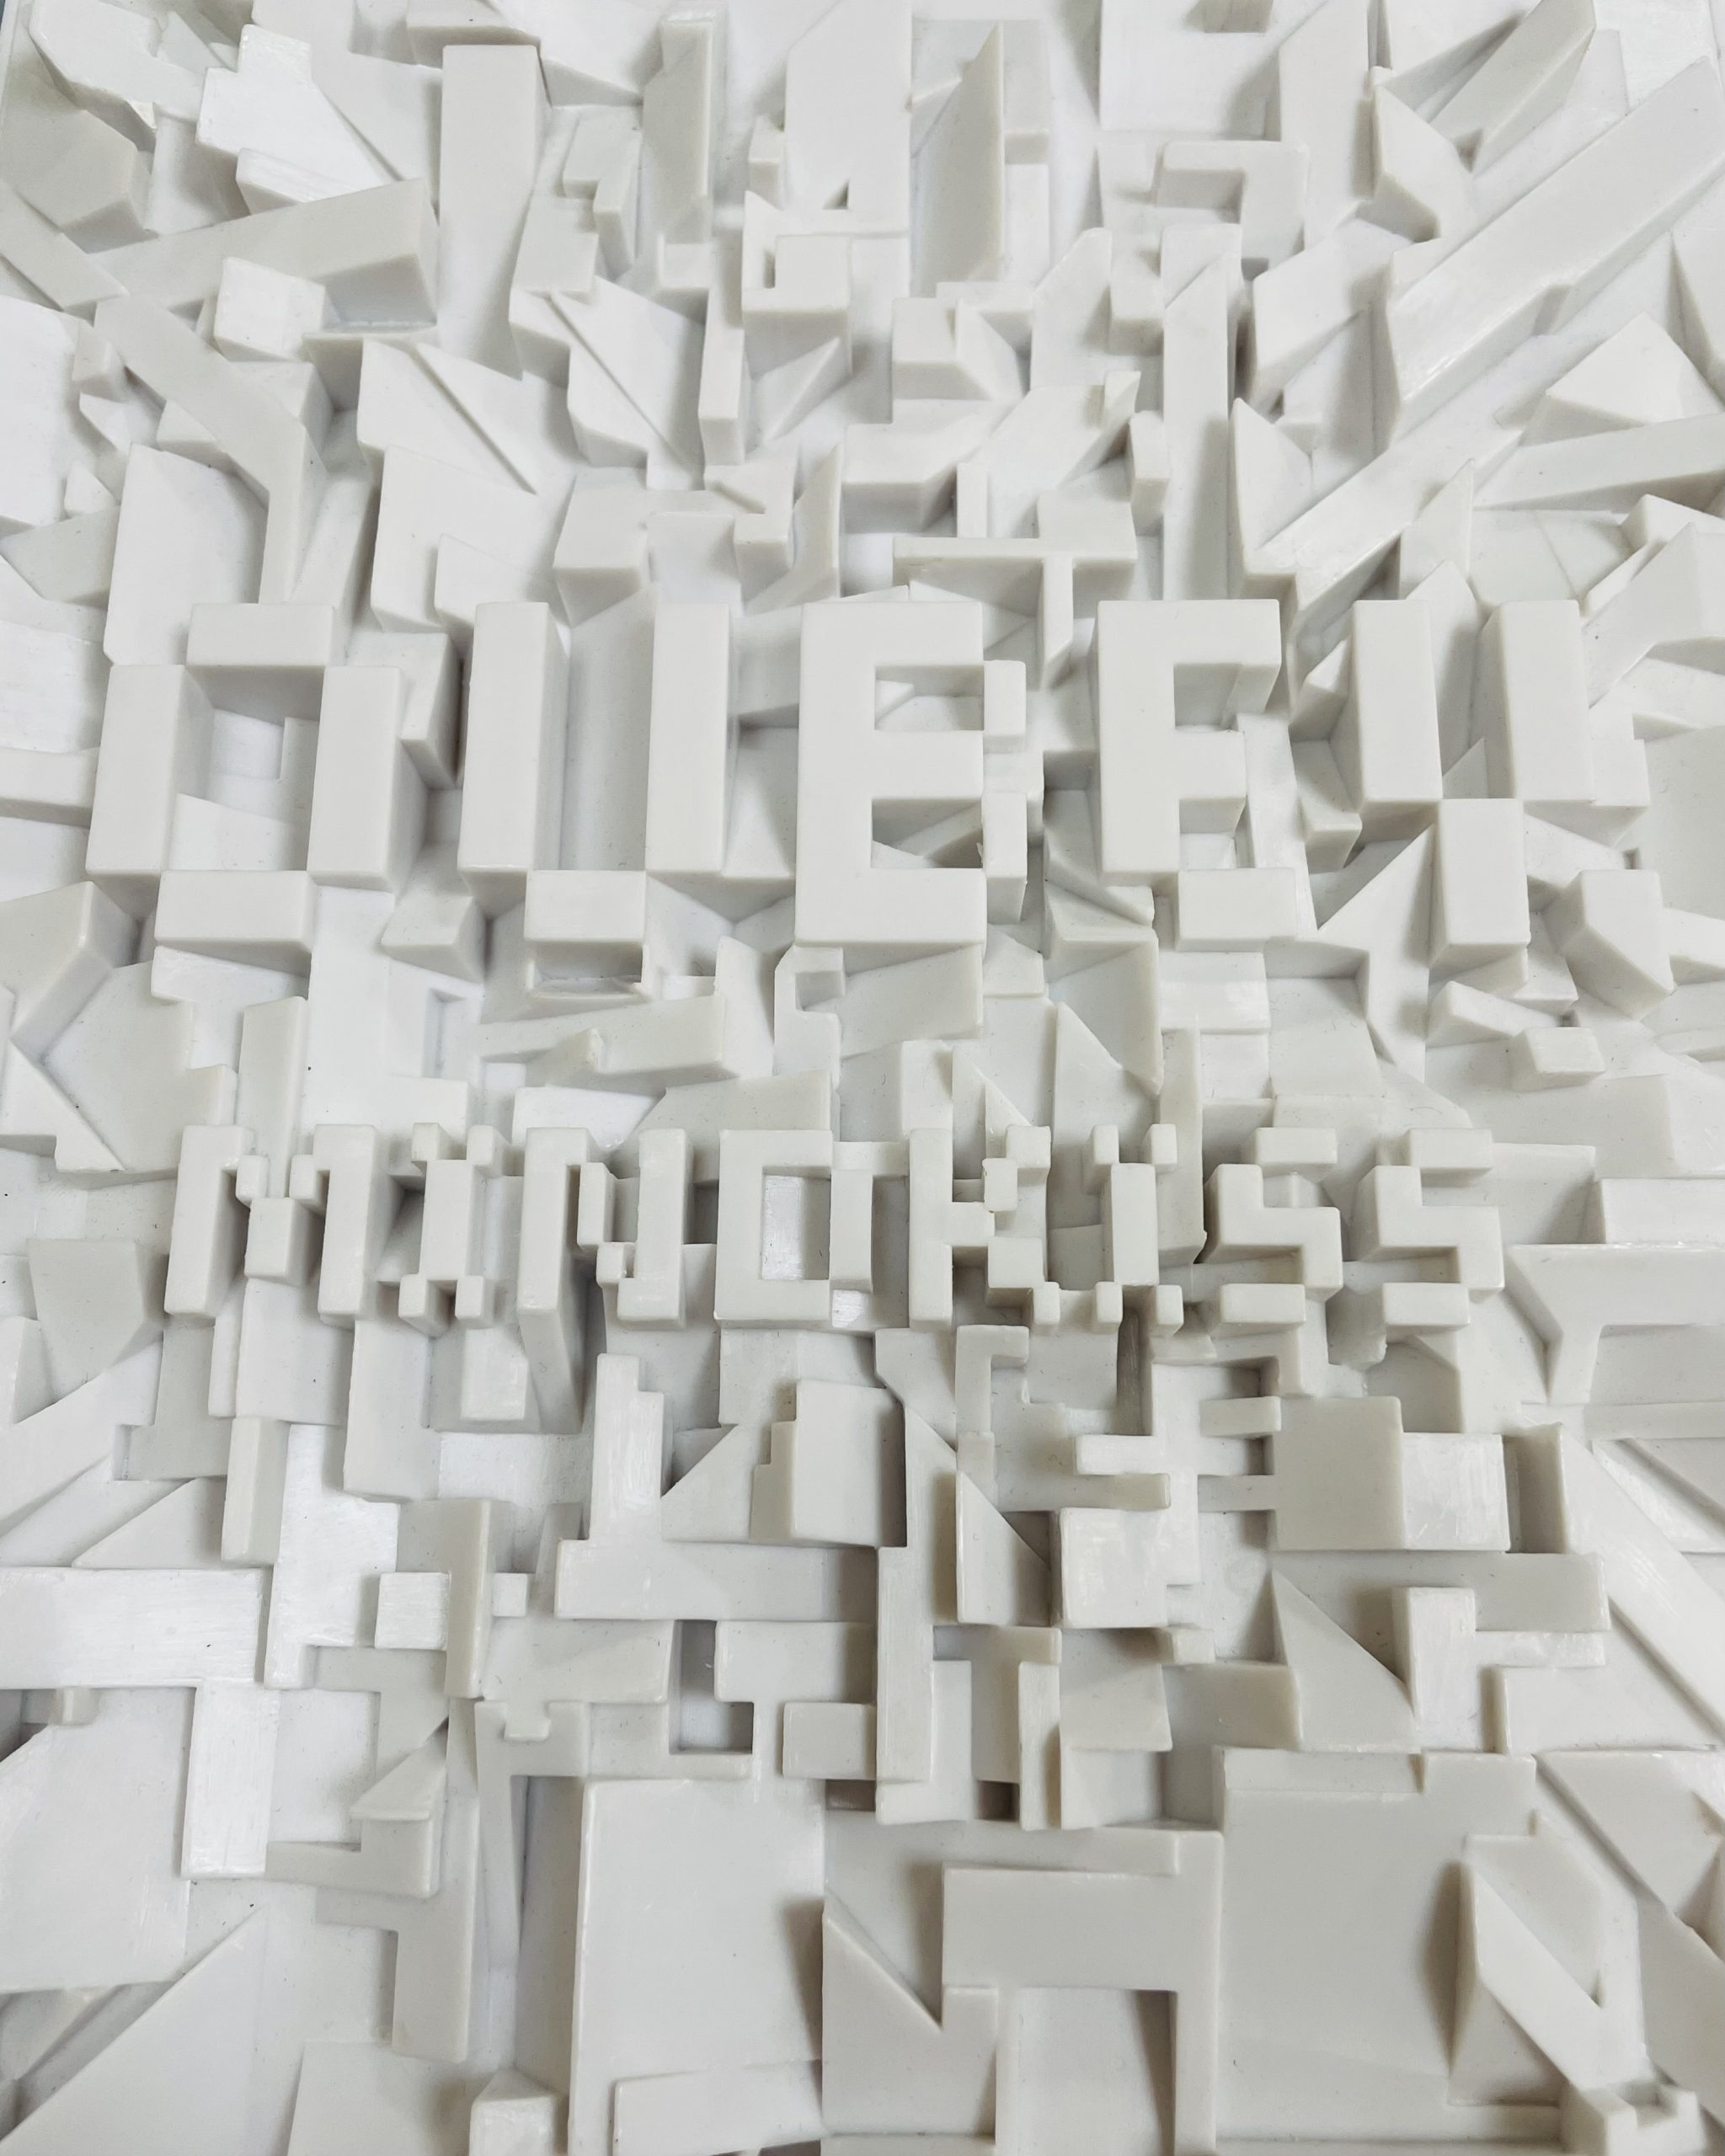
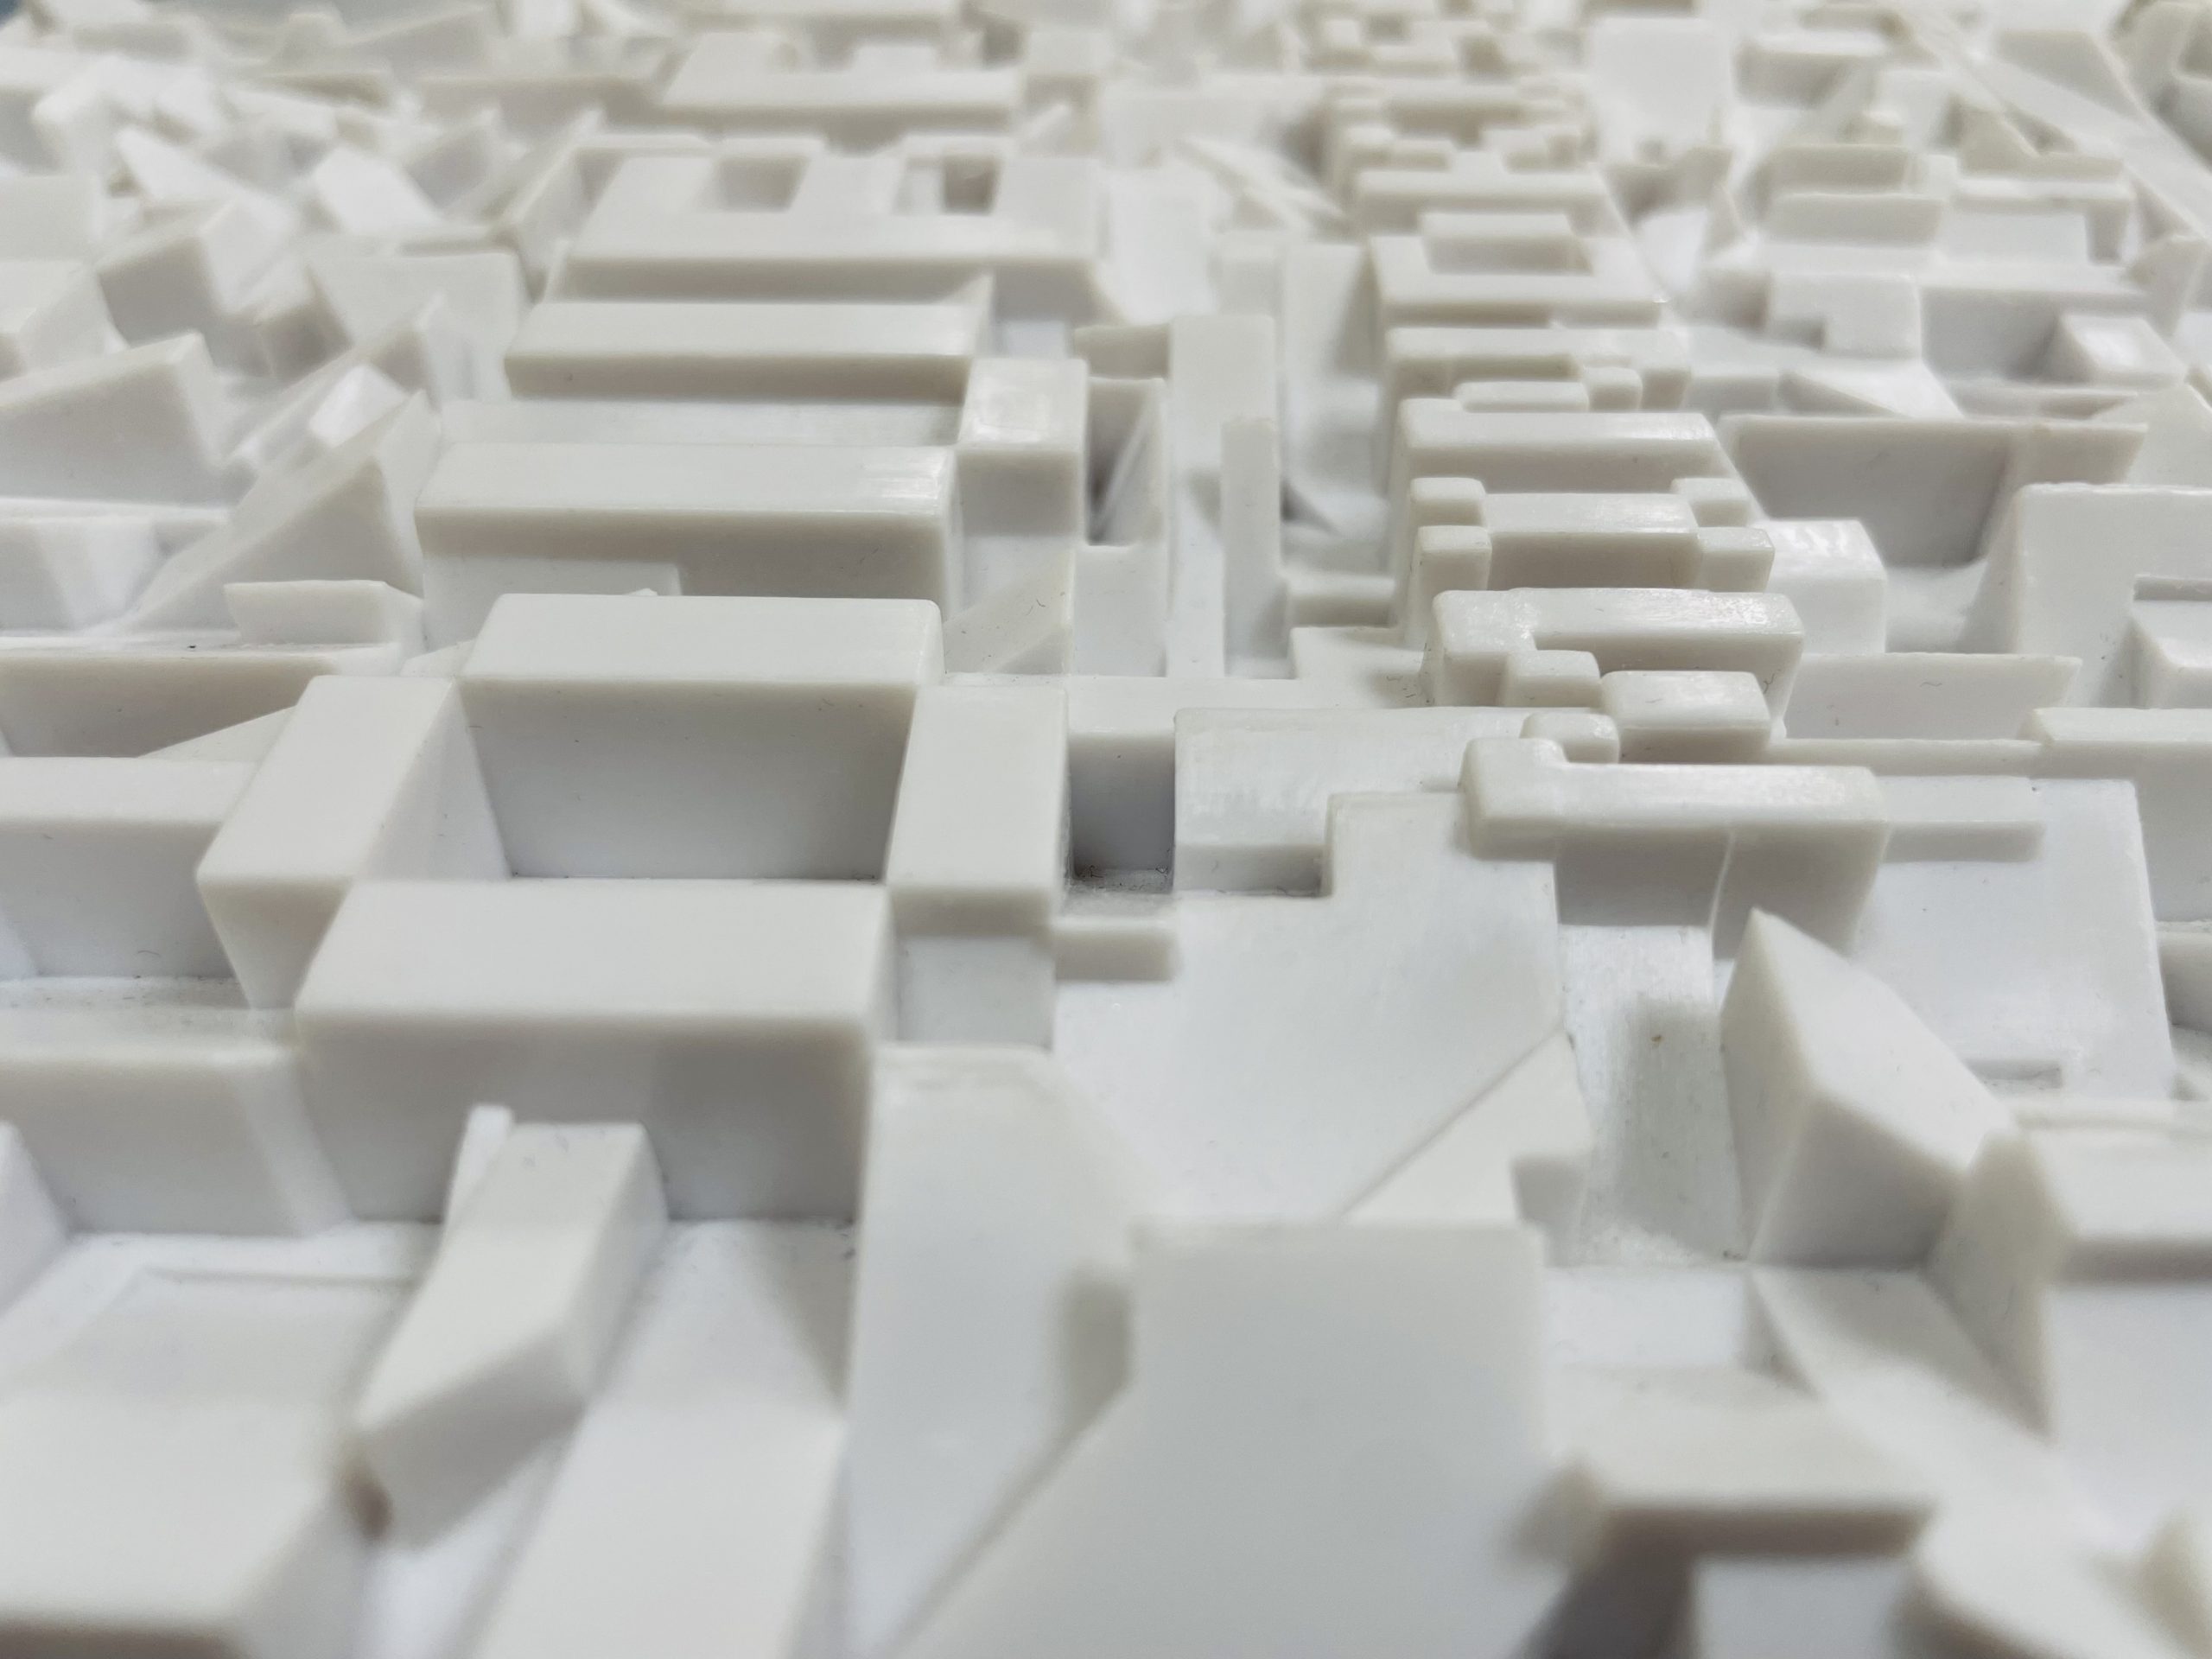
Here at Duke University Libraries, we’re fortunate to have a stunning collection of artist books from all over the world. Just like a regular book, artist books can come in a range of shapes and sizes. Some, however, come in more unusual shapes than most, which in turn can pose some interesting conservation questions.
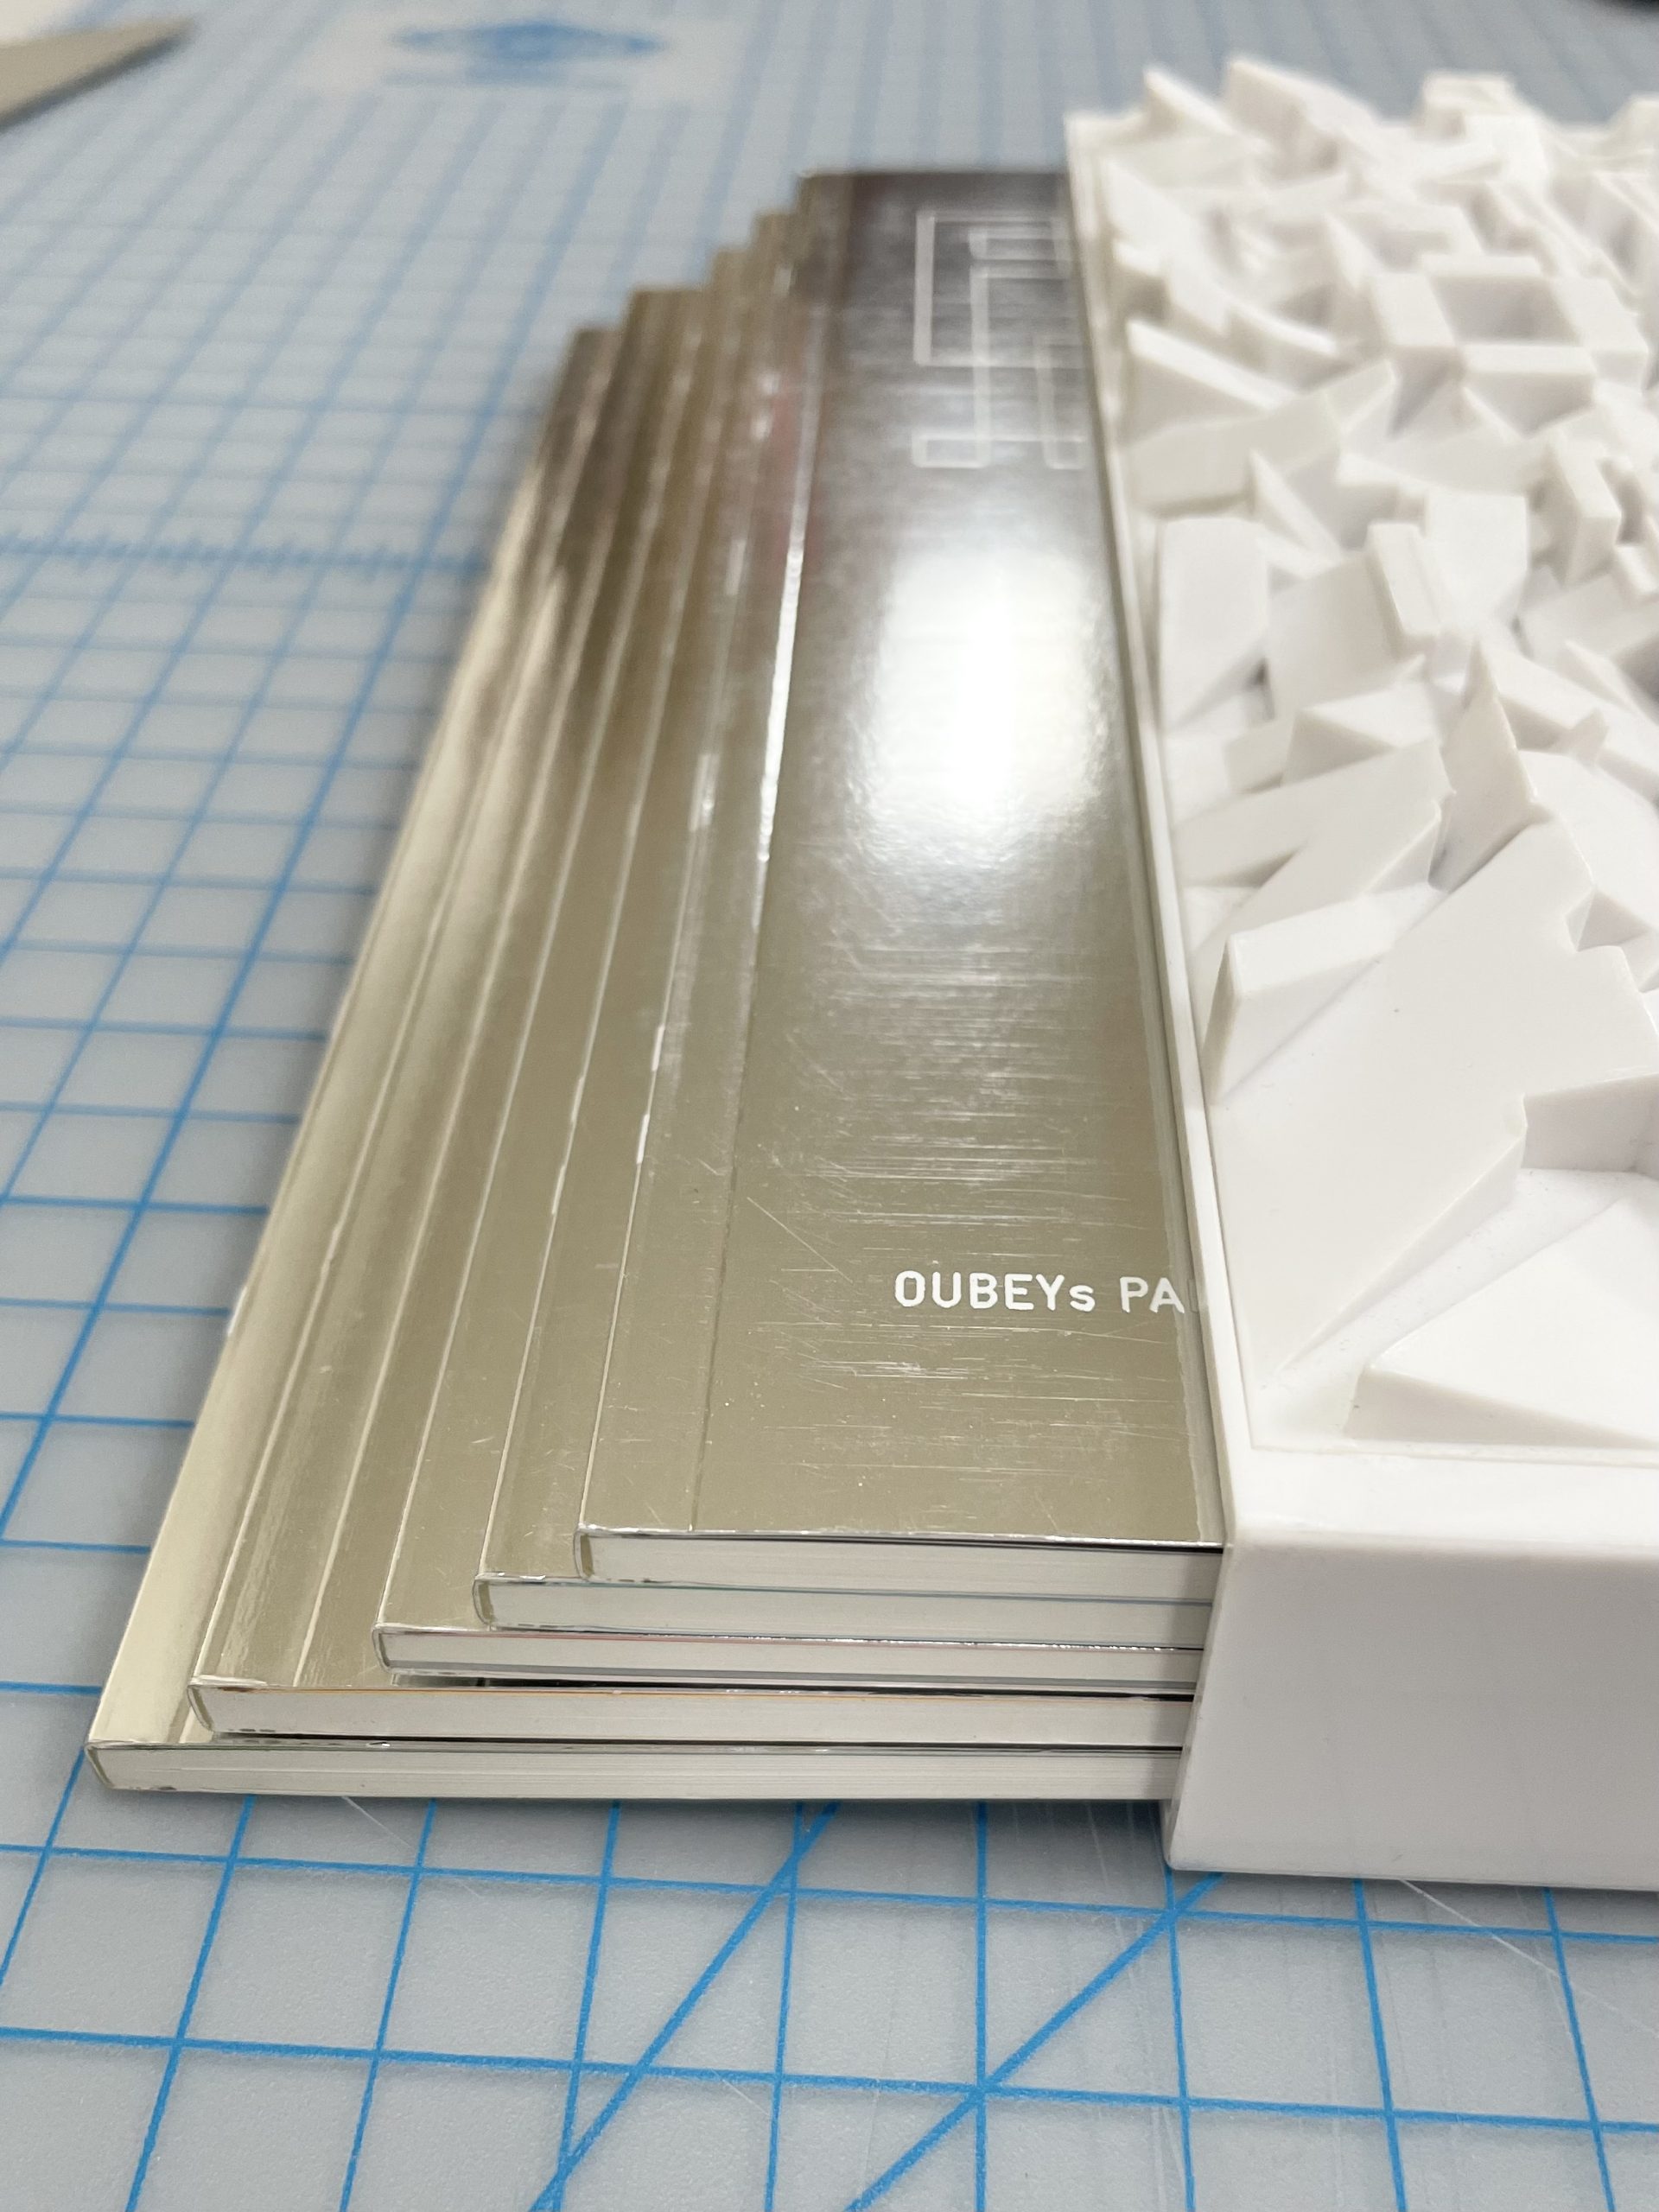
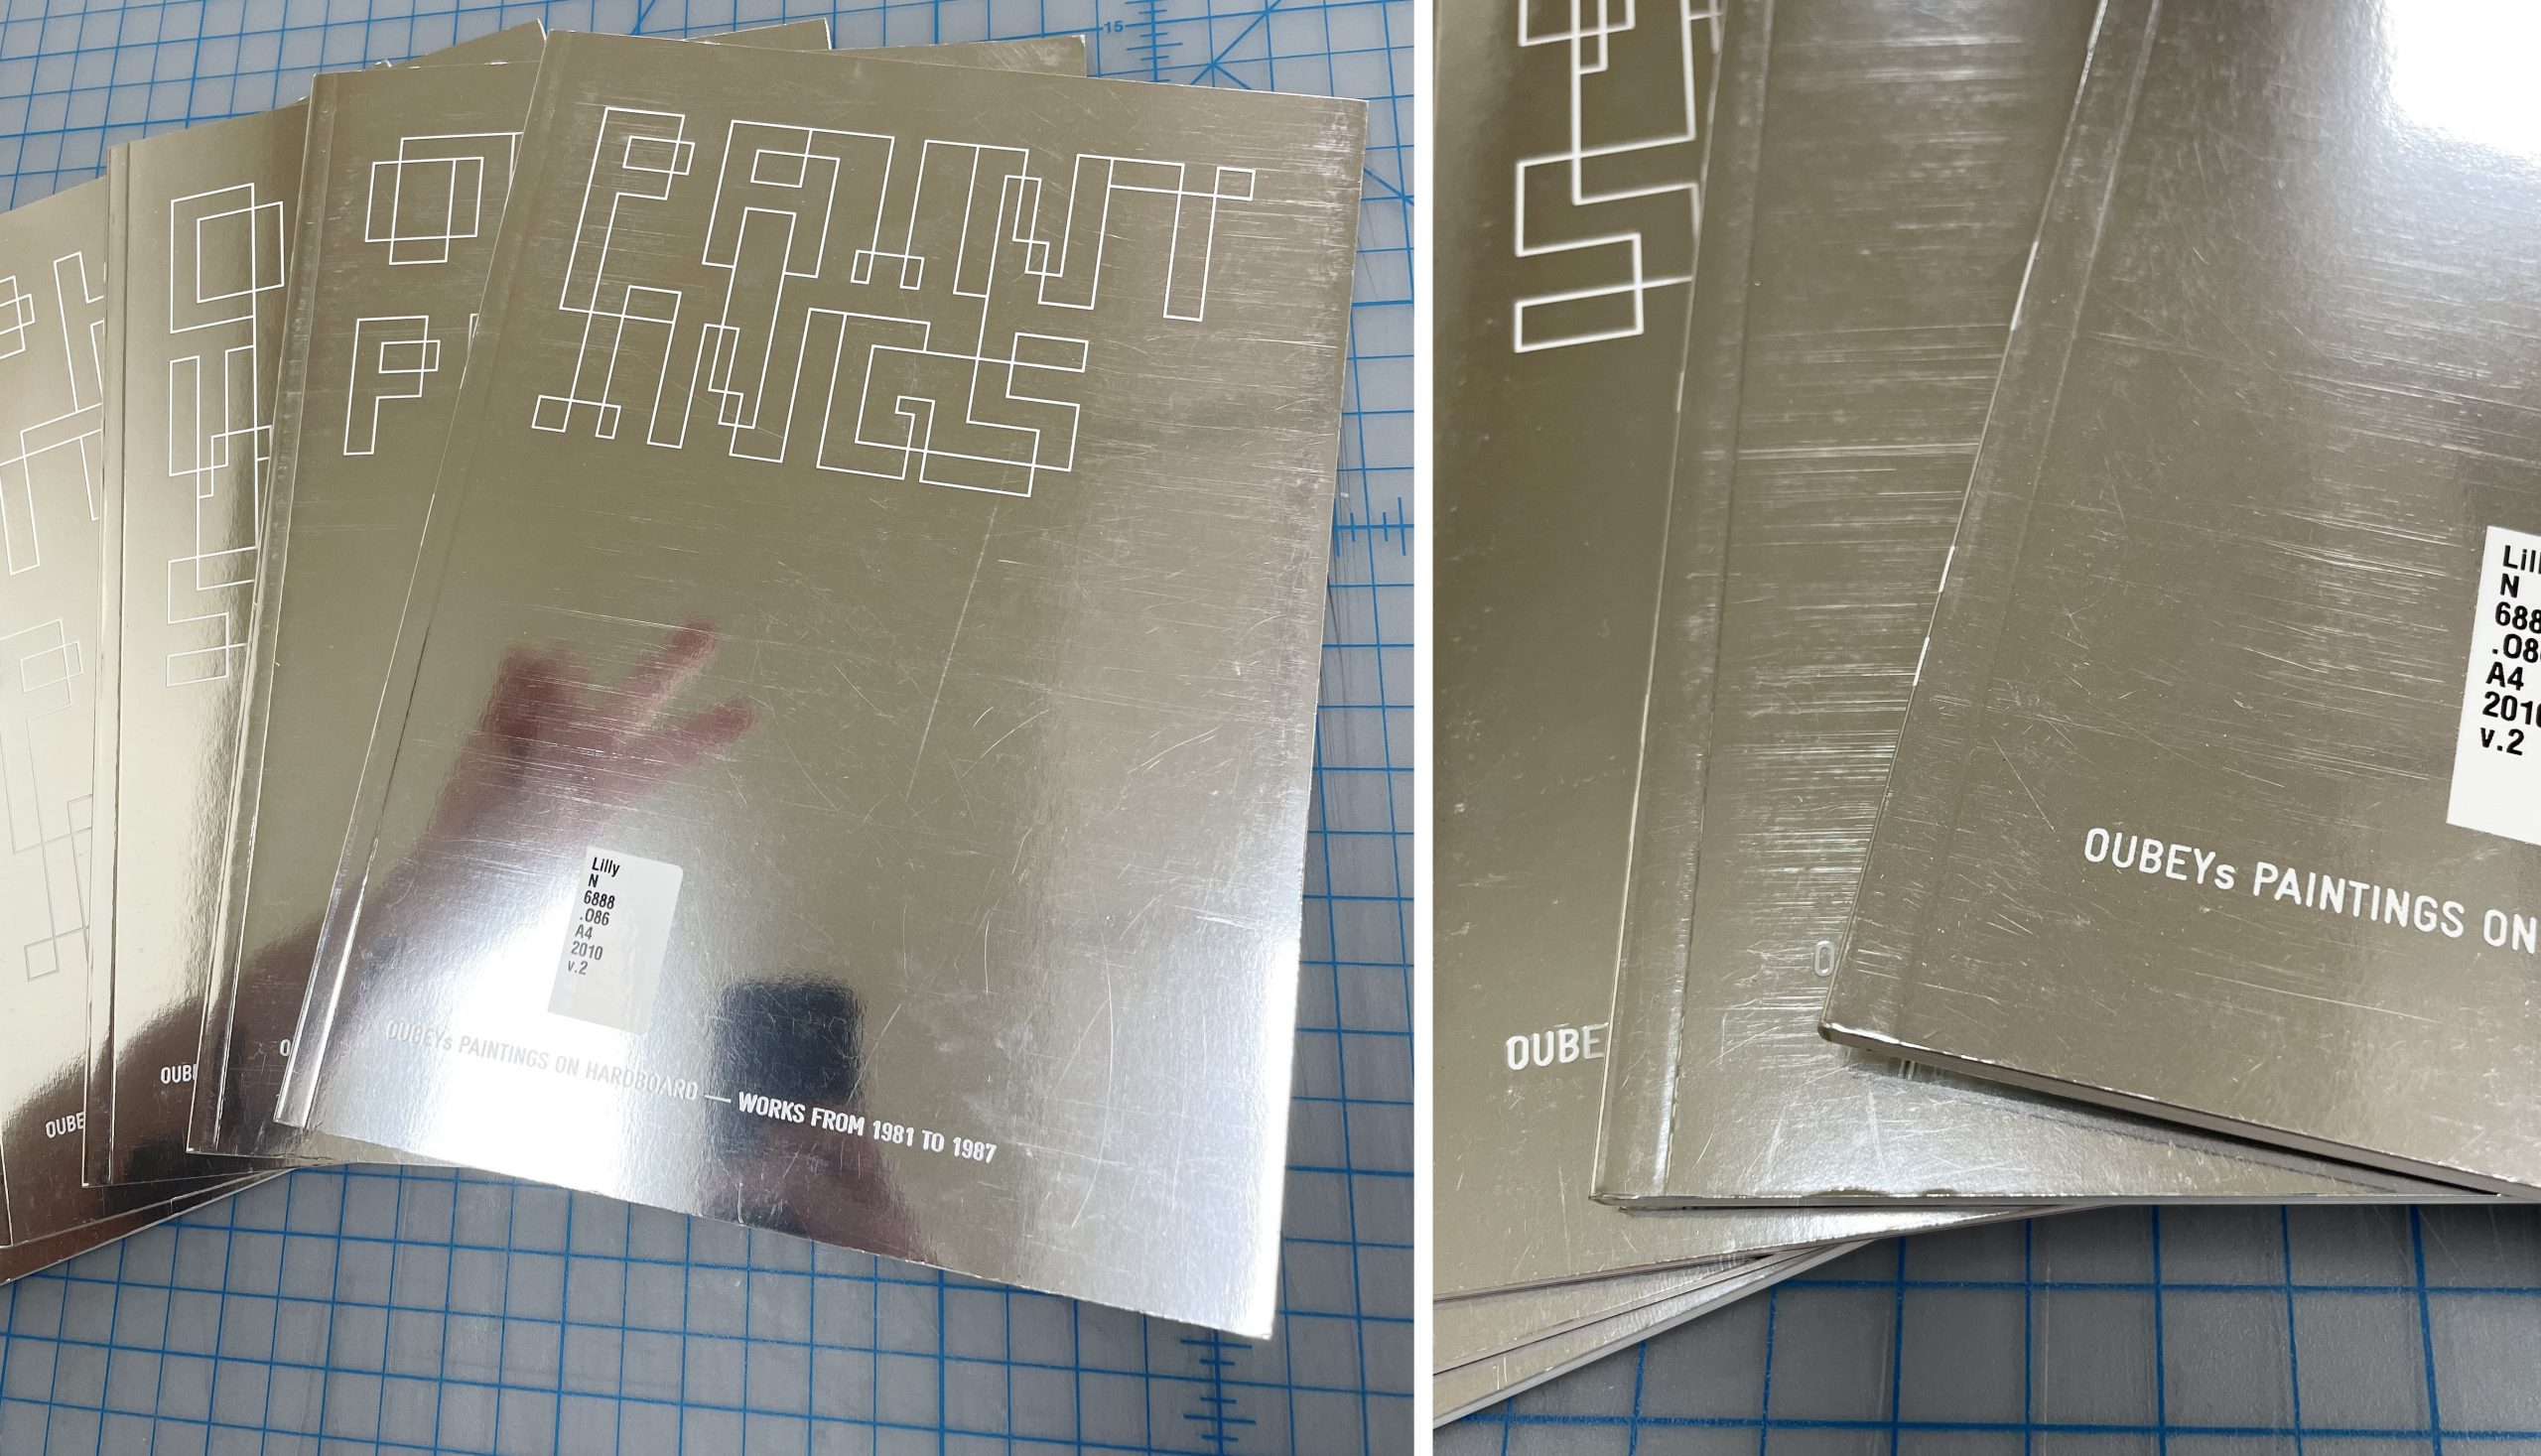
As you’ve probably noticed, this is not simply a book. “Oubey: Mindkiss” is made up of a sculptural slipcase containing five separate books.
Each book is devoted to the work of t late artist Oubey and is organized by the medium of the work or the time period the work was made.
The piece is clearly a work of art in itself. This is all the more evident by the fact that it has won multiple awards for its design. However, there are features of this item that have to be addressed from the view of a conservator, rather than one of an artist.
The Concerns
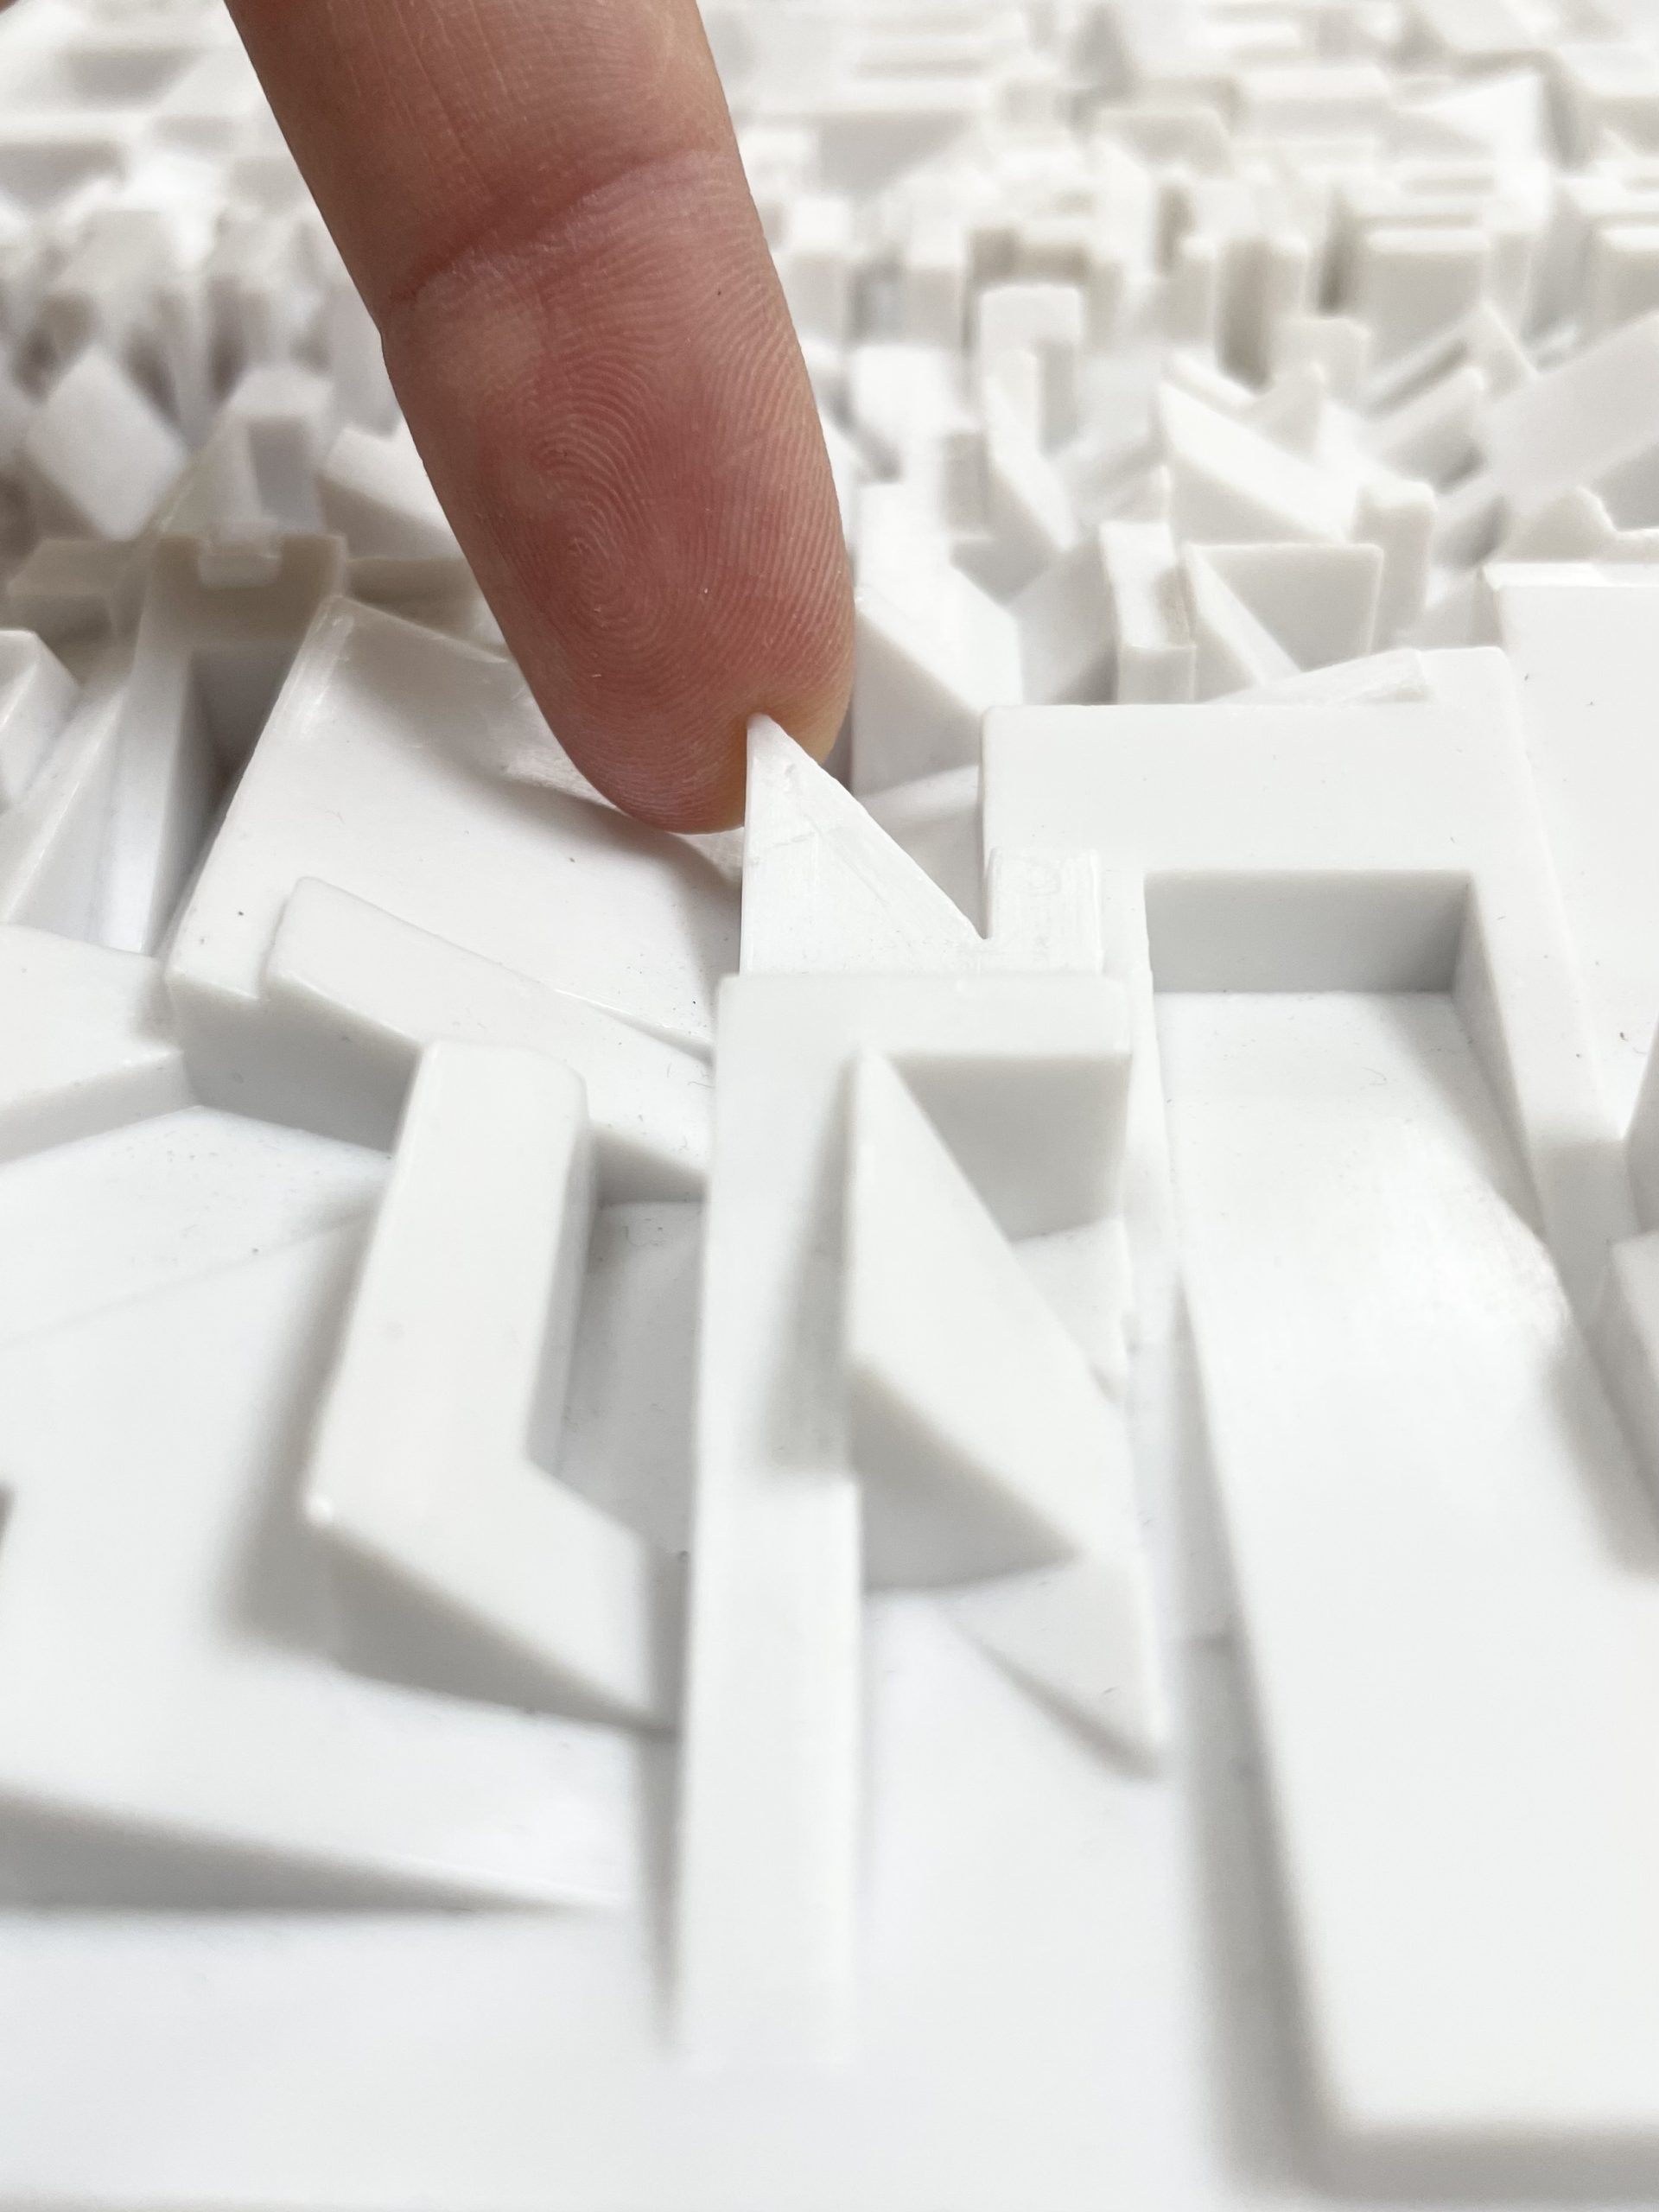
For one, the sculptural top of the slipcase consists of shapes and edges that are noticeably sharp. Pair that with the hard plastic material it’s made of, and you have an item that is bound to do some damage.
I am mostly referring to the damage the slipcase would do to any object placed beside it, but honestly this slipcase could probably hurt your hands as well if not handled carefully.
One of many pointy bits
If this item were to sit as is on a shelf next to other items as normal, there is no way the stiff plastic edges wouldn’t eventually catch, snag, or tear the item beside it.
Another common problem with slipcases is how easily the books within them can fall out. These books are no exception due to the slippery, metallic material they are covered with. That combined with the equally slippery plastic case means the books have an especially high risk of sliding around.
Additionally, the plastic of the slipcase might be doing damage to the books inside of it over time. Although the books are still reflective and metallic (I provided proof in the following photo), if you look at the covers more closely you can see many horizontal scratch marks across the surface of each cover.
Still a decent mirror
This observation is more of an assumption than a proven fact, but my guess is that these scratch marks are the result of the repetitive in and out motion of the books when they are removed or inserted in to the slipcase. The books fit rather snugly into the case, so they could be rubbing up against the inside whenever they move.
So, what can a conservation specialist do?
The Conclusion
Unfortunately, I can’t fix the issue regarding the covers of the books. Even if I knew how of a way treat metallic coatings (which I certainly don’t), something would still have to be done about the material of the slipcase rubbing up against the covers in the first place. An extreme solution would be to refrain from taking the books out of the slipcase at all, but then future readers would lose access to a significant portion of the information this item has to offer.
On a more positive note, something can be done about the nature of the slipcase. Luckily that solution is simple. We just make a box for it.
Does it feel a bit like hiding away a piece of art? Sure. However, as a library, one of our priorities is maintaining our collections while providing access to them. Making a box will protect our collections while also insuring that “Oubey: Mindkiss” is safer to handle for future patrons. And that’s a win for everyone.
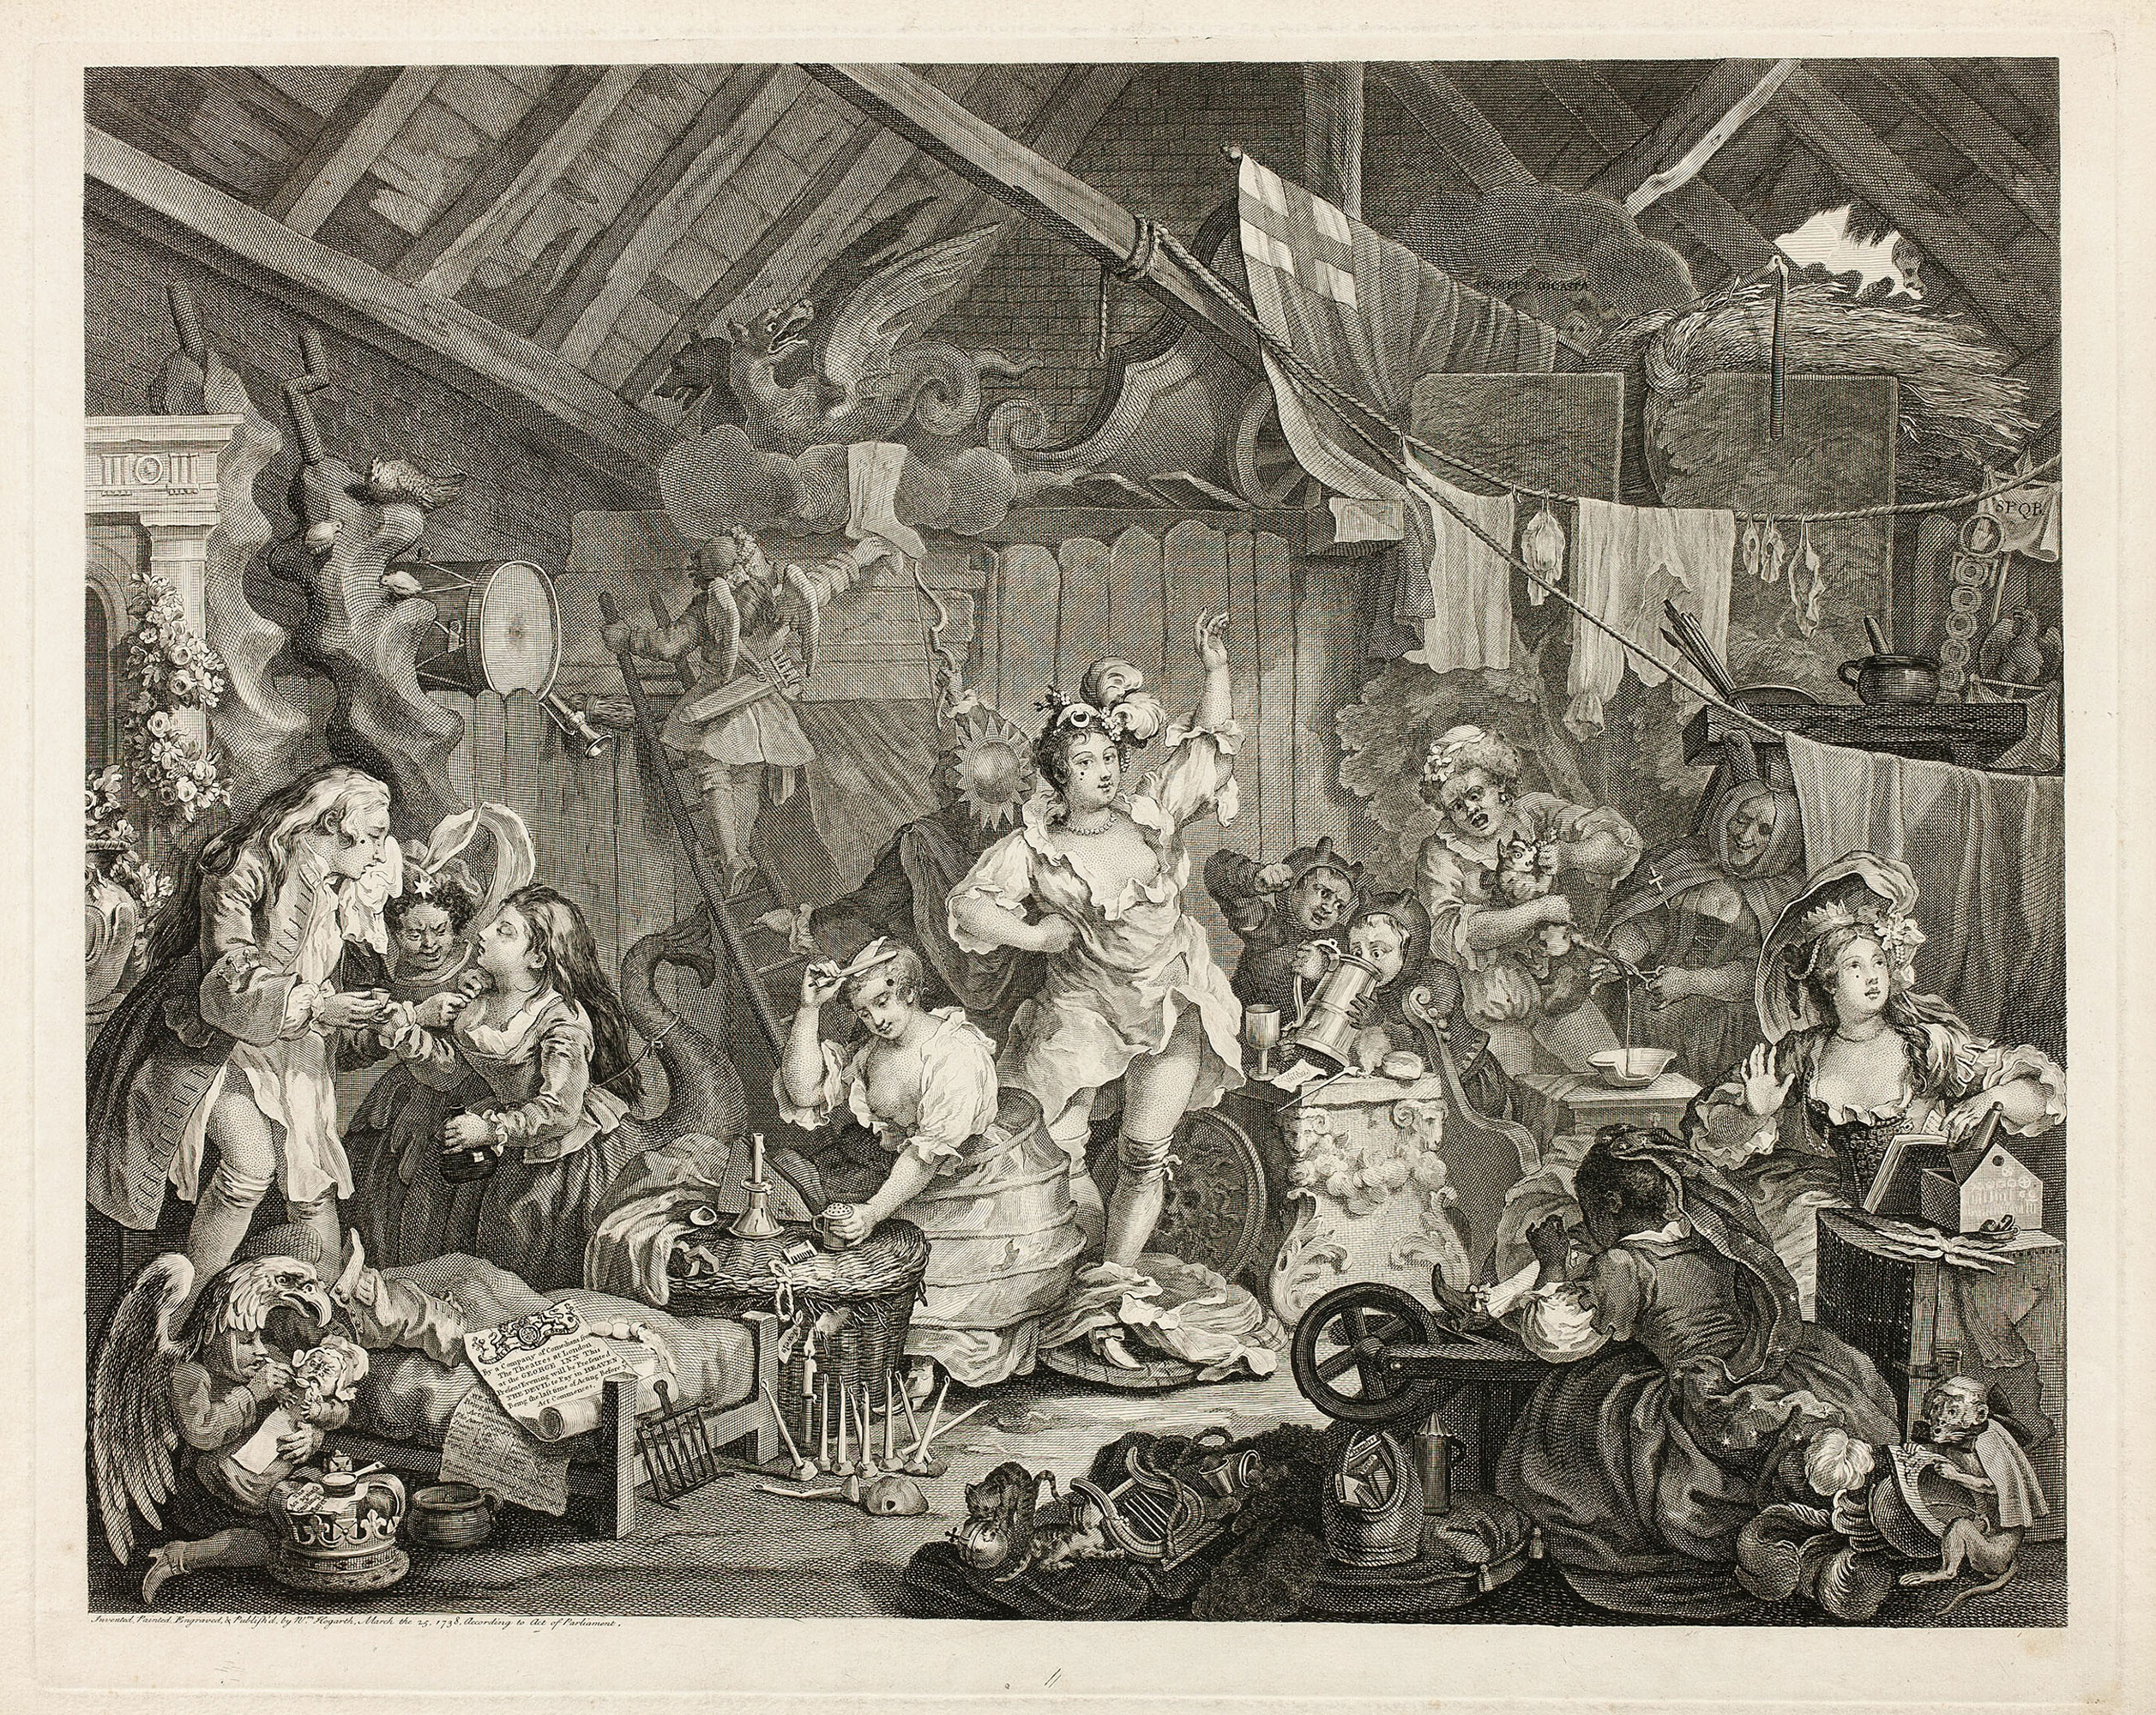
For the last few months, I have been working on cleaning and stabilizing a very large (25″ x 19″) and fascinating book.
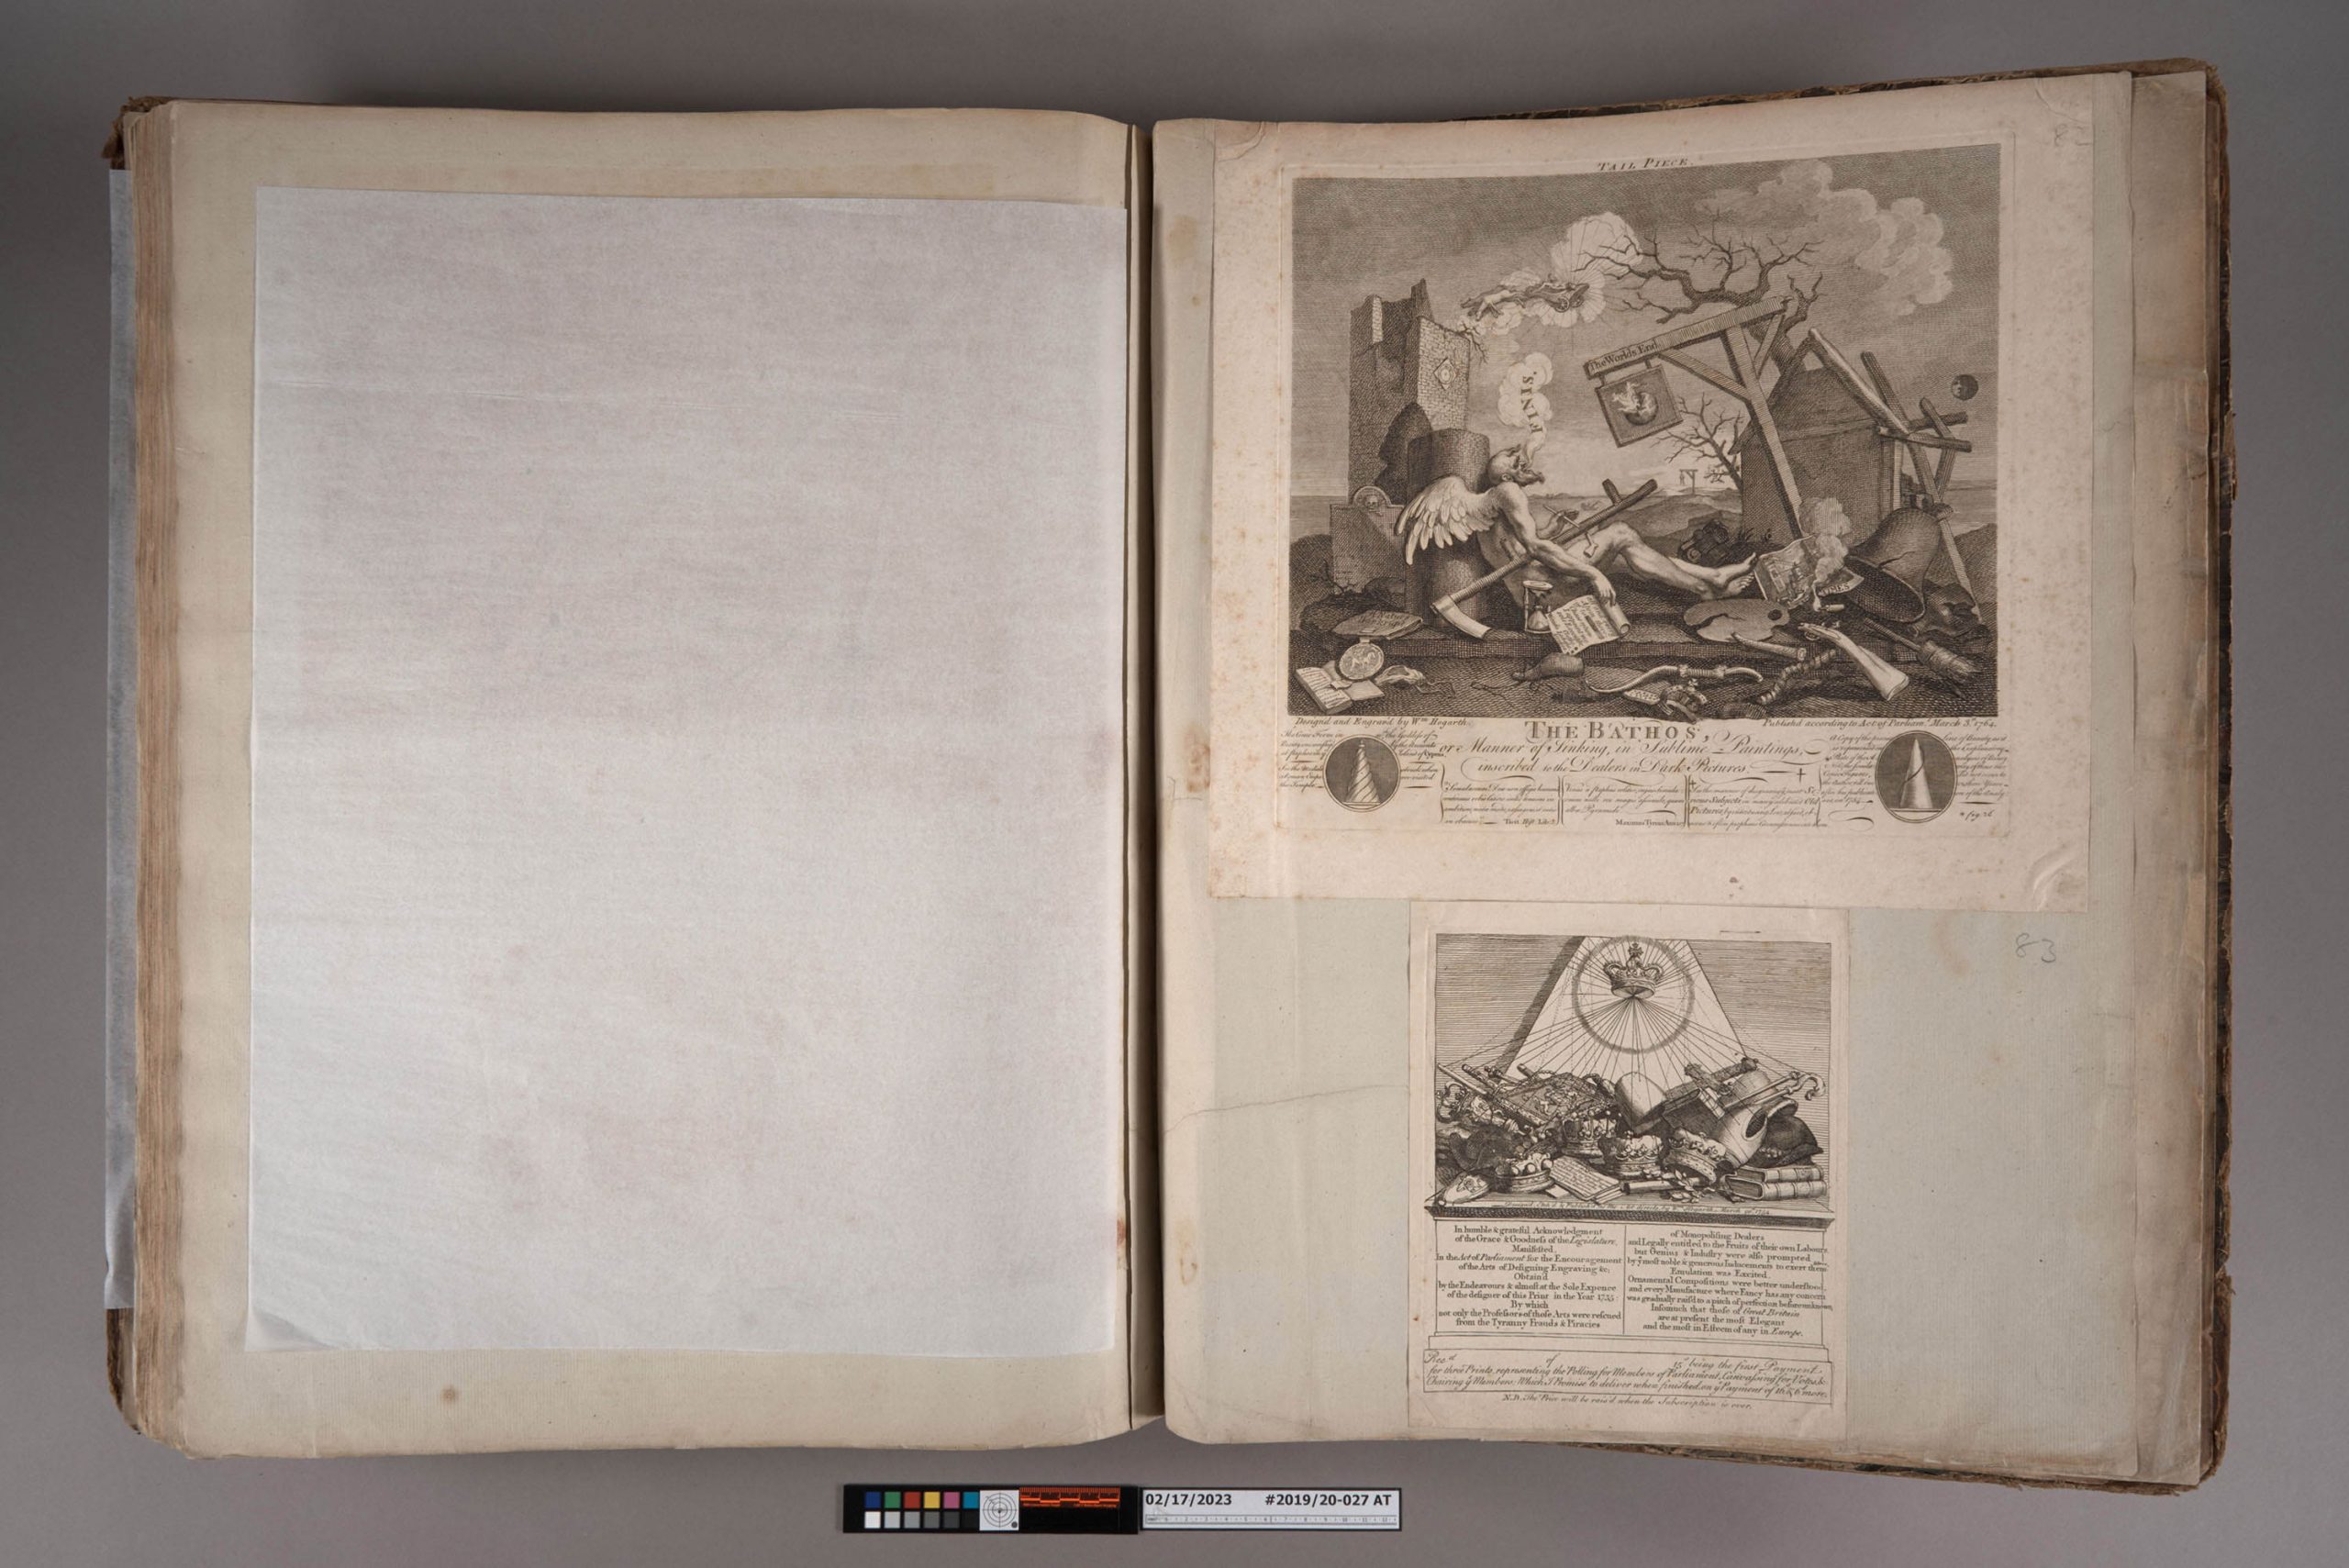
This binding contains a collection of 83 engravings, in various sizes, by William Hogarth (1697 – 1764). This item was formerly owned by Frank Baker (1910-1999), a faculty member at Duke. Hogarth was an English artist known best for his satirical works depicting morality and social criticism. These works were first executed as paintings and then sold as engravings by subscription. The prints are remarkable and capture so many small details of English life in the 18th century. Interestingly, Hogarth’s work was so widely pirated that he fought to obtain copyright protection and the Copyright Act passed by Parliament in 1735 is known as the Hogarth Act.
In order to make these prints available to patrons, the book needed quite a bit of cleaning and mending. Several of the pages at the front and back were detached.
Before and after surface cleaning
The paper was so covered in surface grime that your fingers would become black from just turning pages, so I spent several weeks just surface cleaning everything. The resulting change was pretty dramatic.
With the tears along the edges mended, and the loose sheets reattached, this items is a little less daunting and safer to handle.
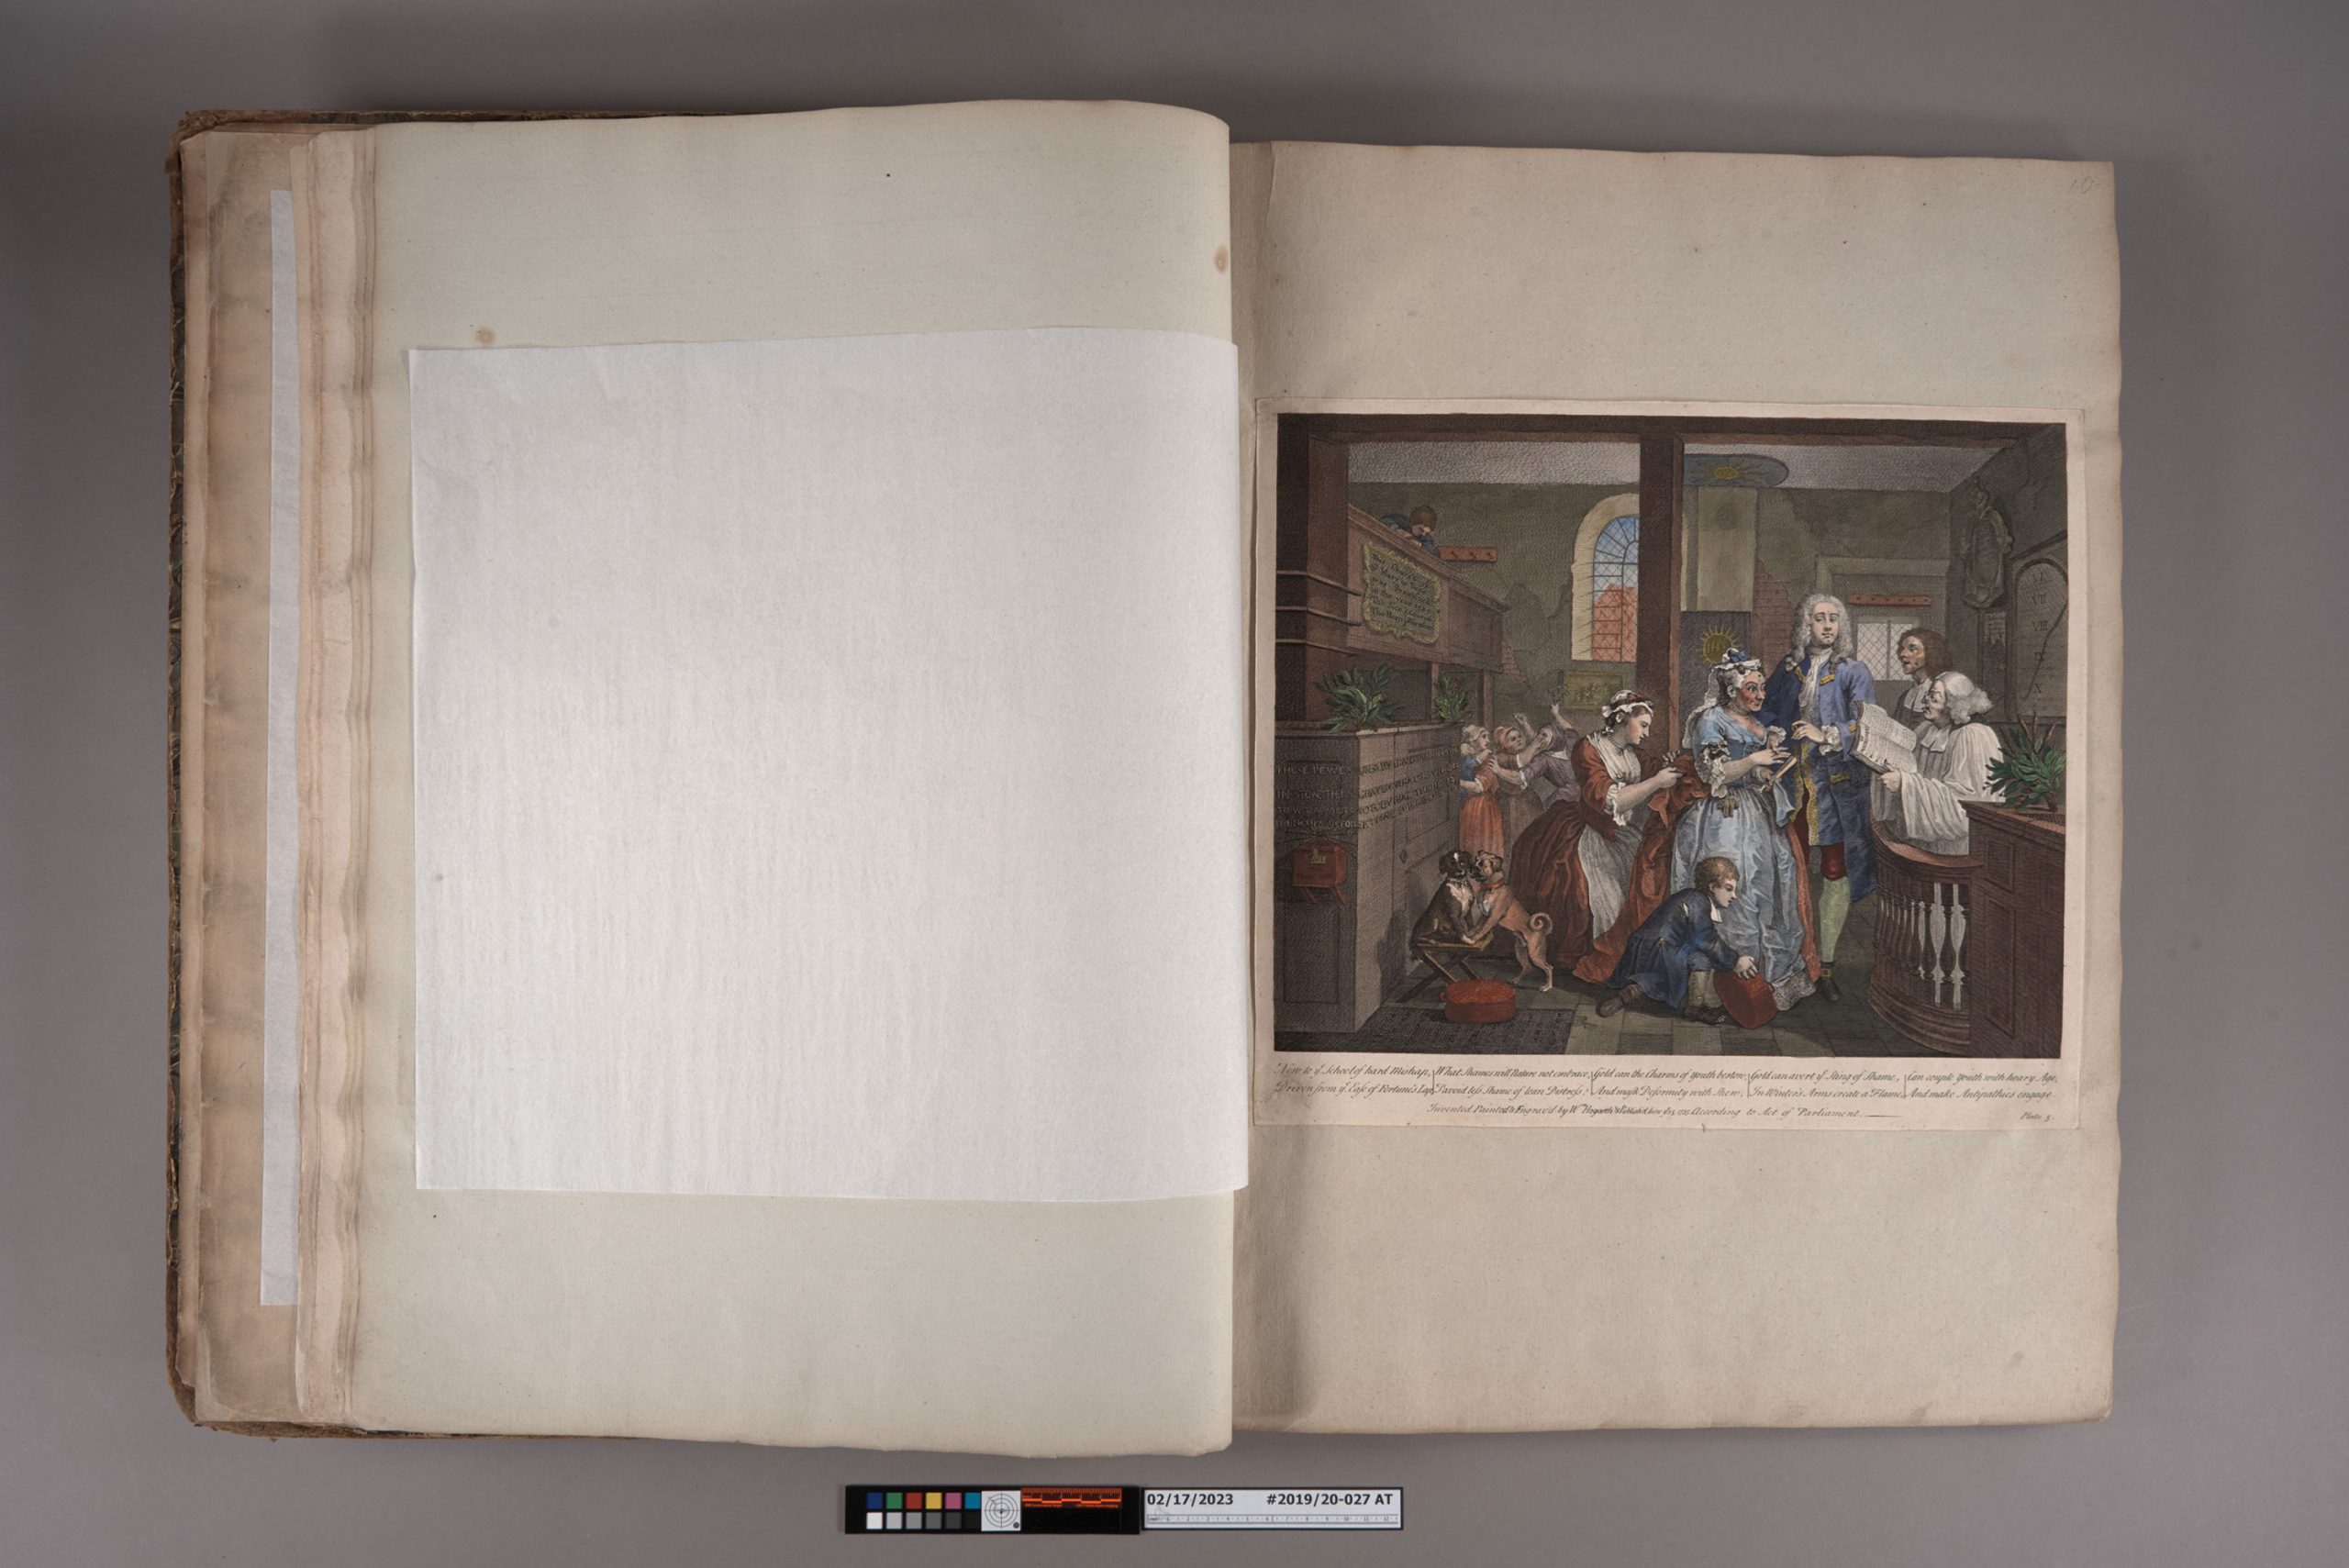
Many of the prints are large enough that they are simply sewn into the binding, but the smaller prints are mounted at the corners to larger sheets. Some of the smaller prints had become detached. Only a few of the prints in the volume have hand-applied color like plate 5 from ‘A Rake’s Progress‘ (above).
Loose prints were reattached with wheat starch paste.
During my initial review, I thought that the first of four plates in the Election series was torn along the top (or gutter of the binding).
Upon closer inspection though, I discovered that the Election plate was whole – this torn stub was from something else.
Dr. Baker’s typewritten inventory doesn’t list another print in this location and the numbers penciled on each page aren’t interrupted, so it seems like this one has been missing for quite a while. Looking at the details of exposed wooden rafters that are depicted, this fragment could be from one of Hogarth’s more famous works, “Strolling Actresses Dressing in a Barn”.
It is hard to know for sure, but we will be noting the fragment’s location in the catalog record.
Apart from mending and reattaching the prints themselves, I also spent some time flattening the original interleaving. The binder had included sheets of thin, laid paper by affixing them to the verso of each leaf using dots of red wax. The interleaving had become very badly creased, torn, and in some cases was missing entirely.
During treatment, I flattened and repaired the interleaving as much as possible. New loose interleaving sheets were added for the openings where original interleaving was missing or had major losses.
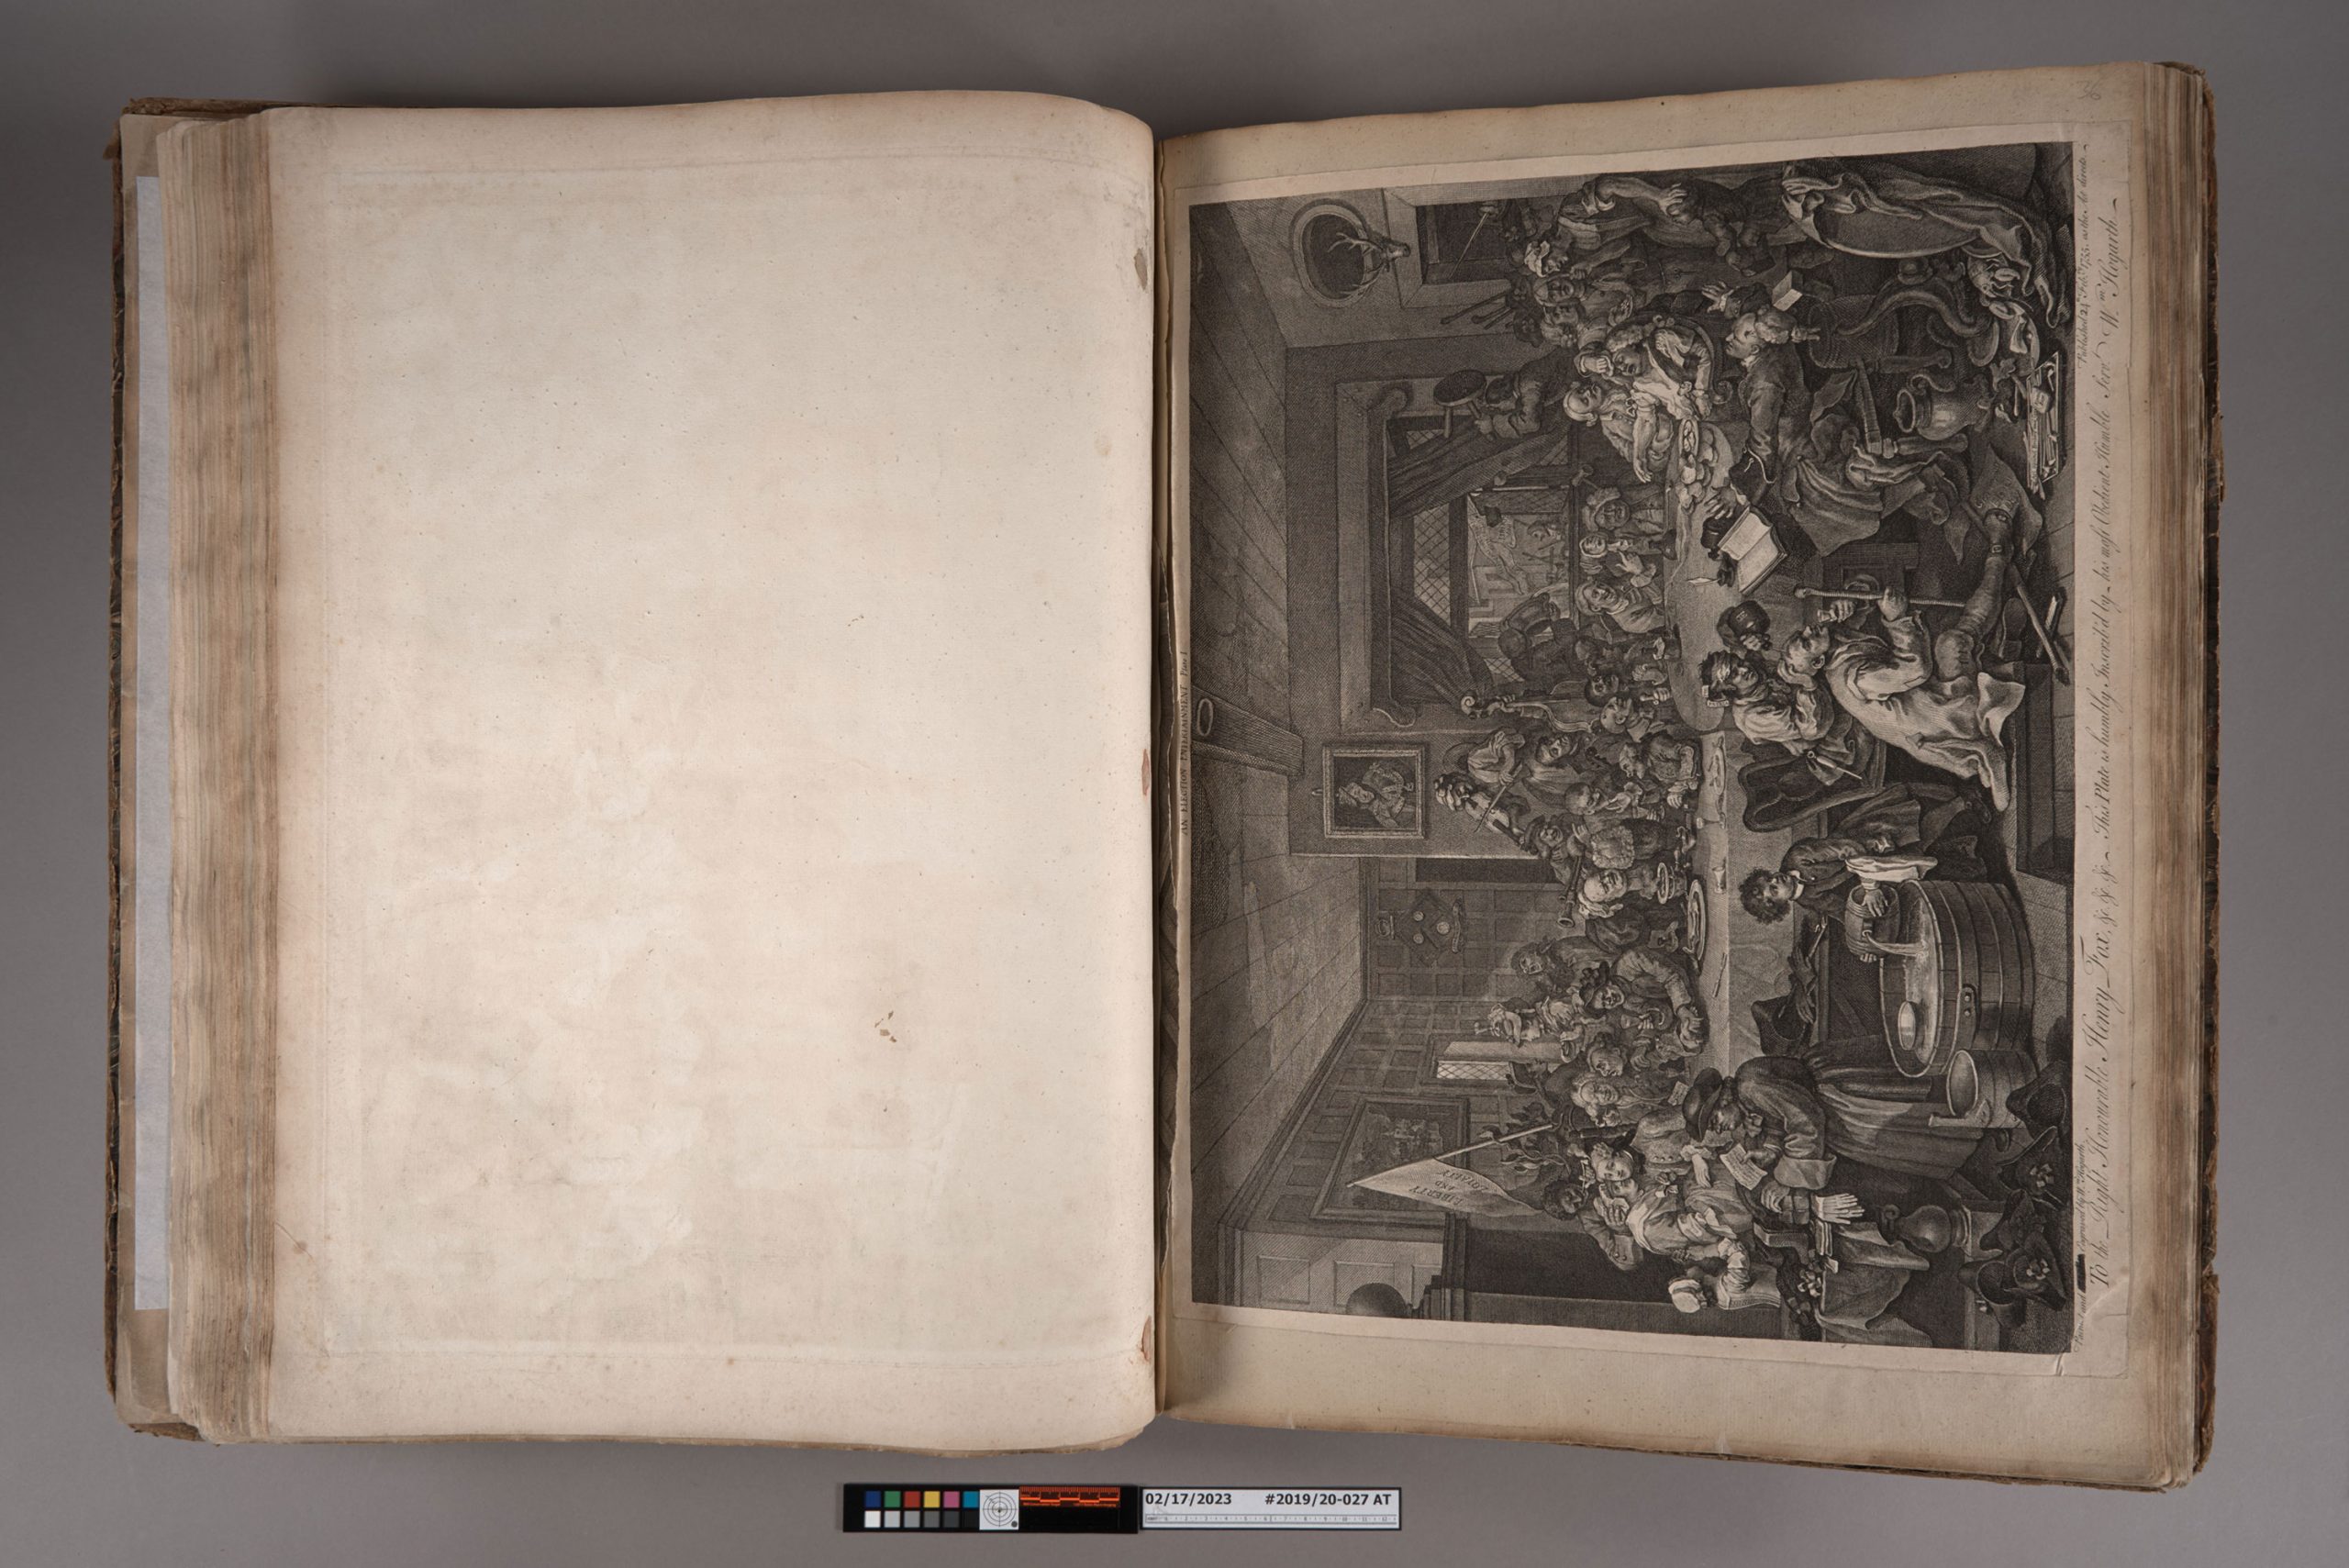
The top engraving above, titled “Tailpiece, or The Bathos”, is Hogarth’s last engraving, published just eight months before his death. It depicts the figure of Time exhaling his last breath among ruins. In the advertisements for this print that ran in the St James’s Chronicle for April 14, 1764, Hogarth wrote that it should “serve as a Tail-Piece to all the Author’s Engraved Works, when bound up together”.
The previous owner who had these prints collected and bound honored Hogarth’s wishes.