Category Archives: Conservation

A Tiny Press Calls for a Tiny Book

Over the past year, I’ve been working on an exhibit revolving around the work I do in Conservation Services and the Collection Services Division as a whole. As luck would have it, Beth has this wonderful miniature book press that fit perfectly into the display case I was in charge of designing.

But what is a book press without a book to press? With that in mind, I took this opportunity to make my first miniature book.

First, I made a tiny book block.

I left the paper longer than it needed to be so that I could weigh the pages down while I sewed it all together. Once that was done, I decided it would be nice to try and round the spine. This proved to be a bit difficult with the normal tools we use for rounding.

I felt I was more likely to just crush the entire spine with the hammer than actually round it. A Teflon folder made for a safer option for this tiny spine.

Next, I needed to trim the book block to a more appropriate size. I started to cut it with just a scalpel and a ruler, but as you can see that wasn’t really going well or looking particularly nice.

I decided instead to try to trim the book in a more traditional method. This meant placing the book block into a press and using a sharp, flat blade to cut across the pages evenly.

This was much more successful and I ended up with a nice and neat book block.

After that, I covered the spine with a Japanese tissue for strength. Then I added a textile spine lining as well as a paper lining for additional support.

Now I could make the covers, which ended up being the easiest part of this whole process.

The hardest part came next, which was casing the book block into the covers. Because the book is so tiny, it was difficult to make sure the book didn’t move out of place as I glued up the paper that would connect the book block to the covers.

I eventually managed to figure it out and put the book in a press to dry flat.

I have to say it looks a bit silly in the full-sized press.

But once it was dry, the book was done!

It certainly fits in much better with a press its own size.

You can check out this tiny press with its tiny book, along with the rest of the great displays my colleagues put together, in the exhibit The Library Uncovered: Behind the Scenes with Collection Services that is currently open to the public in the Jerry and Bruce Chappell Family Gallery in Perkins.

The Week in Conservation: We’ve Been Busy!

It’s been a busy week this week in the Underground. We hosted a tour for the Class of 1990, who had their 20th Reunion a bit late due to the pandemic.

Tour group listens to department head
Our first in-person tour of the new academic year.

We have a tremendous amount of mold recovery work in the lab at the moment. We have been drying and vacuuming materials pretty much non-stop for several weeks. There is no light at the end of the tunnel yet, but every page gets us closer.

vacuuming mold spores from paper
Vacuuming mold is both satisfying and disappointing. It’s like the Schrödinger’s Cat of treatments.

We had an all-hands-on-deck repair day for the circulating collections backlog. With no summer students this year, we had a lot of materials waiting for their 15 minutes of fame aka Quick Repair. We got through 107 items in half a day.

book truck with finished repairs
Quick repairs are very satisfying and great for the stats.

Speaking of backlogs…Technical Services has been working through a lot of musical scores lately and they have backed up a bit in the lab. This workflow is next on our list of “get it done” projects.

Book truck with music scores ready for binding.
Can scores have existential crises?

Preparations for the Lilly Library renovation started back in 2019 and really hasn’t stopped. We are getting close to finishing a huge project to provide enclosures for items going to the Library Service Center for the duration of the renovation project. Tyvek envelopes are a quick and economical enclosure for brittle and fragile materials that we can’t treat before going off site.

book truck with enveloped collection material
So. Many. Envelopes.

Our student assistant is back, and plowing through work. Look at all the brittle pamphlets she has put into binders this week. We love seeing work pile up on the QC shelf.

A shelf of finished pamphlets await quality control
We love seeing the QC shelf pile up with work.

And of course, at the time of writing this post, we are experiencing the remnants of Hurricane Ian. We spent Thursday afternoon putting out absorbent pads around our known leaks, and making sure everyone knew the disaster team’s contact information.

Map of Hurricane Ian
Hurricane Ian’s impact. Image Raleigh News & Observer

For organizations looking for recovery help, here are some resources:

We are thinking of all our colleagues in Florida whose institutions took a direct hit, as well as everyone who has experienced the ravages of this storm.

When the Paper is too Nice

There’s something special about a book made with handmade paper. You don’t come across it too often in general collections, but, when you do, you want to take extra good care of it. This week a beautiful example of this arrived at the lab in the form of The Poems of Sappho, printed in 1910. As you can see in the images below, the book was in rather rough shape. I could tell it would be the perfect candidate for a new case. This means I would need to make new covers for this book.

Upon opening it, I immediately noticed the lovely deckled edges of the paper and what appeared to be a watermark.

A watermark is an image or design that is impressed into the paper during the papermaking process. This is easier to see when you hold the paper up to a light like so.

The main purpose of a watermark is to identify the papermaker; however, this watermark goes even further and tells us where the paper was made as well. In this case, the paper was handmade in Italy by a group called “The PM co”, which could possibly refer to The Paper Mills Company.

Saving this paper and the vital information on it is going to be my priority as I treat this book. This should be relatively straightforward, but what happens when two of these pages have been glued to the covers?

Preserving the Paper

When the book was bound, the pastedowns were made with the first and last sheet of the textblock of the book rather than using a separate decorative paper.

In order to make a new case for a book, I have to remove the old covers.  I must lift the original handmade paper from the front and back boards to retain it. This can be done by taking an exceptionally thin metal spatula and running it back and forth under the paper to loosen and separate the paper from the covers.

This can be a tricky and time-consuming process if the paper is old and brittle, or if the paper is well adhered to the covers and doesn’t want to come off. Luckily, both pages cooperated with me and I managed to remove the covers without damaging the paper.

A lot of the original board material had to be lifted along with the paper, so the next step is to remove that material from the pages. Leaving it on would make it nearly impossible to neatly reattach the pastedowns when I made a new case for this book. So, I removed as much as I could mechanically before moving onto the rest of the treatment.

With the brand-new case complete, the book and it’s handmade paper are better protected and ready to be handled.

Books Can be Deceiving

As someone who repairs books for a living, the idiom “don’t judge a book by its cover” can have a much more literal meaning than expected. I’m regularly encountering books that seem to need only one kind treatment from the outside, but then have more problems than I realized on the inside. This can be a bit frustrating when you’ve mentally prepared yourself for one kind of project and instead find yourself tackling more than you had planned for. Even so, it is especially satisfying to finish a treatment on a book that you felt was going to be complicated. In today’s blog, I’ll be sharing my most recent encounter with a book that I misjudged.

The Problem

The Perkins Library has a great number of collections of Arabic books like the ones you see below.

These books are especially striking due to the eye-catching uniformity of their spines. Outside of how aesthetically pleasing they are, there is an added benefit to the fact that all the books are identical in design. Take a look at this collection of books below. Do any of them look different than the rest?

If you happened to notice the fourth book from the left in particular, then you can see what I meant earlier by “an added benefit”. Thanks to the collections precise design, it’s all the more obvious when something isn’t quite right.

In this case, this poor book seems to have been crushed under something as well as torn along the spine. We certainly can’t leave the book to be handled by patrons in this state, so back to the lab it goes.

At this point, I had assumed the only problem I was dealing with was the crushed spine of the covers/textblock. Unfortunately for me, I didn’t realize that this book had been through more than just some extreme pressure. Right as you open the book to its title page, you’re greeted by discolored paper and some significant black speckling. The spotting continues a good 20 or so pages.

These are the tell-tale signs that not only did the book get wet at some point, but mold had made itself at home here as well.

Now, luckily this isn’t a terrible amount of mold to be dealing with. However, it does mean I have to add several more steps to my treatment before I can tackle the original issue of the crushed spine.

The Solution

Let’s say there hadn’t been any mold in this book. What would my treatment have looked like?

First, I would remove the covers so I could assess the damage done to the spine of the textblock. Once I had addressed that, I would prepare the textblock as I normally would for a recase. Finally, I would repair the covers by making a new spine piece to replace the damaged one, and reattached the textblock to the case.

Now, I will have to remove all of the mold first before I can start anything else.

Based on the dry and powdery consistency of the mold, I can tell that it is no longer active and can be safely cleaned by hand. To do so, I used a soot sponge to manually clean the mold and debris off of every page.

You can see the immediate difference before and after using the sponge on the old mold, both on the pages and the sponge itself.

The soot sponge is mostly likely also picking up dirt and dust on the pages as well, but regardless it’s clear the book needed a good cleaning.

Now that the textblock is free of the residual mold, I can finally get to the treatment I had planned at the start. This book will be back on the shelves and ready for patrons in no time!

North Korea as Seen Through Stamps

Stamp collecting, often associated with philately (or the study of stamps), is a hobby that has been around since the first postage stamp was issued by Britain in May of 1840. Since then, stamp collecting has been one of the world’s most popular hobbies, resulting in the production of over 400,000 different types of stamp by the year 2000.

Many of the stamps produced are from smaller countries seeking to bring in much needed revenue, which they achieve through the printing of limited run stamps specifically for stamp collectors. One such country happens to be North Korea. This fact came to my attention when a collection of North Korean stamp albums arrived at our lab.

The collection of stamp albums stacked on top of one another
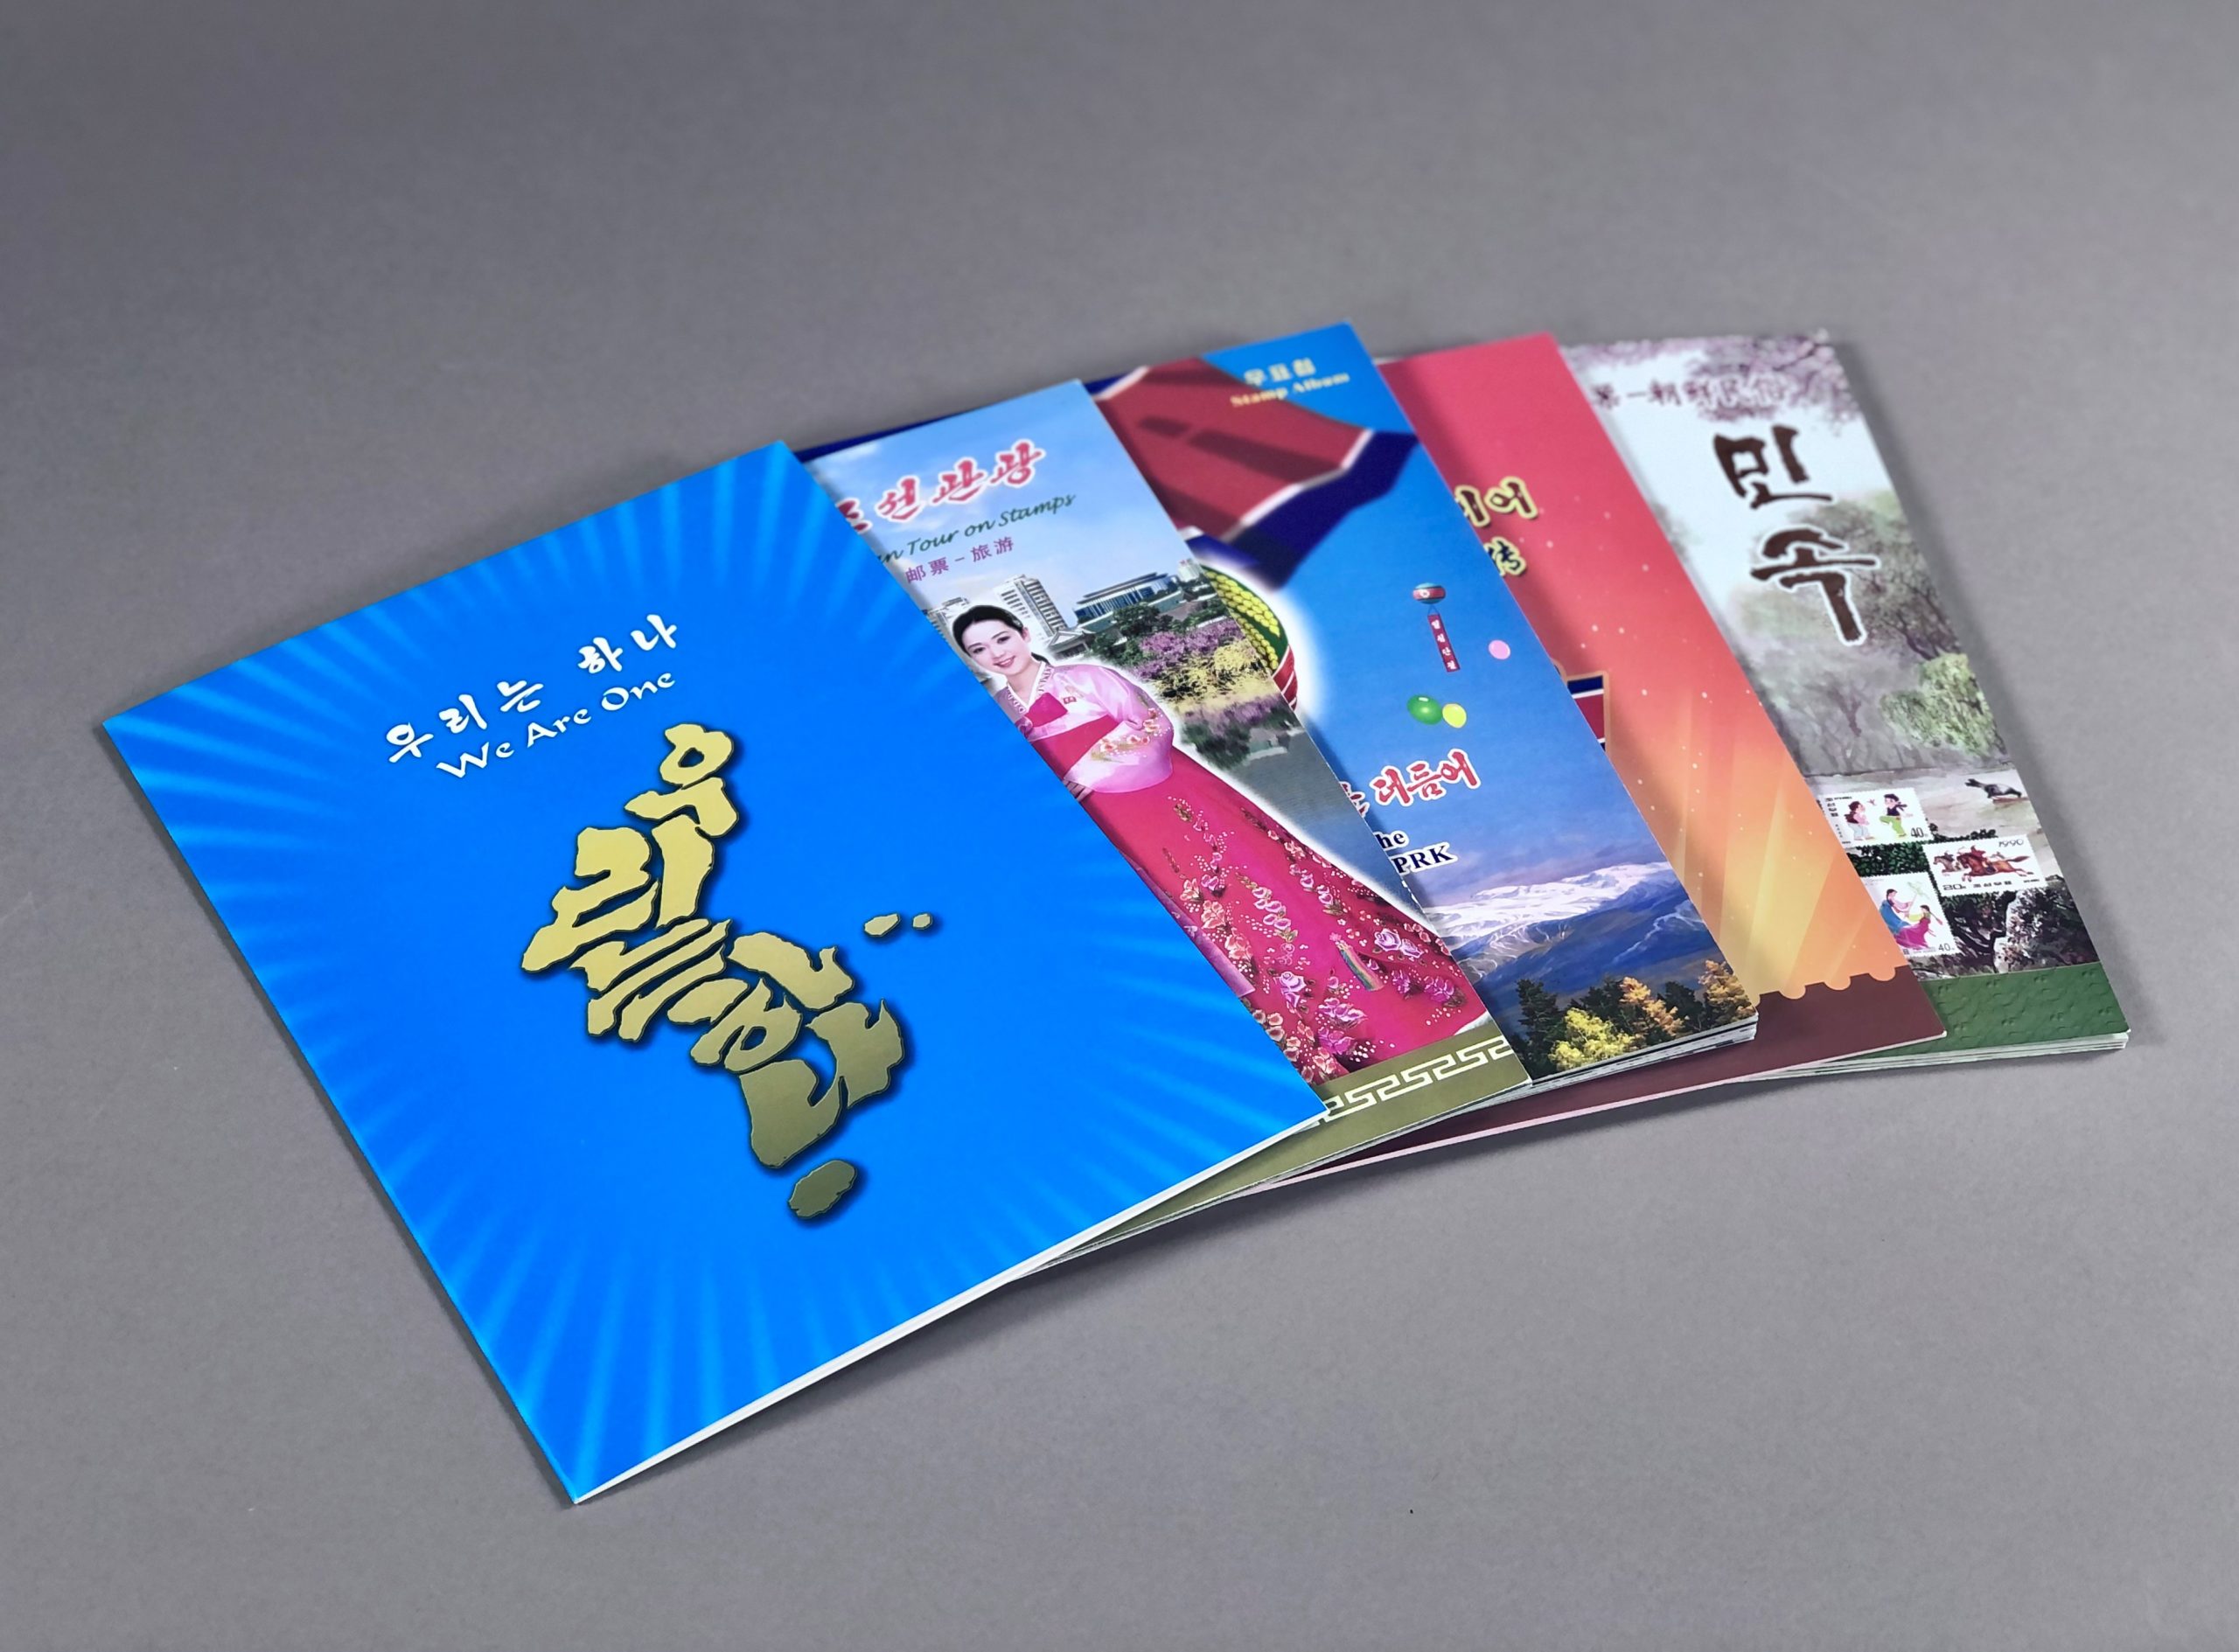
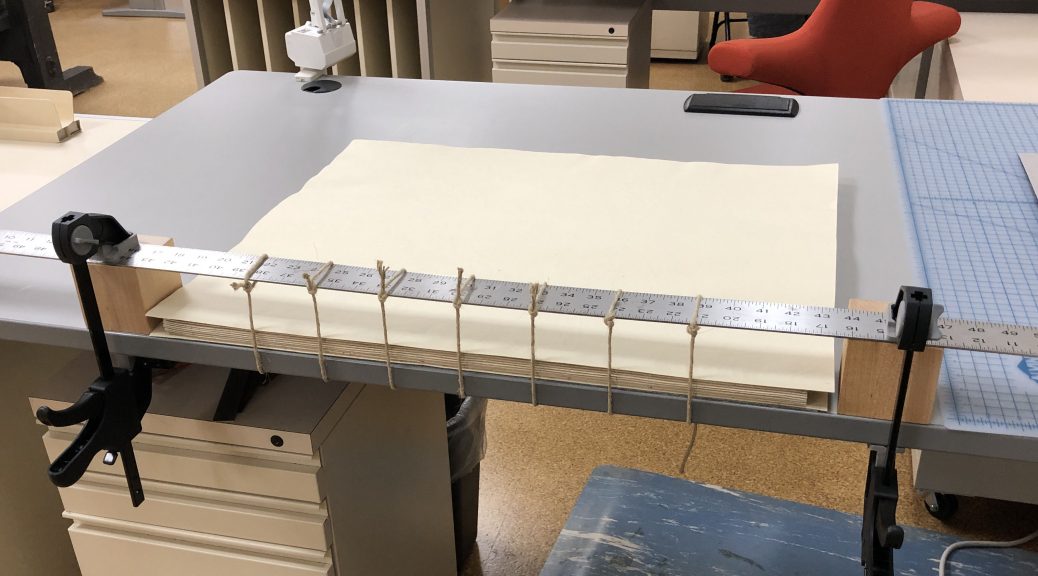
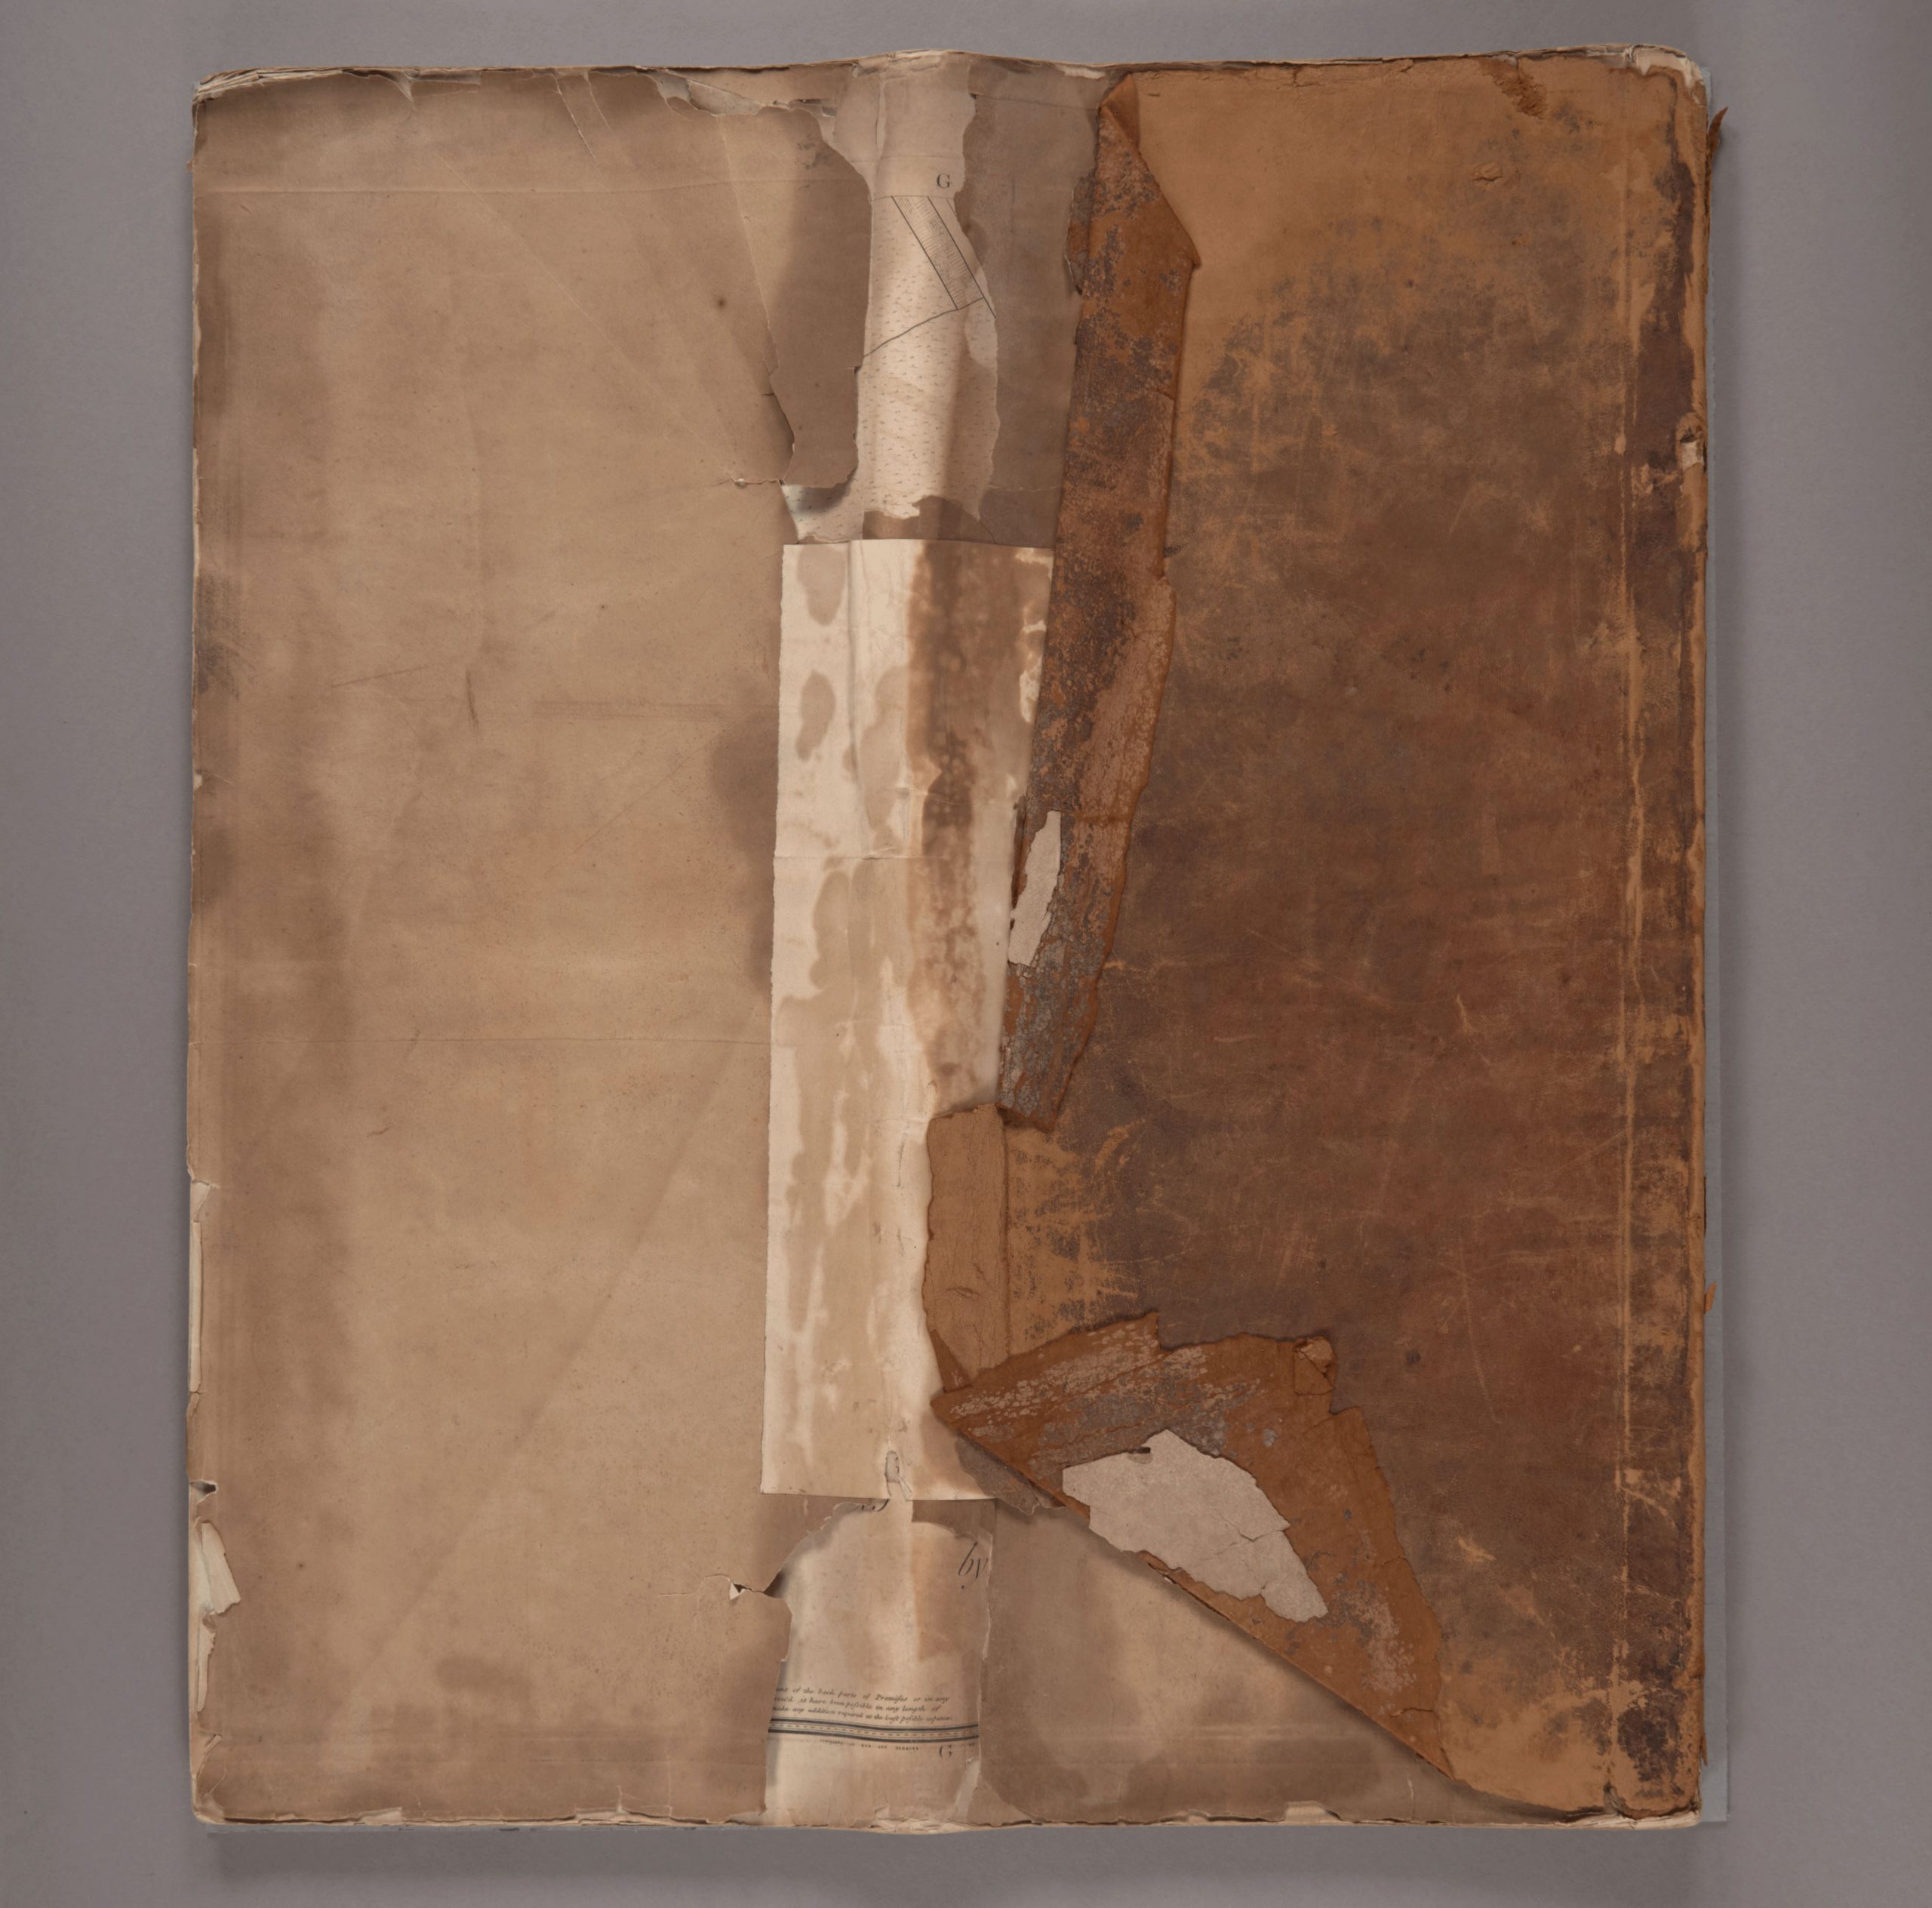
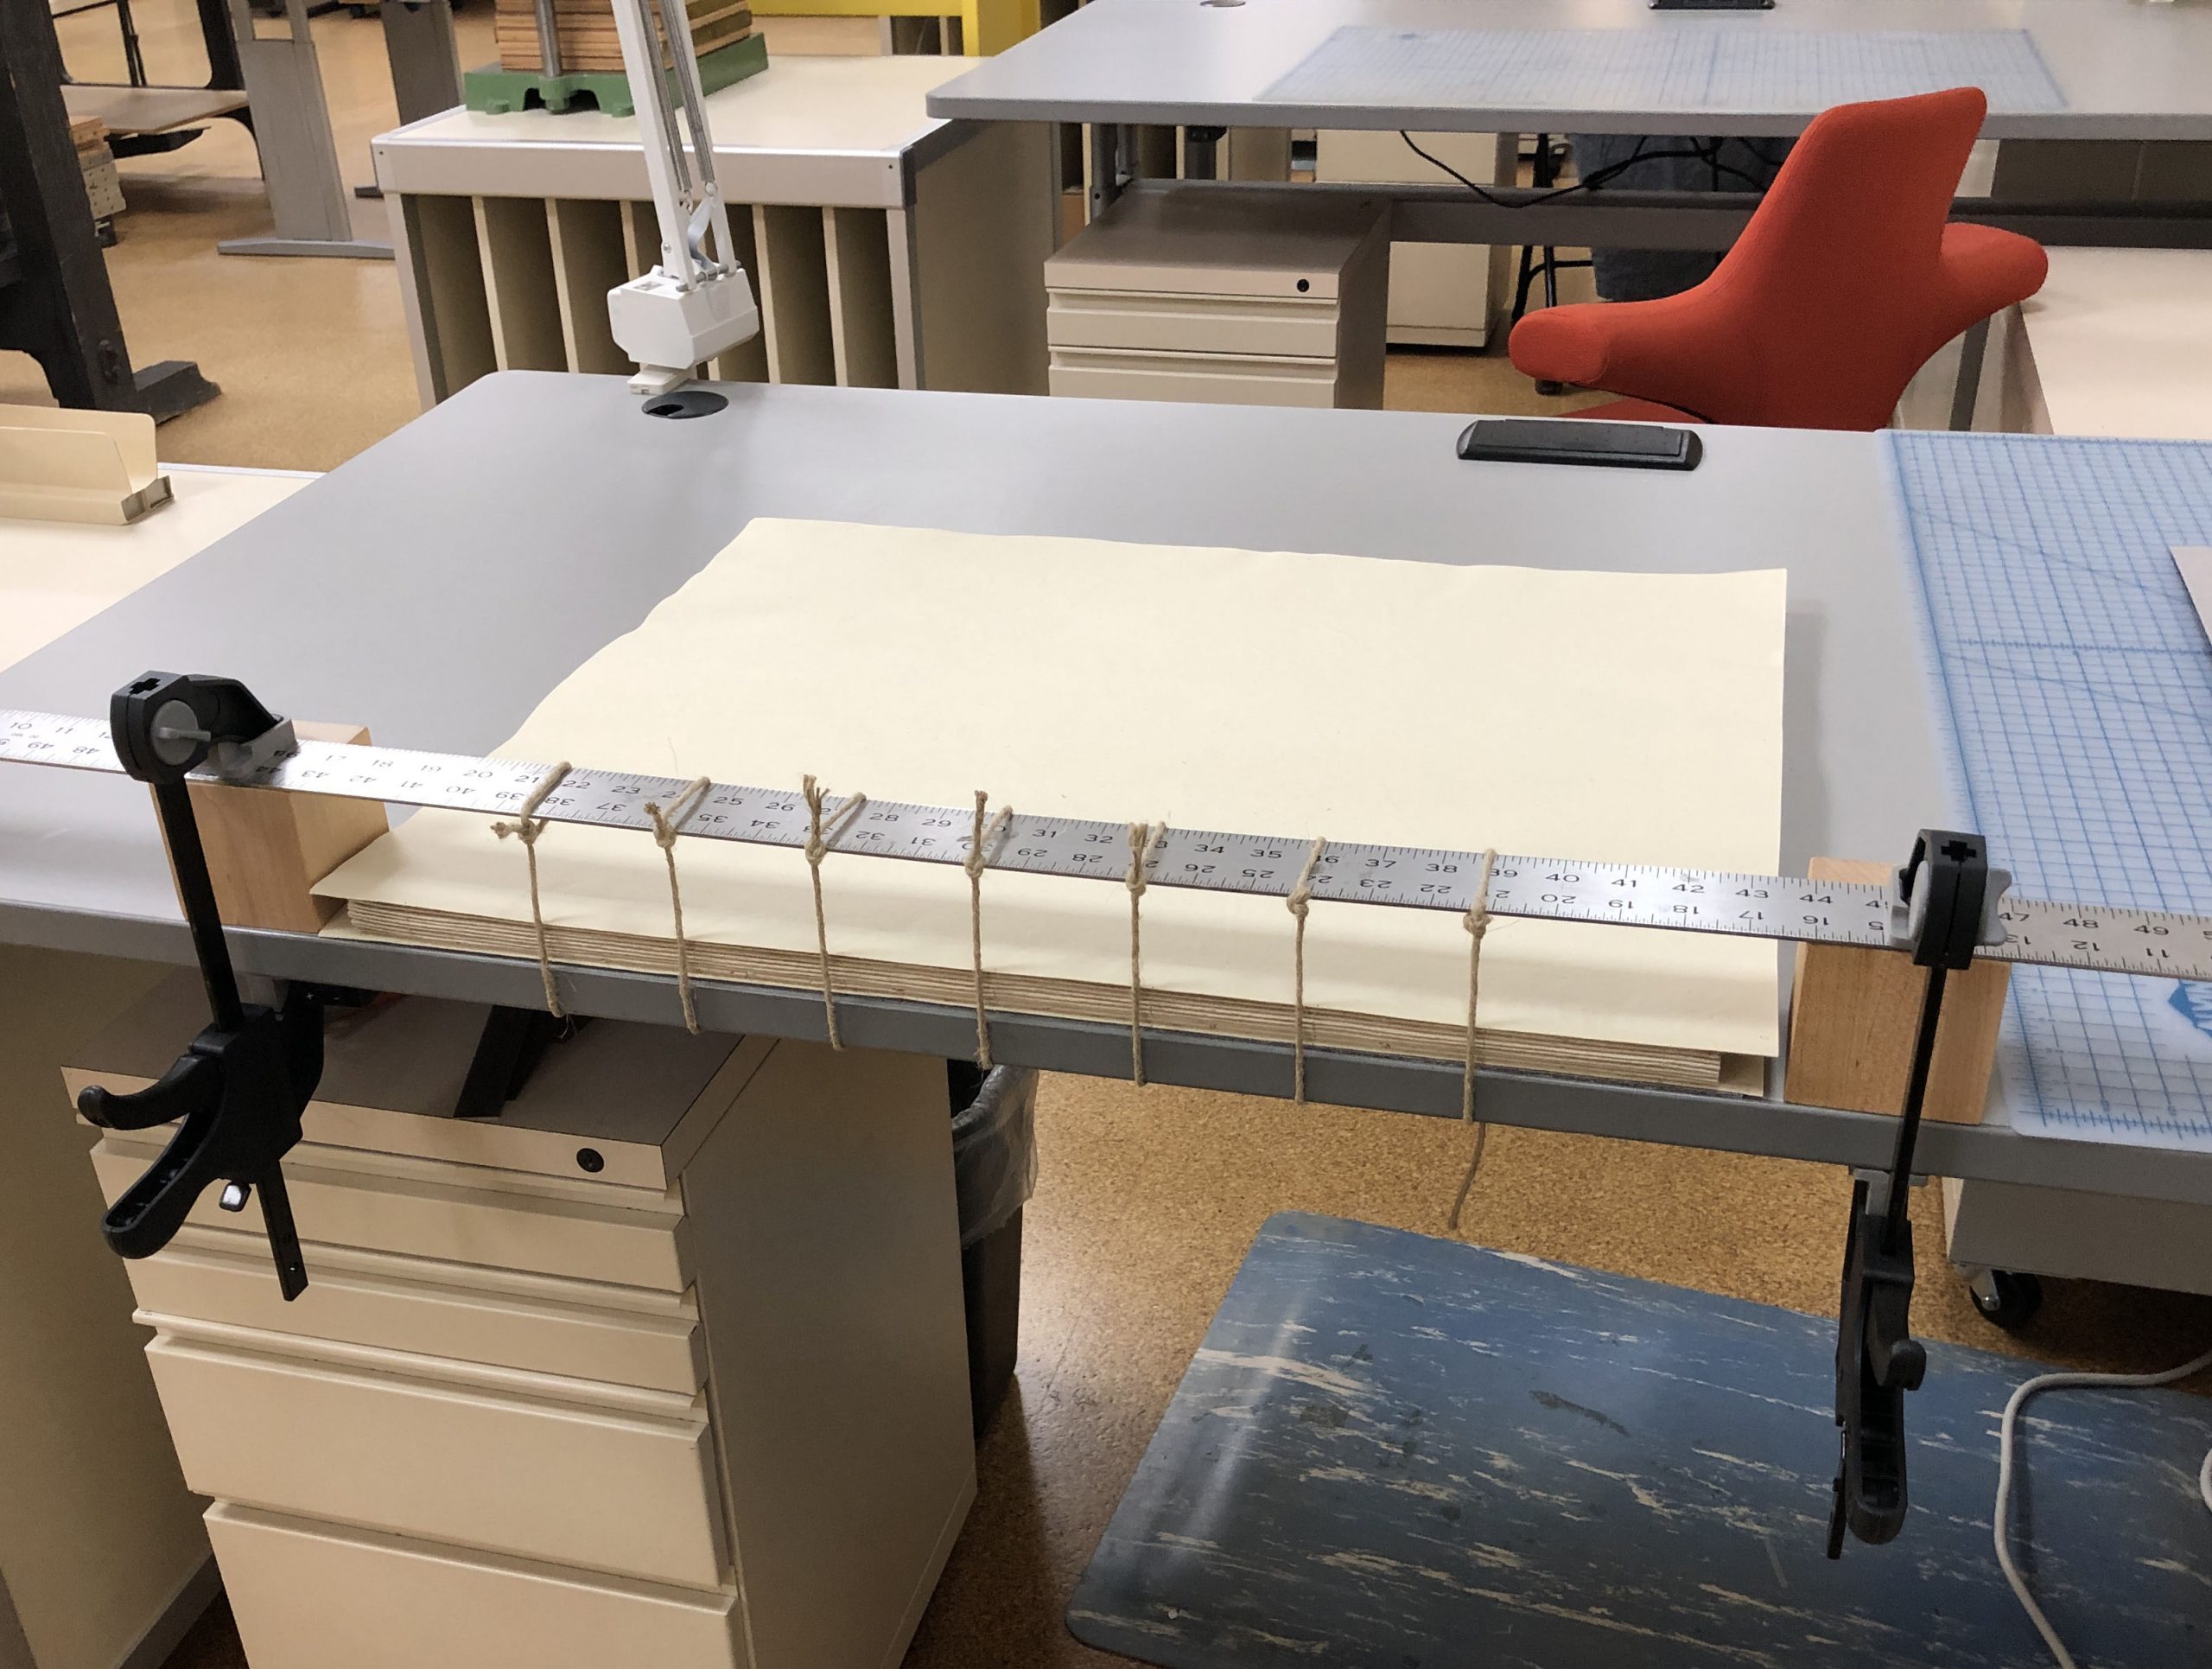
The collection consists of five stapled pamphlets and two bound books, all full of loose stamps in need of securing.

The stamp albums that are pamphlets spread out on a flat surface.

A top down view of the the stamp albums that are in book format.

I will mention that it is unclear whether these are actually functional stamps or just coated paper made to look like stamps. There is no noticeable adhesive on the backs of them, and even a UV light analysis and our ordering specialist couldn’t get us any closer to a conclusive answer.

Regardless, we couldn’t risk all of these stamps being lost or stolen. I had to find a way to contain them all so that patrons could access these albums without leaving the fate of these stamps to chance.

How do we treat these items?

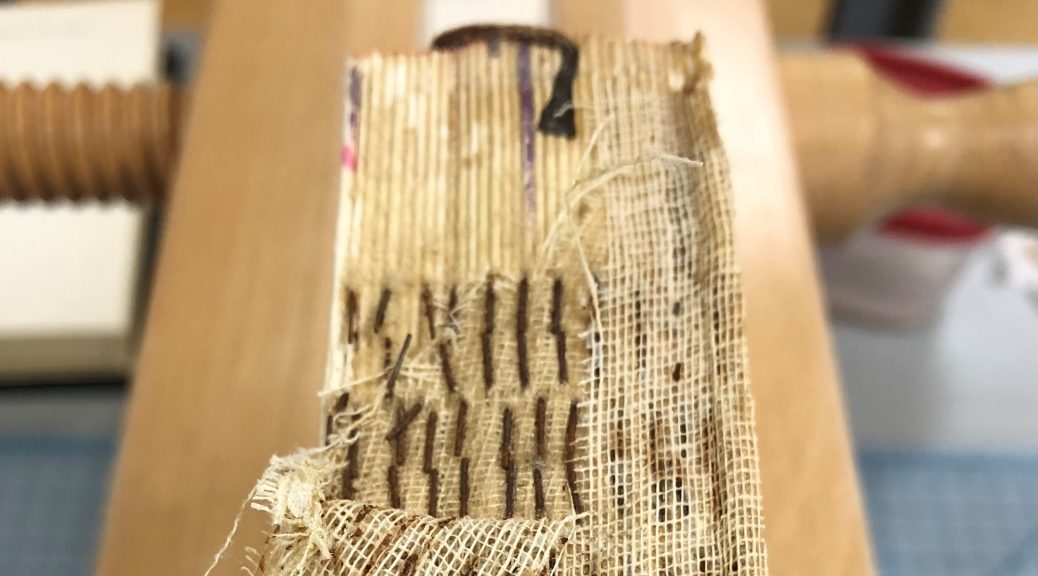
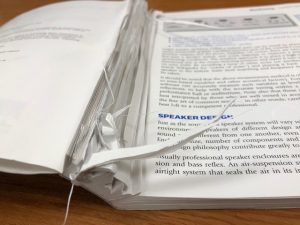
Each of these albums is made up of pages containing several small slips of mylar with the bottom edge adhered to the actual page.

A hand pulls back one of the mylar slips and also bends one of the loose stamps away from the page.

Within each of these slips sits either a single stamp or multiple stamps, which varies from page to page.

A page from one of the stamp albums showing an assortment of stamps focused on North Korean fine art.

A page from one of the stamp albums showing an assortment of stamps focused on North Korean natural landmarks.

Although the stamps don’t necessarily fly about or out of the slips as you flip through the pages, it’s obvious that they aren’t exactly going to just stay in place over time.

So, what is the solution here?

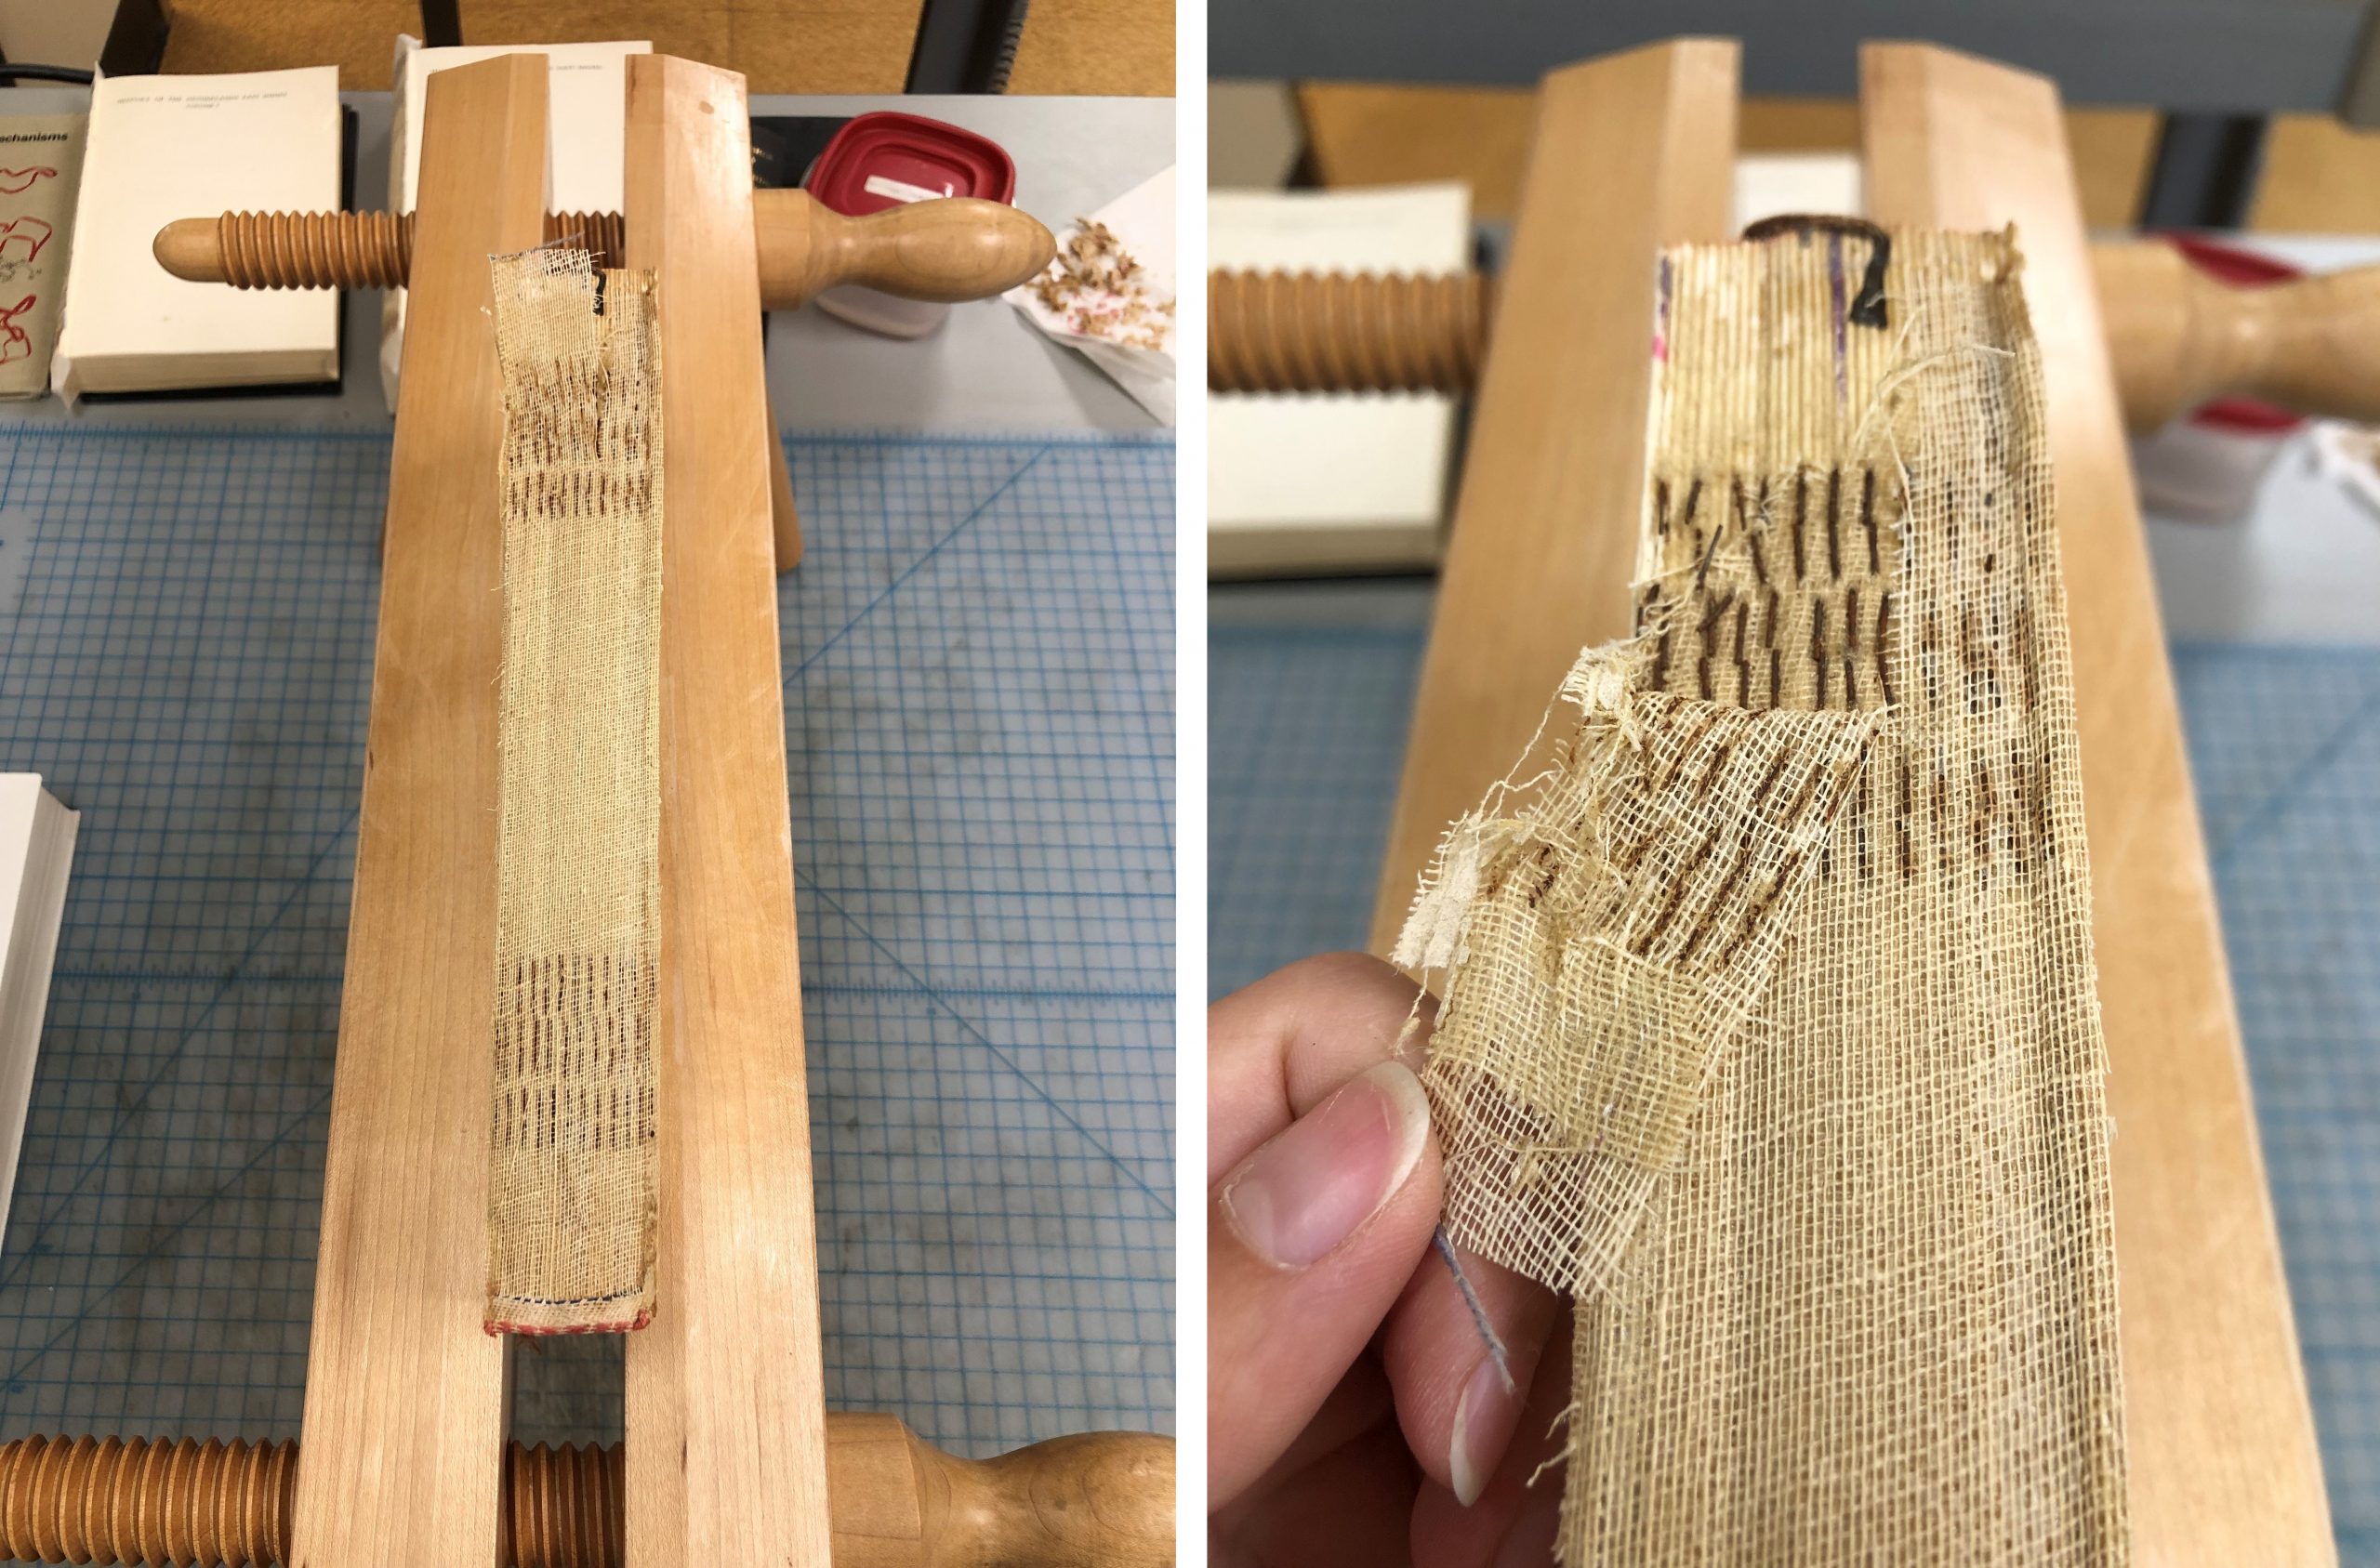
Since these mylar slips were already at my disposal, it made the most sense to use them to my advantage. After applying a thin bead of wheat starch paste to the top of each stamp, I tipped each stamp into the mylar and made sure the bottom of the stamp was placed as far down into the slip as possible.

Two photos side by side. The photo on the left shows a brush being used to apply wheat starch paste to the top edge of the back of a stamp. The photo on the right shows the stamp being placed back into its mylar slip and adhered to the page.

This way the stamp is secured in place without having to glue up the entire back of the item, and the mylar acts as a catch for the bottom of the stamp so that they can’t be pulled out as easily. With the stamps now safely secured, these albums are ready for a closer look at their contents.

How do we interpret these items?

These albums seem to be geared towards foreigners and tourists. Of the seven albums here, three contain text in Korean, Chinese, and English, one contains text in just Korean and English, and the other three contain text in just Korean and Chinese. Seeing as none of these are written only in Korean, it can be assumed that these albums were not intended solely for Korean audiences.

A page from one of the stamp albums showing a larger sheet that is perforated to hold multiple stamps. The stamps depict images of Kim Il-sung, various antique cars, and a music score. There is also accompanying text in Korean and in English.

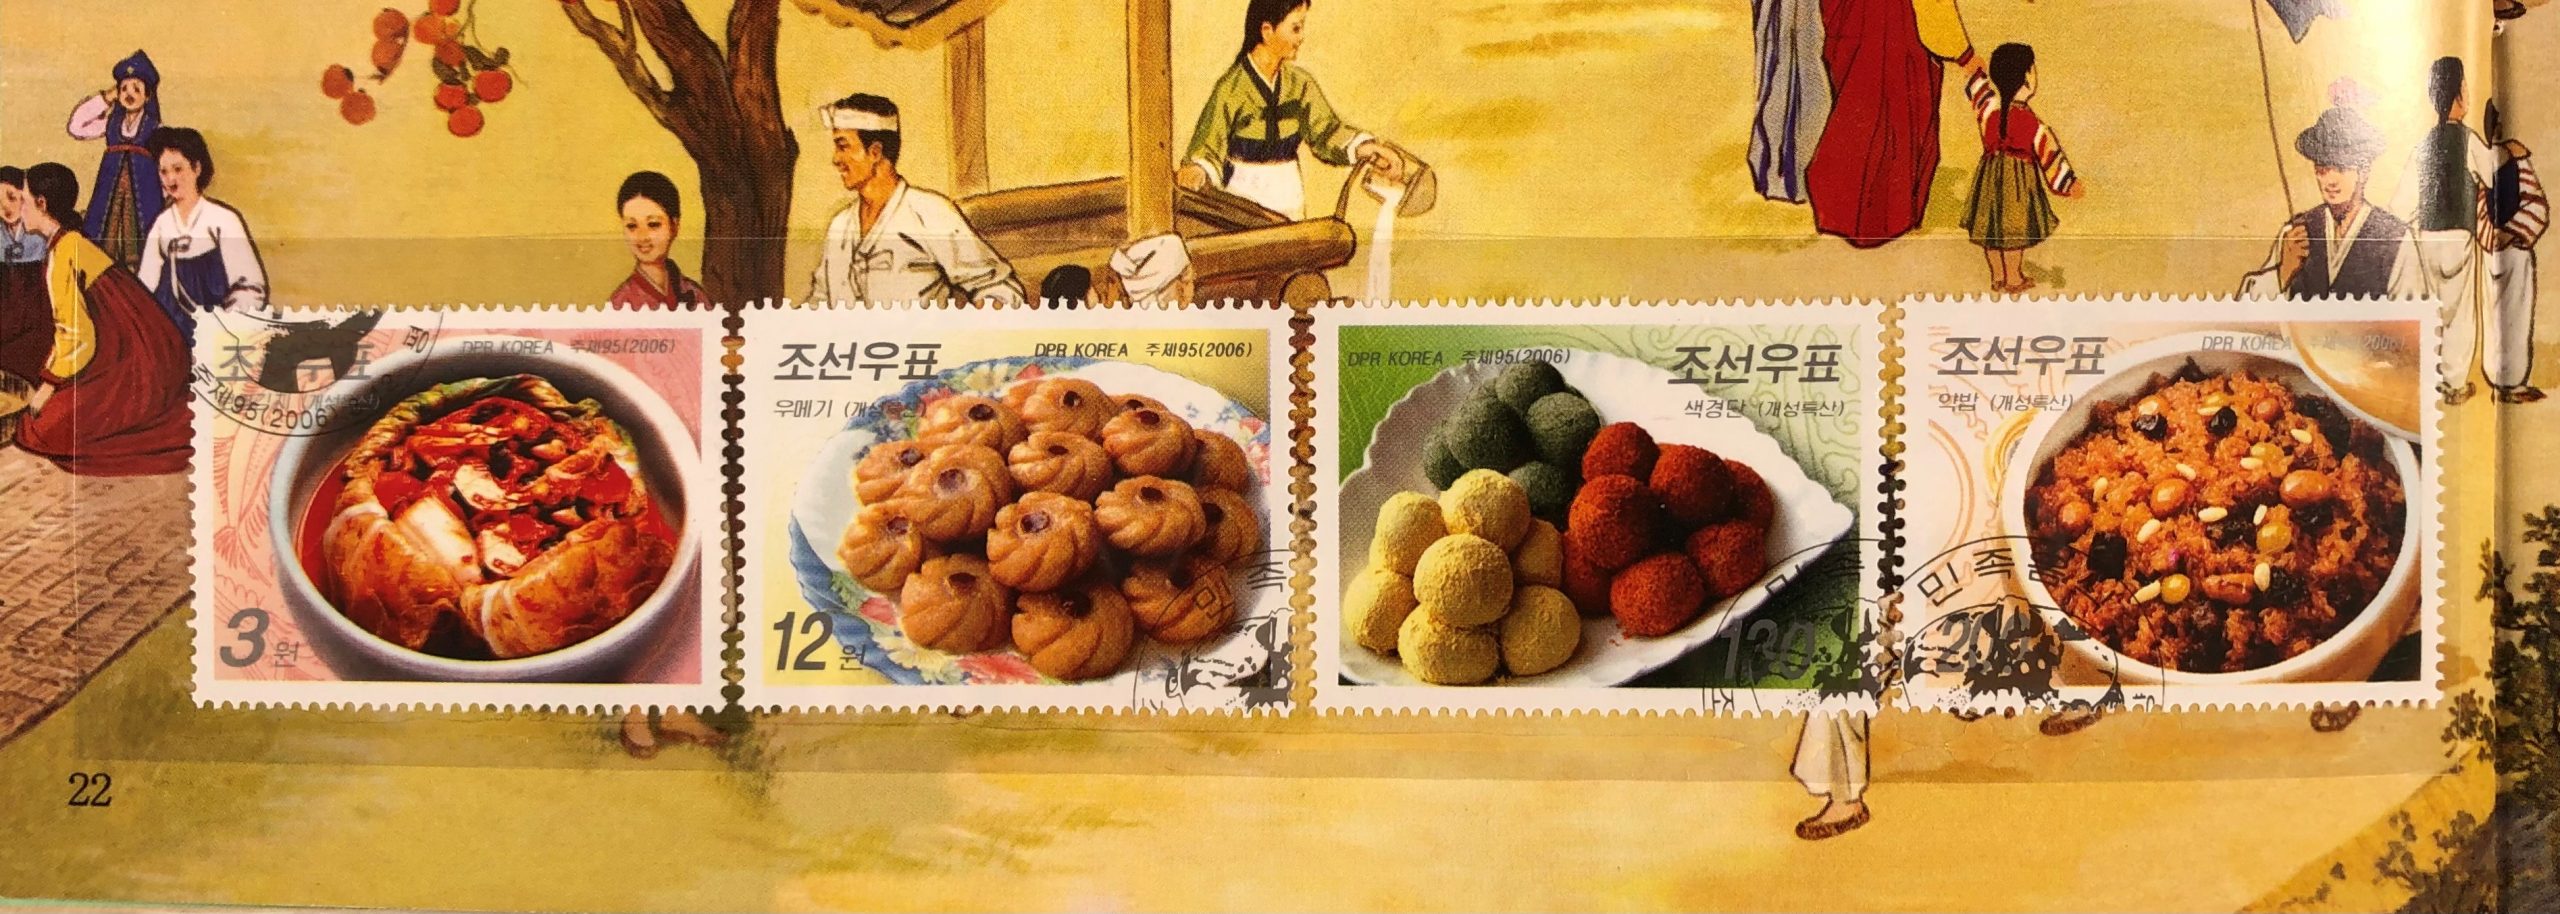
As you have also probably noticed, these stamps cover a wide variety of subjects as well. It seems as though you can find a stamp on just about anything if you really wanted to. This is probably for the benefit of appealing to as many collectors as possible who might only collect certain kinds of stamps.

A page from one of the stamp albums showing an assortment of stamps focused on Kim Jong-il meeting with various international leaders.

The world of stamps is quite intriguing, especially considering how they can become vehicles for propaganda. Are you a stamp collector or a philatelist (someone who studies stamps)? Leave a comment with your thoughts on this collection if you are, and leave a comment even if you aren’t! We’d love to hear what you think about our new addition to the Perkins Library. If you’d like to find these items in our catalog, you can click any of these links.

Stapled Instead of Sewn

When you look at how books are generally made, you’ll find that a majority of them are either sewn with thread, glued together as individual sheets, or occasionally bound with a combination of sewing and commercial glue.

On rarer occasions, a book will be stapled together. As luck would have it, one of these books recently came across my bench in need of a new cover. At first glance, you can’t immediately tell the difference between a stapled book and a sewn book.

It’s not until you open the book up and look at the gutter of one of the signatures that you might be able to see whether the book is stapled or not.

An opened book revealing the gutter of the pages where a staple can be seen.

It’s even easier once you’ve taken the cover off and can look directly at the spine of the textblock. As you can see in the images below, there are staples running through a significant portion of the signatures of this book.

Now, in a perfect world where I have all the time and patience I could want, I might remove the staples, mend any damage to the signatures in the process, sew the book back together, and then make a new cover. In this case, such an approach would be too labor intensive and time consuming. As the only senior conservation technician charged with maintaining the general collections, I cannot devote that much time to one book when I might have as many as 25 other books also waiting to be treated.

Considerations

With binding structures like this, the treatment decisions tend to boil down to preserving the provenance of the object vs choosing to rebind the book for greater longevity. In this blog post by Peter D. Verheyen in 2011, it’s evident that these wire bindings are a curious part of the history of bookbinding. Since they’re unusual, and since our goal is to conserve as much of the original item as possible, one might think that saving the original binding would be the obvious choice.

But how do technicians in general collections conservation (such as myself) reconcile keeping as much of the original object intact when we also have to prioritize making sure that the book can withstand regular use from patrons? If the staples in the binding had been so rusted that they were breaking whenever I opened the book, I would most likely take a more involved approach to the treatment of this book. An example of such a treatment would be adhering a cotton cambric to the spine and sewing through it along with the textblock, which you can see an example of in this paper by our very own Beth Doyle.

Luckily, in this case, both the paper and the staples were in good enough condition that a secondary treatment wasn’t necessary. However, it could be argued that perhaps I should have gone ahead with the more complex treatment just in case the staples failed in the future. In the end, these are the dilemmas we face in general collections conservation.

Treatment

I decided that the best course of action would be to clean the spine of its original lining and glue and replace it with a strong Japanese tissue adhered with wheat starch paste. By doing so, the spine is stabilized and strengthened while the staples are also given additional support. This reduces the potential damage that could occur from future use and repeated opening and closing of the book.

A picture of the stapled textblock post spine cleaning being held in a hand. The spine and staples are protected with a thin Japanese tissue, so you can still see the staples.

With the textblock now in a stable state, I could prepare a new case for the book. The original case had already failed and since the original materials were too fragile to keep using, it didn’t make sense to try and reuse the case. Instead, I made an inset on the front board in order to preserve the original cover material. If you’d like to learn more about the book, you can find the catalog record here.

Keeping It Together

Keeping it together can be a real challenge these days. There are many effective strategies for maintaining one’s mental health, but unfortunately this blog post isn’t about any of that. This blog is about library and archives materials. So I’m here to share a simple system for keeping it together when you are working on a textblock in need of some major intervention.

For the past several months, I’ve been working on (and writing about) a 16th century German book which has a number of problems. The textblock was already in pieces, but then it had to be taken apart completely for treatment. I was worried about keeping all the little bits organized, so that nothing would be lost or put in the wrong order as it underwent this long and multi-stage process.

As part of the pre-treatment documentation process, I collated the book using a digital copy of the same edition hosted by the Bavarian State Library. Early books are not paginated in the same way as modern ones, so you have to look for other clues to maintain the correct order. To help, I numbered each leaf in pencil before disbinding. The textblock is organized into sections of three folios. Some of the folds are intact with a little damage, but many of them have split entirely, leaving individual leaves. Each separated section was placed into a numbered paper folder, including any separated little bits of paper from that section.

Throughout the treatment, I have been trying to work on one section at a time to keep all the parts in easily manageable groups. This was true for washing, resizing, and mending.

Since all of the sections are composed of three folios, I started making marks on the outside of the paper folder to keep track of what I had finished in each packet. For example, in the mending and guarding stage it is best to work from the inside of the section to the outside. It can be a rather drawn out process of adding mends, then leaving them to dry under weight. I would cross out the number 3 as I finished the most interior folio, proceeding through the entire textblock before starting on the middle folios. Over the course of a couple of weeks doing this, it was very easy to just look through the stack of folders and see where to continue.


The first two sections have the most losses, so I’m still finishing some of the stabilization/infills on those – but overall the textblock is looking much improved!

(still in process, but you can compare to the “before” photo to see the progress)

There are probably many strategies for keeping the different parts of your treatments organized, but I have found this low-tech one to be very straightforward and helpful for books at least. What strategies/tools do you use?

MacGyver-ing the Big Books

Oversized books come with a lot of handling and treatment challenges. Just moving and opening them can be physically demanding and former owners may not have had a good place for storage. This atlas of London street maps from 1799 measures approximately 26″x22″. Prior to acquisition, it had been rebound in a modern limp leather binding and, in attempt to make it easier to transport or store, had been folded vertically in half. The leather became very chemically degraded and the outward-facing rear cover was torn off.

I’ve spent the last several months piecing the broken, brittle maps back together and now it is ready for some new covers. We’ve written on Preservation Underground before about boxing some of the biggest bindings in the collection and treatment of double folios. As in those cases, a lot of the specialized equipment we have in the lab is too small for books of this size. At times like these, you just have to put on the appropriate theme song, channel Richard Dean Anderson, and gather up all the clamps in the lab.

Resewing a book on raised cords requires that some tension be put on the sewing supports. We typically employ a sewing frame to hold them in the correct position during this process, but even the large wooden one we have in the lab is a bit too short. Luckily we have a very long, rigid metal ruler and uniform wooden press blocks to take its place.

I will be constructing a new binding with rigid boards for this atlas similar to another copy in the collection, and that requires some rounding and backing of the textblock spine. This process is traditionally done with a flat-faced hammer, in a lying press or job backer. The textblock spine is actually composed of compensating guard strips of flexible paper, to which the maps have been mounted. This allows me to reshape the atlas textblock safely. These guards also made the sewing process much easier, as I could just sew through them instead of a full-sized folio.

Our job backer is, again, about 4″ too short for this book to fit inside – so I attempted to recreate one with press boards and deep-throated C-clamps.

It had to be clamped to the table to allow me to tap with a wooden block between the raised bands and shape the spine. I had to adjust the center clamp as I moved from head to tail, then flip the entire contraption to get each side.

It ended up being fairly effective. With some temporary working boards laced on, you can see the gentle round and small textblock shoulder that is formed.

The atlas will get endbands and a strong linen spine lining before the final board attachment. The laced on, rigid boards will provide the protection and strength that such a large book requires. Although I’m sure those clamps will be needed again before it is finished.

Evidence in Print Waste

I recently shared some images of a 16th century printed book that is the lab for full treatment and I have since uncovered some additional information about the binding. As previously mentioned, the book was not in good working order when it was acquired, looking more like something left behind in the mines of Moria than a volume that you would be served in the reading room.

With so much water damage and loss to the covering materials, it was clear in my examination that the remains of multiple bindings exist on the wooden boards. The outer-most covering is a “quarter-style” strip of brown leather (both adhered and nailed to the boards) and block printed, blue paper sides. Underneath that first layer are wide leather corners and a brown or purple paste paper siding-up the boards.

The pastedowns have several layers of paper with both manuscript and print faintly visible underneath. The inner-most layers of covering material were adhered with a thick layer of hide glue, which has begun to fail either through age or the book’s exposure to moisture.  This made it possible to mechanically lift all the layers of pastedown away from the wooden board in one piece, revealing  the print waste.

I was surprised to see a New York newspaper from the late 1700s, especially since the text was printed in Frankfurt some 200 years prior. The date at the top left was slightly obscured by minor losses and the remnants of fanned-out sewing supports, adhered to the interior of the front board. Luckily the full run of The Daily Advertiser has been digitized and is freely available through America’s Historical Newspapers, so I was able to look for dates in 1786  ending in “4” that occurred on a Wednesday and locate the issue.

(1786, June 14). Daily Advertiser, II (405), p. [1]. Available from Readex: America’s Historical Newspapers.

I was able to repeat the process for the lower board and that pastedown actually includes the lower half of the same printed sheet. I would not have been able to identify it so quickly without a digital image of the full newspaper.

The print waste in this binding is a fascinating find on a number of levels. I will note that this particular newspaper is not uncommon, with many libraries holding copies; however, the advertisements printed on this page tell a number of stories. Many of the ads are focused on shipping, with cargo ships for sale and others for hire. There are advertisements for Canadian furs, Irish linen, glassware, and iron goods from England. My favorite is the notice describing a large reward for the perpetrators of a robbery or a smaller one for just the return of the stolen goods. But the darkest parts of our history are represented here as well: ships traveling from Barbados or Antigua carrying sugar and rum, redemptioner servants and slaves described as “healthy” and offered for sale.

We don’t have much information about provenance of this book, but the presence of this newspaper used as binding material gives us clues about when and where at least one of its many repair and rebinding campaigns may have occurred.  This important evidence will be stabilized and retained as part of the conservation treatment.

Things Come Apart–On Purpose

Occasionally we are asked to disbind books. Sometimes that is an easy task, but when it comes to library-bound serials from the mid 1980’s it isn’t so easy.

Library binding is a specific process, there is even a NISO Standard for it. It’s a tough, made-to-last binding that includes sewing signatures around sawn-in cords, gluing the spine and applying a heavy spine lining, and creating a cover of heavy boards and durable buckram cloth. I love library bindings, they are indestructible by design and have a utilitarian-ness about them.

But when you have to take one apart it can be challenging, and time consuming. Cutting the threads and carefully cutting through the spine lining between issues takes patience. There is always some damage that must be repaired later. The paper scarfs, or your knife slips and cuts the outer folio.

Issue by issue I take it apart. I see the small knots in the thread where the person who sewed this added a new piece so she could keep going. It took time to bind this, and it was probably one of a thousand books that she bound that year.

The evidence of her hand is a reminder that a skilled trades person put this together. Her sewing is still tight. She made that small knot, trimmed it carefully, and kept going until she had a three-inch thick volume sewn together, ready for casing in.  Taking this apart is a reminder that not everything we do in Conservation is permanent. Sometimes we undo hours of care and labor. I honor the labor that it took to create this volume, even as I take it apart, smiling at each small knot I come across.