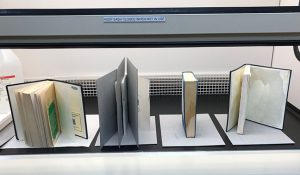
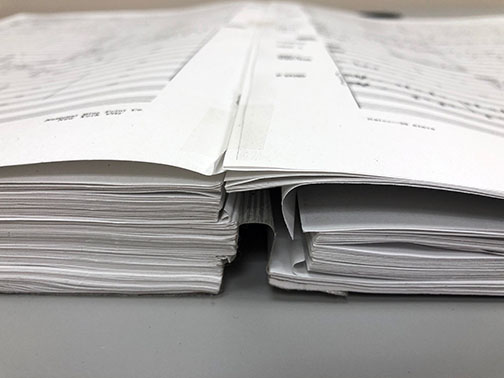
We have all seen sticky notes peeking out the edge of bindings. I have to say, I’ve never seen them put completely inside a book. It’s almost like they didn’t want to use a pen, pencil, or highlighter. Thanks for that at least.
So. Many. Sticky notes. Luckily this paper isn’t very brittle or this would be much worse.
A plea from the underground, if you put sticky notes in a library book, kindly remove them so the next patron can read without distraction.
We are participating in two events for Preservation Week 2021. There is so much happening this year. Make sure you follow #preswk to find other events across the country.
FFV1: The Gains of Lossless (Duke University Libraries)
Monday, April 26, 2021, 2-3 pm Eastern Time (US and Canada)
One of the greatest challenges to digitizing moving-image sources such as videotape and film reels is the enormous file sizes that result, and the high costs associated with storing and maintaining those files for long-term preservation. To help offset this challenge, Duke University Libraries has recently implemented the FFV1 video codec as its primary format for moving image preservation.
FFV1 enables lossless compression of moving image content, and produces a file that is, on average, 1/3 the size of its uncompressed counterpart. Alex Marsh, Digitization Specialist—Video and Craig Braeden, Audiovisual Archivist will give a brief overview of FFV1, and their experience utilizing it to digitize the David M. Rubenstein Rare Book and Manuscript Library’s moving-image assets.
Careers in Preservation: A Panel Discussion (University of Illinois)
Join five preservation professionals as they discuss their education and career paths. The final half of the session will be reserved for questions from the audience.
Panelists:
Jacob Nadal, Director for Preservation, Library of Congress
Miriam Centeno, Preservation and Digitization Strategist, The Ohio State University Libraries
Henry Hébert, Conservator for Special Collections, Duke University Libraries
Daniel Johnson, Digital Preservation Librarian, University of Iowa Libraries
Sarah Mainville, Media Preservation Librarian, Michigan State University Libraries
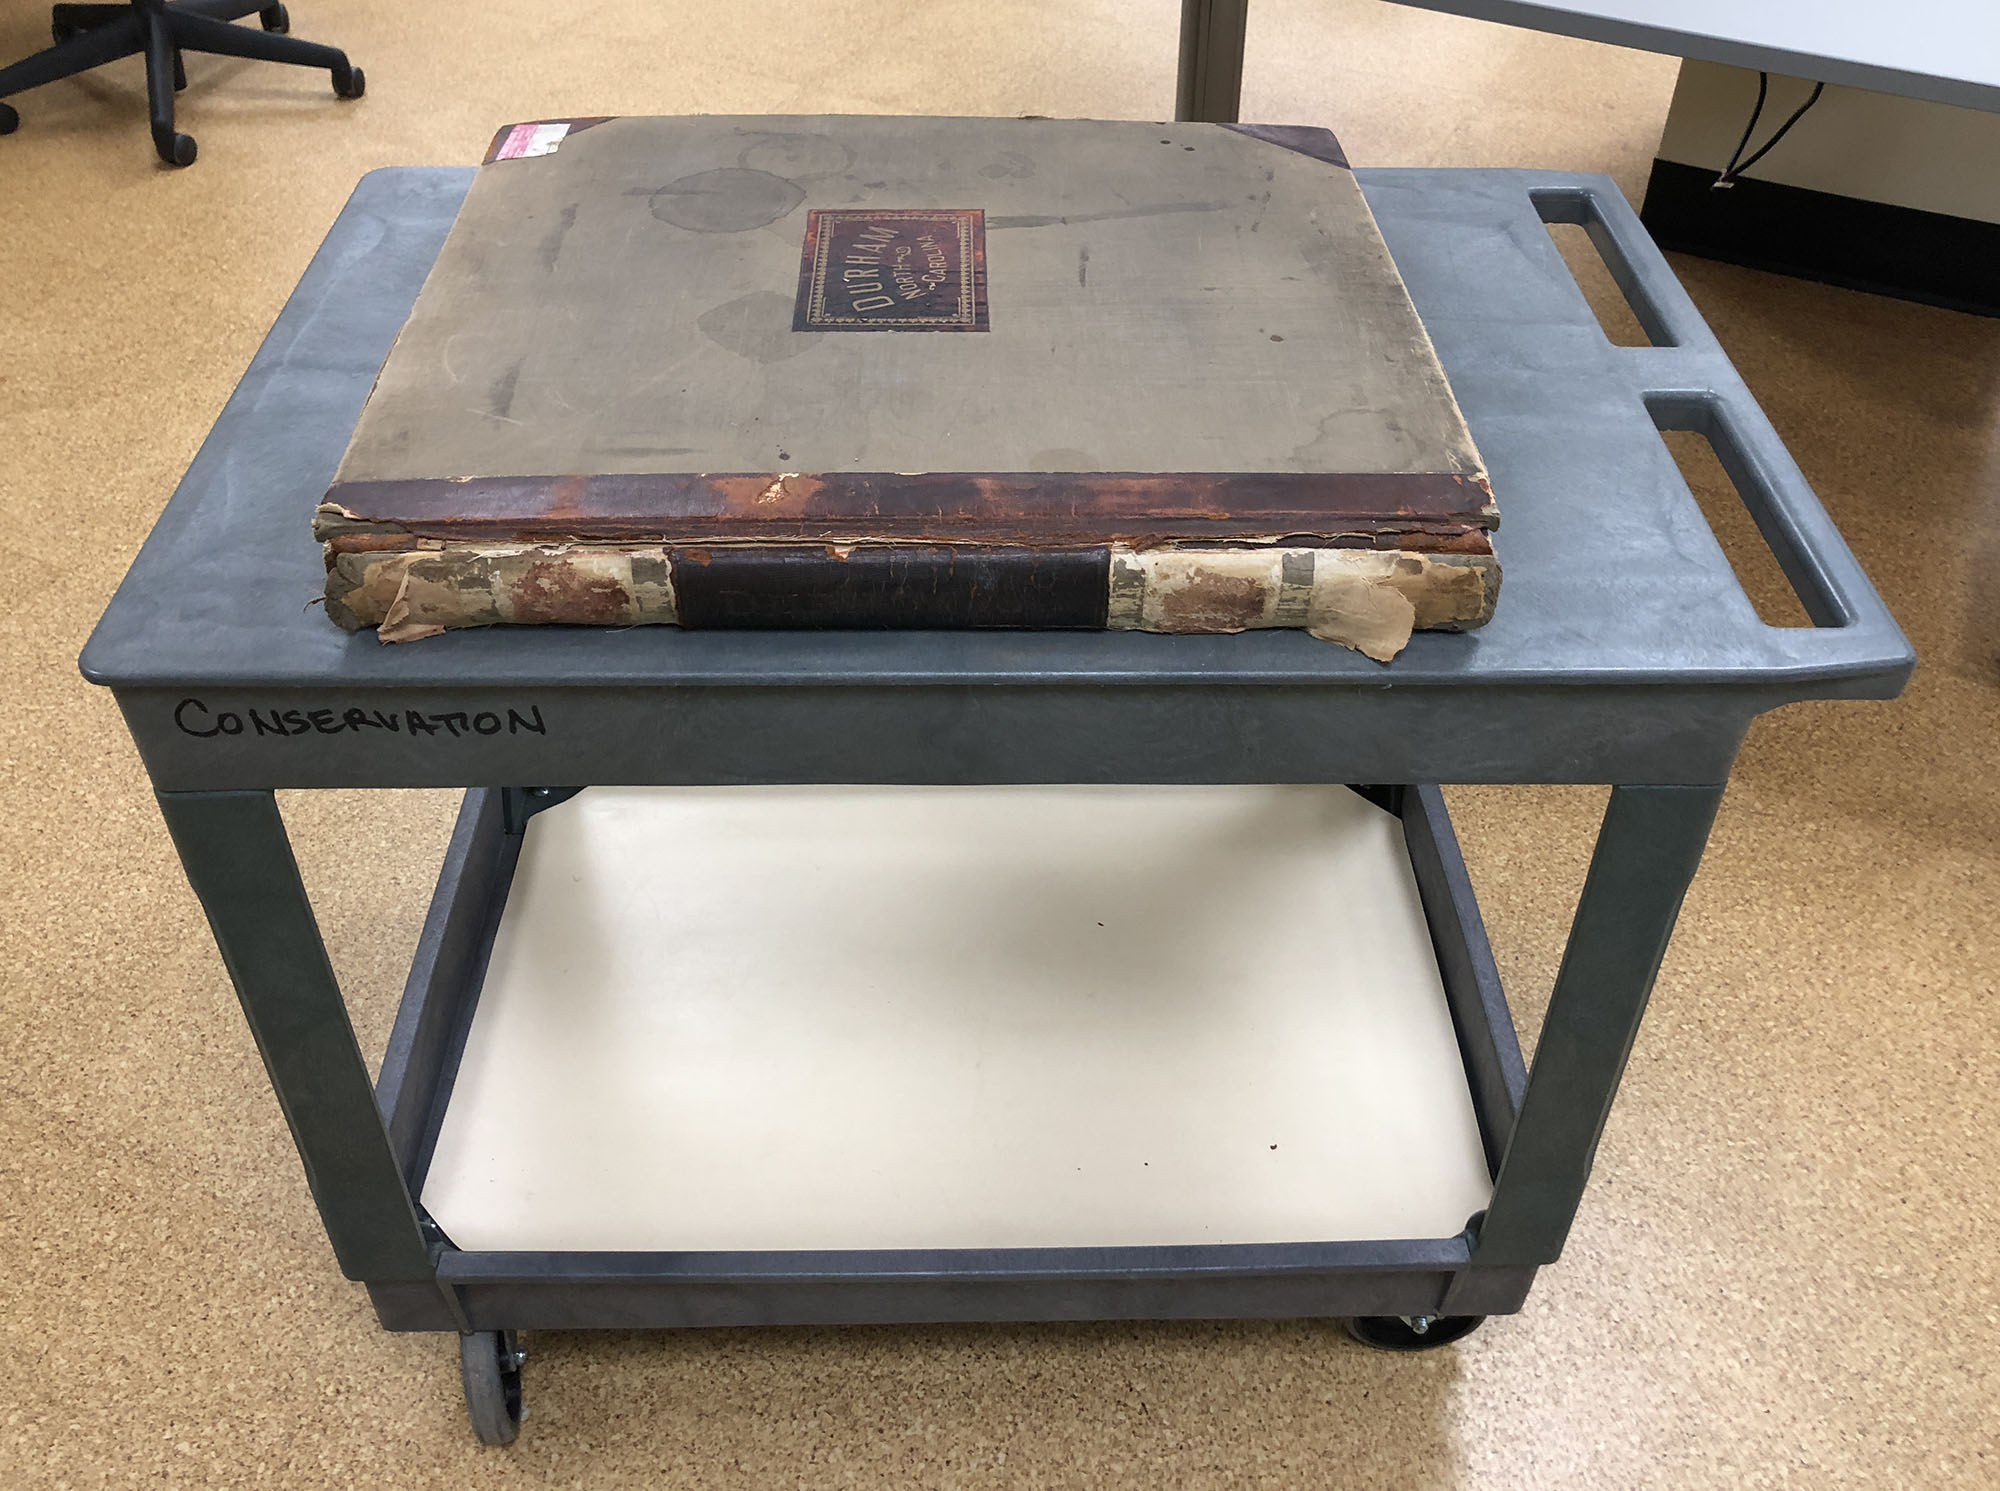
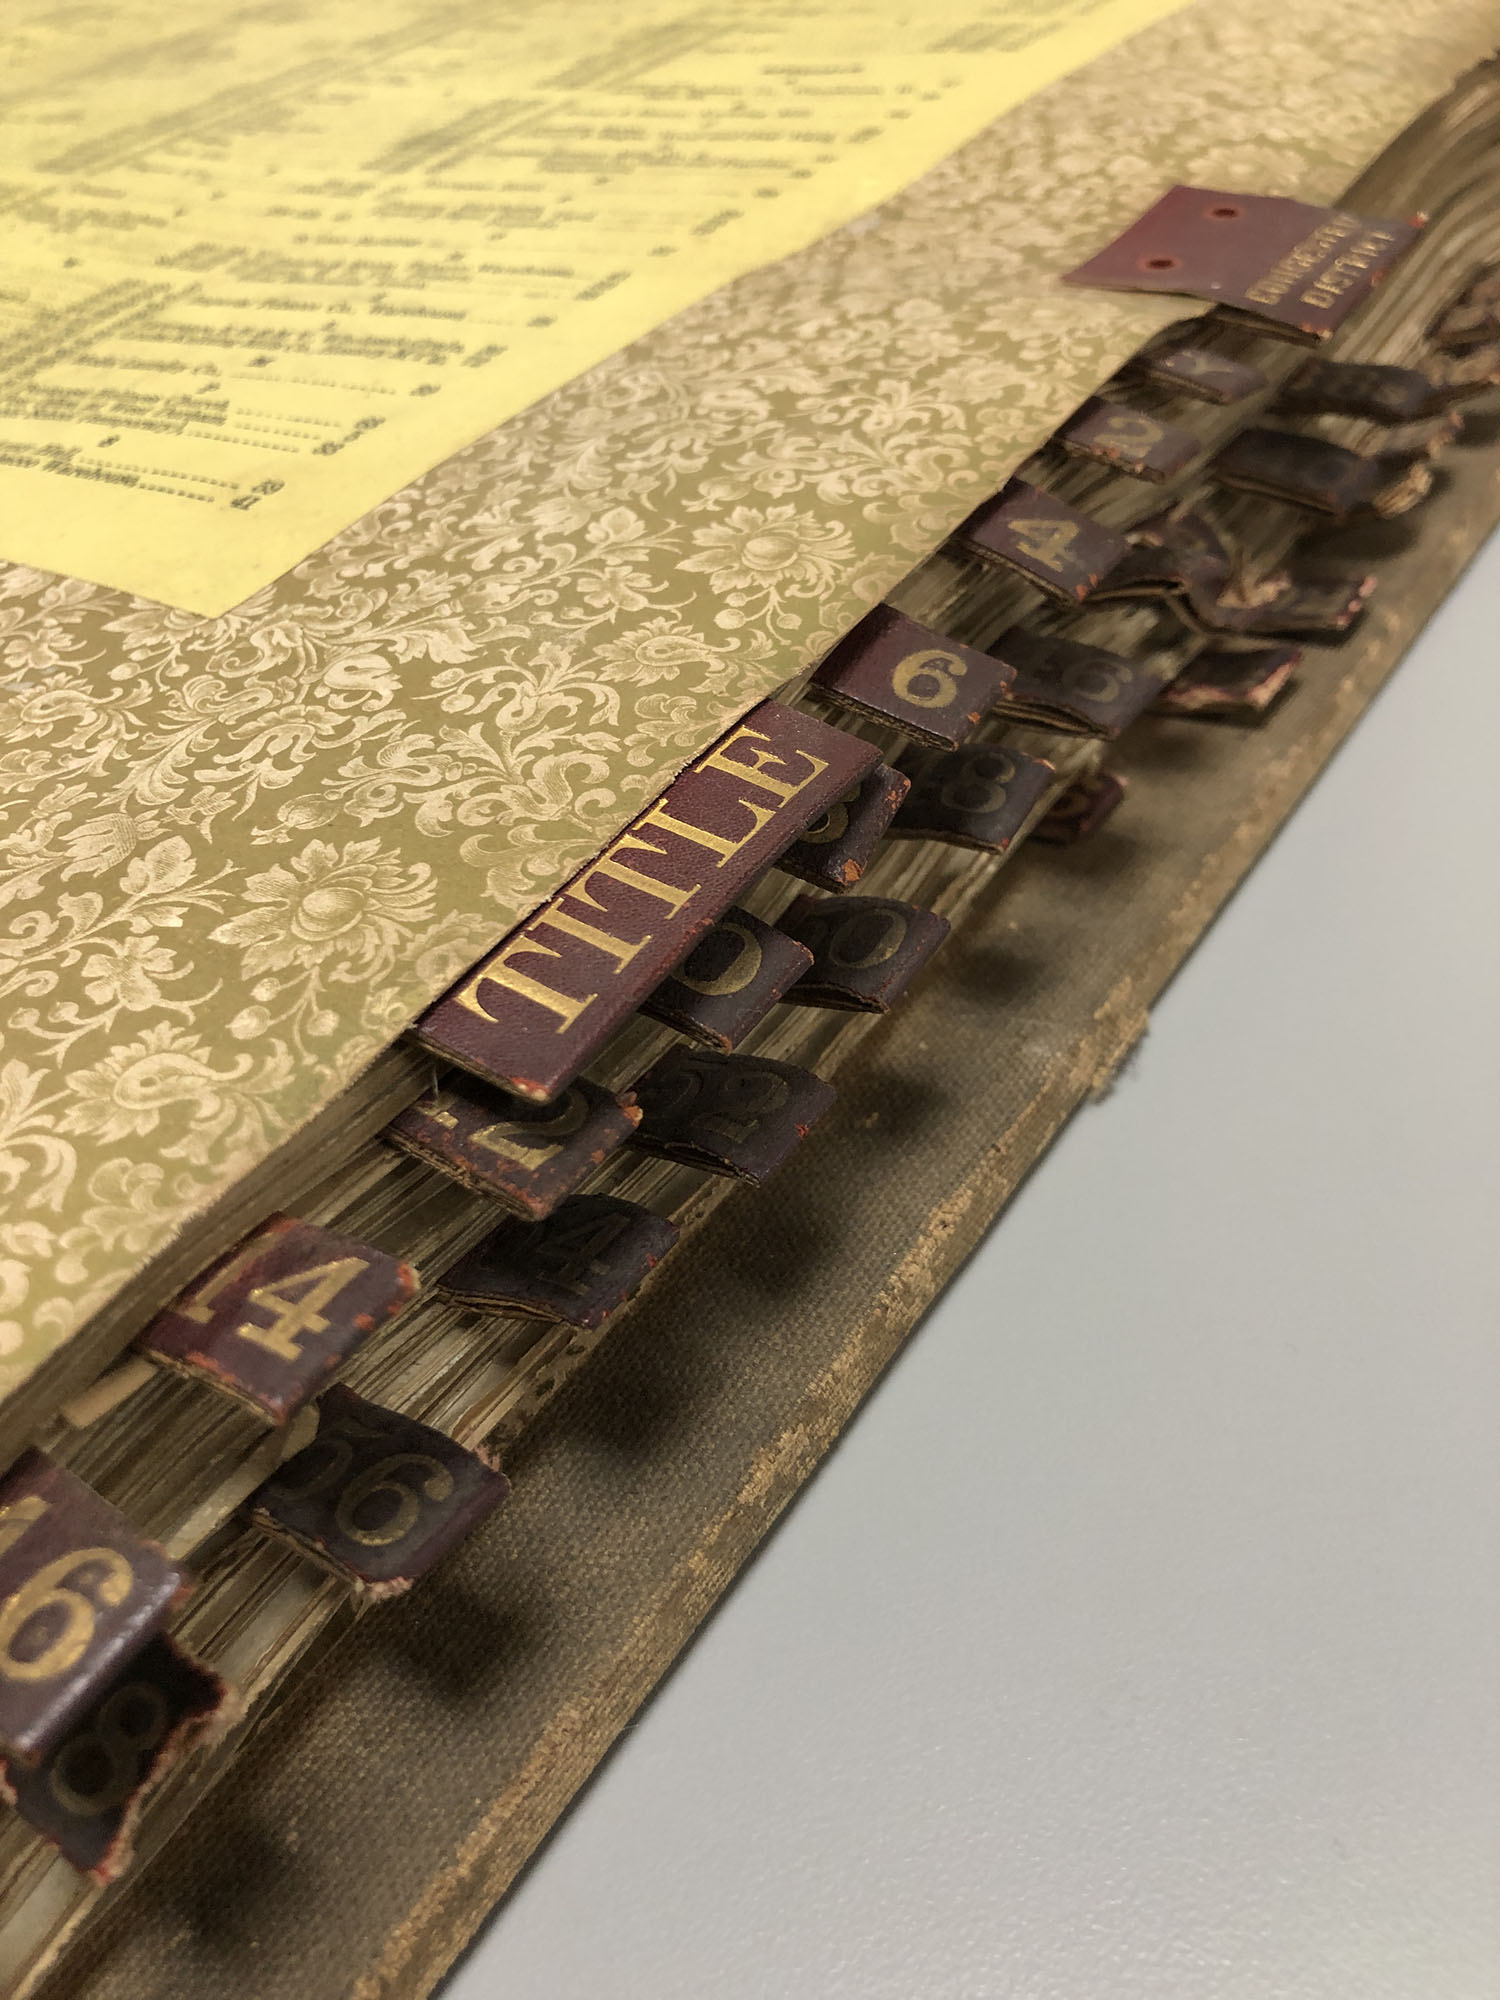
Another very exciting and very large book arrived in the lab this week: a volume of the Sanborn fire insurance maps for the city of Durham.
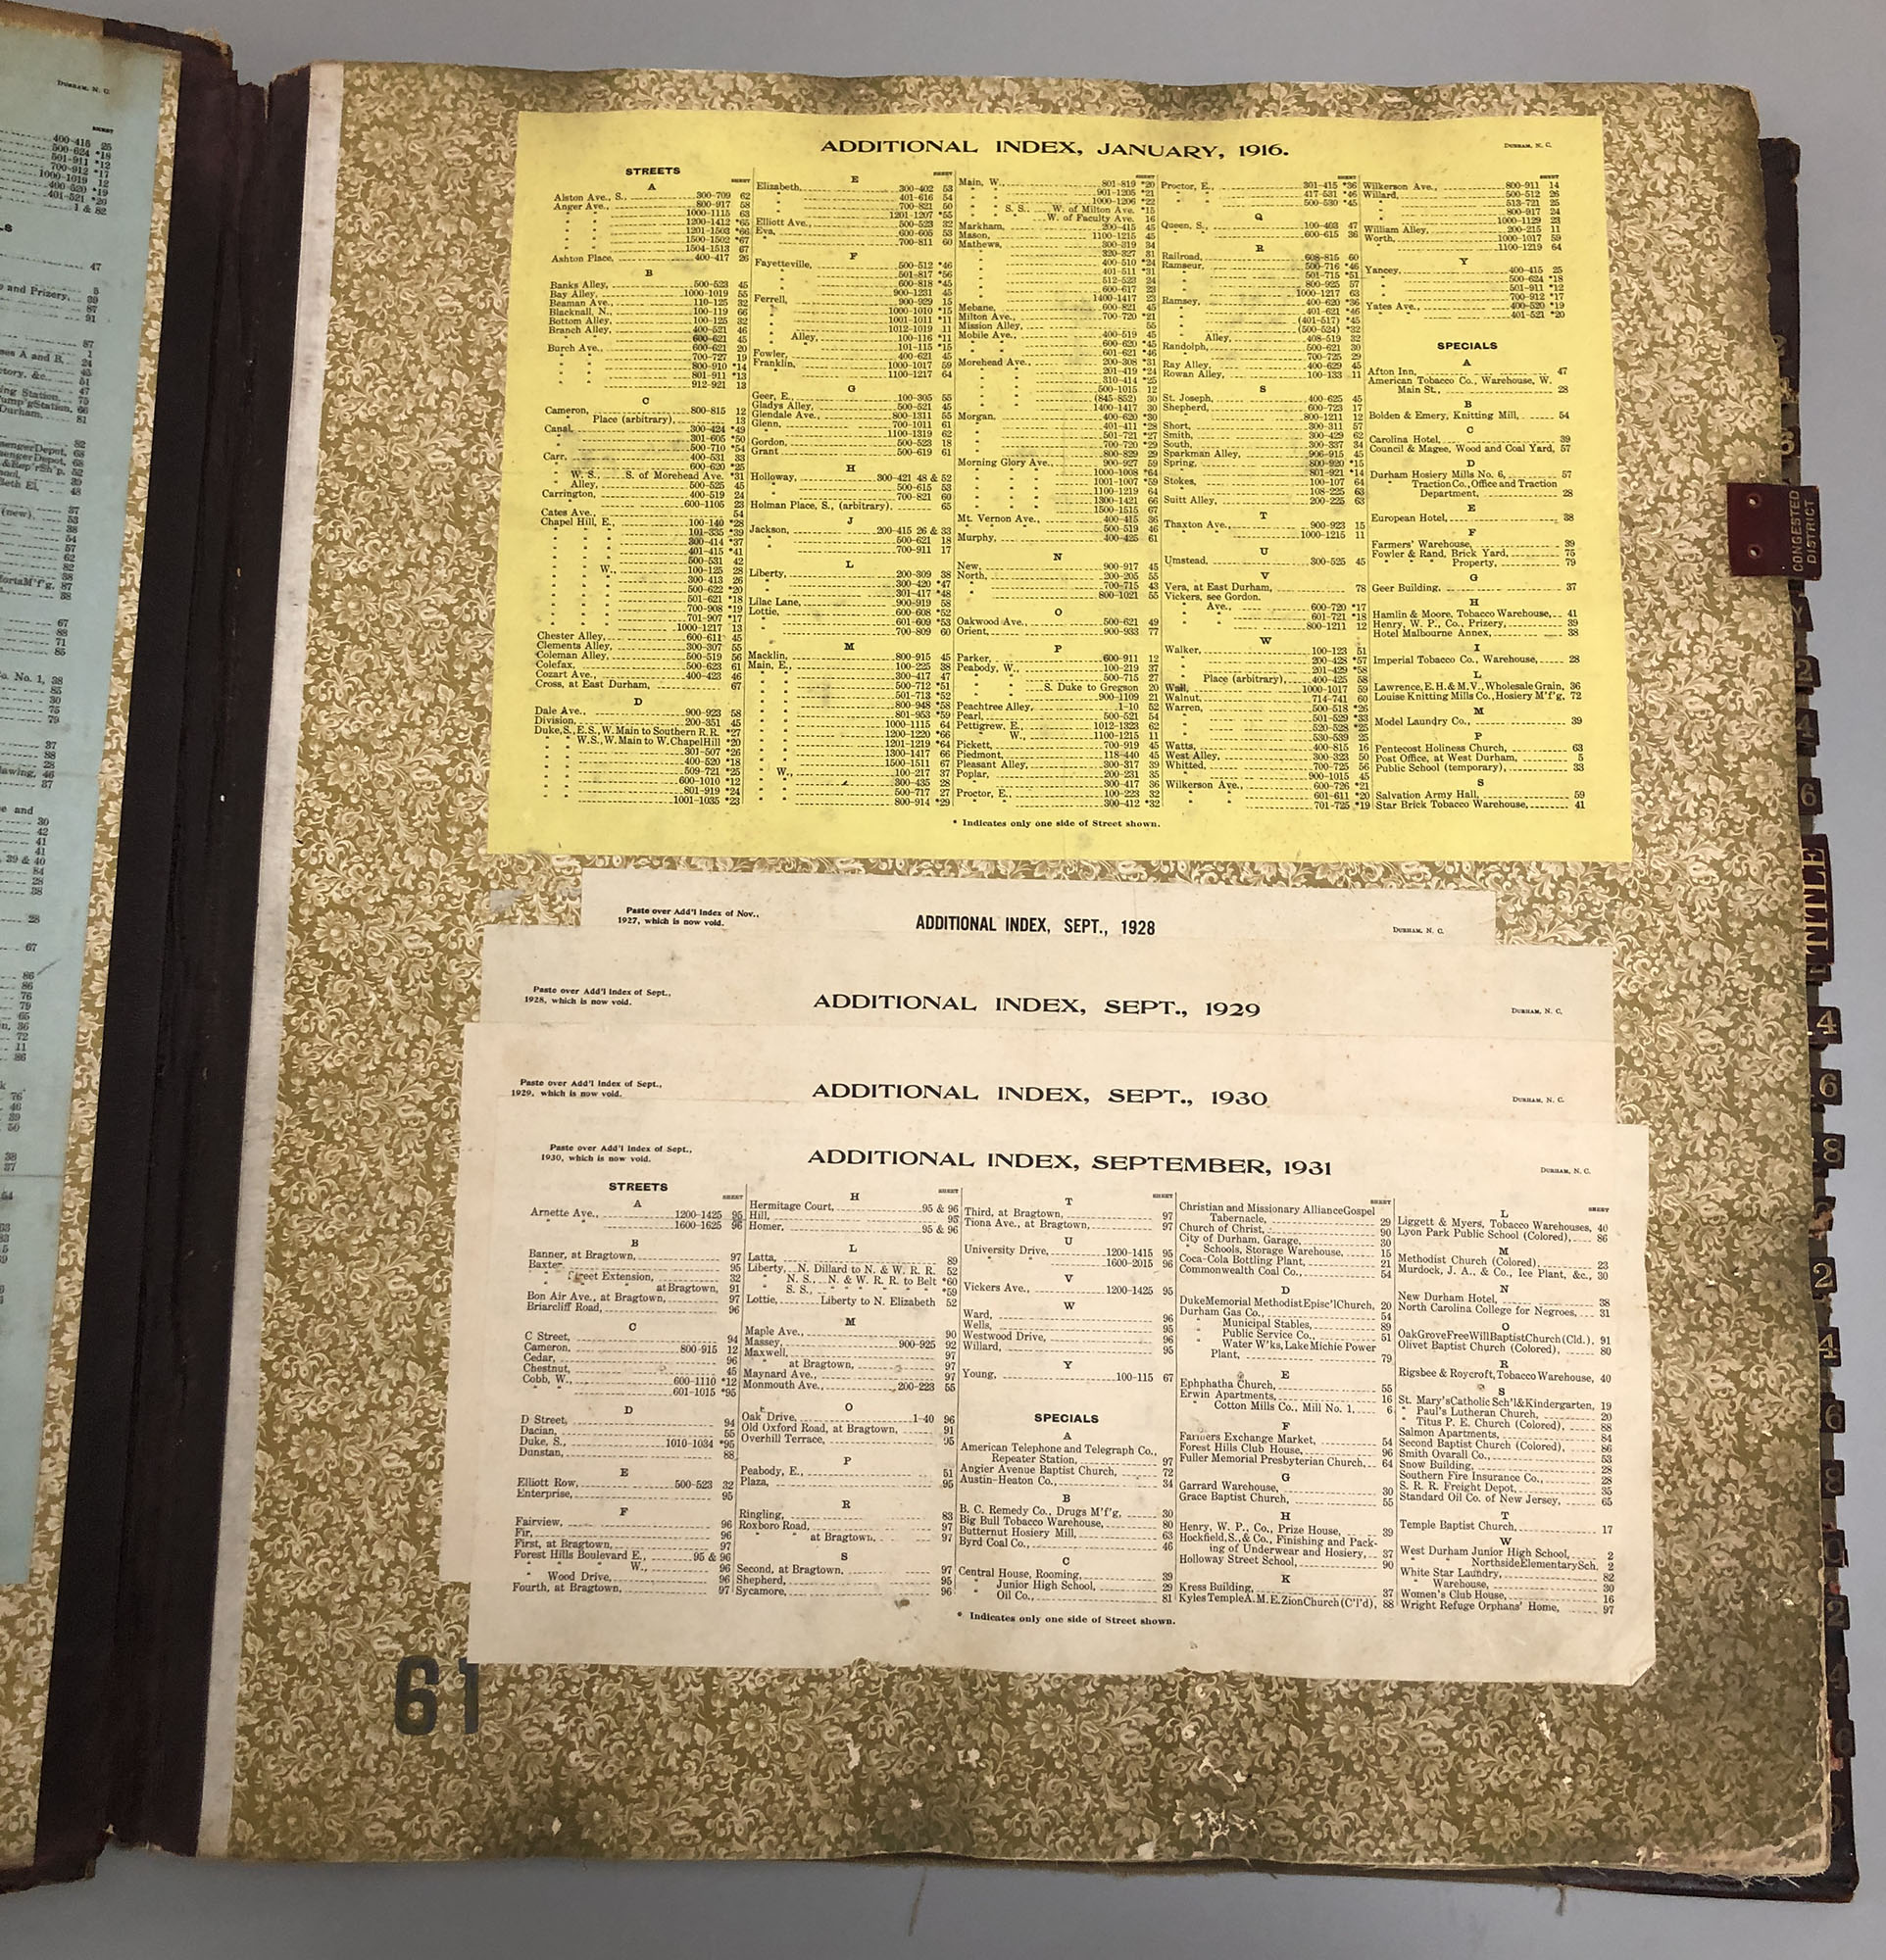
The Sanborn maps were used as a reference by insurance underwriters to assess risk and determine how much insurance to offer without having to physically travel to the location. Originally published in 1913, the contents of this book were continually updated until 1931 to accurately reflect changes in buildings throughout the city. Rather than reprint the maps annually with updates, corrections were just pasted in. You can see the evidence of these corrections everywhere. For example, the endsheets are covered in additional indexes:
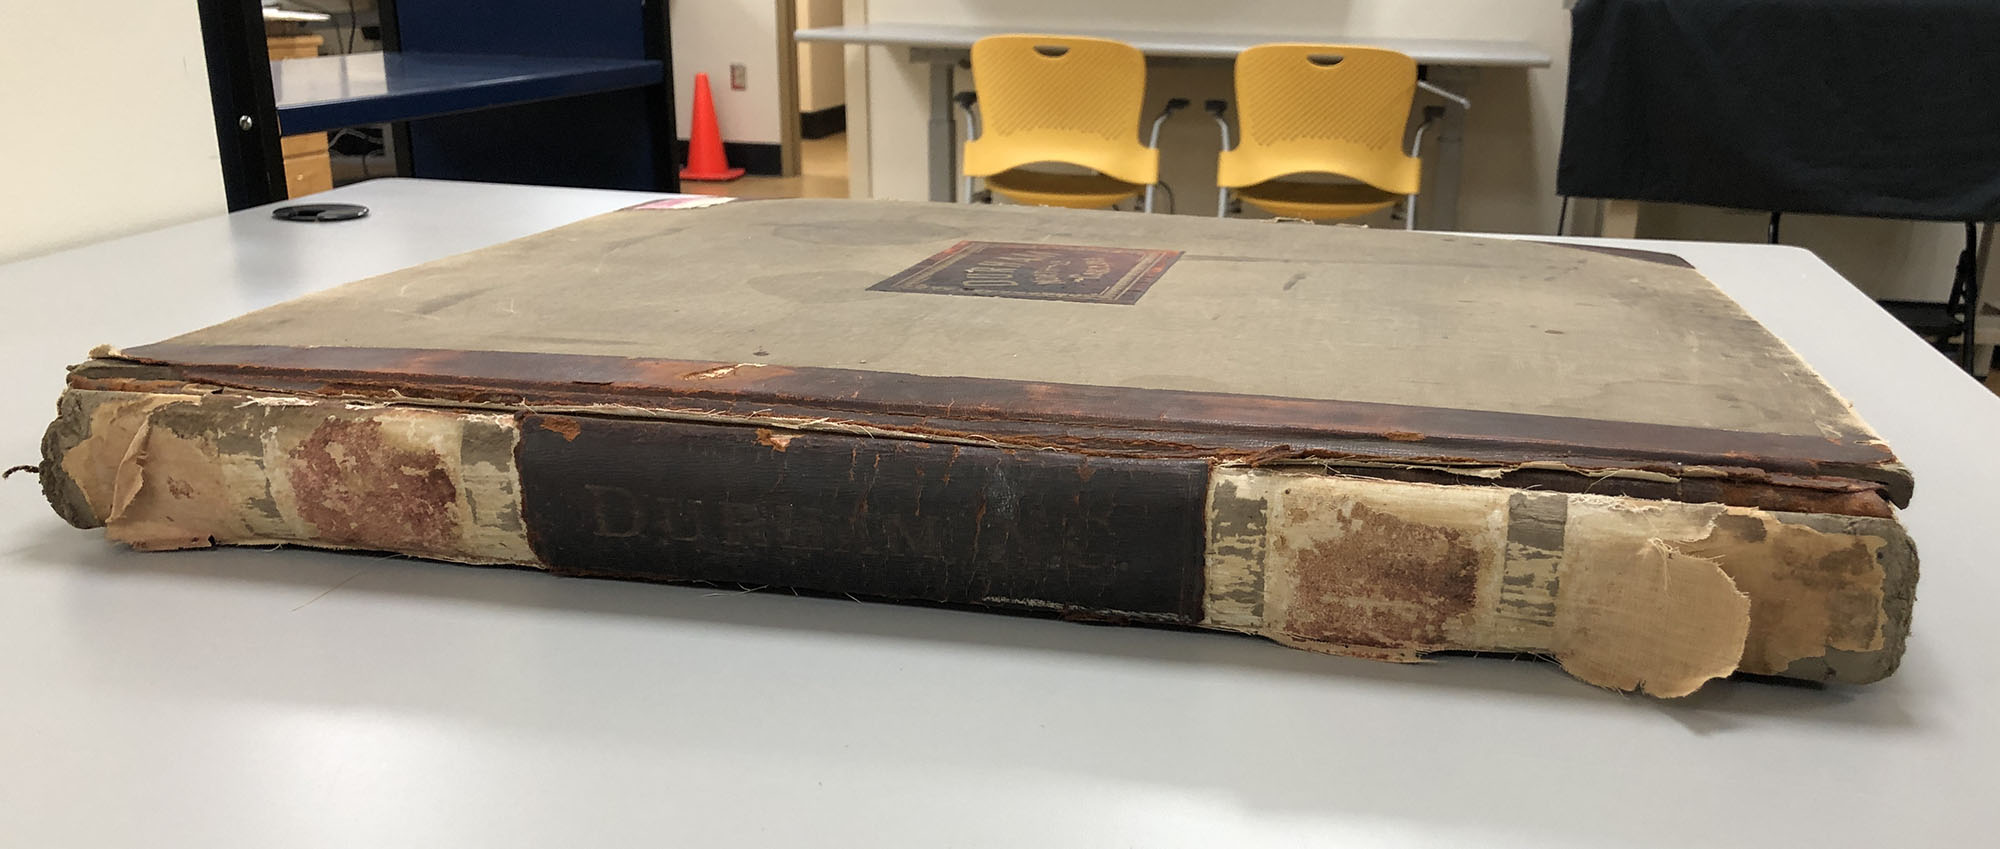
Looking closely, you can see printed instructions to the corrector for which indexes to paste over with the update. Small cutouts of updated maps are also pasted, layer after layer, throughout the interior. The binding is reflective of common ledger bindings from the late 19th and early 20th century, which feature a number of structural components designed to allow such a large and heavy book to function. These include both leather and heavy cloth spine linings, a shaped rigid spine piece, and cloth reinforced hinges. Despite the added strength from those materials, they have not been able to withstand the stresses that this book places on them when opening – particularly as they have aged and weakened. Large portions of leather and the “hubs” (raised bands) are missing from the spine. The leather joints have completely split and the spine piece is just hanging on by a thread now. Fortunately the sewing and spine linings remain intact and functional.
Luckily, most of the stamped leather tabs remain.
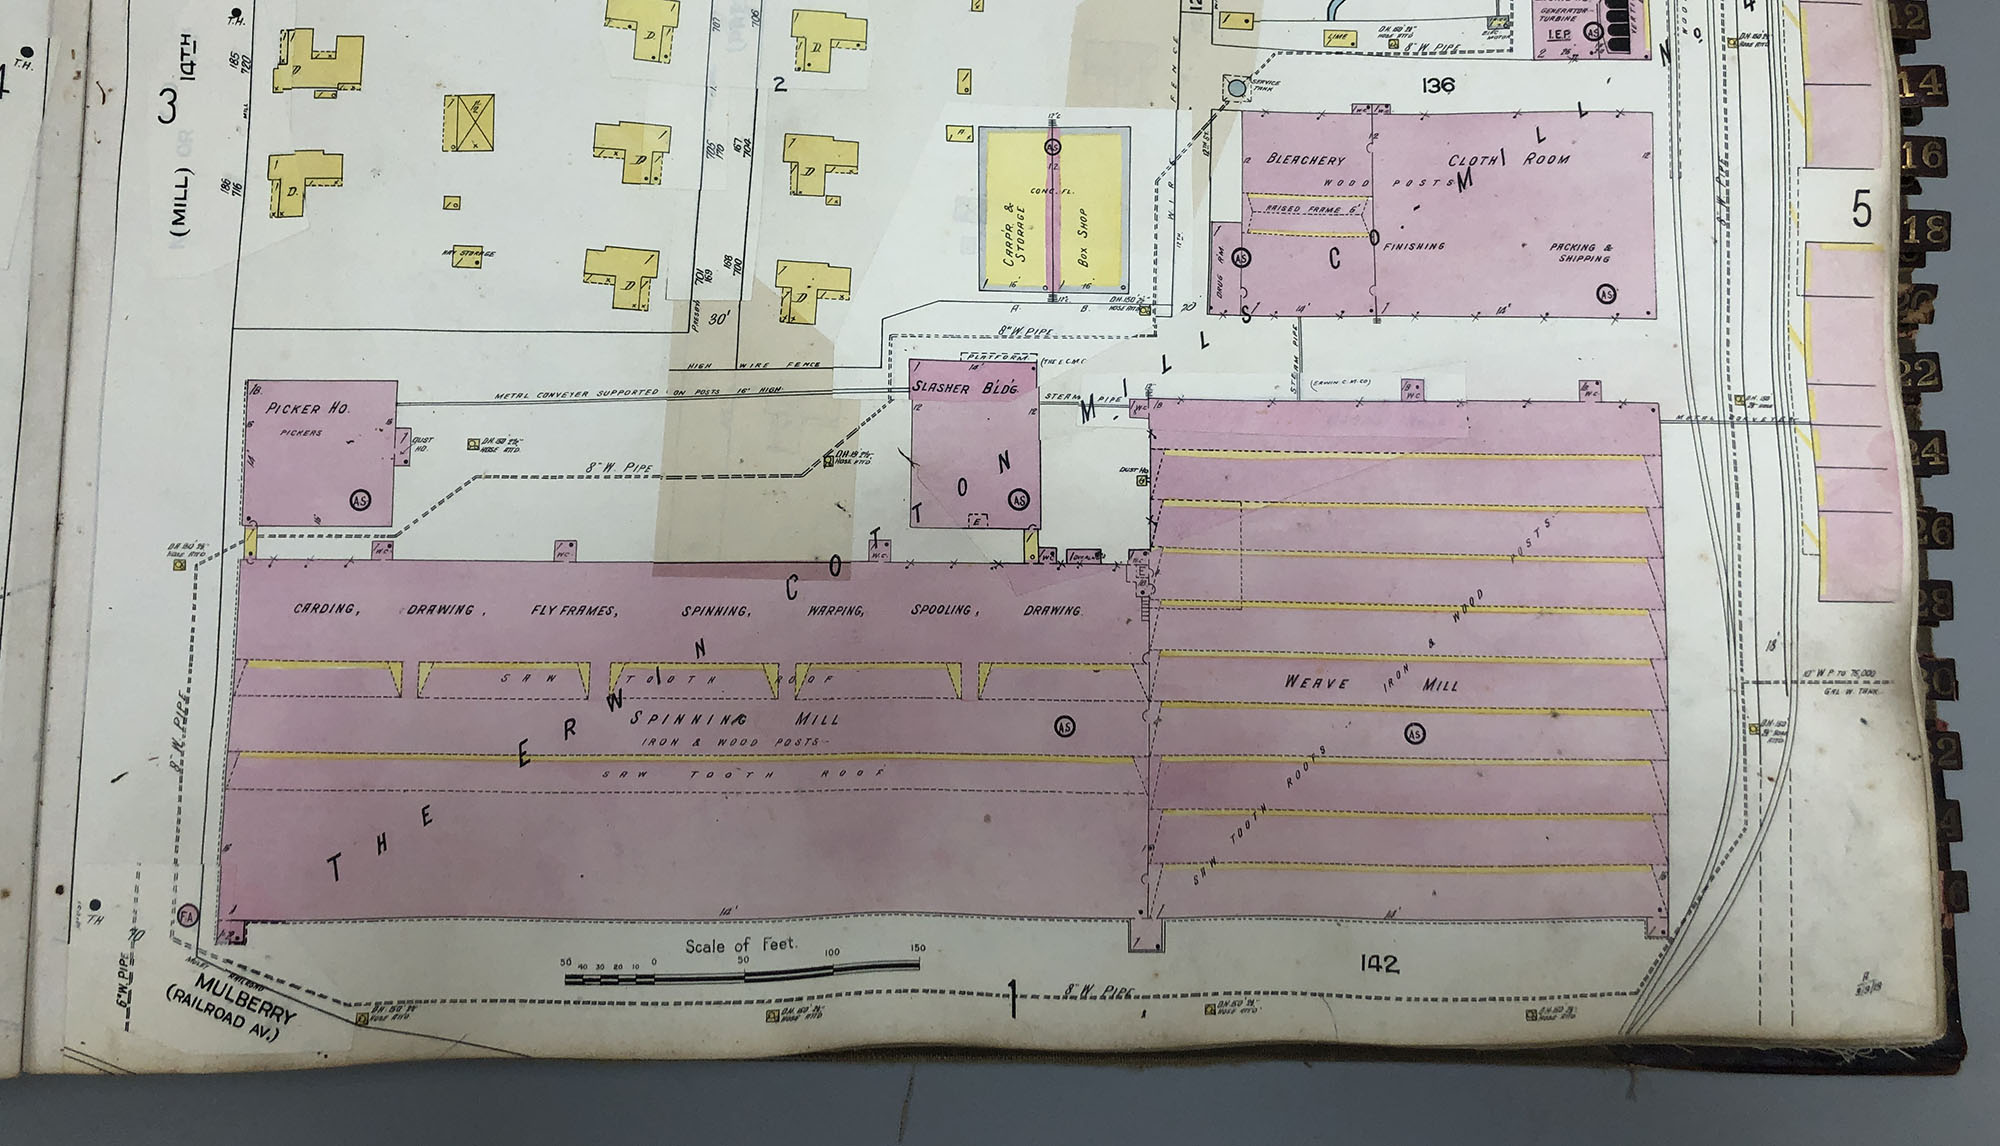
While examining the book, I was keeping an eye out for some of Durham’s more notable landmarks. The Erwin Cotton Mill, located at the corner of 9th and Main street, was easy to spot.
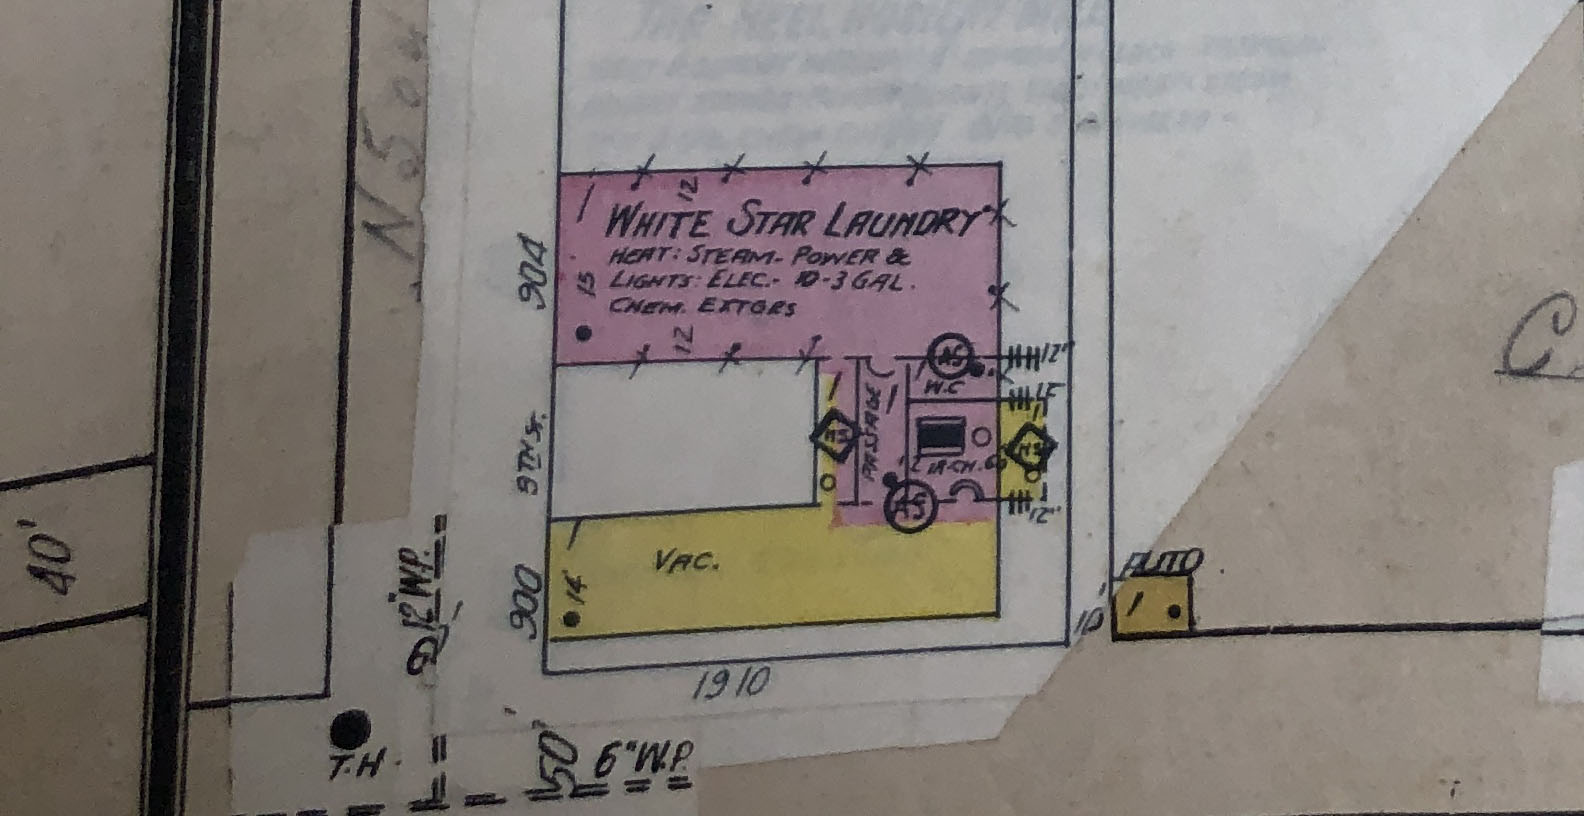
I also found the oldest operating business on 9th street, the White Star Laundry. That corner looks a little different these days. The building in yellow was demolished in the 1950s.
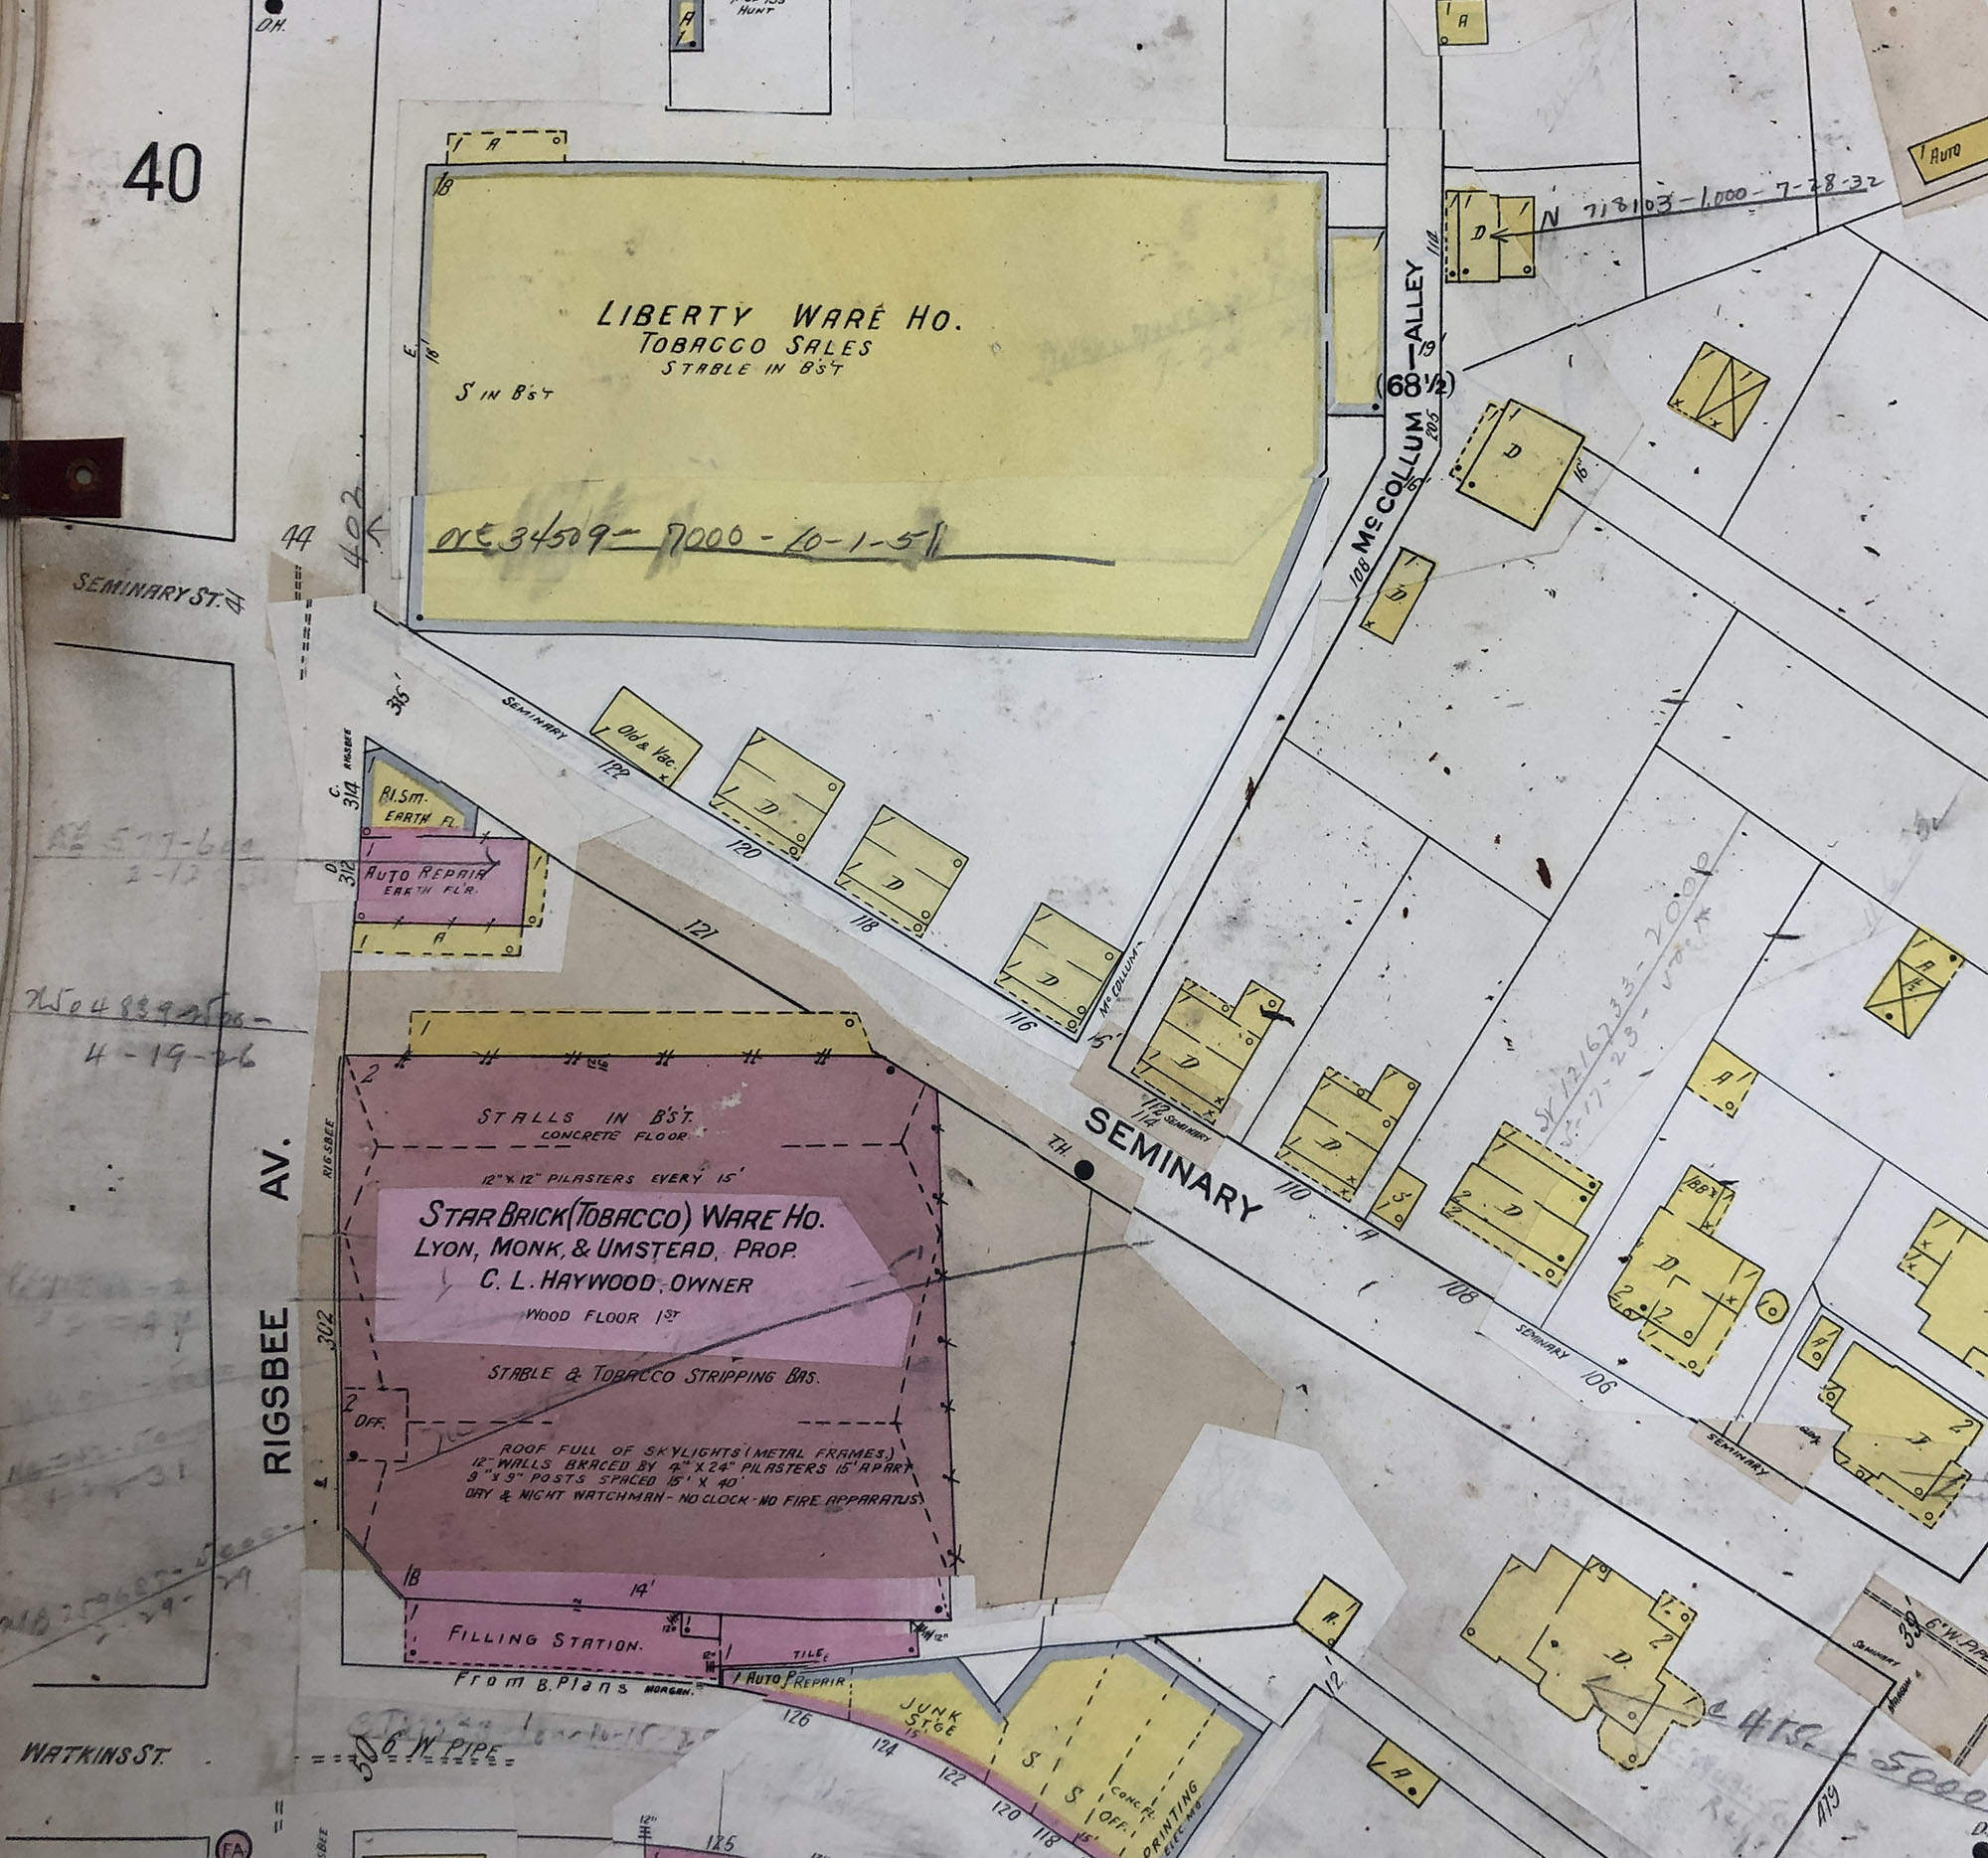
When I came across the Liberty Warehouse, it looked like it was in the wrong place. But the building that I have always known as the Liberty Warehouse (now the site of an apartment building by the same name) was actually the third iteration of the warehouse, built in 1940.
I even found the infamous “Canopener” bridge on Gregson St!
The Sanborn maps contain a wealth of information about the cities they describe and are an important resource for scholarship. We will be working with the curators at the Rubenstein Library to determine the best treatment plan for stabilizing and housing this volume so that it can be safely accessed by patrons.
One of the perks of working in a university library is that you will regularly encounter some very strange and delightful things. The item that checked that box for me this week was the Codex Seraphinianus by Luigi Serafini.
It was pretty obvious why it came in to the lab for repairs. The cover to textblock attachment was way too weak for the size of the book.
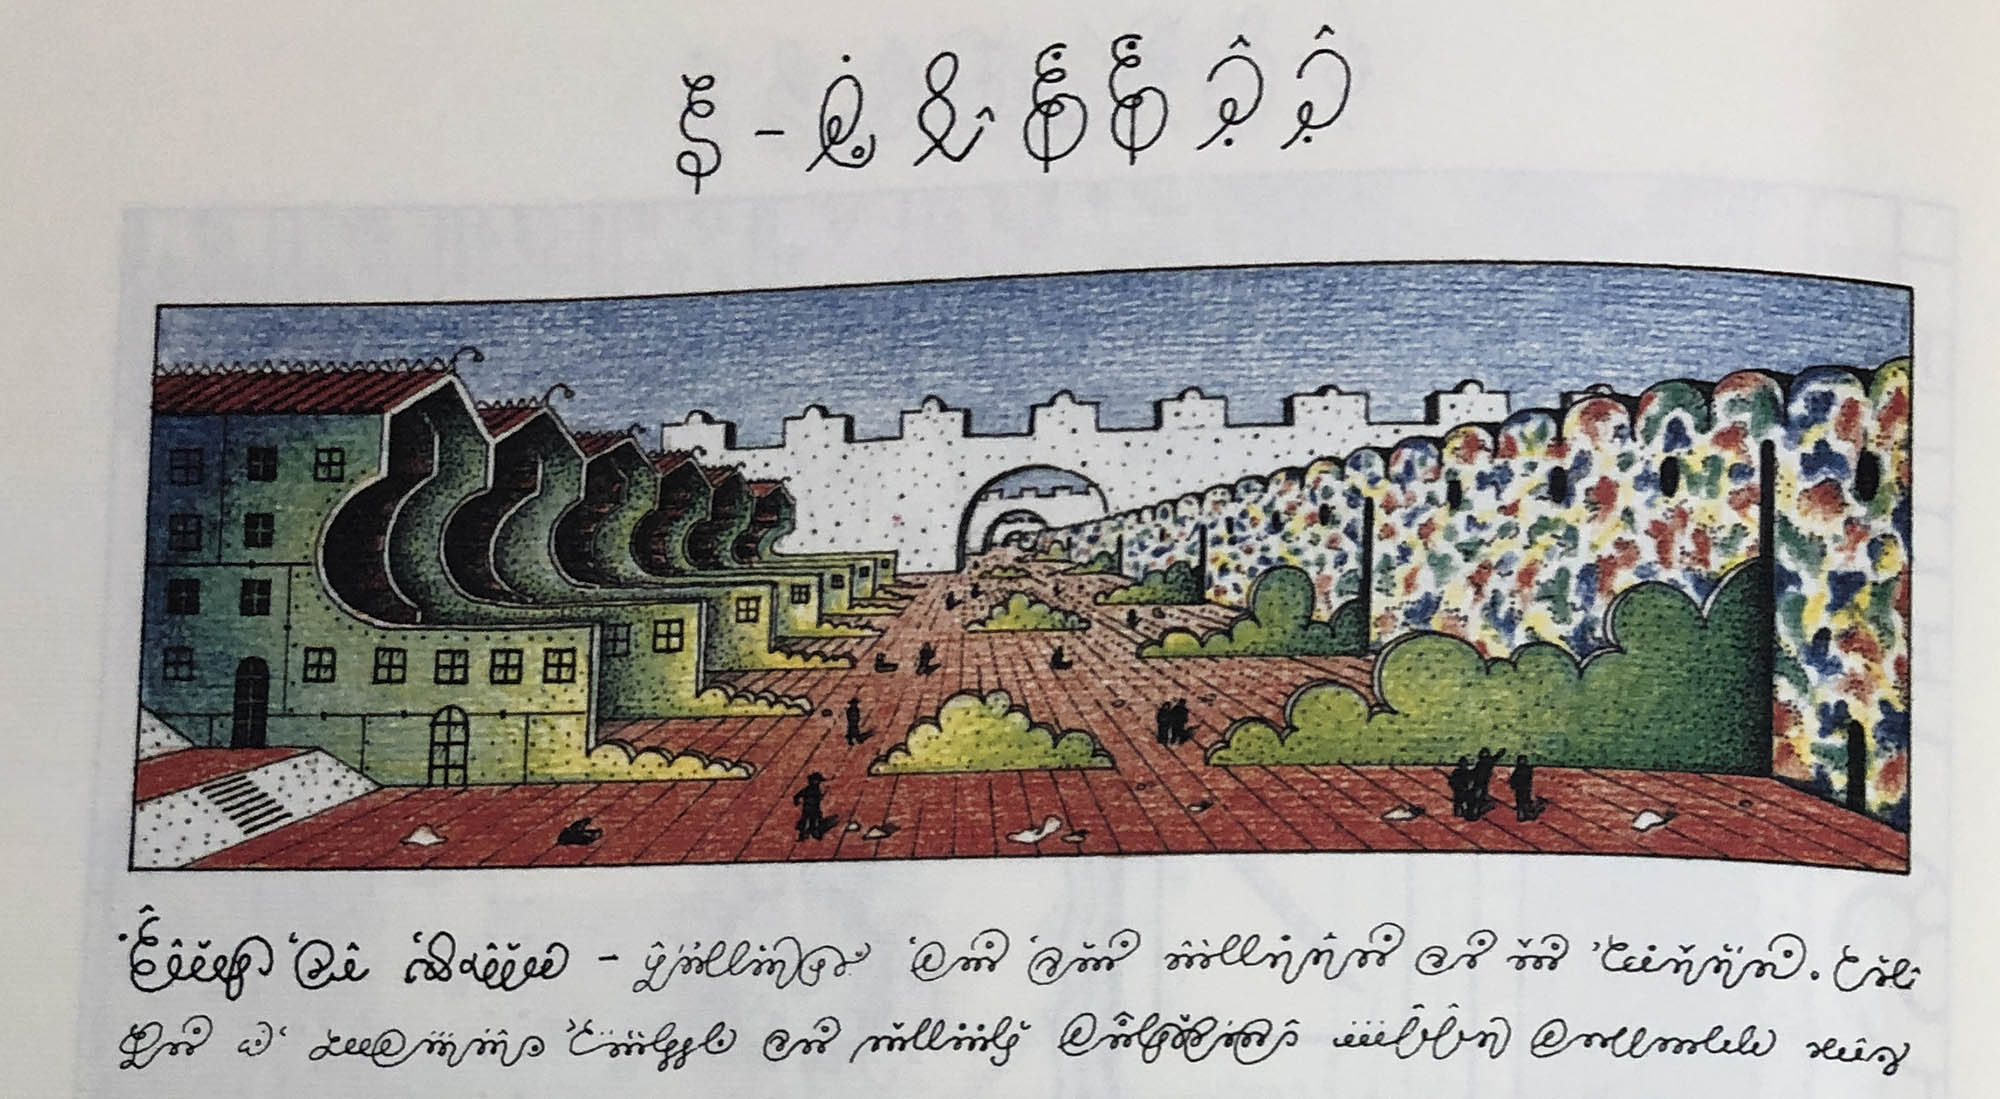
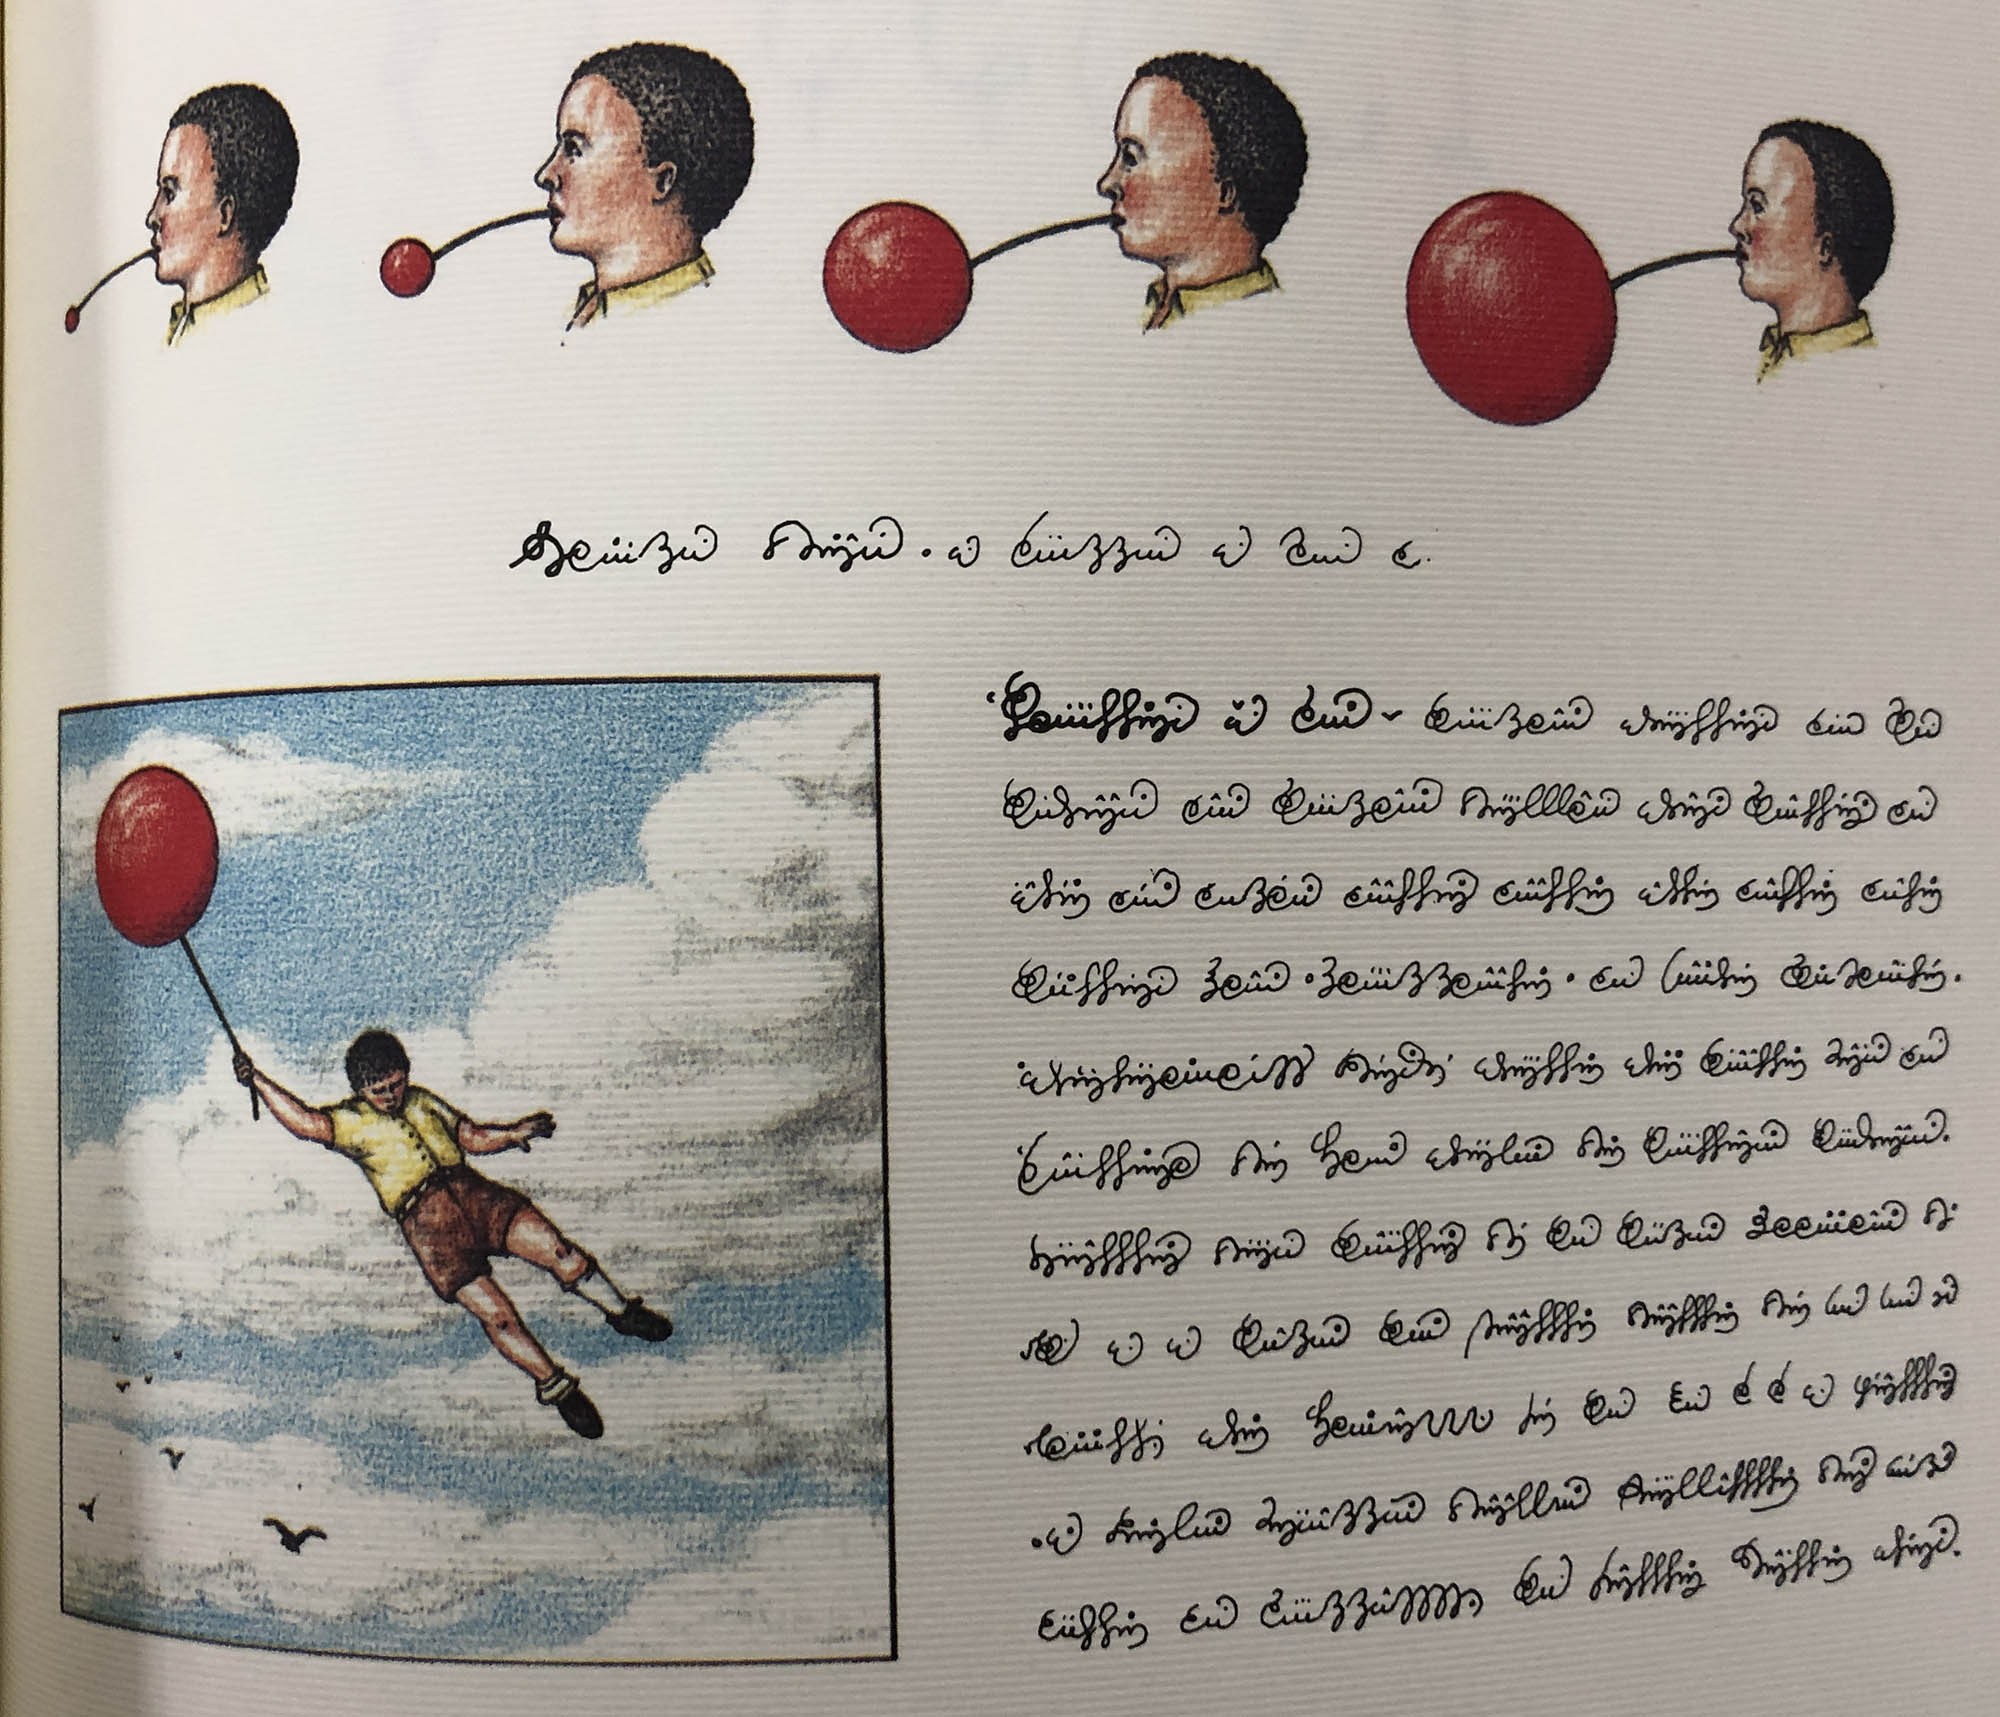
The text held a number of surprises, though. This illustrated encyclopedia, written in some imaginary language, contains images of all kinds of crazy stuff. The illustrations cover everything from animals, …
A surreal Wool E. Bull?
… to fashion, …
… , to elaborate machines and architecture.
It even has some suggestions for activities to occupying your free time.
If you are a fan of mysterious illustrated books, like the Voynich Manuscript or the Rohonc Codex, then Codex Seraphinianus is probably worth a look. Once we’ve had a chance to reattach the case, of course.
Duke Libraries lost a beloved colleague yesterday. Sam Hammond passed away Thursday at the age of 73. Sam was many things. He worked in the library for 41 years including as a music librarian, and as a librarian in the Rubenstein Rare Books and Manuscripts Library. Sam was also a campus carillonneur for over 50 years. He started playing the carillon as a first year Duke student in 1964. He retired from that job in 2018. He also walked to work, and used those walks to pick up litter from the roadside. With every step he made the world just a little bit better.
Sam was a kind soul who always had time to help you when you needed information. When I would visit his office to review something, he would share some of the other wondrous things he was working on. I learned a lot from him. Sam had a sharp wit, and when he told a joke his eyes would shine. He was a true gentleman. But above all, he would routinely tell me how much he appreciated Conservation’s work, and that he was happy I was here at Duke . That always made me feel good, and it was a master class in how to treat your colleagues.
To honor Sam and his contributions to campus, Carillonneur Joey Fala played a variety of Sam’s favorites yesterday at 5pm. You can see the full recital online at Duke Today. Recordings of Sam playing the carillon, and more information on his life can be found online here and here.
As I was contemplating this blog post, I looked for items in the lab that would resonate. Flowers are often given to the family after they lose a loved one. This wonderful book on flowers is on our repair shelf. Tulips have many meanings, love, loyalty, peace and forgiveness. Plus, spring is just around the corner, and after the year we have had, who doesn’t need some cheerful spring blooms?
We had two books turned into chew toys come into the lab this week. One is old damage, so I’m not sure we can blame that on the current pandemic.
Book turned leather chew toy.
This one came to us from Circulation this week. Fido is either anxious because her person went back to work, or is upset because her person is spending too much time on Zoom and not enough time on belly rubs.
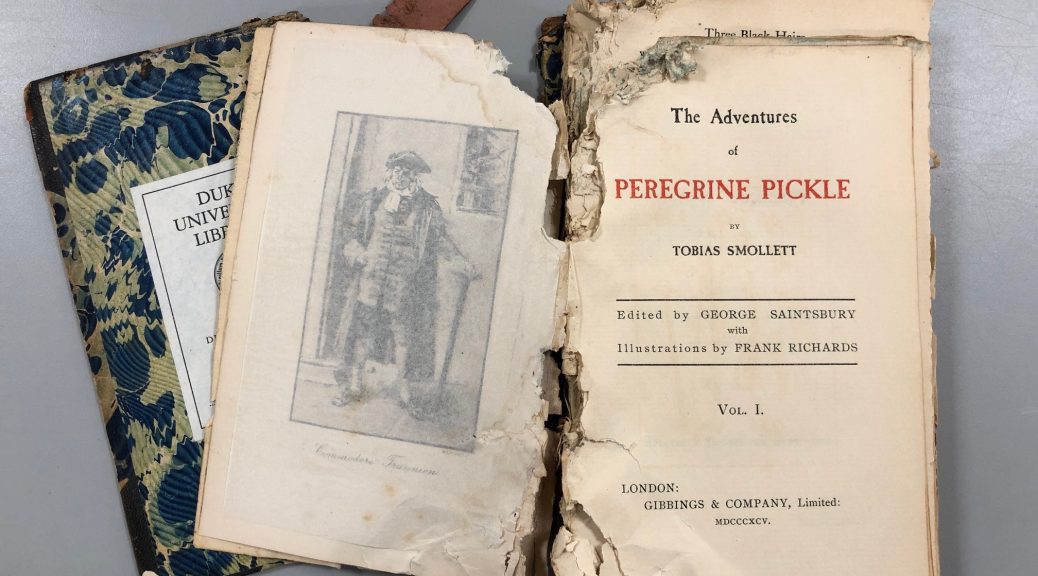
Peregrine Pickle finds itself in a jam.
Both are half leather volumes. Maybe the leather just tasted good? We may never know.
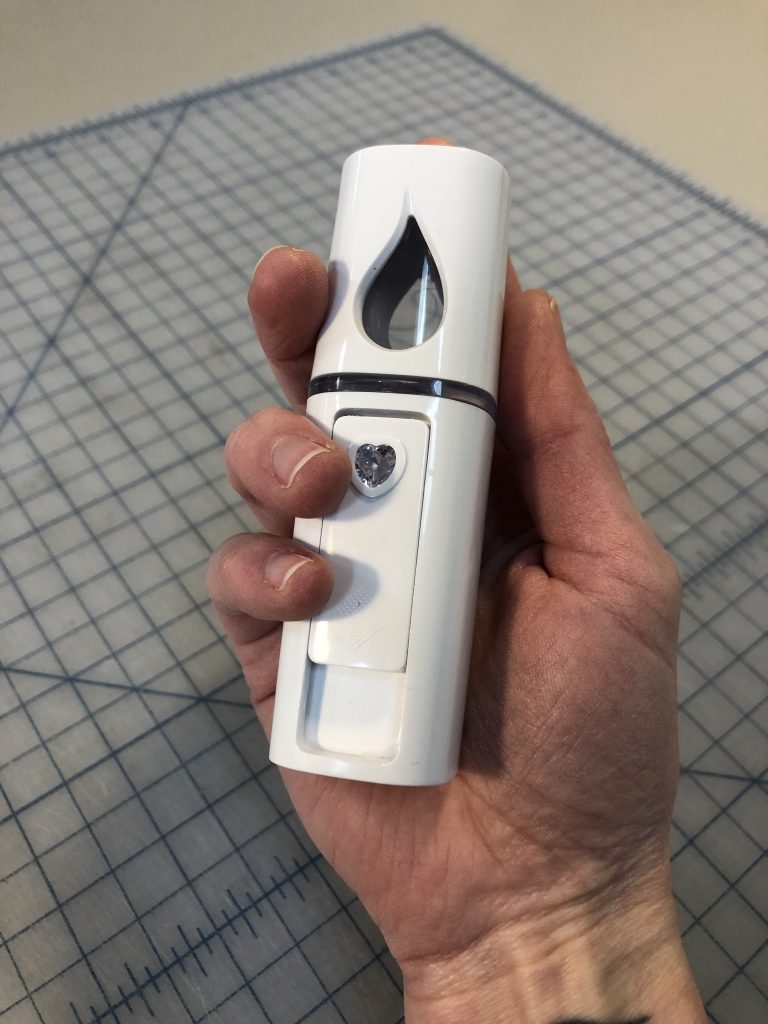
This tip is shamelessly stolen from a blog post by Satomi Sasaki Verhagen on The Book & Paper Gathering and I cannot thank them enough for writing about this wonderful tool.
It’s a mini, handheld humidifier that creates a very fine mist (click here for a short video) perfect for localized humidification. It looked so useful in their blog post I ordered one right away and had fun playing around with it when it arrived.
Now over a year later I’ve finally had a chance to use it on a treatment project. I blame working from home for not finding a use for it earlier.
We recently got a large vellum binding with many creased and torn fold outs that needed flattening and mending. The binding was stiff and allowed for only a very small opening angle. Mini-humidifier to the rescue. I was able to very lightly humidify just the localized areas of creasing to flatten and realign them before mending. It worked beautifully. Because the little humidifier doesn’t create a very large spray of mist it was easy to direct and keep only in the areas I wanted. Also, it creates such a small amount of moisture that it worked very slowly so it was easy to control how humid each area got.
It wasn’t perfect though. If left running it could build up condensation around the nozzle especially when held at an angle. I found I had to hold a paper towel around the base to prevent any of these drops of condensation from falling on the page I was humidifying. Regularly turning the humidifier off and blotting drops of water off from around the nozzle helped manage condensation build up. The battery didn’t last very long but it is rechargeable and charged very quickly while I was at lunch.
Overall I was so happy with how this tool works and will definitely be using it again.
Normally I don’t like to point fingers, but this item came into the lab and I really cannot NOT comment. I don’t know if this is a standard binding method for oversized music scores, but it certainly is a terrible binding for one. “Troubled Island” by William Grant Still is printed in single sheets on 11×17 inch paper and with 339 pages ends up about two inches thick. But the binding…
Does this qualify as a “binding”?
The cataloging record does say “bound with tape,” so warning number one that this is as issued. What the record doesn’t say is that this is bound with strapping tape, the kind with the glass yarn filament embedded in it.
So shiny, so strong.
But wait! There’s more! To create folios the publisher/printer placed three pieces of tape between each single sheet. One at the head, tail, and center of the sheet.
So. Much. Tape.
This is bound for failure on so many levels. And it does not disappoint.
Bound to fail.
I wish I could have a conversation with the publisher about this. Is there a reason this score is bound the way it is? Was the binding meant to be temporary? I really don’t understand any of it, but there must be a reason why they chose to bind this score in this way, right? If anyone knows, please leave the answer in the comments because I am stumped.
End Note 1: “Bound to Fail” would be a great bookbinding contest theme. Or has that been done already?
When paring leather for book bindings or book repair, it is essential to have a flat, smooth surface on which to work. The parts of the leather that will be turned-in, particularly around the endcaps of the book, must be made very thin and often with a long, gradual bevel. Uneven paring will visibly show after being adhered, so it takes some care and practice to get it right. Paring on the right surface allows you to feel any variation in the leather with your fingertips and take off more material as needed. You also need to work on a material that is hard enough to not be cut up by the paring knife. Many materials (such as glass, marble, or granite) are used for this work surface, but one of the more common is lithographic limestone. Limestone won’t dull a blade as quickly as other stones. It also absorbs water, so I like using it as a work surface for the whole process of covering in leather.
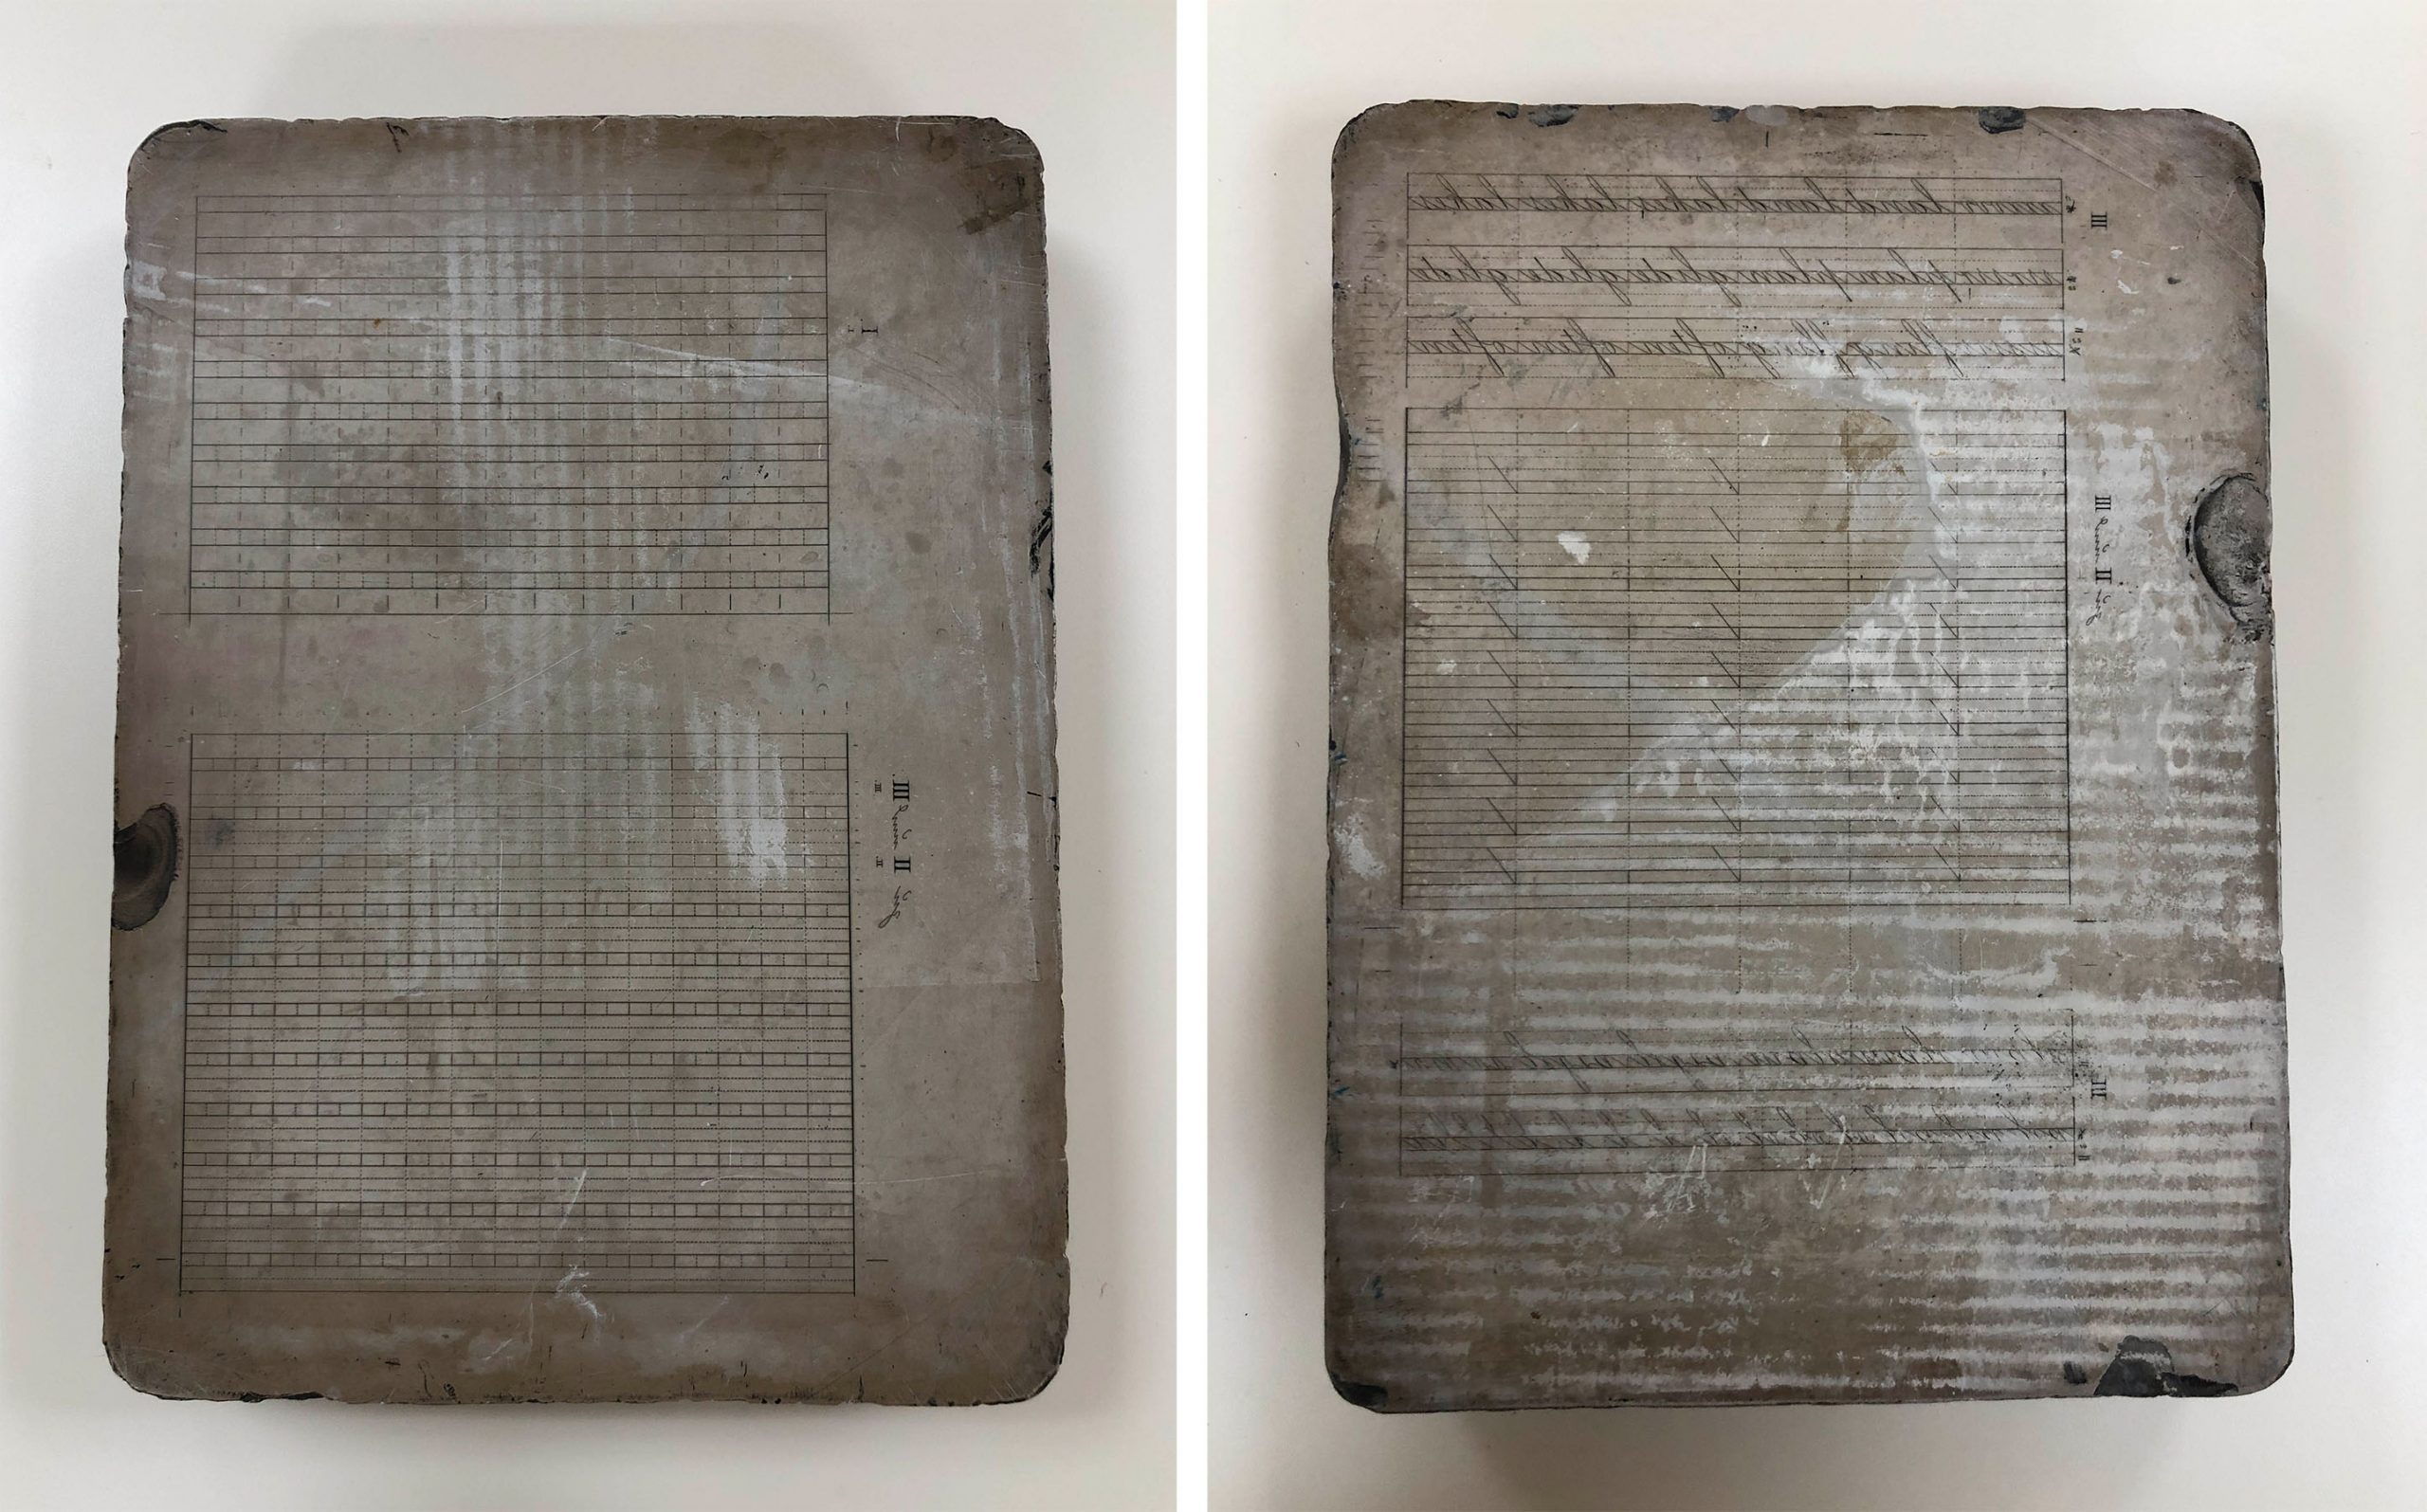
Our new stone. We’ll call the image on the left the “Top” of stone and the image on the right the “Bottom”.
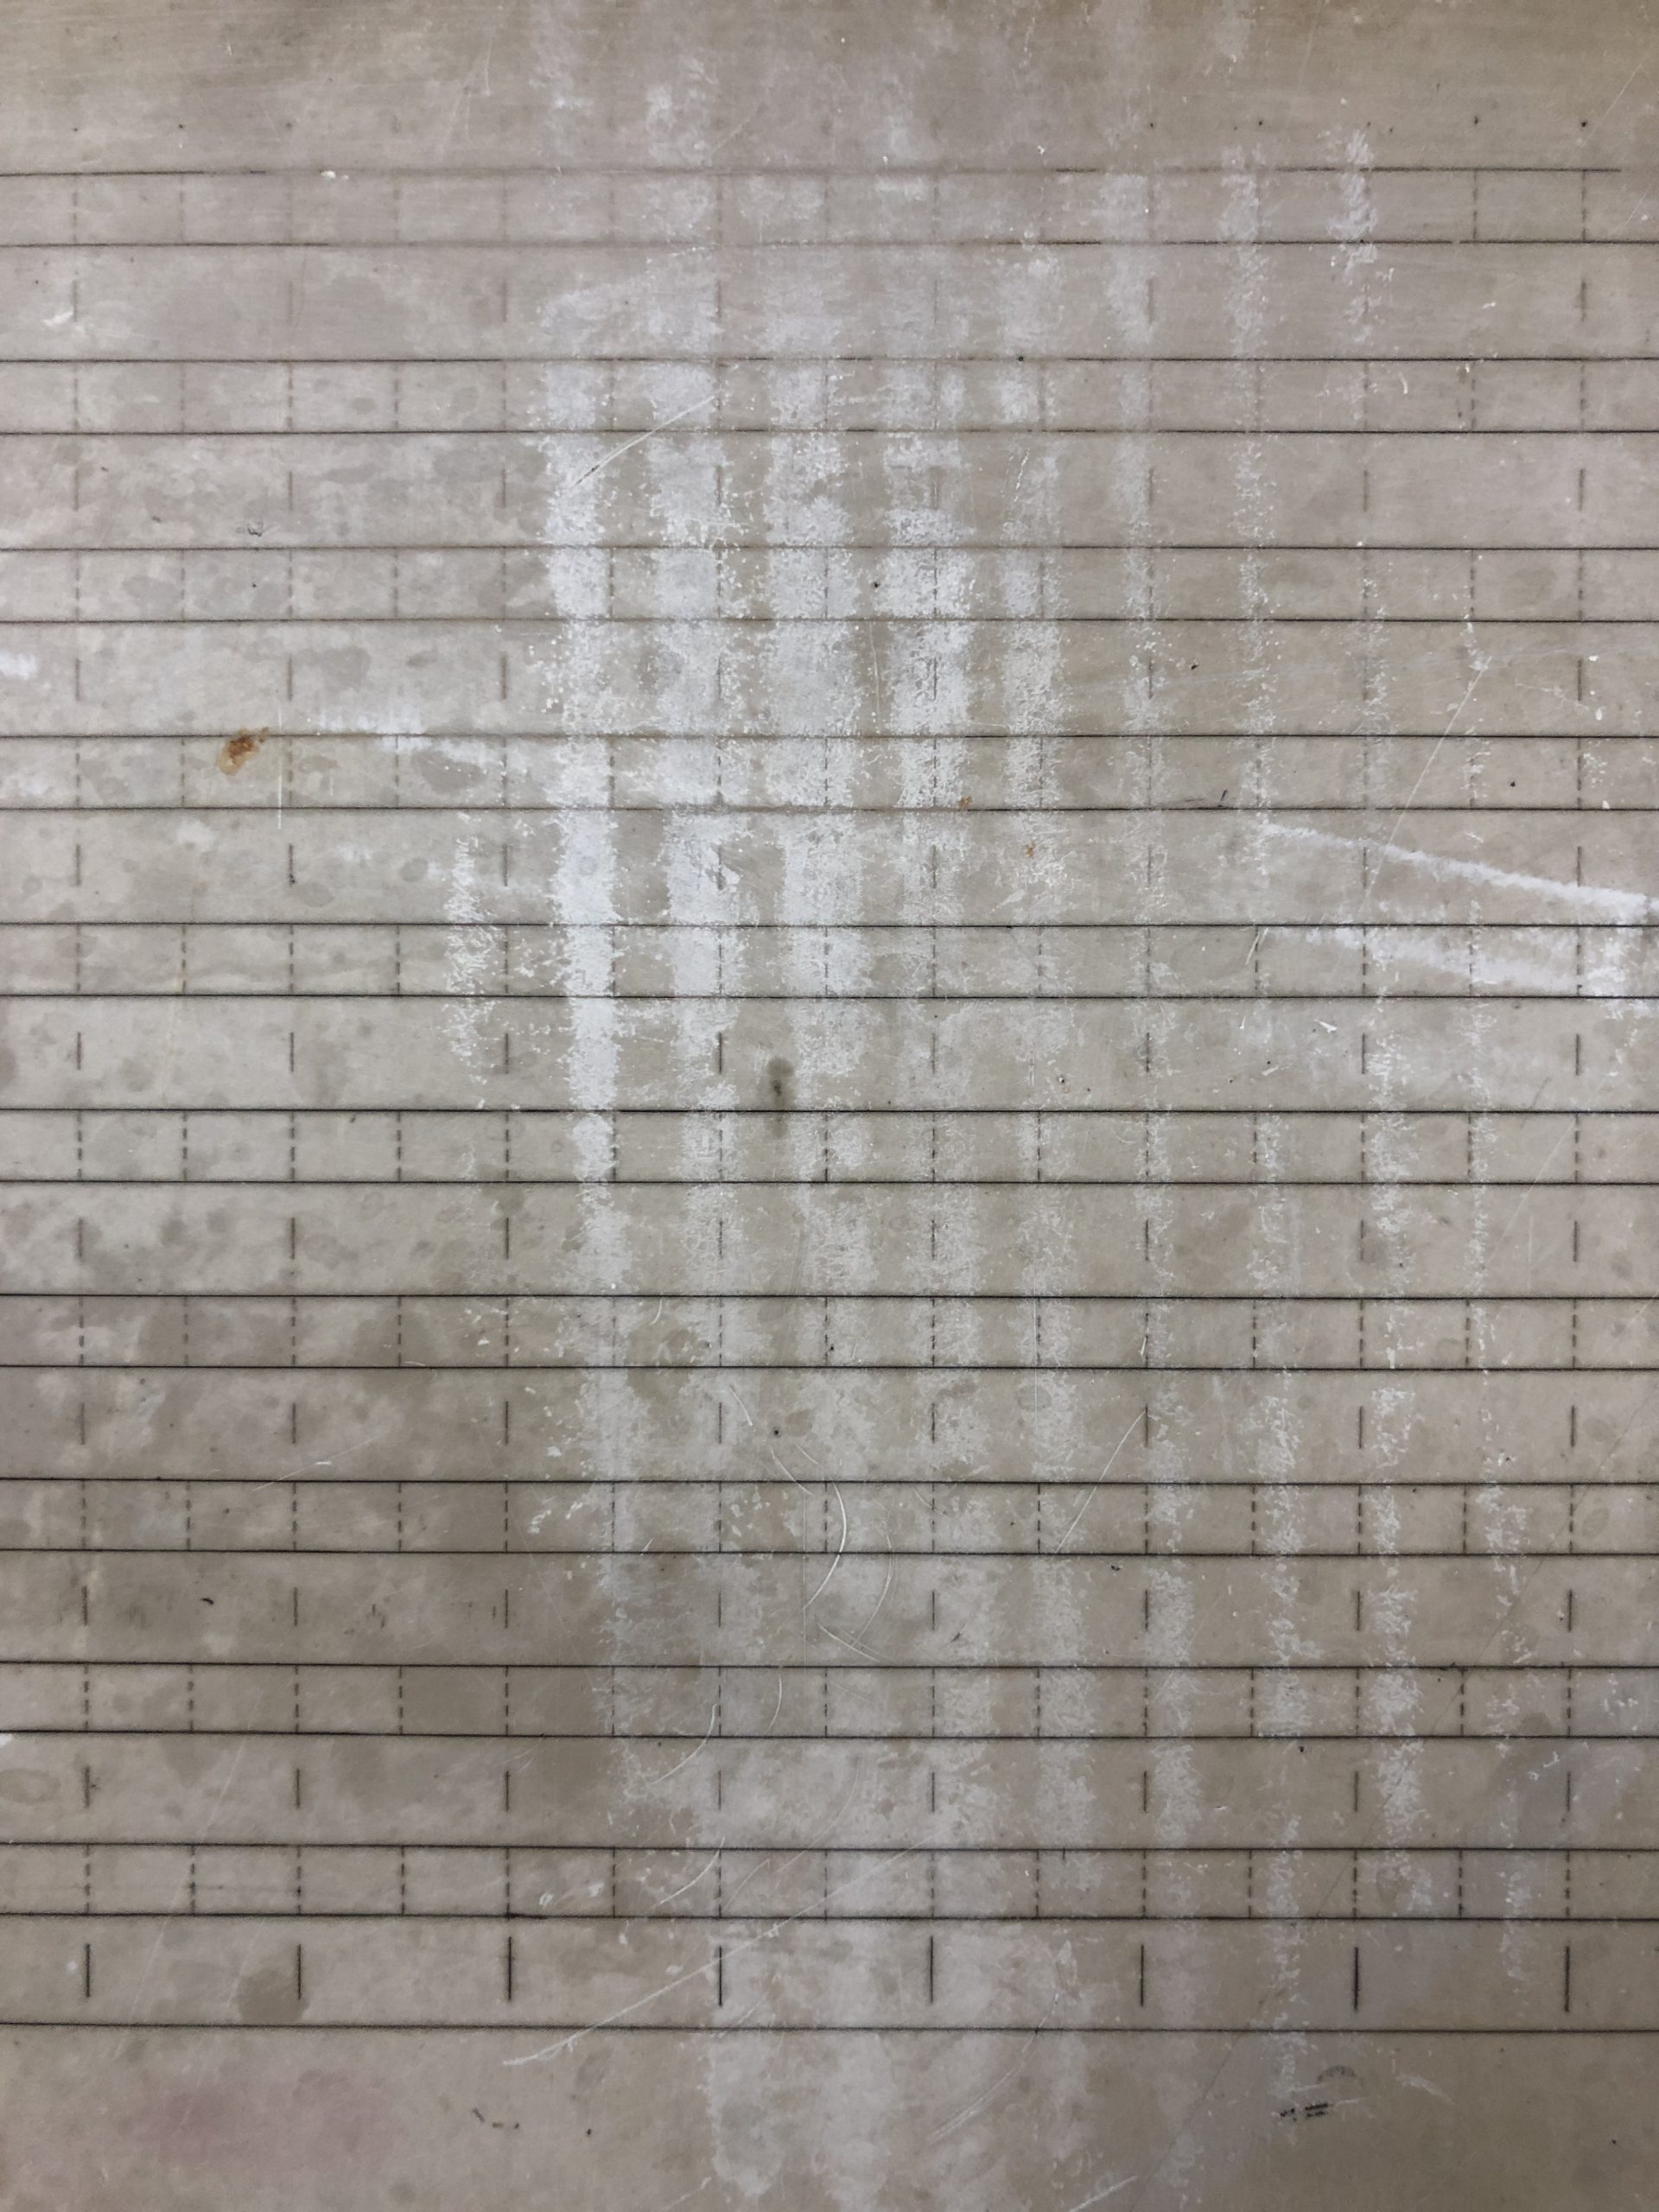
The lab recently acquired this small lithography stone, which was used as a printing plate for what appears to be a worksheet for practicing handwriting. The printing image on the “bottom” of the stone includes examples of short words with ascenders and descenders: land, lakes, plan, glide, plan, fling, often, etc.
The stone was pretty flat, but had a number of scrapes and scratches that could mask problems with paring work. I wanted to remove those before we began using it. Luckily there is a standard method and a lot of resources available to help me do that.
When a stone plate has been printed for the last time, it must be refinished (or “grained”) to remove the old image and prepare the surface for a new drawing. I consulted The Tamarind Book of Lithography to see what we would need to do to prepare the stone. This is a great resource that includes a lot diagrams and step-by-step instructions. Luckily Duke’s Department of Art, Art History & Visual Studies had the equipment to grain a stone and they allowed me to bring the stone over to the studio.
The process was fairly simple and kind of fun to do. With the stone sitting on top of the graining sink, I poured a little water over the top of the stone to act as a lubricant and then added some course carborundum grit (silicon carbide) for the abrasive.
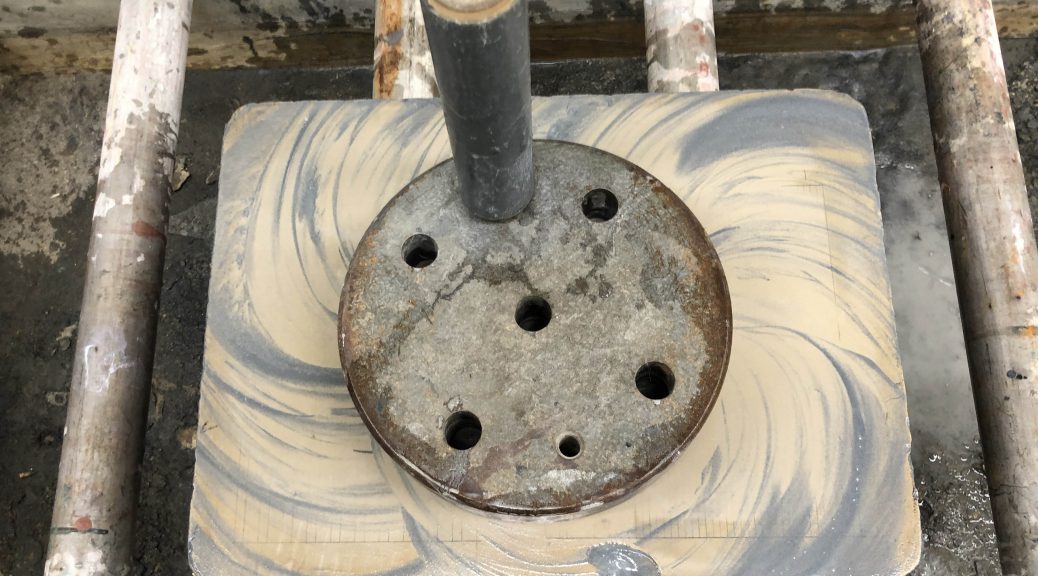
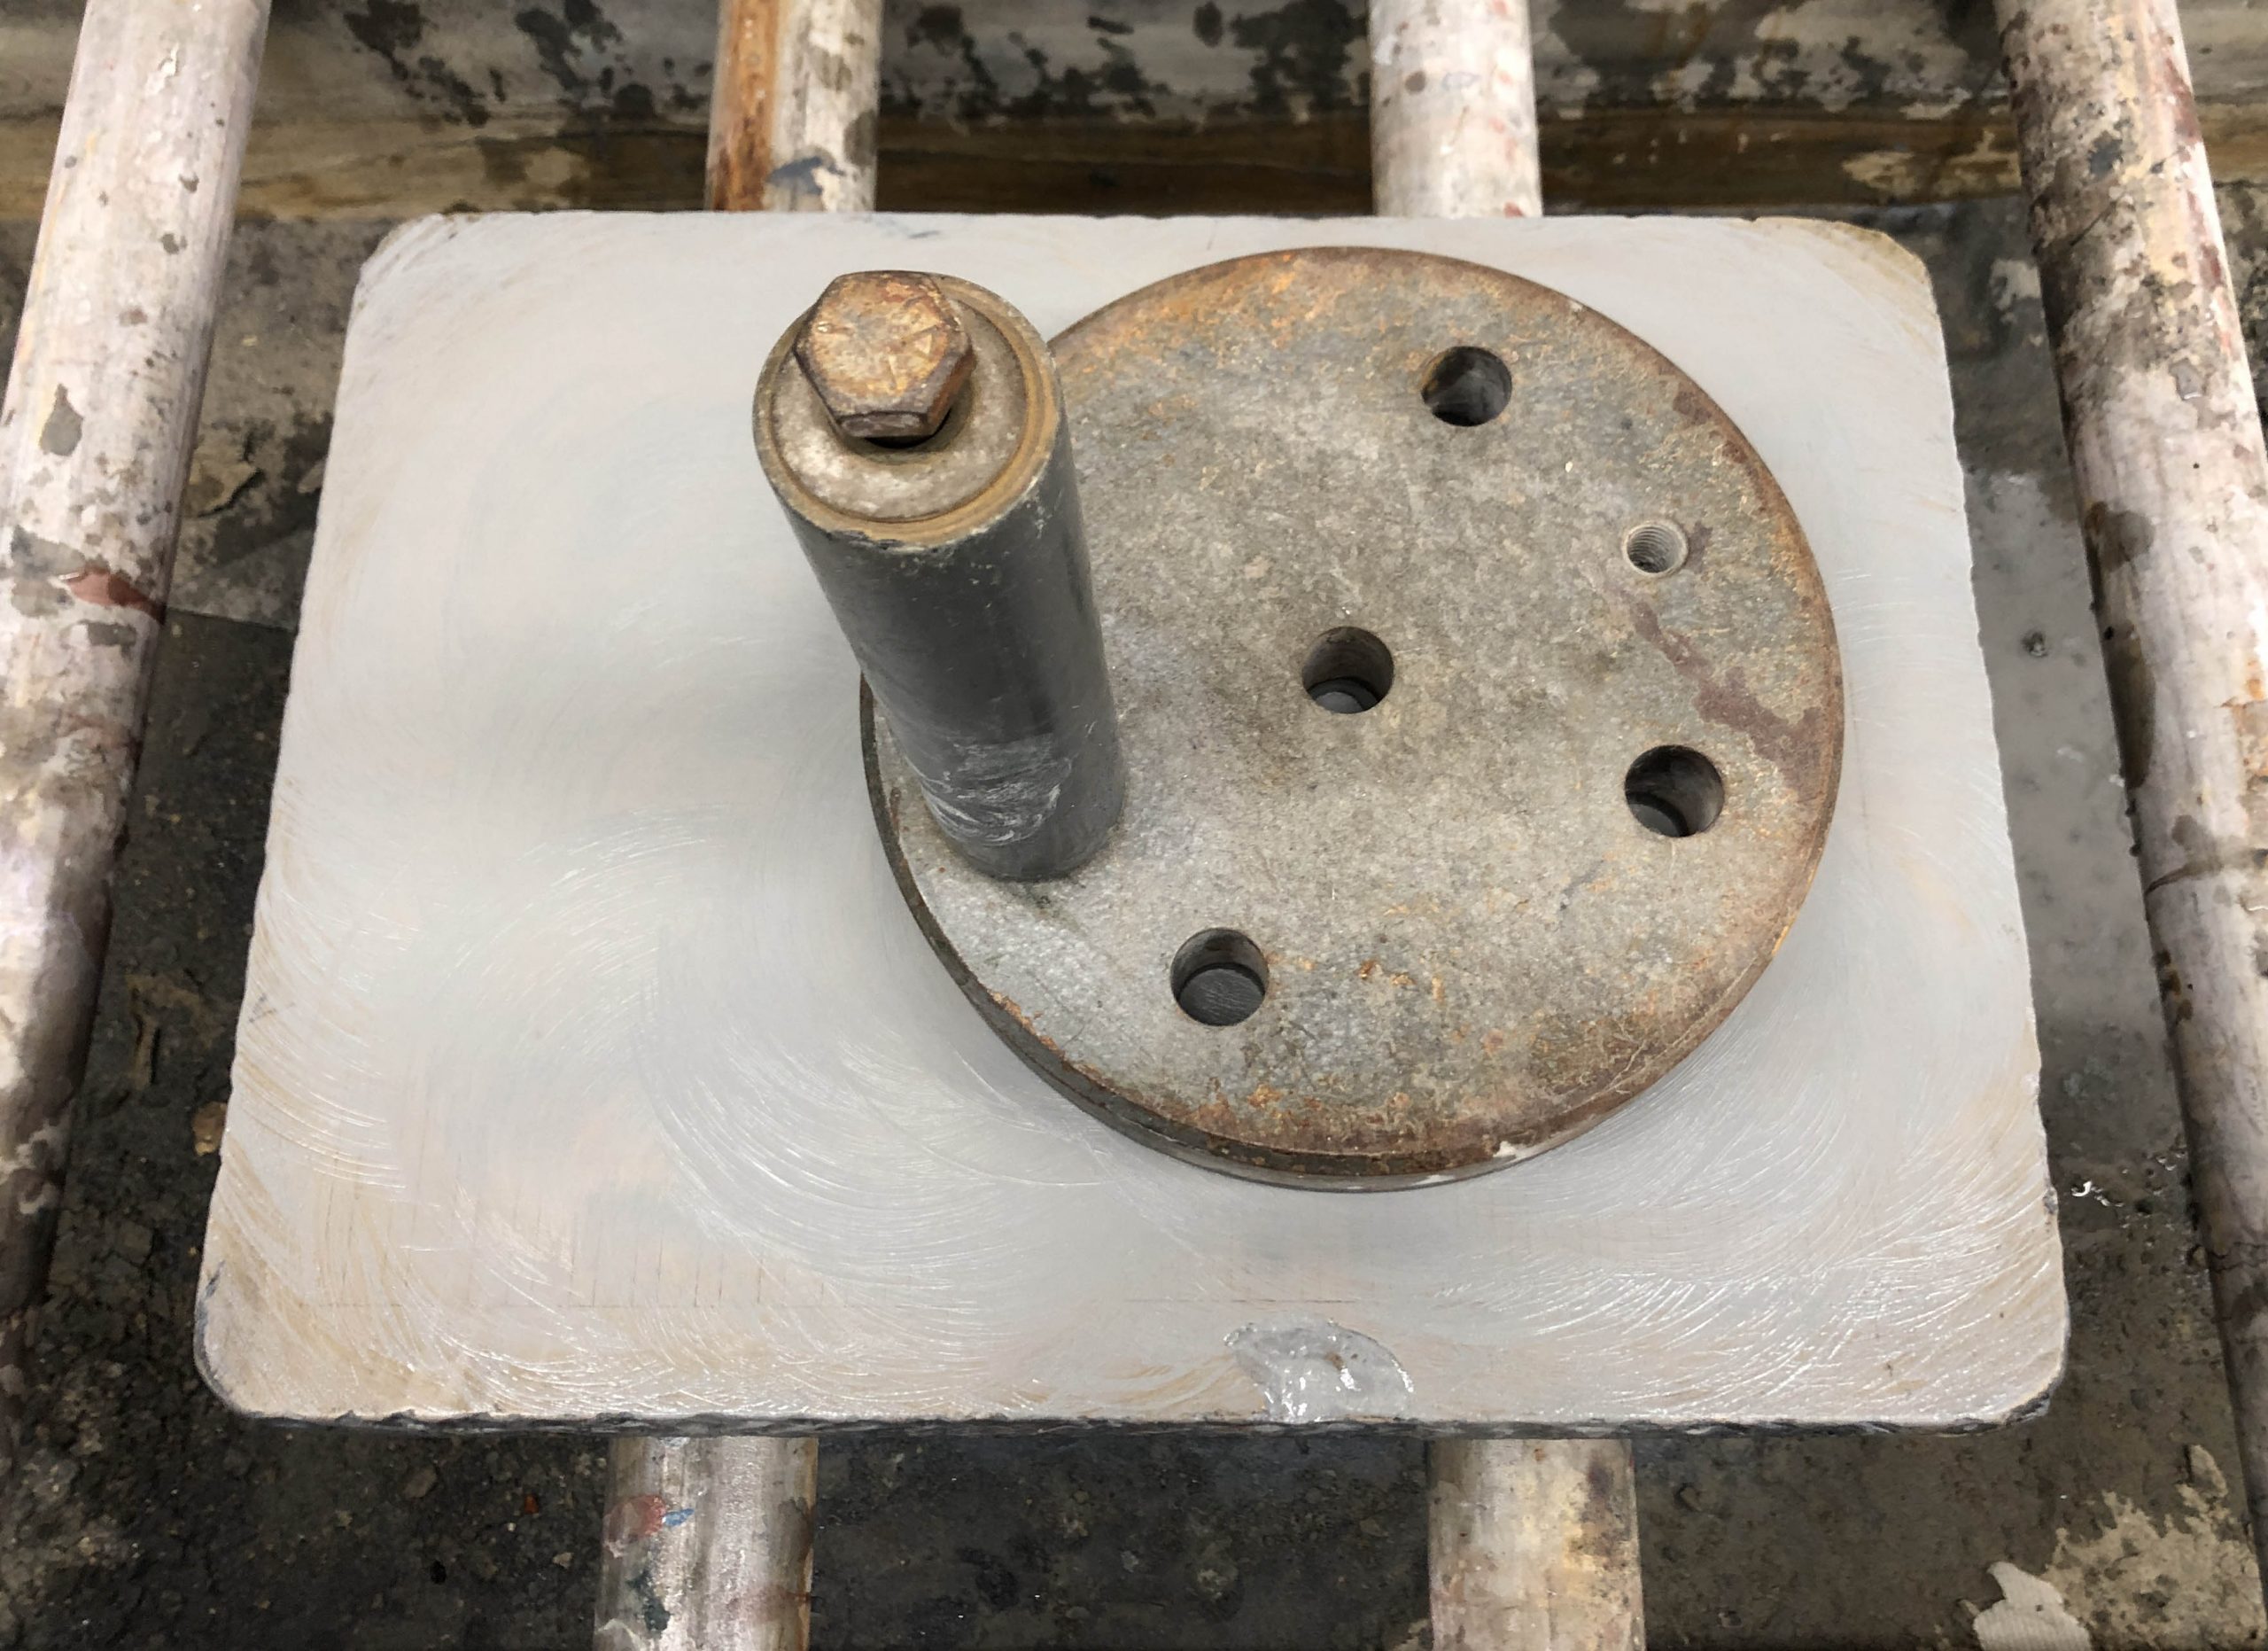
A heavy piece of round steel with a handle, called a levigator, is then used to spin over the stone surface to start grinding it down.
I tried taking a video of the process, but it was a little hard for me to hold the camera steady while using the levigator. You can get a much better overhead view in this video from California State University Stanislaus:
The spinning continued until I had worked up a fairly thick stone sludge.
The stone is washed clean and the process is repeated until enough of the surface has been removed.
Printers will continue graining with increasingly fine grits to get a very fine surface for drawing – but that didn’t seem necessary for our purposes. I believe the outside edges of the stone surface are also filed by the printer to keep them from showing up as an artifact in the print, so the patina and ghost of the original print are still visible around the outside of our stone. I decided to stop at this point because some of the edges were starting to get sharp. We’ve got a sizable chip on one side that needs to be avoided anyway.
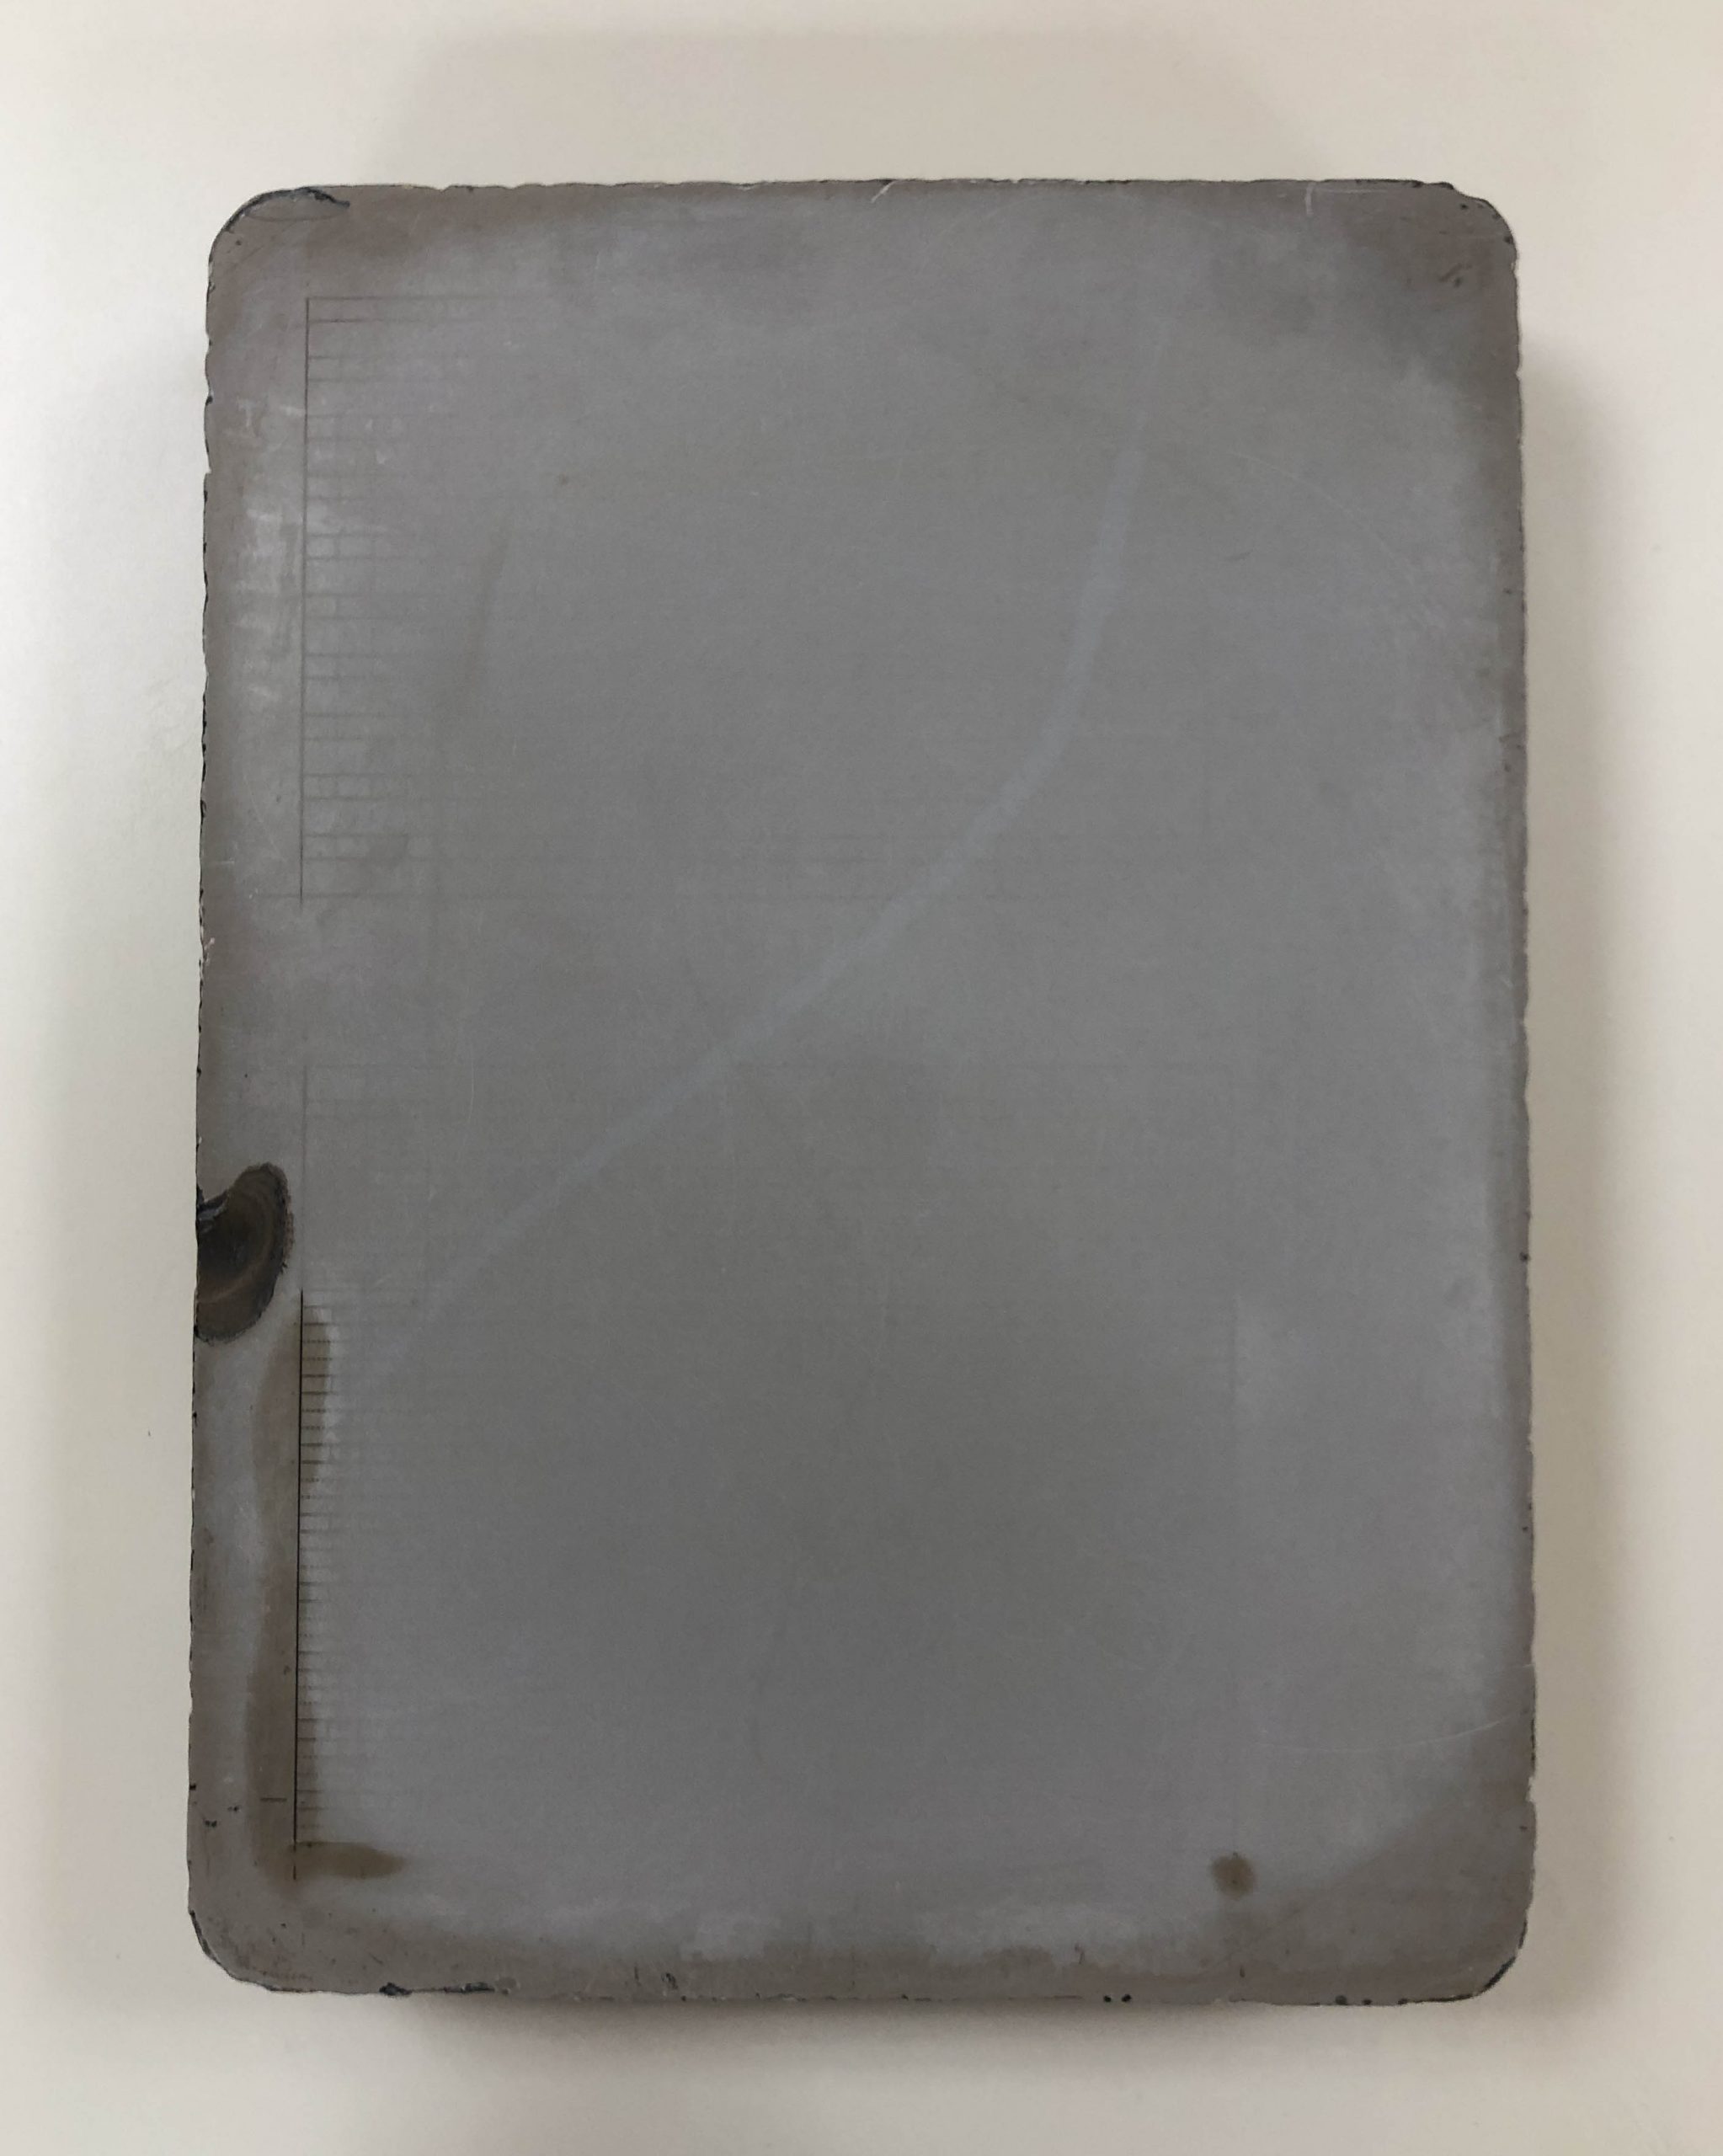
The top after graining and drying
I’m pretty pleased with the results. The print image still remains on the bottom of the stone, so we can keep some evidence of what the stone was used for previously. The stone is fairly heavy (40-50 lbs by my guess), so it now lives on a wheeled cart so it can be easily moved around the lab as needed.