Eddie Cameron is a very well known figure around campus. His forty-six year career with the athletics program is the second longest tenure in Duke’s history and our indoor stadium was renamed for him in 1972.
The Edmund M. Cameron Records in the University Archives consists of nearly 14 linear feet of materials produced during his career, and includes three large scrapbooks. Those scrapbooks were adopted for conservation treatment recently through our Adopt-a-Book Program and, over the course of treating one of them, I was able to (quite literally) see Cameron in a whole new way.
Two of the scrapbooks in the collection focus on particular bowl games, but the third is a more general collection of photographs and newspaper clippings from Cameron’s time at Duke. The scrapbook is no longer bound and is currently stored as loose sheets in an over-sized records box.
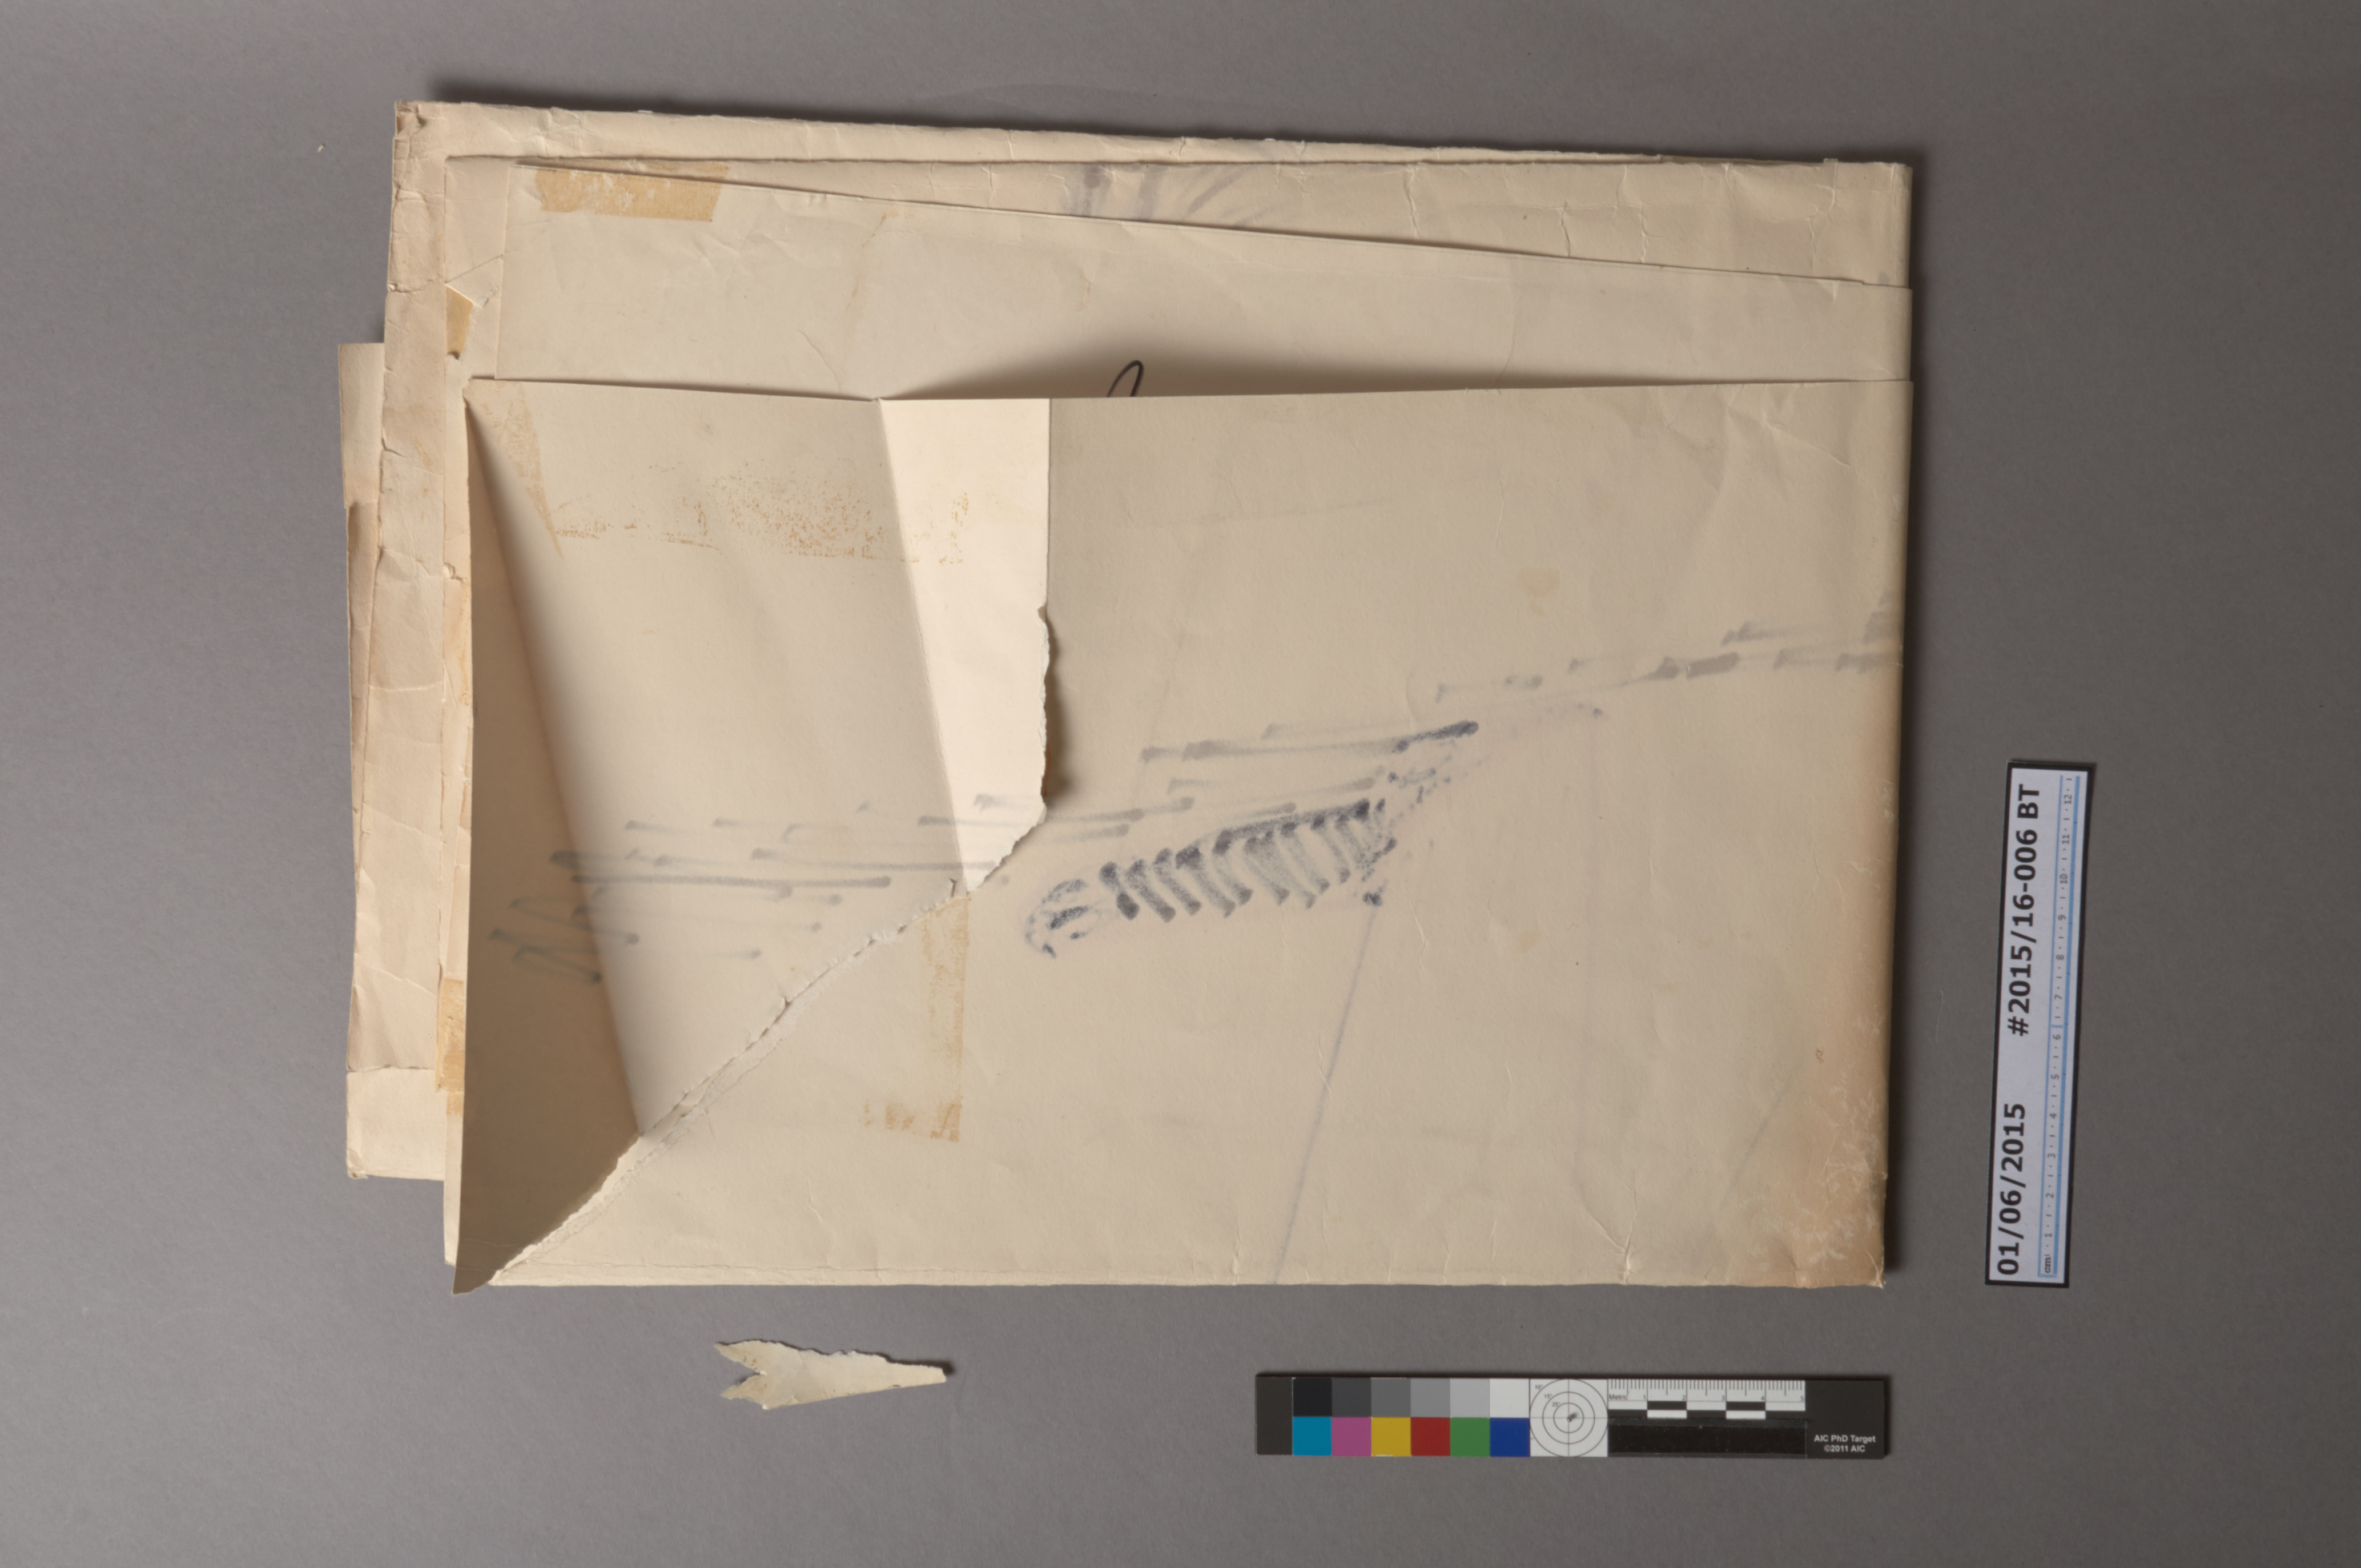
During my initial examination, I came across a large folded sheet at the bottom of the stack, which I could pretty quickly tell was a large drawing executed with a few different colors of marker.
Before Treatment
The thick, machine-made paper had been folded in half three times so that it could fit inside the scrapbook. Two of the edges of the sheet had been rough-cut with scissors, leading me to believe that the paper came off of a large roll. Short pieces of masking tape had been applied along the outer edges of the sheet, presumably to mount it on a wall. There were also stains along the folds and some significant scarf tears. In consultation with the University Archivist, the decision was made to unfold and repair this drawing. We decided not to pursue stain reduction as a part of this treatment, but it could be an option for the future.
The adhesive of the masking tape had become desiccated and powdery, so I was able to simply remove the carrier layer of the tape and gently brush adhesive from the paper surface. The front and back of the poster were then dry-cleaned with white vinyl eraser crumbs to remove any surface dirt or grime. Since the paper was quite thick and had not become brittle, I was able to unfold the sheet during cleaning, but it remained heavily creased and undulated. After testing all of the inks for solubility, the folded poster was placed in a humidity chamber for a couple of hours and then moved to a large felt stack to press for several weeks. When fully flattened, the tears were mended with toned Japanese paper and wheat starch paste.
After Treatment
The drawing is not signed and we may never know the name of the artist, but I really like it. I think that it captures Cameron’s likeness pretty successfully. The unfolded poster is quite large (39″ x 30″), so it was placed in a Bristol board folder and will now live safely in flat file storage.
I am wrapping up treatment on the three Cameron scrapbooks now. With some repairs and new enclosures, they are now much easier to handle and have already been getting some use. On March 1, the New Era Pinstripe Bowl trophy was on display in Perkins Library, along with other historical Duke football memorabilia from the University Archives. Cameron’s scrapbook about the 1945 Sugar Bowl was one of the items on display.
University Archivist Valerie Gillispie with Coach Cutcliffe and President Brodhead
Conservators can be a bit obsessive when it comes to hand tools. Not only must a tool be well suited to perform a specific task, but it must also be ergonomic. If a stock tool is not quite right for the job, I may modify it or just make the tool that I need from scratch. Making or adapting tools does not have to be time consuming or expensive, and some of my favorite tools are quite simple.
For example, I find myself doing a lot of lifting and scraping in my day-to-day work. Original binding material may need to be lifted or damaged paper may have small scarf tears that need to be manipulated. Scraping may be an effective method for mechanically removing accretions, desiccated adhesive, or old lining material. The following three examples are my favorite tools for these tasks, which I have either modified, fabricated, or purchased.
The Casselli 6 1/8″ micro-spatula is great for lifting very thin material, like paper. The size of the spatula ends and thin, flexible steel make it perfect for a lot of small tasks.
Casselli micro-spatula
Two modifications have really improved the working properties of this tool for me: shaping the rounded edge and making the center handle thicker. I have left the pointy end of my spatula unmodified, but I added a single bevel to the rounded end with 3M micro-finishing film abrasive to make it more like a blade. This allows me to get the tool underneath very thin material. The unmodified octagonal handle is fine for quick work, but really becomes tiresome on the pads of my index finger and thumb after lengthy use. I used a common material known as Elastack (by Sutton Scientifics, Inc.) to increase the circumference of the handle and make it more comfortable to hold. Elastack is available in two levels of softness and is very quick to apply or re-wrap to adjust the shape of a tool.
The Casselli is not robust or sharp enough for lifting heavy material (such as leather), so for those tasks I will often switch to a lifting knife. I made this small lifting knife from a 1/2″ Starrett hacksaw blade a few years ago in a workshop with Jeff Peachey and use it just about every day.
Small lifting knife
The total time to make this tool was less than an hour and the material cost is quite low. After grinding the teeth off of the hacksaw blade and rough shaping the round edge using a belt sander, the final sharpening was done by hand. The handle is just thick horse butt leather cut to shape and adhered with PVA. Because the high-speed steel makes sharpening fairly quick, I find myself more likely to resharpen this knife than others in my collection made from harder steel.
A recent acquisition that I have been experimenting with lately is this micro-chisel made by Shanna Leino. With a bit of stropping, it is incredibly sharp and I find that it can do certain tasks better than a scalpel.
One method of mechanically removing a solid, brittle accretion is to press a blade vertically, very close to the edge of the layer and break it off (Ashley-Smith, 1992, p. 30). Of course there are many variables to consider on whether this is a safe or effective method to employ, but in cases where I have been able to use it, the micro-chisel works wonders. I suspect that it will also come in handy the next time I am creating a model of a wooden board binding, particularly for shaping the sewing support channels.
I really enjoy experimenting with different hand tools and applying simple modifications to improve them. What is your favorite hand tool?
Ashley-Smith, J. (1992). Science for conservators: Volume 2 cleaning. London: Museums and Galleries Commission.
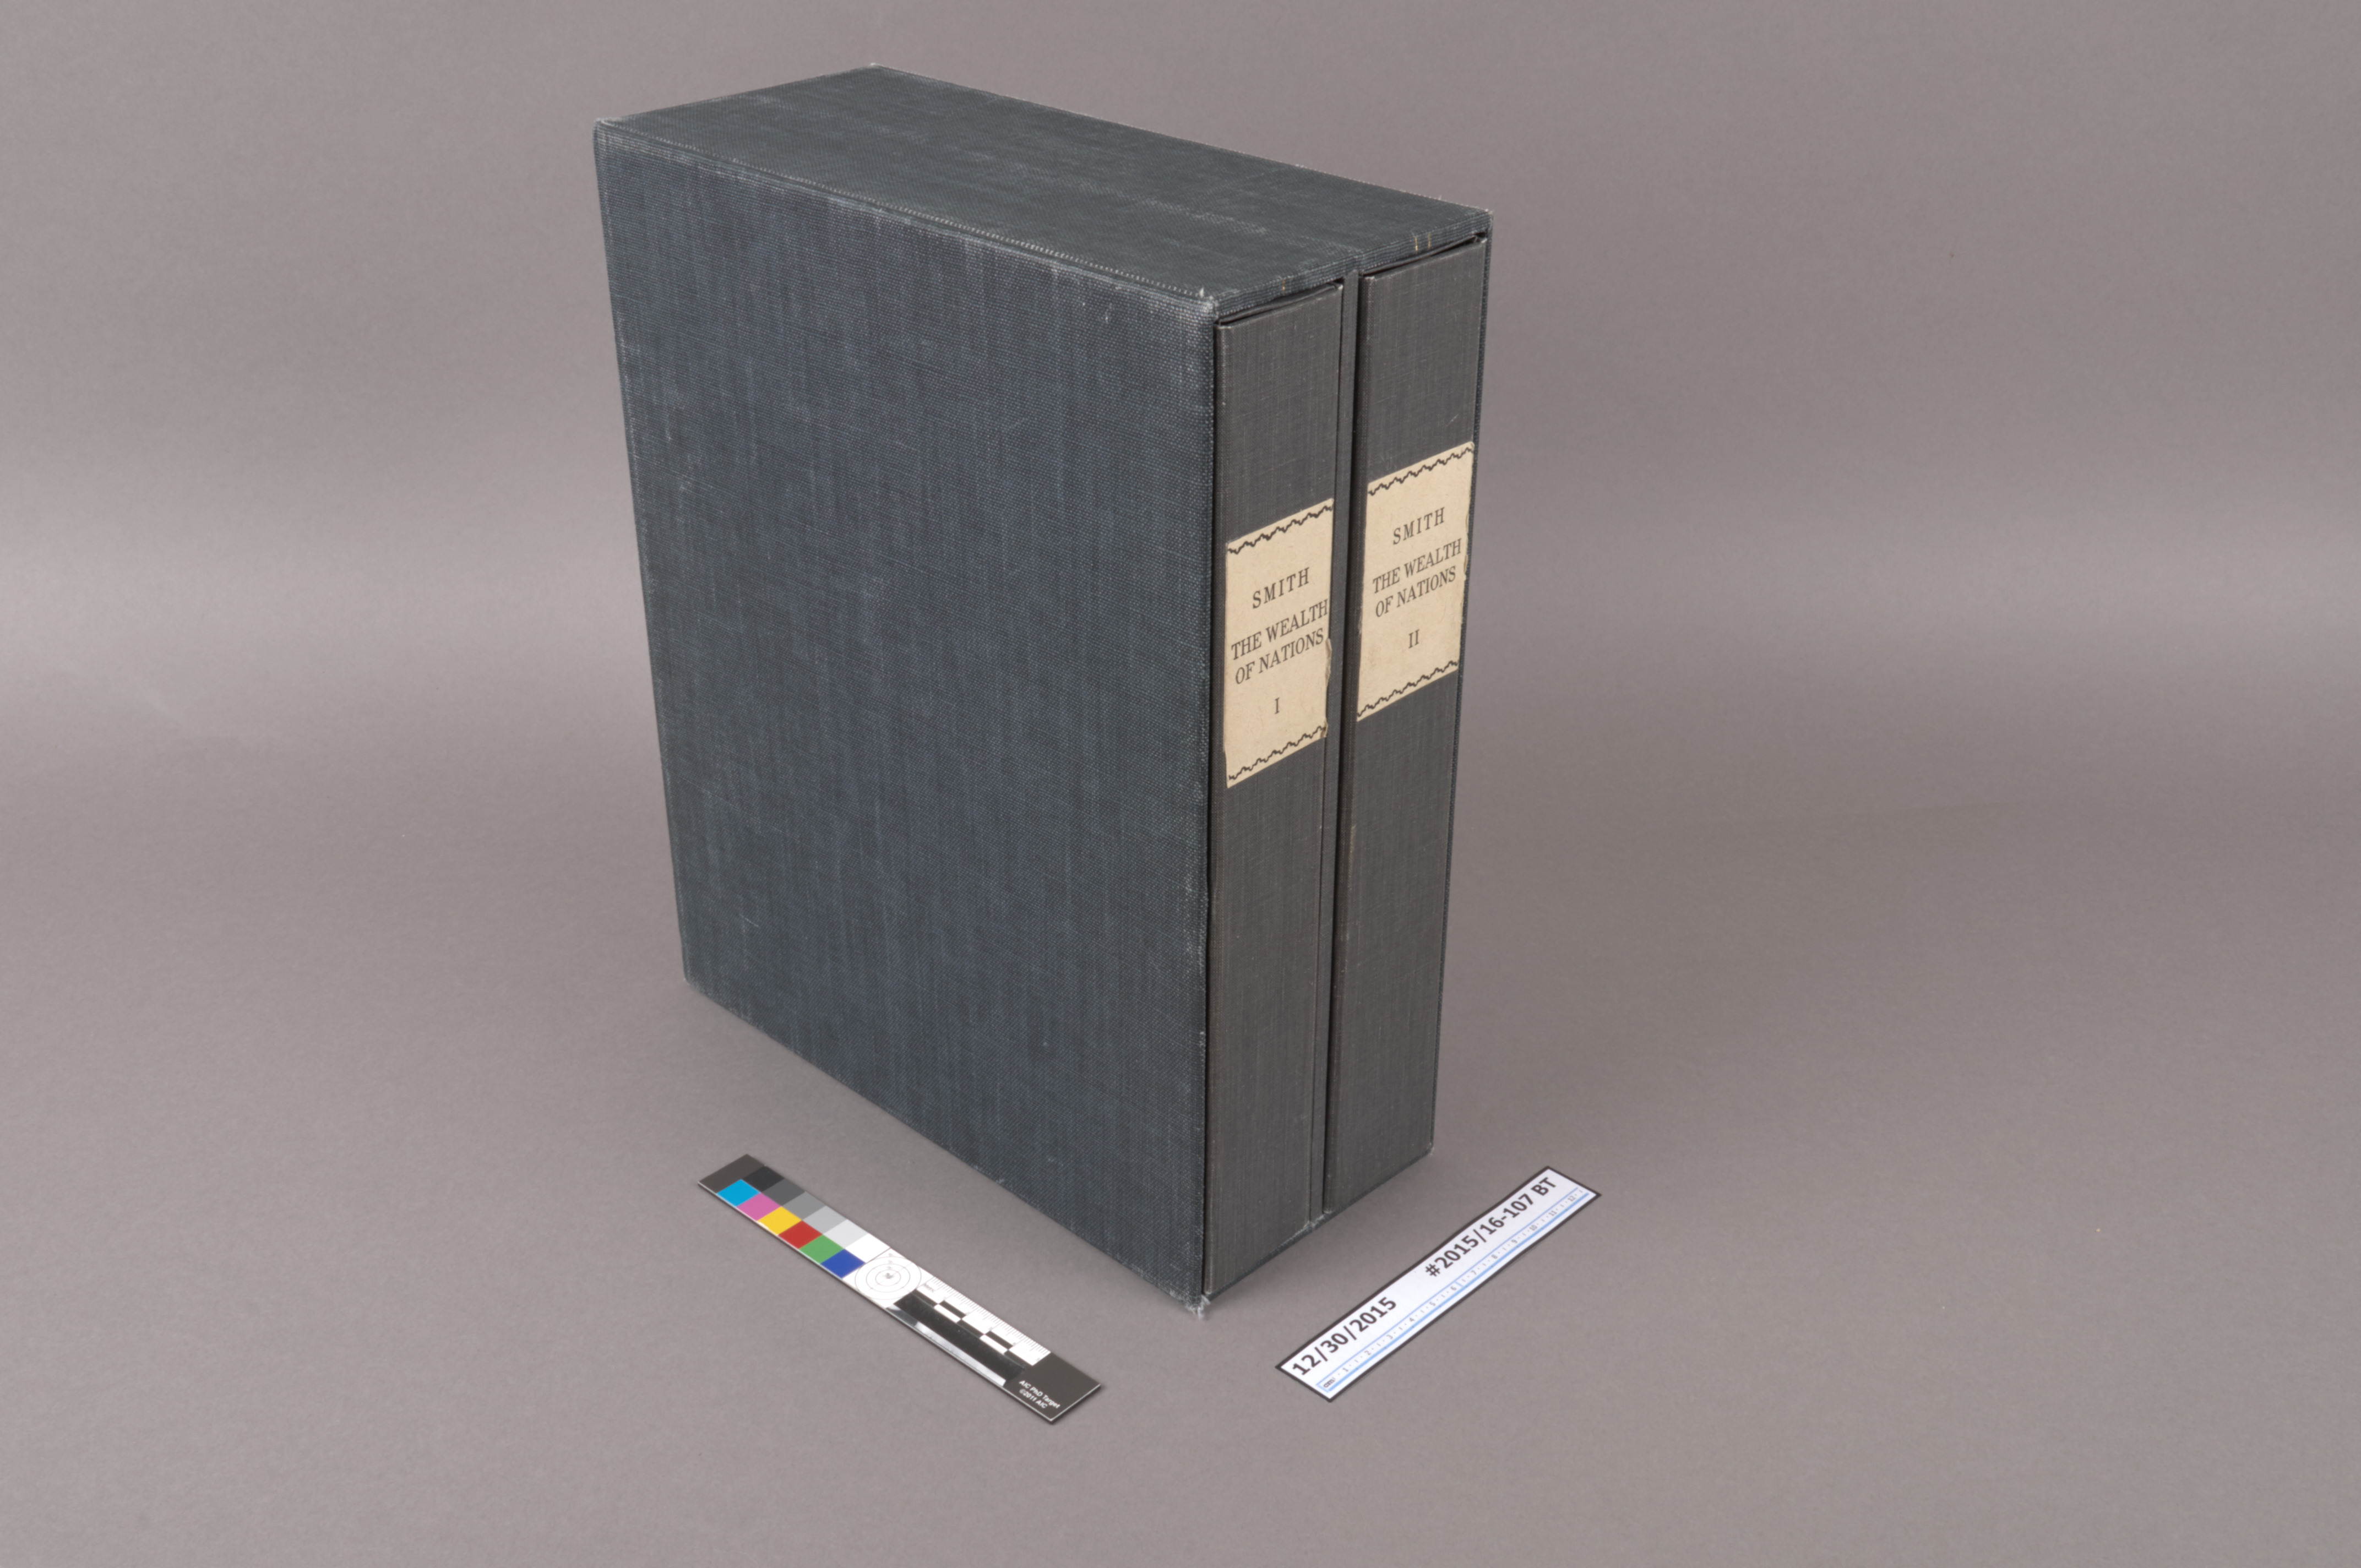
This coming summer Duke will host a 2016 NEH Summer Institute, titled “The History of Political Economy”. In preparation, the library is putting together a small exhibit of complementary materials from our collection. One of the items that will be on display is our first edition set of what is widely considered to be Adam Smith’s magnum opus, An Inquiry into the Nature and Causes of the Wealth of Nations. Smith’s 1776 text is most commonly known for coining the phrase “the invisible hand” to describe forces which guide free markets.
I am a big fan of the NPR podcast Planet Money, and over the years I have learned quite a bit about the significance of Smith (and this work in particular) through the show. Therefore, I was very excited to for the opportunity to examine this item and address some of the condition issues for each volume. While Smith is mentioned frequently on Planet Money, two episodes explore the man and his work in greater depth: “Adam Smith, Mama’s Boy” and “Adam Smith and the Not So Invisible Hand“.
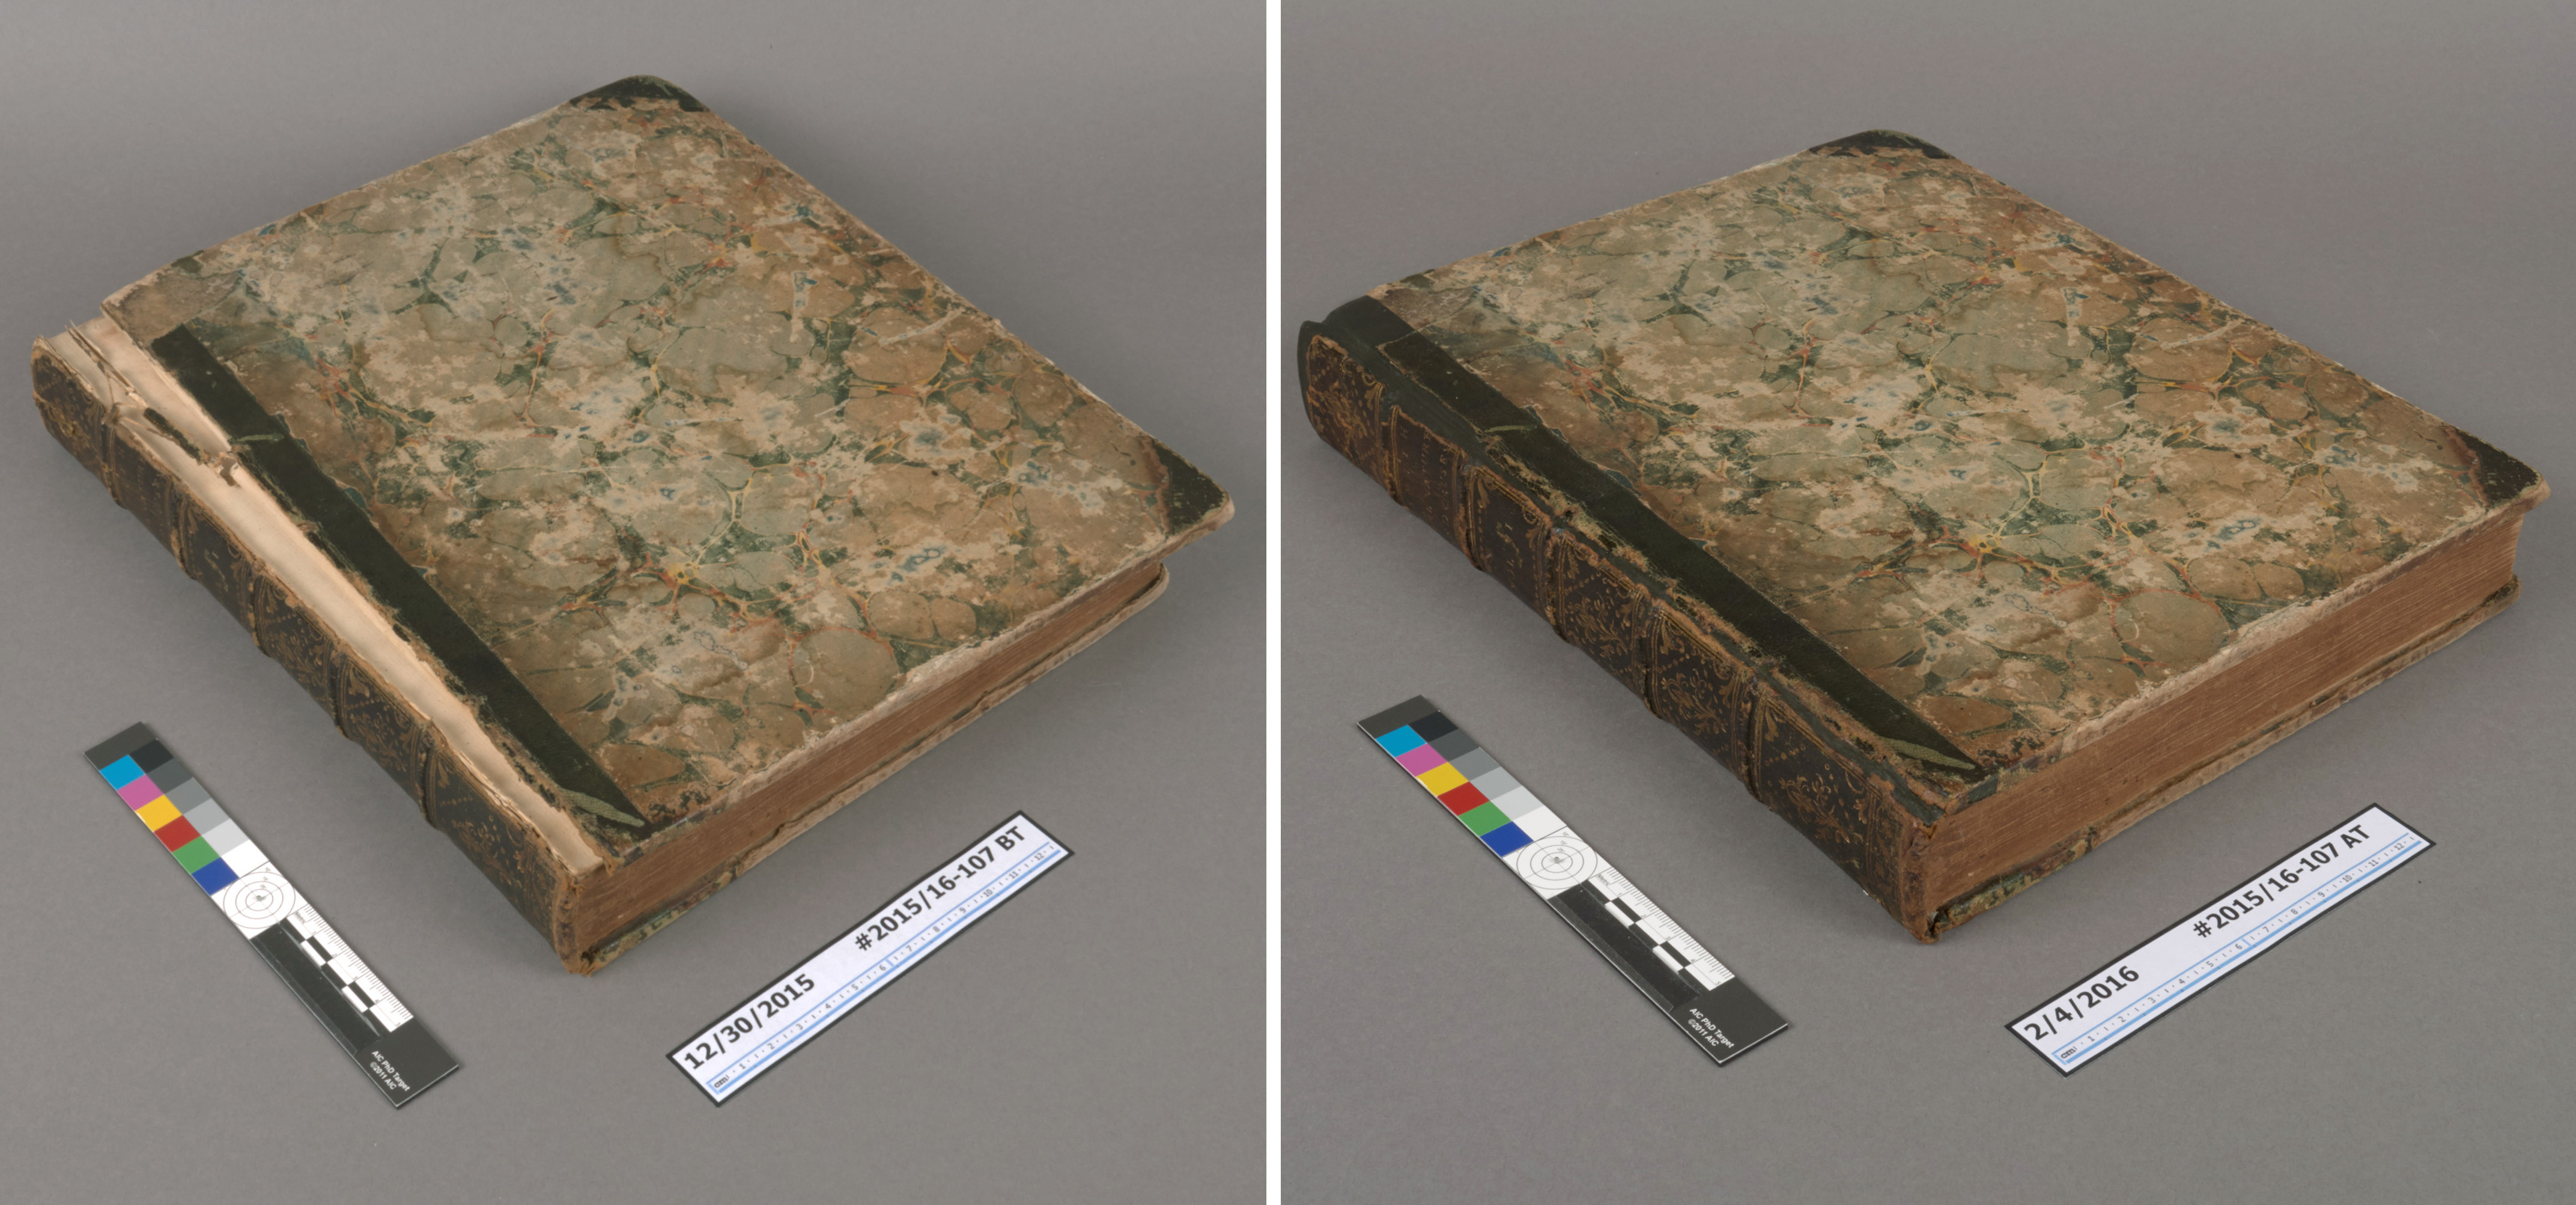
The two volumes of this edition are in matching tightback bindings with single raised sewing supports. The spine and corners are covered in green goatskin with green marbled paper siding-up the boards. The spines are extensively decorated with gold tooling and there is some blind tooling on the faces of the boards. While I cannot determine if these are the original bindings, they appear to be contemporary to the text. The goal of this treatment was to stabilize each book, reattaching any loose pieces and making the bindings functional for safe display or use in the reading room. My repairs attempt to satisfy this goal with minimal alteration to the appearance of the books.
The first volume was in better condition, but had been damaged at the tail of the spine. The joints were splitting along this panel, the tailcap was missing entirely, and the leather was continuing to lift where the damage had occurred.
Volume 1 -Before and After Treatment (click image to enlarge)
While the sewing supports all remained intact and the boards were securely attached, the splitting along the tail end joints and the risk of additional loss was a concern. After fully lifting the leather away from the tail panel of the spine, the textblock spine was lined with thin Japanese paper and wheat starch paste. An extended lining of bias-cut airplane linen was then adhered on top. The extended pieces of this lining were split and adhered on either side of the board using David Brock’s board reattachment method. Finally, the volume was rebacked with a thick Kozo fiber Japanese paper, toned to match the original leather. All original covering materials were readhered.
The front board of the second volume was nearly detached, hanging on by just a single thread! I began by carefully lifting the leather at the boards and spine to gain access to the textblock.
Volume 2 – Before and After
As with the first volume, new structural board attachment was created with bias-cut linen transverse spine linings. The spine was rebacked with toned Kozo paper and the original covering materials were re-adhered. The edges of the reback material were lined up with the edges of the existing leather, to visually blend the repair materials with the original covering.
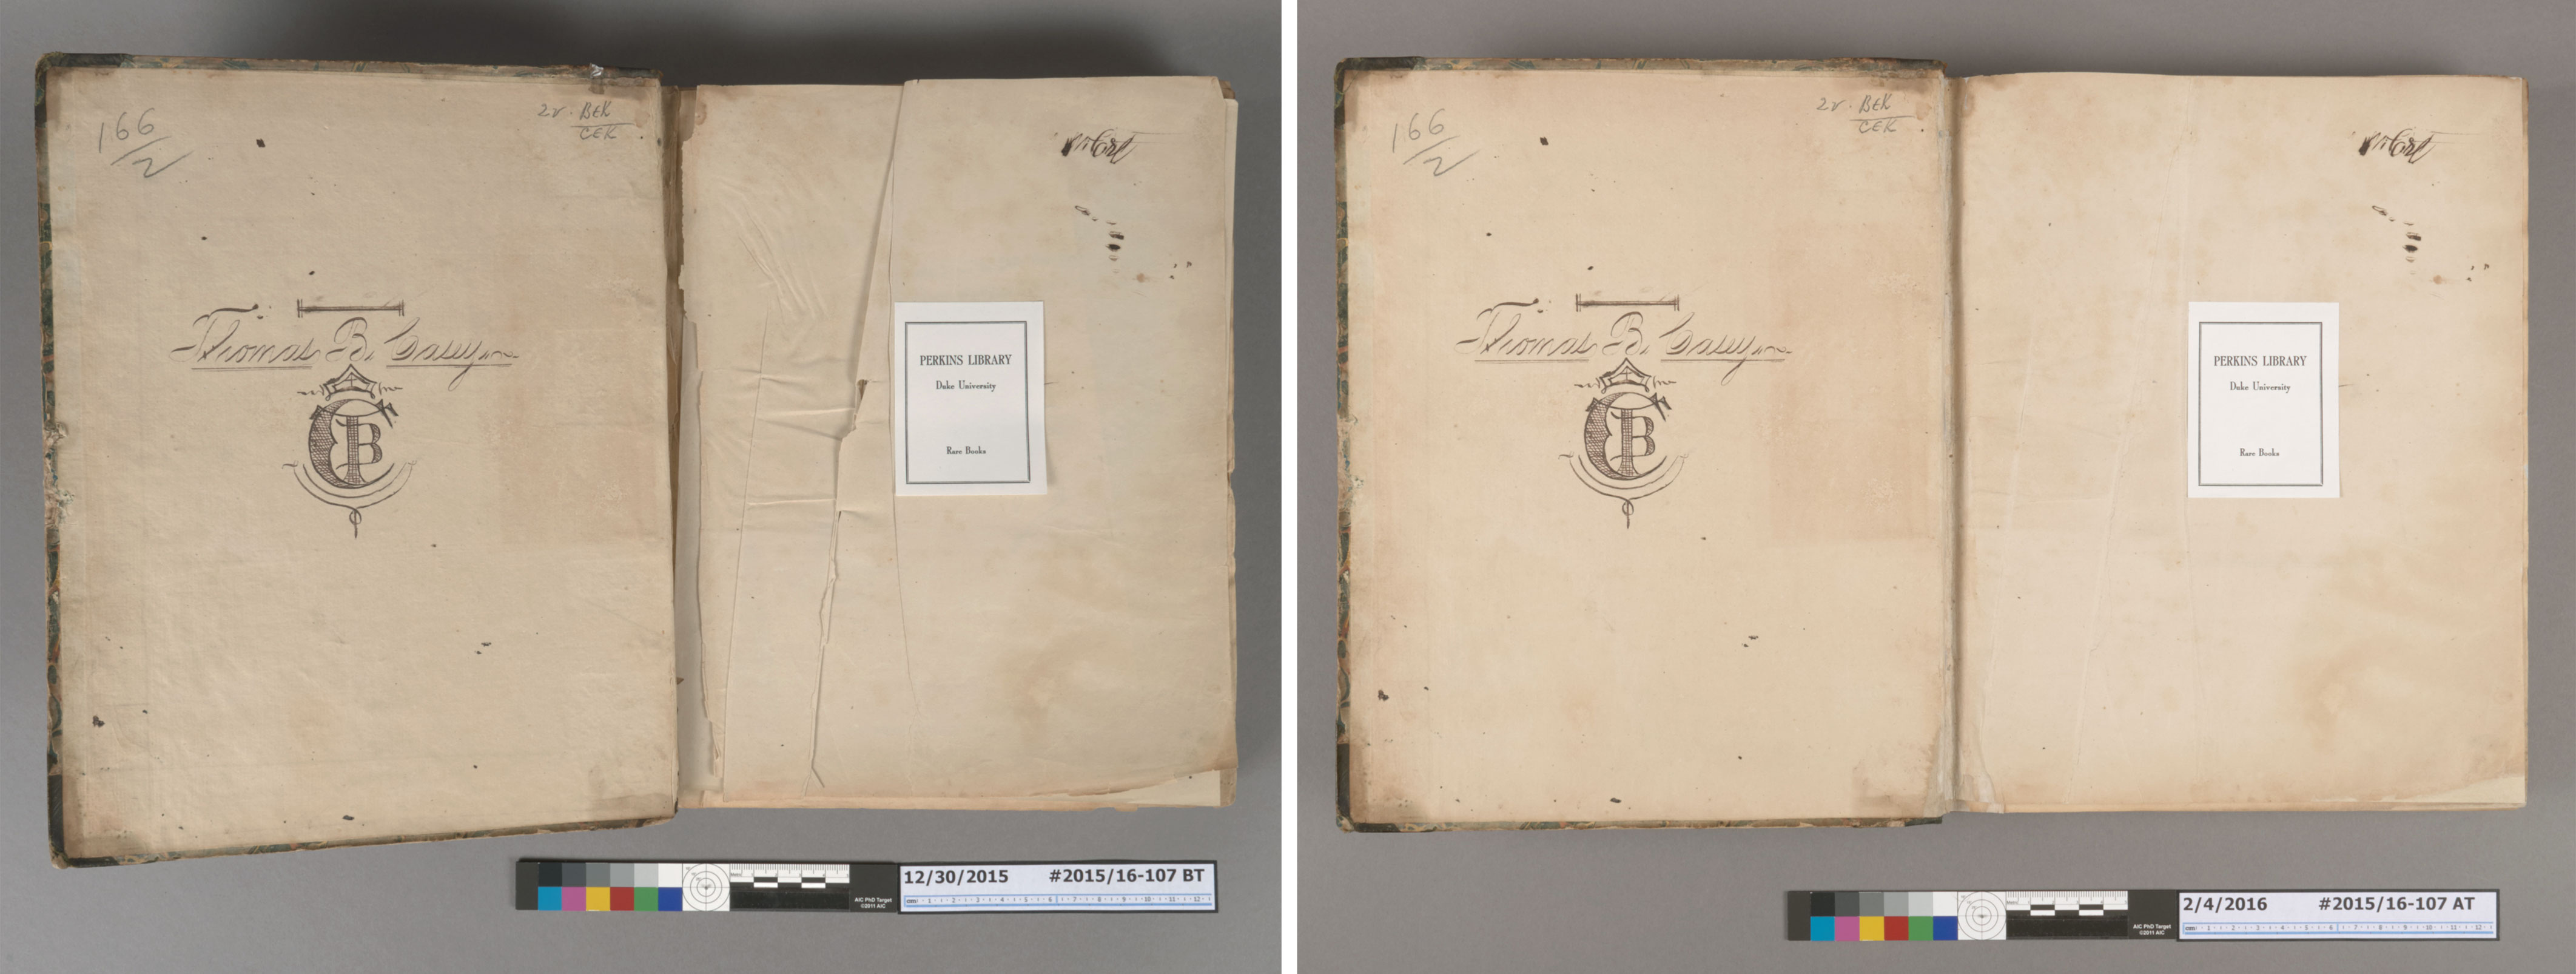
Repairs to the interior of the text were kept to a minimum as well.
Volume 1 front endsheets – Before and After
It appears that the endsheets of both volumes had been replaced at some point with a thin wove paper. These new endsheets had become creased and were developing cracks and tears along the folds. Using local humidification techniques, the creases were flattened and tears were mended with thin Korean papers, toned to match.
The second volume features an interesting blank leaf with a large bookplate adhered to the recto.
Volume 2 bookplate – Before and After
The catalog record indicates that this item once belonged to Prince Lieven, the Russian ambassador to London from 1812-1834. This leaf is currently around 1/4″ shorter than the rest of the textblock and had a very poorly repaired tear along the head edge near the spine. During treatment, I was able to release this repaired piece and reattach it correctly along the tear. Strangely, when the torn corner was put back into place, the height of the leaf matched the rest of the textblock. My best guess is that the top edge of this leaf had become damaged at some point. Possibly when the new endsheets were added, this leaf was hastily repaired and trimmed down to have straight edges.
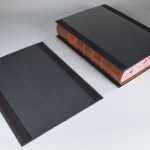
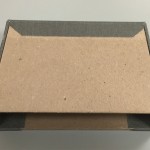
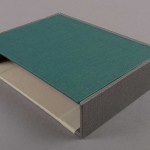
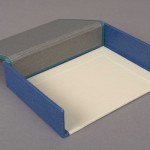
The last issue for me to deal with was the somewhat awkward enclosure. In more recent years, someone had constructed a double slipcase for the two volumes.
Double Slipcase: Before Treatment:
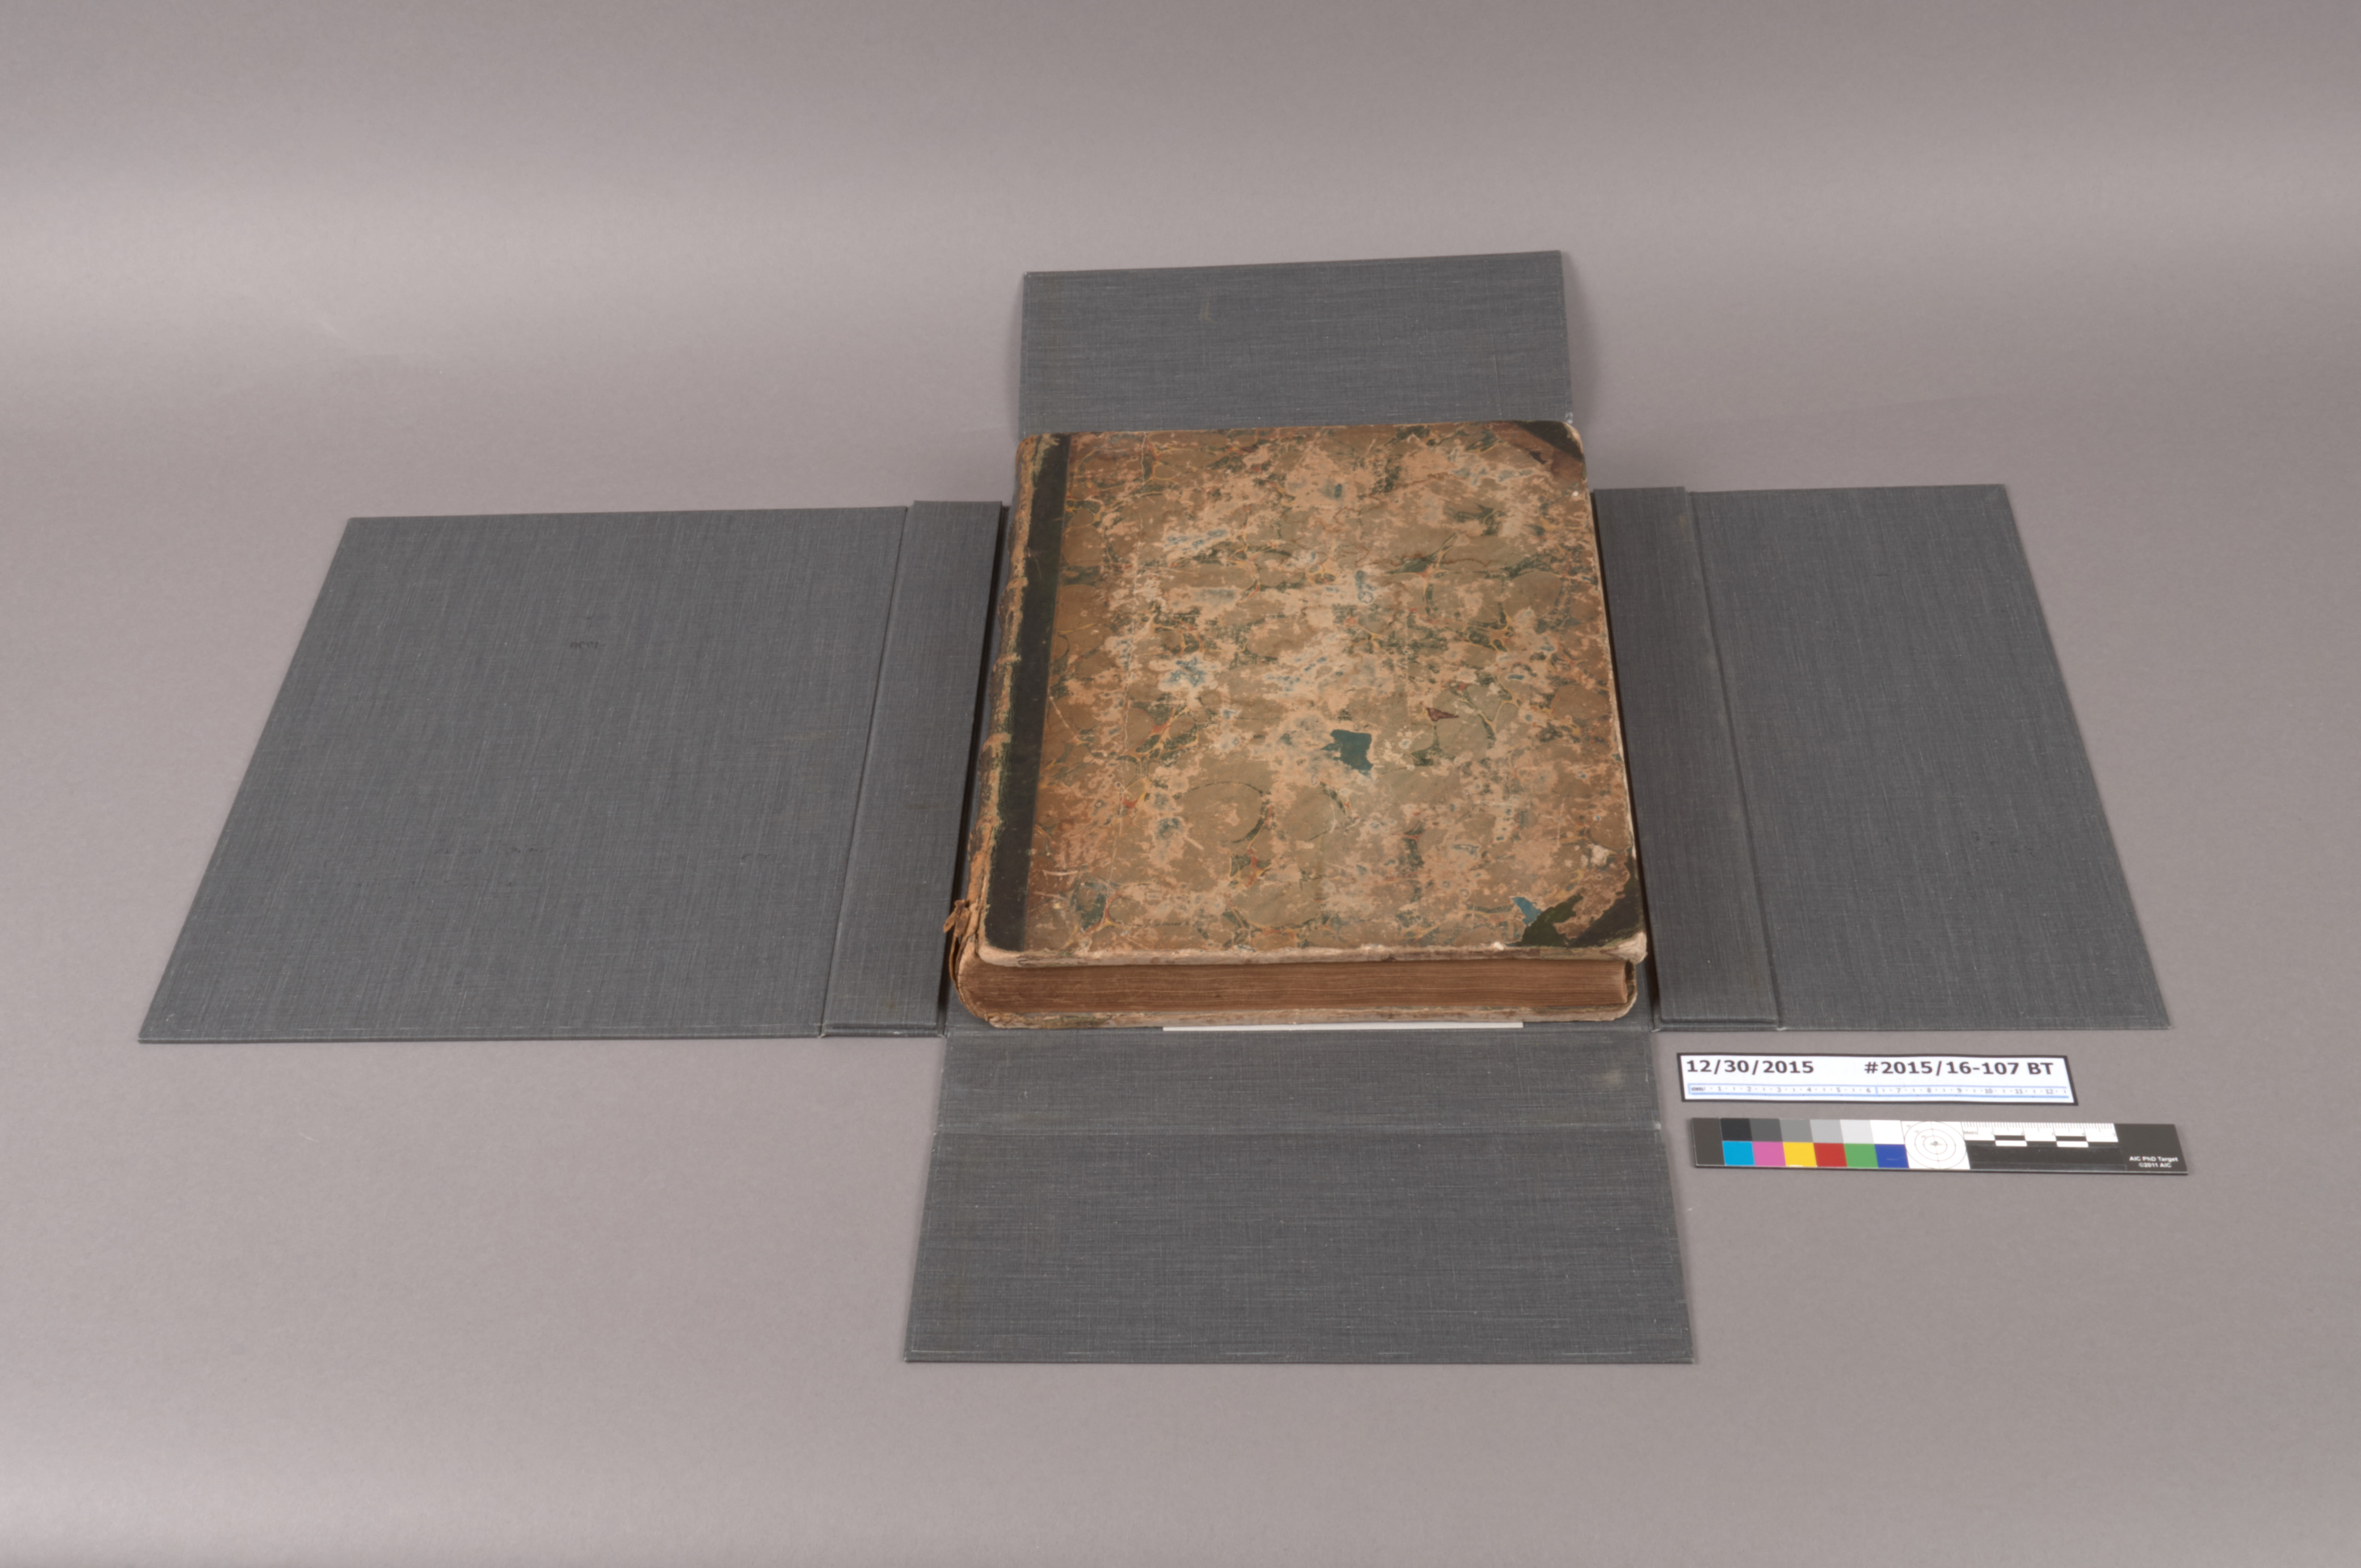
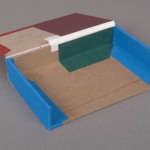
Each volume was also placed inside a cloth-covered 4-flap enclosure.
This was actually an enclosure solution that I had not seen before, and is a nice addition to my post about restraining enclosures. While the 4-flap does mitigate some of the dangers of a slipcase that a standard chemise cannot cover, having two books in one slipcase makes handling much more difficult. The case doesn’t have pull tabs or an easy way to extract a single book. The user must tip the entire set forward so that both books will slide out simultaneously. As you can imagine, this can be quite dangerous if the user isn’t being observant. Additionally, the 4-flap creates a very large footprint when open (see above). As these enclosures were made fairly recently and not artifactually significant, we discussed with the curator the option of replacing them with standard cloth-covered clamshell boxes.
With the new board attachment, consolidated covering materials, and simpler enclosures, Mr. Smith is ready for engagement with human hands again. Check back with our Exhibits Page to see when this and other exciting items from the collection go on display.
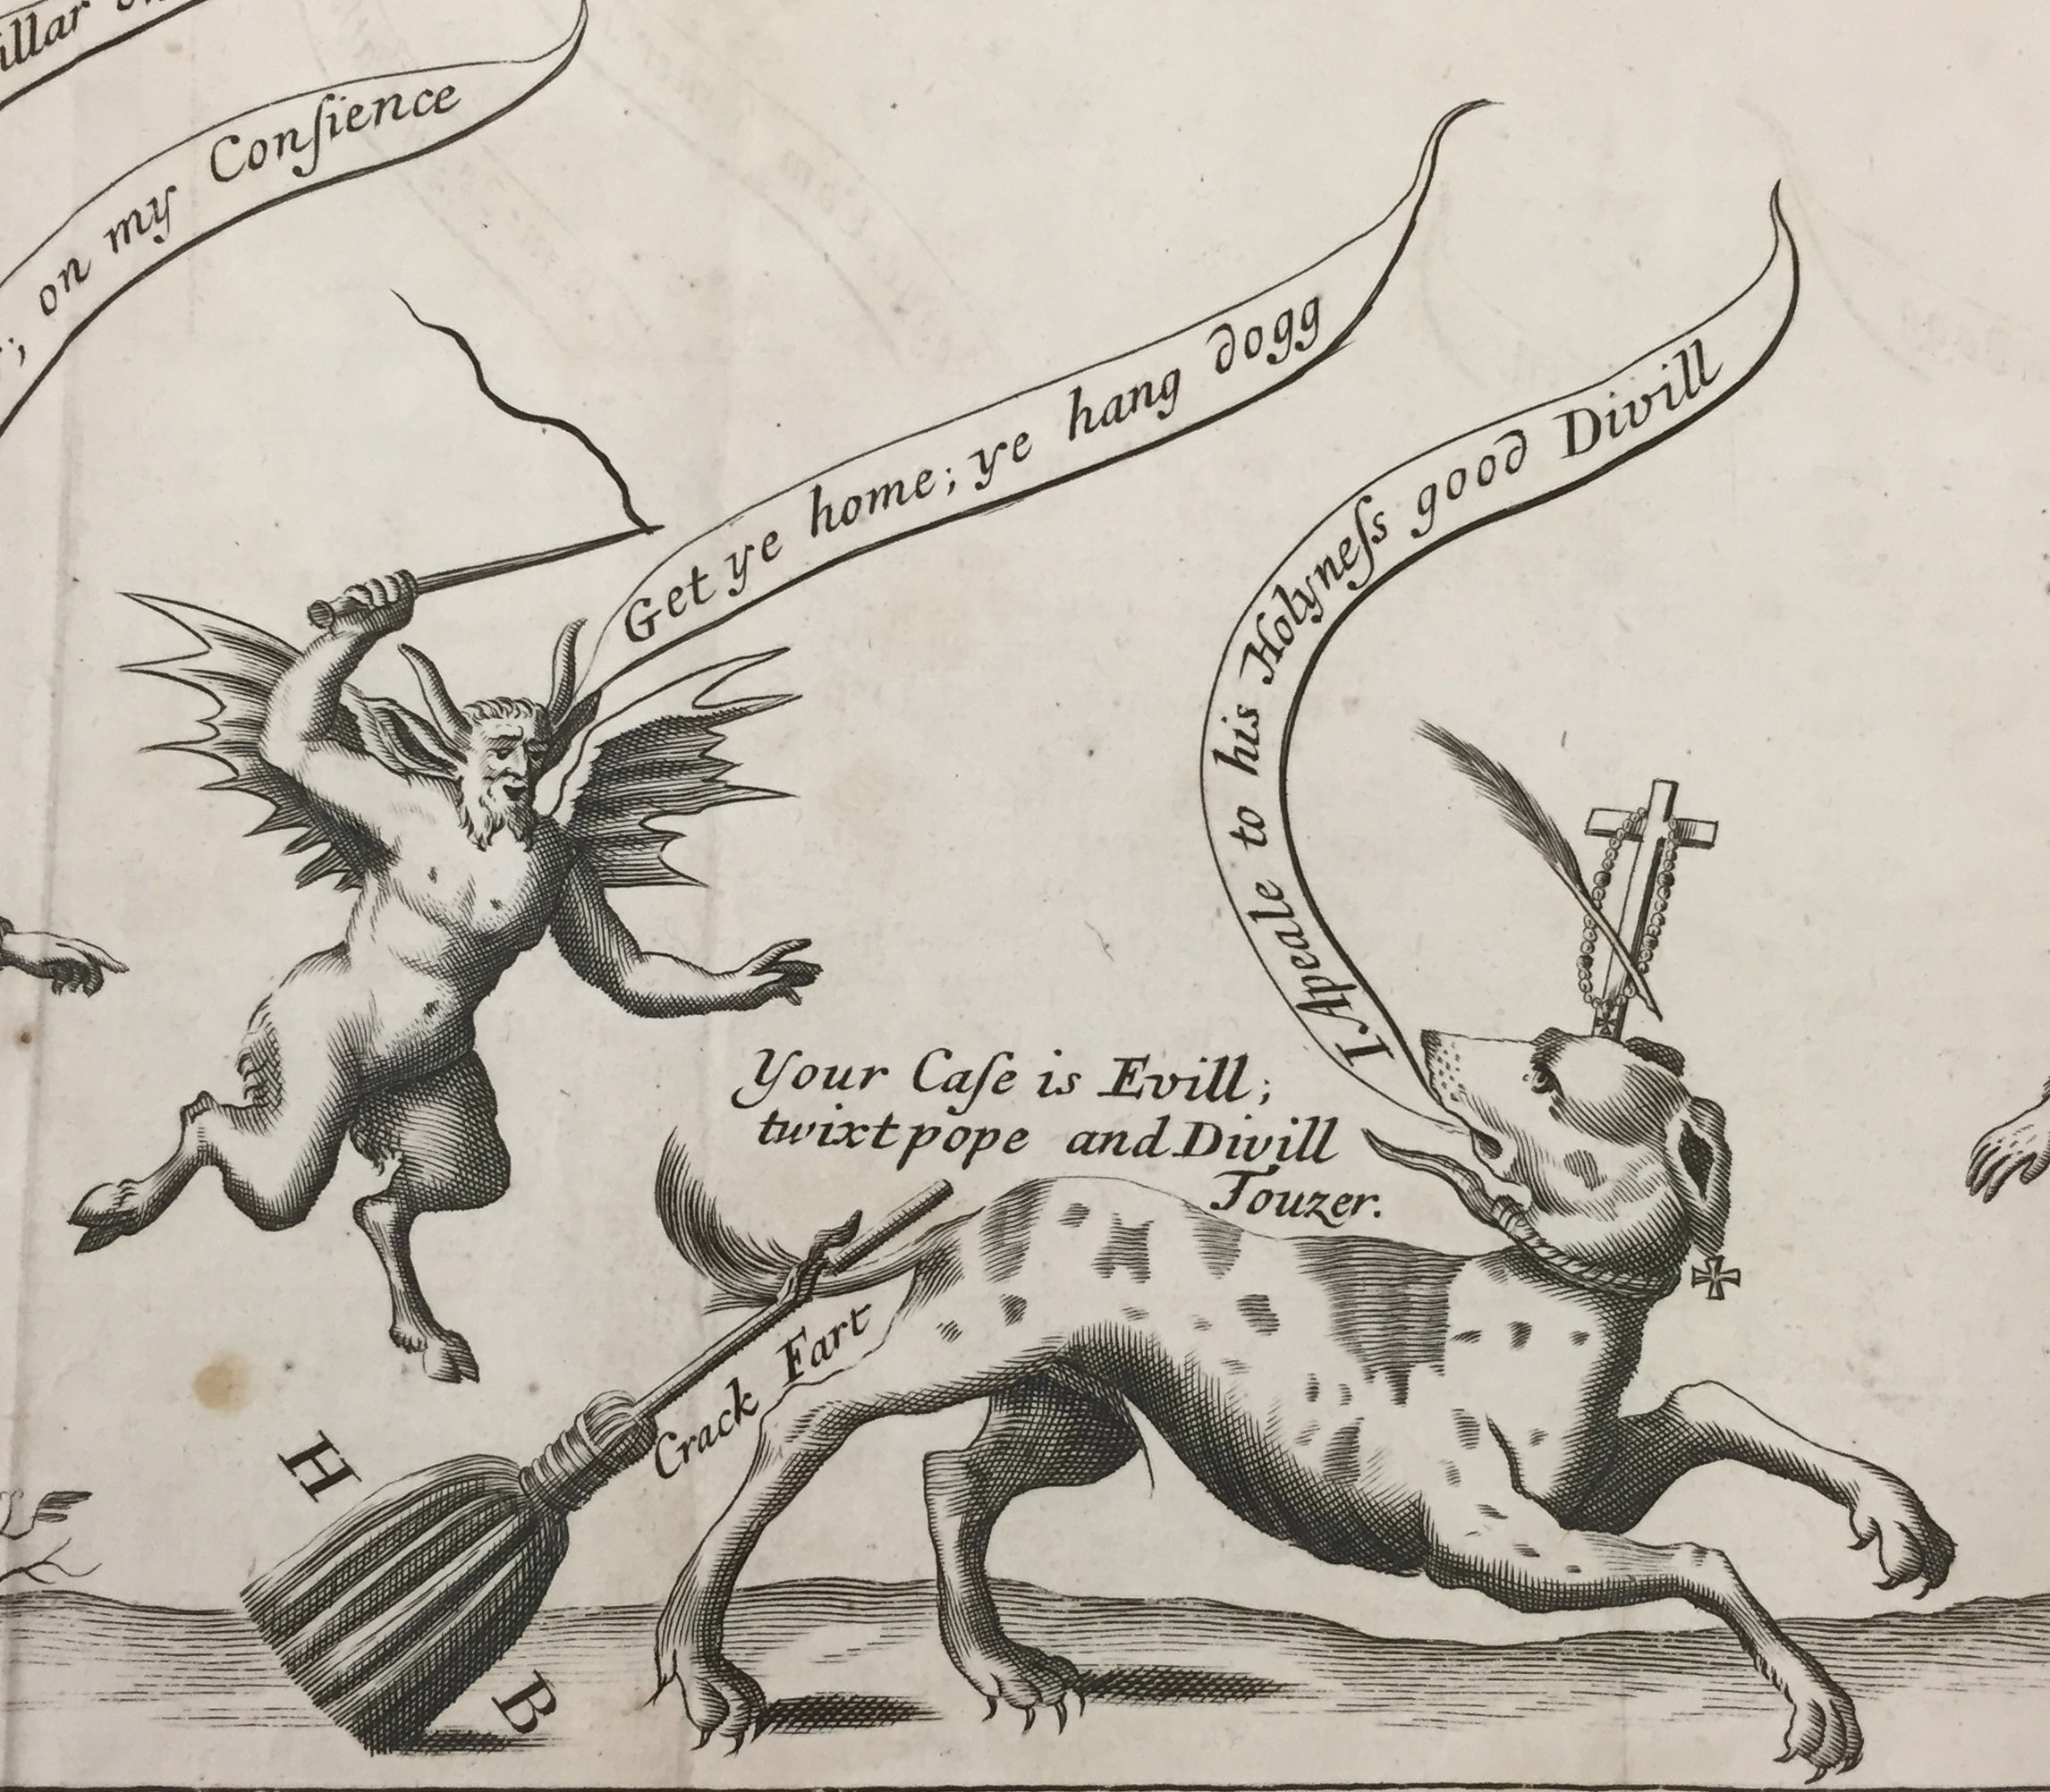
Last week a rather strange and amusing item came in for rehousing, prompting me to do a little research about its origin. This satirical engraving by Stephen College, fittingly titled Strange’s Case, Strangely Altered, was printed in 1680. The dog represents Robert L’Estrange, an English pamphleteer, fleeing the gallows from his alleged involvement in the “Popish Plot“. “Crack-Fart” is one of the many names given to L’Estrange. The British Museum has digitized their copy, which includes extensive contemporary annotations on the characters involved. Ironically, the printer was hanged and quartered for sedition a year later, while L’Estrange returned and was knighted in 1685 for helping to discredit the plot.
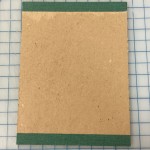
As evidenced by the archives from the tag “Boxing Day“, we make a lot of boxes in the lab. Some objects require specific enclosures and we have many materials and techniques at our disposal for fulfilling the needs of the object. Of particular interest to me lately have been enclosures appropriate for parchment over boards bindings, which include some form of restraint.
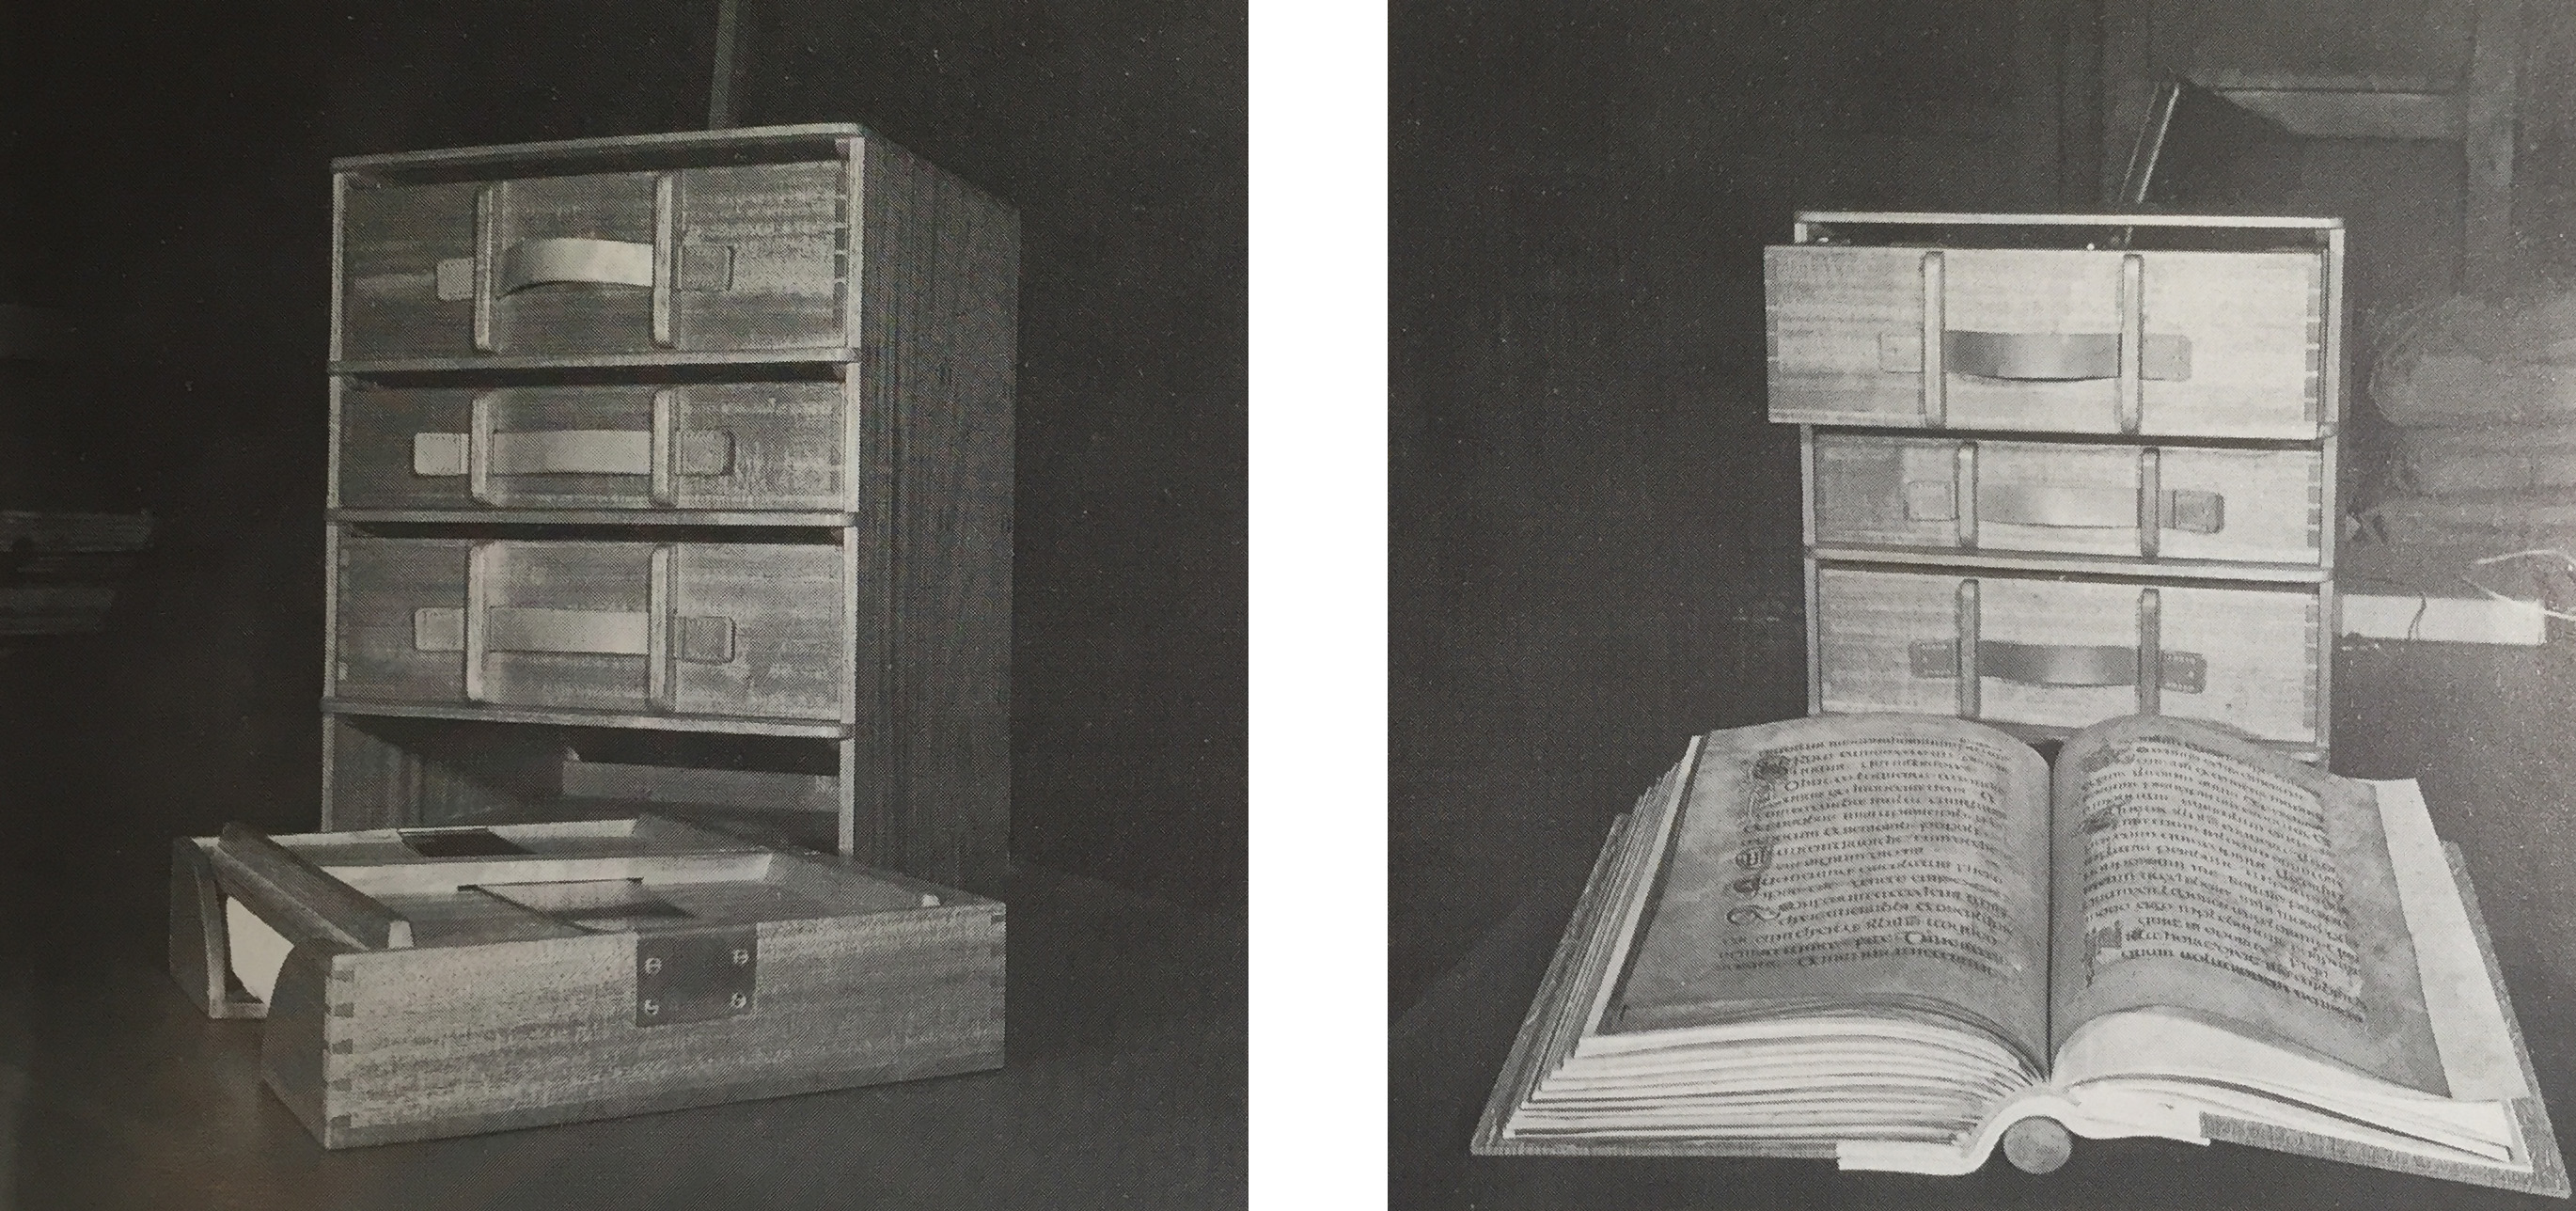
Parchment is hygroscopic by nature and will change size and shape dramatically under different environmental conditions (Woods, 2006). The structure and limited adhesive of a limp binding will usually allow the parchment to adjust (Clarkson, 1982), but bindings composed of parchment adhered over stiff boards can distort significantly with fluctuating relative humidity. The vellum over boards binding below recently came through the lab for treatment and illustrates (to a lesser extent) some of the typical warping that can occur with this style of binding.
Planar distortion of the board creates a poor book action and opens the textblock to dust penetration. Once the boards have been flattened again, storing the book in an enclosure can create a micro-climate and buffer the item from some environmental fluctuations. Including gentle pressure or restraining elements can prevent the warp from returning or pushing open the box. Note that one should not attempt to flatten warped boards with pressure alone. Simply pressing down on the fore edge of a distorted board will strain and potentially damage the joints. There are many different options for creating a restraining enclosure; the following examples are common solutions, but certainly not exhaustive.
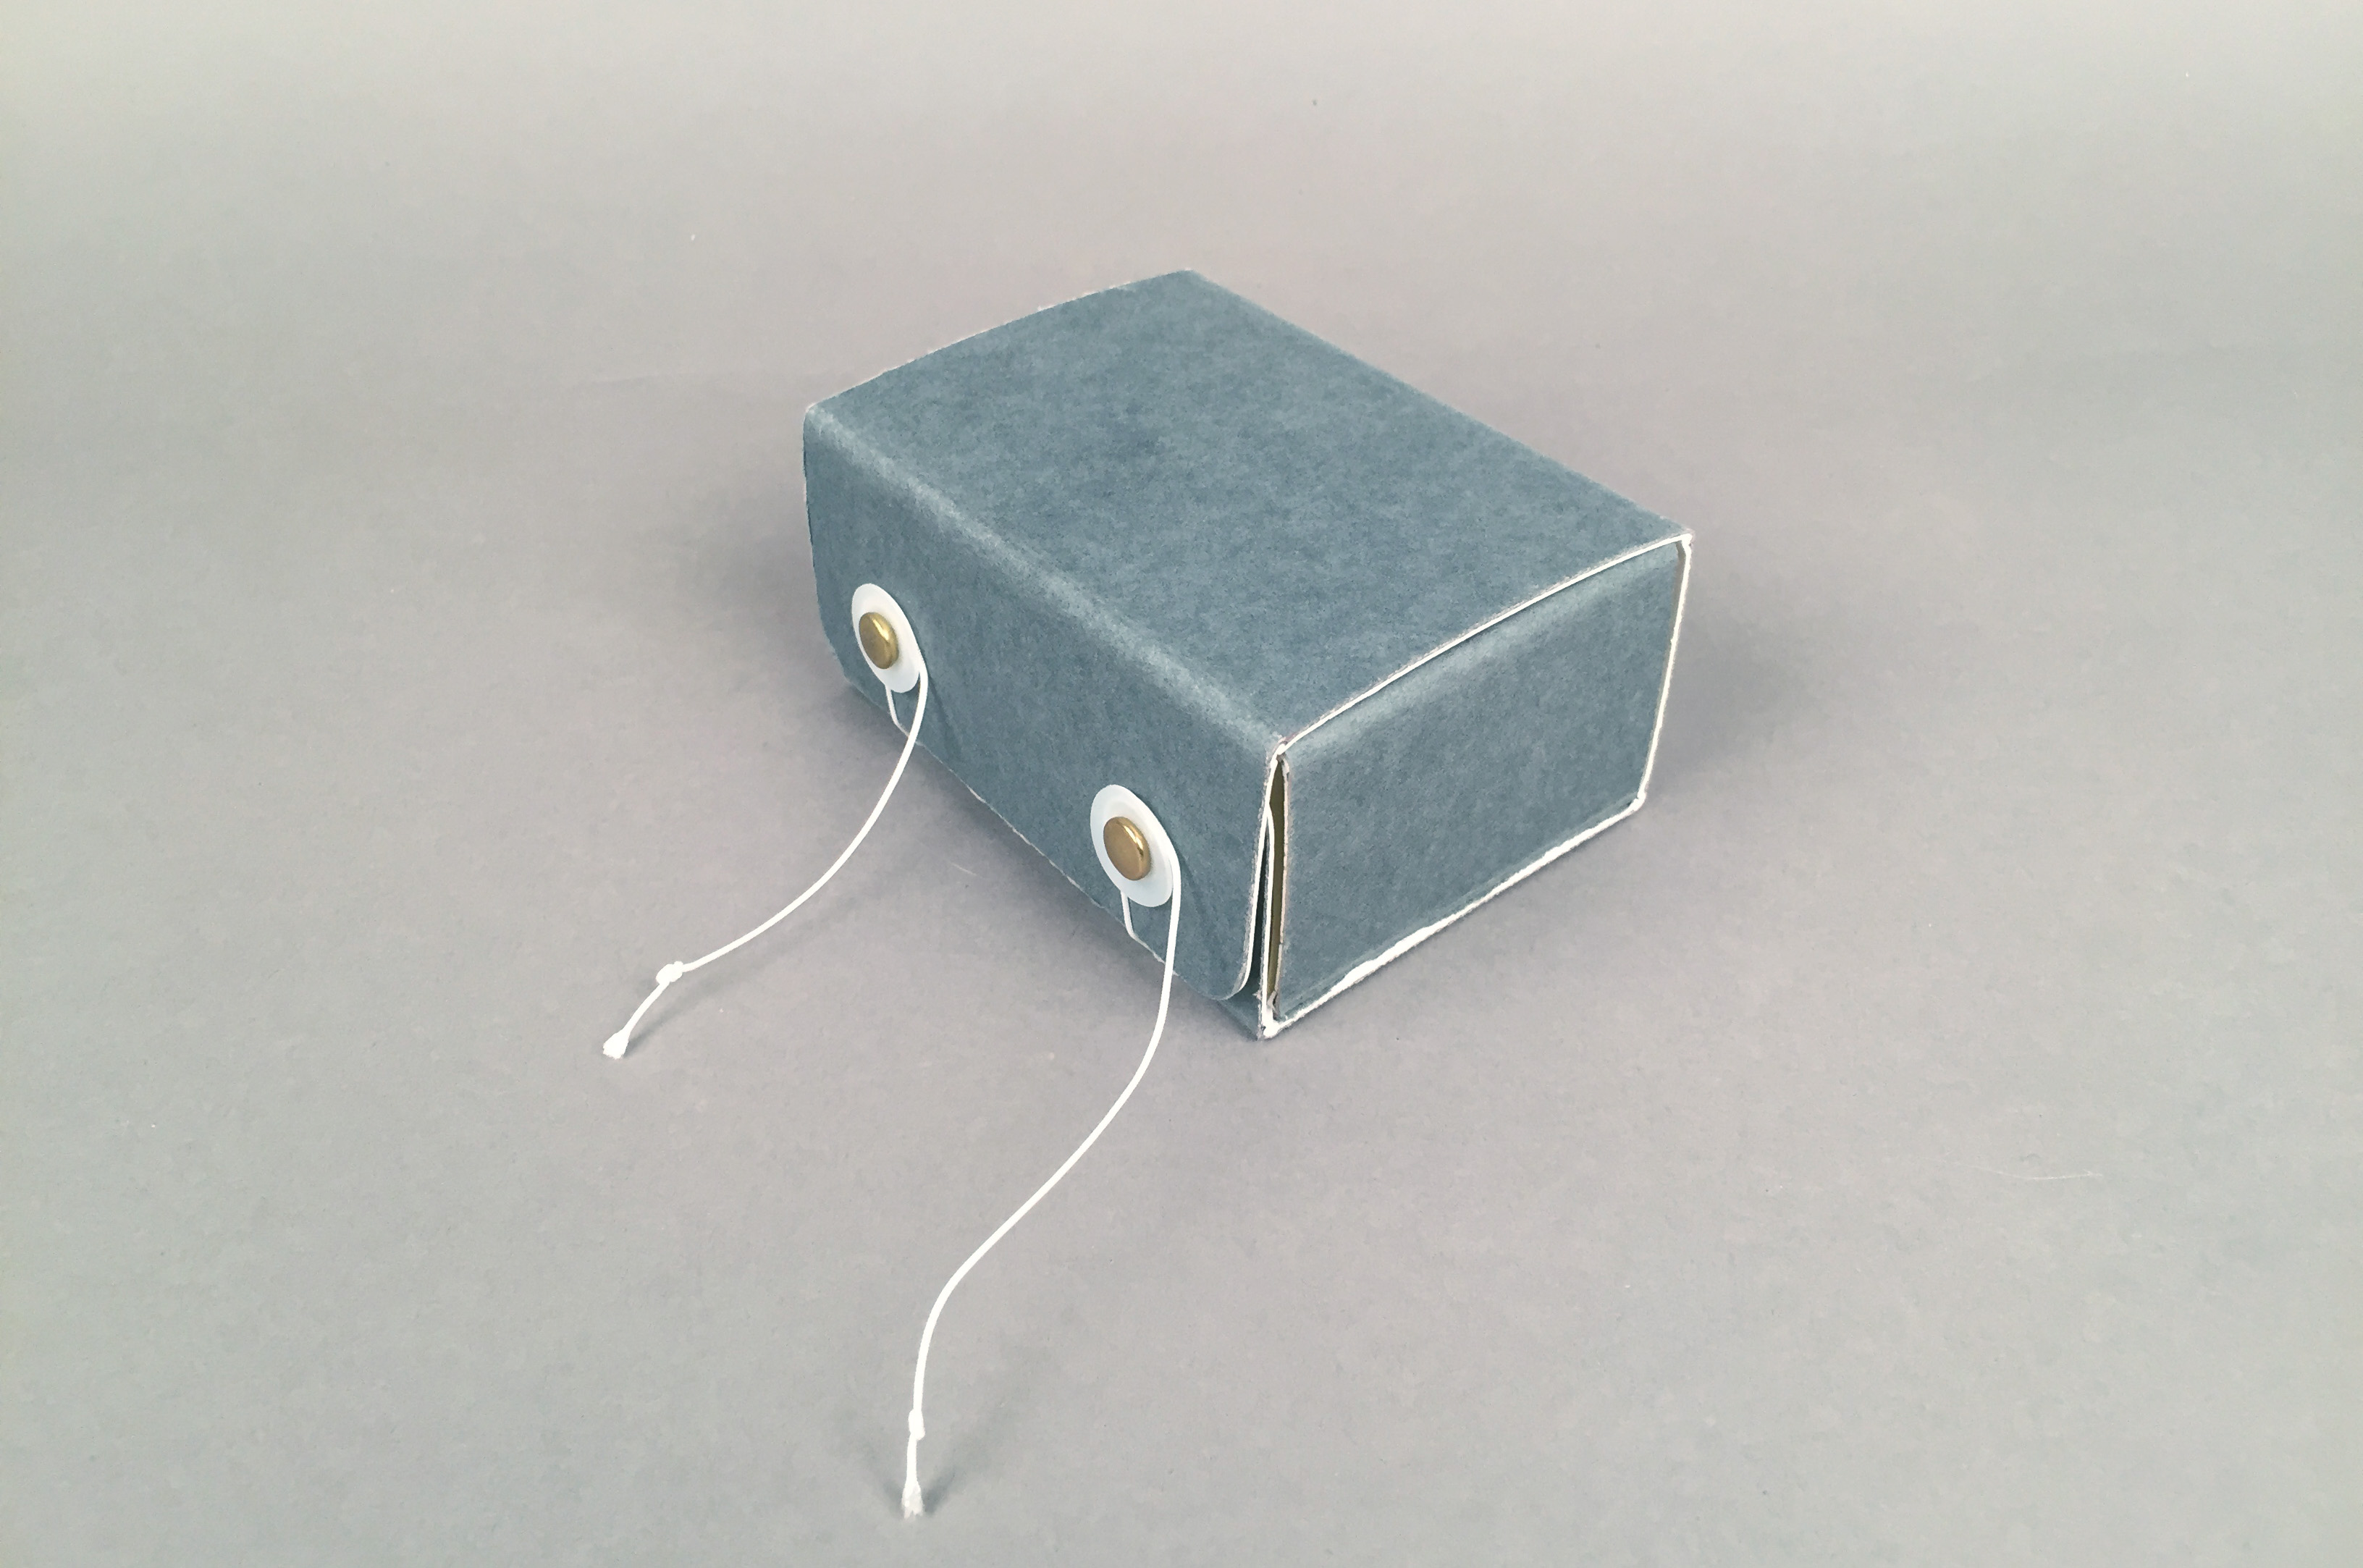
The simplest and most cost-effective of this type of enclosure is the the classic “phase box” (Waters, 1998). This design is constructed from stiff barrier board, with string and post ties at the fore edge. While quick to construct, this solution is not as elegant as some of the others.
Another option is to construct a restraining wrapper that would sit inside a standard box. Tomomi Nakashima, Book Conservator at the University of Utah, J. Willard Marriott Library, has developed a rather inventive wrapper, using magnets, barrier board, and clear polyester. Photos below by Christina Thomas.
Magnetic wrapper designed by Tomomi Nakashima. Photo by
Christina Thomas.
Magnetic wrapper, tail view
Magnetic wrapper, spine view
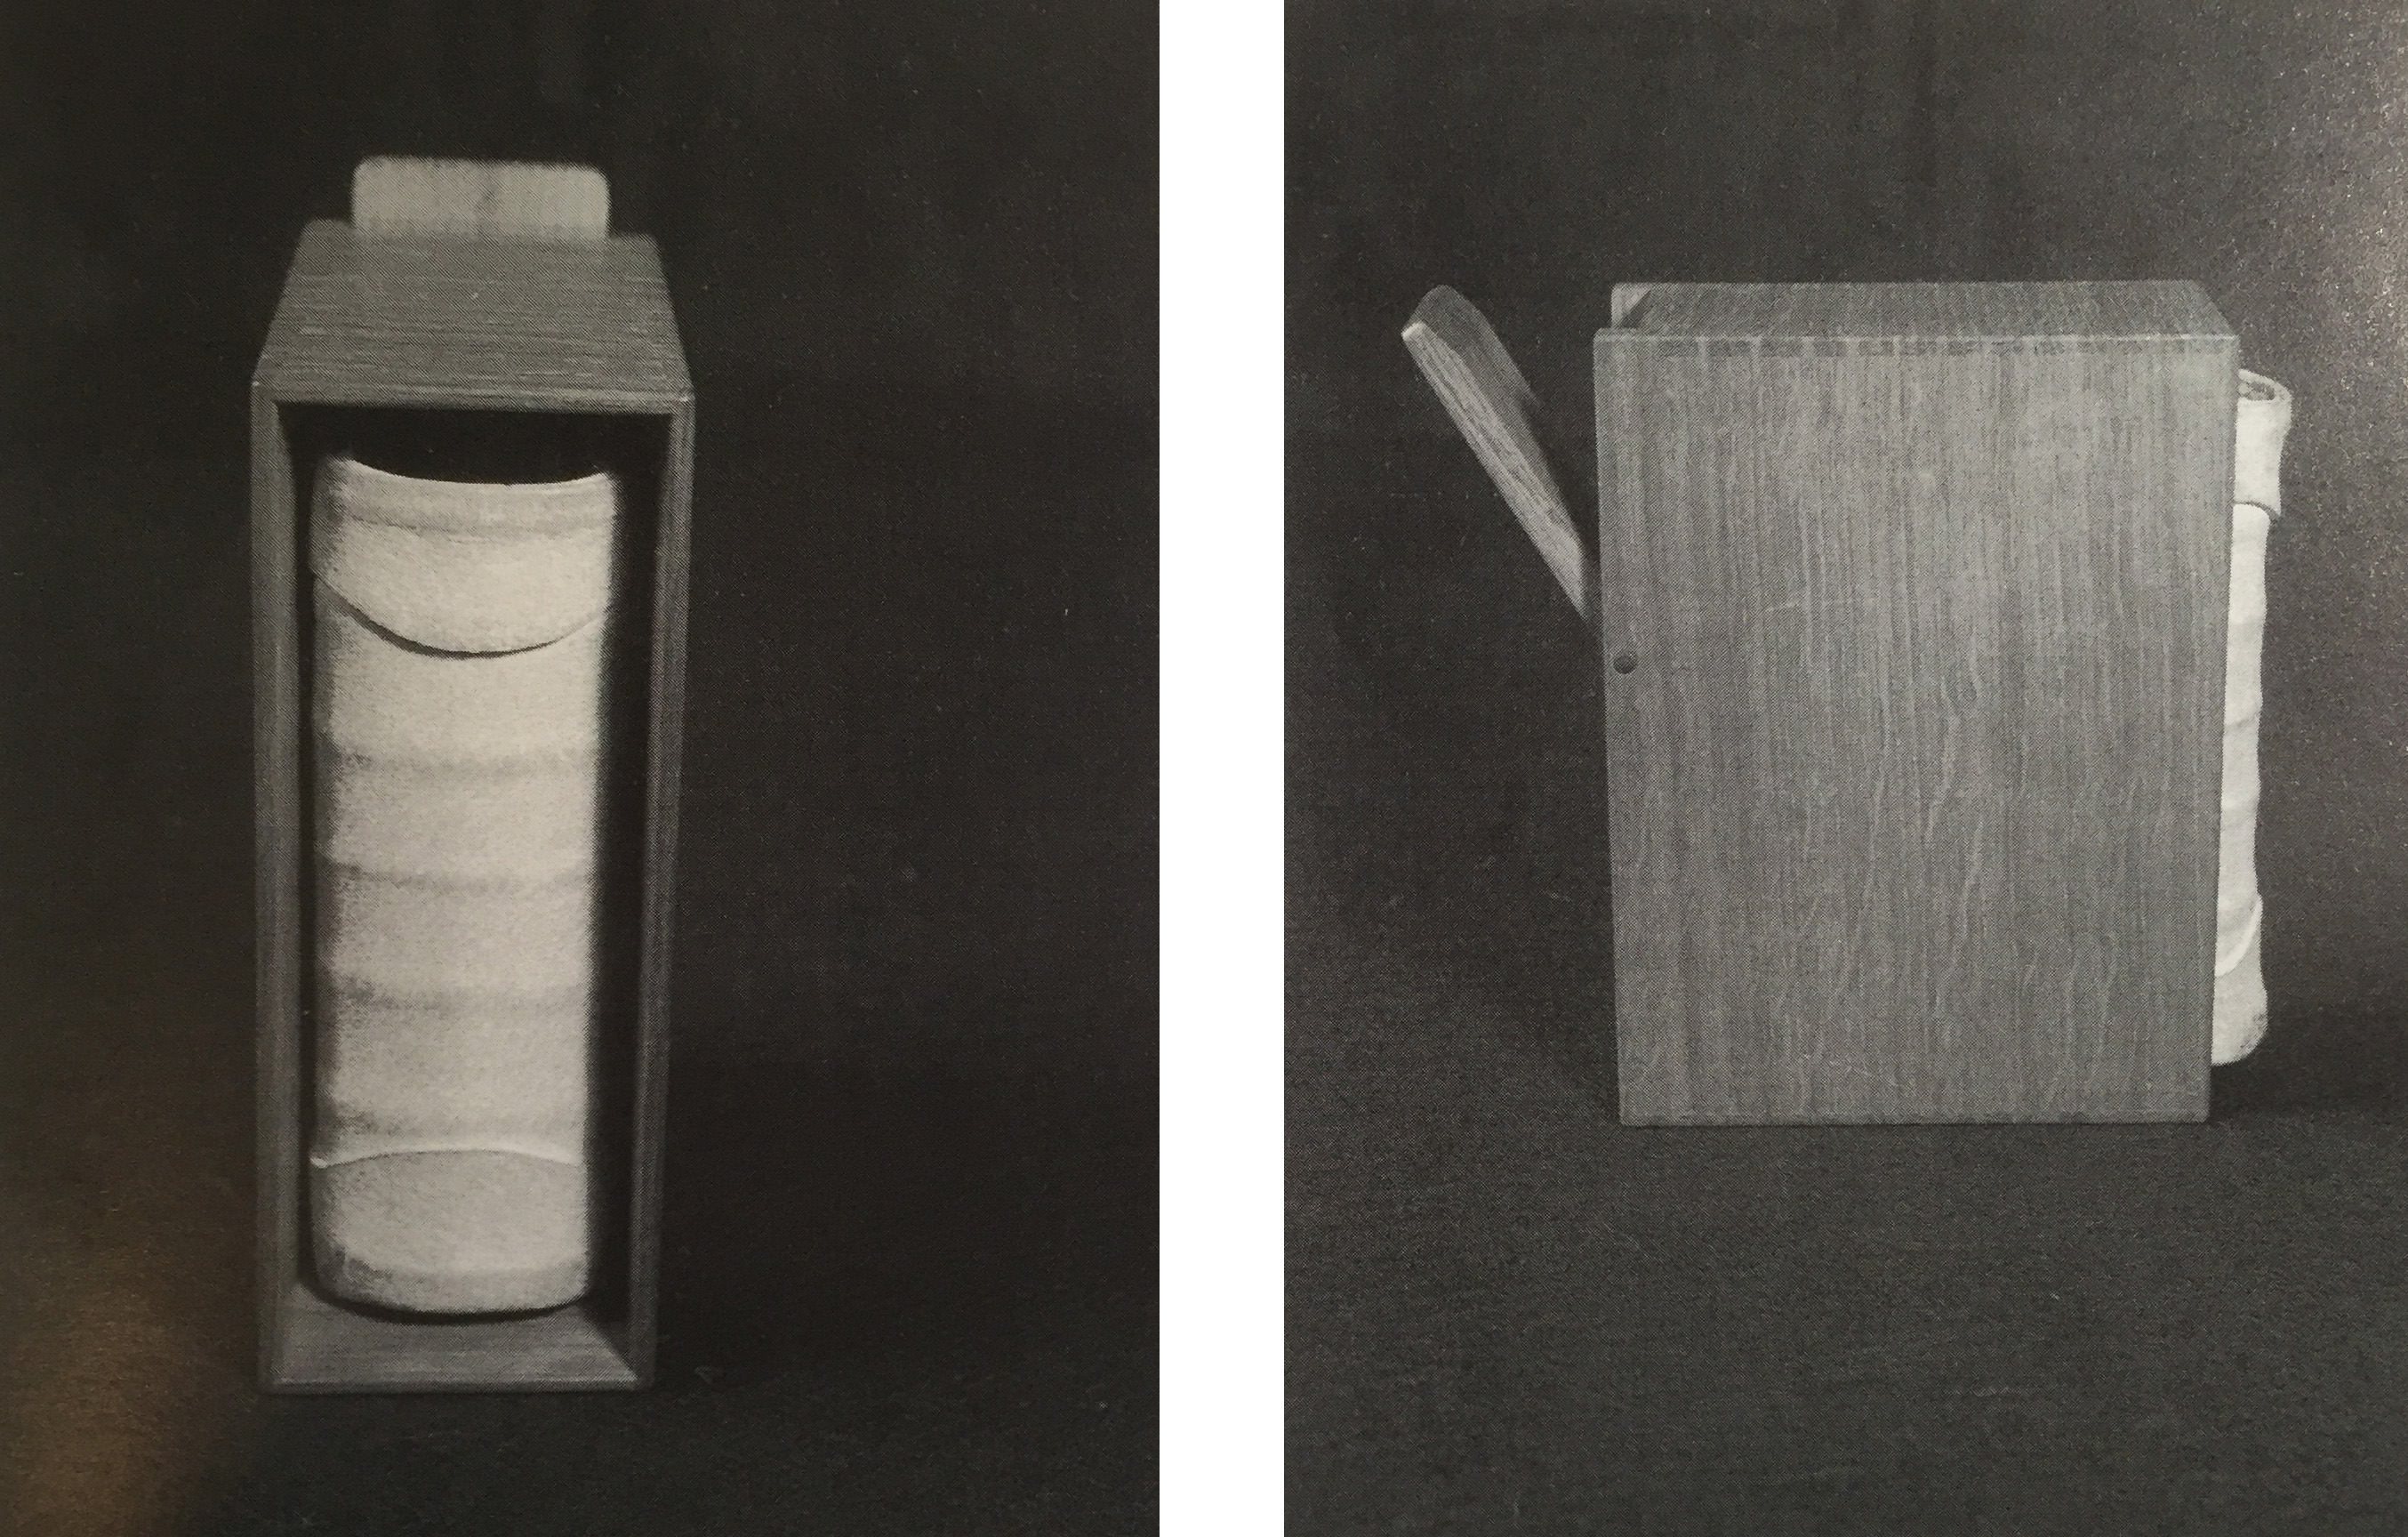
The slipcase was once a very popular style of book enclosure and is still often seen with fine press editions or design bindings. Slipcases can be simple to construct and, if well-fitting, will restrict the opening of the volume inside. Roger Powell’s treatment of the Ricemarch Psalter in the early 1950s made use of a wooden version of the slipcase for this very reason (Cains, 1996). It is worth mentioning that Powell also used a set of spring-lidded wooden boxs for the Book of Kells (Pignatti, 2012).
Ricemarch Psalter. Wooden pressure box designed by David Powell, fabricated by Edward Barnsley’s workshop. (Cains, 1996)
We do not currently make new slipcases for items in our collections. Books can be difficult to safely remove from your run-of-the-mill cloth-covered slipcase, and the abrasive action of sliding a book in and out can present a danger to fragile covering material. A chemise may reduce but likely will not eliminate those handling issues.
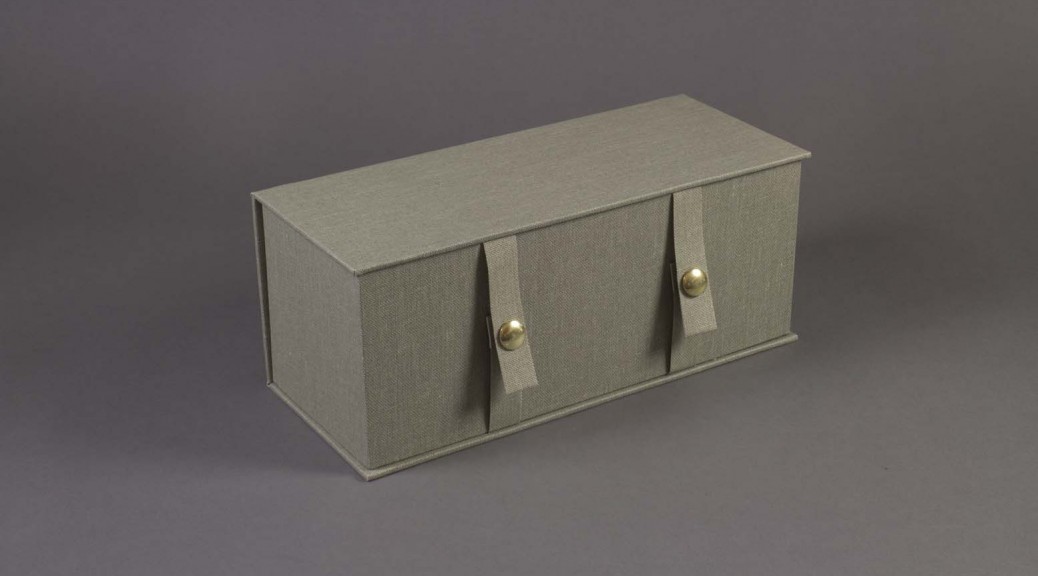
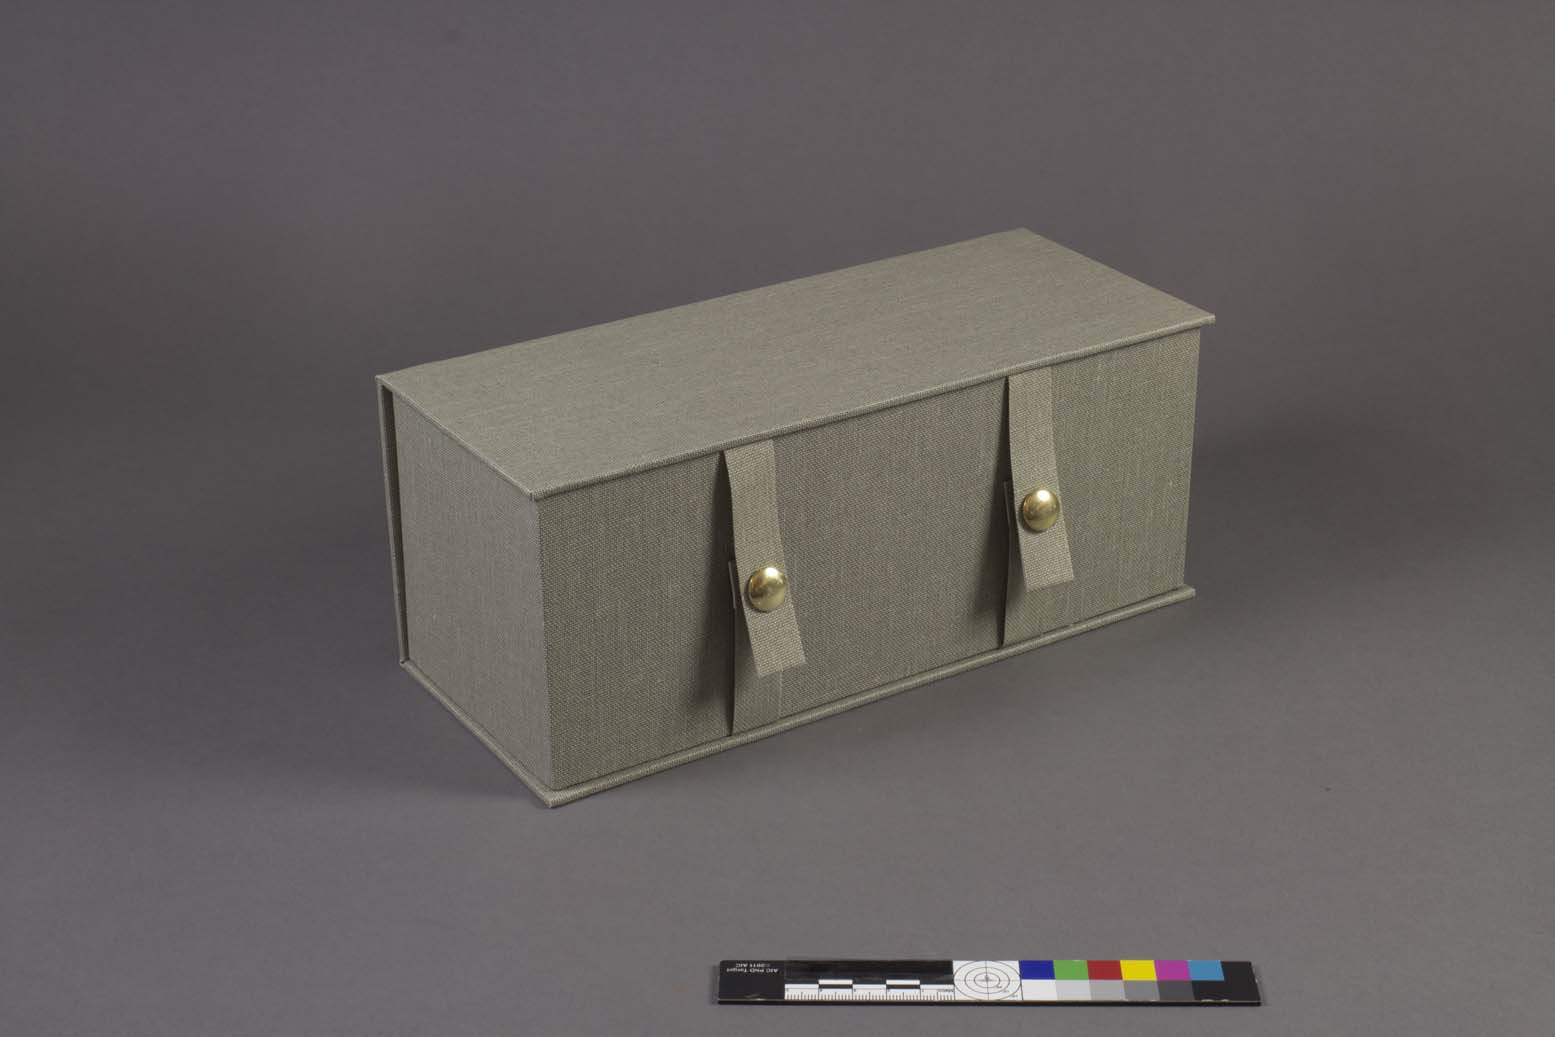
The cloth-covered “clamshell” or “drop-spine” box can be a more durable and aesthetically pleasing enclosure than those listed above. For books requiring restraint, the clamshell structure can be easily modified to include restraining elements. There are examples in the literature of boxes with clasps (Foot, Blacker, & Poole-Wilson, 2004), but I cannot recall ever seeing one. Clasps can be difficult or expensive to make, and one would assume those clasps have suffered from the same condition issues as their book-bound counterparts over the years. There are modern alternatives with the same mechanical principles, however. Fore edge restraints using ribbon ties, Velcro®, or metal snaps can easily be adhered between the trays and case of the clamshell enclosure.
As bookcloth can tear quite easily with applied shearing force, I would suggest including a more durable material at the core of each strap. I will often use Tyvek® or parchment strips, wrapped in bookcloth.
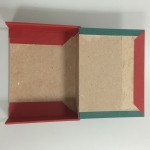
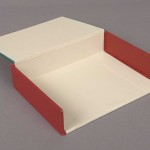
Another variation commonly made to hold parchment over boards bindings is the pressure-lid clamshell box. The inner tray of the enclosure features a simple flap or lid, which is hinged to the fore edge wall and prevents the boards from pushing the box open.
I cannot recall ever receiving explicit instruction on an exact method for covering and attaching the inner lid for this style of box. Having learned many different methods over the years for constructing and covering a standard clamshell enclosure, I became curious as to how other conservators and bookbinders were executing this modification.
I began with a review of the literature on book enclosures to determine where this structure originates. Email listserv discussions have suggested several attributions of its origin to notable figures in the field, but I have not been able to make a definite link. Many of the classic manuals and reference volumes describe a method for making a clamshell box, but I have yet to find one which describes the making of the pressure lid. My biggest obstacle is nomenclature: while I tend to call this feature a “pressure lid”, it is often described with other names. A simple online search yields several images of this style of box shared in digital portfolios or treatment documentation, with “pressure lid” “pressure flap”, “fore edge flap”, and “inner lid” all appearing as descriptors. I have not yet been able to examine some of the more obscure print resources, however, and my own admittedly compulsive curiosity will likely force me to continue searching.
With input from colleagues, I began constructing models using different methods of attaching the pressure lid. Four methods emerged. A note about these illustrative models: Each model is only the inner tray of the enclosure. I completed each step of the covering process with a different color of cloth to better illustrate the process. In all but Method D, the pressure lid closes to fit inside the walls of the tray. Obviously for these methods, the thickness of the covered board must be accounted for in constructing the dimensions of the inner tray.
Method A
My initial thought was to attach the inner lid with as few pieces of cloth as possible. In this method, the head and tail of the lid are first covered with strips of cloth, then the lid is attached at the time of covering the inner tray. The interior of the lid and tray were then covered with a single piece of cloth. Click the thumbnail images for a larger image.
This method of covering is the nicest looking in my opinion, but it can be tricky to accomplish neatly and produces more waste cloth than the others.
Method B
Sidney F. Huttner suggested a method with similar attachment. The lid is still attached at the time of covering the tray, but with a much narrower strip of cloth. A second piece of material covers the outside of the lid, with turn-ins at the three remaining sides. For this model, I covered the inside with separate pieces of cloth for the interior hinge, interior of the lid, and floor of the tray.
This covering technique can be accomplished very quickly and makes use of smaller pieces of material, creating less waste. The slight bump of cloth on the exterior of the tray (far right image) is not as attractive, but could be mitigated with in-filling.
Method C
The boxing manual from the Library of Congress includes a description of a clamshell box with a “hinged shelf” (Brown, Etherington, & Ogden, 1982). This shelf was intended to separate and hold two items in the interior of the box; for example, a book and a set of plates. I discovered that the design could be easily adapted to function as a pressure lid.
The inner tray of the enclosure is constructed and covered in the usual way, with an additional covered board thickness added to the width of the tray dimensions. The flap is constructed separately, using two pieces of board. The thinner board of the flap is then glued to the interior fore edge of the tray.
This method uses a little more material and can be a little tricky to securely attach. During the gluing process, I stood the tray up on the fore edge inside a book press with the flap in place. Wooden blocks were then stacked inside the tray until they cleared the spine edge. The press was then tightened down onto the wooden blocks.
Method D
The final method of covering was suggested by Scott Kellar. For this method, the pressure lid actually sits on top of the walls of the tray. The tray is covered as usual, but the flap of cloth which usually covers the interior of the fore edge wall of the tray is sliced off at the top of the wall. The pressure lid is covered with an extended piece of cloth at what will be the fore edge and the remaining three sides are turned in. A spacer of thin material (20pt Bristol board) is placed between the flap and the tray while the extended cloth is glued around the fore edge of the tray and turned in underneath. When dry, a strip of material is added to the interior joint. In this model, it would appear that the interior fore edge wall and floor of the tray are covered separately. The lovely cut away model pictured below was kindly made and sent to me by Karen Hanmer.
I find that it is always nice to have options when constructing an enclosure and the different elements of these methods can be adapted or recombined in many different ways. I would like to thank everyone who answered my inquiries about their covering methods, and I hope that these descriptions and images are of some use to those attempting the pressure lid box for the first time.
Bibliography
Brown, M., Etherington, D., & Ogden, L. (1982). Boxes for the protection of rare books. Washington, D.C.: Library of Congress.
Cains, A. G. (1996). Roger Powell’s innovation in book conservation: The early Irish manuscripts repaired and bound, 1953-1981. In R. Powell & J. Sharpe (Ed.). Roger Powell, the compleat binder (pp. 80-85). Turnhout: Brepols.
Clarkson, C. (1982). Limp vellum binding and its potential as a conservation type structure for the rebinding of early printed books. Hitchin, Herts., England: Red Gull Press.
Foot, M. M., Blacker, C. & Poole-Wilson, N. (2004). Collector, dealer, and forger: A fragment of nineteenth century binding history. In M. M. Foot (Ed.) Eloquent witnesses (pp. 264-281). London: Bibliographical Society.
Pignatti, G. (2012). Boxes for the housing and protection of books: Observations on their history and development. E-conservation: the online magazine, 23.
Woods, C. S. (2006). The conservation of parchment. In M. Kite & R. Thomson (Ed.). Conservation of leather (pp. 200-224). Oxford: Elsevier Butterworth-Heinemann.
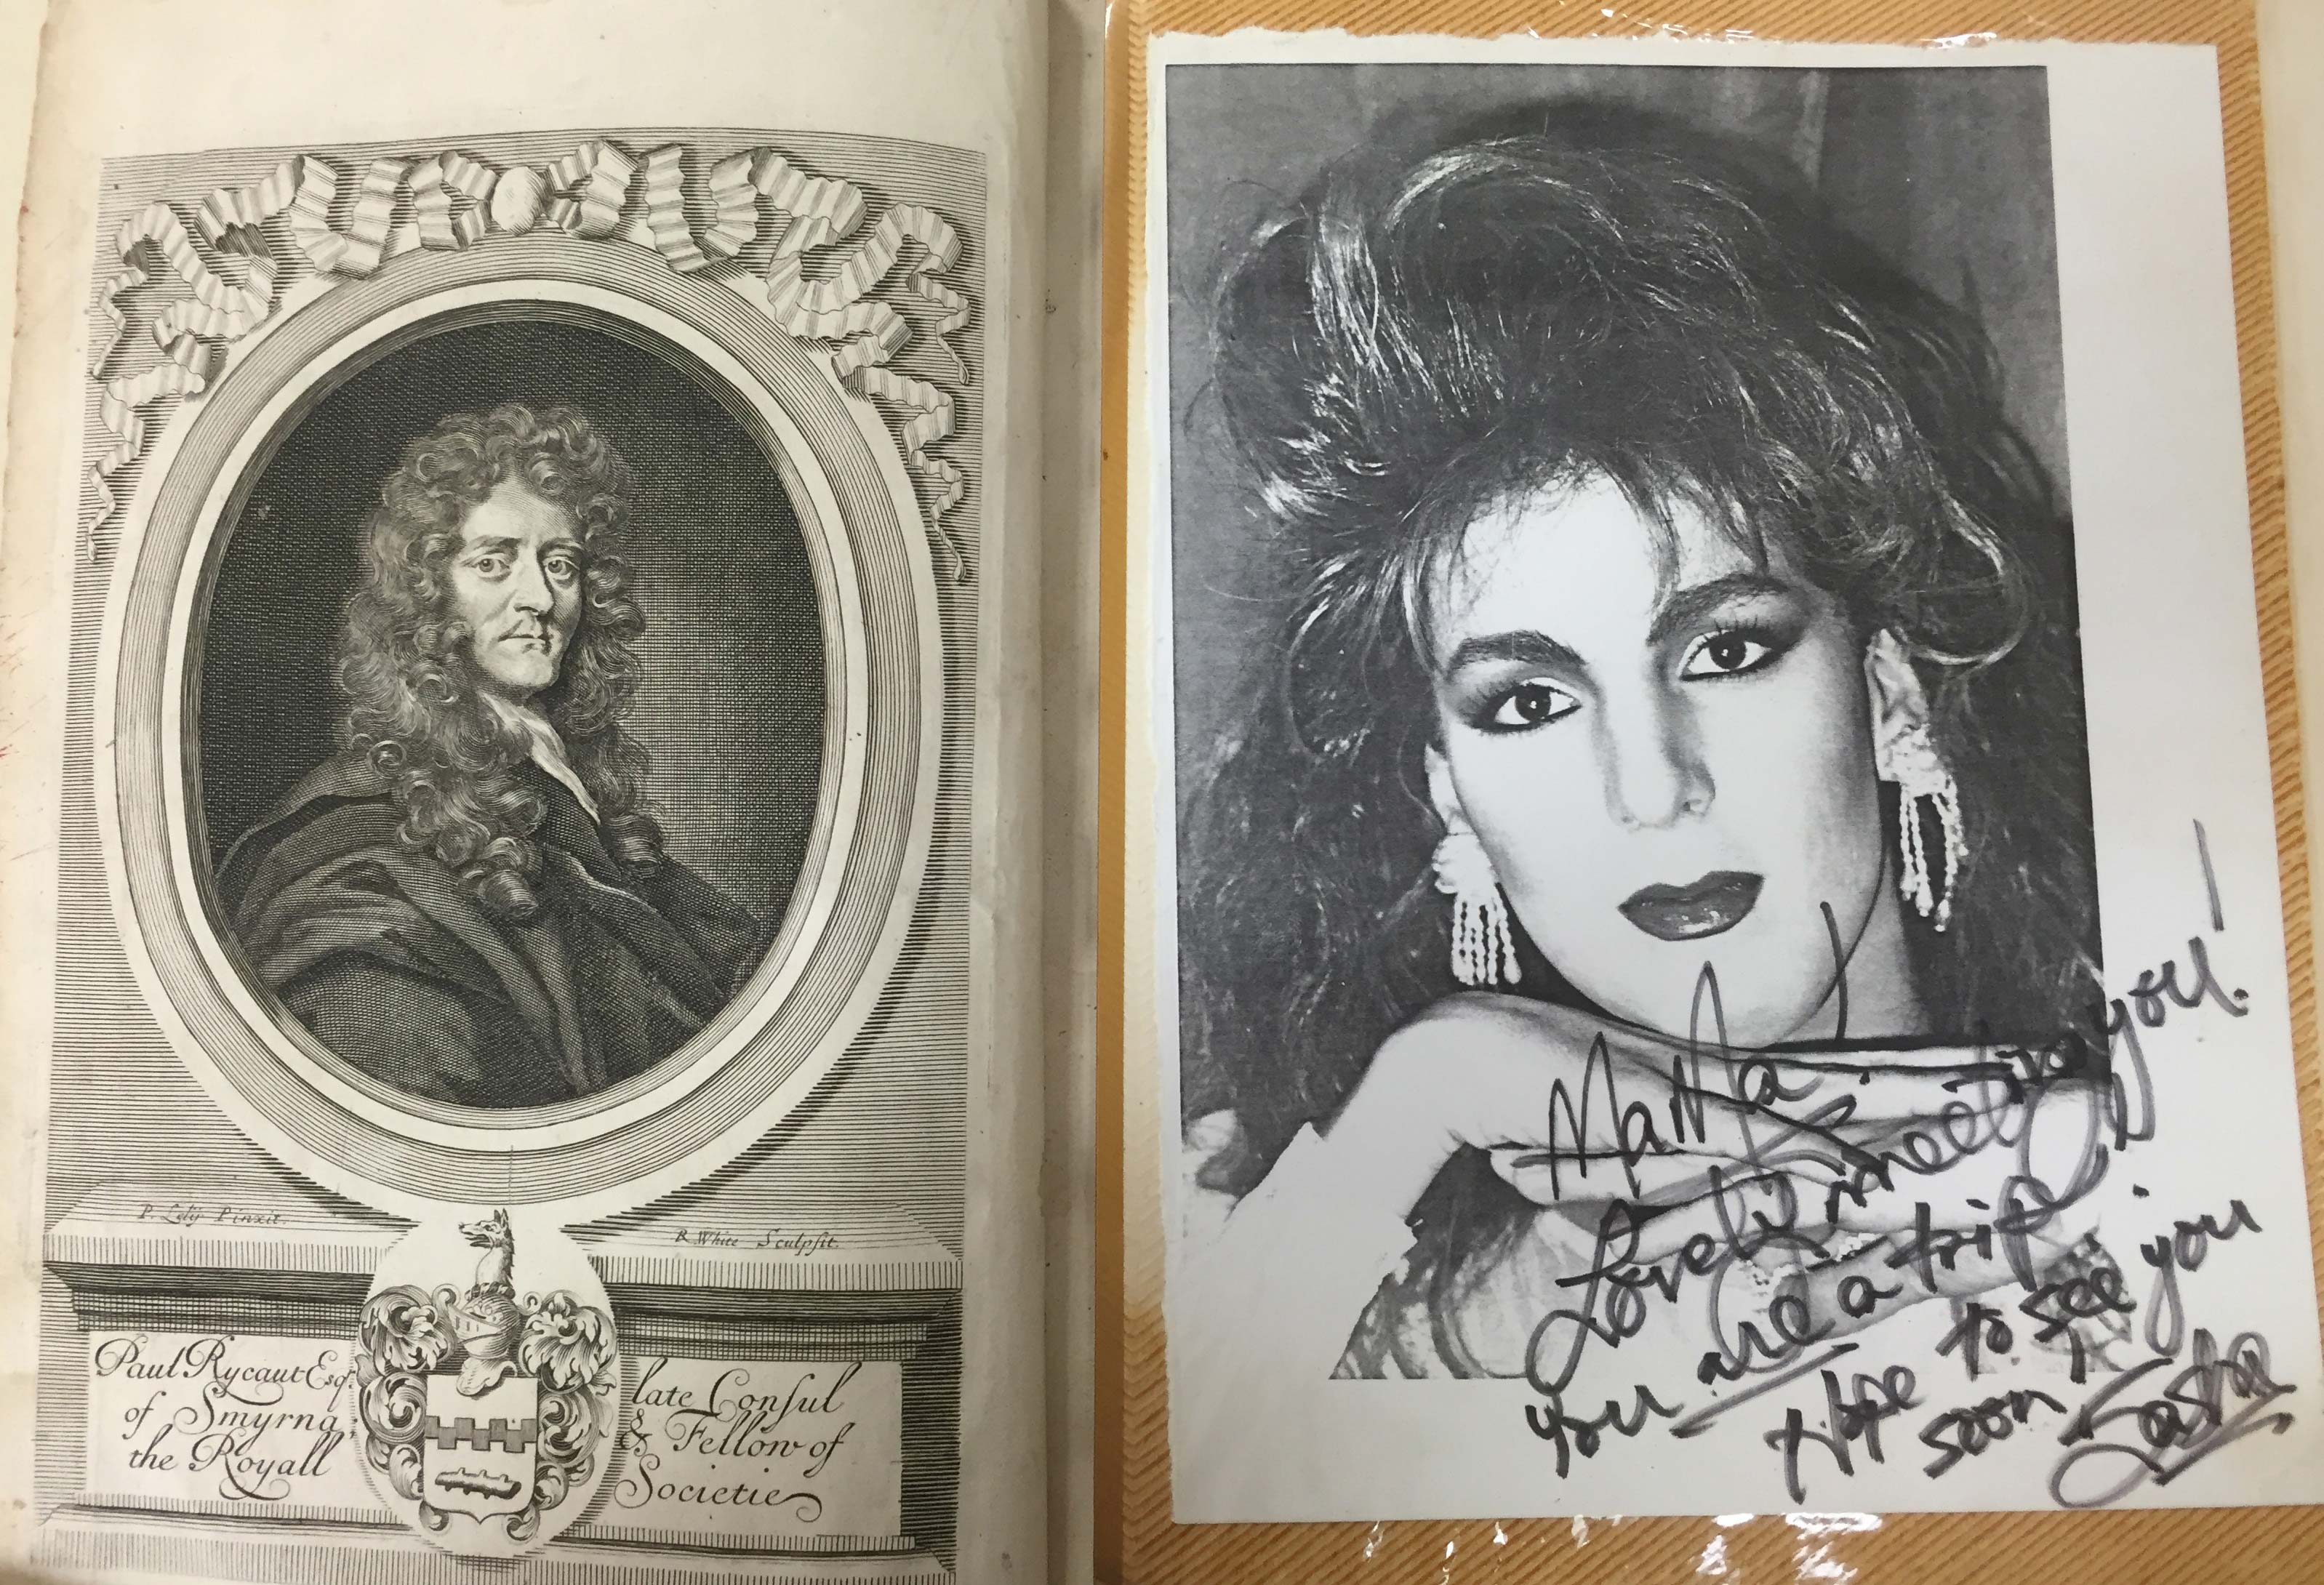
With the incredible diversity of Duke’s collections, you never know what will come through the conservation lab. For example, some of my recent treatments included a 17th century printed bookand a photograph album from the early 1990s. Despite the differences in format, materials, and subject matter between these two items, one common thread persists: big hair never goes out of style.
The holidays are upon us and that means it is the season for parties, family get-togethers, and making memories. There will inevitably be photographs and keepsakes from these events, and you may at some point consider gathering them together in a photo album or scrapbook. Before you begin, however, let us take a look at some historical examples so that you can avoid the mistakes of our scrapbooking-forebears.
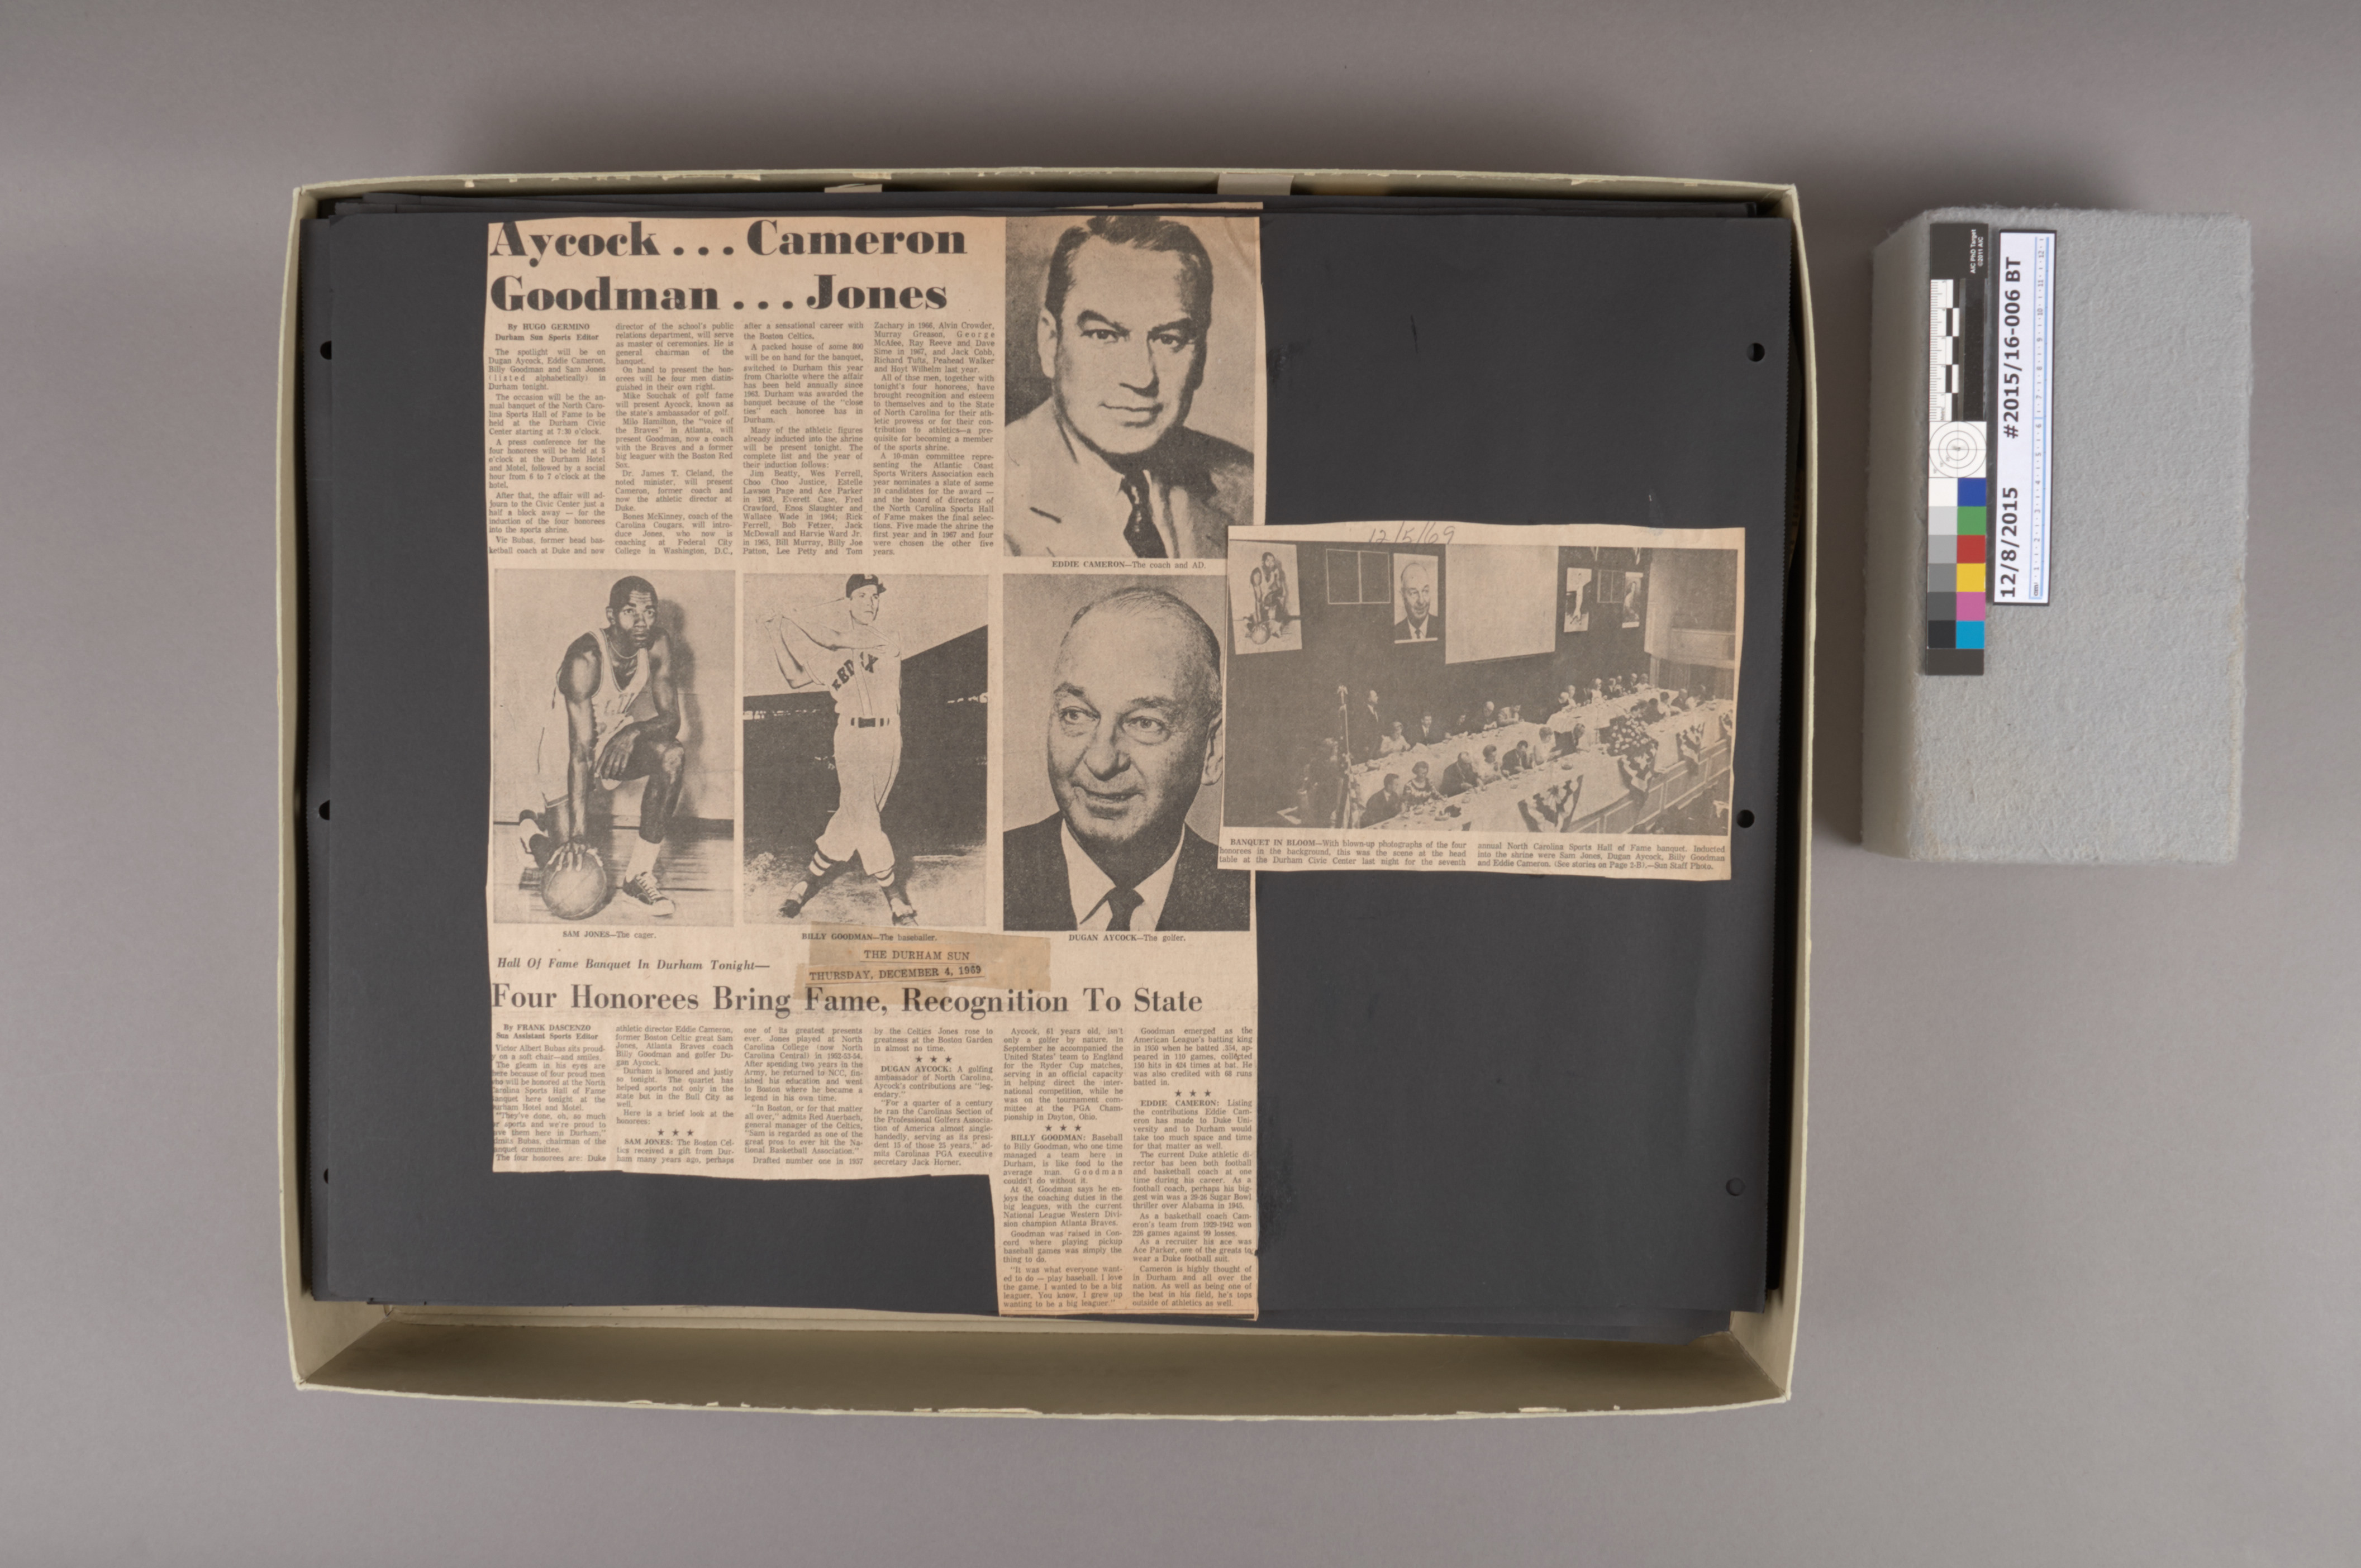
Duke, like many research libraries, holds a large number of scrapbooks and photo albums across our collections. Scrapbooks are complex objects and they frequently come to the conservation lab to address inherent problems with the materials or housing issues. Usually, we find some pretty strange objects inside as well. A student scrapbook from the 1940s recently arrived in the lab which perfectly illustrates five common and problematic conditions.
No. 1: Tape
Evil tape
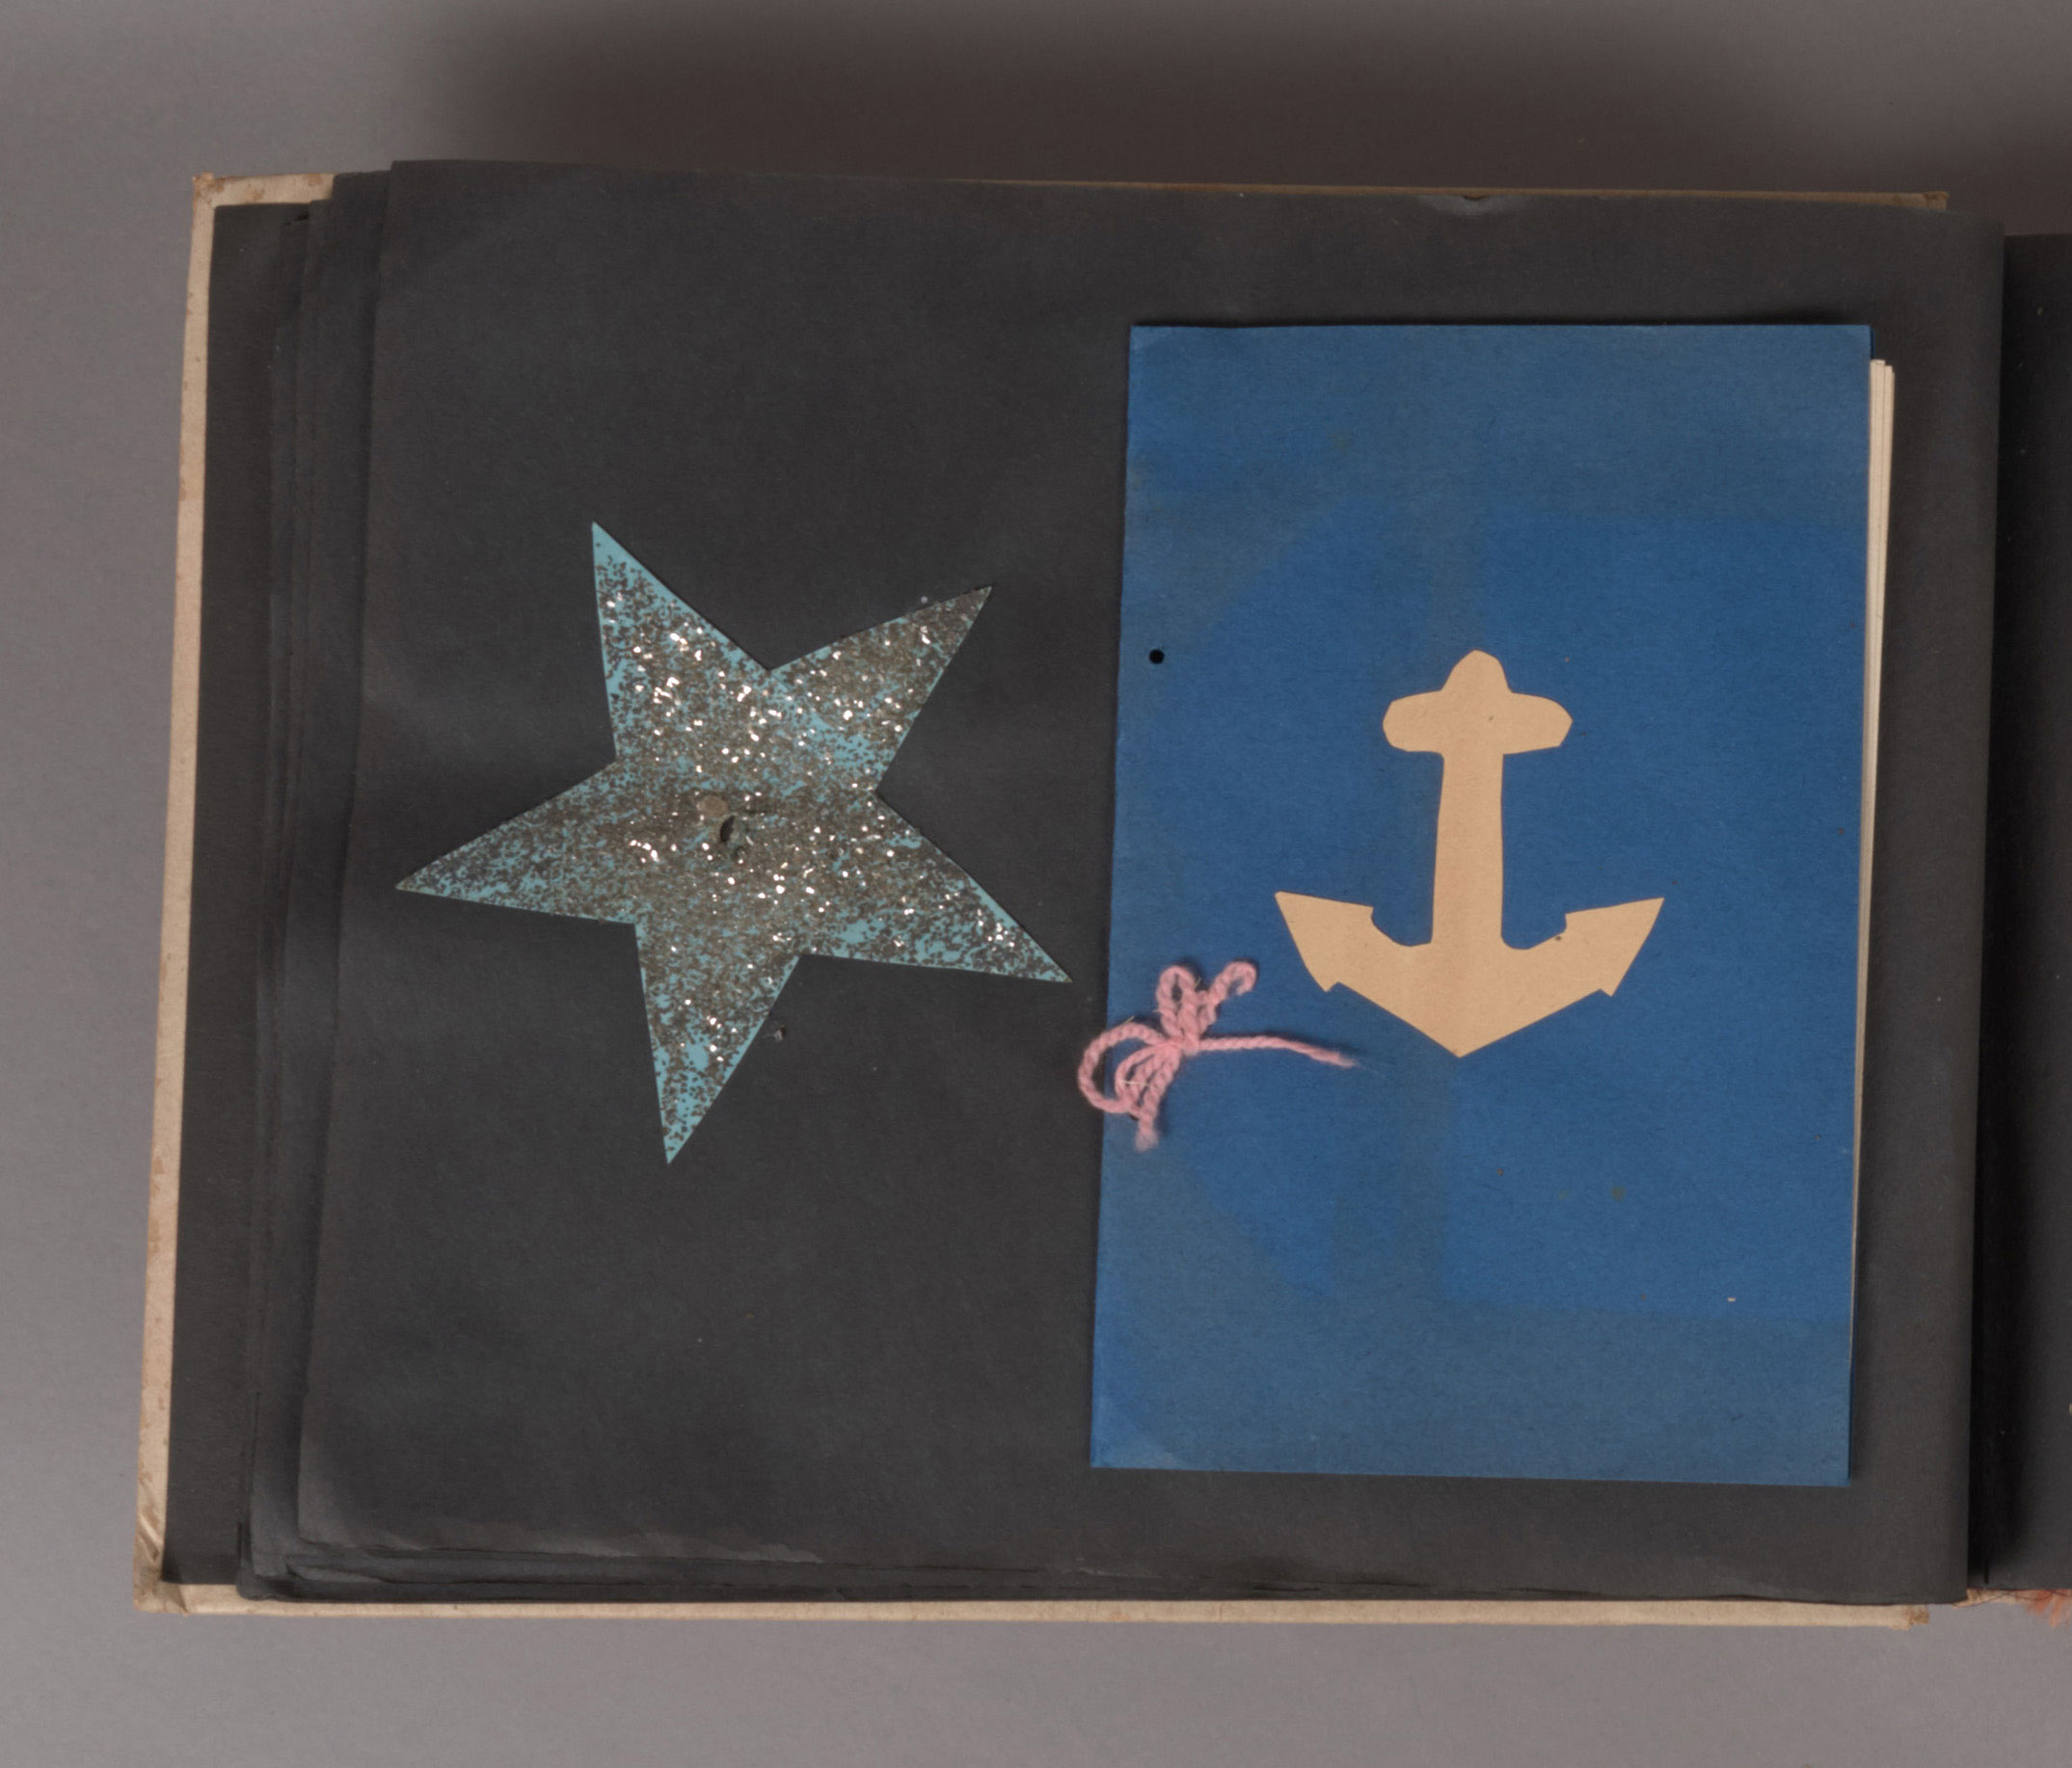
There are so many varieties of pressure sensitive tape and, because it is a very convenient way to attach materials to pages, we encounter it all the time on collection material. Unfortunately, adhesive tapes do not age well and can exhibit a number of problems, such as discoloration, adhesive creep, or even adhesive failure. Tape can stain the items it touches (like the white tabs on the felt flag above) or cause pages to stick together. A better option is to use a simple and reversible attachment method, such as photo corners. Stable plastics such as polyester, polyethylene, or polypropylene are preferred.
No. 2: Glitter
This one is more social etiquette than preservation practice: When you add glitter to your scrapbook, you give the gift of glitter to every person who looks at your scrapbook until the end of time. It is literally all over my bench as I write this.
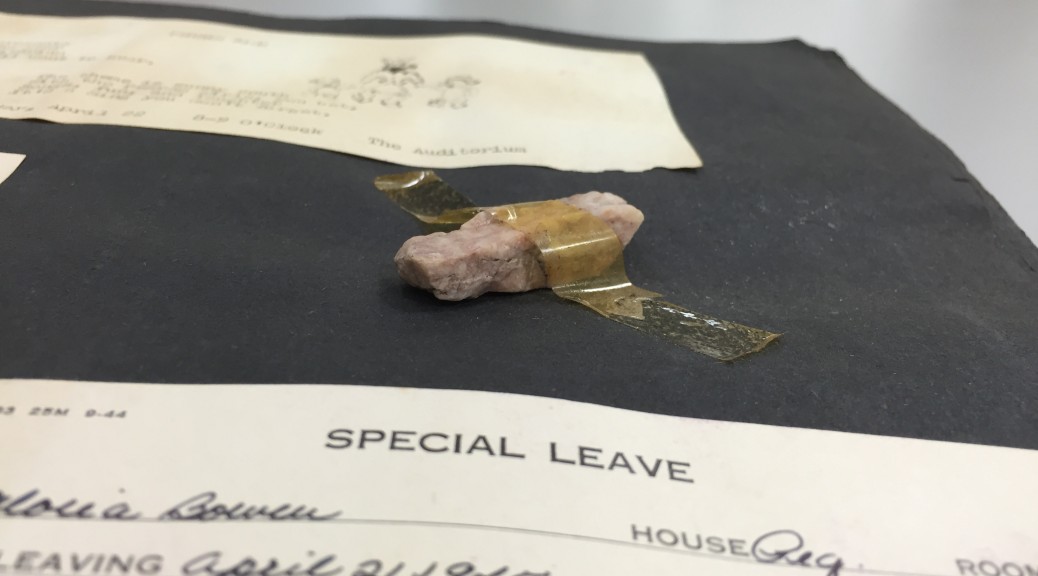
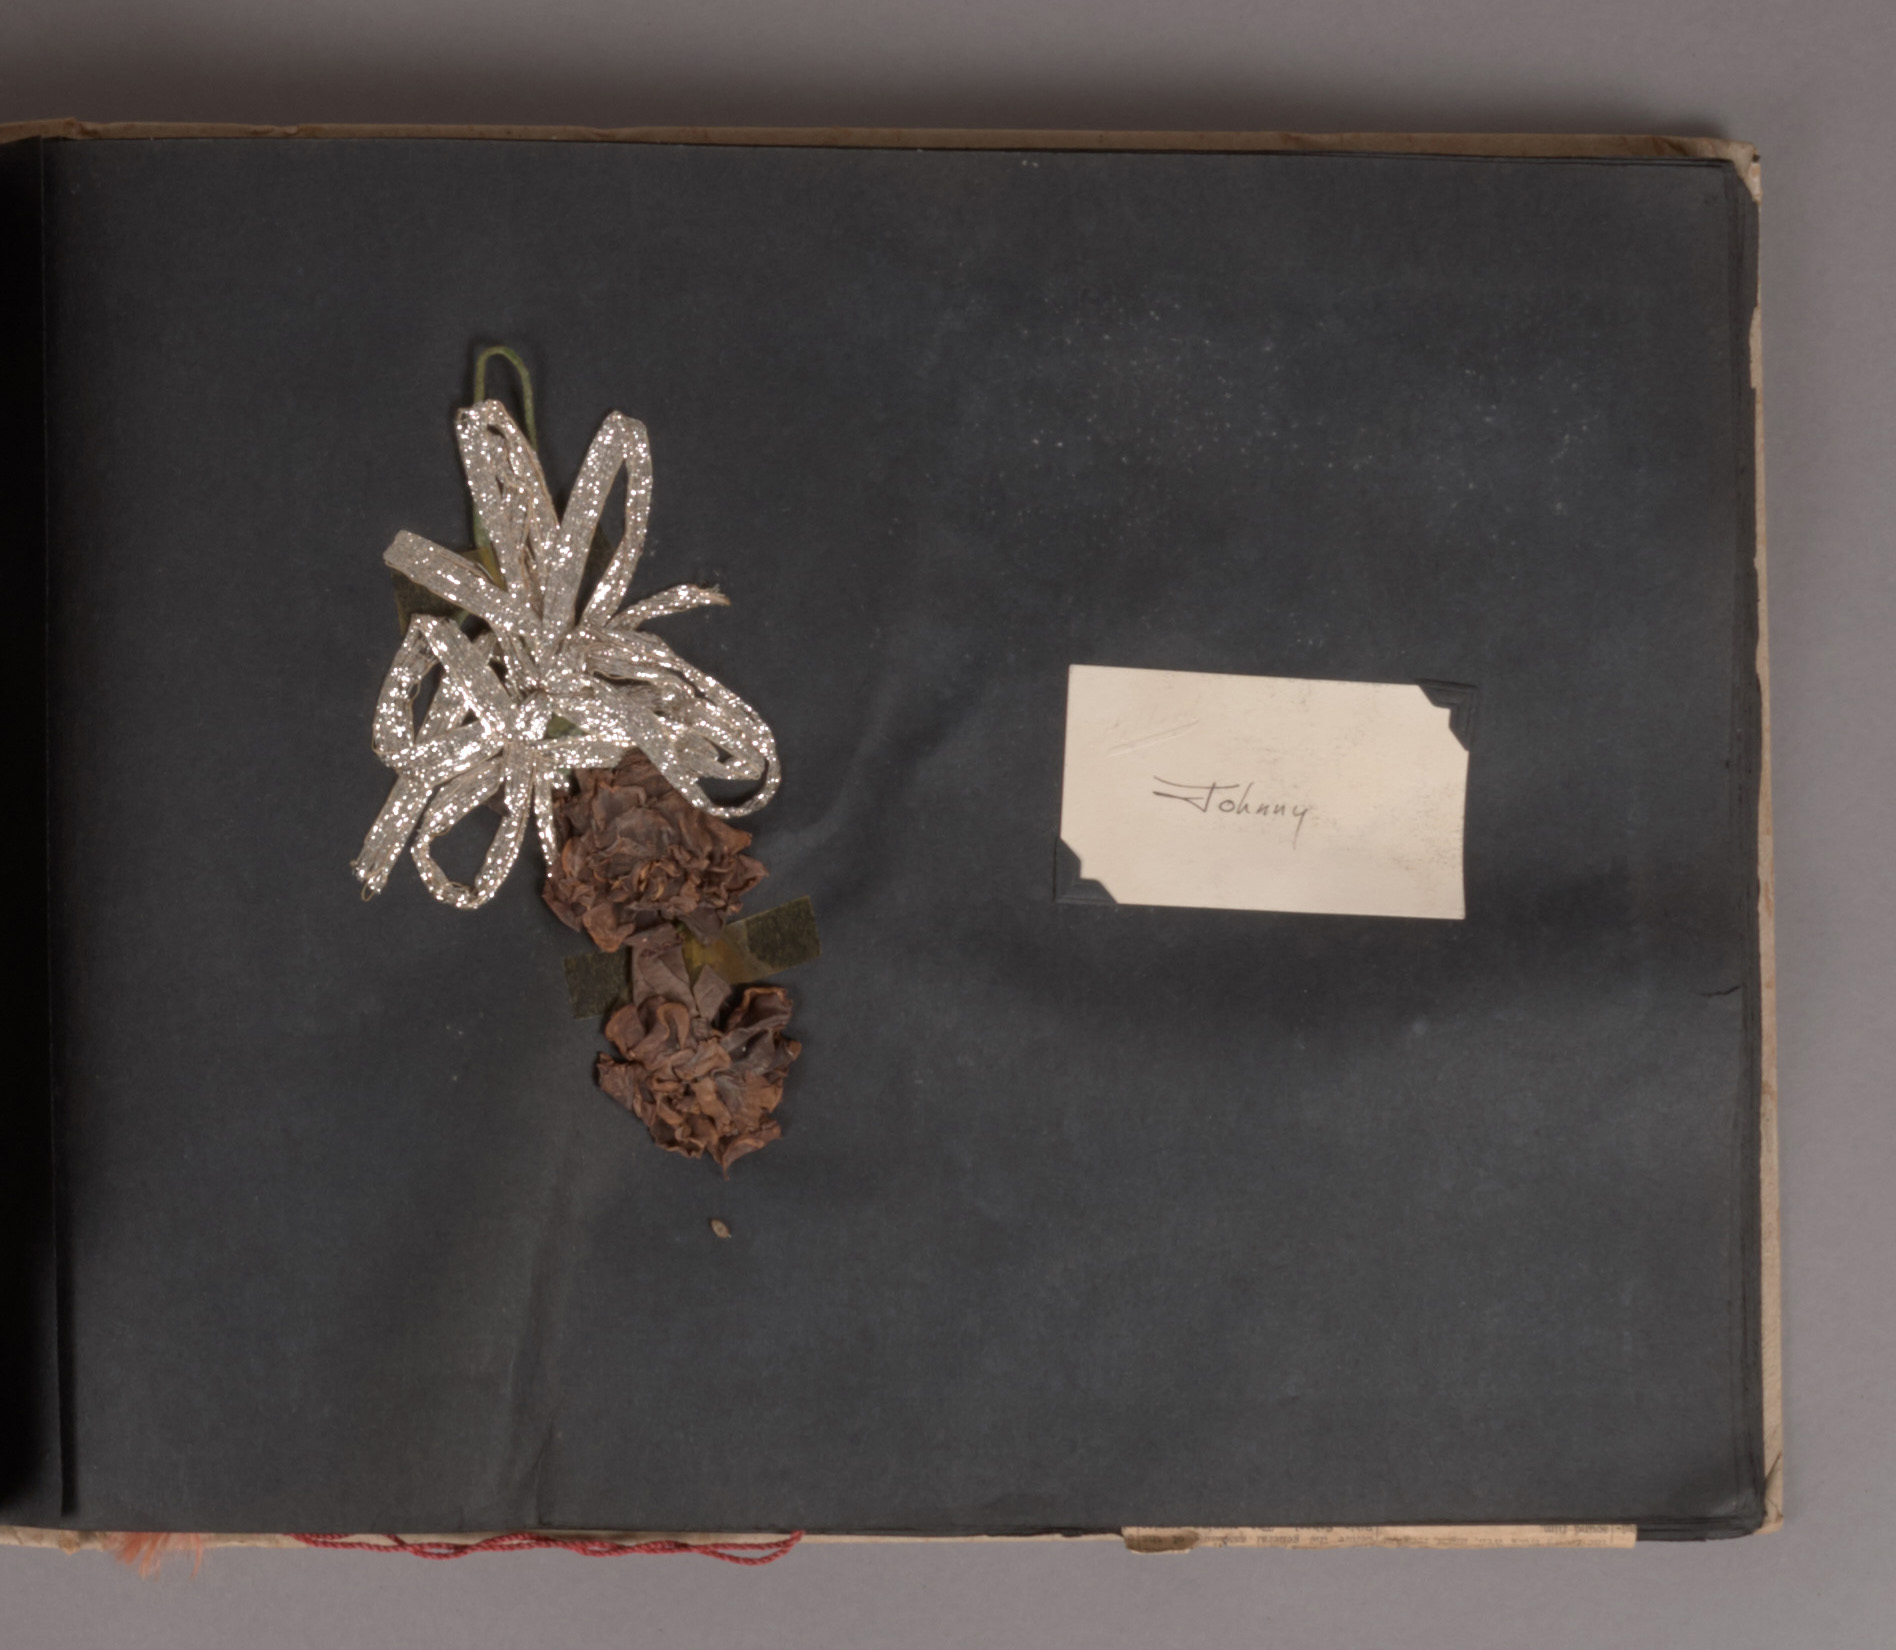
No. 3: Perishable Items
This was once a flower.
Flowers and candy may hold many memories, but they are not so compatible with scrapbooks. Like tape, perishables can either discolor the pages and items around them or adhere pages together. These items may also be attractive to insects or mold, potentially compromising the entire scrapbook and putting other items in the collection at risk. Photographs of the flowers will function a little better in the book.
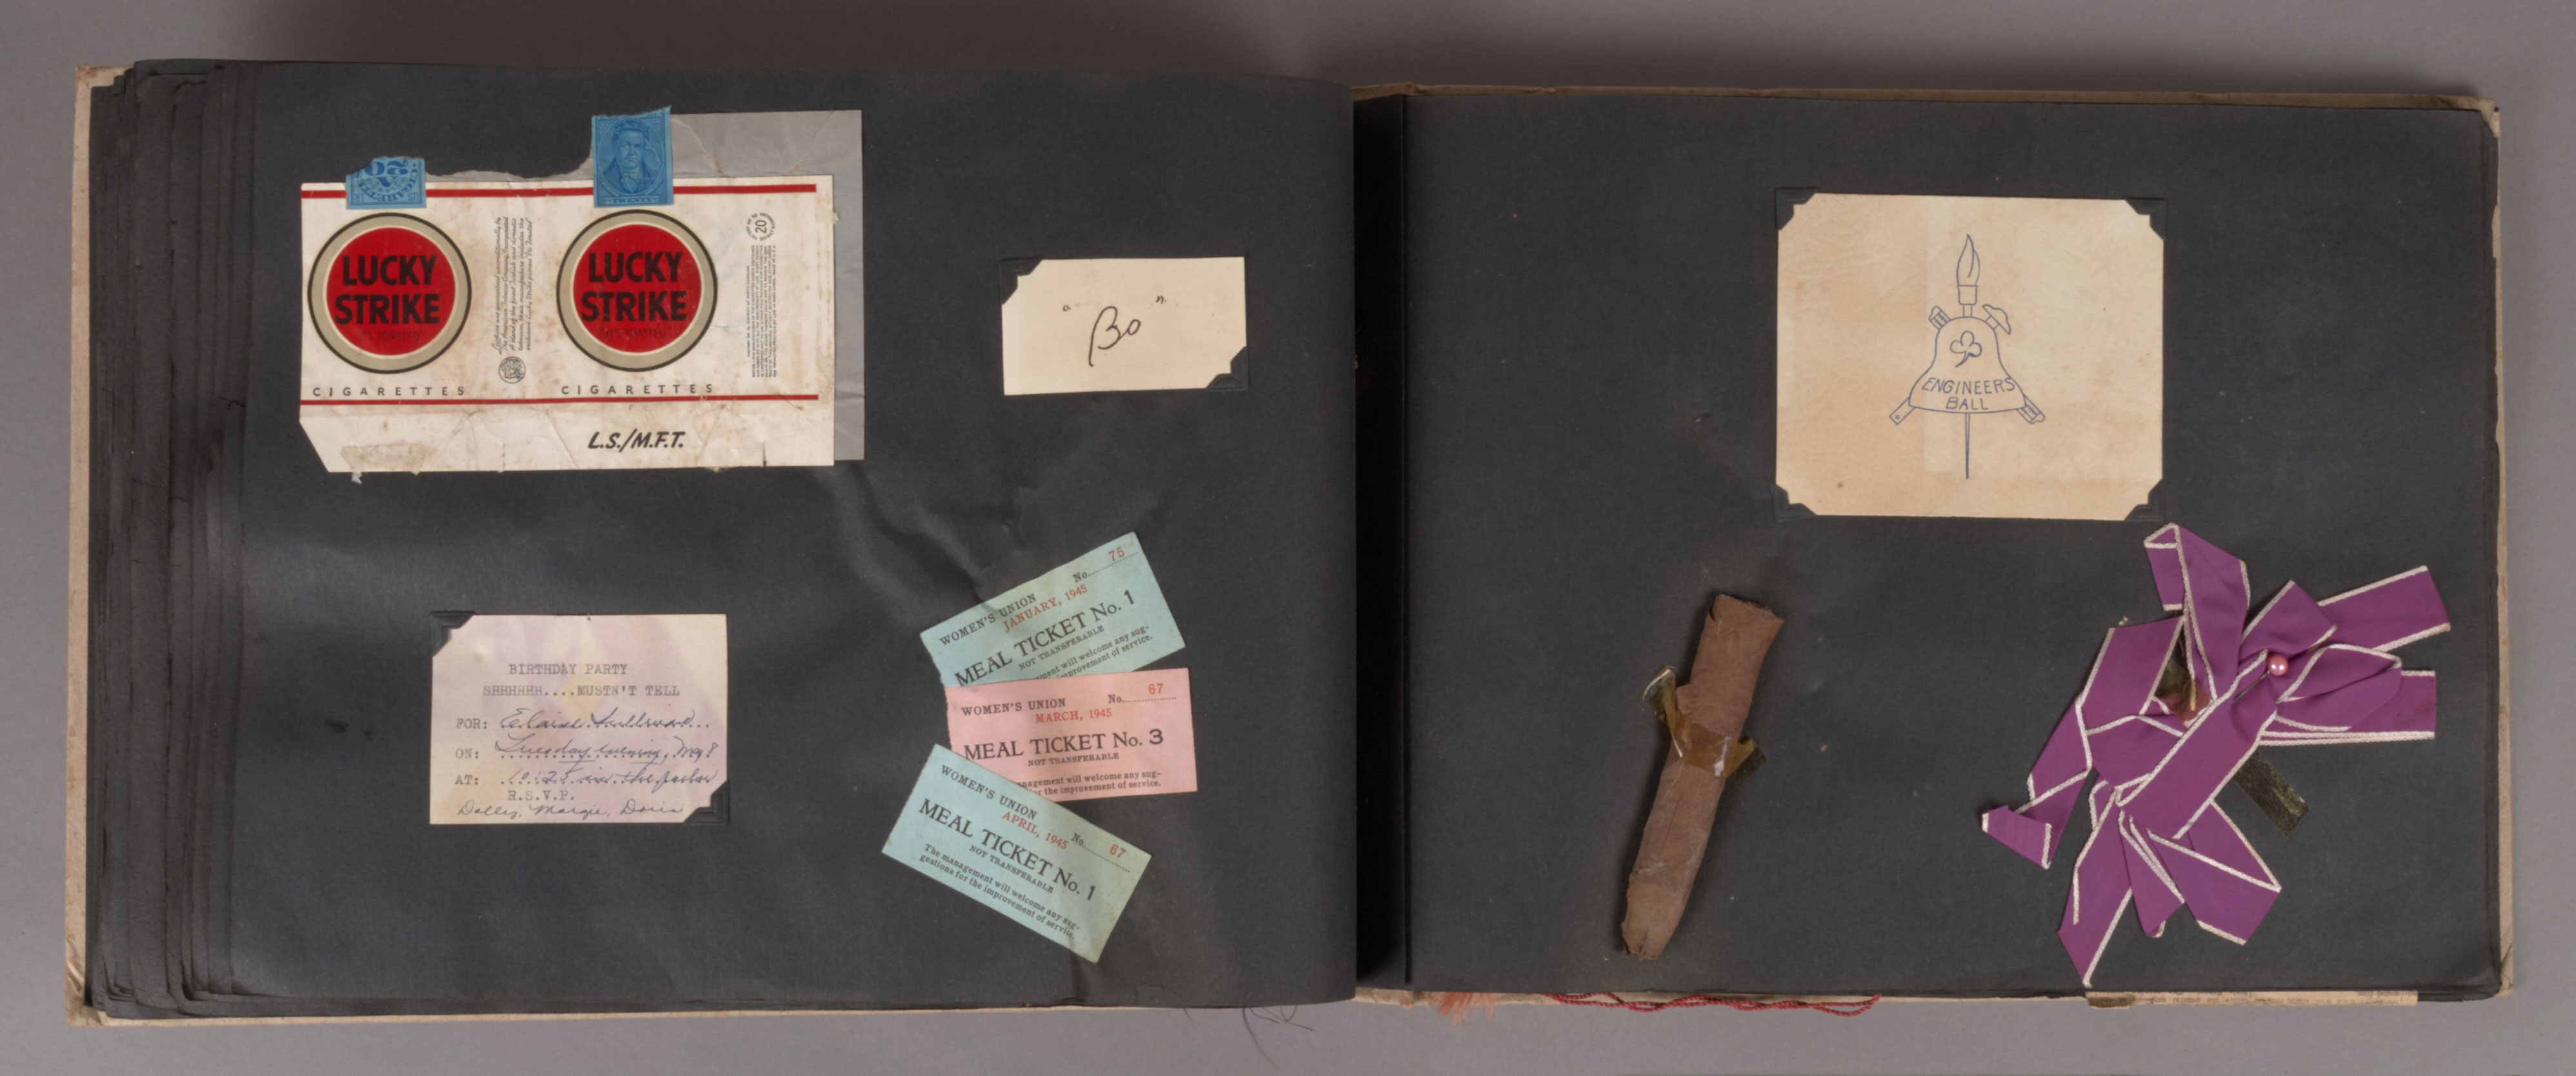
Strangely, tobacco products, like cigars or cigarettes are also commonplace in historic scrapbooks. Use of tobacco products in general seems to be declining, so maybe we will stop seeing this in more modern scrapbooks that come into our collection. If the urge does strike you, however, I would suggest just including the wrapper or packaging (like the Lucky Strikes on the left, above), rather than an entire cigar (as on the right).
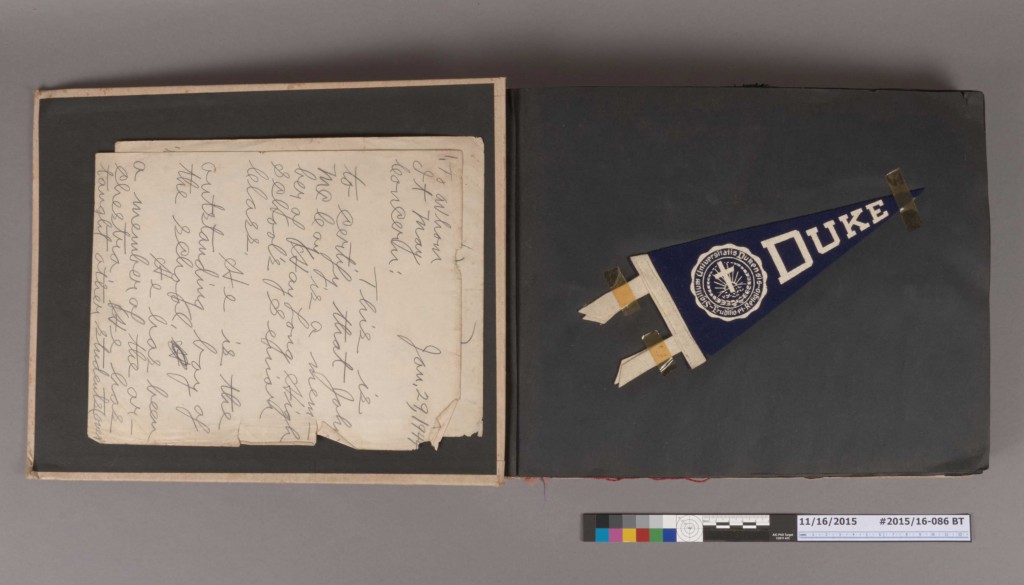
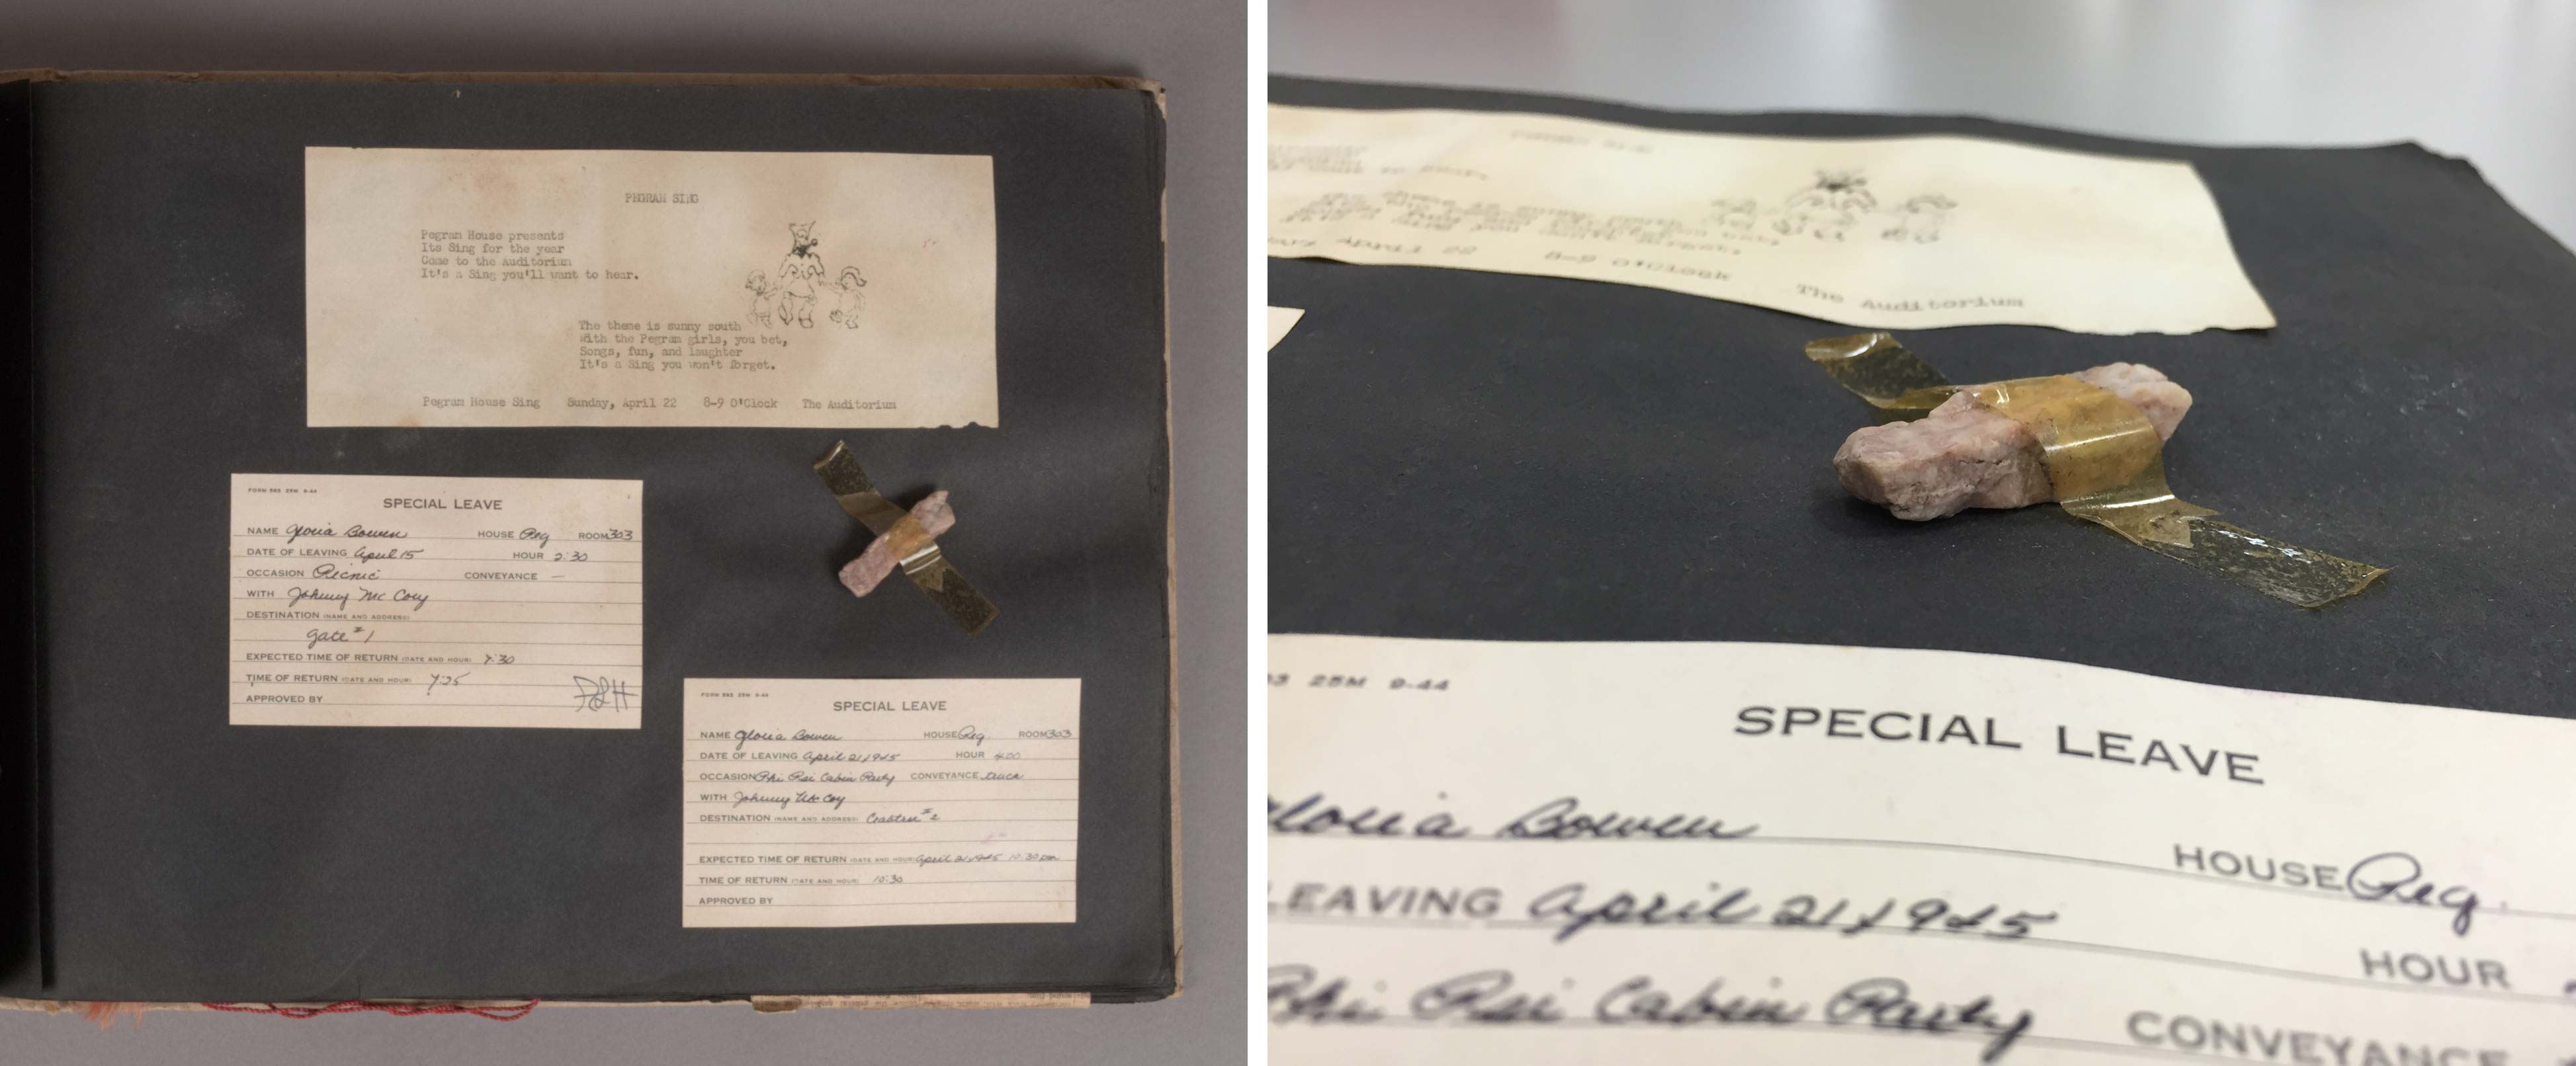
No. 4: Rocks (Or really any hard, pointy object)
Yep, that’s a rock taped to a page.
Books are not the best containers for three-dimensional objects. In addition to distorting the entire book, pointy objects can pierce through facing pages and damage the attached photographs or ephemera. Heavier objects can even tear support pages from the book. Objects like this will be much happier in a box.
No. 5: Large format materials
A whole newspaper tucked inside and actually in remarkable shape for its age.
In a similar vein, larger format pages, such as whole newspapers or large posters, may not survive well when folded up and tucked inside a scrapbook. The bulk of the folded piece can strain the scrapbook binding. Some papers become very brittle as they age and may crack along the folds- especially as they are unfolded and refolded with use. These items are better left out of the book and stored flat.
Scrapbooks can be important cultural artifacts. I hope that in this digital age people continue to make them and that they will eventually make their way into library and archives collections. But I also hope that they do not contain so much tape.
In early August, just as the final move back into the renovated space was taking place, Henry Hebert joined Conservation Services as the new Conservator for Special Collections. Henry is no stranger to the lab, having worked on the circulating collection as a graduate student several years ago.
I always ask our new staff about their favorite conservation project. Here’s Henry’s favorite:
While working as a contractor at Baker Library at the Harvard Business School, I was able to assist with treatment of the United Fruit Company Photograph Collection. The collection is composed of around 10,000 photographs documenting the company’s extensive banana production and shipping operations in Central and South America. Every day brought new and exciting photographs – everything from serpentariums to stone ruins in the jungle. The working condition on the farms were harsh and some of the images of workers were quite haunting. Through this project I learned that the story behind your typical grocery store banana is far more strange and interesting than you would ever think.


