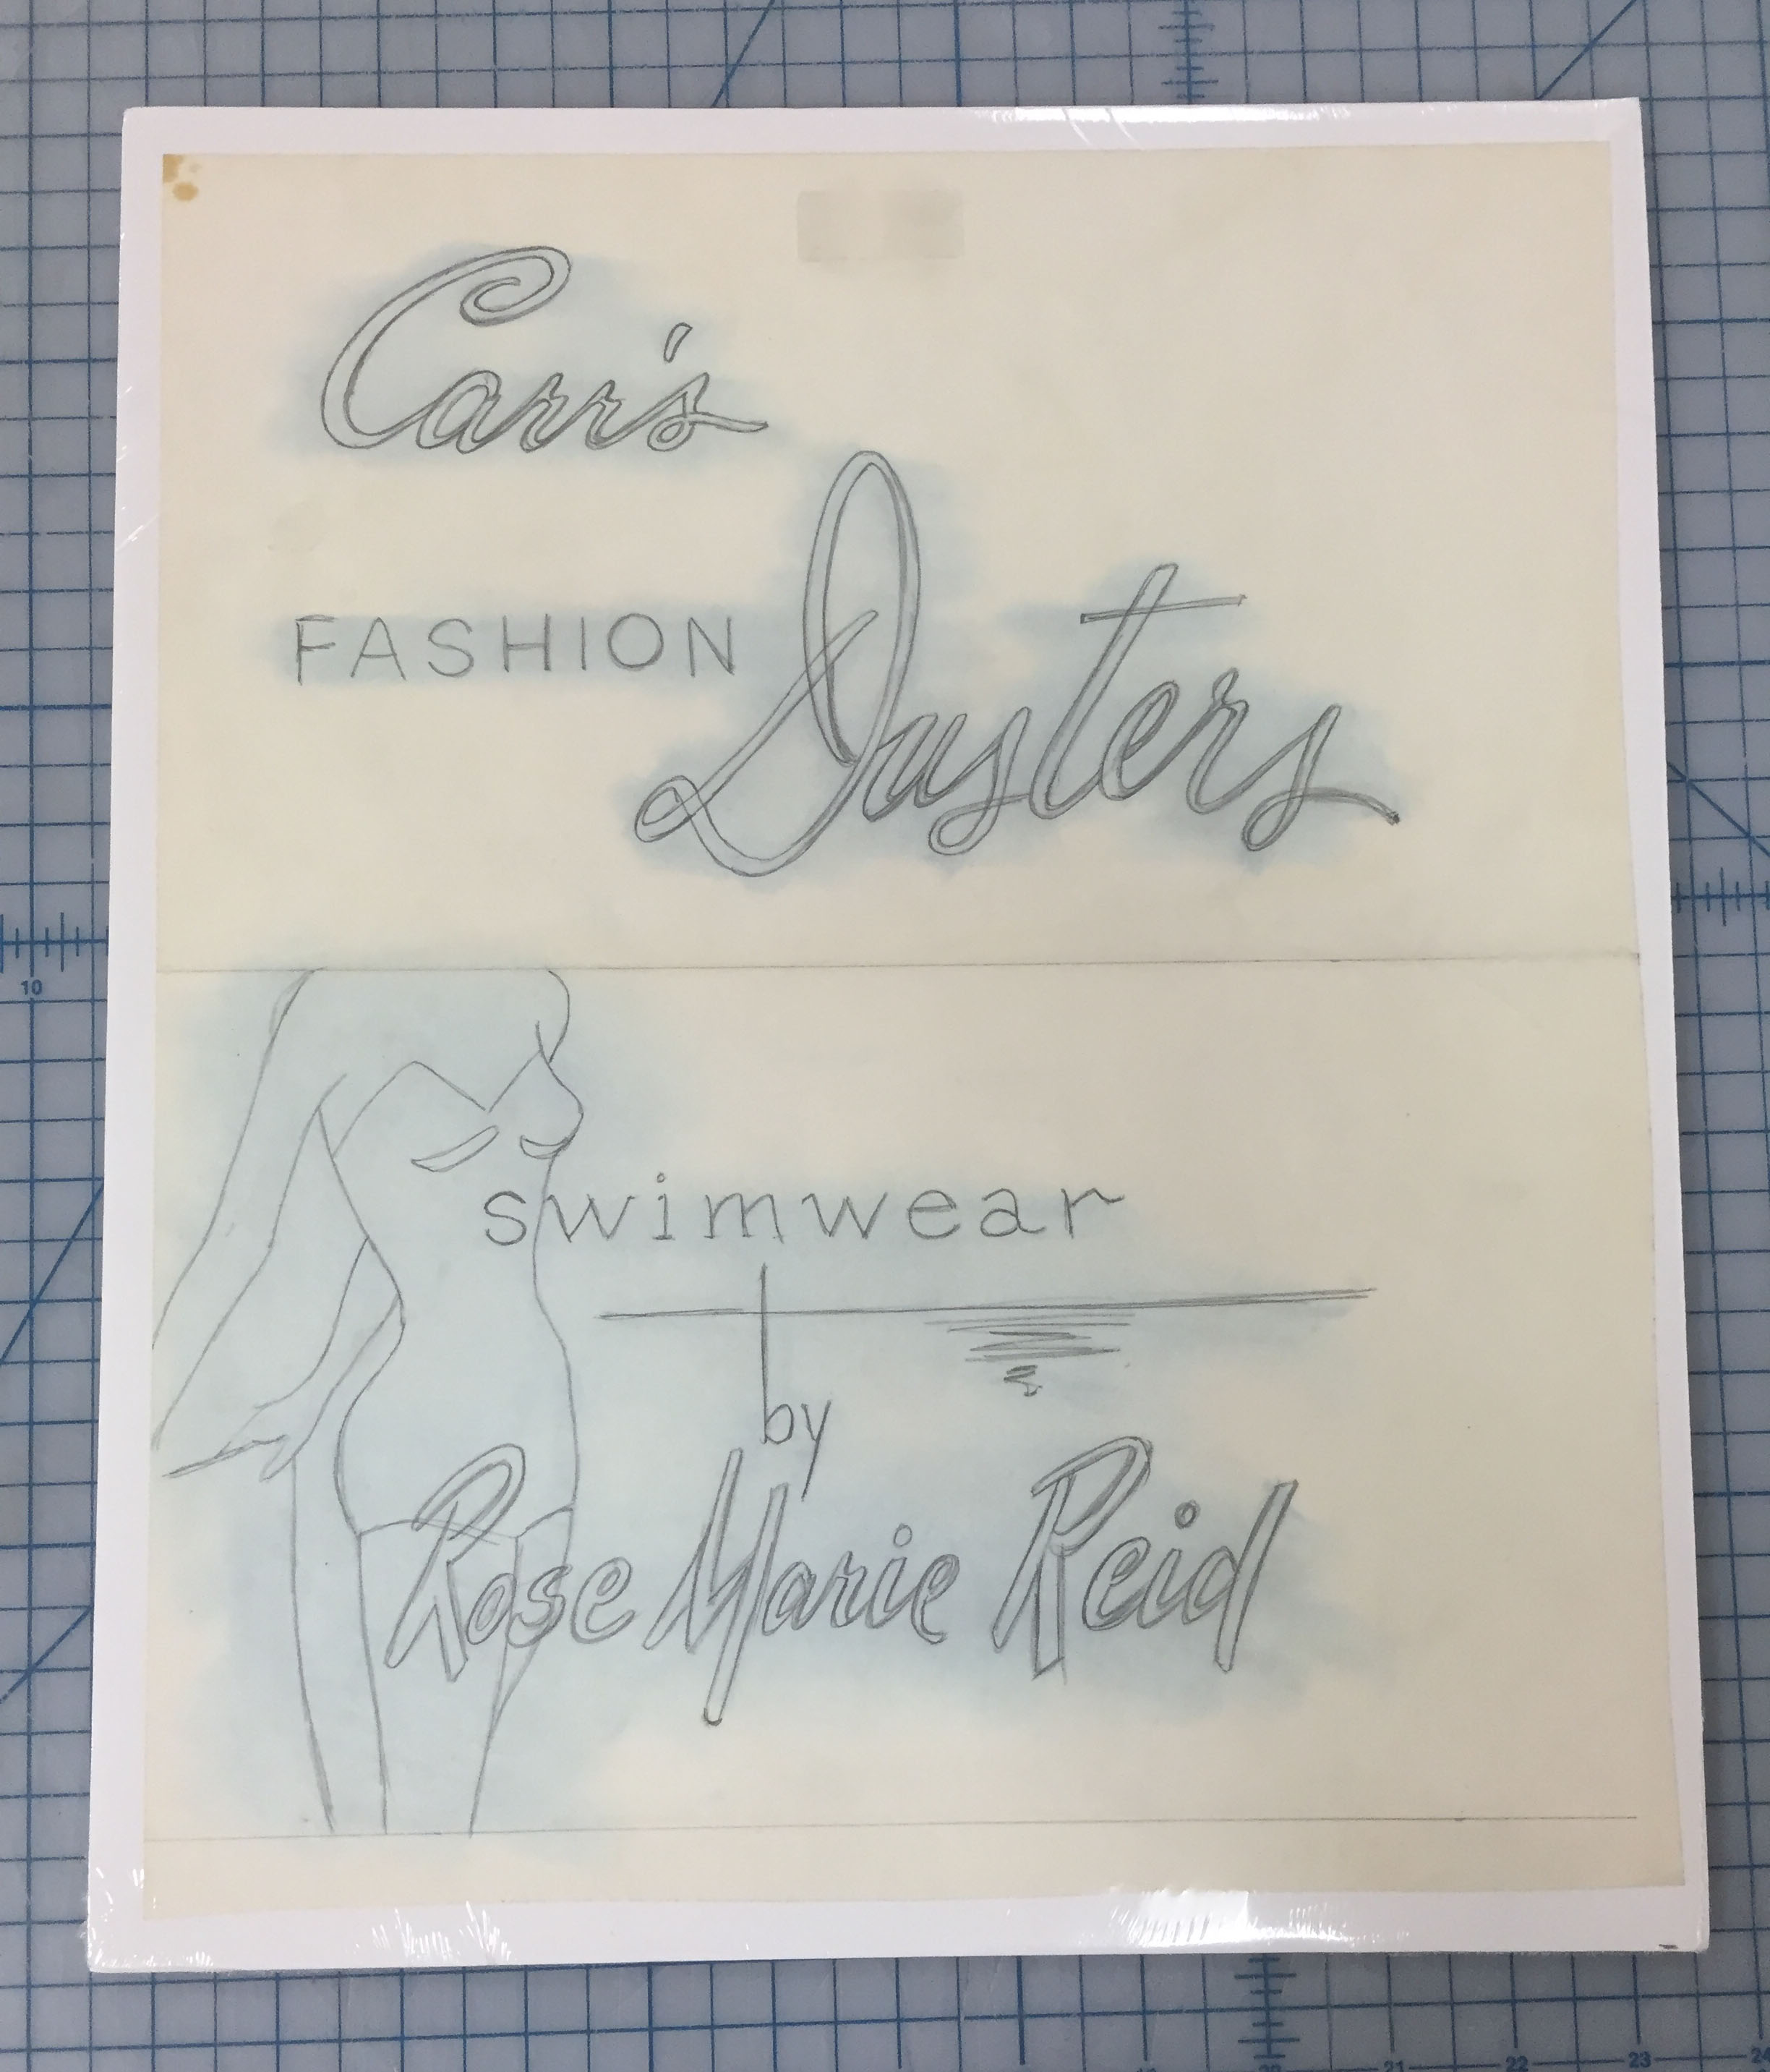
Last year the John W. Hartman Center for Sales, Advertising & Marketing History acquired a small collection of fashion design drawings from the 1940s and 50s by Vivian Gauld. Gauld was West Coast-based commercial artist whose drawings were used in retail advertising campaigns for companies like Rose Marie Reid, Jantzen, and Carr’s Fashions. Some of the drawings are currently on display in the Michael and Karen Stone Family Gallery, highlighting recent acquisitions to the collection.
Before coming to Duke, each drawing had been mounted to foam-core board with double-sided tape and then shrink-wrapped. I can see why this packaging method was done. While it does reduce the risk of mechanical damage from handling and shipping, the tape and sealed package are not the most stable environment for long-term storage. Curators and conservators always assess items with our Exhibitions Coordinator before they go on display. Because the items going on exhibit needed to come out of their shrink wrap anyway, the team made the decision to rehouse the whole collection.
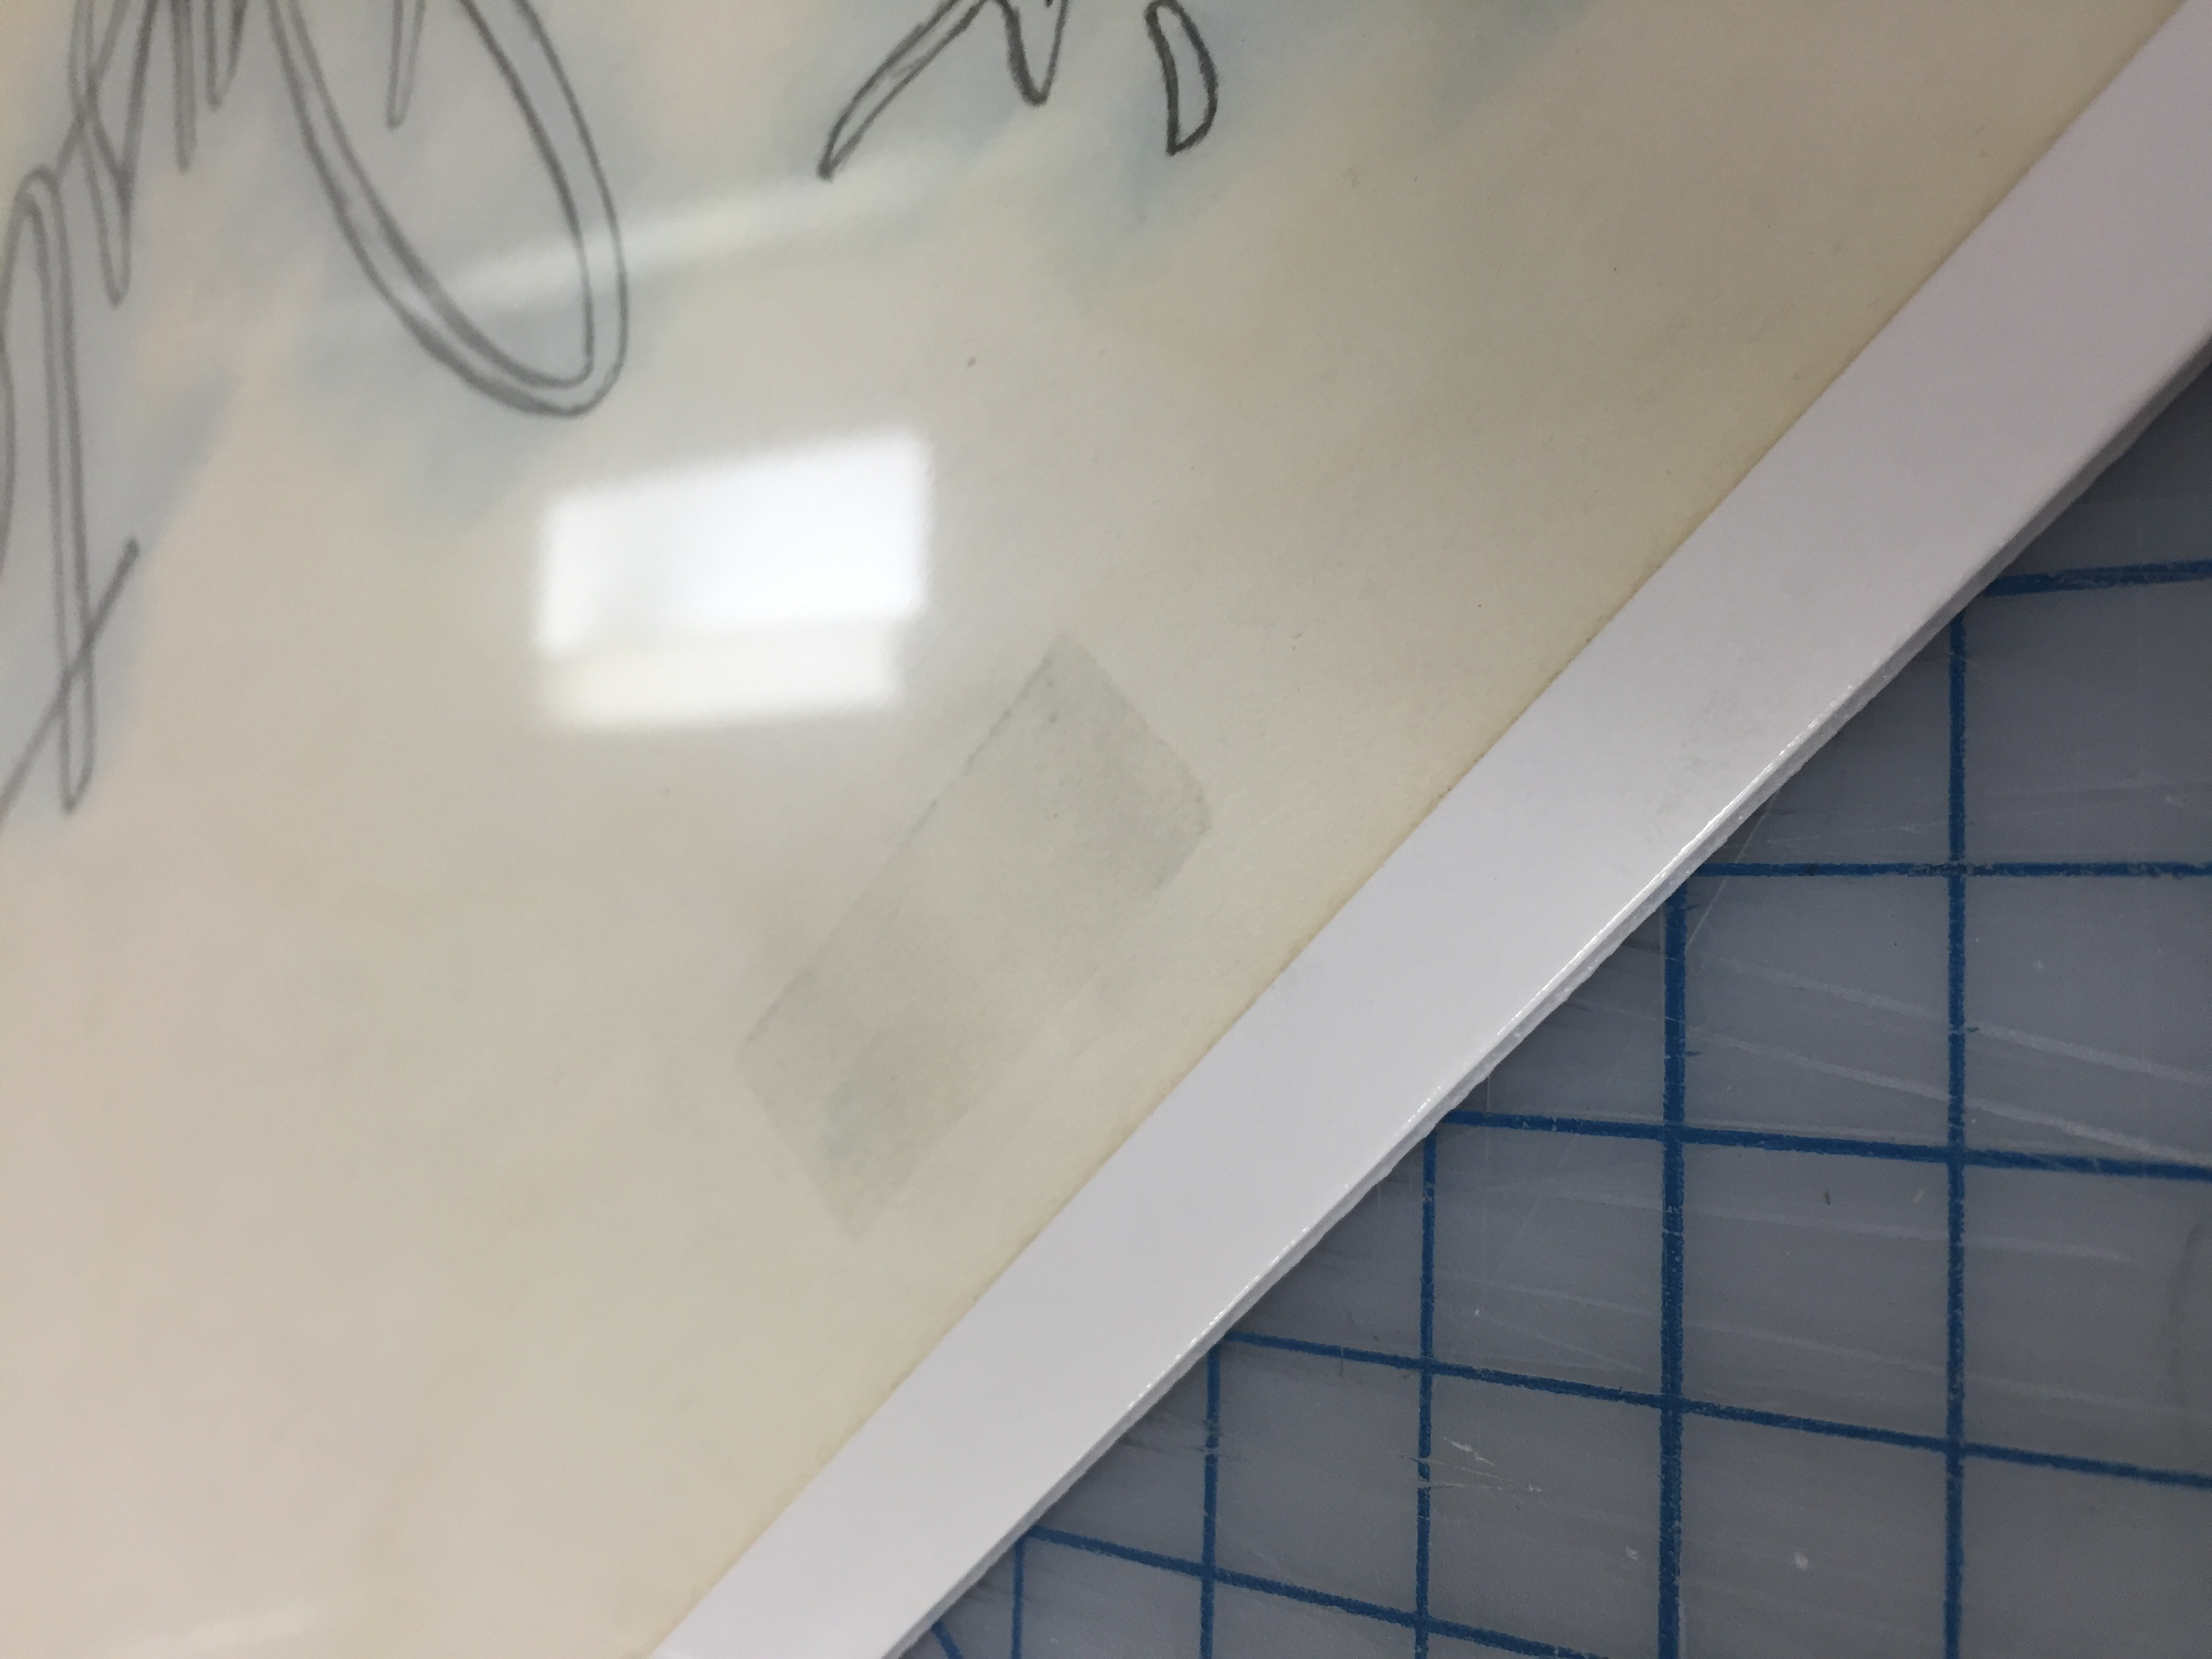
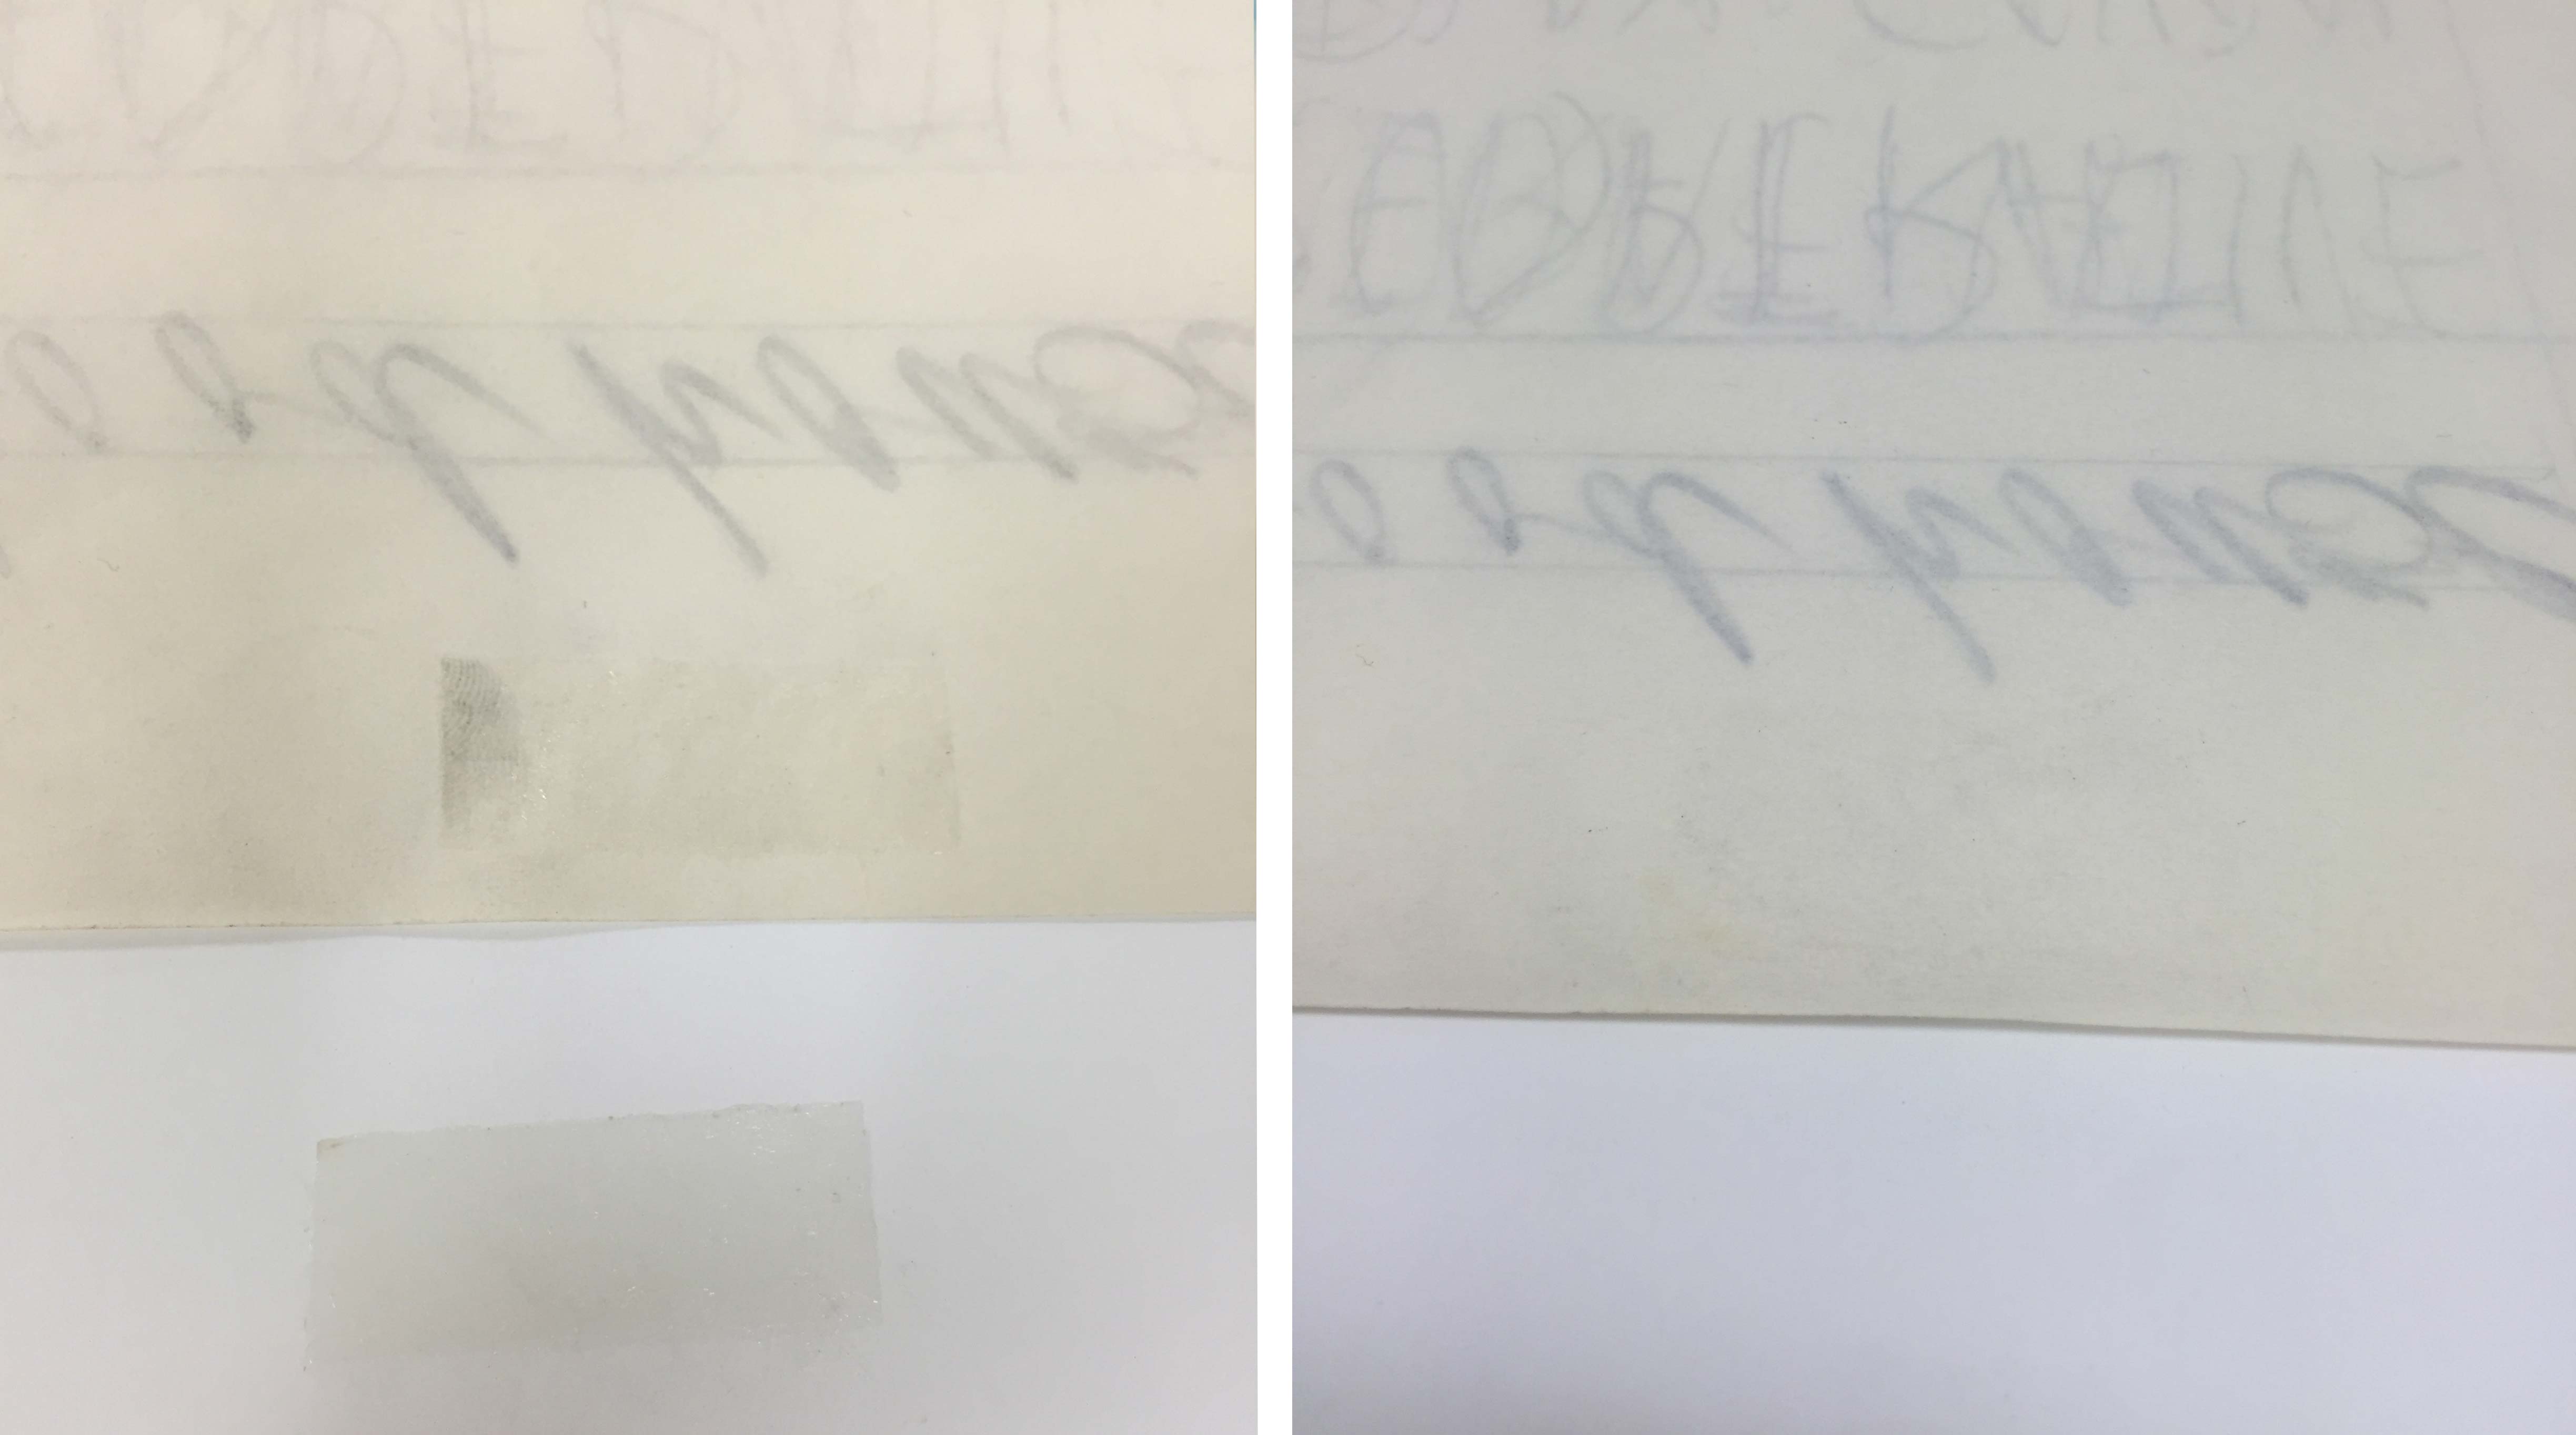
I was able to carefully cut and remove the shrink wrap from each package. The few drawings with friable media (like pastel or charcoal) actually have it applied to the back of the thin drawing paper, so there was little risk of disruption from the static charge of the plastic film. I was able to separate each drawing from the backing board by heating a very thin metal spatula with a hot air pencil and passing it between the drawing and the tape carrier, however, residual adhesive still remained on the verso of the drawing and needed to be removed prior to rehousing (image below, left).
The double-sided tape appears to have been applied fairly recently and had not yet penetrated the paper or crosslinked. I was able to remove it without disturbing the paper fibers by gently rolling the adhesive off with a crepe eraser (image above, right).
These drawings will now be stored in either clear polyester L-sleeves or paper folders, depending upon the drawing media. The collection had been placed into two metal edge boxes, but removing the foam-core backing has significantly reduced the required storage space. We can now fit them all into one box. While the shrink wrap package probably seemed like a good idea at the time, I am glad we were able to rehouse the drawings before they were visibly affected by it.
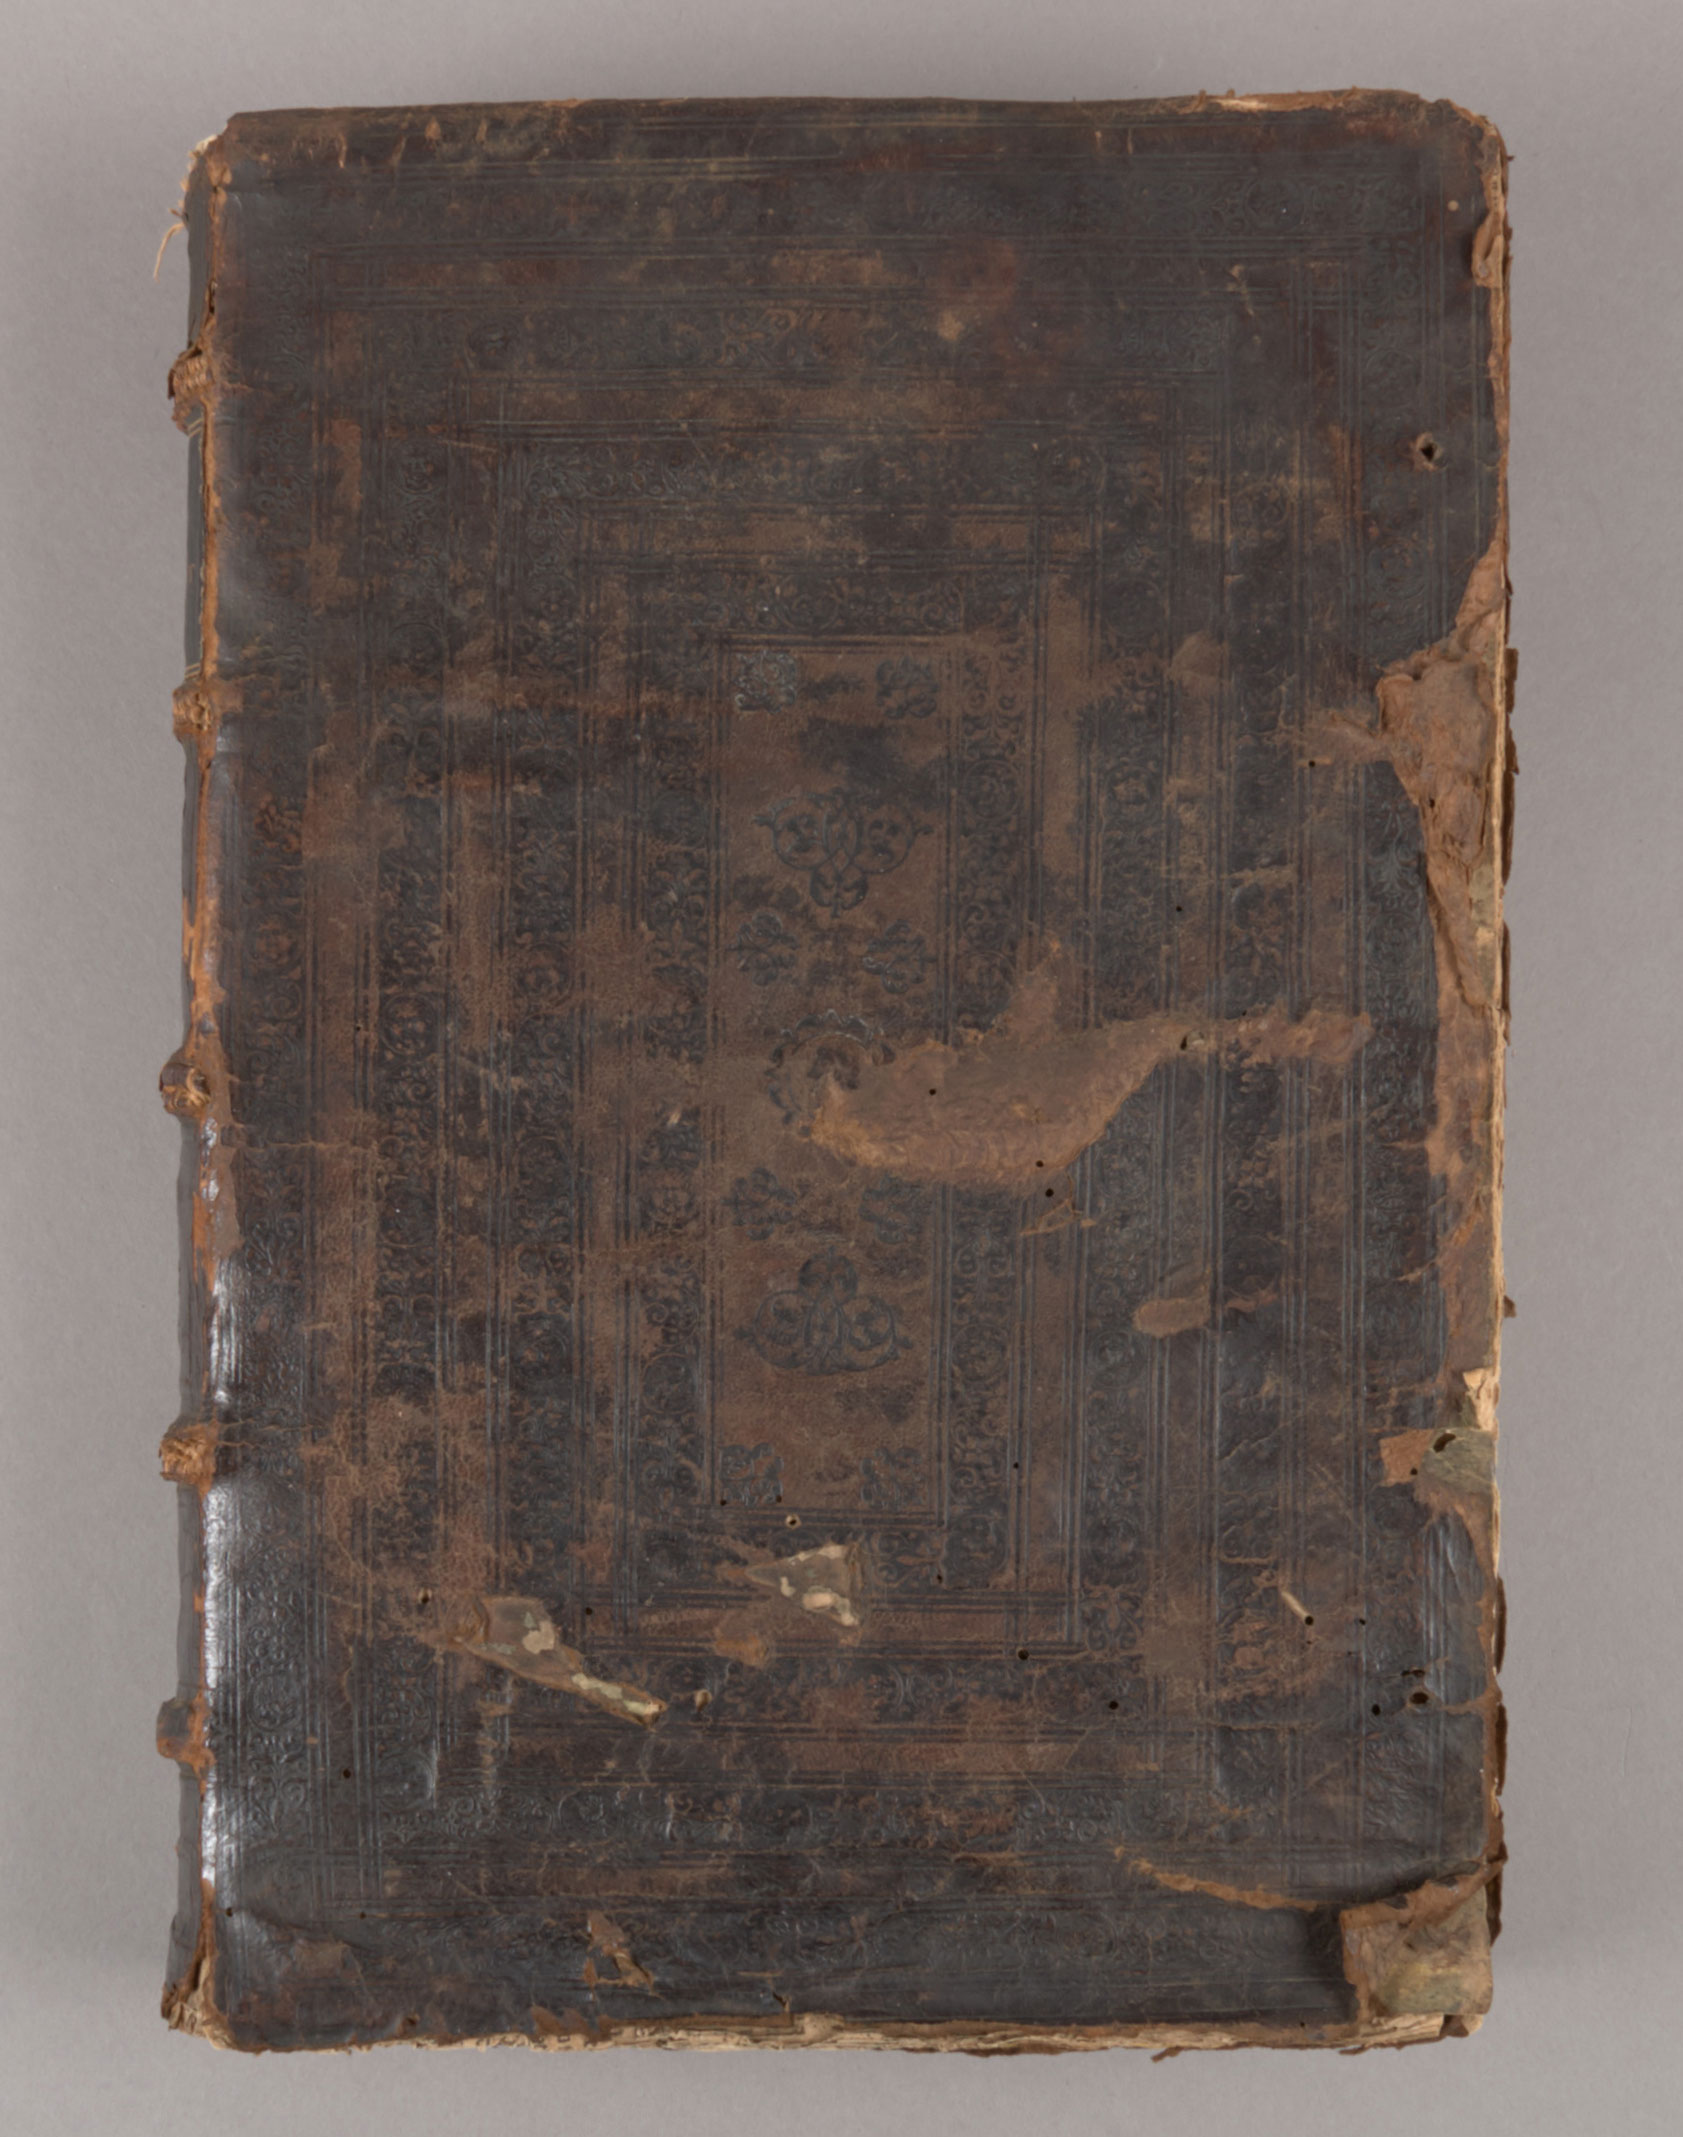
A damaged binding can present the opportunity to examine the interior structure and composition of a book without the use of advanced imaging equipment. This copy of Durandus of Saint-Pourçain‘s four books of commentaries on the Sentences of Peter Lombard from 1539 offers an interesting look at some common elements of early book structure. Many books from this period have been rebound or drastically altered over the years, so objects like this are quite exciting to examine in detail.
The binding is fully covered in brown tanned leather, tooled in blind over the boards in a multi-panel design that is common for the period.
Front board
You may be able to make out the first few letters (“DVRAN”) of the author’s name written on the fore-edge of the textblock in ink, which probably served as the original titling. Early storage and labeling practices for books were very different from the upright, spine-facing-out shelving method we use today. Henry Petroski, Professor of Civil Engineering at Duke, has a wonderful book on design and book storage, titled The Book on the Bookshelf, which describes this in more detail. I highly recommend it.
Fore-edge
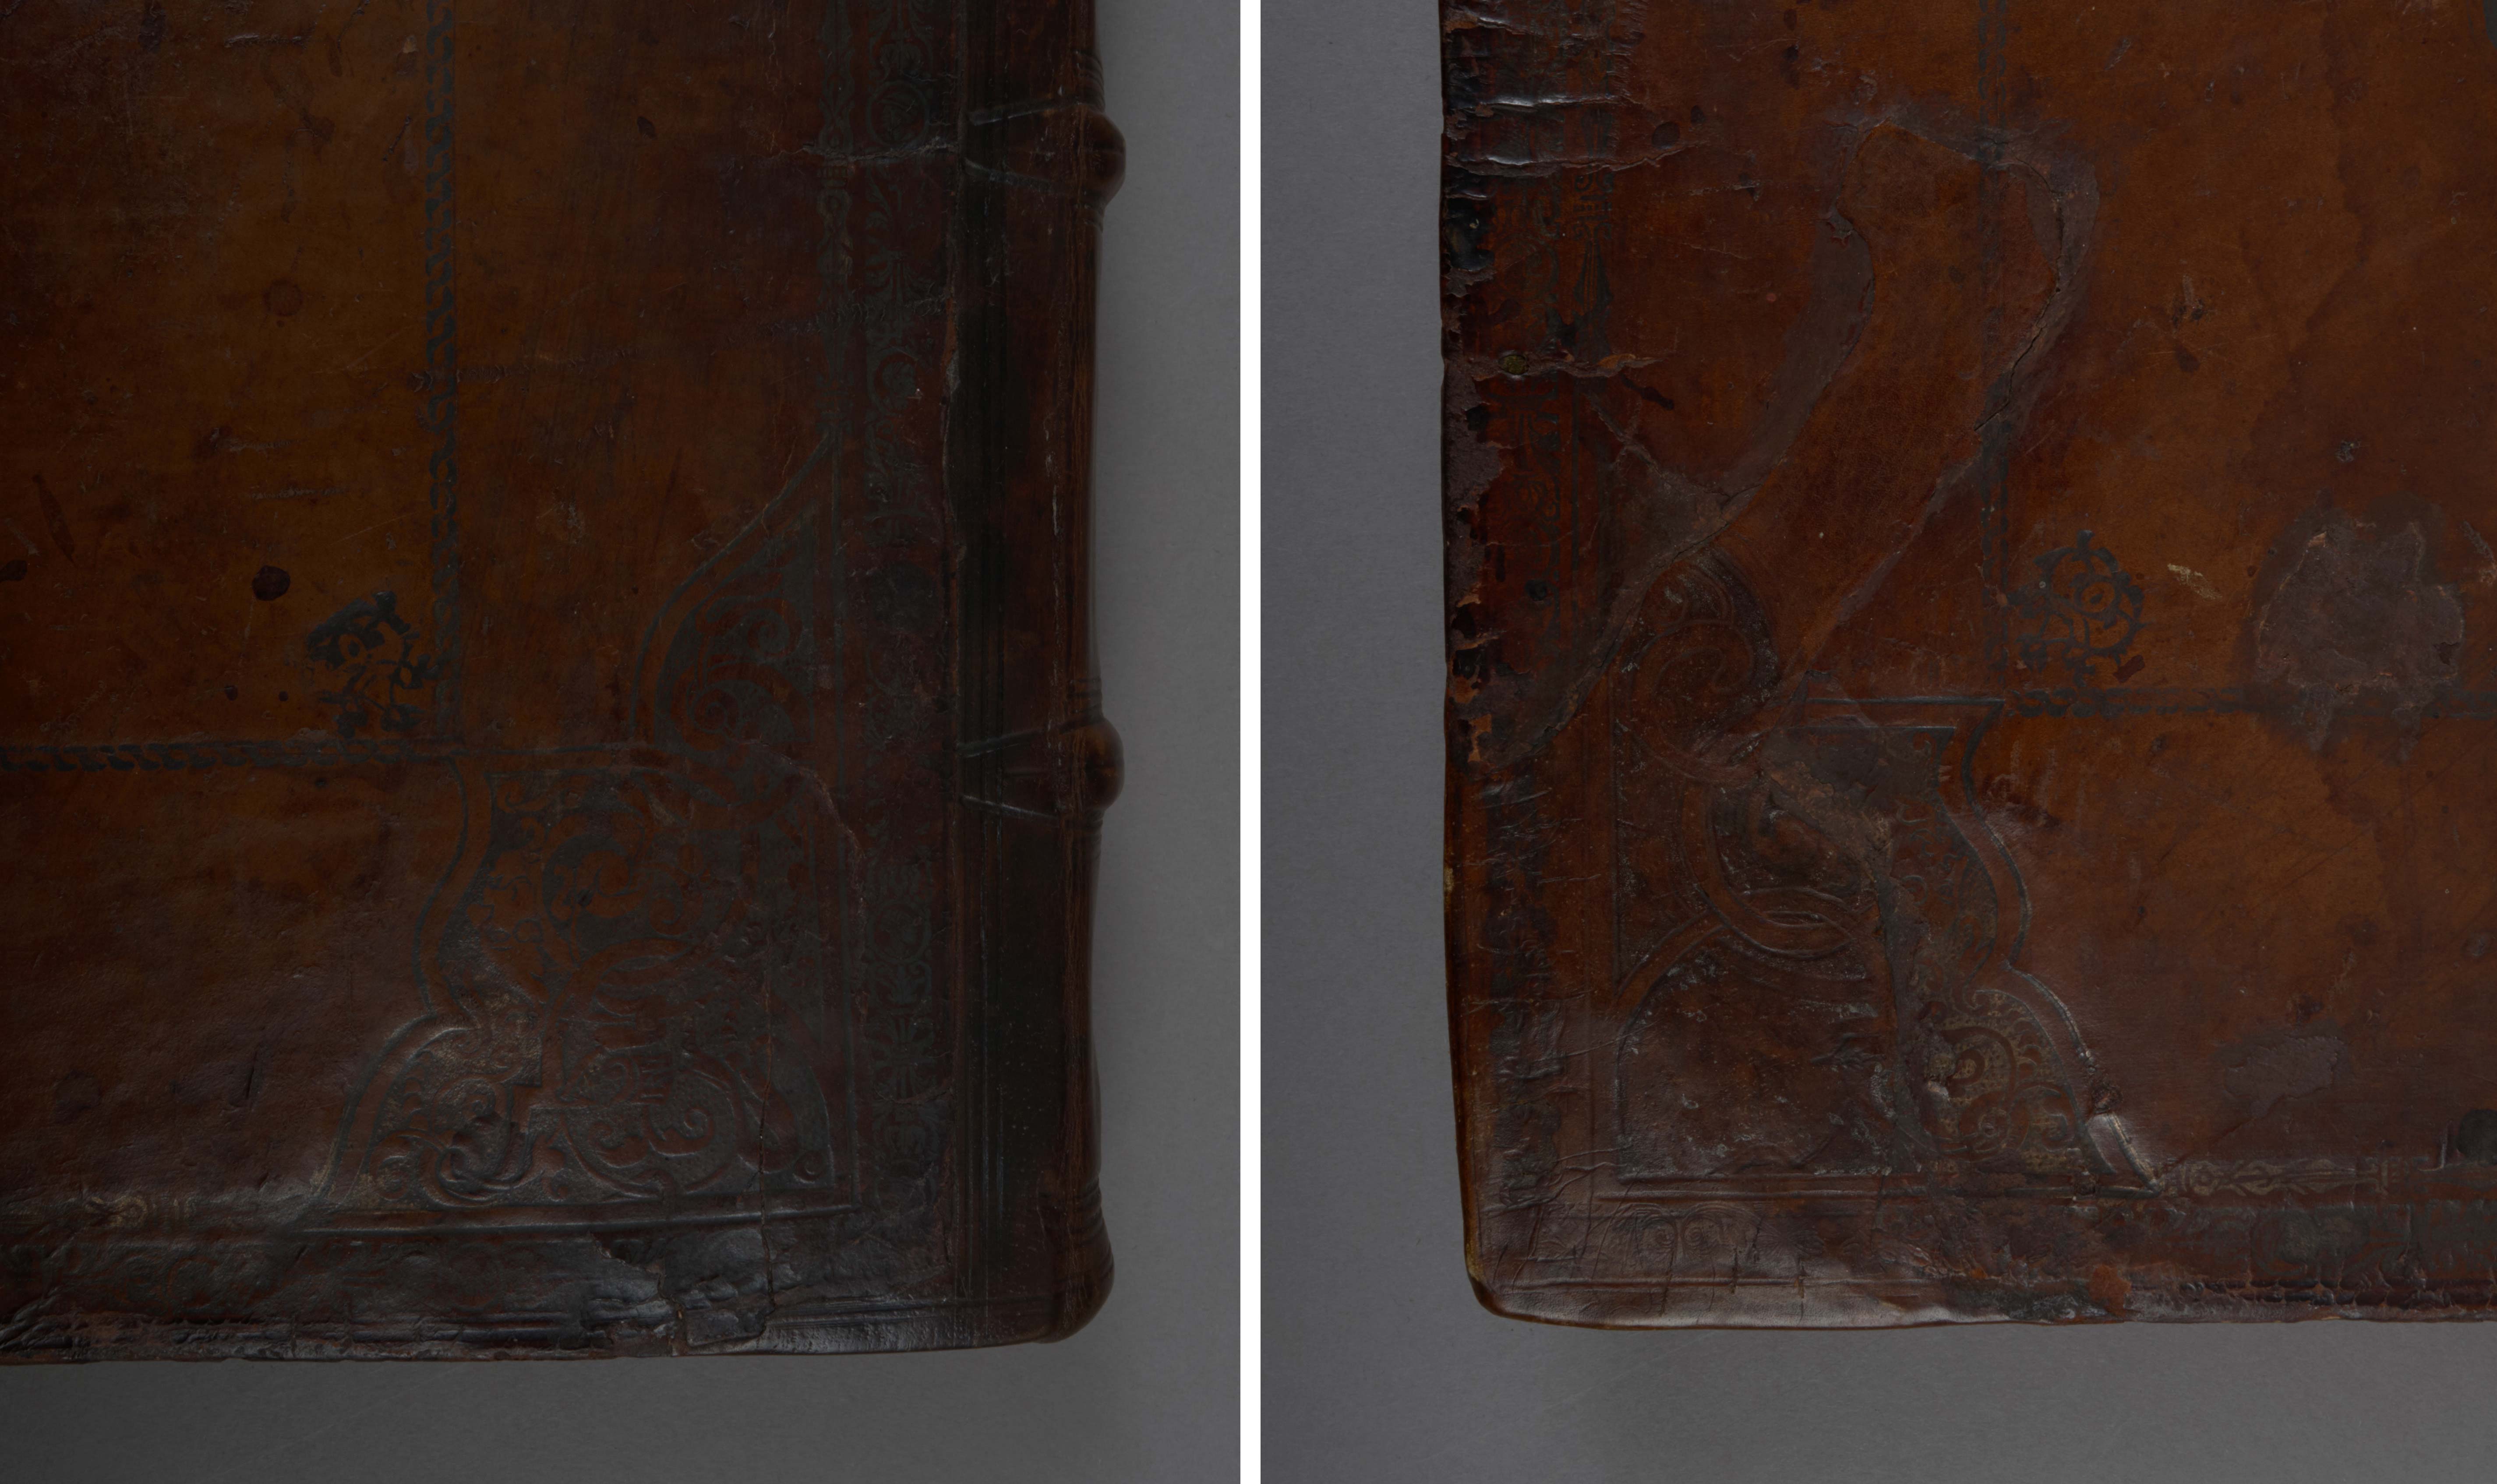
Two labels were later applied to the spine of the volume. In the image below, you can see the remains of a paper label in the top spine panel and a leather label in the second panel. Some of the damage here offers an interesting glimpse into the structural elements of the binding. The textblock was sewn on double raised supports of twisted leather, rather than vegetable cord. The sewing pattern is pretty clearly visible here. Damage to the headcap has exposed a spine lining of parchment manuscript waste, as well as the tie-down threads of the sewn headband.
Sewing Supports
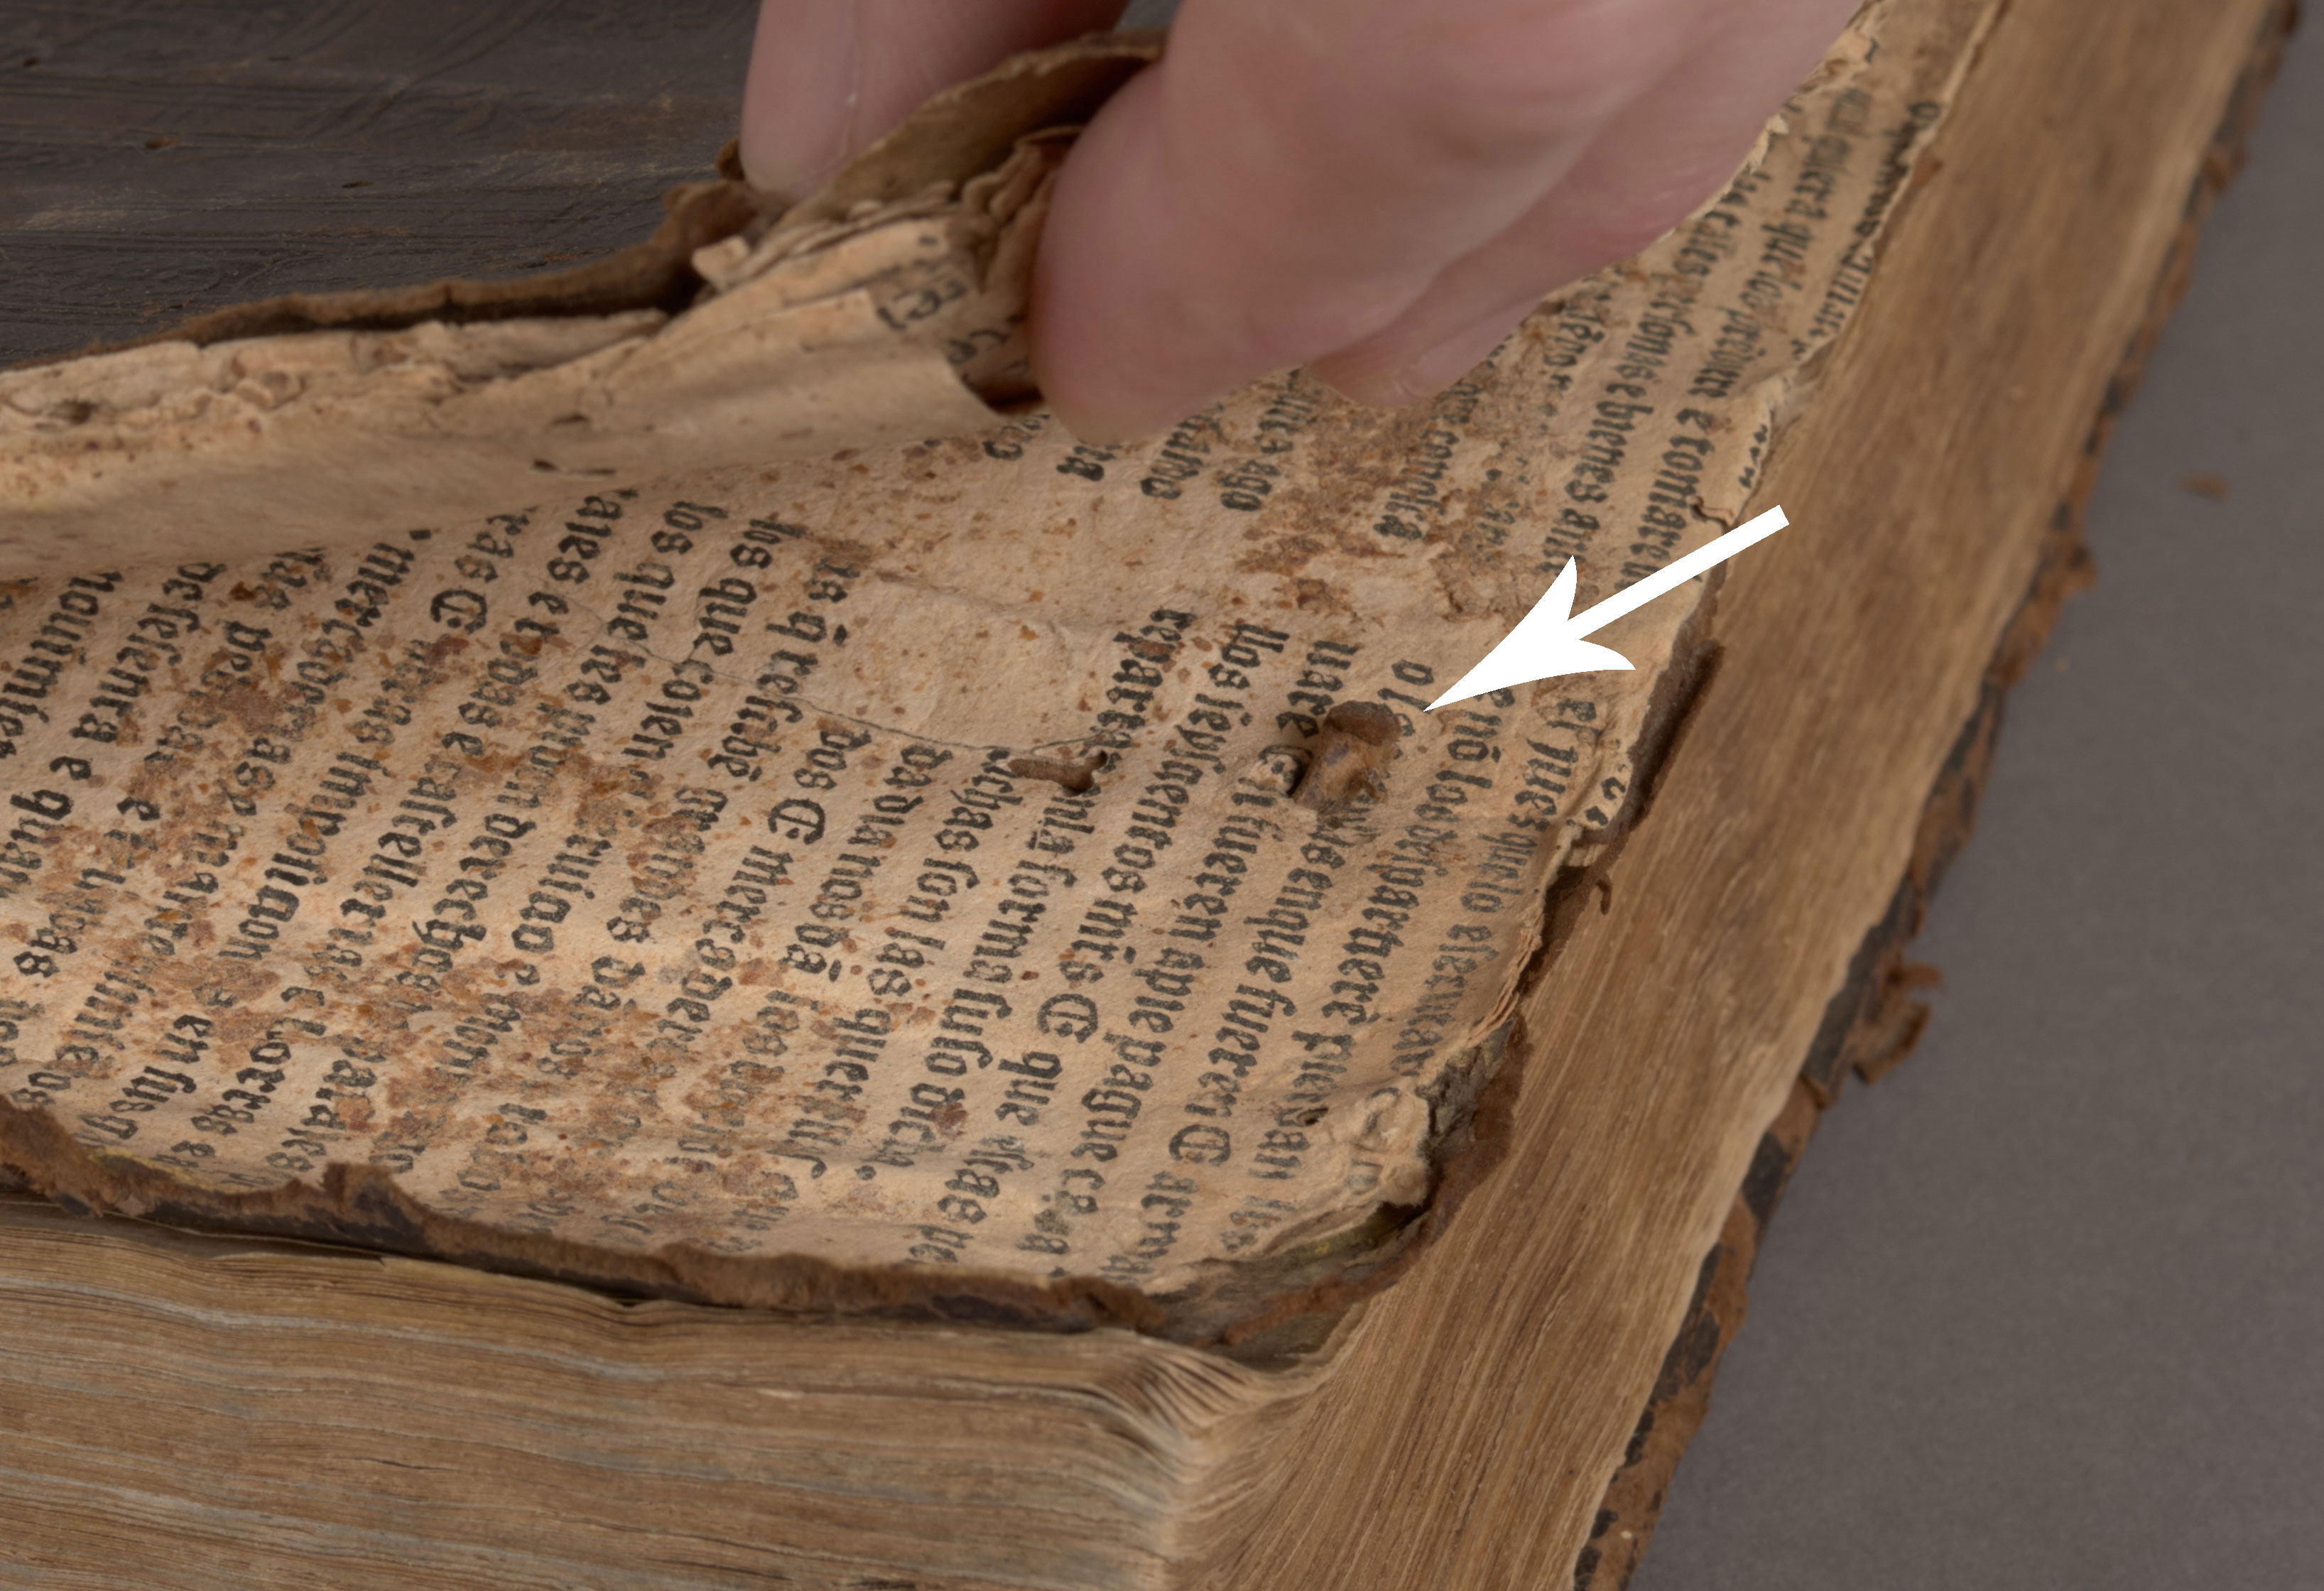
The most interesting part of this binding (for me at least) is the boards. It is common to see 16th century bindings with thick wooden boards, but this is a nice example of early pasteboard, a technique for making stiff board by laminating pieces of paper together with adhesive (Etherington & Roberts, 1982). Pasteboards tend to be much softer and more flexible than other types of book board. The adhesive between many layers of the paper has failed and the leather has split all around the edges of both boards, so the boards now freely “open” in places and allow a look inside.
Interior of board, head/fore-edge
In the image above, you can clearly see some of the print waste which was used to make up the board. You can also see the remains of two leather fore-edge ties, which laced through the boards. While the the majority of that leather tie has broken off and is now gone, the ends are visible inside the board and through the rear pastedown (blue arrows below). You can also clearly see the holes where they exited the boards in the image of the front cover near the top of this post.
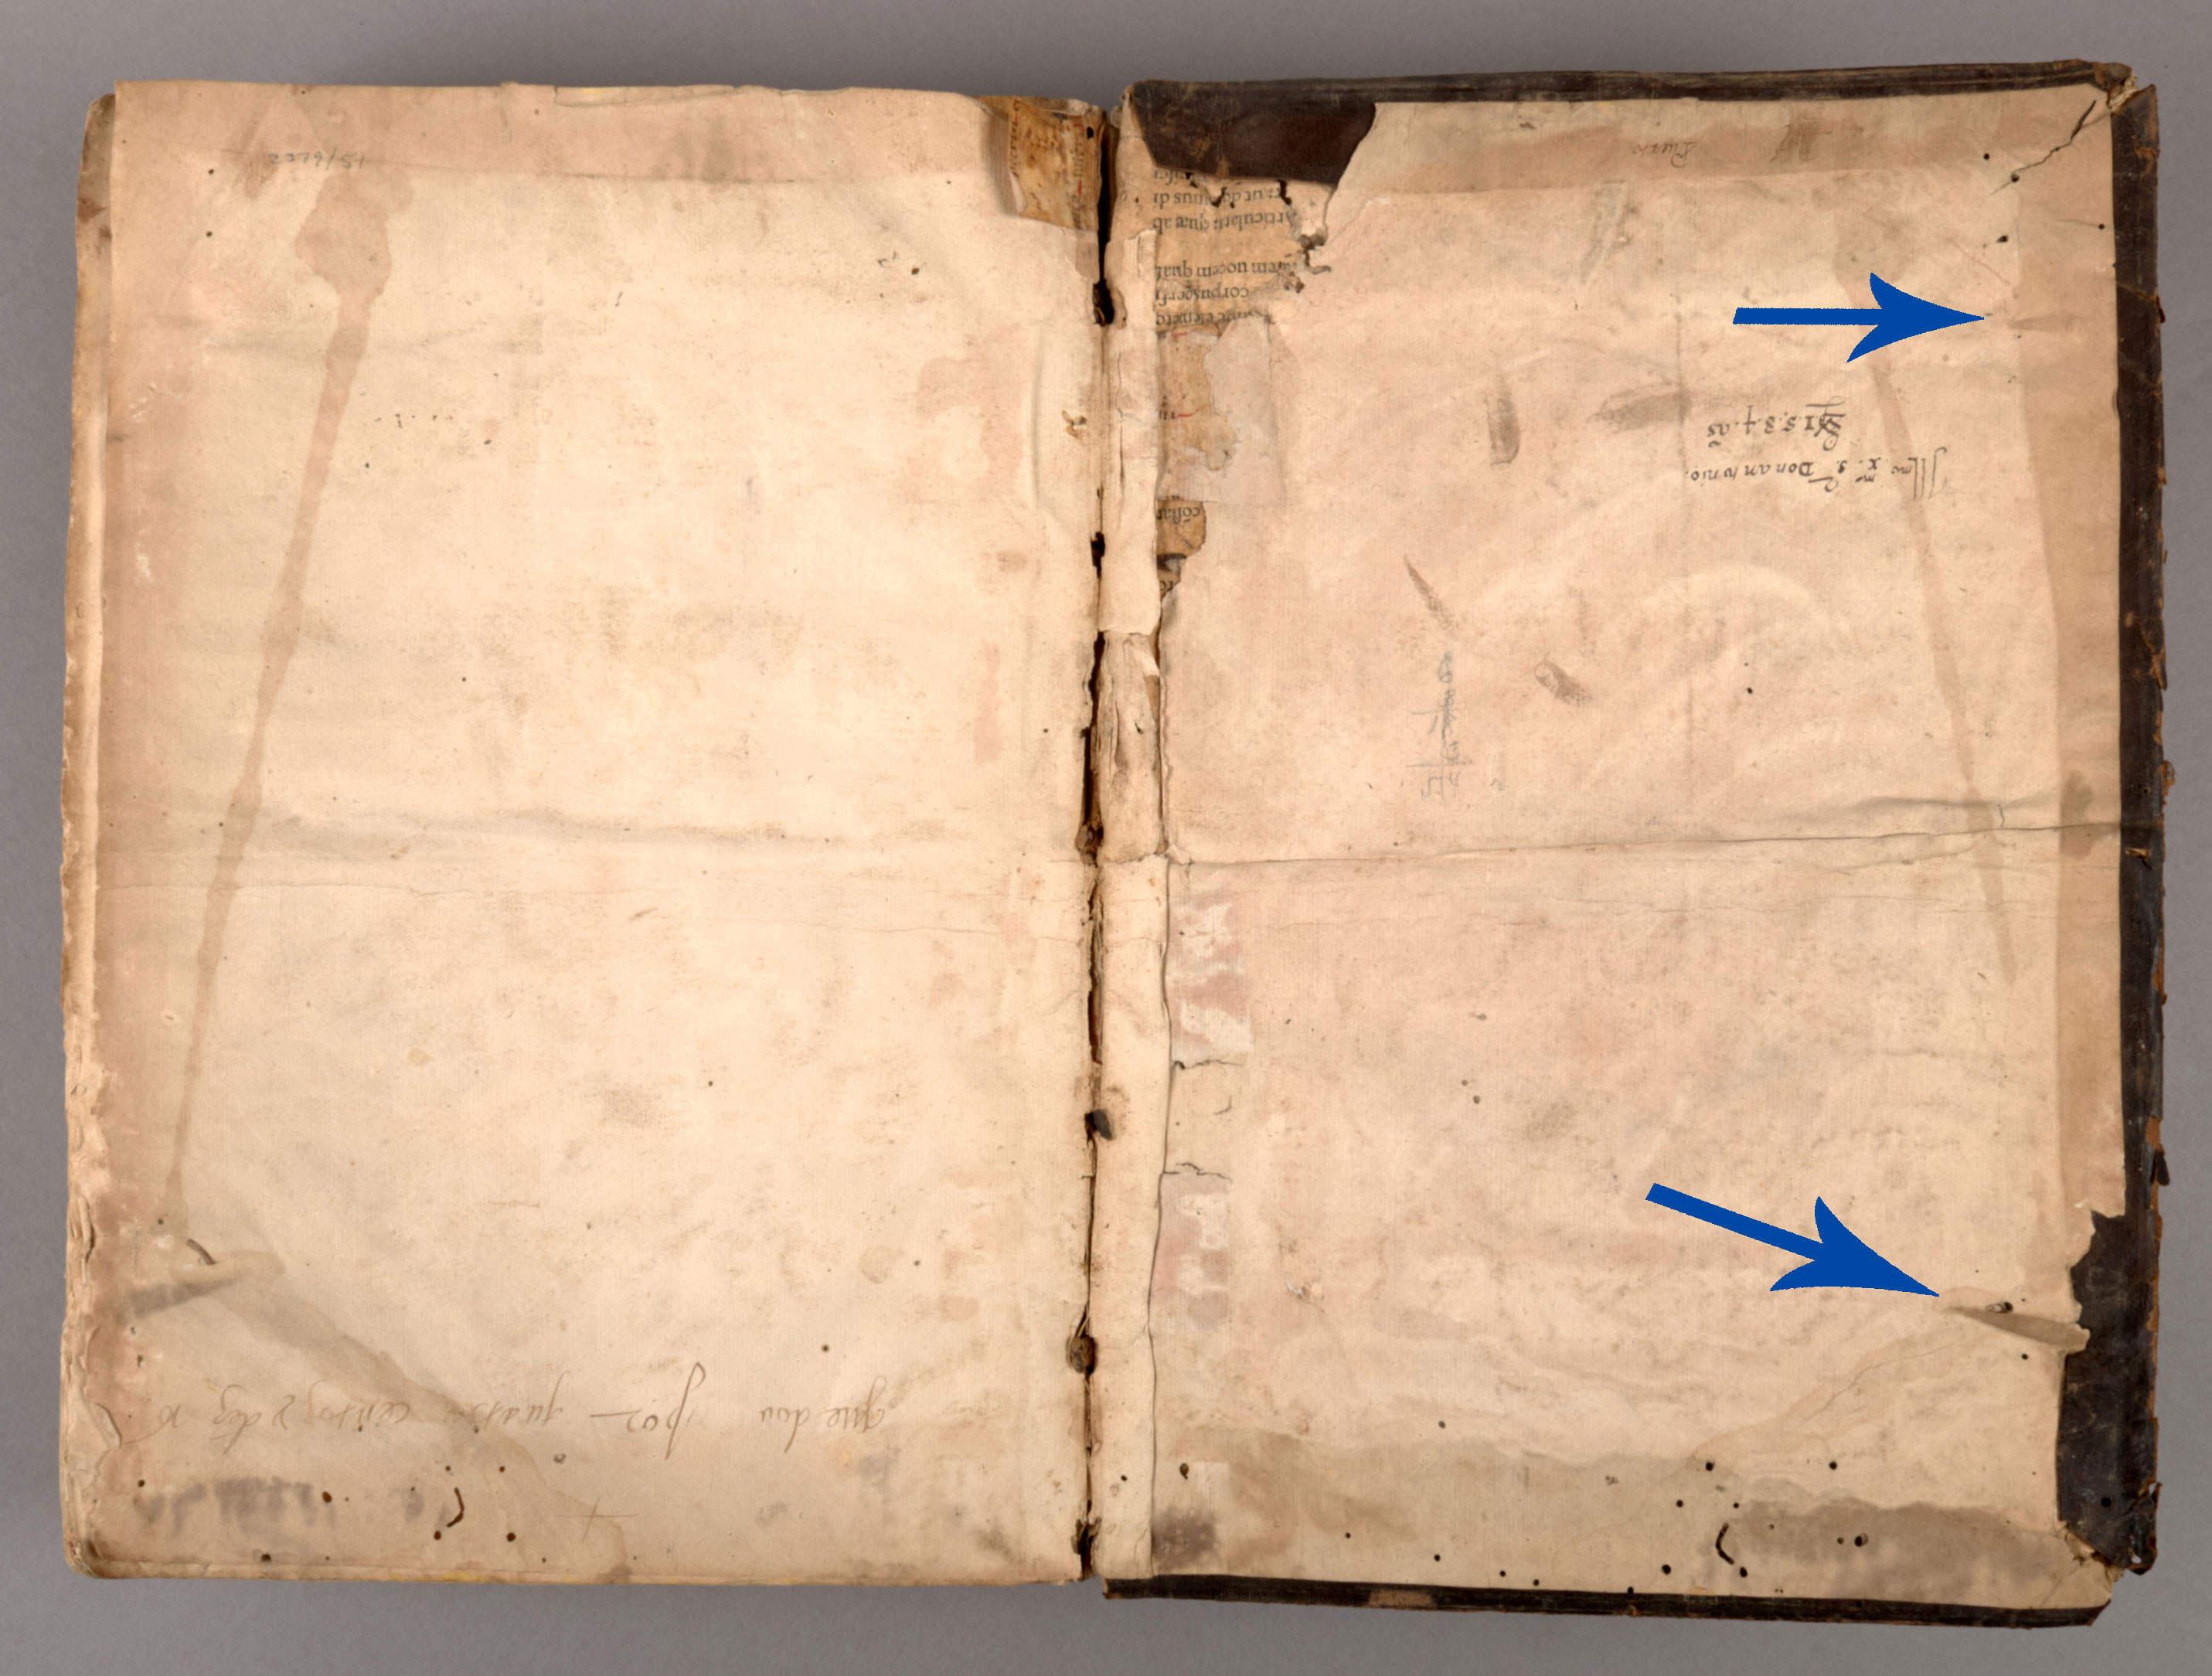
Rear Pastedown
Both print and manuscript waste are visible in the exposed layers of the front board, but there is another very interesting element here: The arrows in the image below point to a thin strip of paper, which laces through one of the board’s constituent sheets. I cannot say for certain, but this could be part of a laced paper binding, which got chopped up and added to the pasteboard.
Interior of front board, tail
While the condition issues of this binding present a risk of further damage and loss, they also provide the opportunity to learn more about its structure and means of production. These raise some interesting questions about the best approach for treatment and rehousing, and will inform our discussions with the curators.
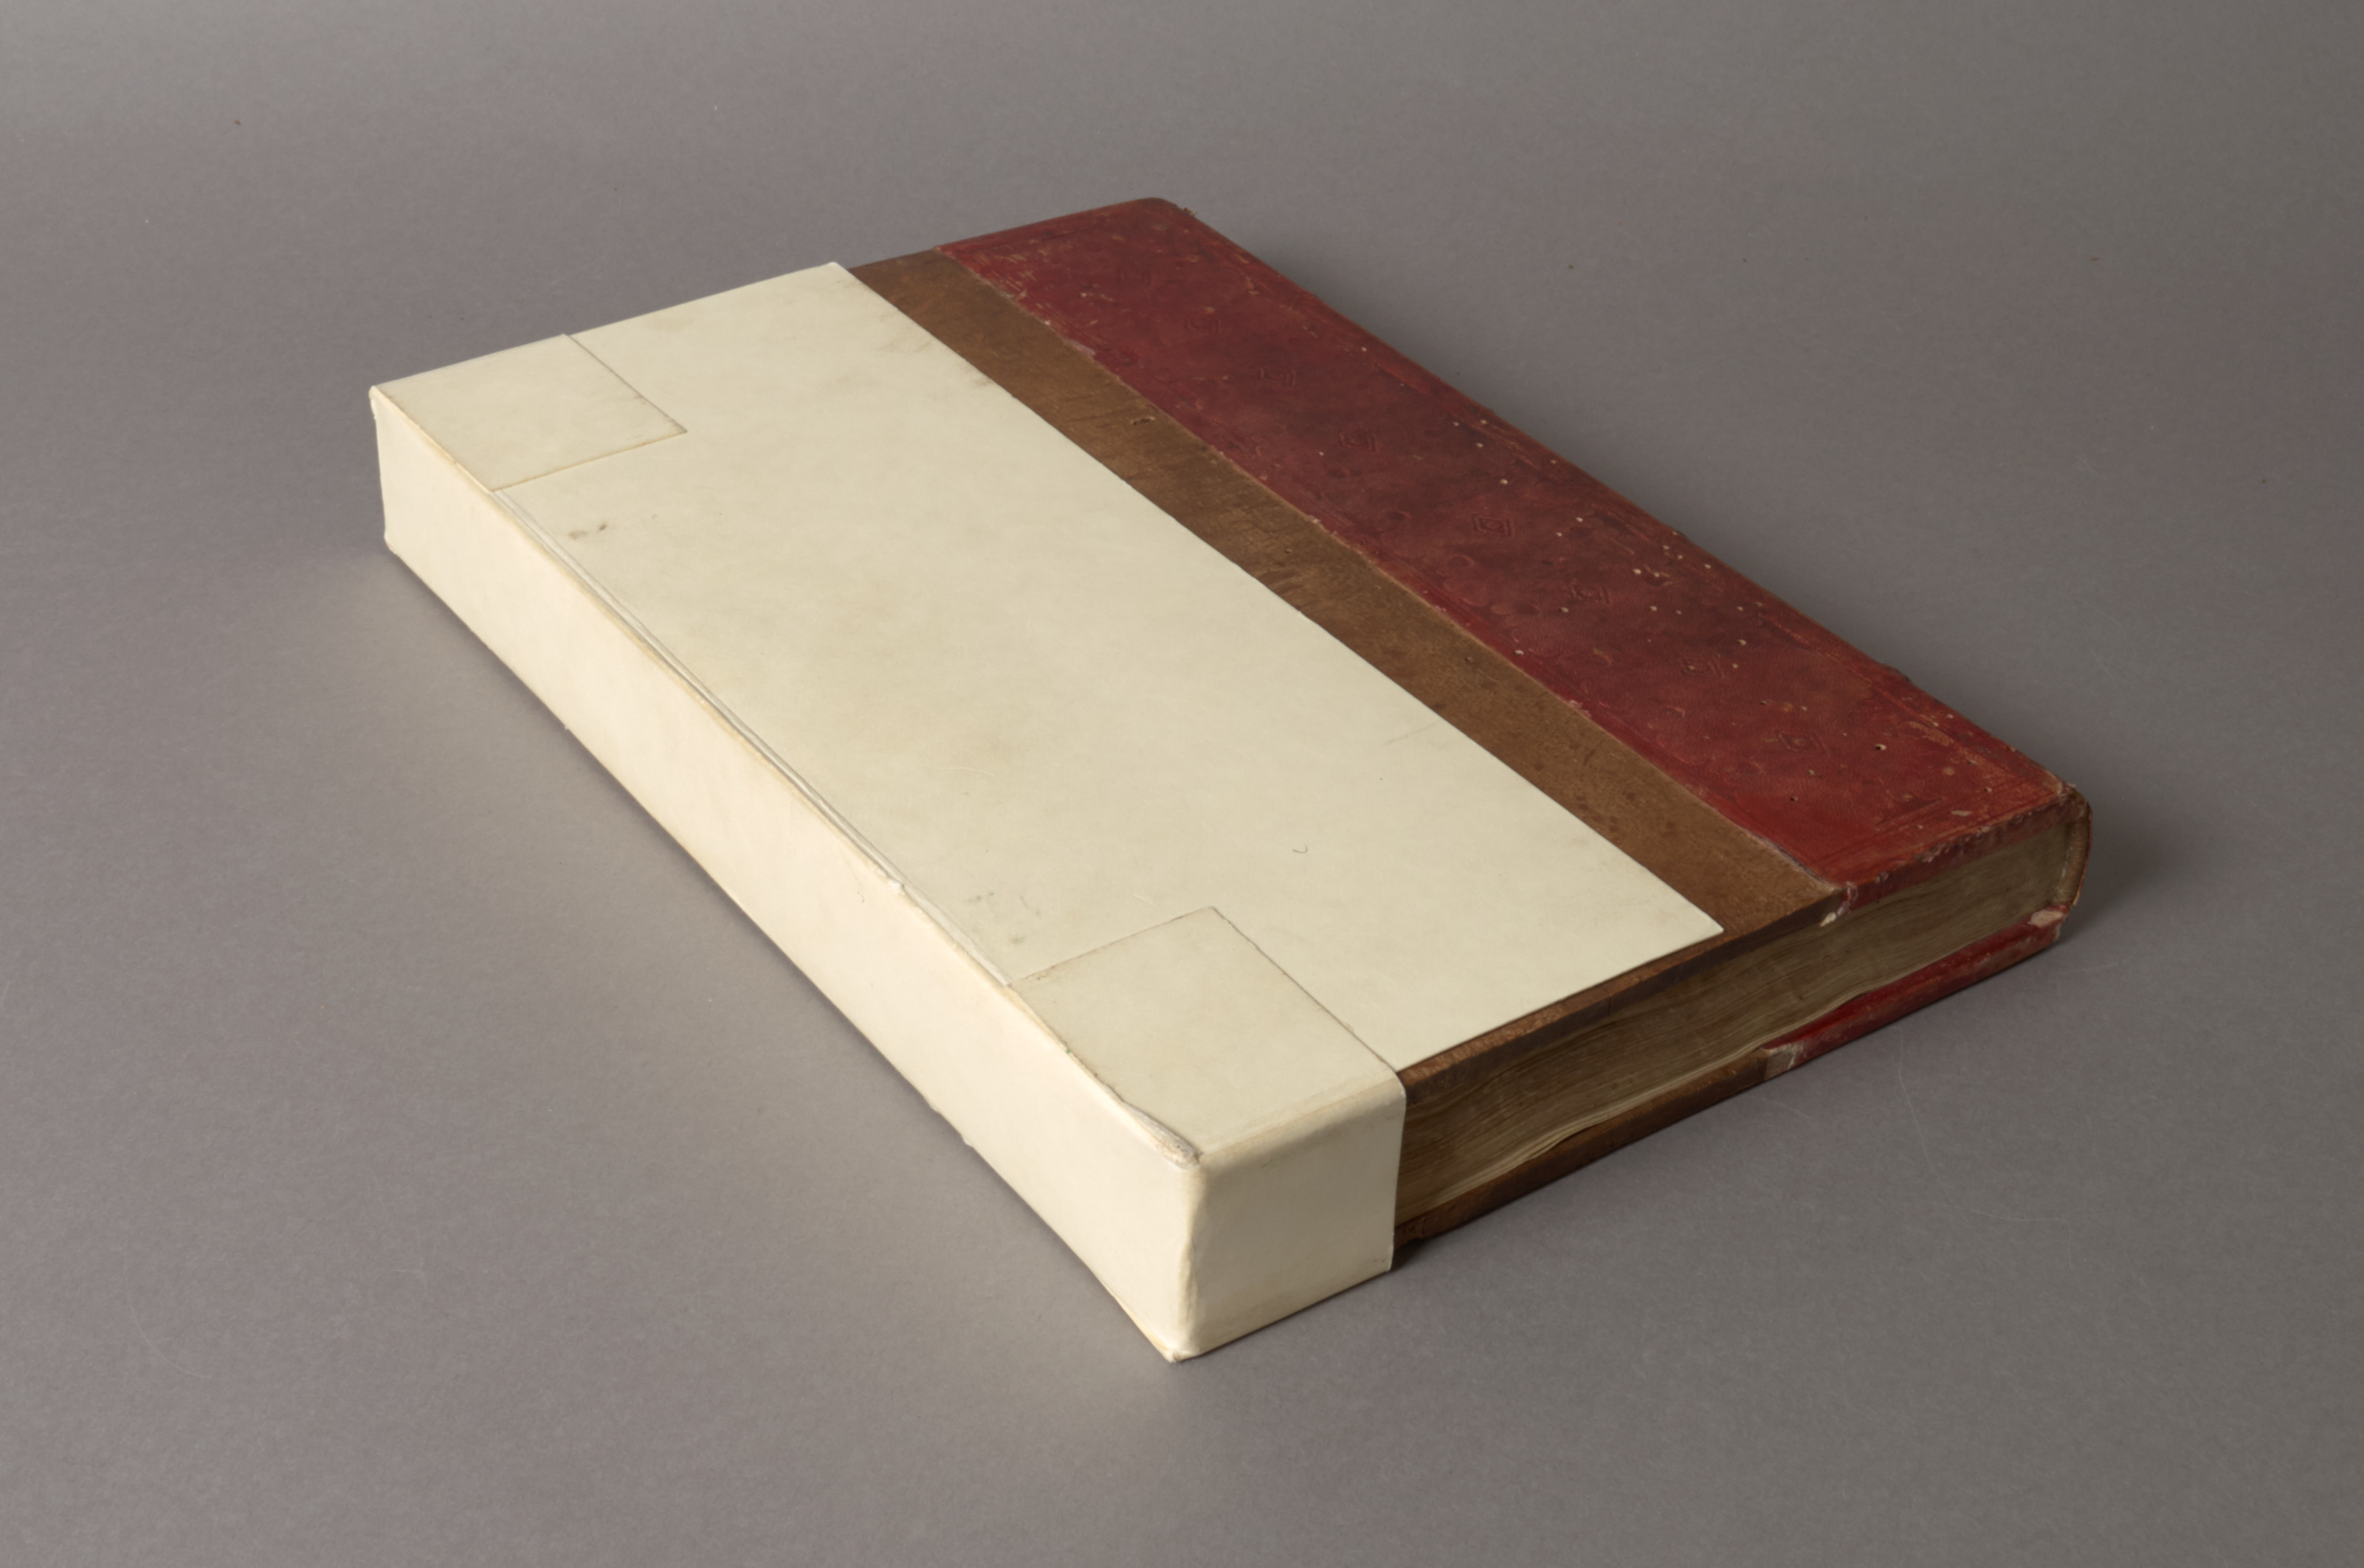
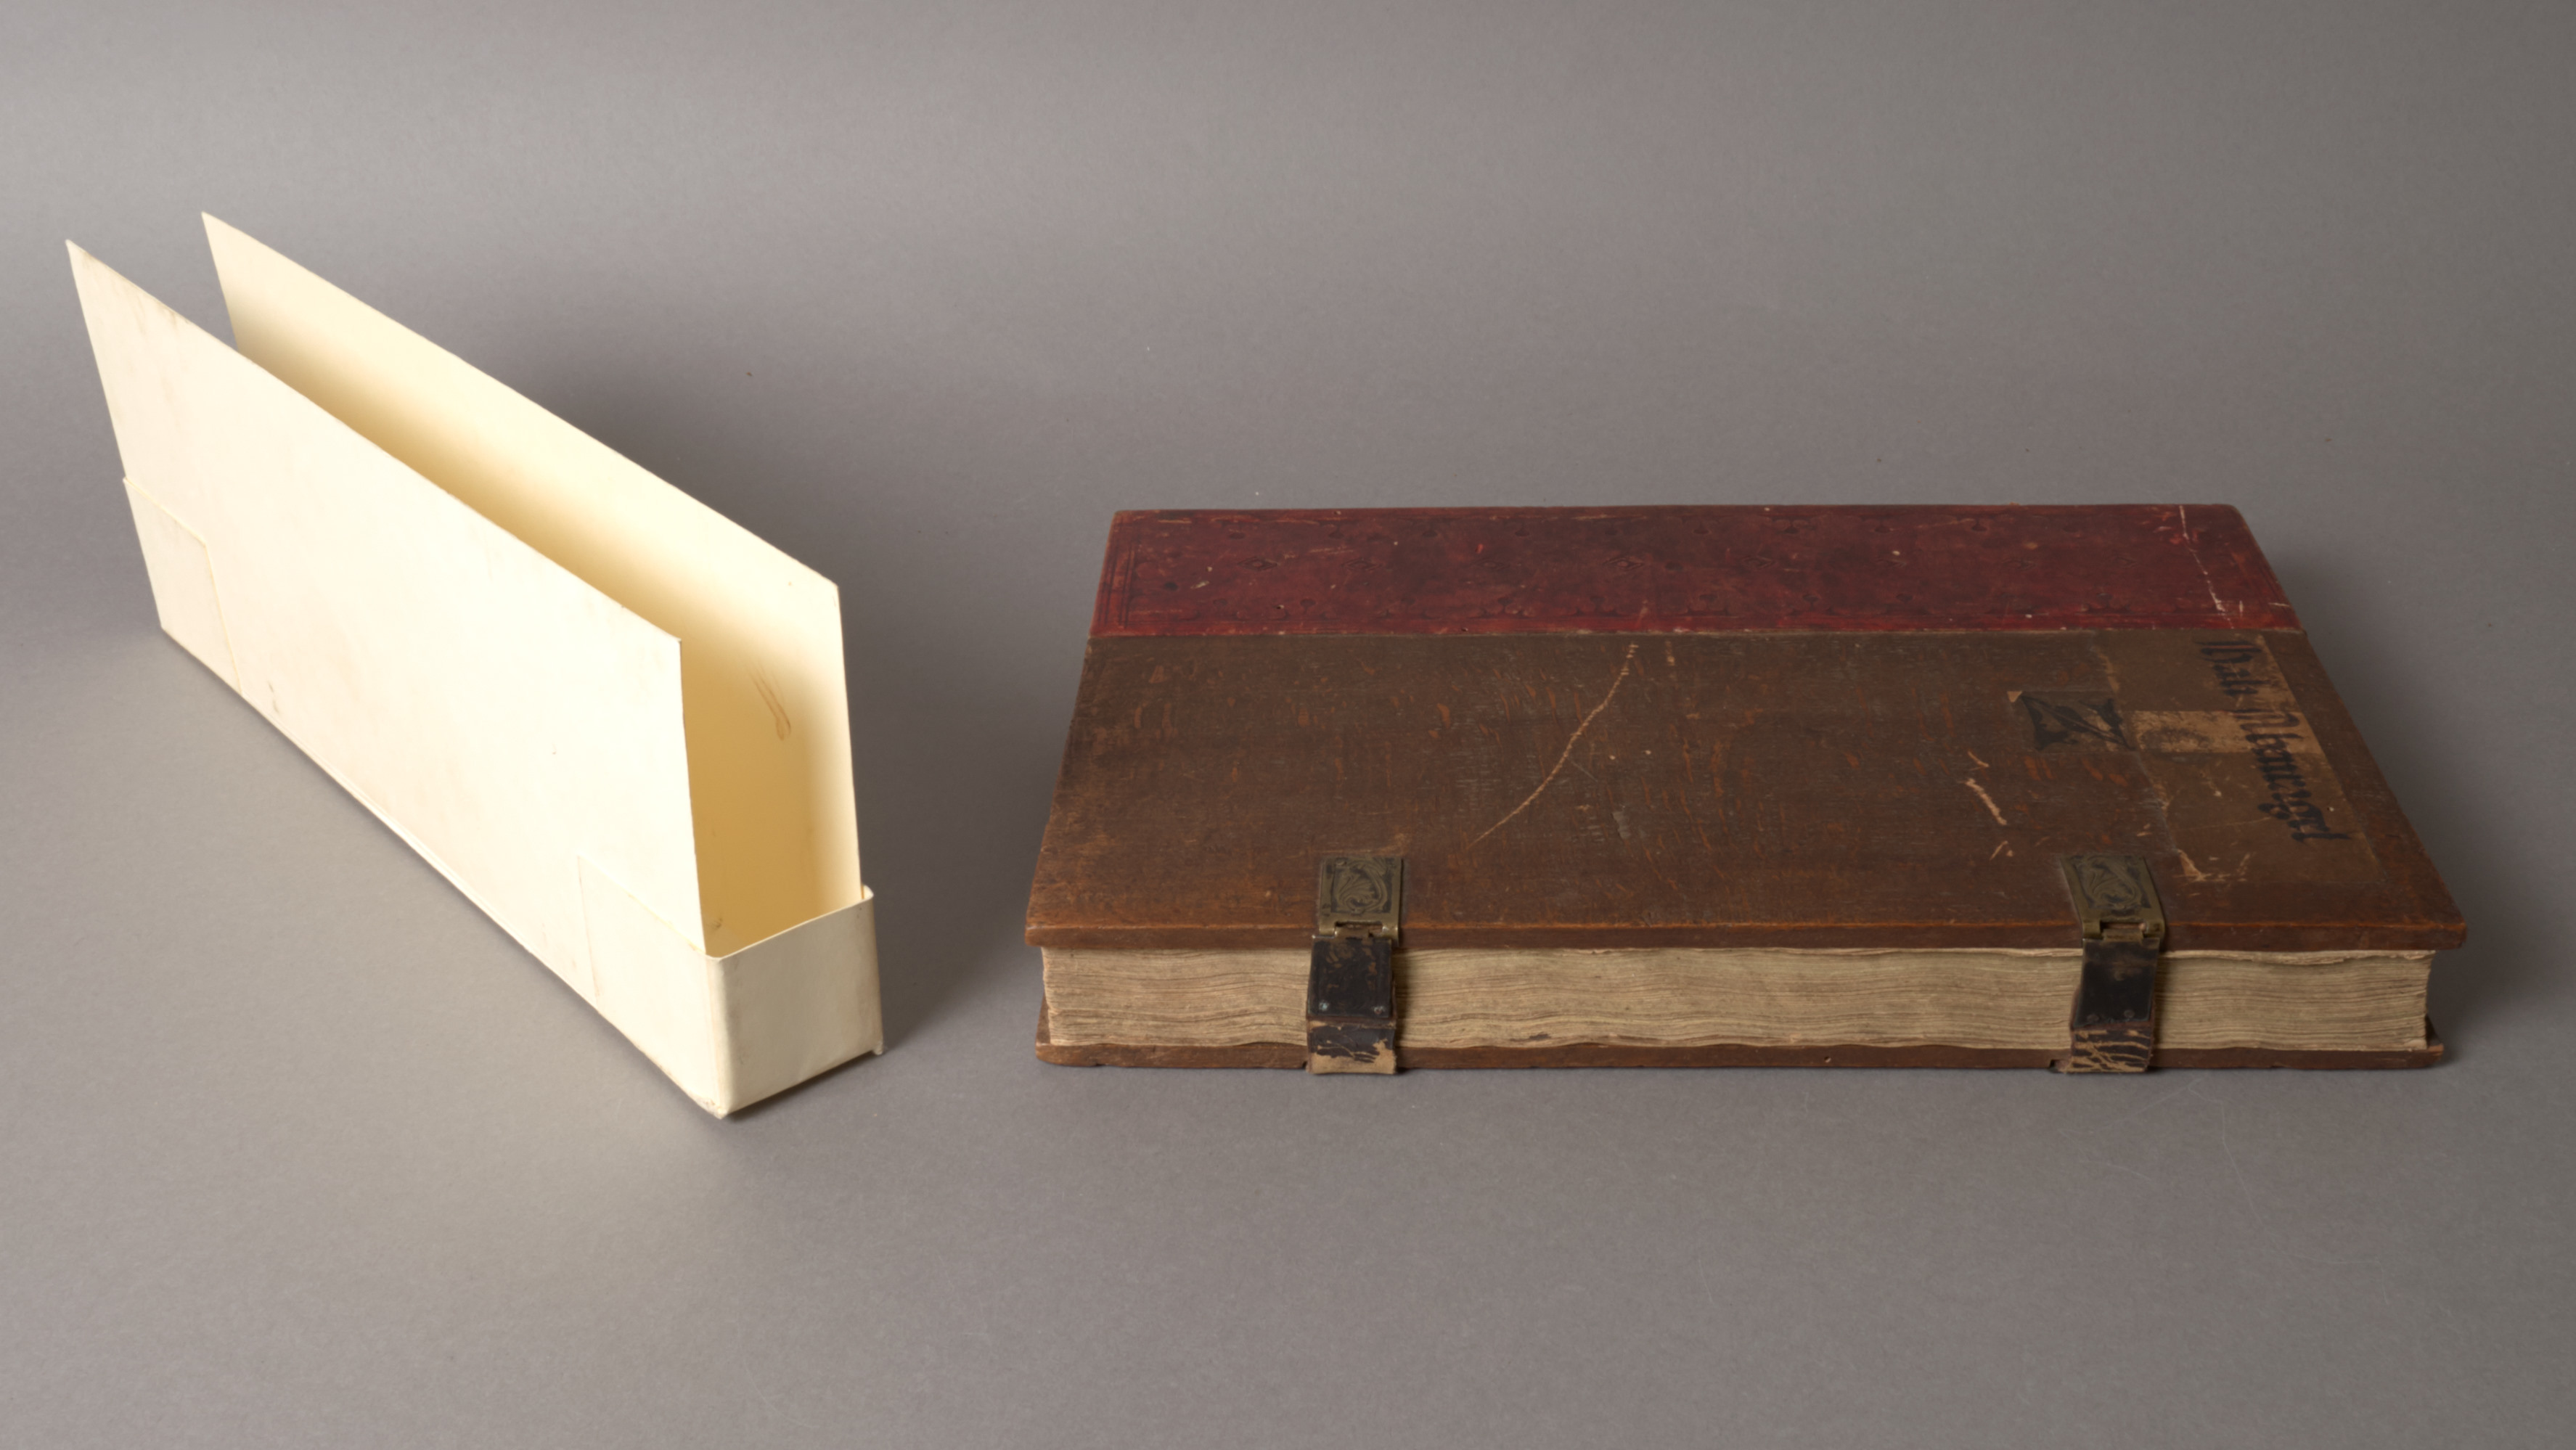
There are many different options for protective enclosures or wrappers for books and you can find a variety of examples in a typical research library collection. Occasionally I will find something that I have never seen before and this week I encountered a 15th century binding with a very simple, but novel form of book wrapper. I am not quite sure what to call it.
The wrapper is constructed of thin card (similar to 10 pt Bristol board) and fits snugly over the fore-edge. The wrapper is held together by cut tabs, which are folded over the board edge and glued down.
It slips on and off the book fairly easily and offers some protection to the exposed wooden boards and fore-edge clasps. It’s certainly a very quick and economical option, but has it’s own problems.
Rachel Penniman has suggested calling this a “book bikini”, which I think has a nice ring to it. I’d be interested to know if a more established name exists, though. Regardless, I believe that this particular book deserves some more protection, so I will be replacing the wrapper with a full enclosure.
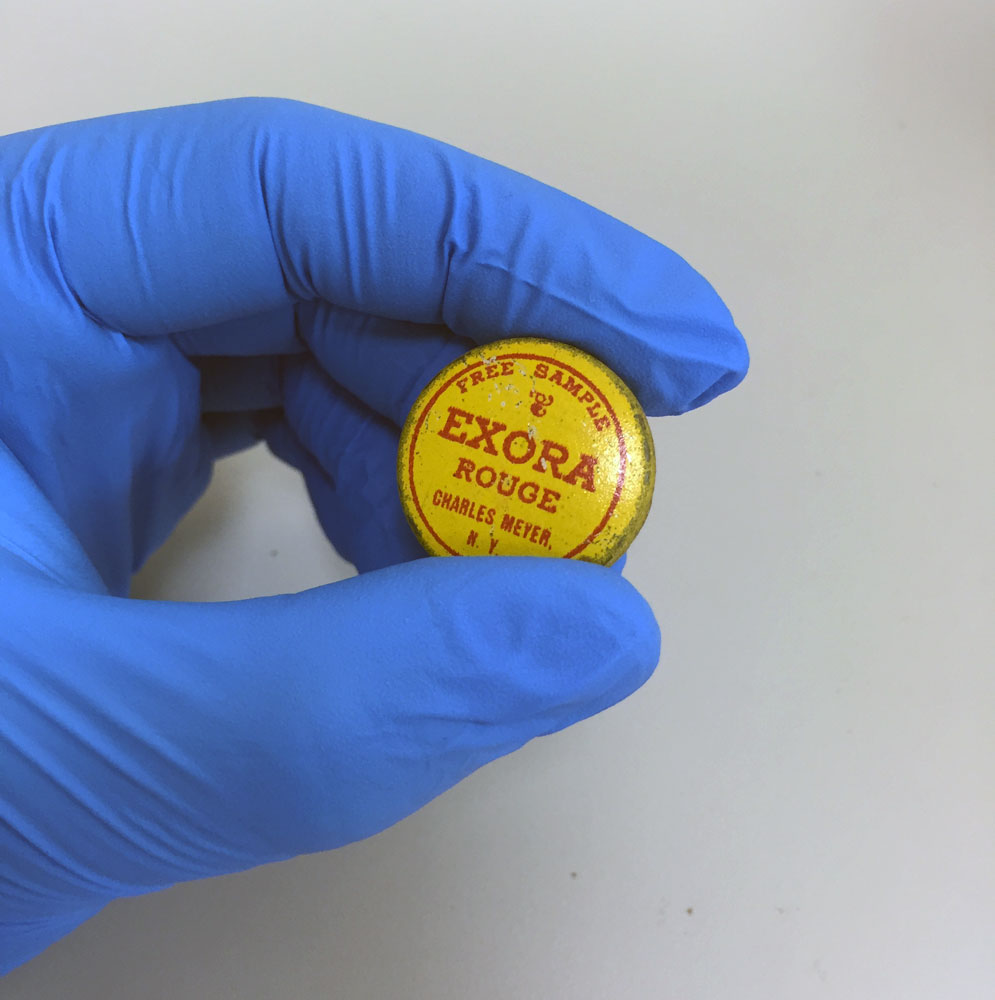
We currently have a small collection of late 19th and early 20th century cosmetic samples from our Advertising Ephemera Collection in the lab for stabilization and rehousing. The majority of the samples are little paper envelopes with loose powder inside, but one of them contained a fun little surprise.
This sample of Charles Meyer Exora Rouge was quite a bit thicker than the others and I could feel a tiny, rigid container inside. The adhesive on the envelope flap was easily released and inside was the smallest tin I’ve ever seen.
One of my favorite aspects of my job is getting to closely examine books from our collection and learn more about how they have been used and maintained over time. A binding’s current condition or the way in which it has been repaired can tell you a lot about its value and use, but I am also very interested in the variety of the techniques or craftsmanship found in historical book repairs. The history of book repair is as long as the format has existed, and the level of proficiency can range from crude utilitarian (like this example) to a more subtle sophistication (such as our current standard of repair). We have shared examples of historical repairs from the collection before, but I found this next item to be very interesting in its execution and level of workmanship.
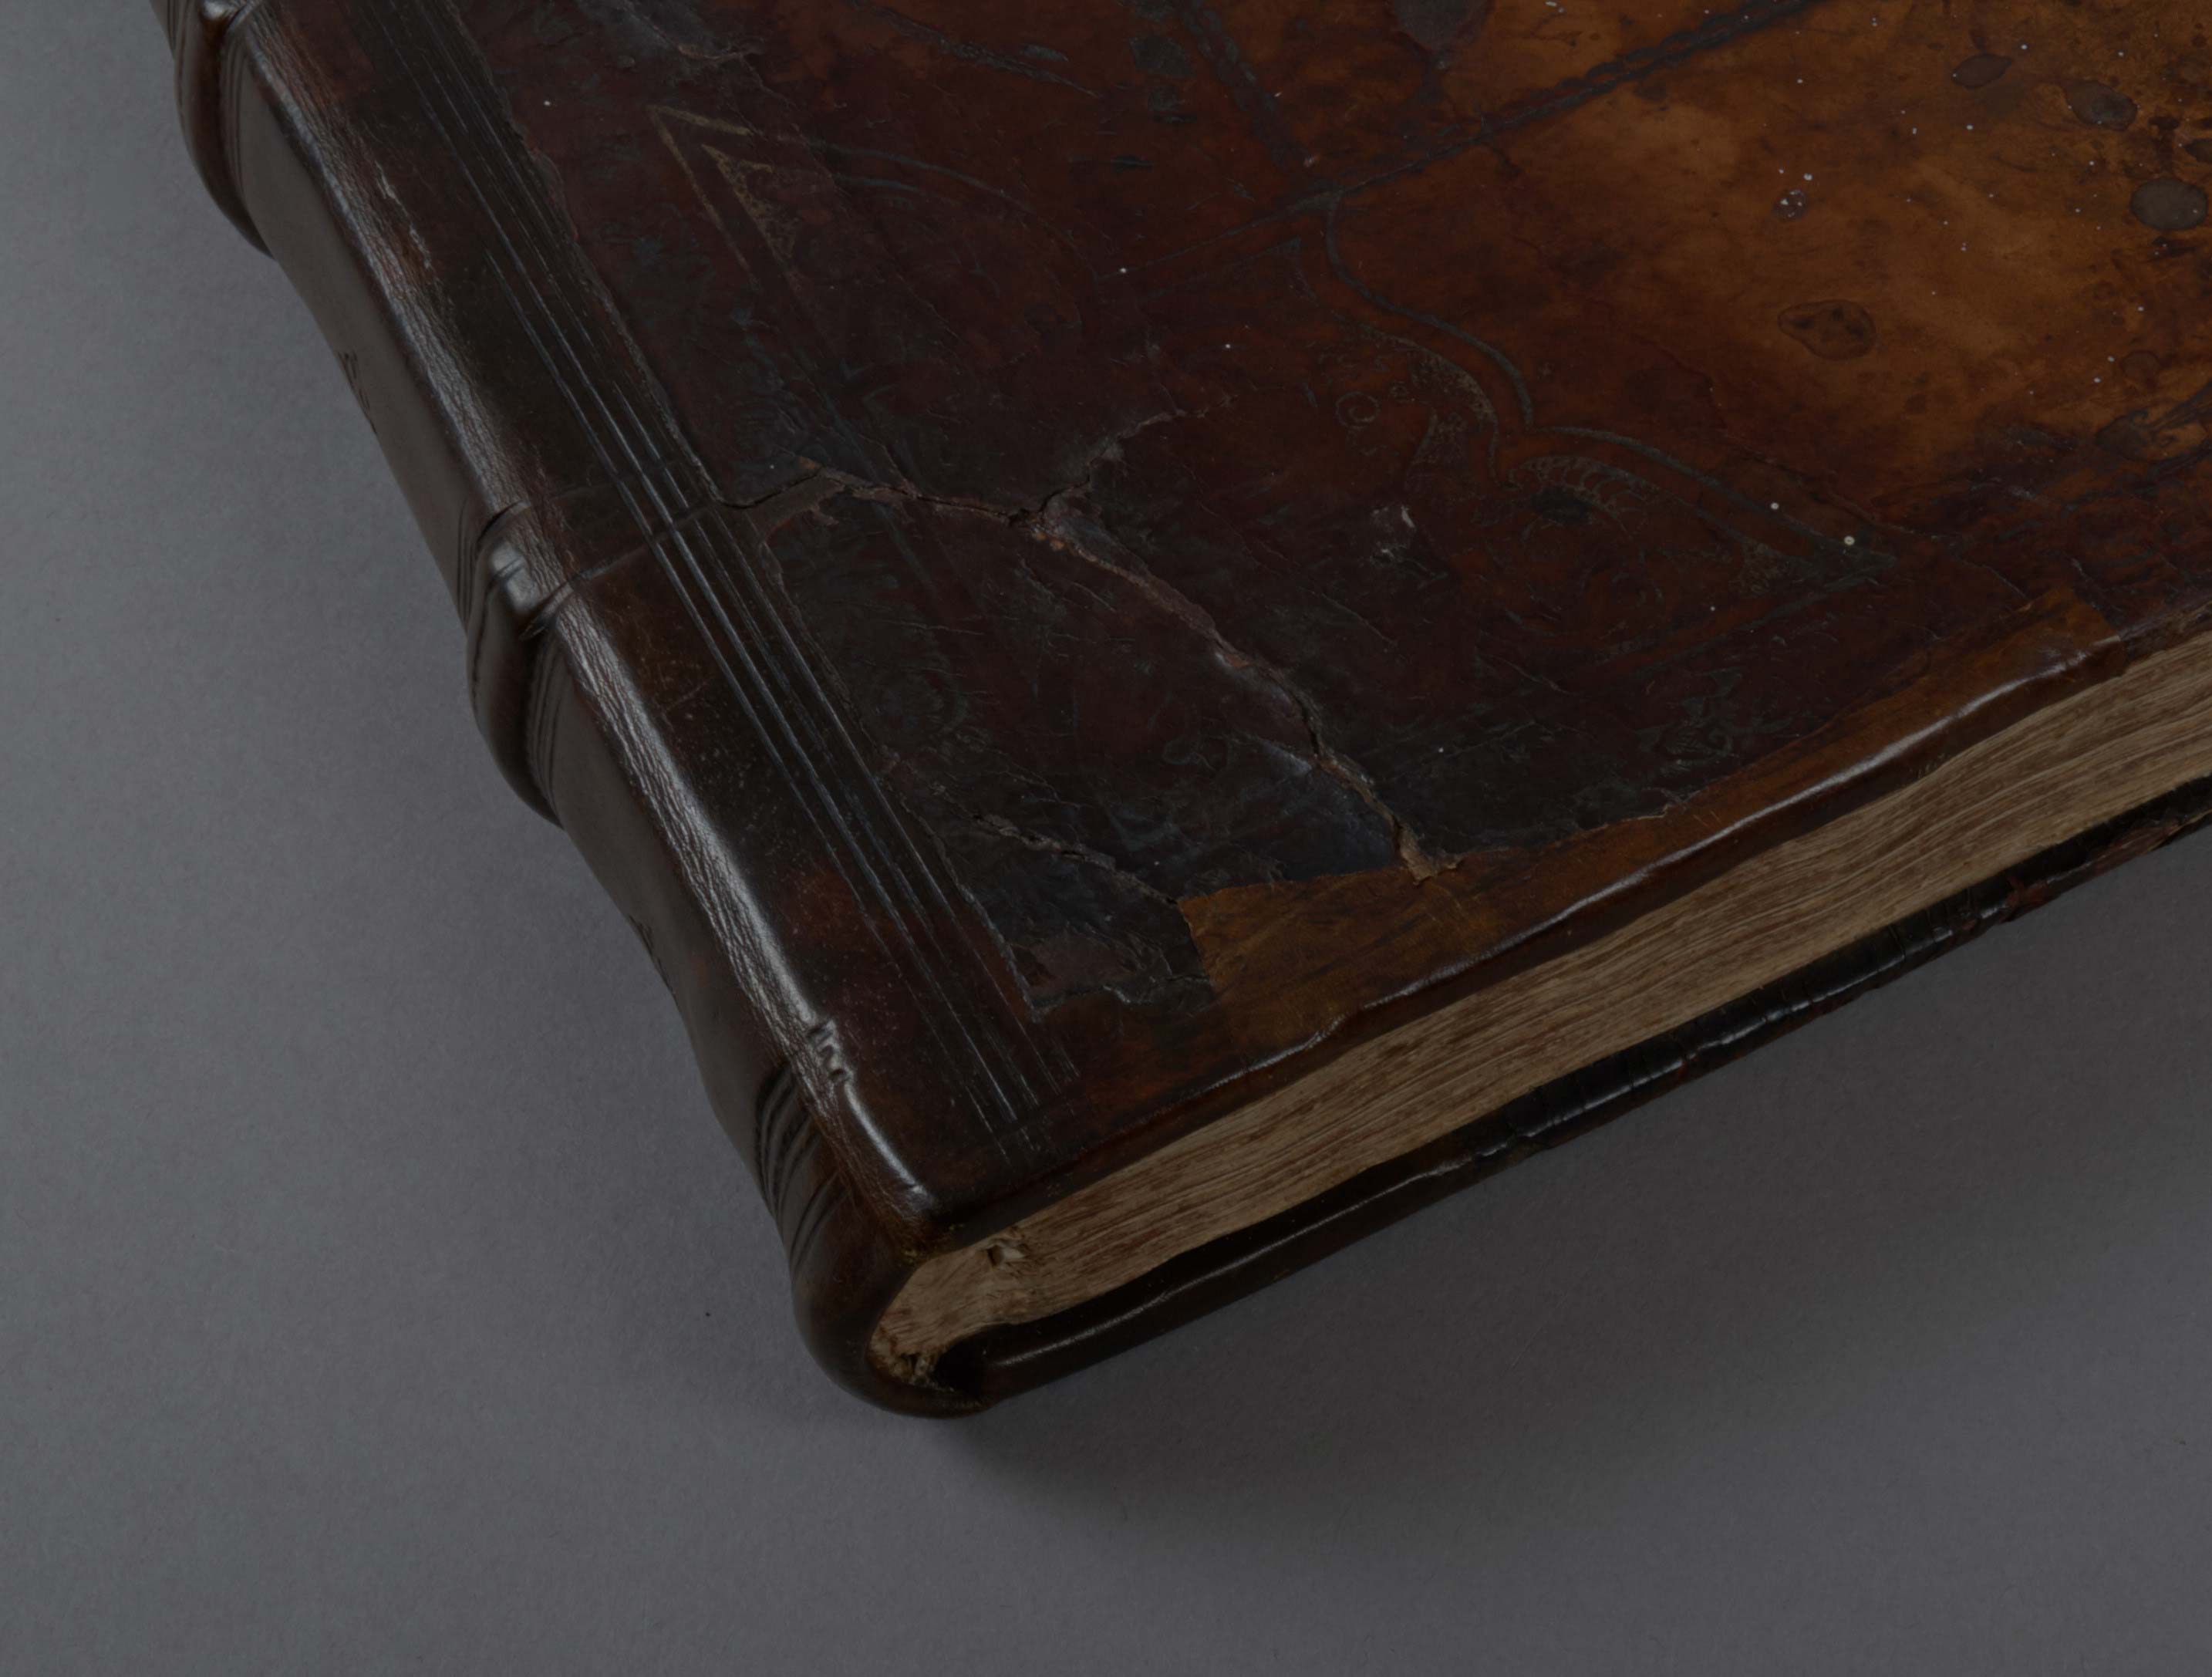
This 16th century atlas in a full calfskin binding has obviously been through a great deal and has been extensively repaired. The spine has been rebacked in dyed calfskin, the corners have all been repaired, and large areas of loss have been filled with new leather. I cannot say for certain when these repairs were done or even if they were all done at the same time, but suffice to say they are not recent. Several techniques have been used to blend the repairs with the original binding material and they are marginally successful in this regard. Click the photos below to enlarge.
New leather has been applied to the spine in the way of a typical reback: the original covering material has been lifted and new material has been adhered underneath. Nothing unusual there. The board corners and edges, however, have been repaired with onlays, or very thin pieces of calfskin adhered on top. Lines have been tooled in blind over the reback and onlays to continue the original decoration around the boards.
The fore-edge corner of the lower board has been repaired with a large inlay. Inlays are shaped pieces of leather of the same thickness as the original material, which fill the area of loss. My favorite part of this repair is the decoration which attempts to imitate the original floral patterns at the corners. The image below shows an intact original corner with decoration on the left and the decorated inlay on the right for comparison.
The binder who executed this repair did not have decorative rolls or stamps to match, so they just kind of made it up. The lines in this corner decoration are quite rough and shallow, which makes me think they were just drawn into the dampened leather, rather than actually impressed. Decorative rolls have been used around the outer edge of this corner, but they are quite different from the other decoration on the book. The binding has been heavily dressed, resulting in a very shiny surface to the leather.
It is apparent that a great deal of time and effort was put into this repair and it is successful insofar as it is still structurally sound and allows the book to function. We would approach treatment for a similar item very differently today, however.
Suez to Singapore by Cecil Brown. Binding by Edward McLean.
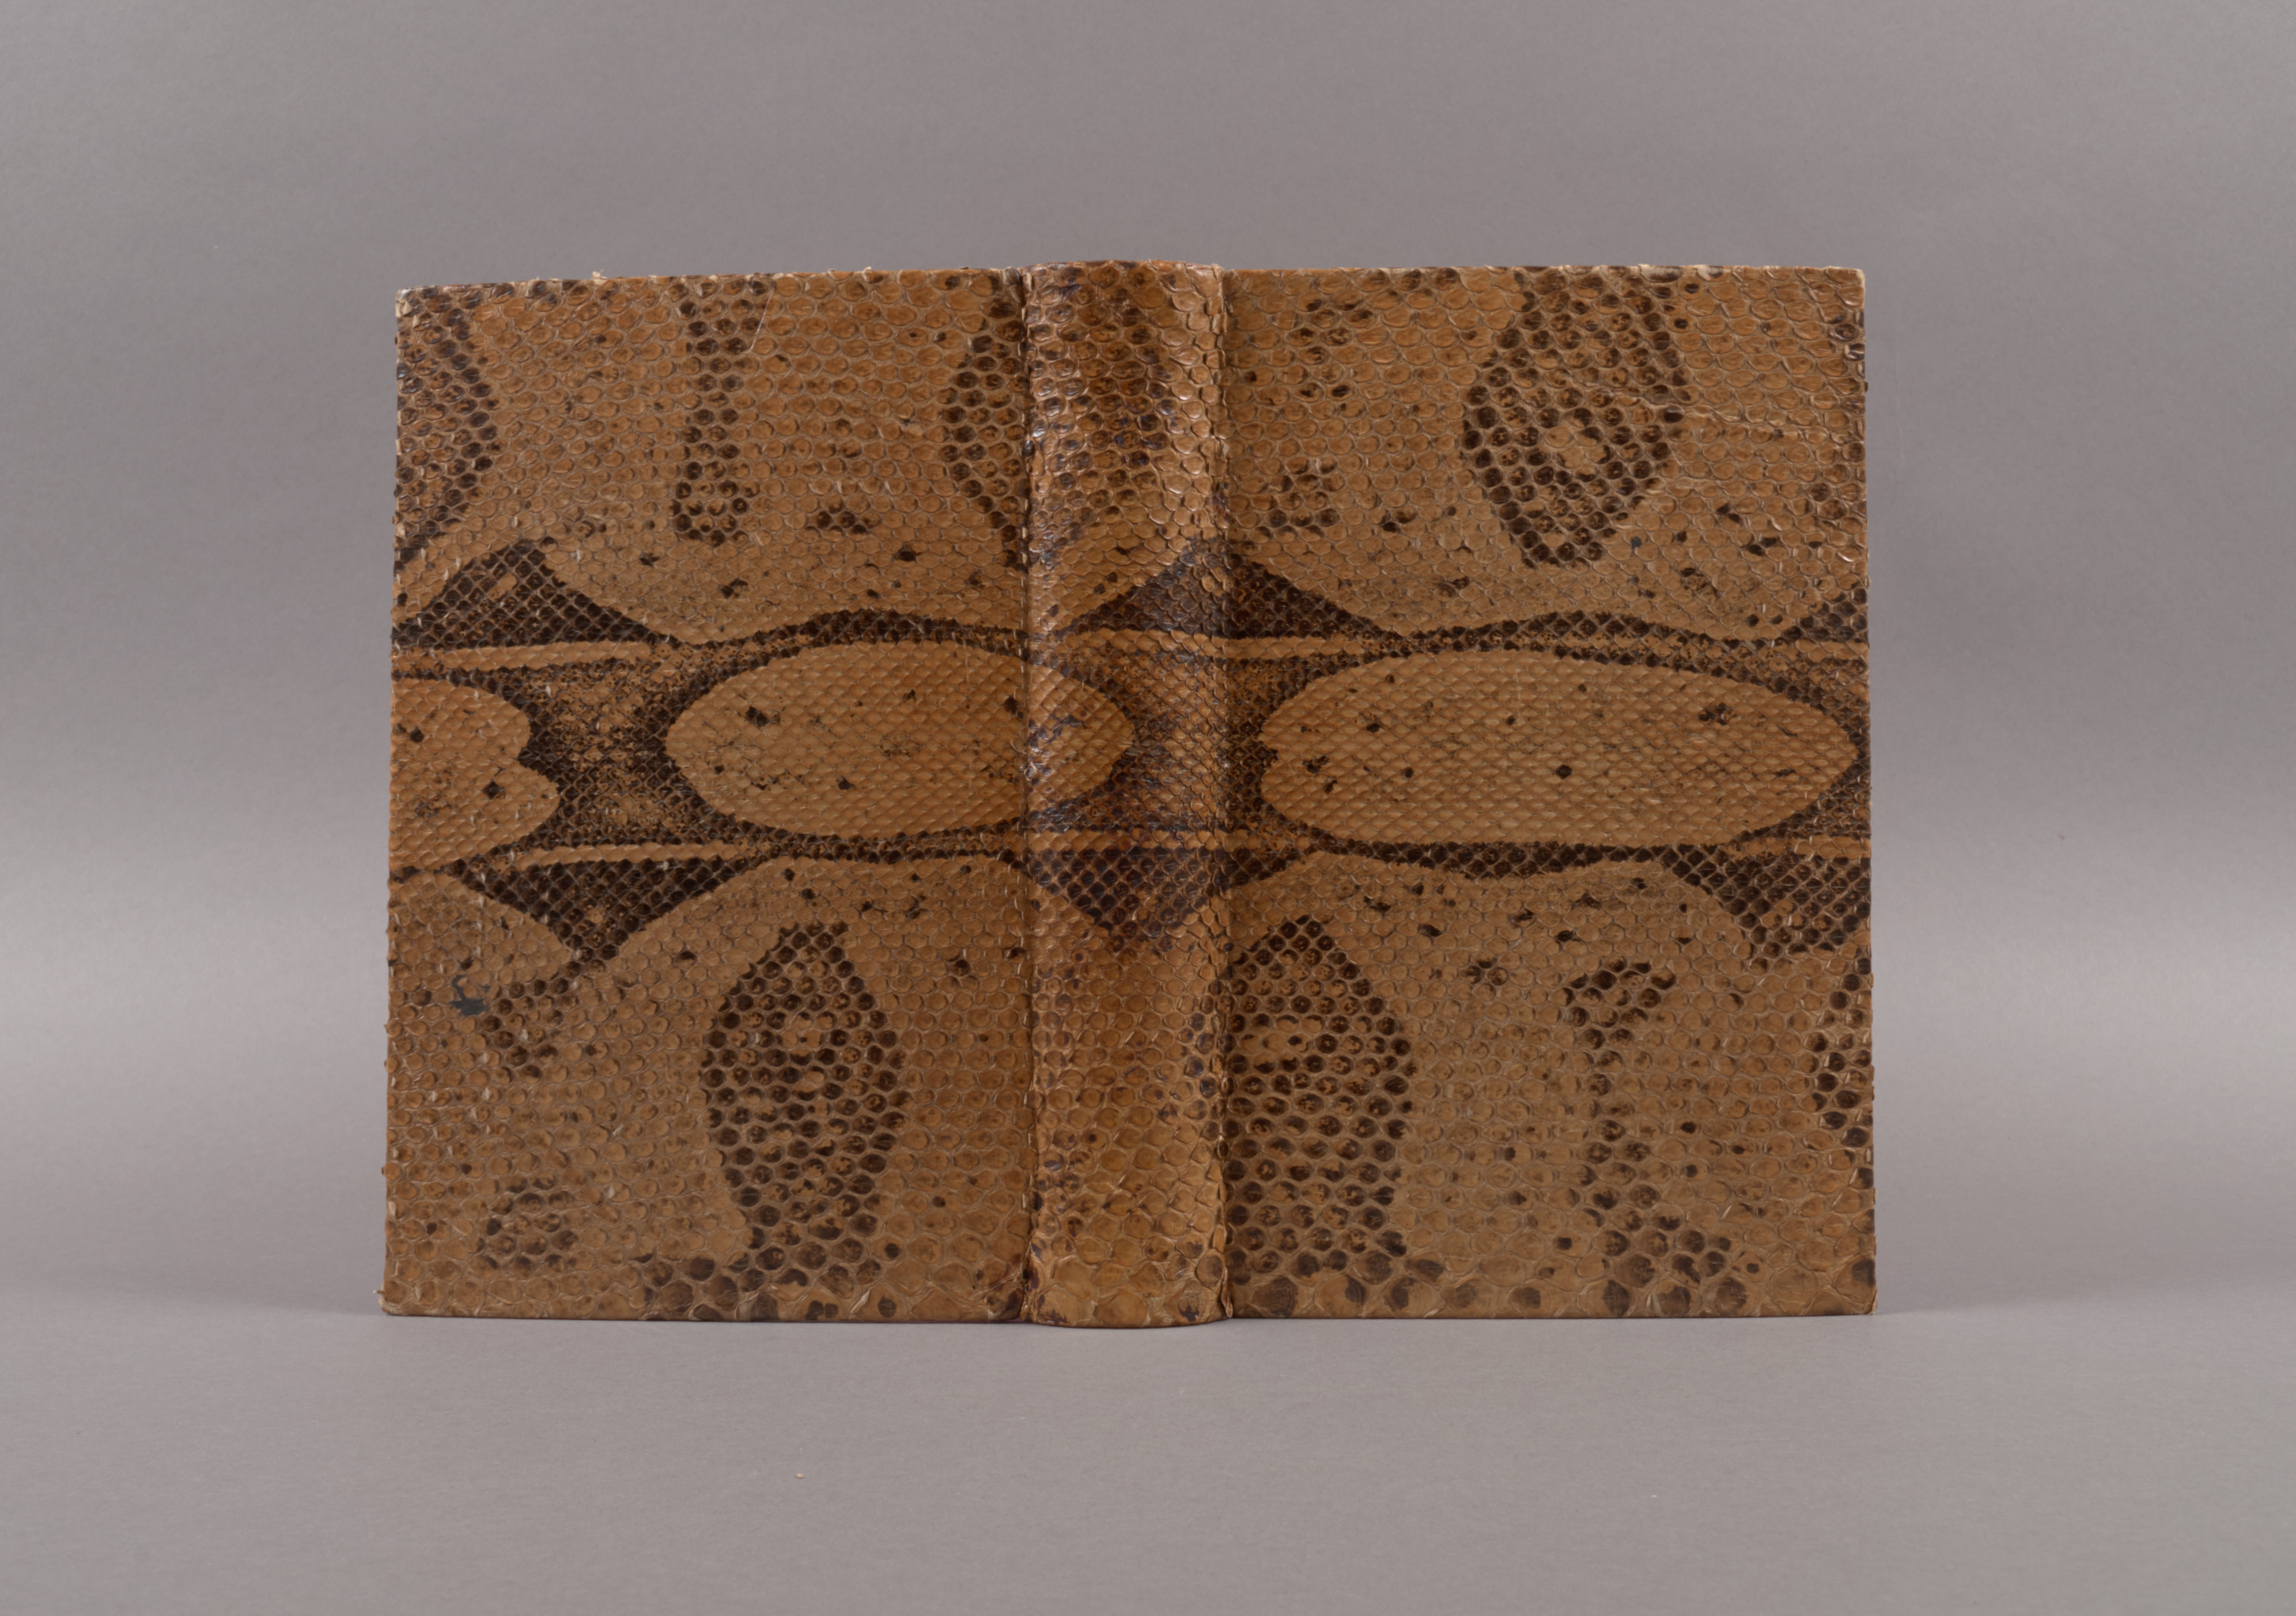
According to legend, St. Patrick chased all of the snakes out of Ireland in the fifth century. We see snakes occasionally here in the conservation lab – just in book form. This binding is supposedly covered in python and features some very colorful endsheets.
Eddie Cameron is a very well known figure around campus. His forty-six year career with the athletics program is the second longest tenure in Duke’s history and our indoor stadium was renamed for him in 1972.
The Edmund M. Cameron Records in the University Archives consists of nearly 14 linear feet of materials produced during his career, and includes three large scrapbooks. Those scrapbooks were adopted for conservation treatment recently through our Adopt-a-Book Program and, over the course of treating one of them, I was able to (quite literally) see Cameron in a whole new way.
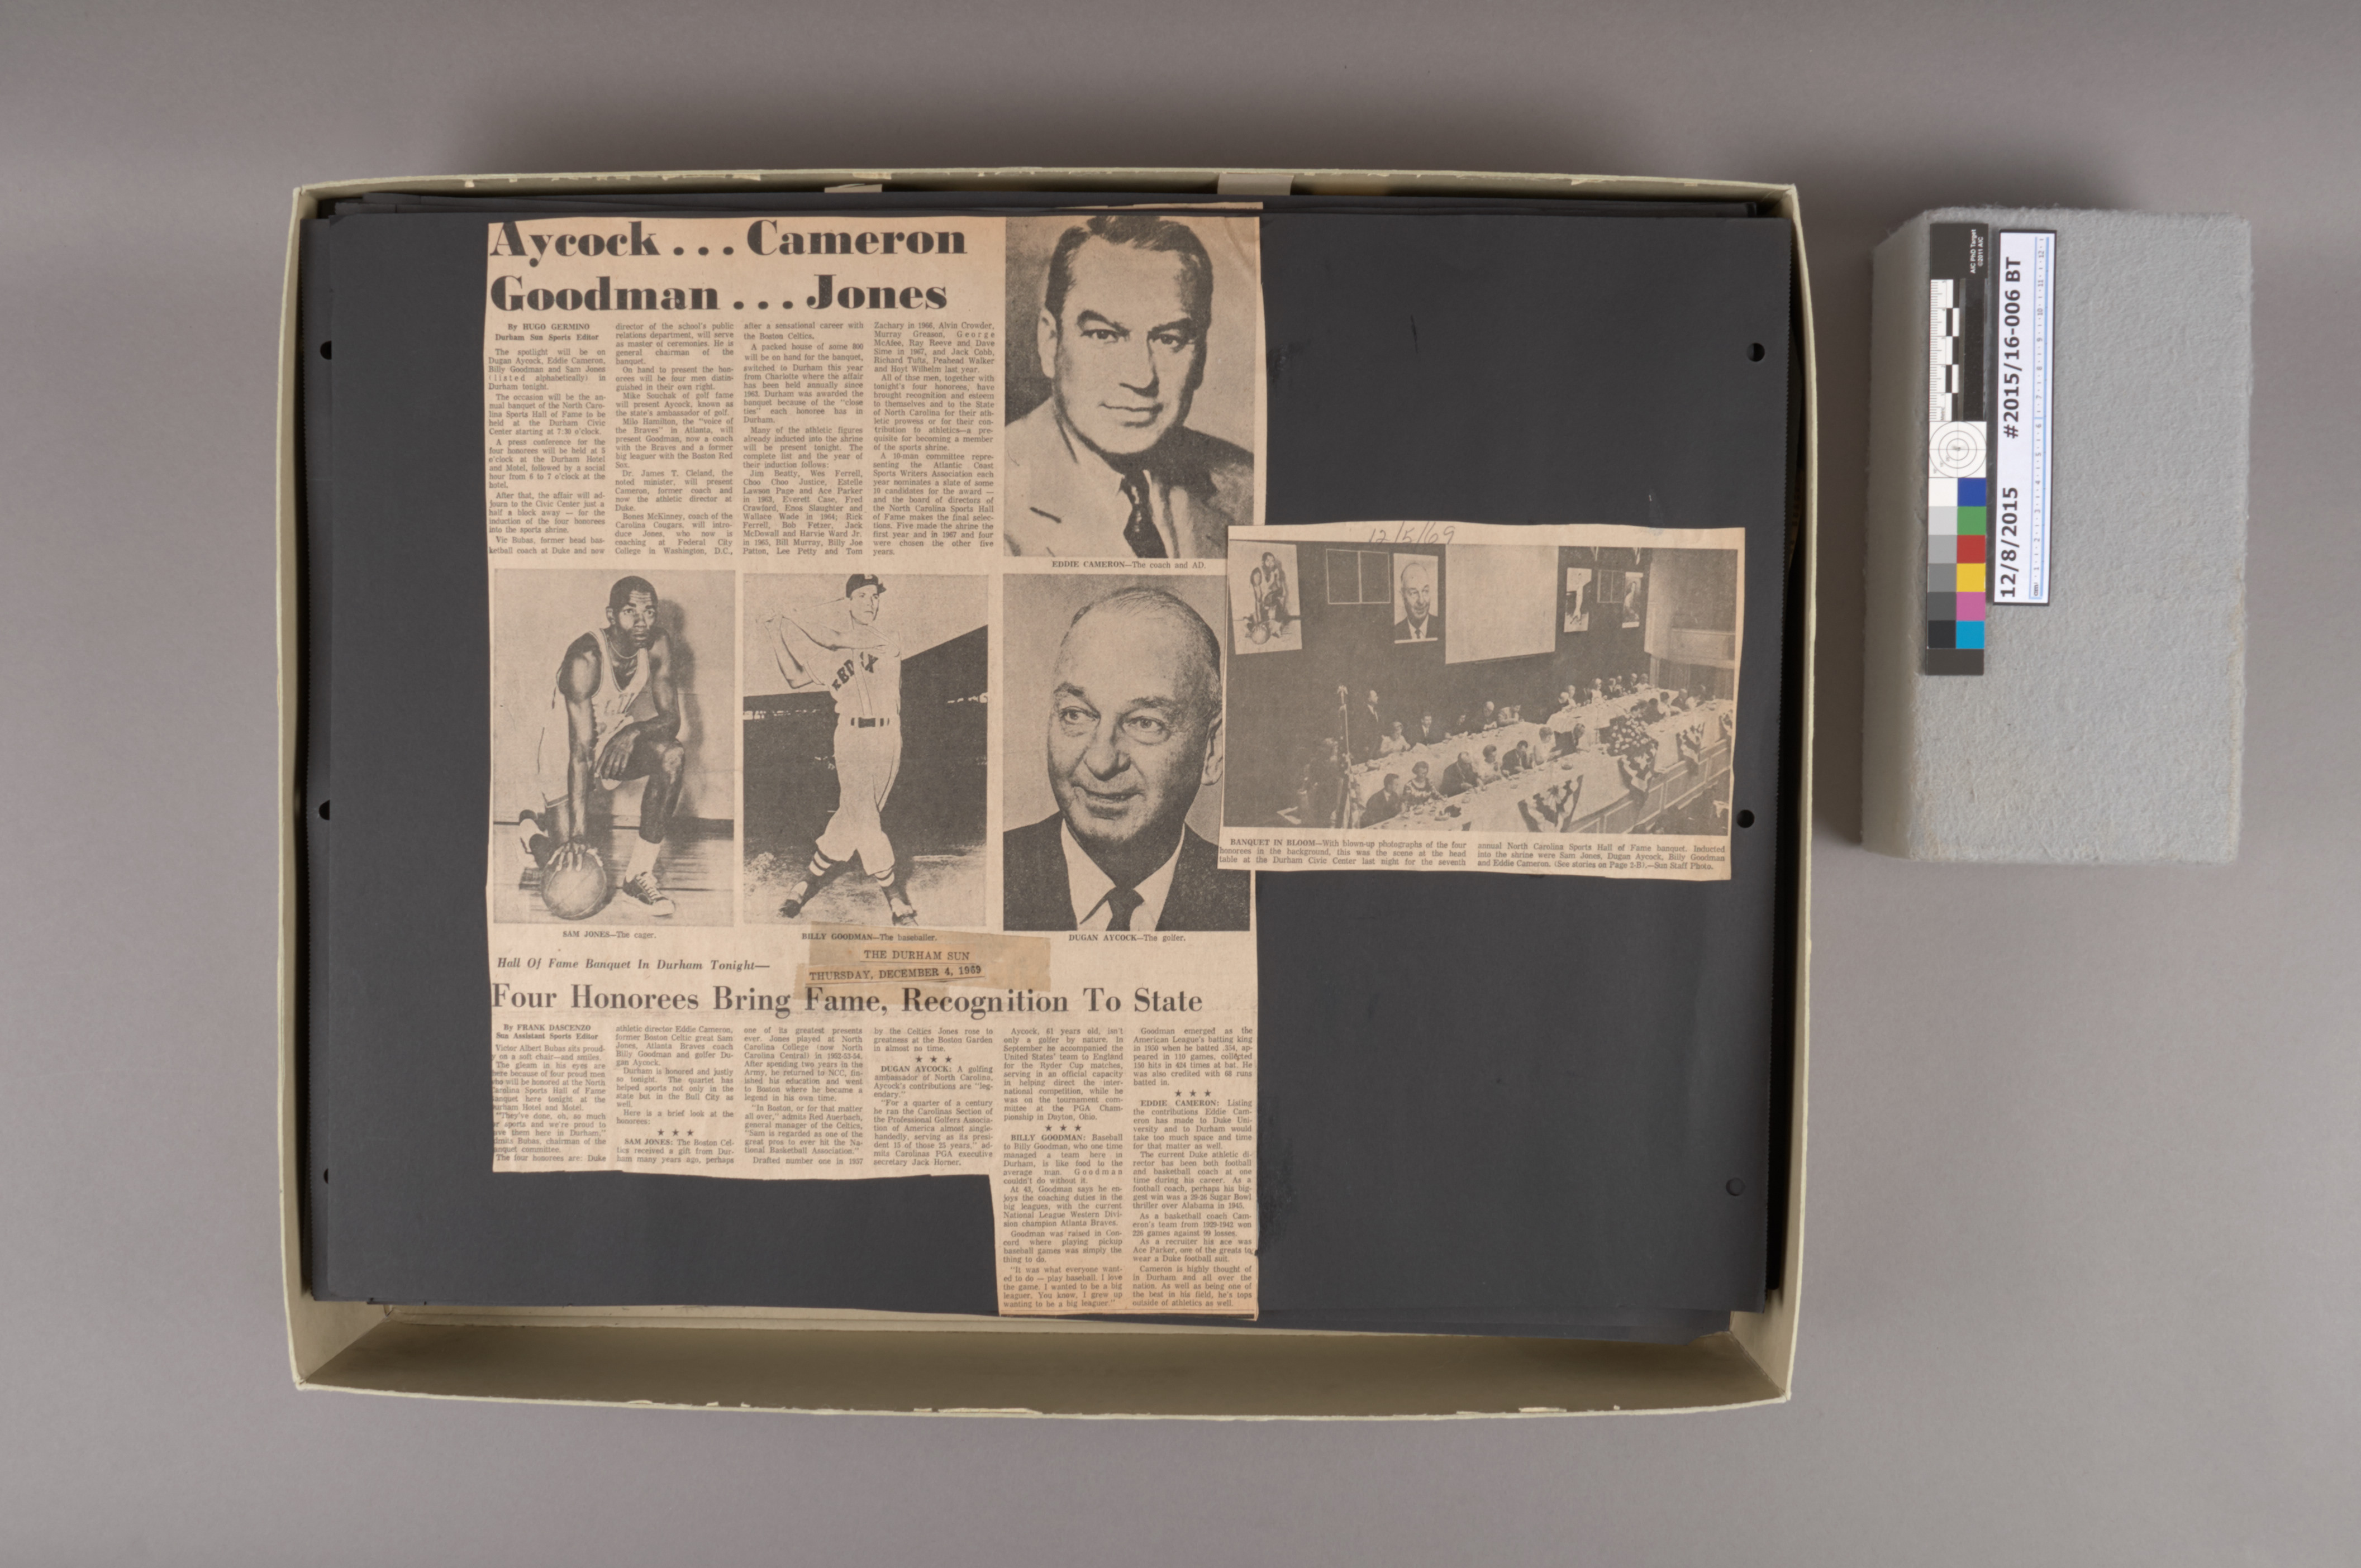
Two of the scrapbooks in the collection focus on particular bowl games, but the third is a more general collection of photographs and newspaper clippings from Cameron’s time at Duke. The scrapbook is no longer bound and is currently stored as loose sheets in an over-sized records box.
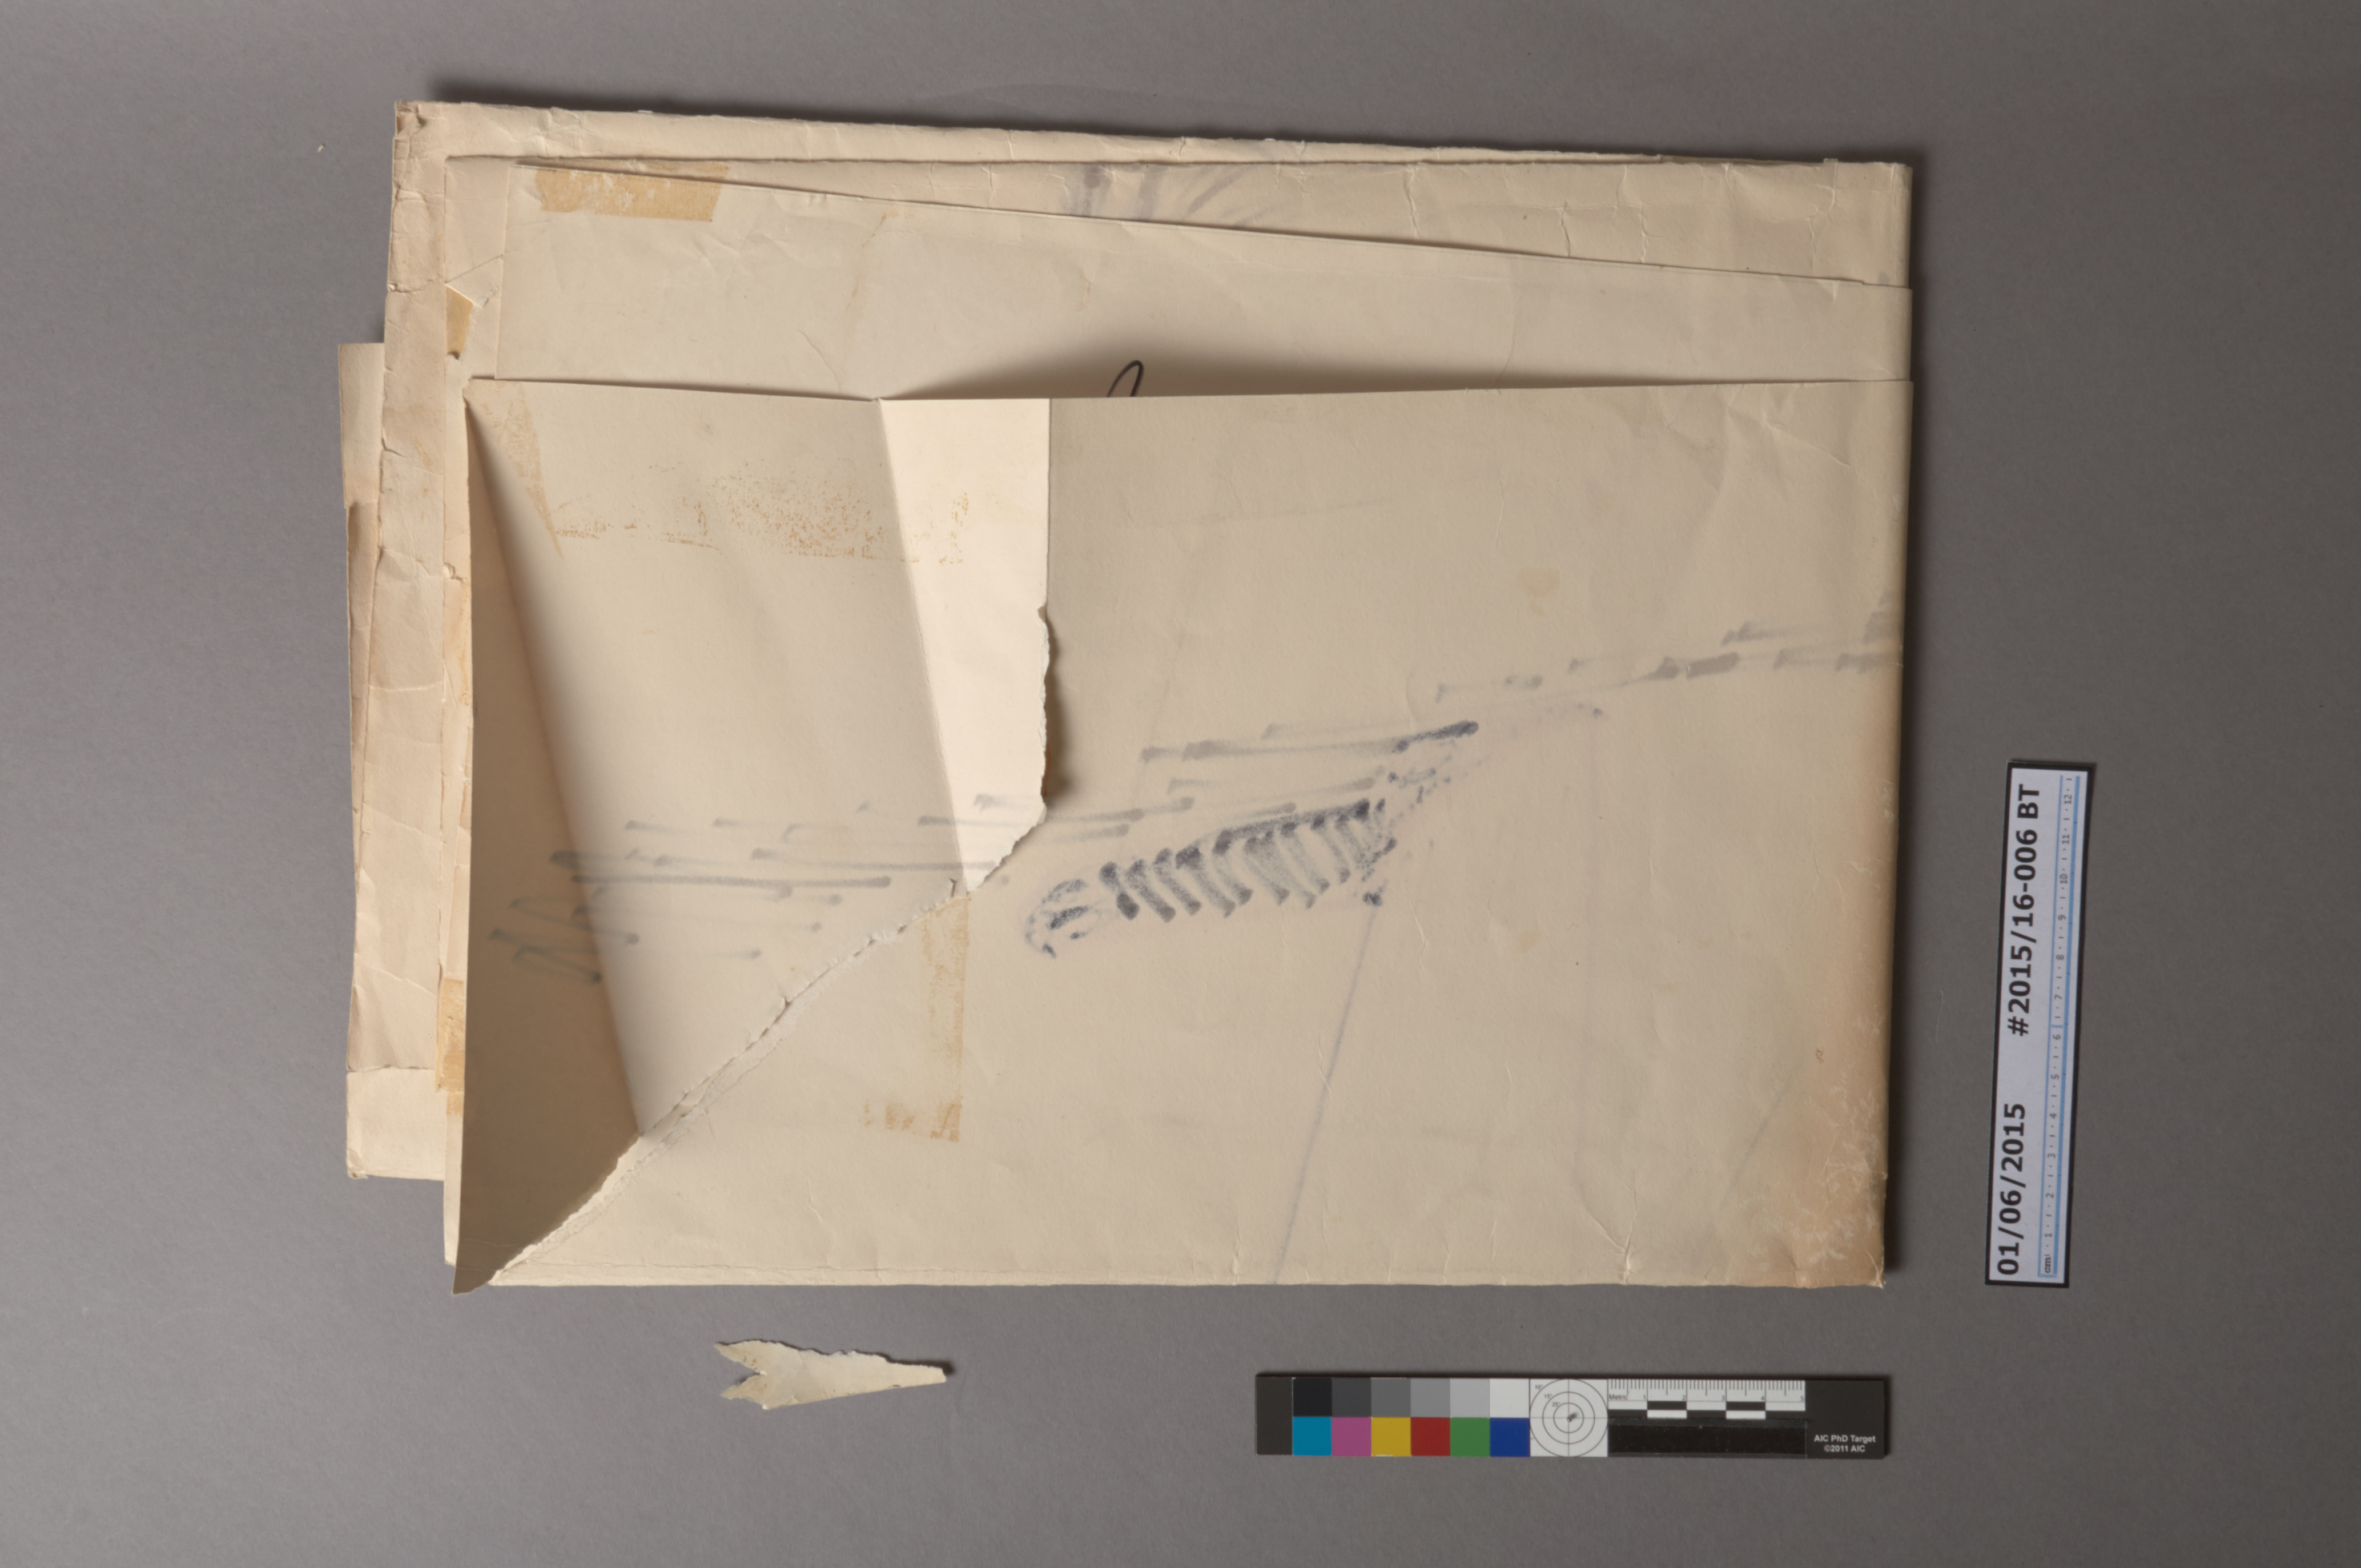
During my initial examination, I came across a large folded sheet at the bottom of the stack, which I could pretty quickly tell was a large drawing executed with a few different colors of marker.
Before Treatment
The thick, machine-made paper had been folded in half three times so that it could fit inside the scrapbook. Two of the edges of the sheet had been rough-cut with scissors, leading me to believe that the paper came off of a large roll. Short pieces of masking tape had been applied along the outer edges of the sheet, presumably to mount it on a wall. There were also stains along the folds and some significant scarf tears. In consultation with the University Archivist, the decision was made to unfold and repair this drawing. We decided not to pursue stain reduction as a part of this treatment, but it could be an option for the future.
The adhesive of the masking tape had become desiccated and powdery, so I was able to simply remove the carrier layer of the tape and gently brush adhesive from the paper surface. The front and back of the poster were then dry-cleaned with white vinyl eraser crumbs to remove any surface dirt or grime. Since the paper was quite thick and had not become brittle, I was able to unfold the sheet during cleaning, but it remained heavily creased and undulated. After testing all of the inks for solubility, the folded poster was placed in a humidity chamber for a couple of hours and then moved to a large felt stack to press for several weeks. When fully flattened, the tears were mended with toned Japanese paper and wheat starch paste.
After Treatment
The drawing is not signed and we may never know the name of the artist, but I really like it. I think that it captures Cameron’s likeness pretty successfully. The unfolded poster is quite large (39″ x 30″), so it was placed in a Bristol board folder and will now live safely in flat file storage.
I am wrapping up treatment on the three Cameron scrapbooks now. With some repairs and new enclosures, they are now much easier to handle and have already been getting some use. On March 1, the New Era Pinstripe Bowl trophy was on display in Perkins Library, along with other historical Duke football memorabilia from the University Archives. Cameron’s scrapbook about the 1945 Sugar Bowl was one of the items on display.
University Archivist Valerie Gillispie with Coach Cutcliffe and President Brodhead
Conservators can be a bit obsessive when it comes to hand tools. Not only must a tool be well suited to perform a specific task, but it must also be ergonomic. If a stock tool is not quite right for the job, I may modify it or just make the tool that I need from scratch. Making or adapting tools does not have to be time consuming or expensive, and some of my favorite tools are quite simple.
For example, I find myself doing a lot of lifting and scraping in my day-to-day work. Original binding material may need to be lifted or damaged paper may have small scarf tears that need to be manipulated. Scraping may be an effective method for mechanically removing accretions, desiccated adhesive, or old lining material. The following three examples are my favorite tools for these tasks, which I have either modified, fabricated, or purchased.
The Casselli 6 1/8″ micro-spatula is great for lifting very thin material, like paper. The size of the spatula ends and thin, flexible steel make it perfect for a lot of small tasks.
Casselli micro-spatula
Two modifications have really improved the working properties of this tool for me: shaping the rounded edge and making the center handle thicker. I have left the pointy end of my spatula unmodified, but I added a single bevel to the rounded end with 3M micro-finishing film abrasive to make it more like a blade. This allows me to get the tool underneath very thin material. The unmodified octagonal handle is fine for quick work, but really becomes tiresome on the pads of my index finger and thumb after lengthy use. I used a common material known as Elastack (by Sutton Scientifics, Inc.) to increase the circumference of the handle and make it more comfortable to hold. Elastack is available in two levels of softness and is very quick to apply or re-wrap to adjust the shape of a tool.
The Casselli is not robust or sharp enough for lifting heavy material (such as leather), so for those tasks I will often switch to a lifting knife. I made this small lifting knife from a 1/2″ Starrett hacksaw blade a few years ago in a workshop with Jeff Peachey and use it just about every day.
Small lifting knife
The total time to make this tool was less than an hour and the material cost is quite low. After grinding the teeth off of the hacksaw blade and rough shaping the round edge using a belt sander, the final sharpening was done by hand. The handle is just thick horse butt leather cut to shape and adhered with PVA. Because the high-speed steel makes sharpening fairly quick, I find myself more likely to resharpen this knife than others in my collection made from harder steel.
A recent acquisition that I have been experimenting with lately is this micro-chisel made by Shanna Leino. With a bit of stropping, it is incredibly sharp and I find that it can do certain tasks better than a scalpel.
One method of mechanically removing a solid, brittle accretion is to press a blade vertically, very close to the edge of the layer and break it off (Ashley-Smith, 1992, p. 30). Of course there are many variables to consider on whether this is a safe or effective method to employ, but in cases where I have been able to use it, the micro-chisel works wonders. I suspect that it will also come in handy the next time I am creating a model of a wooden board binding, particularly for shaping the sewing support channels.
I really enjoy experimenting with different hand tools and applying simple modifications to improve them. What is your favorite hand tool?
Ashley-Smith, J. (1992). Science for conservators: Volume 2 cleaning. London: Museums and Galleries Commission.
This coming summer Duke will host a 2016 NEH Summer Institute, titled “The History of Political Economy”. In preparation, the library is putting together a small exhibit of complementary materials from our collection. One of the items that will be on display is our first edition set of what is widely considered to be Adam Smith’s magnum opus, An Inquiry into the Nature and Causes of the Wealth of Nations. Smith’s 1776 text is most commonly known for coining the phrase “the invisible hand” to describe forces which guide free markets.
I am a big fan of the NPR podcast Planet Money, and over the years I have learned quite a bit about the significance of Smith (and this work in particular) through the show. Therefore, I was very excited to for the opportunity to examine this item and address some of the condition issues for each volume. While Smith is mentioned frequently on Planet Money, two episodes explore the man and his work in greater depth: “Adam Smith, Mama’s Boy” and “Adam Smith and the Not So Invisible Hand“.
The two volumes of this edition are in matching tightback bindings with single raised sewing supports. The spine and corners are covered in green goatskin with green marbled paper siding-up the boards. The spines are extensively decorated with gold tooling and there is some blind tooling on the faces of the boards. While I cannot determine if these are the original bindings, they appear to be contemporary to the text. The goal of this treatment was to stabilize each book, reattaching any loose pieces and making the bindings functional for safe display or use in the reading room. My repairs attempt to satisfy this goal with minimal alteration to the appearance of the books.
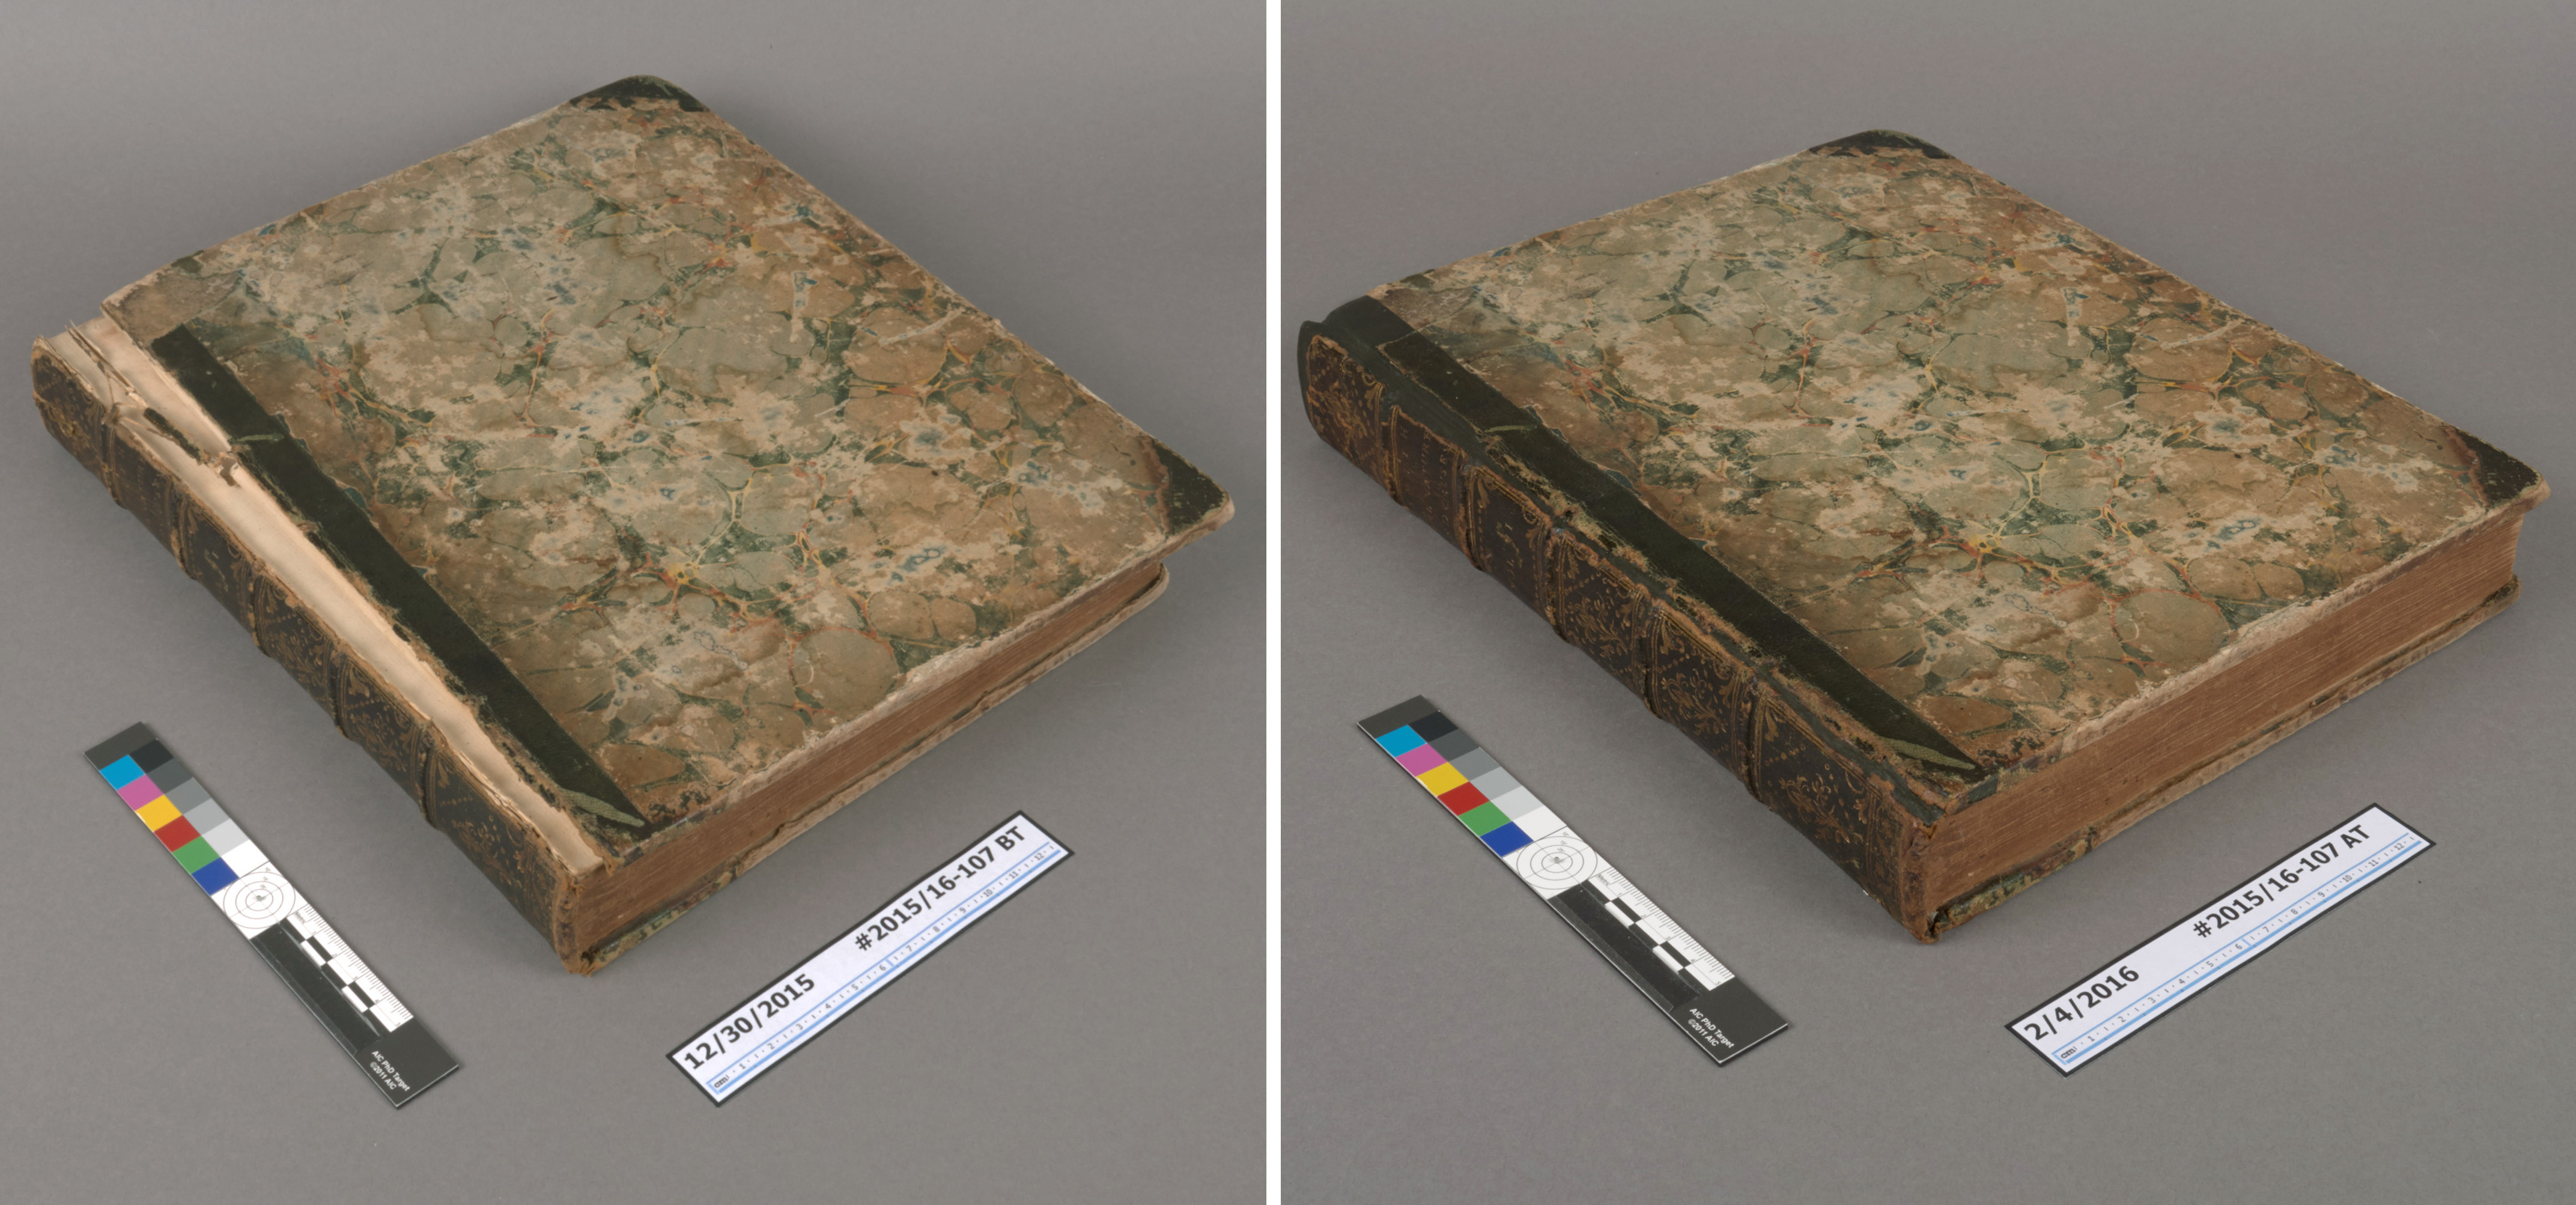
The first volume was in better condition, but had been damaged at the tail of the spine. The joints were splitting along this panel, the tailcap was missing entirely, and the leather was continuing to lift where the damage had occurred.
Volume 1 -Before and After Treatment (click image to enlarge)
While the sewing supports all remained intact and the boards were securely attached, the splitting along the tail end joints and the risk of additional loss was a concern. After fully lifting the leather away from the tail panel of the spine, the textblock spine was lined with thin Japanese paper and wheat starch paste. An extended lining of bias-cut airplane linen was then adhered on top. The extended pieces of this lining were split and adhered on either side of the board using David Brock’s board reattachment method. Finally, the volume was rebacked with a thick Kozo fiber Japanese paper, toned to match the original leather. All original covering materials were readhered.
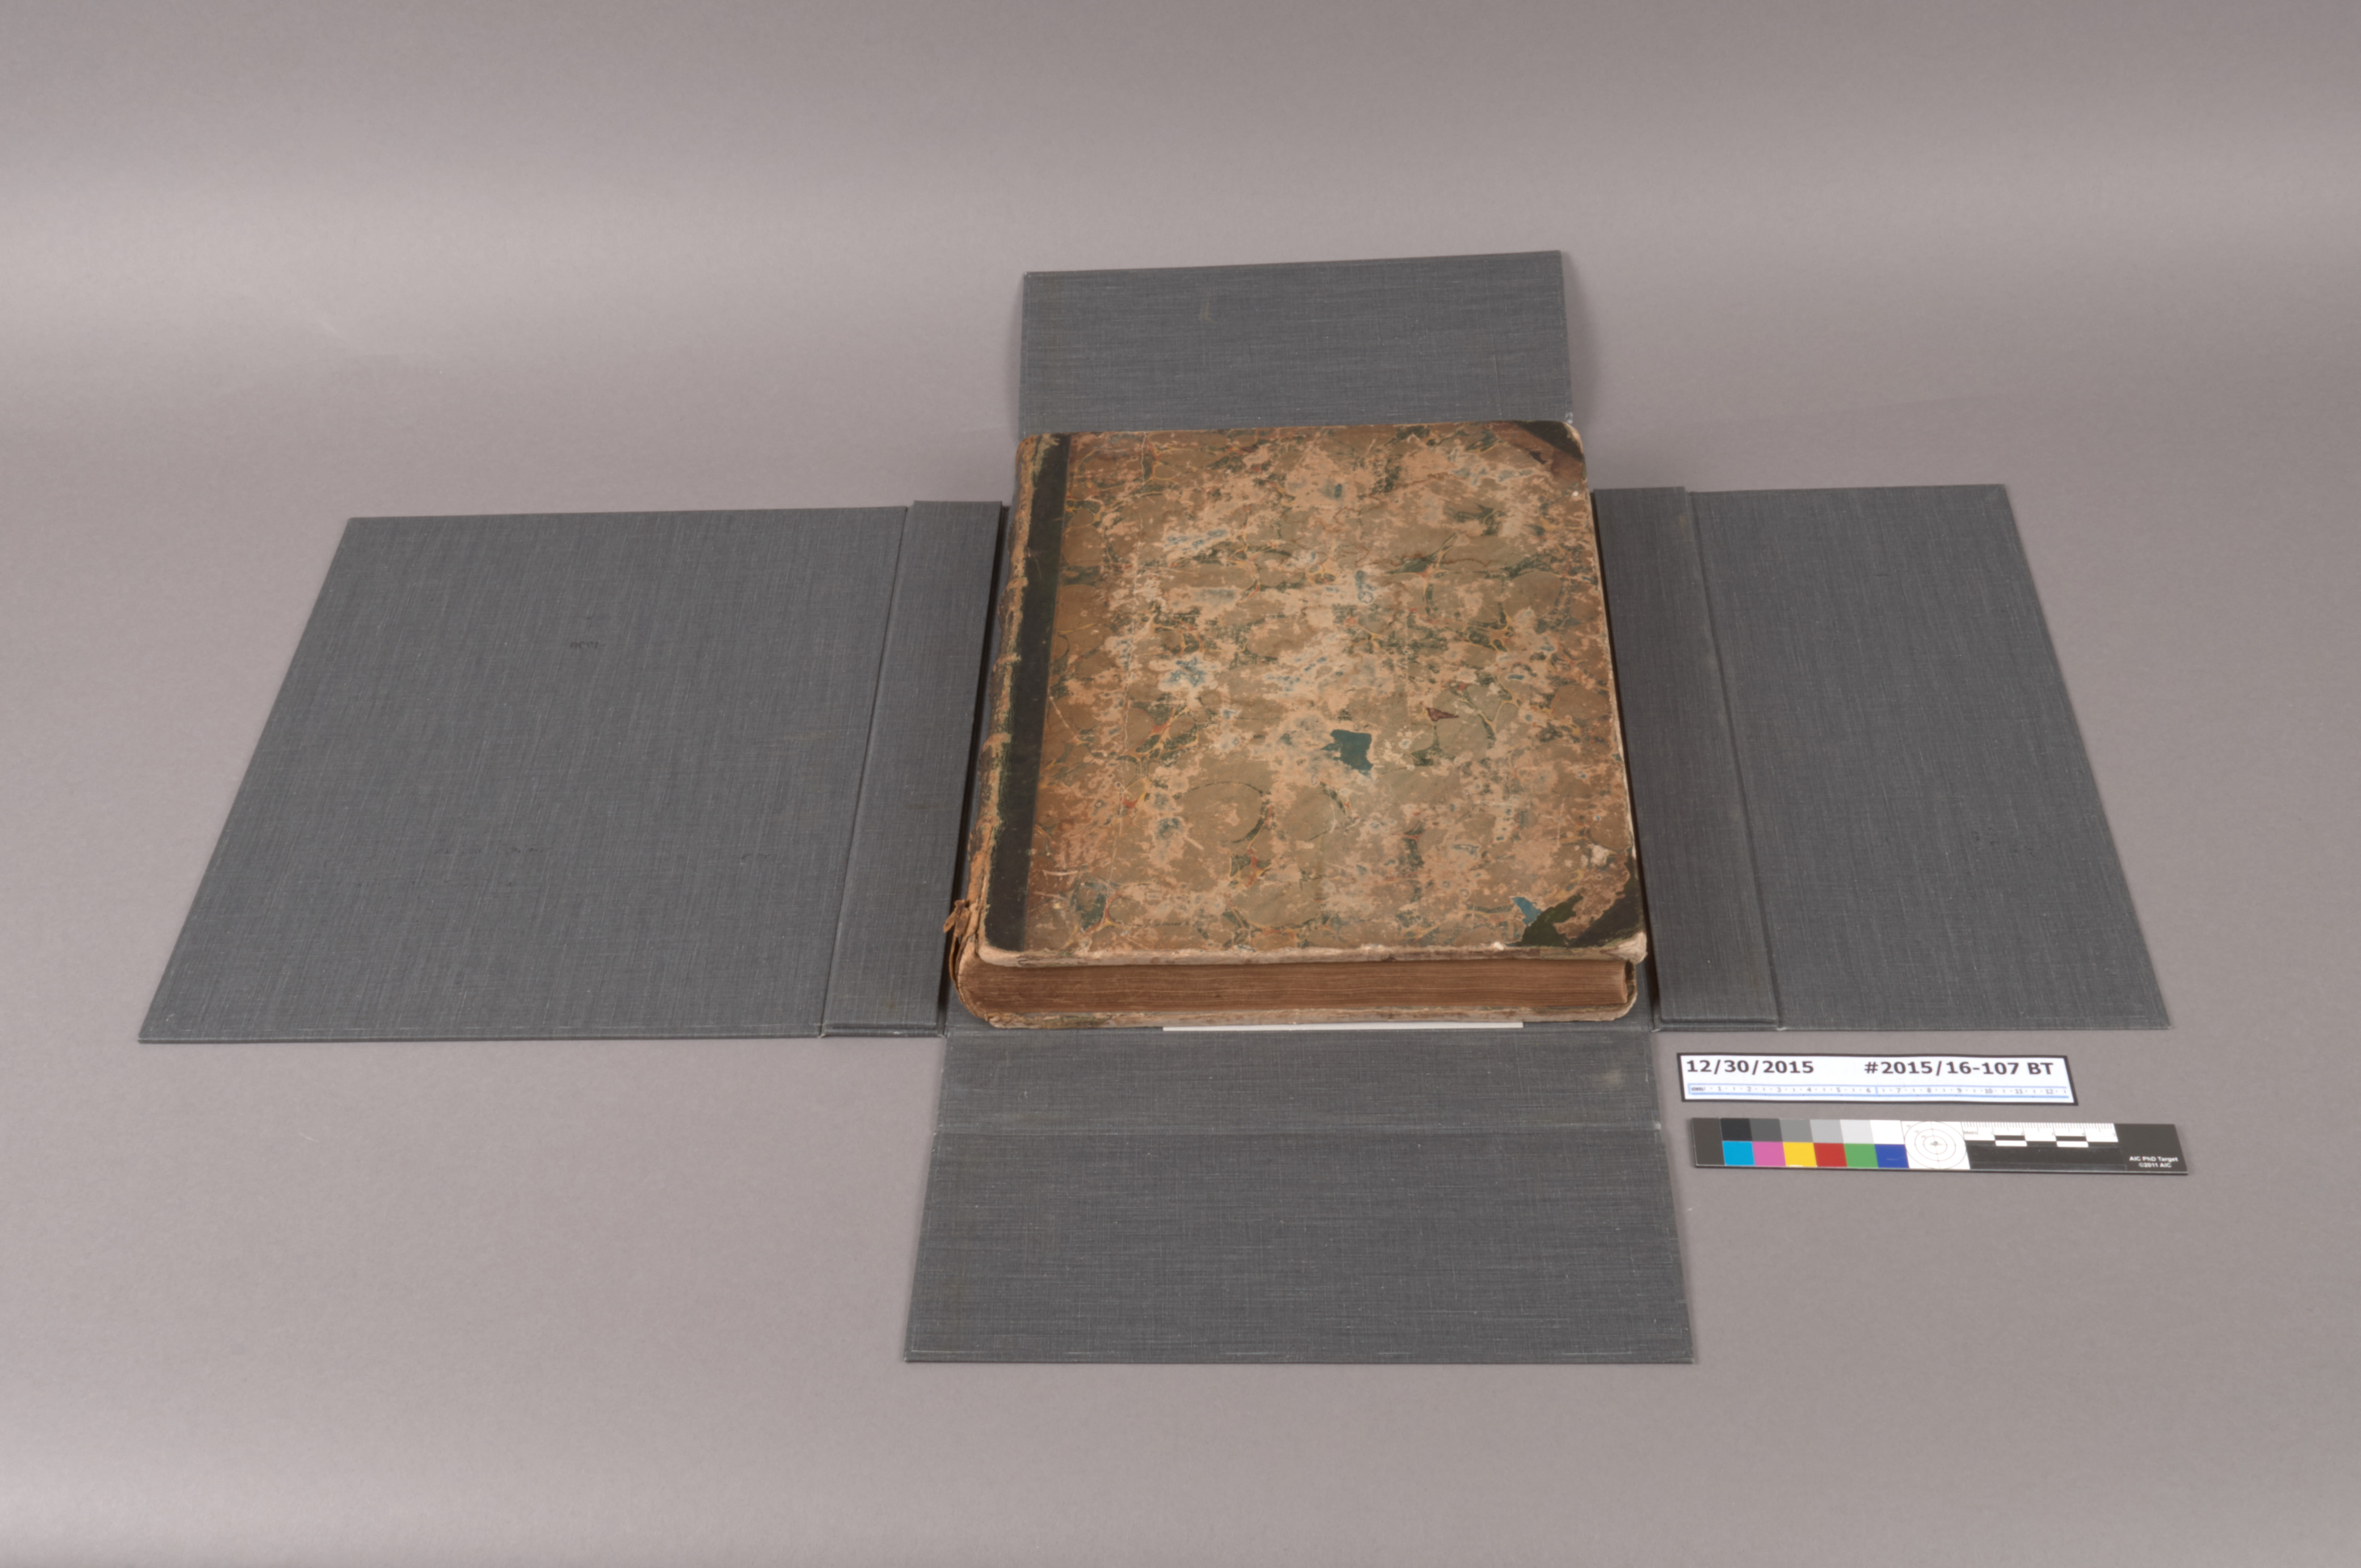
The front board of the second volume was nearly detached, hanging on by just a single thread! I began by carefully lifting the leather at the boards and spine to gain access to the textblock.
Volume 2 – Before and After
As with the first volume, new structural board attachment was created with bias-cut linen transverse spine linings. The spine was rebacked with toned Kozo paper and the original covering materials were re-adhered. The edges of the reback material were lined up with the edges of the existing leather, to visually blend the repair materials with the original covering.
Repairs to the interior of the text were kept to a minimum as well.
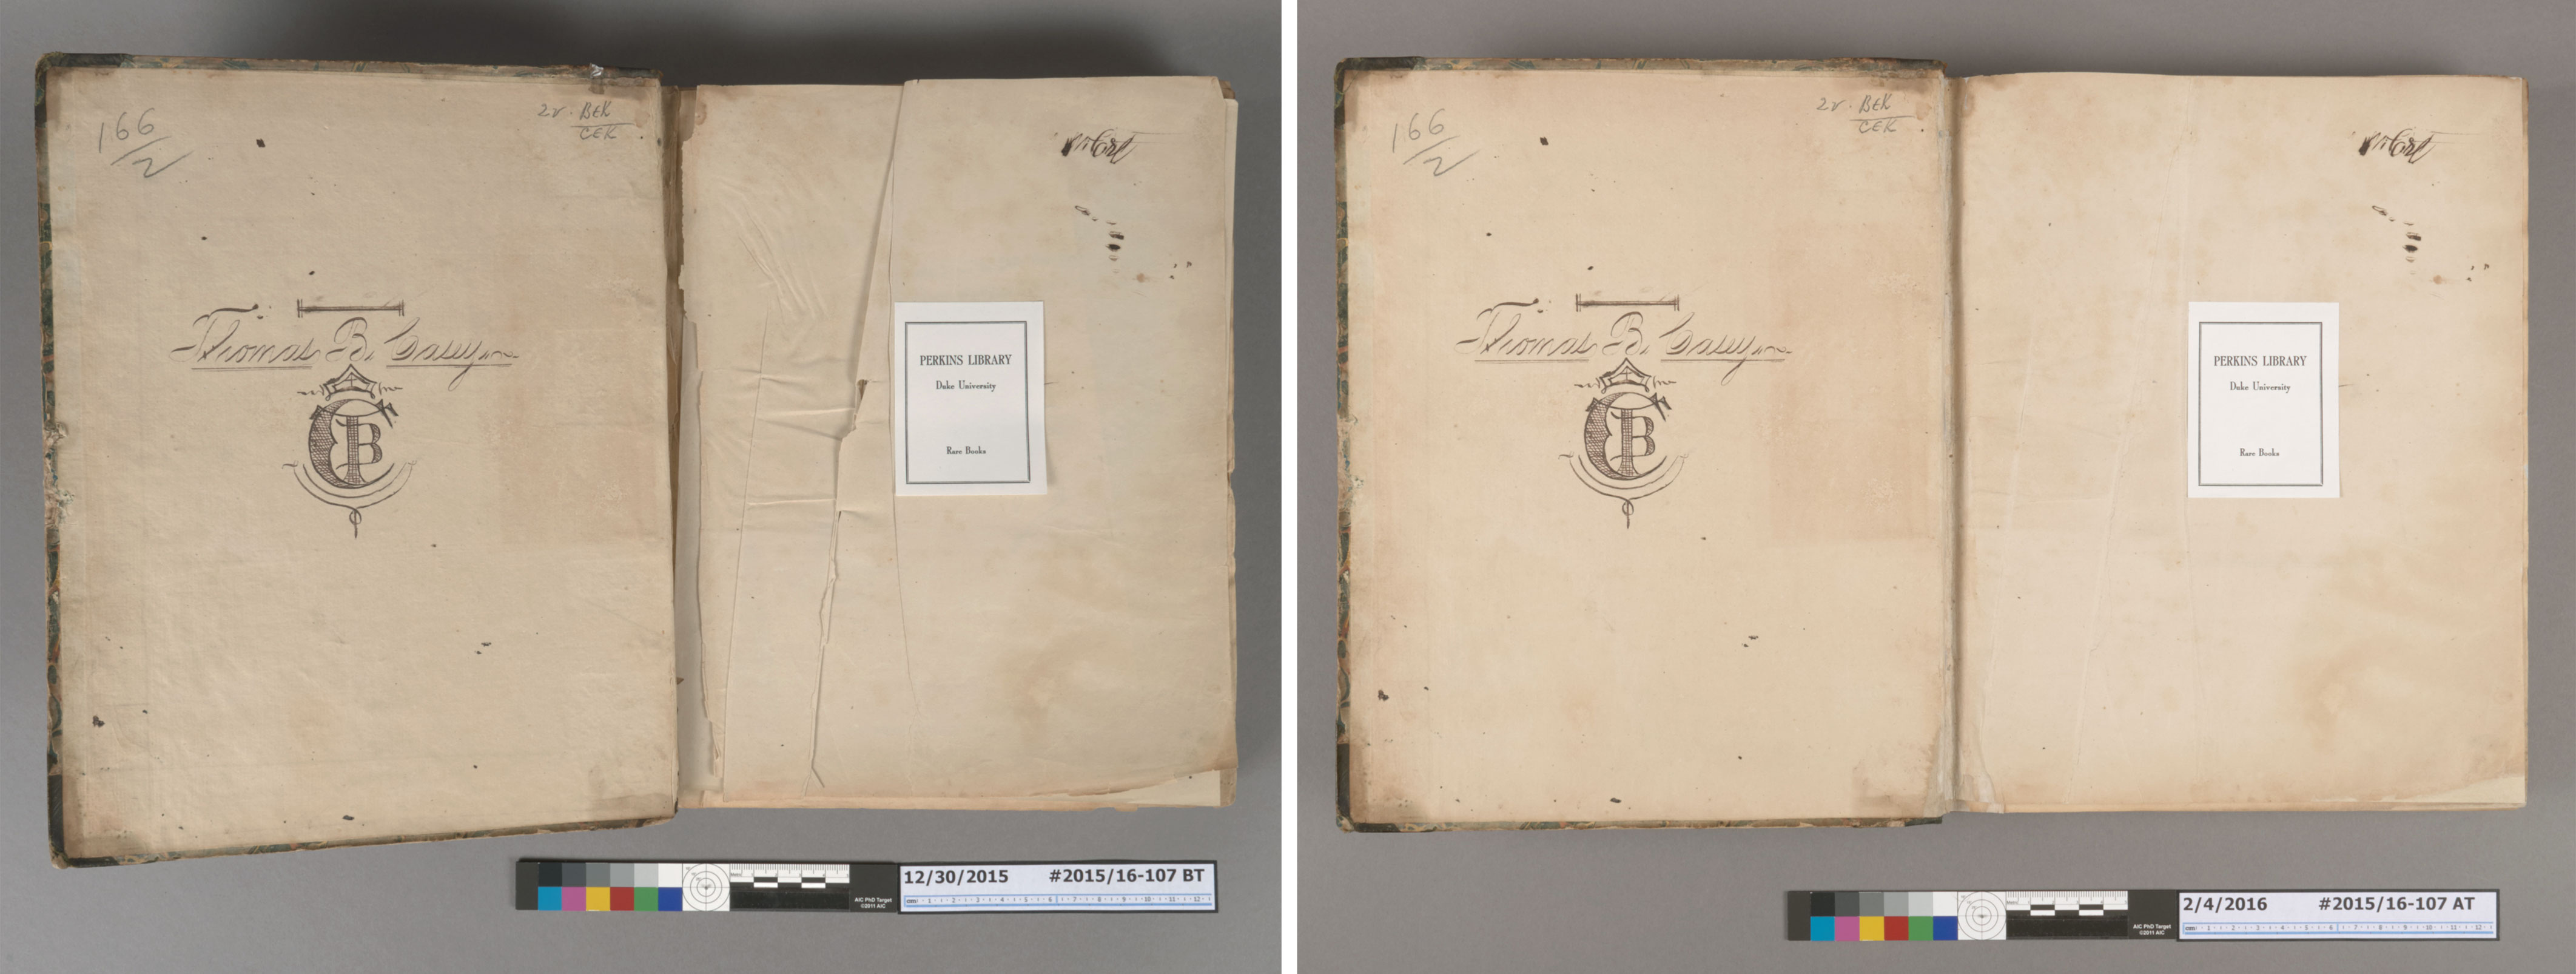
Volume 1 front endsheets – Before and After
It appears that the endsheets of both volumes had been replaced at some point with a thin wove paper. These new endsheets had become creased and were developing cracks and tears along the folds. Using local humidification techniques, the creases were flattened and tears were mended with thin Korean papers, toned to match.
The second volume features an interesting blank leaf with a large bookplate adhered to the recto.
Volume 2 bookplate – Before and After
The catalog record indicates that this item once belonged to Prince Lieven, the Russian ambassador to London from 1812-1834. This leaf is currently around 1/4″ shorter than the rest of the textblock and had a very poorly repaired tear along the head edge near the spine. During treatment, I was able to release this repaired piece and reattach it correctly along the tear. Strangely, when the torn corner was put back into place, the height of the leaf matched the rest of the textblock. My best guess is that the top edge of this leaf had become damaged at some point. Possibly when the new endsheets were added, this leaf was hastily repaired and trimmed down to have straight edges.
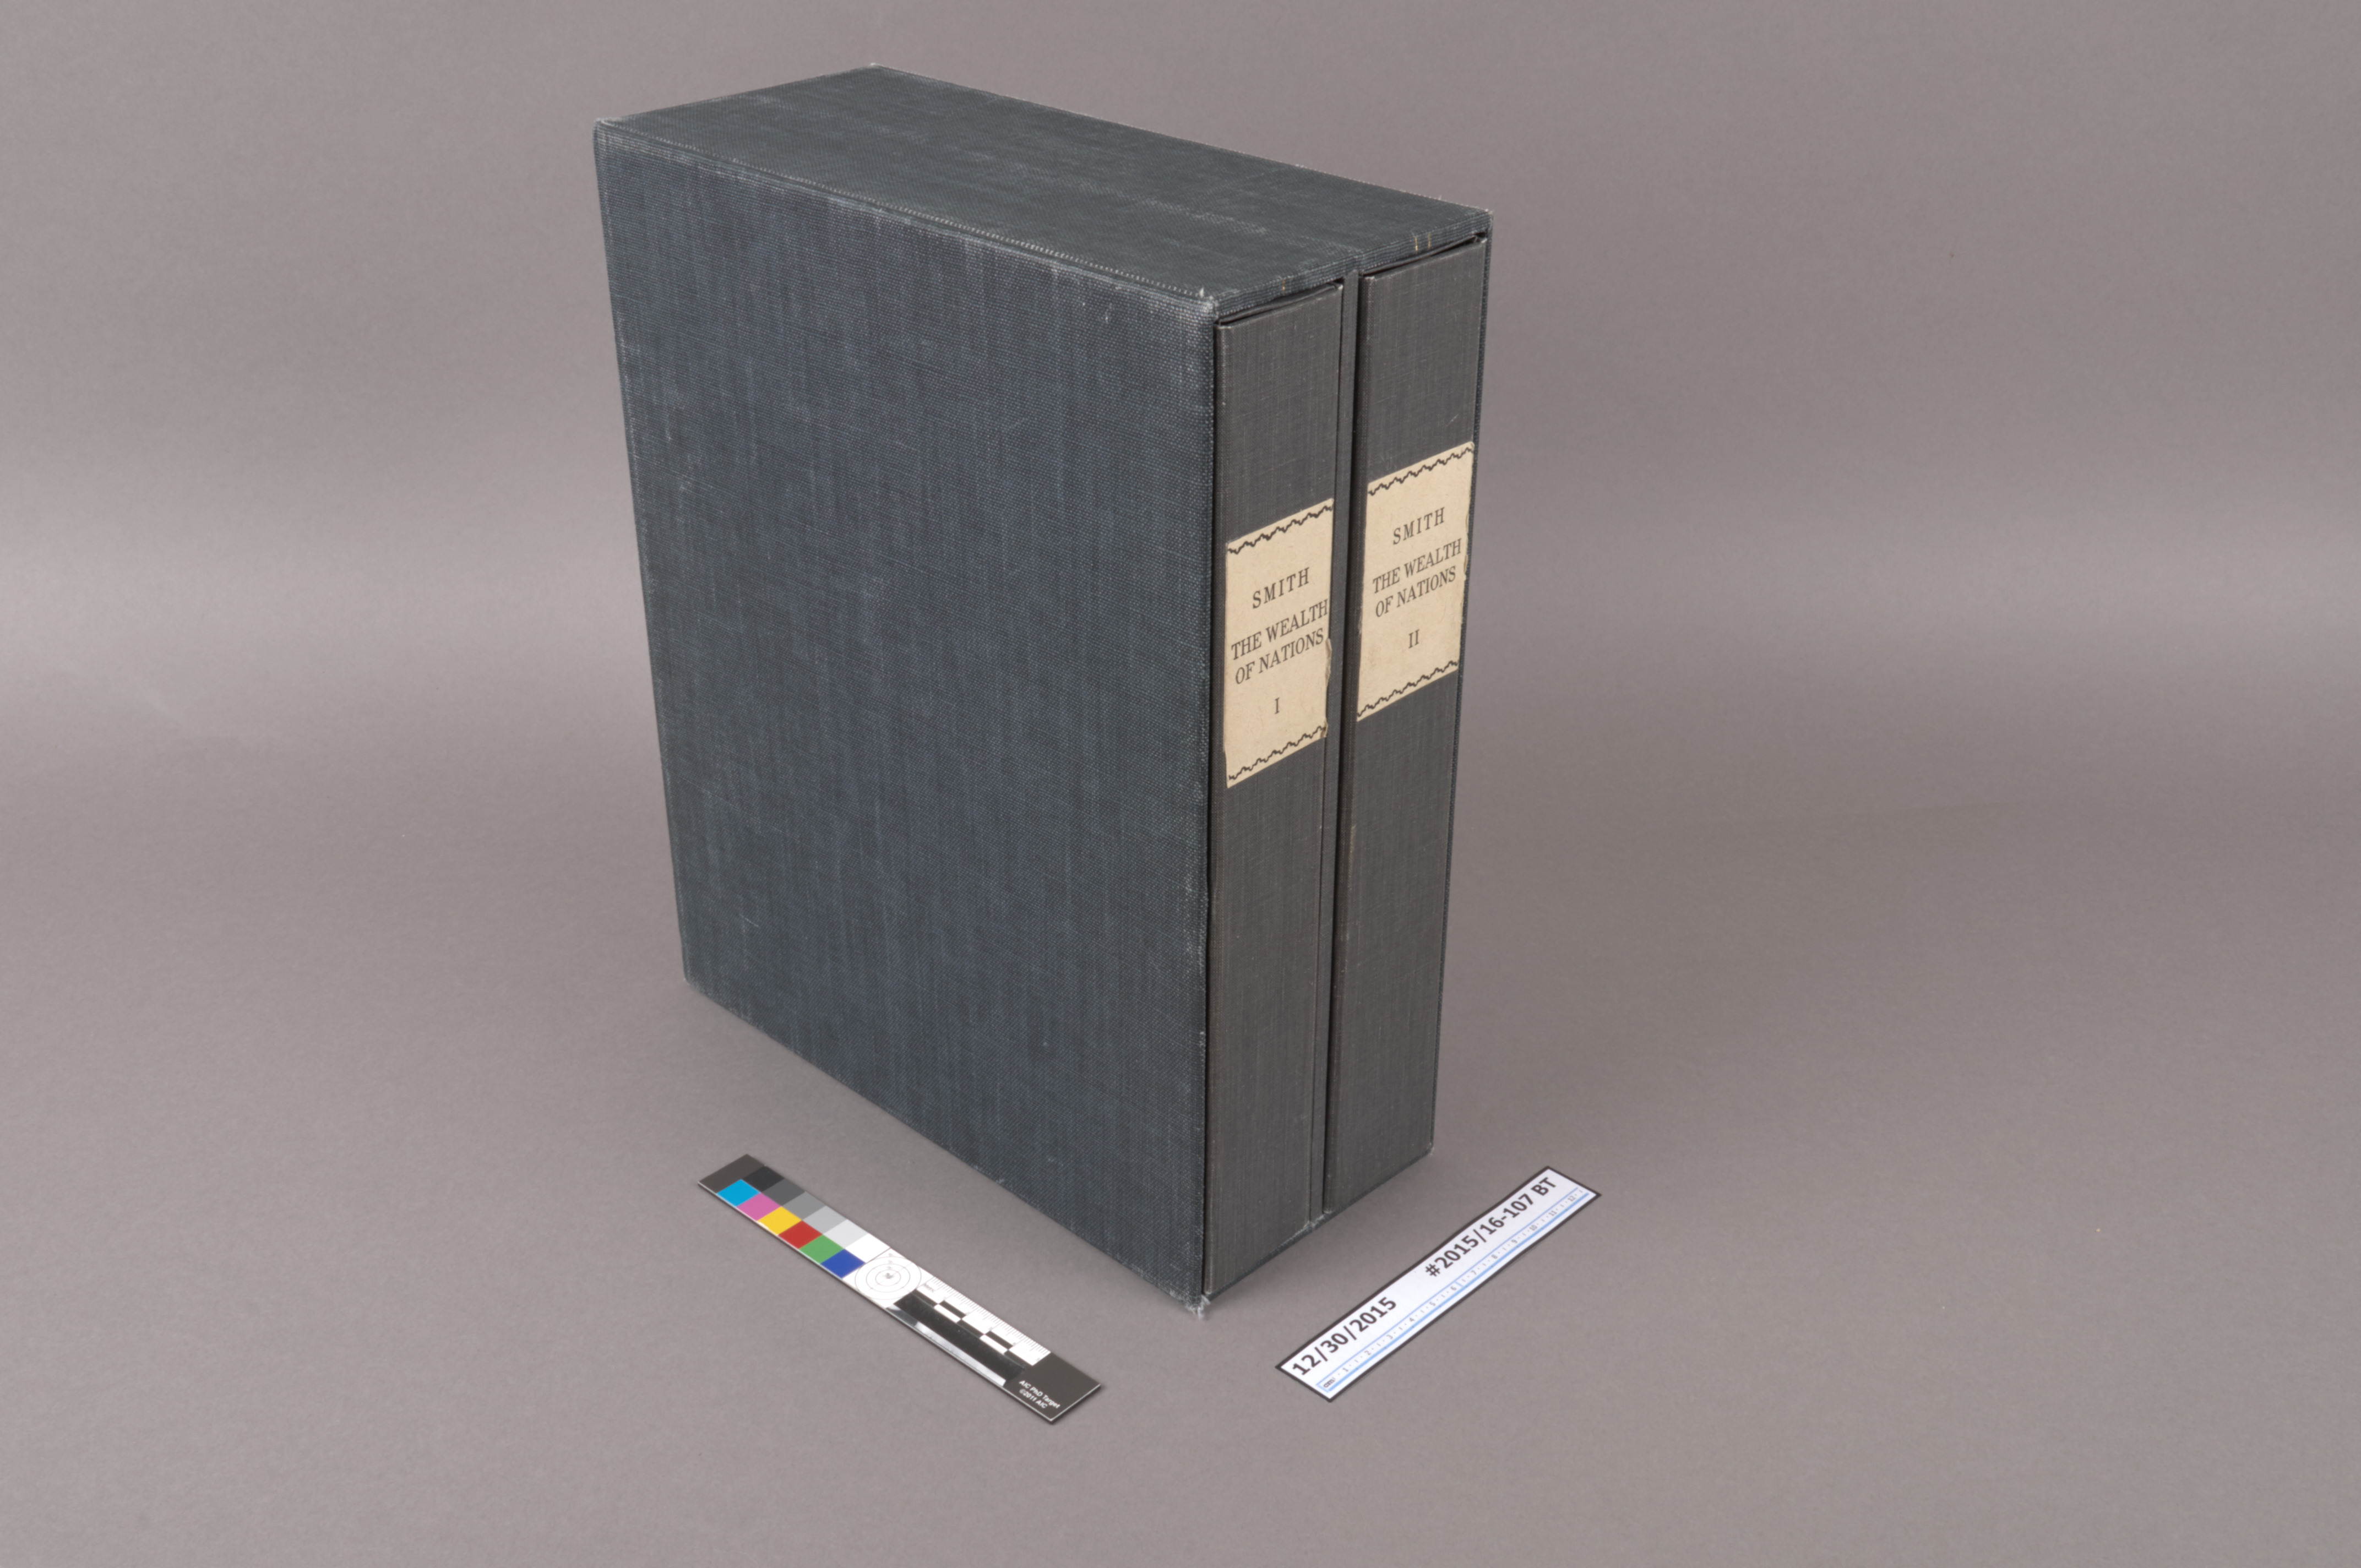
The last issue for me to deal with was the somewhat awkward enclosure. In more recent years, someone had constructed a double slipcase for the two volumes.
Double Slipcase: Before Treatment:
Each volume was also placed inside a cloth-covered 4-flap enclosure.
This was actually an enclosure solution that I had not seen before, and is a nice addition to my post about restraining enclosures. While the 4-flap does mitigate some of the dangers of a slipcase that a standard chemise cannot cover, having two books in one slipcase makes handling much more difficult. The case doesn’t have pull tabs or an easy way to extract a single book. The user must tip the entire set forward so that both books will slide out simultaneously. As you can imagine, this can be quite dangerous if the user isn’t being observant. Additionally, the 4-flap creates a very large footprint when open (see above). As these enclosures were made fairly recently and not artifactually significant, we discussed with the curator the option of replacing them with standard cloth-covered clamshell boxes.
With the new board attachment, consolidated covering materials, and simpler enclosures, Mr. Smith is ready for engagement with human hands again. Check back with our Exhibits Page to see when this and other exciting items from the collection go on display.
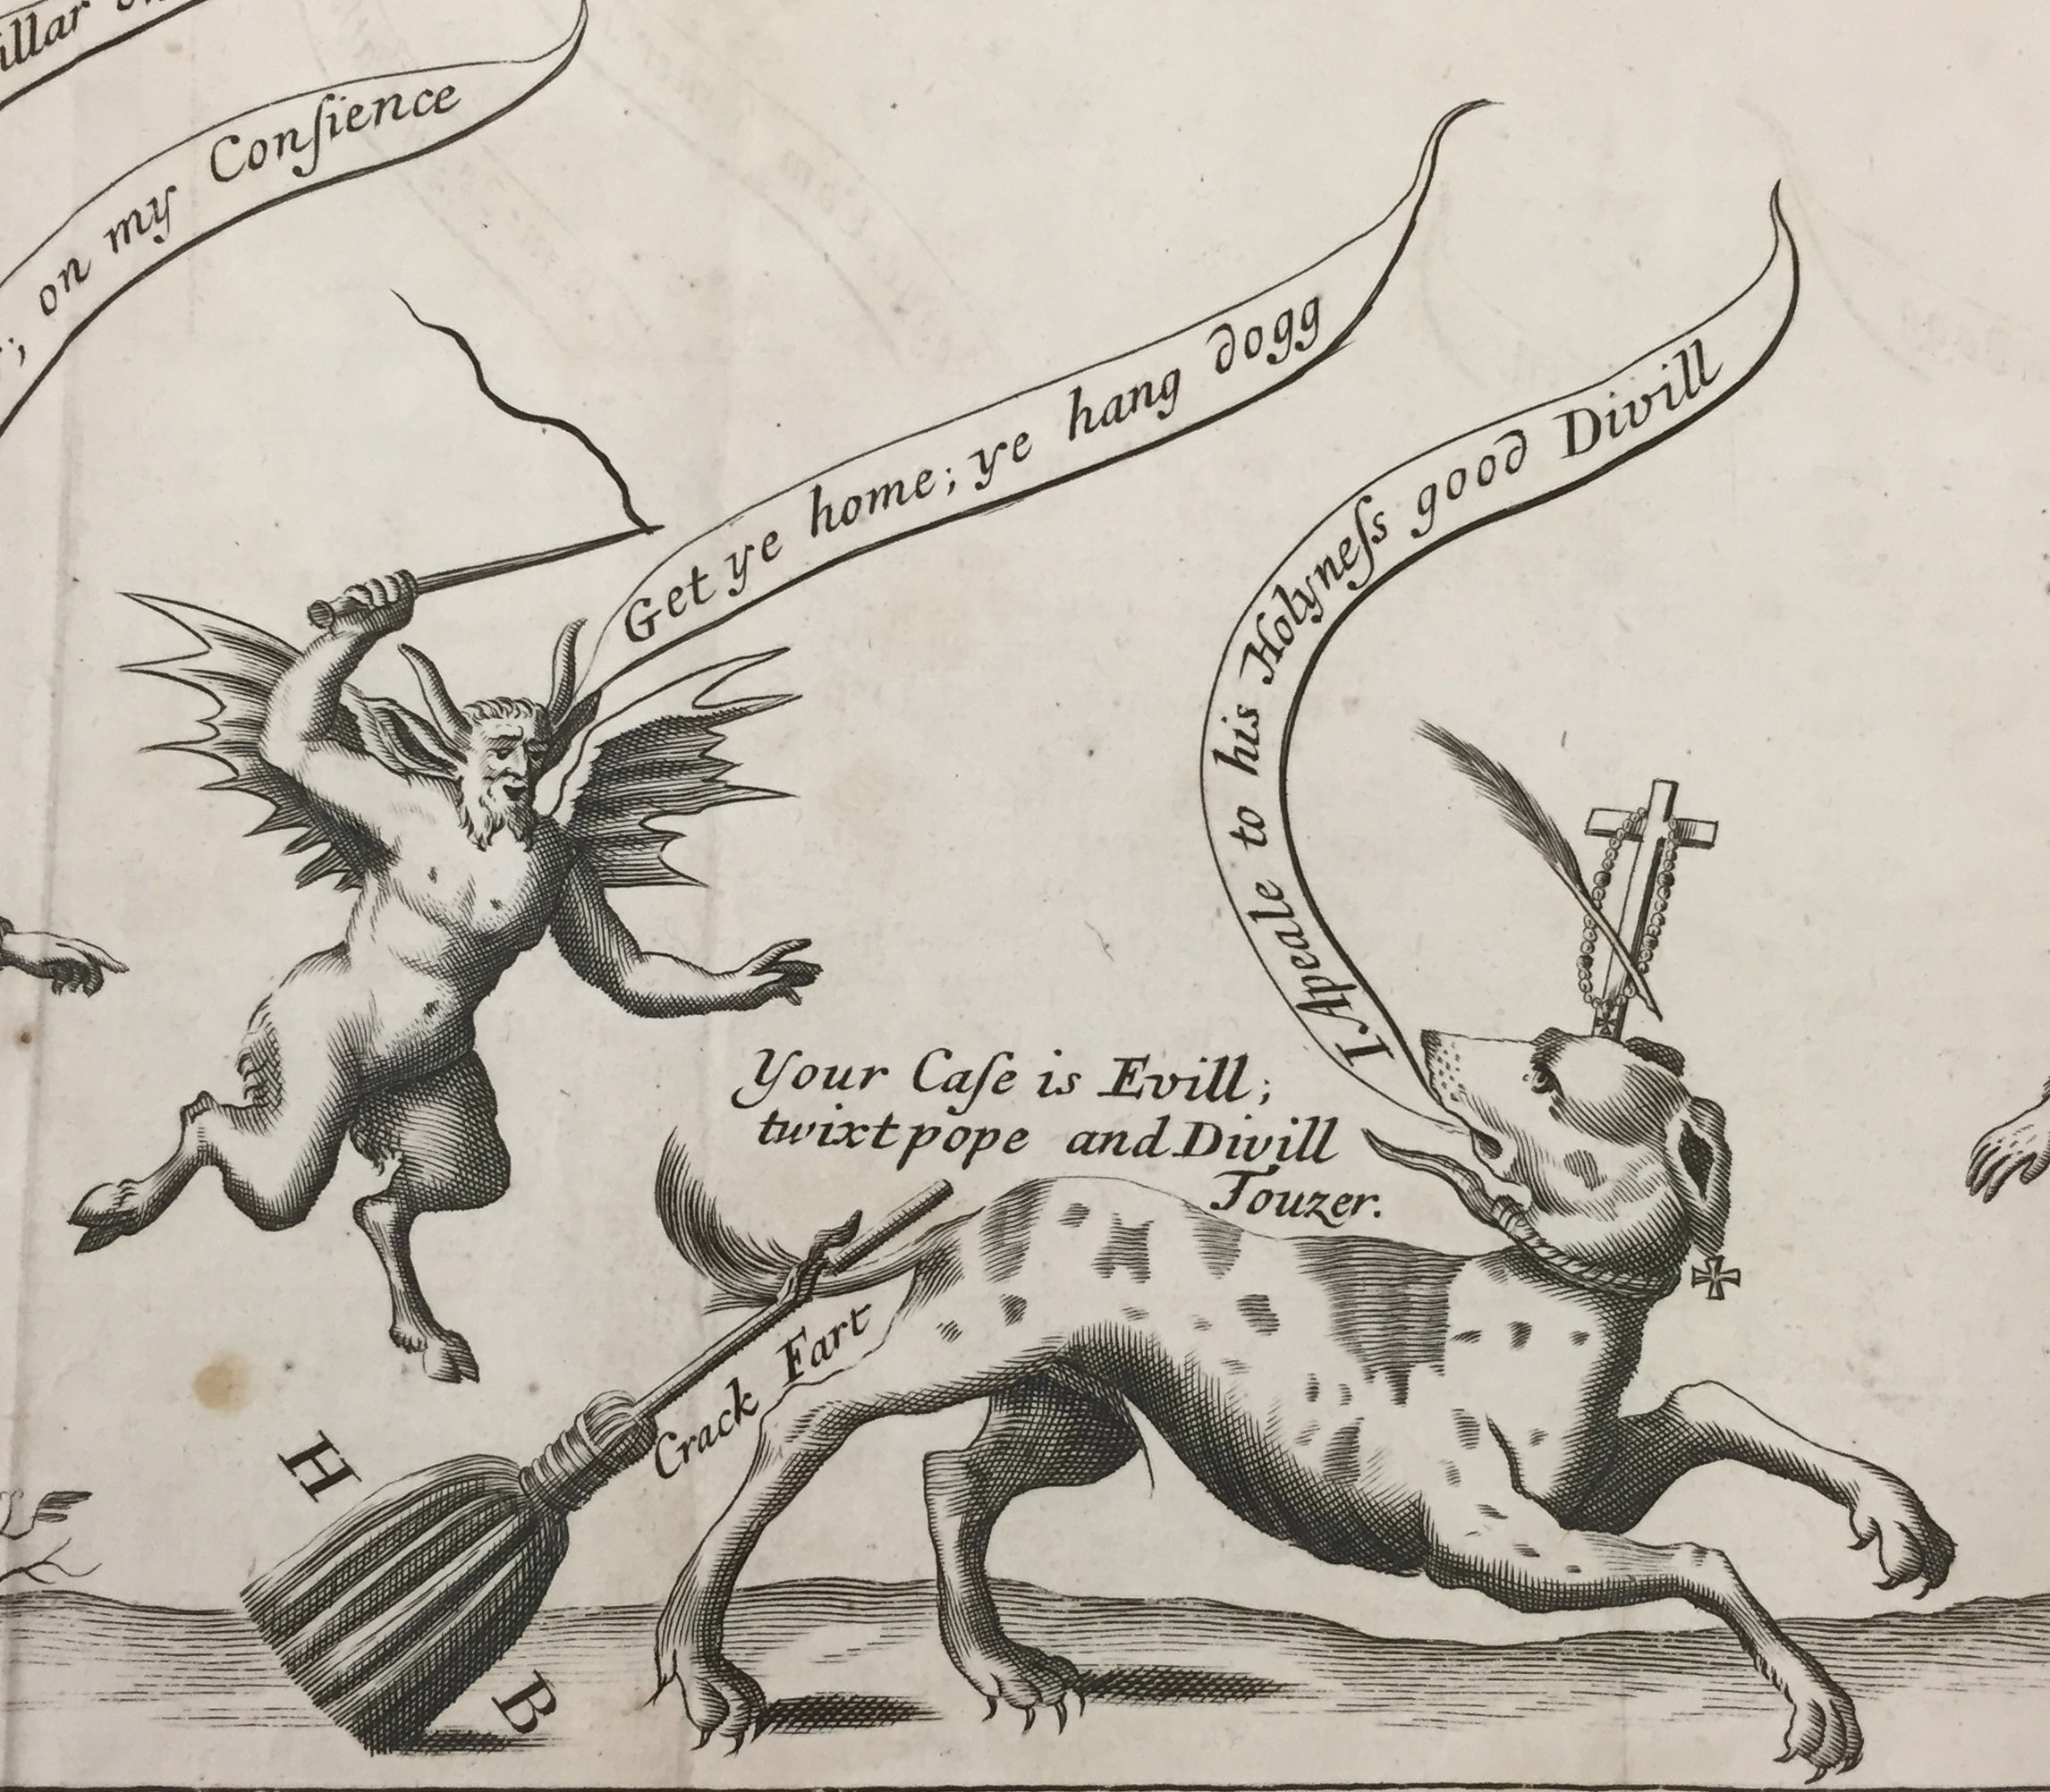
Last week a rather strange and amusing item came in for rehousing, prompting me to do a little research about its origin. This satirical engraving by Stephen College, fittingly titled Strange’s Case, Strangely Altered, was printed in 1680. The dog represents Robert L’Estrange, an English pamphleteer, fleeing the gallows from his alleged involvement in the “Popish Plot“. “Crack-Fart” is one of the many names given to L’Estrange. The British Museum has digitized their copy, which includes extensive contemporary annotations on the characters involved. Ironically, the printer was hanged and quartered for sedition a year later, while L’Estrange returned and was knighted in 1685 for helping to discredit the plot.