Category Archives: Equipment

Winter Cross-Training in the DPC

The Digital Production Center engages with various departments within the Libraries and across campus to preserve endangered media and create unique digital collections. We work especially closely with The Rubenstein Rare Book, Manuscript, & Special Collections Library, as they hold many of the materials that we digitize and archive on a daily basis. This collaboration requires a shared understanding of numerous media types and their special characteristics; awareness of potential conservation and preservation issues; and a working knowledge of digitization processes, logistics, and limitations.

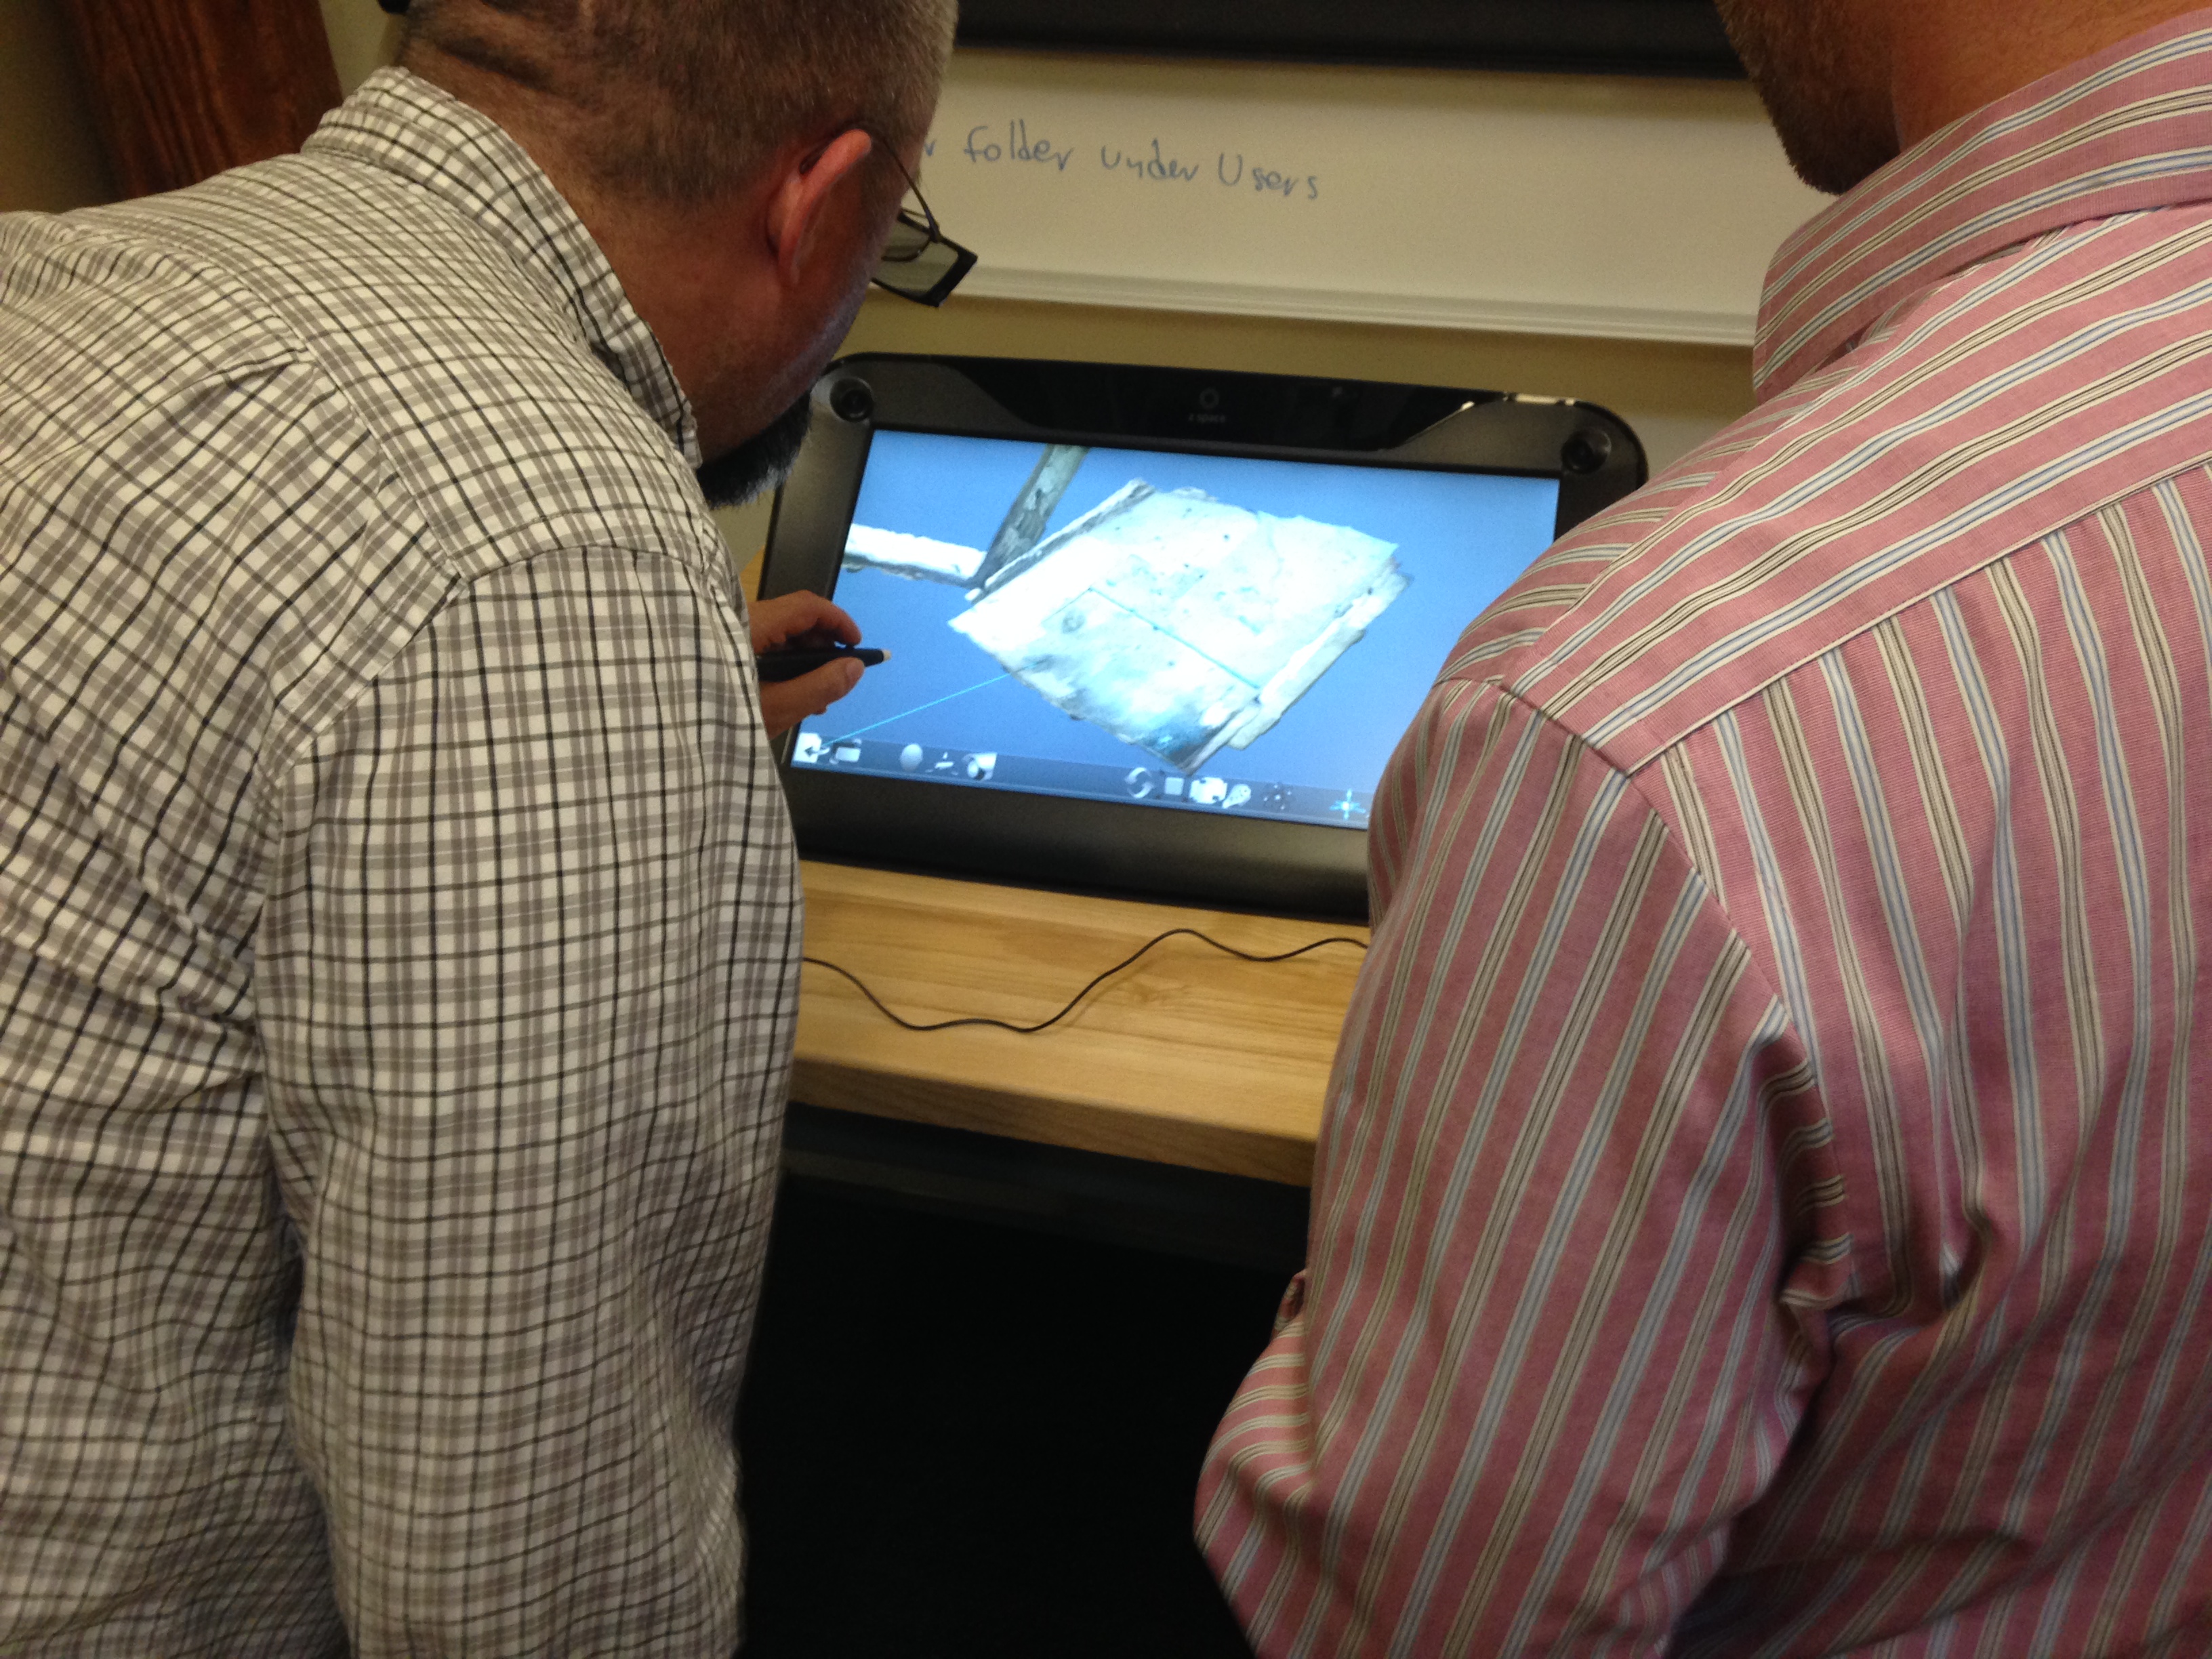
In order to facilitate this ongoing collaboration, we recently did a semester-long cross-training course with The Rubenstein’s Reproductions Manager, Megan O’Connell. Megan is one of our main points of contact for weekly patron requests, and we felt that this training would strengthen our ability to navigate tricky and time-sensitive digitization jobs heading into the future. The plan was for Megan to work with all three of our digitization specialists (audio, video, & still image) to get a combination of hands-on and observational learning opportunities.

IMG_1068

Still image comprises the bulk of our workload, so we decided to spend most of the training on these materials. “Still image” includes anything that we digitize via photographic or scanning technology, e.g. manuscripts, maps, bound periodicals, posters, photographs, slides, etc. We identified a group of uniquely challenging materials of this type and digitized one of each for hands-on training, including:

  • Bound manuscript – Most of these items cannot be opened more than 90 degrees. We stabilize them in a custom-built book cradle, capture the recto sides of the pages, then flip the book and capture the verso sides. The resulting files then have to be interleaved into the correct sequence.
  • Map, or other oversize item – These types of materials are often too large to capture in one single camera shot. Our setup allows us to take multiple shots (with the help of the camera being mounted on a sliding track) which we then stitch together into a seamless whole.
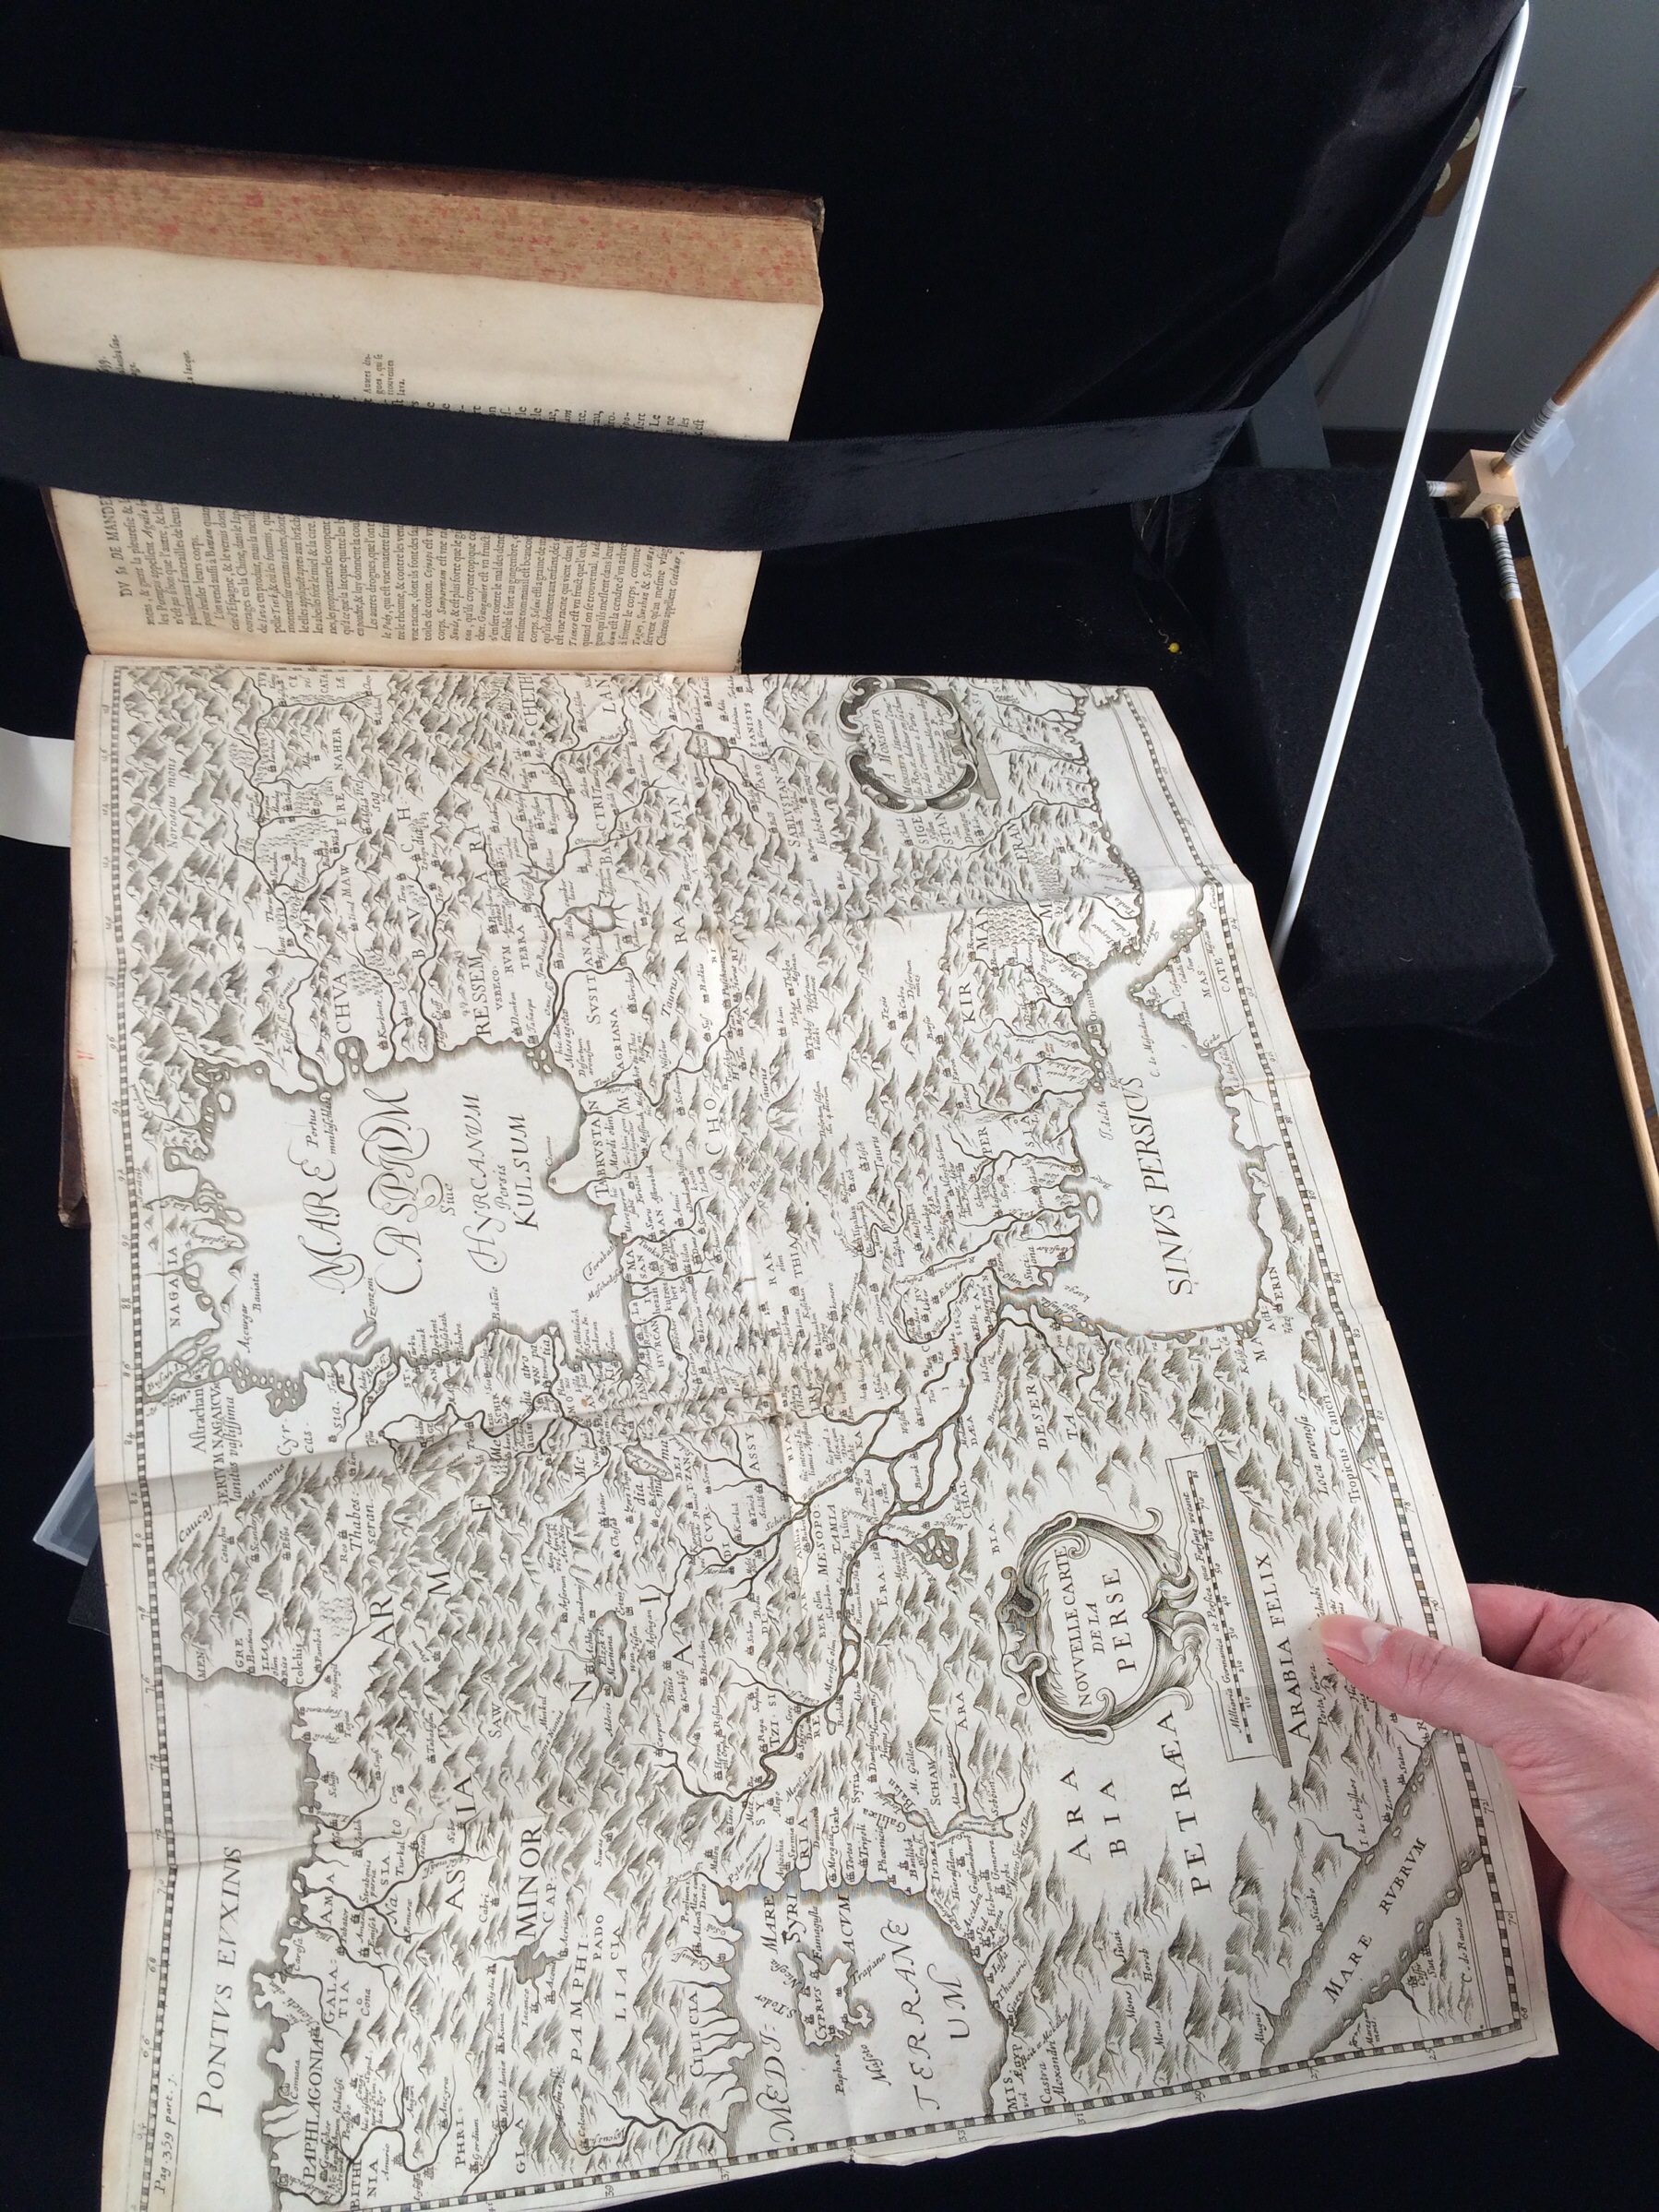
  • Item with texture or different item depths, e.g. a folded map, tipped into a book – It is often challenging to properly support these items and level the map so that it is all in focus within the camera’s depth of field.
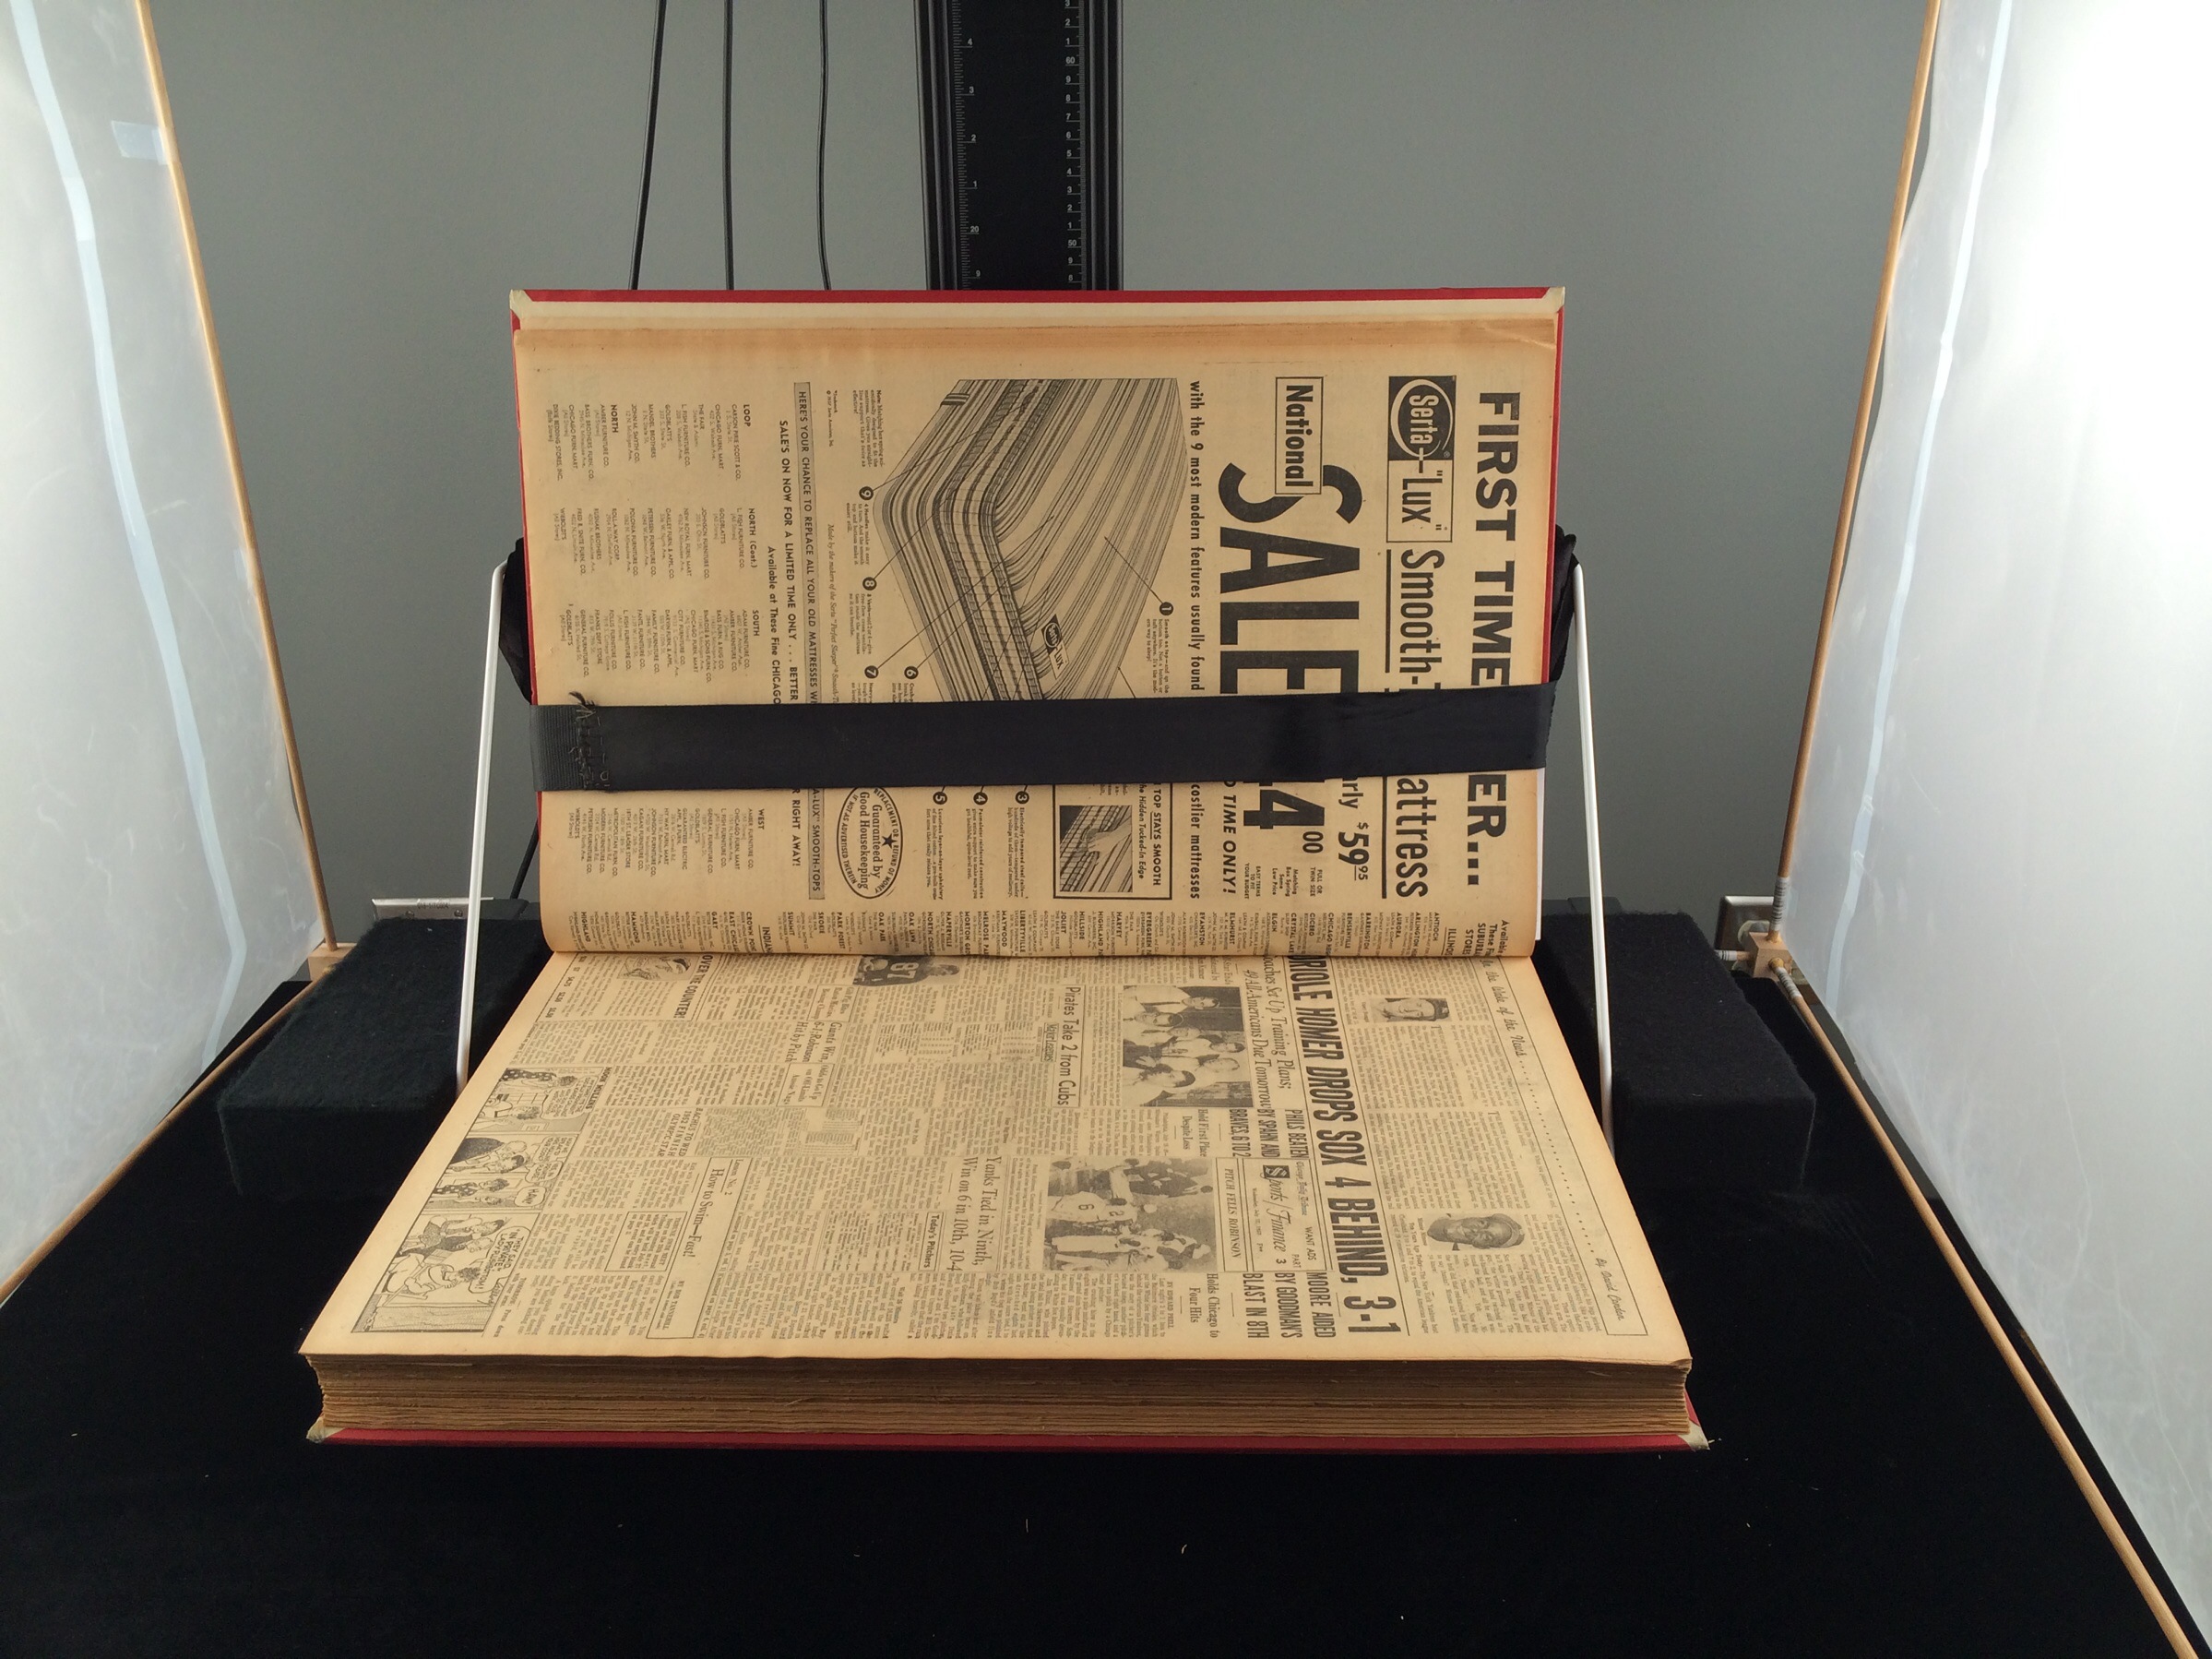
  • ANR volume – These are large, heavy volumes that typically contain older newspapers and periodicals. The paper can be very fragile and they have to be handled and supported carefully so as not to damage or tear the material.
  • Item with a tight binding w/ text that goes into the gutter – We do our best to capture all of the text, but it will sometimes appear to curve or disappear into the gutter in the resulting digital image.

IMG_1069

Working through this list with Megan, I was struck by the diversity of materials that we collect and digitize. The training process also highlighted the variety of tricks, techniques, and hacks that we employ to get the best possible digital transfers, given the limitations of the available technology and the materials’ condition. I came out of the experience with a renewed appreciation of the complexity of the digitization work we do in the DPC, the significance of the rare materials in the collection, and the excellent service that we are able to provide to researchers through the Rubenstein Library.

IMG_1065

Check out Megan’s blog post on the Devil’s Tale for more on the other media formats I wasn’t able to cover in the scope of this post.

Here’s to more collaboration across boundaries in the New Year!

IMG_1173

Digital Transitions Roundtable

In late October of this year, the Digital Production Center (along with many others in the Library) were busy developing budgets for FY 2015. We were asked to think about the needs of the department, where the bottlenecks were and possible new growth areas. We were asked to think big. The idea was to develop a grand list and work backwards to identify what we could reasonably ask for. While the DPC is able to digitize many types of materials and formats, such as audio and video, my focus is specifically still image digitization. So that’s what I focused on.dt-bc100-book

We serve many different parts of the Library and in order to accommodate a wide variety of requests, we use many different types of capture devices in the DPC: high-speed scanners, film scanners, overhead scanners and high-end cameras. The most heavily used capture device is the Phase One camera system. This camera system uses P65 60 MP digital back with a 72mm Schneider flat field lens. This enables us to capture high quality images at archival standards. The majority of material we digitize using this camera are bound volumes (most of them rare books from the David M. Rubenstein Library), but we also use this camera to digitize patron requests, which have increased significantly over the years (everything is expected to be digital it seems), oversized items, glass plate negatives, high-end photography collections and much more. It is no surprise that this camera is a bottleneck for still image production. In researching cameras to include in the budget, I was hard pressed to find another camera system that can compete with the Phase One camera. For over 5 years we have used Digital Transitions, a New York-based provider of high-end digital solutions, for our Phase One purchases and support. We have been very happy with the service, support and equipment we have purchased from them over the years, so I contacted them to inquire about new equipment on the horizon and pricing for upgrading our current system.captureone

New equipment they turned me onto is the BC100 book scanner. This scanner uses a 100° glass platen and two reprographic cameras to capture two facing pages at the same time. While there are other camera systems that use a similar two camera setup (most notably the Scribe, Kirtas and Atiz), the cameras and digital backs used with the BC100, as well as the CaptureOne software that drives the cameras, are more well suited for cultural heritage reproduction. Along with the new BC100, CaptureOne is now offering a new software package specifically geared toward the cultural heritage community for use with this new camera system. While inquiring about the new system, I was invited to attend a Cultural Heritage Round Table event that Digital Transitions was hosting.

This roundtable was focused on the new CaptureOne software for use with the BC100 and the specific needs of the cultural heritage community. I have always found the folks at Digital Transitions to be very professional, knowledgeable and helpful. The event they put together included Jacob Frost, Application Software R&D Manager for PhaseOne; Doug Peterson, Technical Support, Training, R&D at Digital Transitions; and Don Williams of Image Science Associates, Imaging Scientist. Don is also on the Still Image Digitization Advisory Board with the Federal Agencies Digitization Guidelines Initiative (FADGI), a collaborative effort by federal agencies to FADGI1define common guidelines, methods, and practices for digitizing historical content. They talked about the new features of the software, the science behind the software, the science behind the color technology and new information about the FADGI Still Image standard that we currently follow at the Library. I was impressed by the information provided and the knowledge shared, but what impressed me the most was the fact that the main reason Digital Transitions pulled this particular group of users and developers together was to ask us what the cultural heritage community needed from the new software. WHAT!? What we need from the software? I’ve been doing this work for about 15 years now and I think that’s the first time any software developer from any digital imaging company has asked our community specifically what we need. Don’t get me wrong, there is a lot of good software out there but usually the software comes “as is.” While it is fully functional, there are usually some work-arounds to get the software to do what I need it to do. We, as a community, spent about an hour drumming up ideas for software improvements and features.

While we still need to see follow-through on what we talked about, I am hopeful that some of the features we talked about will show up in the software. The software still needs some work to be truly beneficial (especially in post-production), but Phase One and Digital Transitions are definitely on to something.

Midnight in the Garden of Film and Video

A few weeks ago, archivists, engineers, students and vendors from across the globe arrived in the historic city of Savannah, GA for AMIA 2014. The annual conference for The Association of Moving Image Archivists is a gathering of professionals who deal with the challenge of preserving motion picture film and videotape content for future generations. Since today is Halloween, I must also point out that Savannah is a really funky city that is haunted! The downtown area is filled with weeping willow trees, well-preserved 19th century architecture and creepy cemeteries dating back to the U.S. Civil and Revolutionary wars. Savannah is almost as scary as a library budget meeting.

The bad moon rises over Savannah City Hall.

Since many different cultural heritage institutions are digitizing their collections for preservation and online access, it’s beneficial to develop universal file standards and best practices. For example, organizations like NARA and FADGI have contributed to the universal adoption of the 8-bit uncompressed TIFF file format for (non-transmissive) still image preservation. Likewise, for audio digitization, 24-bit uncompressed WAV has been universally adopted as the preservation standard. In other words, when it comes to still image and audio digitization, everyone is driving down the same highway. However, at AMIA 2014, it was apparent there are still many different roads being taken in regards to moving image preservation, with some potential traffic jams ahead. Are you frightened yet? You should be!

The smallest known film gauge: 3mm. Was it designed by ancient druids?
The smallest known film gauge: 3mm. Was it built by ancient druids?

Up until now, two file formats have been competing for dominance for moving image preservation: 10-bit uncompressed (.mov or .avi wrapper) vs. Motion JPEG2000 (MXF wrapper). The disadvantage of uncompressed has always been its enormous file size. Motion JPEG2000 incorporates lossless compression, which can reduce file sizes by 50%, but it’s expensive to implement, and has limited interoperability with most video software and players. At AMIA 2014, some were championing the use of a newer format, FFV1, a lossless codec that has compression ratios similar to JPEG2000, but is open source, and thus more widely adoptable. It is part of the FFmpeg software project. Adoption of FFV1 is growing, but many institutions are still heavily invested in 10-bit uncompressed or Motion JPEG2000. Which format will become the preservation standard, and which will become ghosts that haunt us forever?!?

Another emerging need is for content management systems that can store and provide public access to digitized video. The Hydra repository solution is being adopted by many institutions for managing preservation video files. In conjunction with Hydra, many are also adopting Avalon to provide public access for online viewing of video content. Like FFmpeg, both Hydra and Avalon are open source, which is part of their appeal. Others are building their own systems, catered specifically to their own needs, like The Museum of Modern Art. There are also competing metadata standards. For example, PBCore has been adopted by many public television stations, but is generally disliked by libraries. In fact, they find it really creepy!

A new print of Peter Pan was shown at AMIA 2014
A new print of Peter Pan was shown at AMIA 2014. That movie gave me nightmares as a child.

Finally, there is the thorny issue of copyright. Once file formats are chosen and delivery systems are in place, methods must be implemented to control access by only those intended, to protect copyright and hinder piracy. The Avalon Media System enables rights and access control to video content via guest passwords. The Library of Congress works around some of these these issues another way, by setting up remote viewing rooms in Washington, DC, which are connected via fiber-optic cable to their Audio-Visual Conservation Center in Culpeper, Va. Others, with more limited budgets, like Dino Everett at USC Cinematic Arts, watermark their video, upload it to sites like Vimeo, and implement temporary password protection, canceling the passwords manually after a few weeks. I mean, is there anything more frightening than a copyright lawsuit? Happy Halloween!

What’s DAT Sound?

My recent posts have touched on endangered analog audio formats (open reel tape and compact cassette) and the challenges involved in digitizing and preserving them.  For this installment, we’ll enter the dawn of the digital and Internet age and take a look at the first widely available consumer digital audio format:  the DAT (Digital Audio Tape).

IMG_0016

The DAT was developed by consumer electronics juggernaut Sony and introduced to the public in 1987.  While similar in appearance to the familiar cassette and also utilizing magnetic tape, the DAT was slightly smaller and only recorded on one “side.”  It boasted lossless digital encoding at 16 bits and variable sampling rates maxing out at 48 kHz–better than the 44.1 kHz offered by Compact Discs.  During the window of time before affordable hard disk recording (roughly, the 1990s), the DAT ruled the world of digital audio.

The format was quickly adopted by the music recording industry, allowing for a fully digital signal path through the recording, mixing, and mastering stages of CD production.  Due to its portability and sound quality, DAT was also enthusiastically embraced by field recordists, oral historians & interviewers, and live music recordists (AKA “tapers”):

tapers[Conway, Michael A., “Deadheads in the Taper’s section at an outside venue,” Grateful Dead Archive Online, accessed October 10, 2014, http://www.gdao.org/items/show/834556.]


However, the format never caught on with the public at large, partially due to the cost of the players and the fact that few albums of commercial music were issued on DAT [bonus trivia question:  what was the first popular music recording to be released on DAT?  see below for answer].  In fact, the recording industry actively sought to suppress public availability of the format, believing that the ability to make perfect digital copies of CDs would lead to widespread piracy and bootlegging of their product.  The Recording Industry Association of America (RIAA) lobbied against the DAT format and attempted to impose restrictions and copyright detection technology on the players.  Once again (much like the earlier brouhaha over cassette tapes and subsequent battle over mp3’s and file sharing) “home taping” was supposedly killing music.

By the turn of the millennium, CD burning technology had become fairly ubiquitous and hard disk recording was becoming more affordable and portable.  The DAT format slowly faded into obscurity, and in 2005, Sony discontinued production of DAT players.

In 2014, we are left with a decade’s worth of primary source audio tape (oral histories, interviews, concert and event recordings) that is quickly degrading and may soon be unsalvageable.  The playback decks (and parts for them) are no longer produced and there are few technicians with the knowledge or will to repair and maintain them.  The short-term answer to these problems is to begin stockpiling working DAT machines and doing the slow work of digitizing and archiving the tapes one by one.  For example, the Libraries’ Jazz Loft Project Records collection consisted mainly of DAT tapes, and now exists as digital files accessible through the online finding aid:  http://library.duke.edu/rubenstein/findingaids/jazzloftproject/.  A long-term approach calls for a survey of library collections to identify the number and condition of DAT tapes, and then for prioritization of these items as it may be logistically impossible to digitize them all.

And now, the answer to our trivia question:  in May 1988, post-punk icons Wire released The Ideal Copy on DAT, making it the first popular music recording to be issued on the new format.


On the Reels: Challenges in Digitizing Open Reel Audio Tape

The audio tapes in the recently acquired Radio Haiti collection posed a number of digitization challenges.  Some of these were discussed in this video produced by Duke’s Rubenstein Library:

In this post, I will use a short audio clip from the collection to illustrate some of the issues that we face in working with this particular type of analog media.

First, I present the raw digitized audio, taken from a tape labelled “Tambour Vaudou”:


As you can hear, there are a number of confusing and disorienting things going on there.  I’ll attempt to break these down into a series of discrete issues that we can diagnose and fix if necessary.

Tape Speed

Analog tape machines typically offer more than one speed for recording, meaning that you can change the rate at which the reels turn and the tape moves across the record or playback head.  The faster the speed, the higher the fidelity of the result.  On the other hand, faster speeds use more tape (which is expensive).  Tape speed is measured in “ips” (inches per second).  The tapes we work with were usually recorded at speeds of 3.75 or 7.5 ips, and our playback deck is set up to handle either of these.  We preview each tape before digitizing to determine what the proper setting is.

In the audio example above, you can hear that the tape speed was changed at around 10 seconds into the recording.  This accounts for the “spawn of Satan” voice you hear at the beginning.  Shifting the speed in the opposite direction would have resulted in a “chipmunk voice” effect.  This issue is usually easy to detect by ear.  The solution in this case would be to digitize the first 10 seconds at the faster speed (7.5 ips), and then switch back to the slower playback speed (3.75 ips) for the remainder of the tape.

The Otari MX-5050 tape machine

Volume Level and Background Noise

The tapes we work with come from many sources and locations and were recorded on a variety of equipment by people with varying levels of technical knowledge.  As a result, the audio can be all over the place in terms of fidelity and volume.  In the audio example above, the volume jumps dramatically when the drums come in at around 00:10.  Then you hear that the person making the recording gradually brings the level down before raising it again slightly.  There are similar fluctuations in volume level throughout the audio clip.  Because we are digitizing for archival preservation, we don’t attempt to make any changes to smooth out the sometimes jarring volume discrepancies across the course of a tape.  We simply find the loudest part of the content, and use that to set our levels for capture.  The goal is to get as much signal as possible to our audio interface (which converts the analog signal to digital information that can be read by software) without overloading it.  This requires previewing the tape, monitoring the input volume in our audio software, and adjusting accordingly.

This recording happens to be fairly clean in terms of background noise, which is often not the case.  Many of the oral histories that we work with were recorded in noisy public spaces or in homes with appliances running, people talking in the background, or the subject not in close enough proximity to the microphone.  As a result, the content can be obscured by noise.  Unfortunately there is little that can be done about this since the problem is in the recording itself, not the playback.  There are a number of hum, hiss, and noise removal tools for digital audio on the market, but we typically don’t use these on our archival files.  As mentioned above, we try to capture the source material as faithfully as possible, warts and all.  After each transfer, we clean the tape heads and all other surfaces that the tape touches with a Q-tip and denatured alcohol.  This ensures that we’re not introducing additional noise or signal loss on our end.

qtip

Splices

While cleaning the Radio Haiti tapes (as detailed in the video above), we discovered that many of the tapes were comprised of multiple sections of tape spliced together.  A splice is simply a place where two different pieces of audio tape are connected by a piece of sticky tape (much like the familiar Scotch tape that you find in any office).  This may be done to edit together various content into a seamless whole, or to repair damaged tape.  Unfortunately, the sticky tape used for splicing dries out over time, becomes brittle, and loses it’s adhesive qualities.  In the course of cleaning and digitizing the Radio Haiti tapes, many of these splices came undone and had to be repaired before our transfers could be completed.

Tape ready for splicing

Our playback deck includes a handy splicing block that holds the tape in the correct position for this delicate operation.  First I use a razor blade to clean up any rough edges on both ends of the tape and cut it to the proper 45 degree angle.  The splicing block includes a groove that helps to make a clean and accurate cut.  Then I move the two pieces of tape end to end, so that they are just touching but not overlapping.  Finally I apply the sticky splicing tape (the blue piece in the photo below) and gently press on it to make sure it is evenly and fully attached to the audio tape.  Now the reel is once again ready for playback and digitization.  In the “Tambour Vaudou” audio clip above, you may notice three separate sections of content:  the voice at the beginning, the drums in the middle, and the singing at the end.  These were three pieces of tape that were spliced together on the original reel and that we repaired right here in the library’s Digital Production Center.

A finished splice.  Note that the splice is made on the shiny back of the tape, not on the matte side that audio signal is encoded on.
A finished splice. Note that the splice is made on the shiny back of the tape, not on the matte side that audio is recorded on.


These are just a few of many issues that can arise in the course of digitizing a collection of analog open reel audio tapes.  Fortunately, we can solve or mitigate most of these problems, get a clean transfer, and generate a high-quality archival digital file.  Until next time…keep your heads clean, your splices intact, and your reels spinning!


Digitization Details: Thunderbolts, Waveforms & Black Magic

The technology for digitizing analog videotape is continually evolving. Thanks to increases in data transfer-rates and hard drive write-speeds, as well as the availability of more powerful computer processors at cheaper price-points, the Digital Production Center recently decided to upgrade its video digitization system. Funding for the improved technology was procured by Winston Atkins, Duke Libraries Preservation Officer. Of all the materials we work with in the Digital Production Center, analog videotape has one of the shortest lifespans. Thus, it is high on the list of the Library’s priorities for long-term digital preservation. Thanks, Winston!

thunderbolt_speed_comparision
Thunderbolt is leaving USB in the dust.

Due to innovative design, ease of use, and dominance within the video and filmmaking communities, we decided to go with a combination of products designed by Apple Inc., and Blackmagic Design. A new computer hardware interface recently adopted by Apple and Blackmagic, called Thunderbolt, allows the the two companies’ products to work seamlessly together at an unprecedented data-transfer speed of 10 Gigabits per second, per channel. This is much faster than previously available interfaces such as Firewire and USB. Because video content incorporates an enormous amount of data, the improved data-transfer speed allows the computer to capture the video signal in real time, without interruption or dropped frames.

analog_to_sdi
Blackmagic design converts the analog video signal to SDI (serial digital interface).

Our new data stream works as follows. Once a tape is playing on an analog videotape deck, the output signal travels through an Analog to SDI (serial digital interface) converter. This converts the content from analog to digital. Next, the digital signal travels via SDI cable through a Blackmagic SmartScope monitor, which allows for monitoring via waveform and vectorscope readouts. A veteran television engineer I know will talk to you for days regarding the physics of this, but, in layperson terms, these readouts let you verify the integrity of the color signal, and make sure your video levels are not too high (blown-out highlights) or too low (crushed shadows). If there is a problem, adjustments can be made via analog video signal processor or time-base corrector to bring the video signal within acceptable limits.

waveform
Blackmagic’s SmartScope allows for monitoring of the video’s waveform. The signal must stay between 0 and 700 (left side) or clipping will occur, which means you need to get that videotape to the emergency room, STAT!

Next, the video content travels via SDI cable to a Blackmagic Ultrastudio interface, which converts the signal from SDI to Thunderbolt, so it can now be recognized by a computer. The content then travels via Thunderbolt cable to a 27″ Apple iMac utilizing a 3.5 GHz Quad-core processor and NVIDIA GeForce graphics processor. Blackmagic’s Media Express software writes the data, via Thunderbolt cable, to a G-Drive Pro external storage system as a 10-bit, uncompressed preservation master file. After capture, editing can be done using Apple’s Final Cut Pro or QuickTime Pro. Compressed Mp4 access derivatives are then batch-processed using Apple’s Compressor software, or other utilities such as MPEG-Streamclip. Finally, the preservation master files are uploaded to Duke’s servers for long-term storage. Unless there are copyright restrictions, the access derivatives will be published online.

bob_hope
Video digitization happens in real time. A one-hour tape is digitized in, well, one hour, which is more than enough Bob Hope jokes for anyone.

Digitization Details: Before We Push the “Scan” Button

The Digital Production Center at the Perkins Library has a clearly stated mission to “create digital captures of unique, valuable, or compelling primary resources for the purpose of preservation, access, and publication.”  Our mission statement goes on to say, “Our operating principle is to achieve consistent results of a measurable quality. We plan and perform our work in a structured and scalable way, so that our results are predictable and repeatable, and our digital collections are uniform.”

That’s a mouthful!

TV0198

What it means is the images have to be consistent not only from image to image within a collection but also from collection to collection over time.  And if that isn’t complex enough this has to be done using many different capture devices.  Each capture device has its own characteristics, which record and reproduce color in different ways.

How do we produce consistent images?

There are many variables to consider when solving the puzzle of “consistent results of a measurable quality.”  First, we start with the viewing environment, then move to monitor calibration and profiling, and end with capture device profiling.  All of these variables play a part in producing consistent results.

Full spectrum lighting is used in the Digital Production Center to create a neutral environment for viewing the original material.  Lighting that is not full spectrum often has a blue, magenta, green or yellow color shift, which we often don’t notice because our eyes are able to adjust effortlessly.  In the image below you can see the difference between tungsten lighting and neutral lighting.

Tungsten light (left) Neutral light (right)

Our walls are also painted 18 percent gray, which is neutral, so that no color is reflected from the walls onto the image while comparing it to the digital image.

Now that we have a neutral viewing environment, the next variable to consider is the computer monitors used to view our digitized images.  We use a spectrophotometer (straight out of the Jetsons, right?) made by xrite to measure the color accuracy, luminance and contrast of the monitor.  This hardware/software combination uses the spectrophotometer as it’s attached to the computer screen to read the brightness (luminance), contrast, white point and gamma of your monitor and makes adjustments for optimal viewing.  This is called monitor calibration.  The software then displays a series of color patches with known RGB values which the spectrophotometer measures and records the difference.  The result is an icc display profile.  This profile is saved to your operating system and is used to translate colors from what your monitor natively produces to a more accurate color representation.

Now our environment is neutral and our monitor is calibrated and profiled.  The next step in the process is to profile your capture device, whether it is a high-end digital scan back like the Phase One or BetterLight or an overhead scanner like a Zeutschel. From Epson flatbed scanners to Nikon slide scanners, all of these devices can be calibrated in the same way.  With all of the auto settings on your scanner turned off, a color target is digitized on the device you wish to calibrate.  The swatches on the color target are known values similar to the series of color patches used for profiling the monitor.  The digitized target is fed to the profiling software.  Each patch is measured and compared against its known value.  The differences are recorded and the result is an icc device profile.

Now that we have a neutral viewing environment for viewing the original material, our eyes don’t need to compensate for any color shift from the overhead lights or reflection from the walls.  Our monitors are calibrated/profiled so that the digitized images display correctly and our devices are profiled so they are able to produce consistent images regardless of what brand or type of capture device we use.

Gretag Macbeth color checker

During our daily workflow we a Gretag Macbeth color checker to measure the output of the capture devices every day before we begin digitizing material to verify that the device is still working properly.

All of this work is done before we push the “scan” button to ensure that our results are predictable and repeatable, measurable and scalable.  Amen.

Can You (Virtually) Dig It?

A group from Duke Libraries recently visited Dr. Maurizio Forte’s Digital Archaeology Initiative (a.k.a. “Dig@Lab”) to learn more about digital imaging of three-dimensional objects and to explore opportunities for collaboration between the lab and the library.

2014-04-29 15.37.39
These glasses and stylus allow you to disassemble the layers of a virtual site and rearrange and resize each part.

Dr. Forte (a Professor of Classical Studies, Art, and Visual Studies) and his colleagues were kind enough to demonstrate how they are using 3D imaging technology to “dig for information” in simulated archaeological sites and objects.  Their lab is a fascinating blend of cutting-edge software and display interfaces, such as the Unity 3D software being used in the photo above, and consumer video gaming equipment (recognize that joystick?).

Zeke tries not to laugh as Noah dons the virtual reality goggles.

Using the goggles and joystick above, we took turns exploring the streets and buildings of the ancient city of Regium Lepedi in Northern Italy.  The experience was extremely immersive and somewhat disorienting, from getting lost in narrow alleys to climbing winding staircases for an overhead view of the entire landscape.  The feeling of vertigo from the roof was visceral.  None of us took the challenge to jump off of the roof, which apparently you can do (and which is also very scary according to the lab researchers).  After taking the goggles off, I felt a heaviness and solidity return to my body as I readjusted to the “real world” around me, similar to the sensation of gravity after stepping off a trampoline.

Alex--can you hear me?
Alex–can you hear me?

The Libraries and Digital Projects team look forward to working more with Dr. Forte and bringing 3D imaging into our digital collections.

More information about the lab’s work can be found at:

http://sites.duke.edu/digatlab/


Mike views a mathematically modeled 3D rendering of a tile mosaic.

(Photos by Molly Bragg and Beth Doyle)

Digitization Details: Bringing Duke Living History Into Your Future

Recently, I digitized 123 videotapes from the Duke University Living History Program. Beginning in the early 1970’s, Duke University faculty members conducted interviews with prominent world leaders, politicians and activists. The first interviews were videotaped in Perkins Library at a time when video was groundbreaking technology, almost a decade before consumer-grade VCRs starting showing up in people’s living rooms. Some of the interviews begin with a visionary introduction by Jay Rutherfurd, who championed the program:

“At the W. R. Perkins library, in Duke University, we now commit this exciting experiment in electronic journalism into your future. May it illuminate well, educate wisely, and relate meaningfully, for future generations.”

Clearly, the “future” that Mr. Rutherfurd envisioned has arrived. Thanks to modern technology, we can now create digital surrogates of these videotaped interviews for long-term preservation and access. The subjects featured in this collection span a variety of generations, nationalities, occupations and political leanings. Interviewees include Les Aspin, Ellsworth Bunker, Dr. Samuel DuBois Cook, Joseph Banks Rhine, Jesse Jackson, Robert McNamara, Dean Rusk, King Mihai of Romania, Terry Sanford, Judy Woodruff, Angier Biddle Duke and many more. The collection also includes videotapes of speeches given on the Duke campus by Ronald Reagan, Abbie Hoffman, Bob Dole, Julian Bond and Elie Wiesel.

residue
Residue wiped off the head of a U-matic playback deck, the result of sticky-shed syndrome.

Many of the interviews were recorded on 3/4″ videotape, also called “U-matic.” Invented by Sony in 1969, the U-matic format was the first videotape to be housed inside a plastic cassette for portability, and would soon replace film as the primary television news-gathering format. Unfortunately, most U-matic tapes have not aged well. After decades in storage, many of the videotapes in our collection now have sticky-shed syndrome, a condition in which the oxide that holds the visual content is literally flaking off the polyester tape base, and is gummy in texture. When a videotape has sticky-shed, not only will it not play correctly, the residue can also clog up the tape heads in the U-matic playback deck, then transfer the contaminant to other tapes played afterwards in the same deck. A U-matic videotape player in good working order is now an obsolete collector’s item, and our tapes are fragile, so we came up with a solution: throw those tapes in the oven!

oven2
After baking, the cookies (I mean U-matic videotapes) are ready for digitization!

At first that may sound reckless, but baking audio and videotapes at relatively low temperatures for an extended period of time is a well-tested method for minimizing the effects of sticky-shed syndrome. The Digital Production Center recently acquired a scientific oven, and after initial testing, we baked each Duke Living History U-matic videotape at 52 celsius (125 fahrenheit) for about 10 hours. Baking the videotapes temporarily removed the moisture that had accumulated in the binder, and made them playable for digitization. About 90% of our U-matic tapes played well after baking. Many of them were unplayable beforehand.

videoracks
The Digital Production Center’s video rack and routing system.

After giving the videotapes time to cool down, we digitize each tape, in real time, as an uncompressed  file (.mov) for long-term preservation. Afterwards, we make a smaller, compressed version (.mp4) of the same recording, which is our access copy. Our U-matic decks are housed in an efficiently-designed rack system, which also includes other obsolete videotape formats like VHS, Betacam and Hi8. Centralized audio and video routers allow us to quickly switch between formats while ensuring a clean, balanced and accurate conversion from analog to digital. Combining the art of analog tape baking with modern video digitization, the Digital Production Center is able to rescue the content from the videotapes, before the magnetic tape ages and degrades any further. While the U-matic tapes are nearing the end of their life-span, the digital surrogates will potentially last for centuries to come. We are able to benefit from Mr. Rutherfurd’s exciting experiment into our future, and carry it forward… into your future. May it illuminate well, educate wisely, and relate meaningfully, for future generations.


Post contributed by Alex Marsh