
The audio tapes in the recently acquired Radio Haiti collection posed a number of digitization challenges. Some of these were discussed in this video produced by Duke’s Rubenstein Library:
In this post, I will use a short audio clip from the collection to illustrate some of the issues that we face in working with this particular type of analog media.
First, I present the raw digitized audio, taken from a tape labelled “Tambour Vaudou”:
As you can hear, there are a number of confusing and disorienting things going on there. I’ll attempt to break these down into a series of discrete issues that we can diagnose and fix if necessary.
Tape Speed
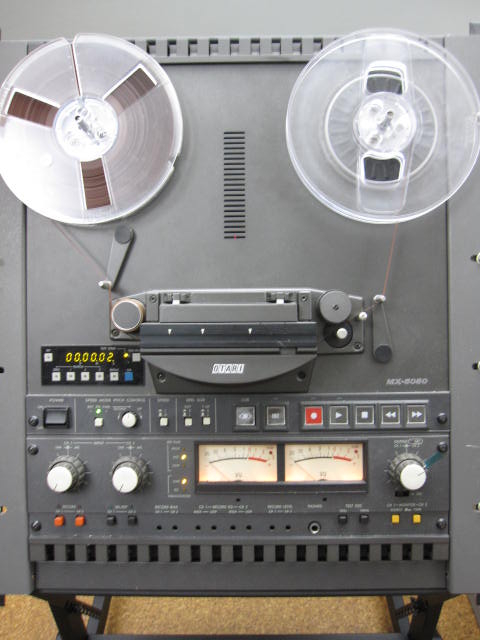
Analog tape machines typically offer more than one speed for recording, meaning that you can change the rate at which the reels turn and the tape moves across the record or playback head. The faster the speed, the higher the fidelity of the result. On the other hand, faster speeds use more tape (which is expensive). Tape speed is measured in “ips” (inches per second). The tapes we work with were usually recorded at speeds of 3.75 or 7.5 ips, and our playback deck is set up to handle either of these. We preview each tape before digitizing to determine what the proper setting is.
In the audio example above, you can hear that the tape speed was changed at around 10 seconds into the recording. This accounts for the “spawn of Satan” voice you hear at the beginning. Shifting the speed in the opposite direction would have resulted in a “chipmunk voice” effect. This issue is usually easy to detect by ear. The solution in this case would be to digitize the first 10 seconds at the faster speed (7.5 ips), and then switch back to the slower playback speed (3.75 ips) for the remainder of the tape.

Volume Level and Background Noise
The tapes we work with come from many sources and locations and were recorded on a variety of equipment by people with varying levels of technical knowledge. As a result, the audio can be all over the place in terms of fidelity and volume. In the audio example above, the volume jumps dramatically when the drums come in at around 00:10. Then you hear that the person making the recording gradually brings the level down before raising it again slightly. There are similar fluctuations in volume level throughout the audio clip. Because we are digitizing for archival preservation, we don’t attempt to make any changes to smooth out the sometimes jarring volume discrepancies across the course of a tape. We simply find the loudest part of the content, and use that to set our levels for capture. The goal is to get as much signal as possible to our audio interface (which converts the analog signal to digital information that can be read by software) without overloading it. This requires previewing the tape, monitoring the input volume in our audio software, and adjusting accordingly.
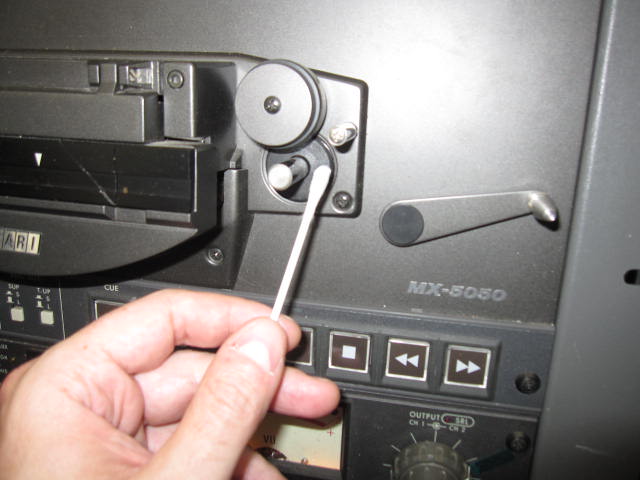
This recording happens to be fairly clean in terms of background noise, which is often not the case. Many of the oral histories that we work with were recorded in noisy public spaces or in homes with appliances running, people talking in the background, or the subject not in close enough proximity to the microphone. As a result, the content can be obscured by noise. Unfortunately there is little that can be done about this since the problem is in the recording itself, not the playback. There are a number of hum, hiss, and noise removal tools for digital audio on the market, but we typically don’t use these on our archival files. As mentioned above, we try to capture the source material as faithfully as possible, warts and all. After each transfer, we clean the tape heads and all other surfaces that the tape touches with a Q-tip and denatured alcohol. This ensures that we’re not introducing additional noise or signal loss on our end.
Splices
While cleaning the Radio Haiti tapes (as detailed in the video above), we discovered that many of the tapes were comprised of multiple sections of tape spliced together. A splice is simply a place where two different pieces of audio tape are connected by a piece of sticky tape (much like the familiar Scotch tape that you find in any office). This may be done to edit together various content into a seamless whole, or to repair damaged tape. Unfortunately, the sticky tape used for splicing dries out over time, becomes brittle, and loses it’s adhesive qualities. In the course of cleaning and digitizing the Radio Haiti tapes, many of these splices came undone and had to be repaired before our transfers could be completed.
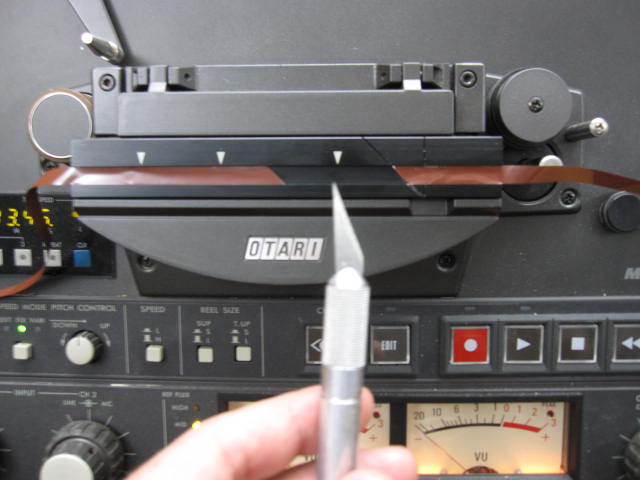
Our playback deck includes a handy splicing block that holds the tape in the correct position for this delicate operation. First I use a razor blade to clean up any rough edges on both ends of the tape and cut it to the proper 45 degree angle. The splicing block includes a groove that helps to make a clean and accurate cut. Then I move the two pieces of tape end to end, so that they are just touching but not overlapping. Finally I apply the sticky splicing tape (the blue piece in the photo below) and gently press on it to make sure it is evenly and fully attached to the audio tape. Now the reel is once again ready for playback and digitization. In the “Tambour Vaudou” audio clip above, you may notice three separate sections of content: the voice at the beginning, the drums in the middle, and the singing at the end. These were three pieces of tape that were spliced together on the original reel and that we repaired right here in the library’s Digital Production Center.

These are just a few of many issues that can arise in the course of digitizing a collection of analog open reel audio tapes. Fortunately, we can solve or mitigate most of these problems, get a clean transfer, and generate a high-quality archival digital file. Until next time…keep your heads clean, your splices intact, and your reels spinning!
I see another problem looming large, though a few hundred years in the future: the British parliament has refused to change its ways since hundreds of years and still has all its acts transcribed onto goat skin as paper has not been shown to last for the amount of time an act needs to be readable resp. accessible. Paper is not parchment and books and paper have not been around for that long when you compare it to the age e.g. of the library of Alexandria. But with reels and any magnetic tapes we have the phenomenon of magnetic dissipation which by laws of nature will eventually make them completely unreadable. (A bit like if the ink on old parchments etc. were to begin to bleed until it covered the whole page evenly and no letters were left.) Now one might think that preservative scans and digitization as describe above will alleviate these problems and the old sources just be damned. But not so: soon there will be no way of verifying if the actual content is exactly 100% true to the original or has been tampered with. Forgeries on paper and parchments have eventually been detected but unless public archives do not make a conscious effort (like establishing an international “notary” for untampered safe-keeping) historians will in a few hundred years have to add caveats all over the place when it comes to the early digitization efforts of the 21st century!
What software did you use to capture the audio recordings?
Adobe Audition, because it is included with the Adobe license that our institution purchases. There are a number of other programs out there that work just as well. Reaper is inexpensive and excellent. Audacity is free and completely adequate for many audio projects.