Tag Archives: exhibits

Welcome to Our New Intern Angela Nettles

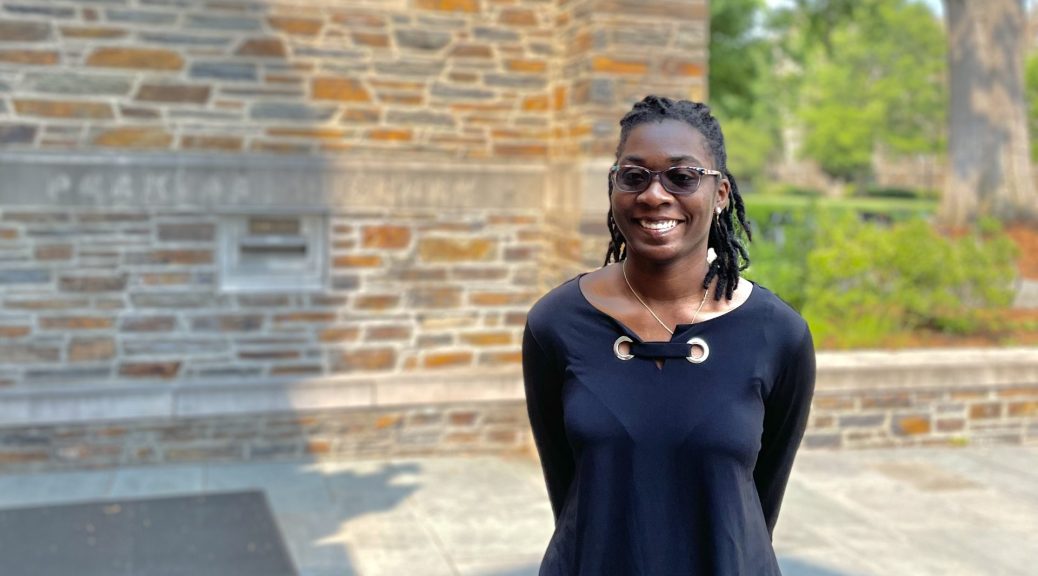
We are delighted to welcome our sixth HBCU Library Alliance intern, Angela Nettles, to Duke Libraries. Angela is a rising senior at Bennett College where she is studying Africana Women’s Studies. She is also one of eight students studying preservation this summer through the University of Delware/HBCU-LA internship program. As a part of the program, she will spend four weeks with us learning everything from binding pamphlets to conducting condition surveys.

After two years of presenting this program online, it’s refreshing to have our intern onsite again. So far, this first week has been a busy one. In addition to her bi-weekly cohort meetings, Angela has dived right into work here at Perkins Library.

To start, she spent the first half of the week assisting the Exhibition Department to set up the “Mandy Carter, the Scientist of Activism” exhibit.
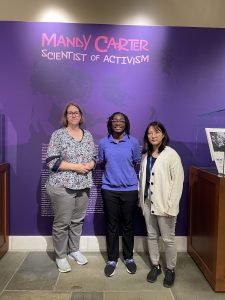
From left to right: Meg Brown (Head of Exhibition Services), Angela Nettles, and Yoon Kim (Senior Library Exhibition Technician) after working on the Mandy Carter exhibit
Placing case labels and adjusting exhibit lights.

As you can imagine, there was a lot to be done. Regardless, Angela was up to the many tasks at hand. From sanding the walls to setting up exhibit cases, she eagerly took part in every step of the process.

Left: Sanding the walls to prep them for the new Phototex graphics that were going up. Right: Meg Brown showing Angela how they measure light in exhibitions for preservation purposes.

Additionally, the second half of the week was spent introducing Angela to my work in the conservation lab. She learned about how we make treatment decisions for general collections, and has already started doing treatments herself.

Angela finishing her first pocket (left) and binding music scores into pamphlet binders (right).

So far she is a quick study and has already picked up how to do tip-ins, pockets, and pamphlet bindings.

Angela hit the ground running during the first week of her internship, and we have appreciated her enthusiasm to learn and try new things. We can’t wait to see what else she will accomplish during the rest of her time with us! You can read about the full cohort of interns on the HBCU-Library Alliance blog post.  You can find posts from our past interns here. 

The Library Uncovered: Behind the Scenes with Collections Services

As mentioned last week, staff in the Collections Services division have been creating a “behind the scenes” look at the work we do to get books to the shelf. The exhibit is now up! Come see a selection of the work we do to make sure the book you need is on the shelf when you need it.

The Library Uncovered: Behind the Scenes with Collections Services
Exhibit dates: December 19, 2022 – June 4, 2023
Location: The Jerry and Bruce Chappell Family Gallery
Opening reception: January 10, 2023, 3:00 pm EST (light refreshments served)

We captured a few in-process installation photos to pique your interest. The exhibit is open to the public during regular library hours.

Meg installing the wall graphics.

Archway graphics!

The animations are live!

Say hello to our little friend in the disaster case.

WHAT CAN YOU SEE IN THIS EXHIBIT? 

The cases in this exhibition highlight interesting items from the collection that represent some of the work we do:

  • Watch a slideshow to see how materials travel through Collections Services
  • Discover what languages are represented in our collections
  • See a map of where our resources come from

This exhibit is brought to you by Duke University Libraries Collections Services. The exhibit team includes:

  • Heather Baker, Metadata & Discovery Strategy
  • Sara Biondi, Monograph Acquisitions
  • Bethany Blankemeyer, Electronic Resources & Serials Acquisitions
  • Beth Doyle, Conservation Services
  • Jovana Ivezic, Conservation Services
  • Elena Feinstein, Collection Strategy & Development
  • Rich Murray, Resource Description
  • Jacquie Samples, Metadata & Discovery Strategy

The exhibit team wishes to thank:

  • Meg Brown, Exhibition Services
  • Michael Daul, Assessment and User Experience Strategy
  • Dracine Hodges, AUL for Collections Services
  • Janelle Hutchinson, Communications
  • Yoon Kim, Exhibition Services
  • Eric Monson, Center for Data and Visualization Sciences
  • Aaron Welborn, Director of Communications

A Tiny Press Calls for a Tiny Book

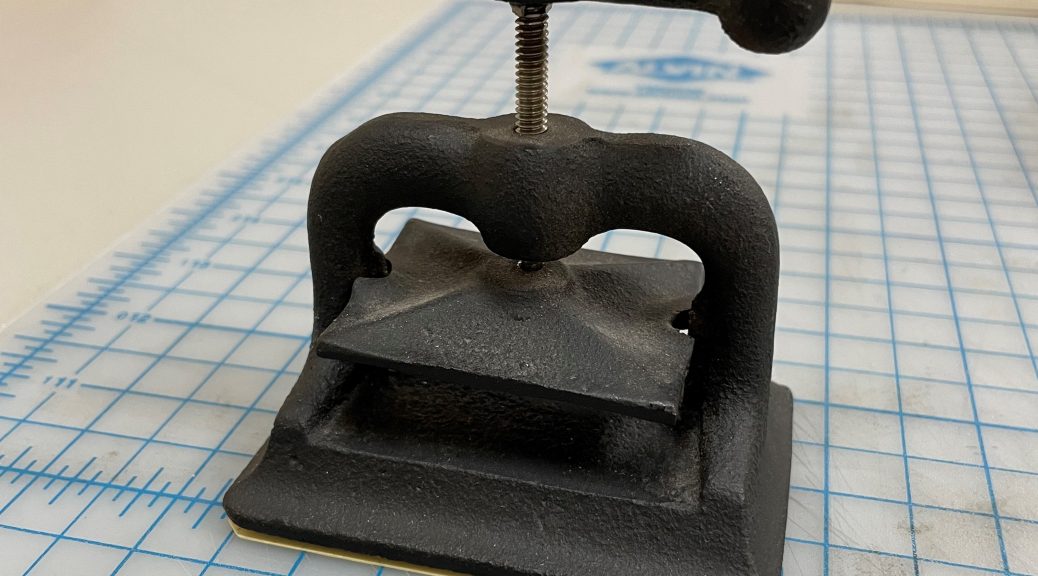
Over the past year, I’ve been working on an exhibit revolving around the work I do in Conservation Services and the Collection Services Division as a whole. As luck would have it, Beth has this wonderful miniature book press that fit perfectly into the display case I was in charge of designing.

But what is a book press without a book to press? With that in mind, I took this opportunity to make my first miniature book.

First, I made a tiny book block.

I left the paper longer than it needed to be so that I could weigh the pages down while I sewed it all together. Once that was done, I decided it would be nice to try and round the spine. This proved to be a bit difficult with the normal tools we use for rounding.

I felt I was more likely to just crush the entire spine with the hammer than actually round it. A Teflon folder made for a safer option for this tiny spine.

Next, I needed to trim the book block to a more appropriate size. I started to cut it with just a scalpel and a ruler, but as you can see that wasn’t really going well or looking particularly nice.

I decided instead to try to trim the book in a more traditional method. This meant placing the book block into a press and using a sharp, flat blade to cut across the pages evenly.

This was much more successful and I ended up with a nice and neat book block.

After that, I covered the spine with a Japanese tissue for strength. Then I added a textile spine lining as well as a paper lining for additional support.

Now I could make the covers, which ended up being the easiest part of this whole process.

The hardest part came next, which was casing the book block into the covers. Because the book is so tiny, it was difficult to make sure the book didn’t move out of place as I glued up the paper that would connect the book block to the covers.

I eventually managed to figure it out and put the book in a press to dry flat.

I have to say it looks a bit silly in the full-sized press.

But once it was dry, the book was done!

It certainly fits in much better with a press its own size.

You can check out this tiny press with its tiny book, along with the rest of the great displays my colleagues put together, in the exhibit The Library Uncovered: Behind the Scenes with Collection Services that is currently open to the public in the Jerry and Bruce Chappell Family Gallery in Perkins.

A Fleet of Futons–Yours for the Making

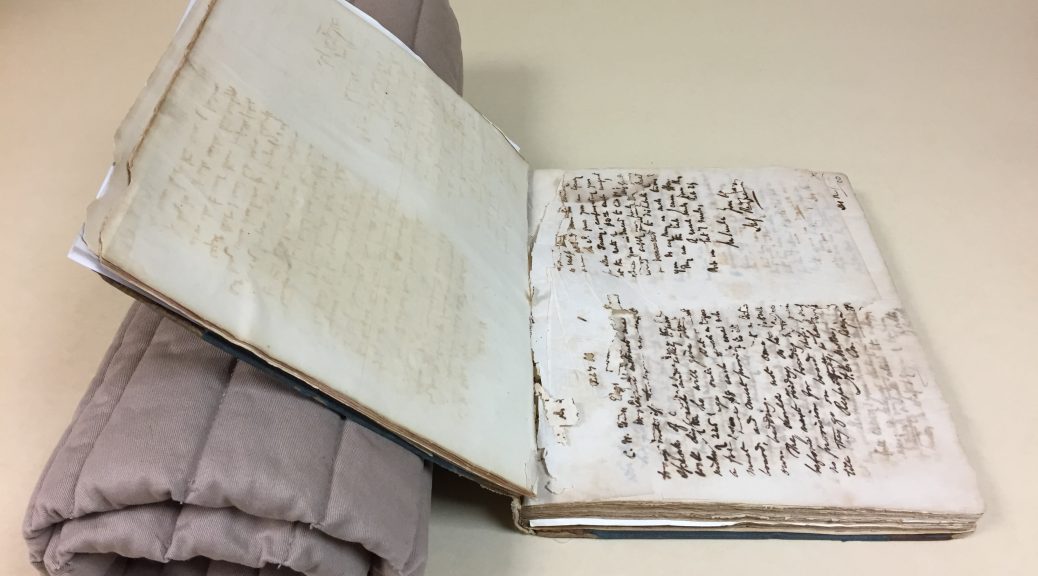
Book futon in use.
Book futon in use.

I first heard about book futons in graduate school at the University of Texas at Austin. It may be that the futon originated there. I am unsure of their provenance but I am fairly certain the conservators at the Harry Ransom Center made book supports of various kinds and likely futons were in the mix.

Making Futons

My first memory of finding instructions for making futons was in Book Displays: A Library Exhibits Handbook by Anne C. Tedeschi (Highsmith Press, 1997). Her depiction of how to make a futon was pretty good, but there were things about her futons that I wanted to change. So I embarked on a mission to make my own version. I even recruited my mother, an expert seamstress, to help. We have made a lot of futons over the years.

A fleet of futons ready for use in the Rubenstein Library.

Together we perfected our methods and ultimately wrote our own instructions for constructing three sizes of futons.  You can access a PDF of our futon instructions here. This PDF includes sewing instructions, laundering information, and an illustrated guide on how to use them. The instructions should be easy to follow if you have a basic understanding of sewing or quilting. Feel free to email me if you have questions.

What’s So Great About A Futon?

What I like about the book futon is they are:

  • Fairly easy to construct, especially for those that have quilting or sewing experience
  • Inexpensive to make. Craft stores often have sales or issue coupons for 40-50% off fabric and batting.
  • Easy to use, and easy to teach patrons to use
  • Highly customizable
  • Machine washable

We use futons in the reading room, the conservation lab, the classroom, and even for temporary exhibits and show-and-tells. Do you know the history of the book futon? Have you made your own futons? Share your futon story in the comment section.

Cradle Boxing Day

Last month, Senior Conservator Erin Hammeke shared her treatment of a caoutchouc binding, which incorporated a clamshell enclosure with integrated cradle. There are many items in the collection that can benefit from an enclosure like this (henceforth referred to simply as a “cradle box”): books which require a restricted opening to reduce the risk of further damage, collection material that is used frequently, or items that are exhibited at library events outside the reading room. Our History of Medicine Collection has several items which meet these criteria and everyone in the lab was interested in learning how to make a cradle box. This week we dedicated a boxing day to this project, which served both as a training exercise and supports use of the collection.

While several variations on structure are described in publicly available resources (see the AIC Wiki), we decided to all just stick with Jeff Peachey’s design. The benefits to this design are that the cradle fits the book very well and is attached to the box, so you don’t have to worry about it being removed and getting lost. We could also rely on Erin’s previous experience and help each other through the more complicated steps!

Construction begins by measuring the book at the intended opening angles to determine the sizes of the individual parts of the cradle.  As with measuring for exhibit cradles, it’s much easier to prop the boards up with cushioned weights before taking measurements.

(Photo by Rachel Penniman)

Then those pieces are cut from Davey board…

(Photo by Rachel Penniman)

… and covered in book cloth. The cradle is essentially constructed in two pieces, which are attached by a cloth spine piece. The image below shows the interior of one cradle side during covering (left), including the adhered ends of cloth tape that allow the user to lift up the cradle (right).

(Photos by Rachel Penniman)

Once the cradle is complete, the book is placed inside and the entire sandwich is measured for the clamshell box. The box is constructed in the usual way, but the right side of the cradle is attached to the interior of the smaller tray near the spine.

It was a lot of fun to approach learning this enclosure design as a group. If one of us hit a roadblock or did not quite understand the next step in the instructions, we could all talk it through together. Over the course of the day, we developed new techniques for completing steps or learned from each other’s mistakes. And, more importantly, now six more books from the collection will have cradles with them wherever they go!

What’s In The Lab: Maps for exhibition

Washing maps
Washing paper is deeply satisfying.

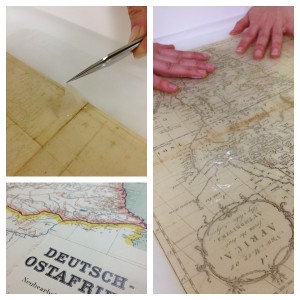
In the lab today are some beautiful maps that will be  loaned to Duke University’s Nasher Museum for an exhibit in the fall.

While most of the maps are in good condition, some need conservation beforehand. Rachel has been doing some dry cleaning, and Grace is washing a few to remove old repairs and stains. Once the conservation is done, we will help to mount them so they can be matted and framed at the Nasher.

Last Chance To See “What’s Missing From Your Video History”

This week will be your last opportunity to see our exhibit “What’s Missing From Your Video History” sponsored by the Preservation Department and the Digital Scholarship and Production Services.

Audio-visual materials’ rapid deterioration (relative to print media), its wide adoption for commercial and personal use, and the range of formats and playback equipment that rose and fell around analog videotape, have profound implications for preserving those pieces of our 20th century history that were captured on videotape.

The exhibit is on Perkins Lower Level 1, outside the Digital Production Center, near room 023. Open during library hours.


10 years, 10 Treatments

This year marks the Preservation Department’s tenth year serving the Duke University Libraries. This exhibit celebrates the work of  the conservation laboratory by displaying a variety of different treatments from the libraries collections.  The department is  planning several events to mark the occasion which includes this exhibit, an open house, and interviews with staff members; for  more information visit Preservation Underground.

(Displayed July 2010-October 2010)

Mastering Craft: Interpreting Historic Bookbindings

The Preservation Department’s new exhibit highlights work from the Triangle Research Libraries (TRLN) Master Bookbinders Group. Our group consists of staff members from the conservation labs of UNC-Chapel Hill, NC State and Duke University libraries. Its purpose is to research historic bookbindings to deepen our understanding of the history of the book, and develop knowledge and skills that help inform our daily conservation work.

(Displayed October 2010-January 2011)

10 Projects: Analog to Digital

Our new exhibit it up!

10 Projects: Analog to Digital highlights some of our favorite digitization projects from the Digital Production Center. For the past five years the men and women in DPC have worked to bring our collections to new life in digital format. You can find these collections through Duke Digital Collections.

For more on the DPC staff, search our site for our Ten Years, Ten People posts. You might also want to follow the Digital Collections Blog, one of many blogs hosted by the Library.

The exhibit is open during regular Perkins/Bostock hours. We are located on the Lower Level (same level as the Link), by Room 023.