I inventory our disaster supplies and make sure people know where to find them every year during Preservation Week and May Day. We have plenty of supplies and equipment in the main library where Conservation is located. A couple years ago we expanded our supplies to include branch libraries and our Collections Services building.
Branch Library Disaster Tote
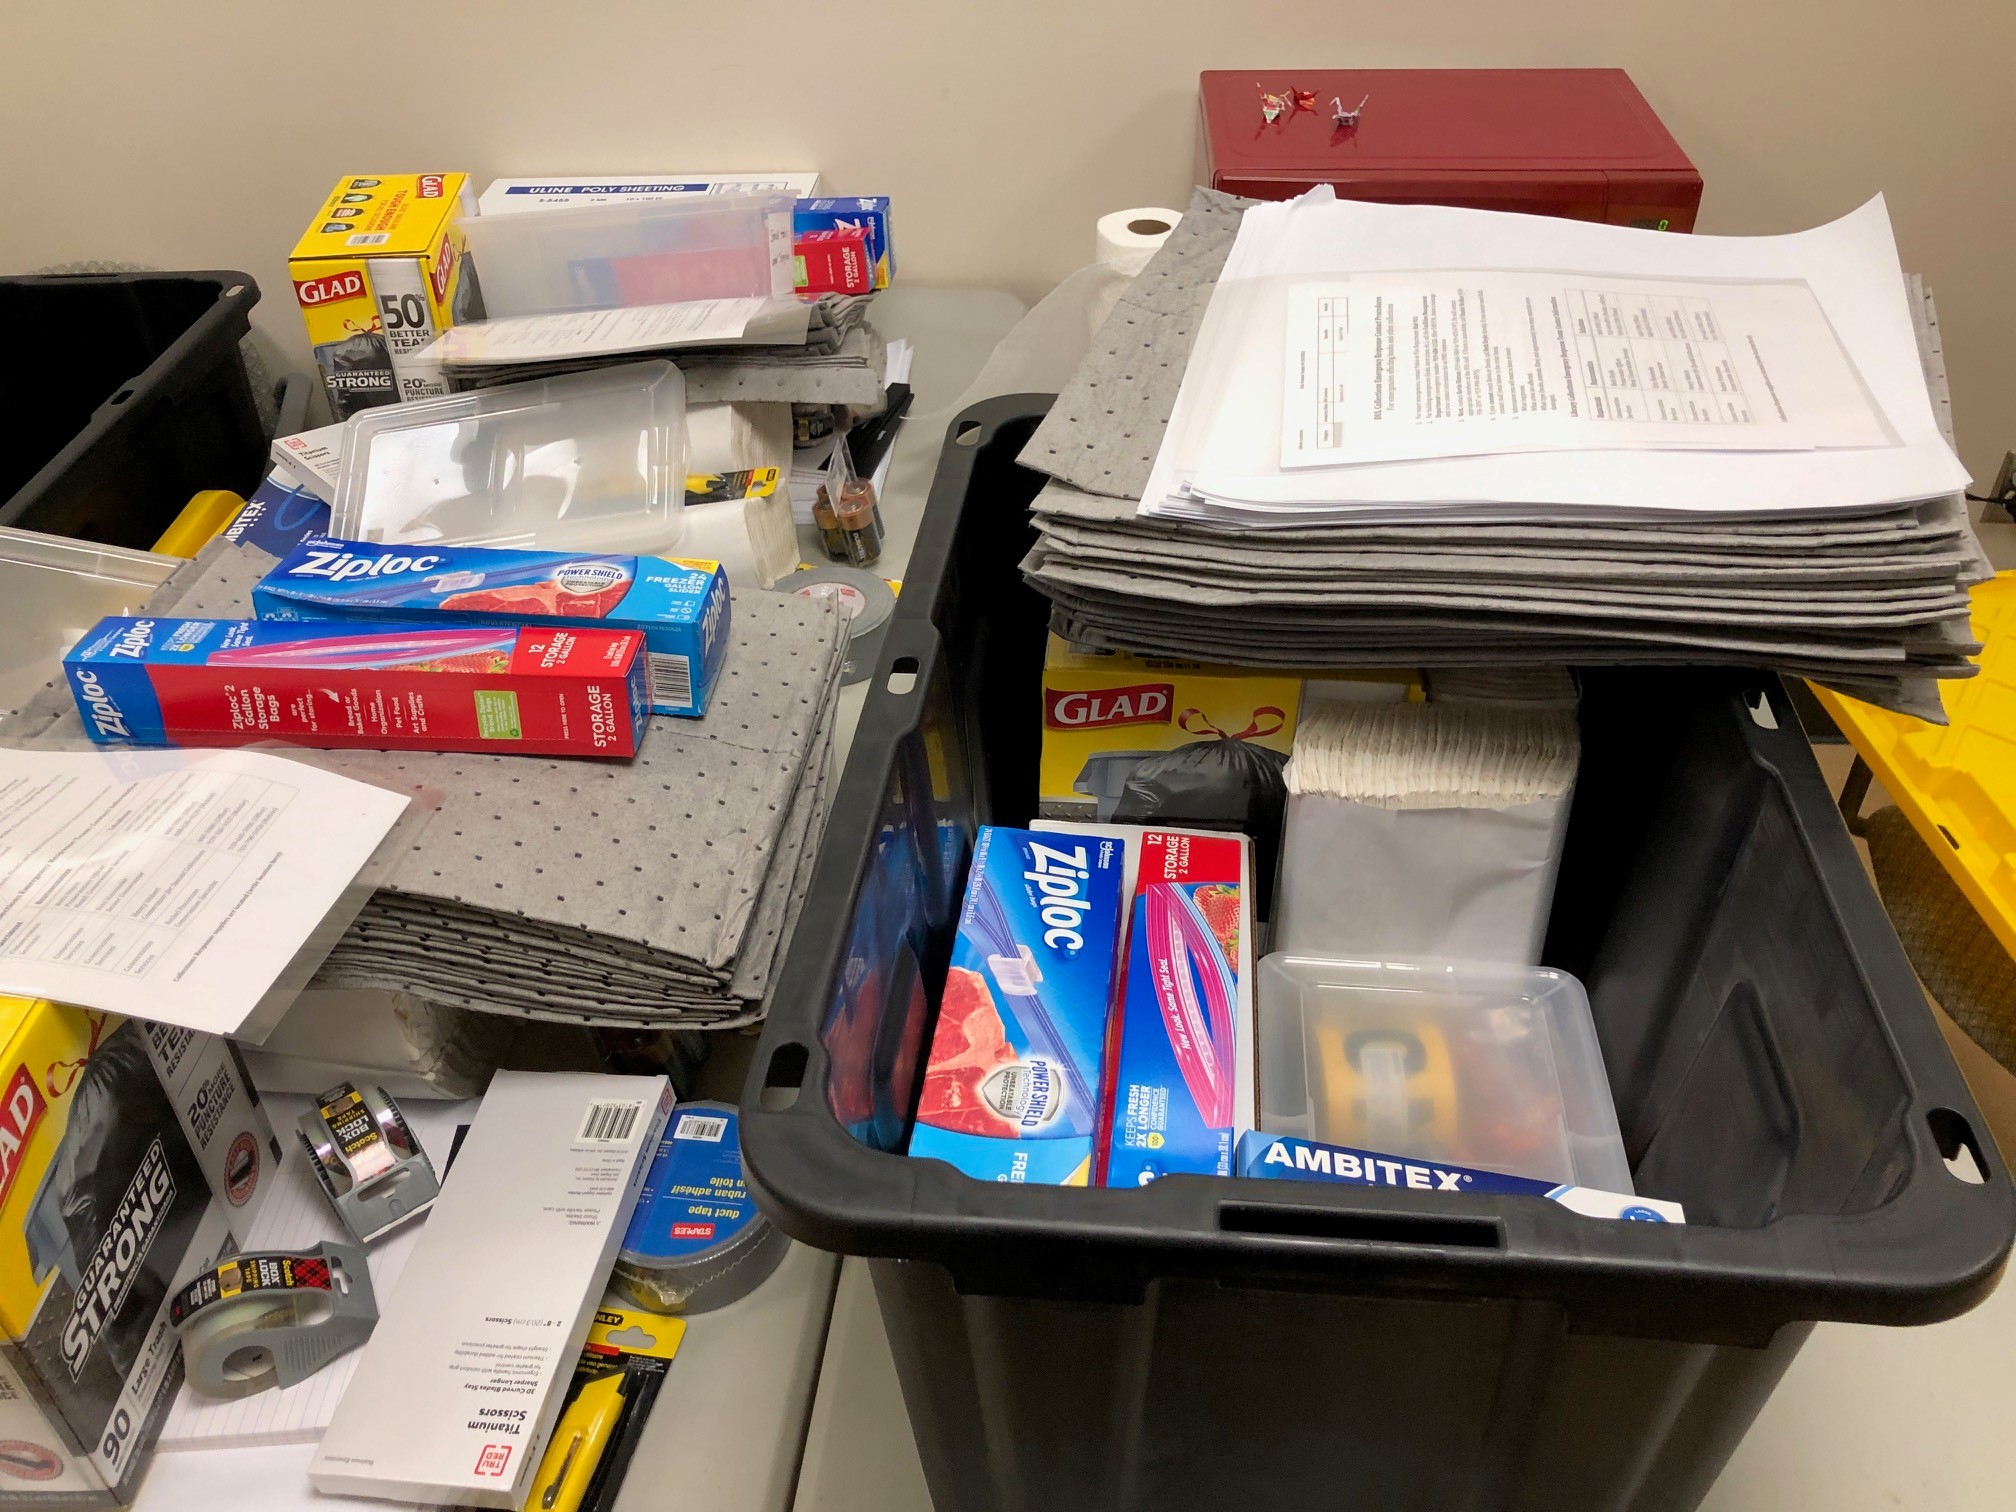
While there are many disaster supply lists available online (see below), we found that for our locations we needed customized supply totes. Our totes are stocked with the basics that are needed to respond to small incidents, or start a response while staff await the disaster team’s arrival. Here is a screenshot of our tote contents. I will probably tweak this list going forward, but these totes have proved useful already by all of our branches.
Disaster Supply Tote Contents
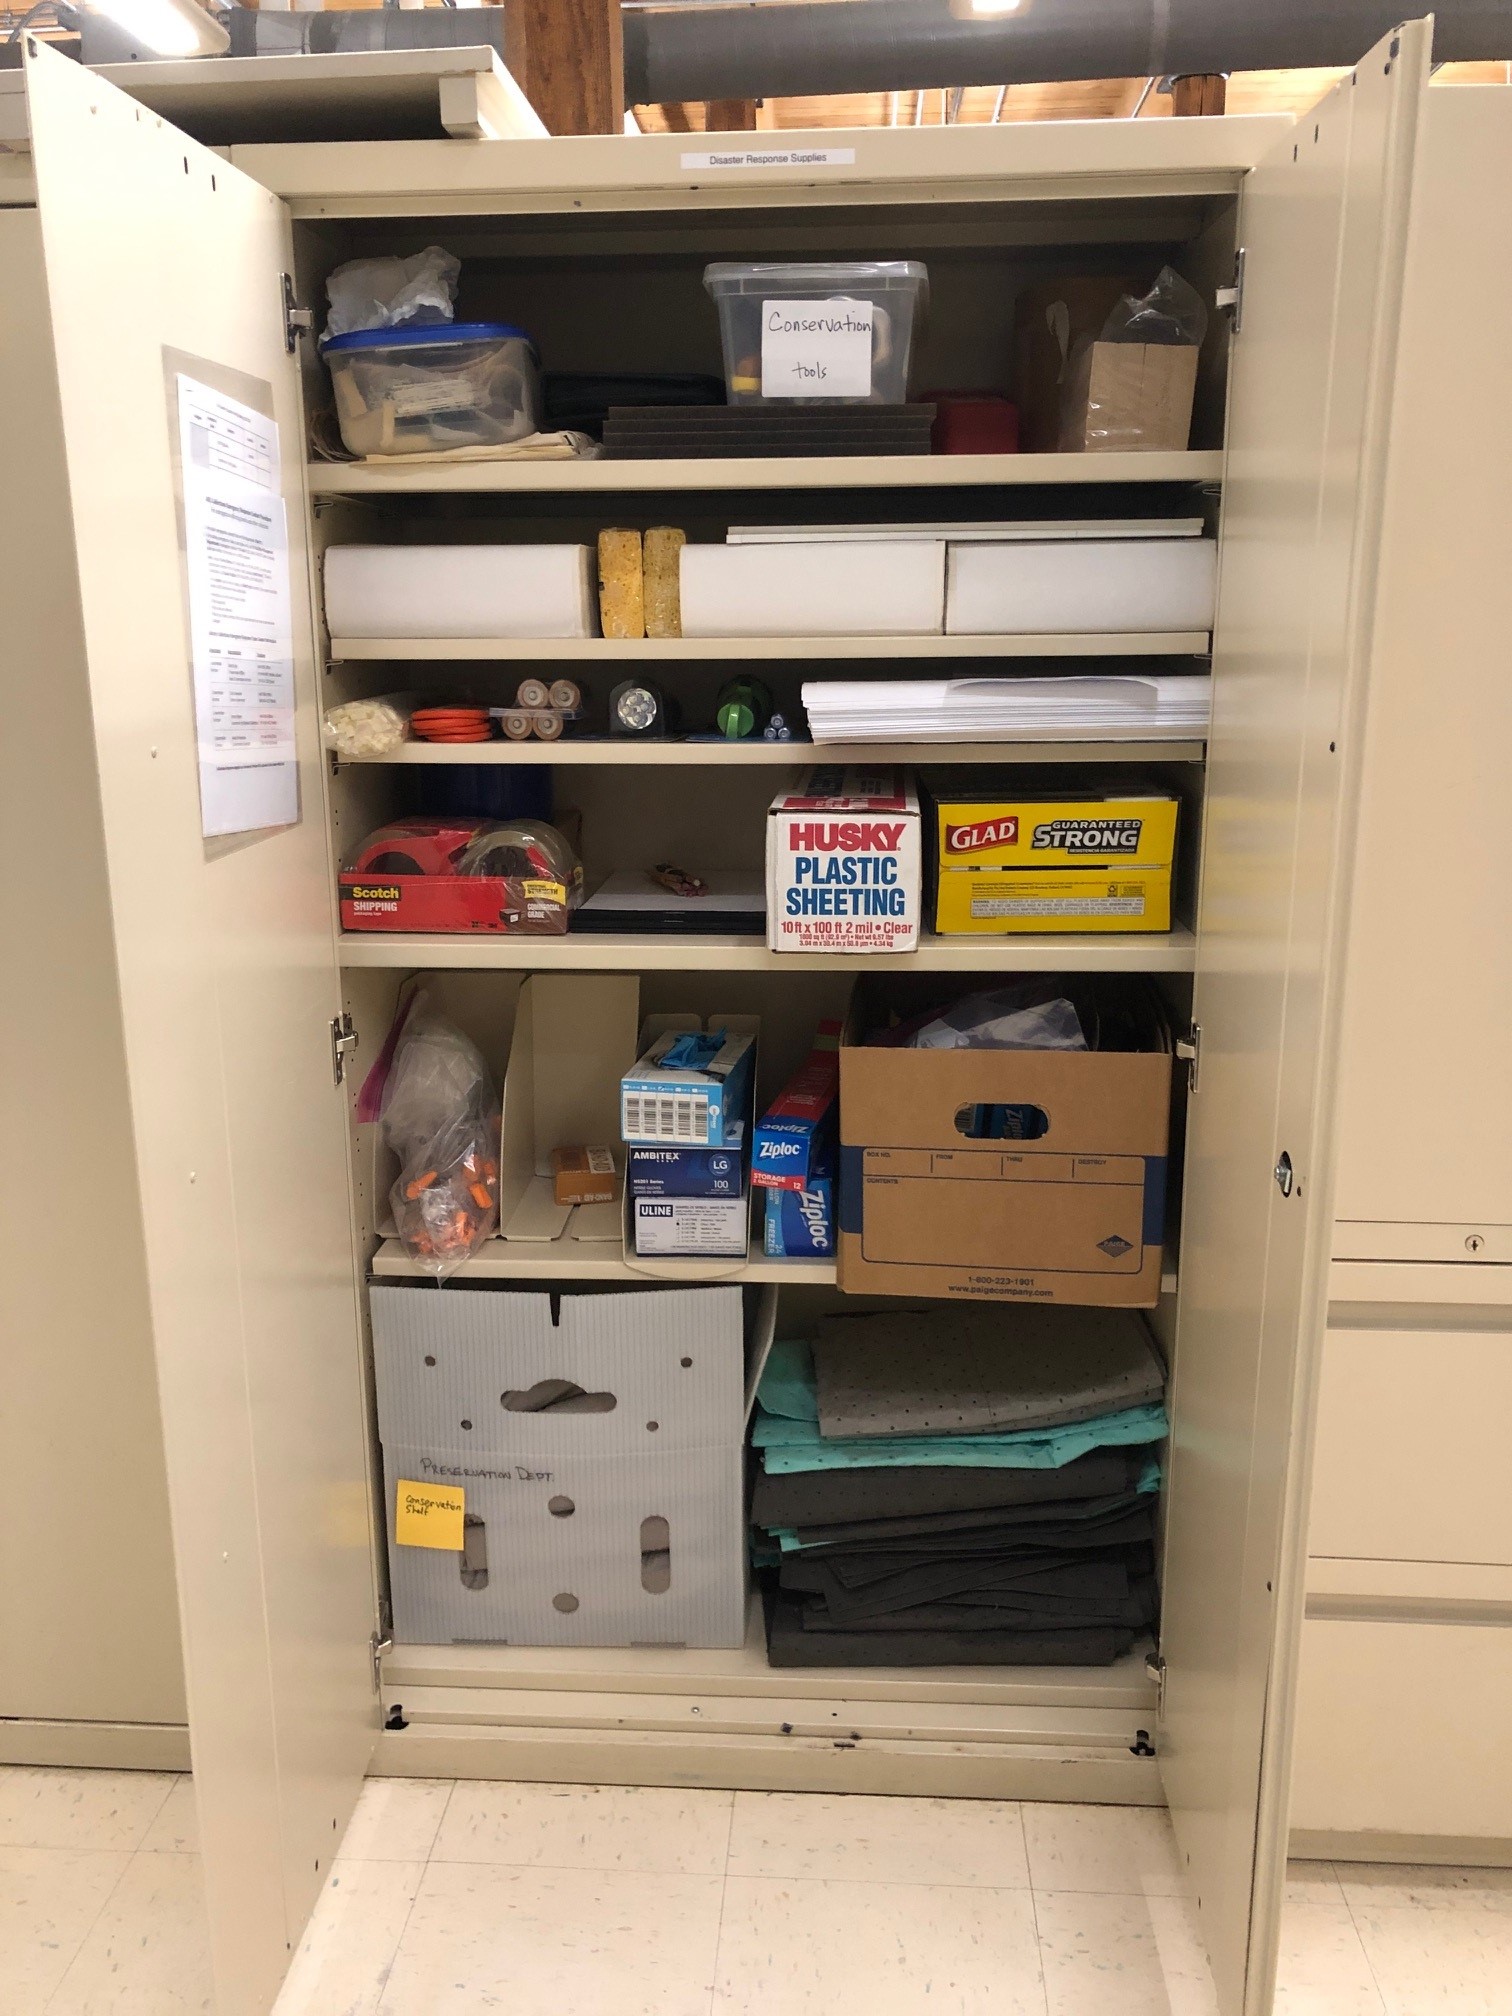
Our supply cabinet in Collections Services contains the same supplies, plus it has some handy tools and supplies for Conservation when we are on site doing some minor repairs.
Supply cabinet in Collections Services
Online Kit Supply Suggestions
There are a lot of resources out there that will advise you on what In our experience we have found that every site has different needs for their disaster kits. These are great places to start your supply list. If you are in a small institution, these can be a quick and easy way to get some supplies in place, then you can add/subtract supplies later to make the kits your own.
It’s May Day, the annual celebration that reminds you to spend a few minutes to make sure your cultural heritage organization is ready when a disaster hits. Be it small or large, any kind of emergency in your institution needs a plan.
Do one thing today to make sure you are ready. That can be making sure the phone numbers and URL’s in your plan are updated; you can look at your disaster kit and make sure your have plenty of supplies on hand; or make sure everyone in your organization knows where they can find a copy of the plan.
Disaster Plan Templates
A 2014 follow up survey by IMLS indicated that only 42% of collecting institutions had a disaster plan. While that was almost double from the initial Heritage Health Survey in 2004, that is still an alarming number. It may take more than 15 minutes to write a plan. There are many templates out there, and once you have that draft the subsequent updates are easy.
The Pocket Response Plan (TM) PREP (TM) templates are one of the easiest plans to adopt. These are customizable templates. We have a phone tree on one side, and we wrote First Steps for staff who will be first on the scene. This plan folds down into a credit card-sized plan that can fit into a small envelope or your wallet. Handy especially when cell phone towers are out due to storms.
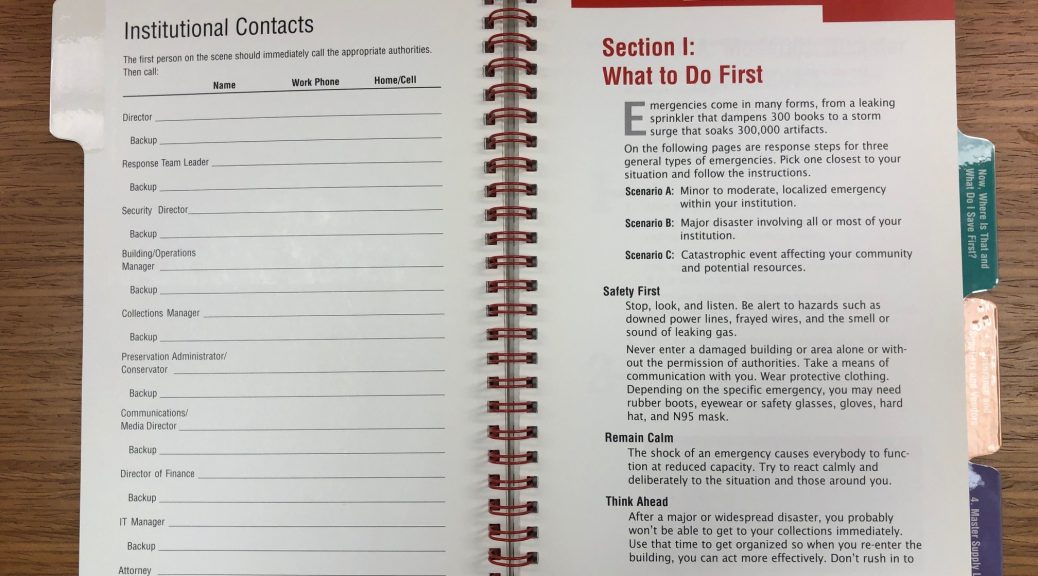
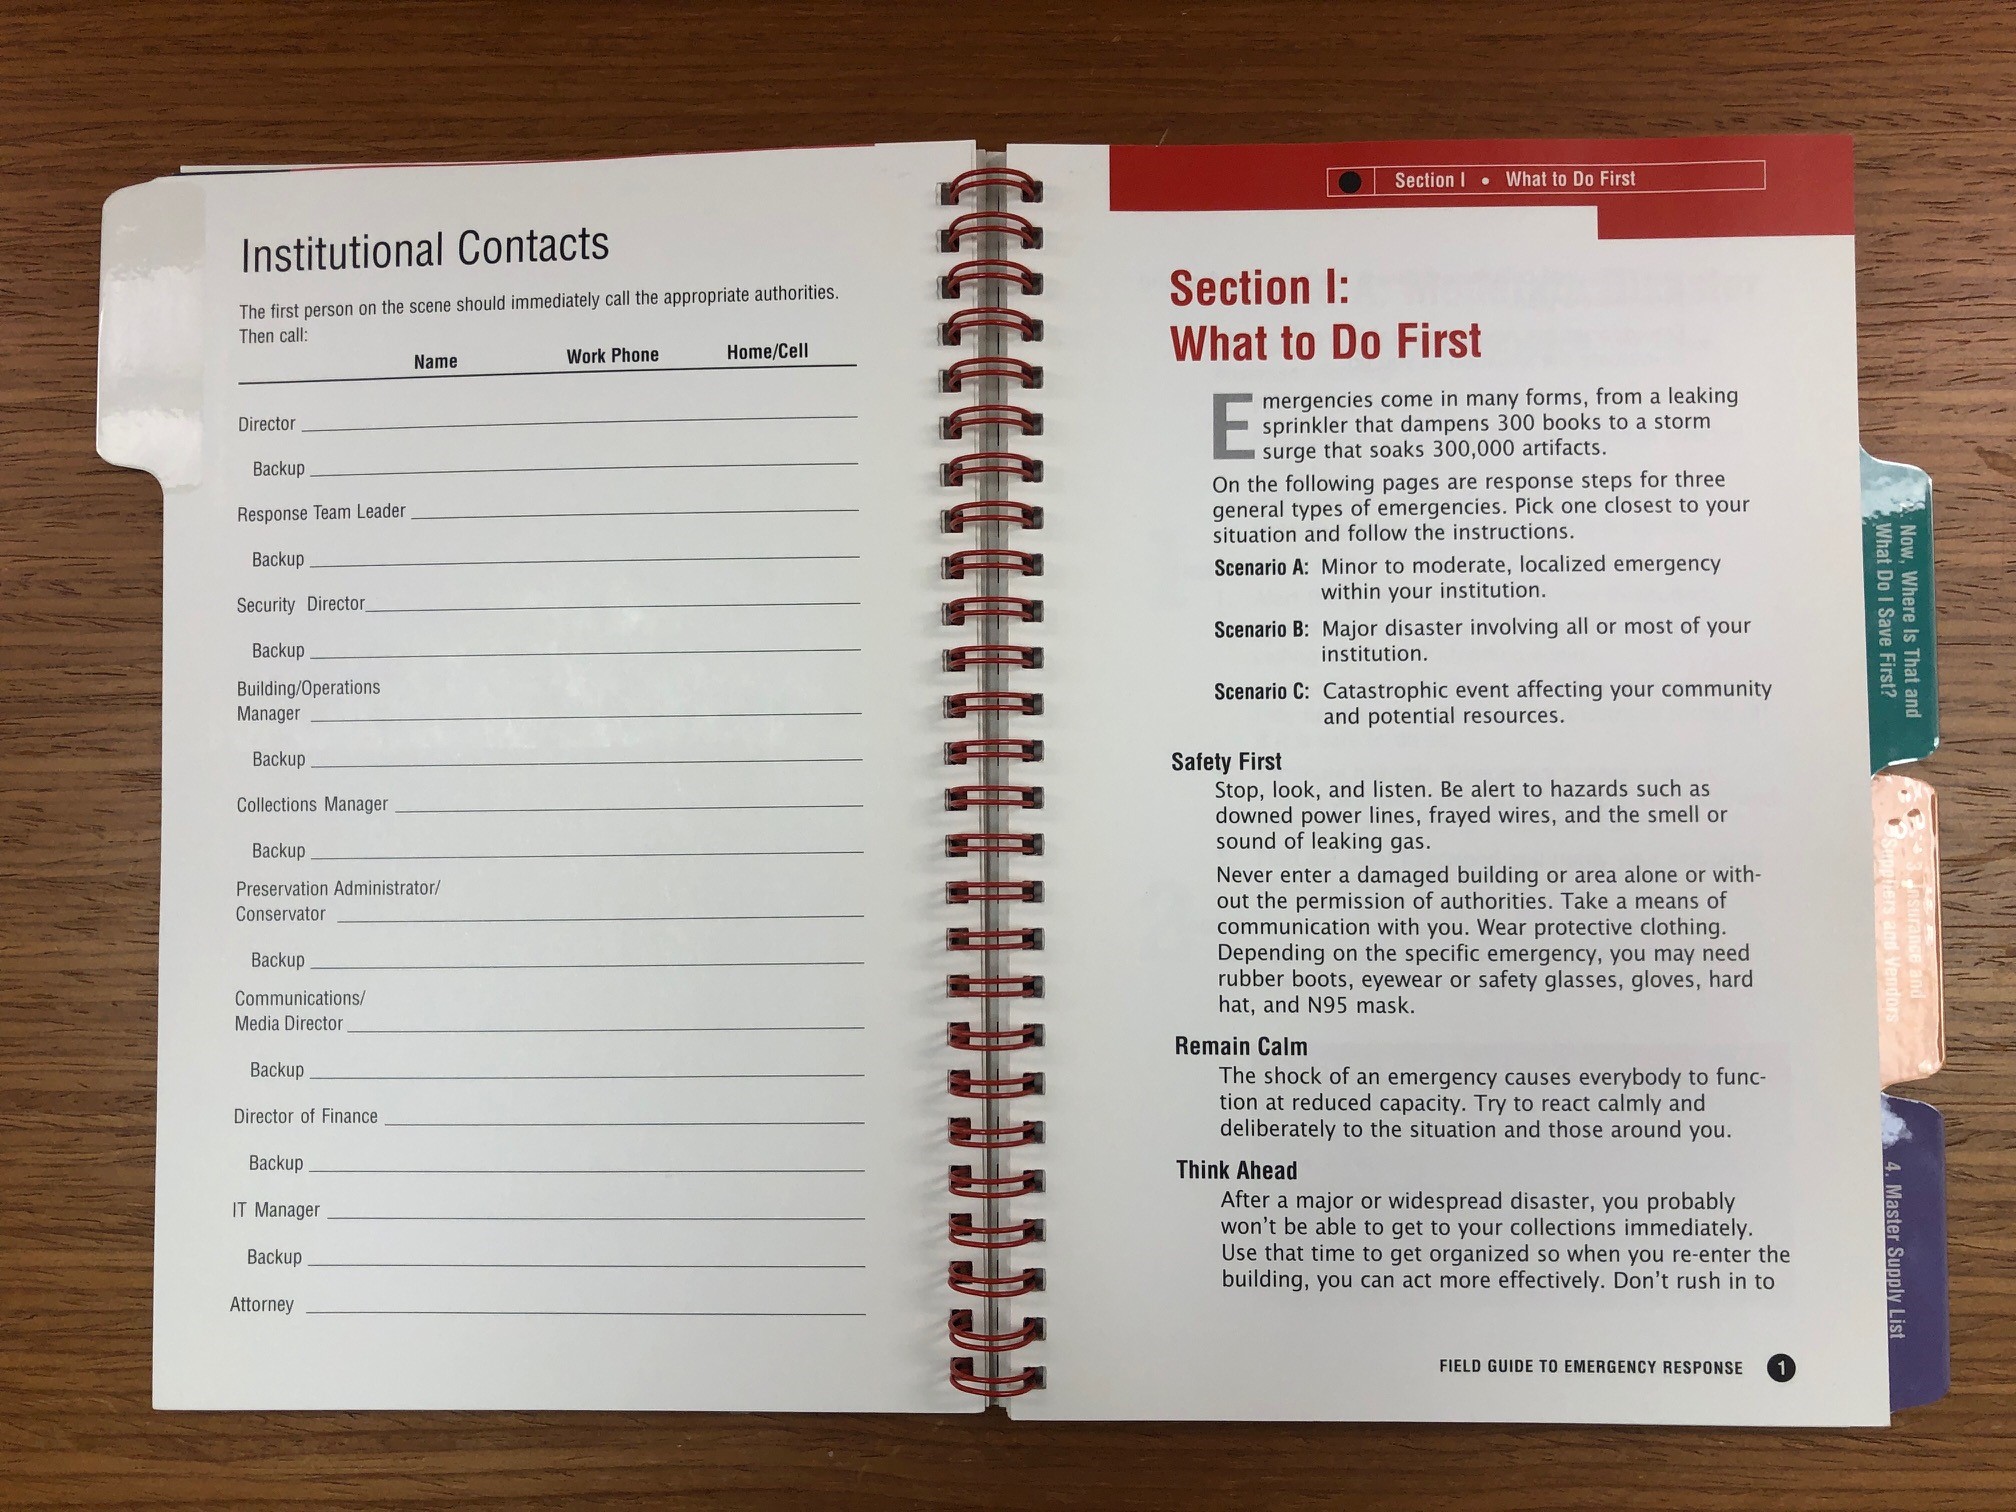
The Field Guide to Emergency Response is a handy spiral-bound book that can walk you through creating a disaster plan. This is a great option for smaller organizations, or for people who like a portable paper option for your plan.
Field Guide to Emergency Response
The Risk Evaluation and Planning Program (REPP) is a series of self-study tools. Originally developed by Heritage Preservation with support from an IMLS grant, the project helps you identify your institution’s risks, helps you prioritize risks, and provides many checklists and worksheets. It requires some time to go through the entire set of worksheets, but you will know a lot about your building and risk factors at the end.
Preservation Week Panel Discussion on Public Digital Collections of Conservation Treatment Documentation
For Preservation Week 2024, Duke University Libraries will host a virtual panel discussion about Public Digital Collections of Conservation Treatment Documentation on Thursday May 2 at 11 am EDT. Conservation representatives from four institutions (The British Museum, The Preservation Lab (Cincinnati, Ohio), Duke University Libraries, and Stanford Libraries) will share their experiences in building and sharing their institutions’ digital collections of conservation treatment documentation. Panelists will introduce their collections and discuss topics such as digital preservation of treatment records, metadata creation, linking to catalog records and finding aids, and potential privacy and copyright issues.
Details:
Cost is free but registration is required
Thursday, May 2, 2024
11:00 a.m. to 12:30 pm EDT (Starts at 10:00 Central, 8 am Pacific Daylight Time, 4 pm British Summer Time)
The panel will be recorded and the video will be shared with registered attendees upon request.
Louisa Burden, Head of Conservation, British Museum
Ashleigh Ferguson Schieszer, Book and Paper Conservator, Co-Lab Manager, (she/her)
Erin Hammeke, Senior Conservator for Special Collections, Duke University Libraries (she/they)
Ryan Lieu, Conservation Operations Coordinator, Stanford Libraries (he/him)
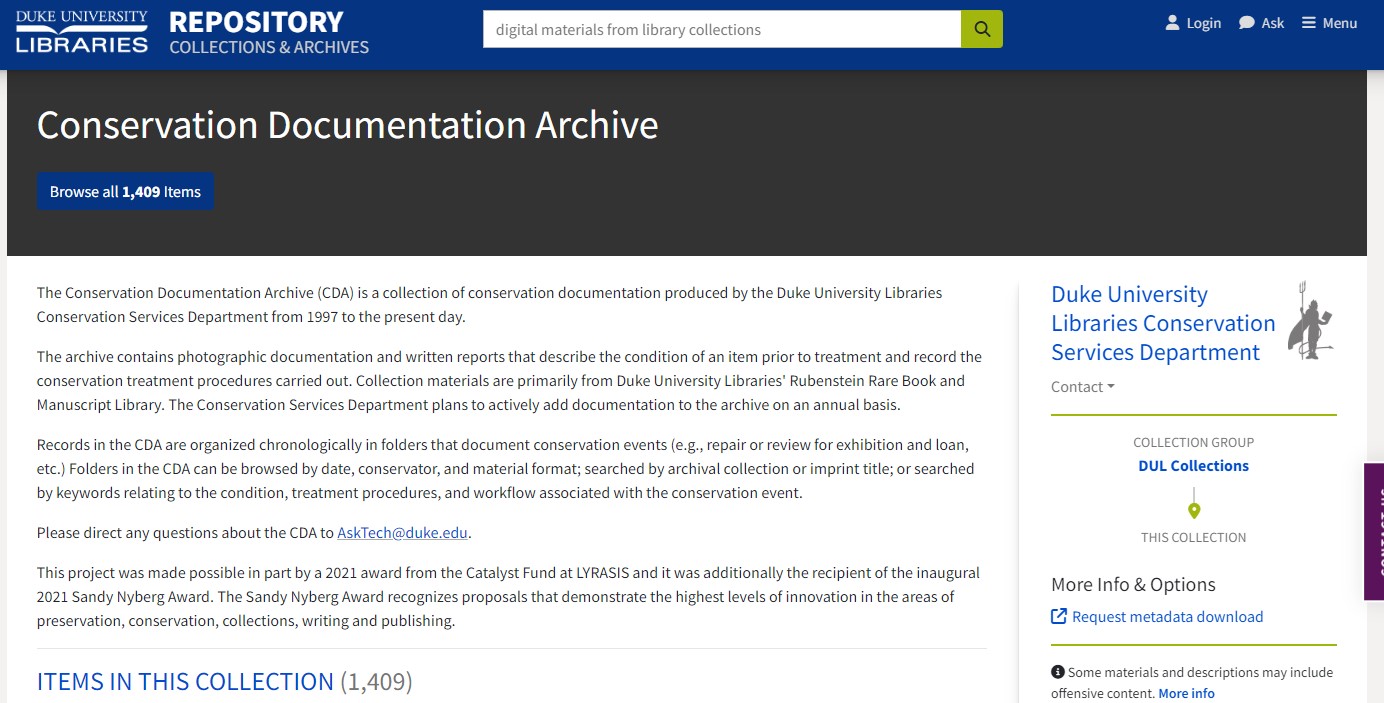
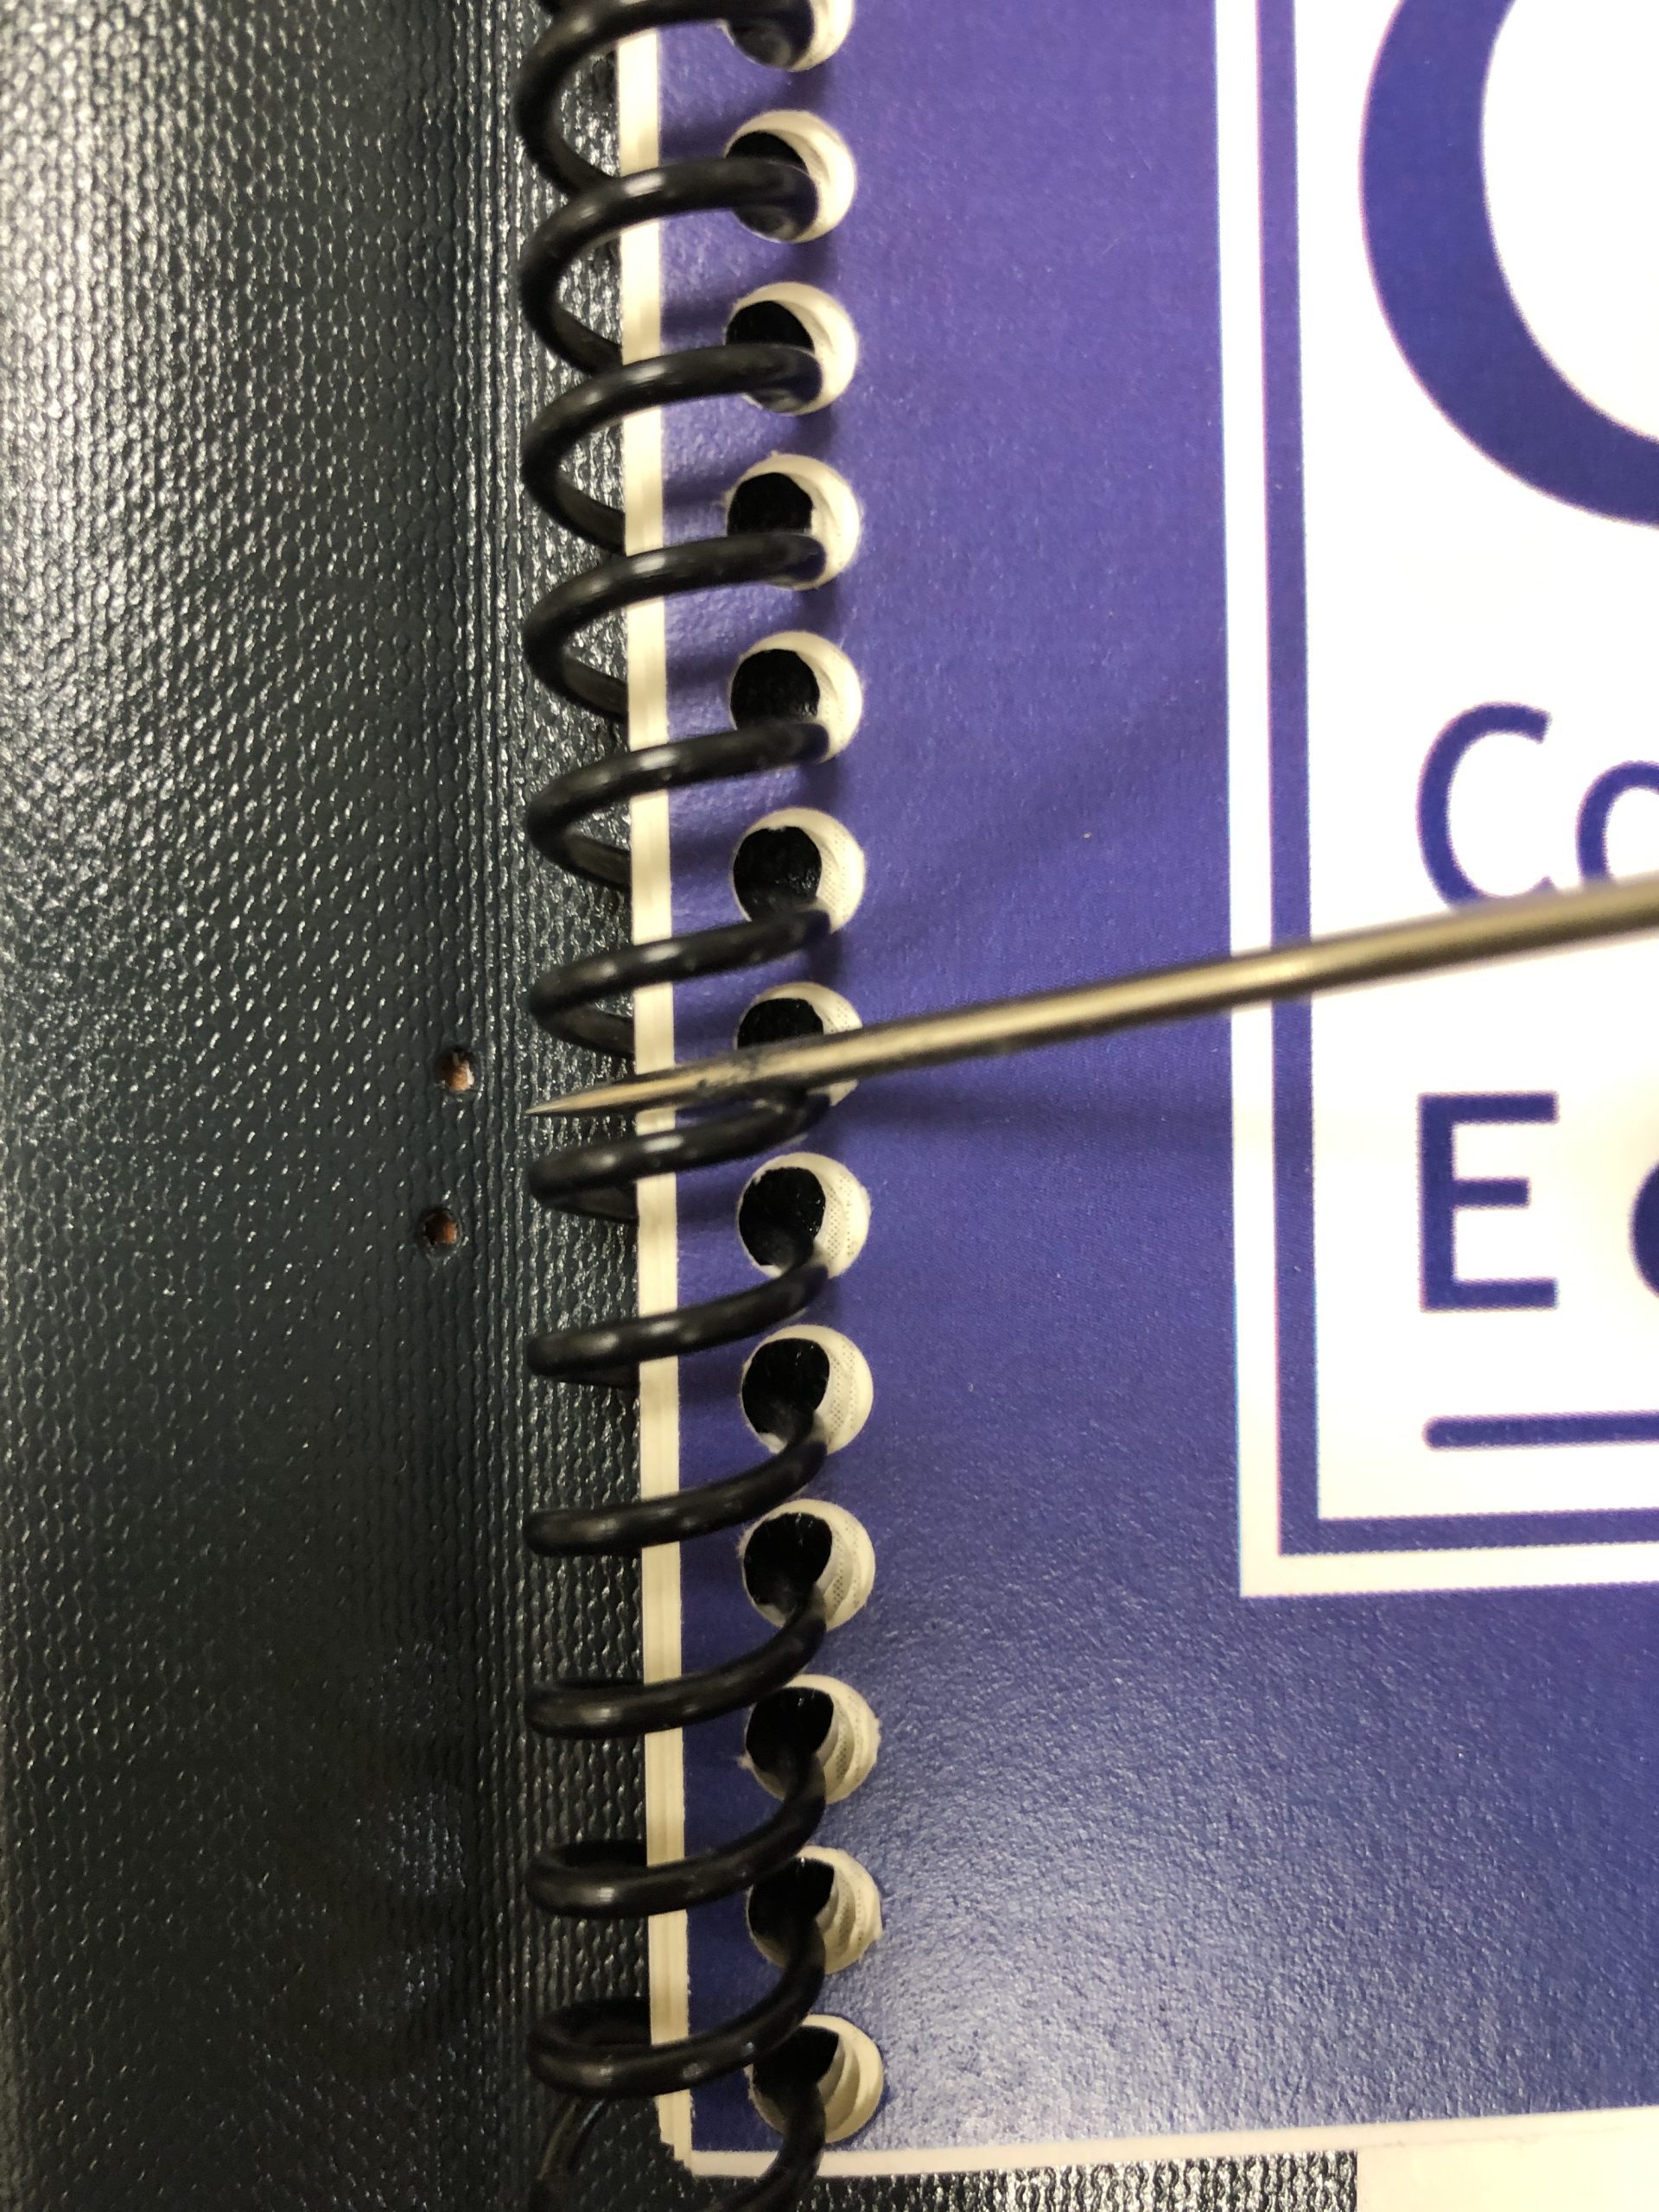
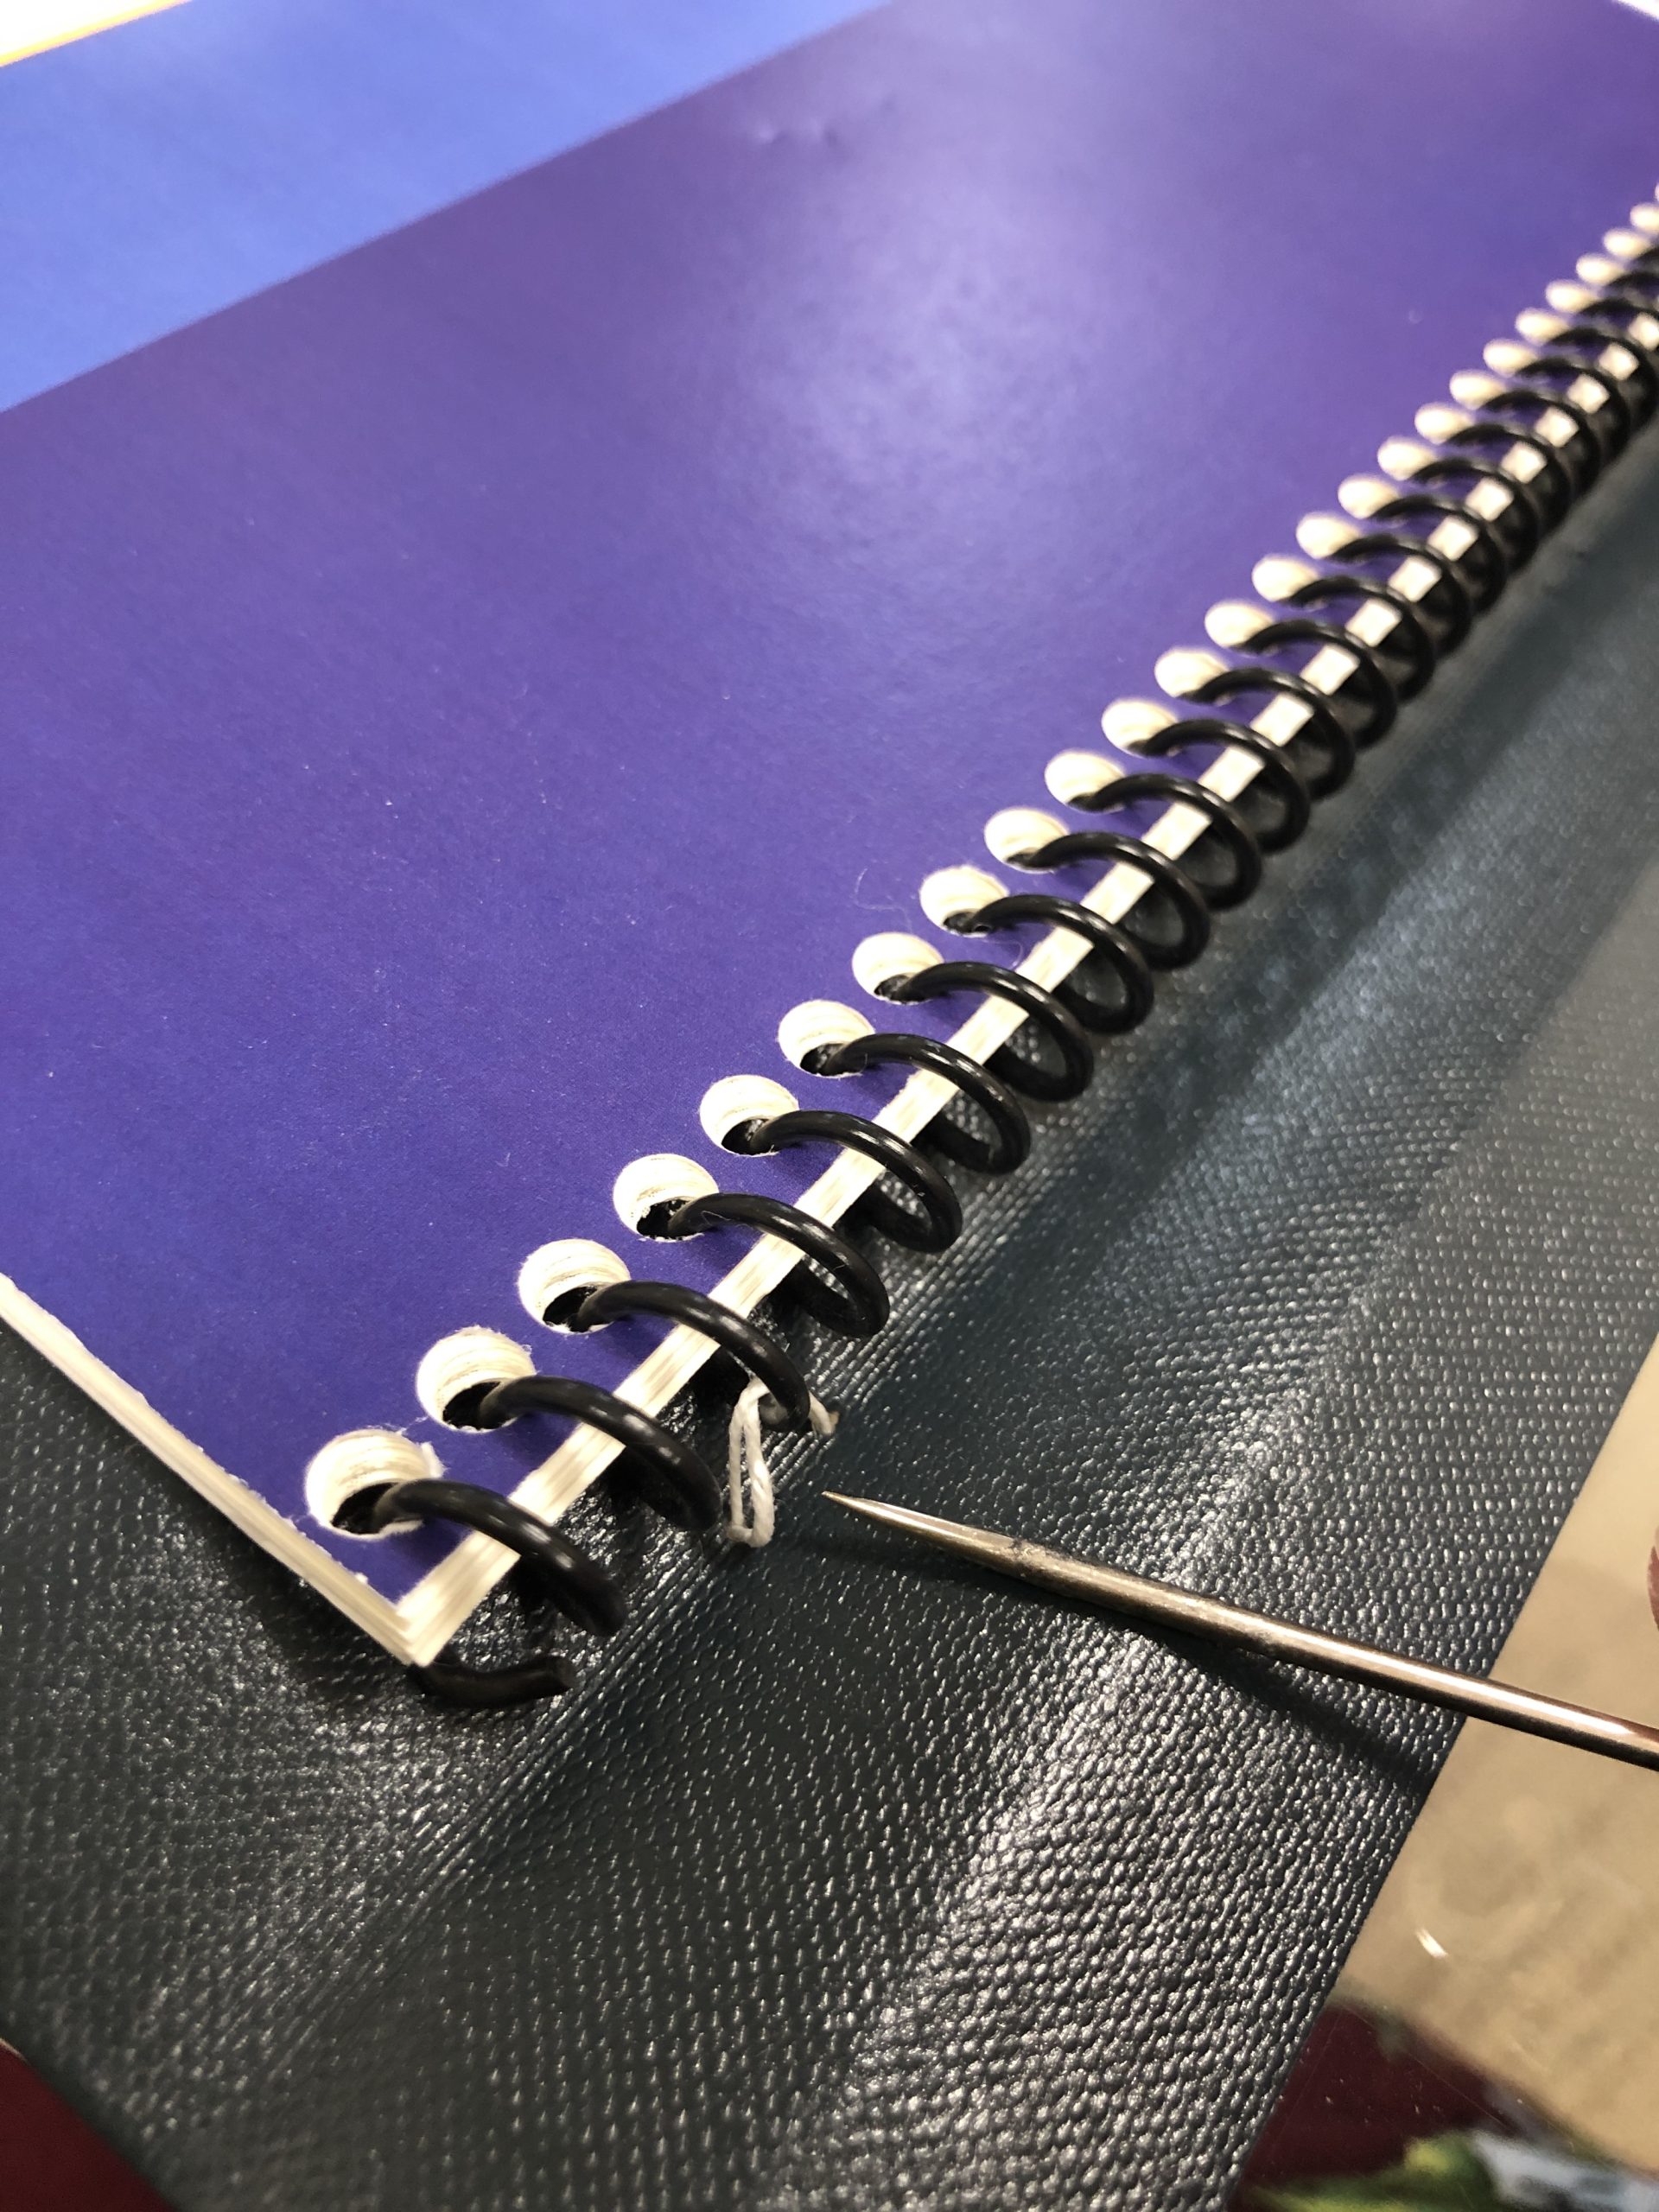
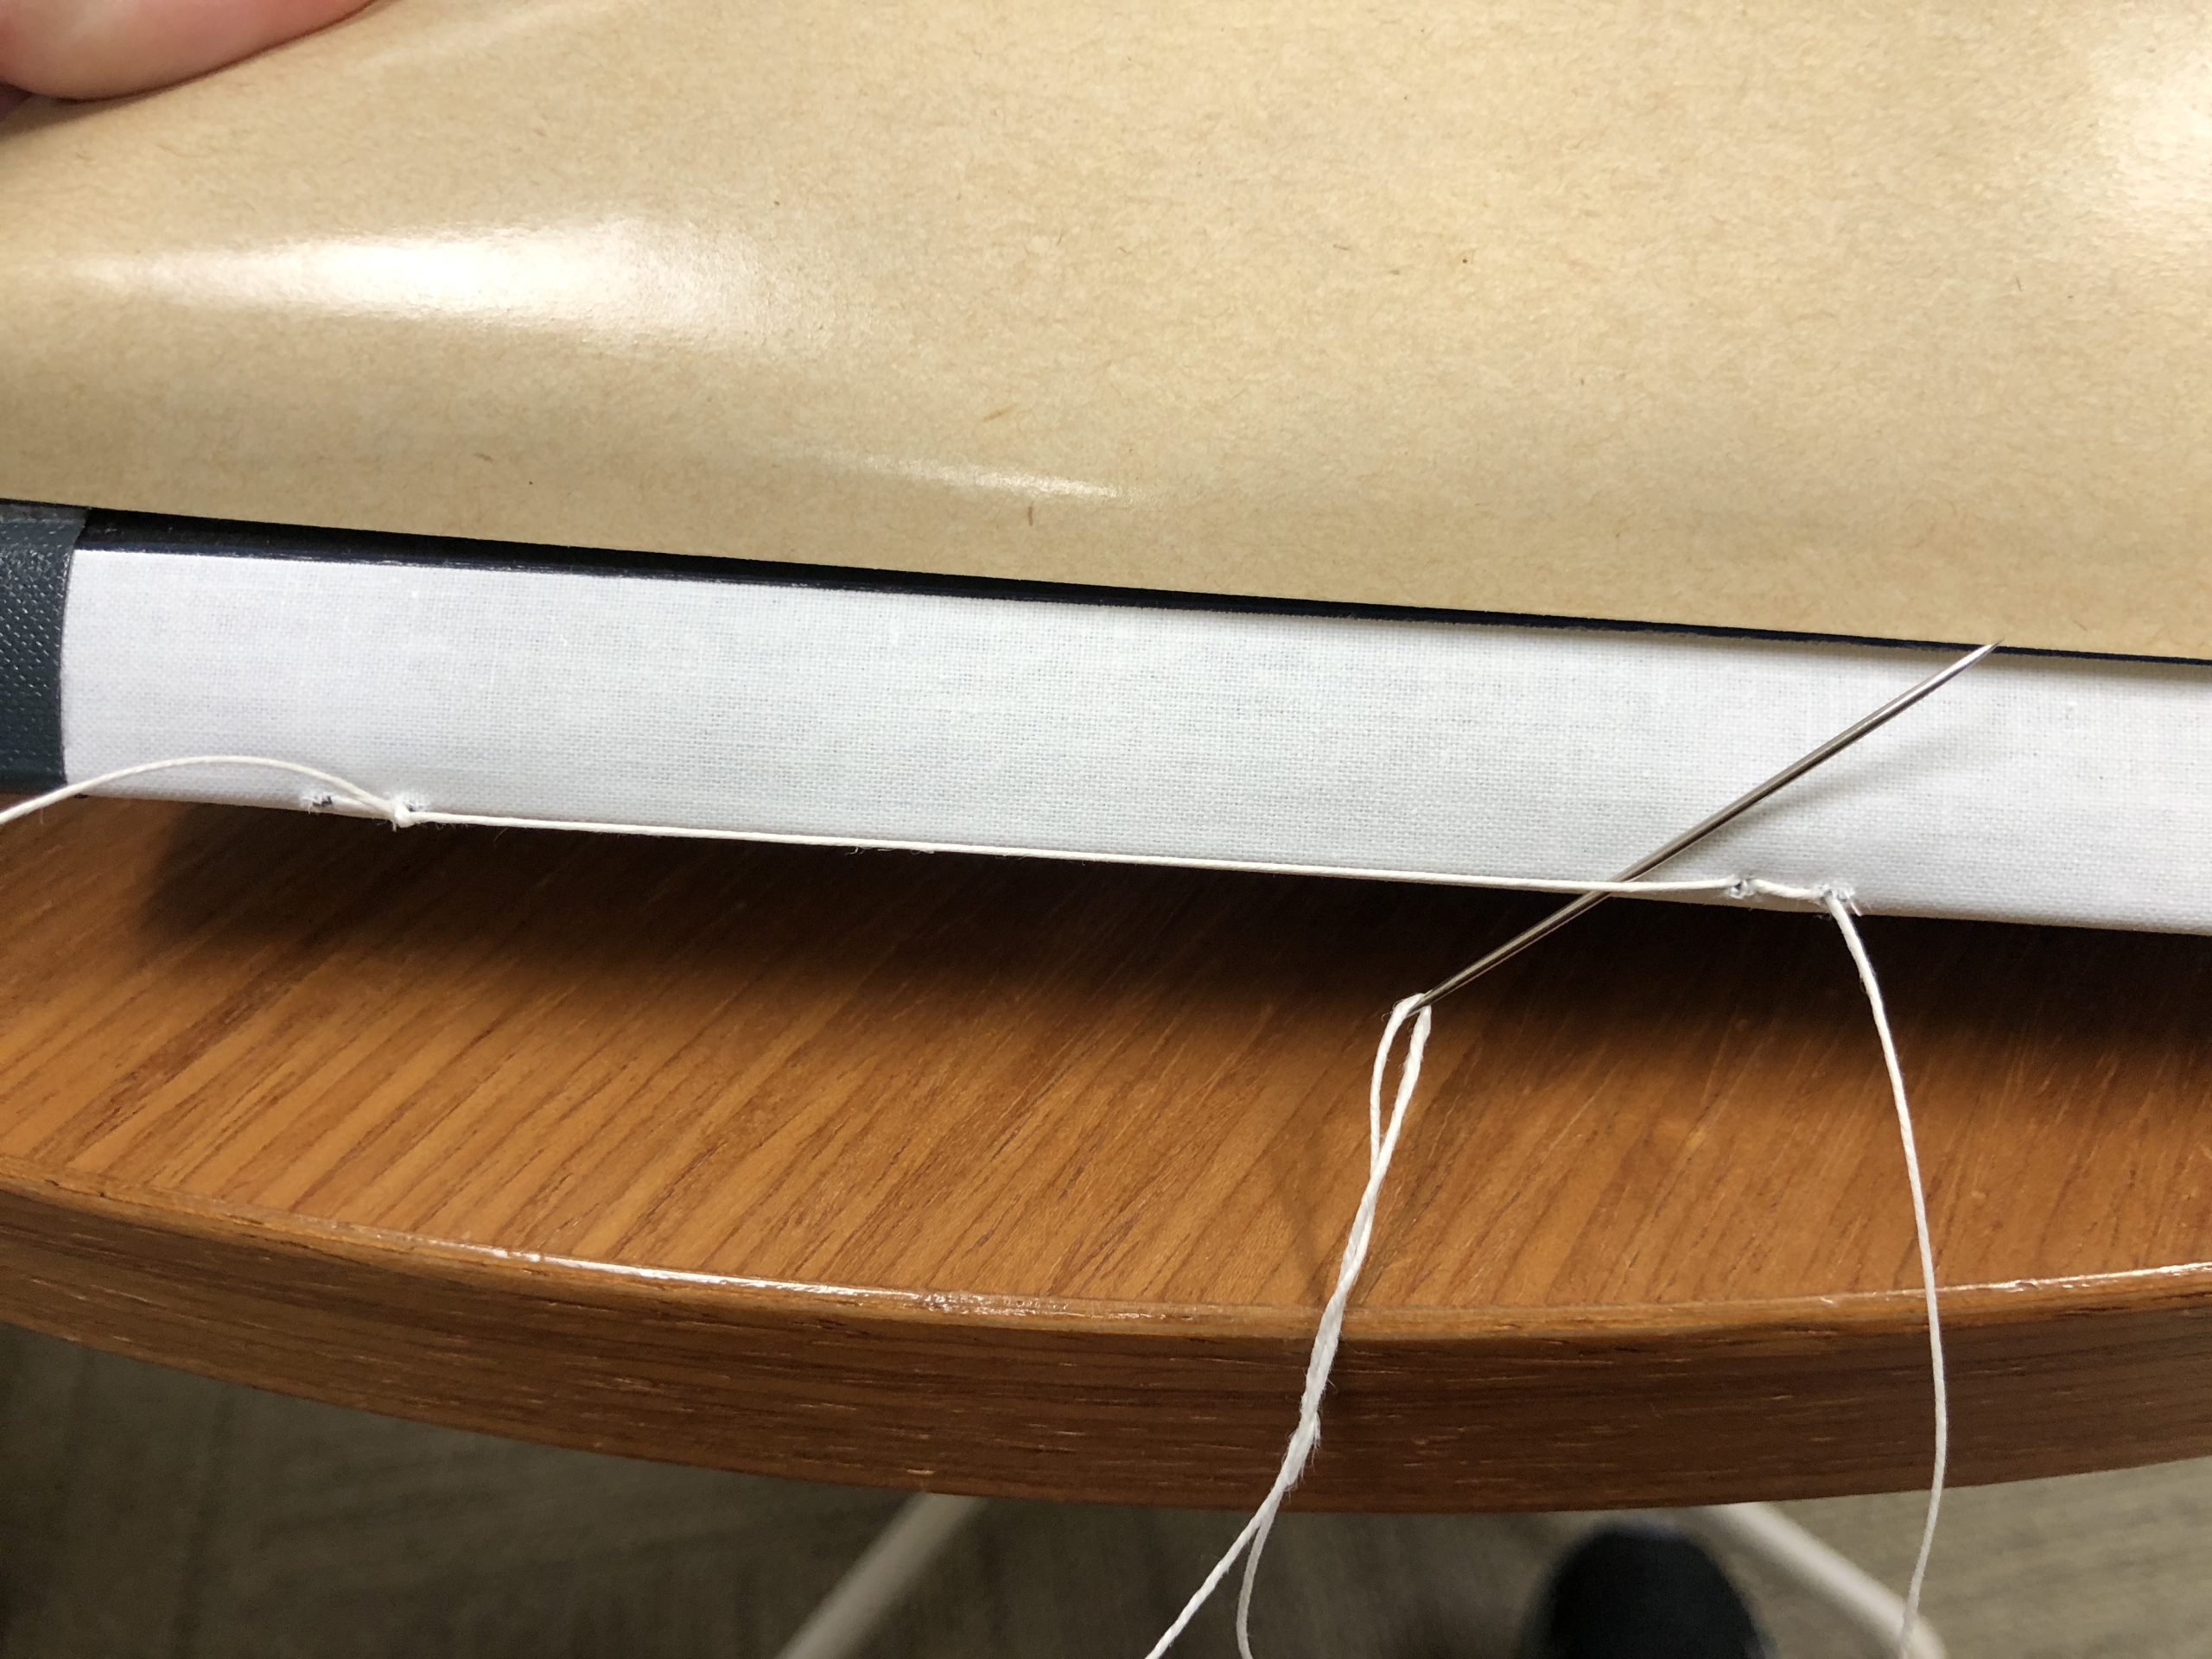
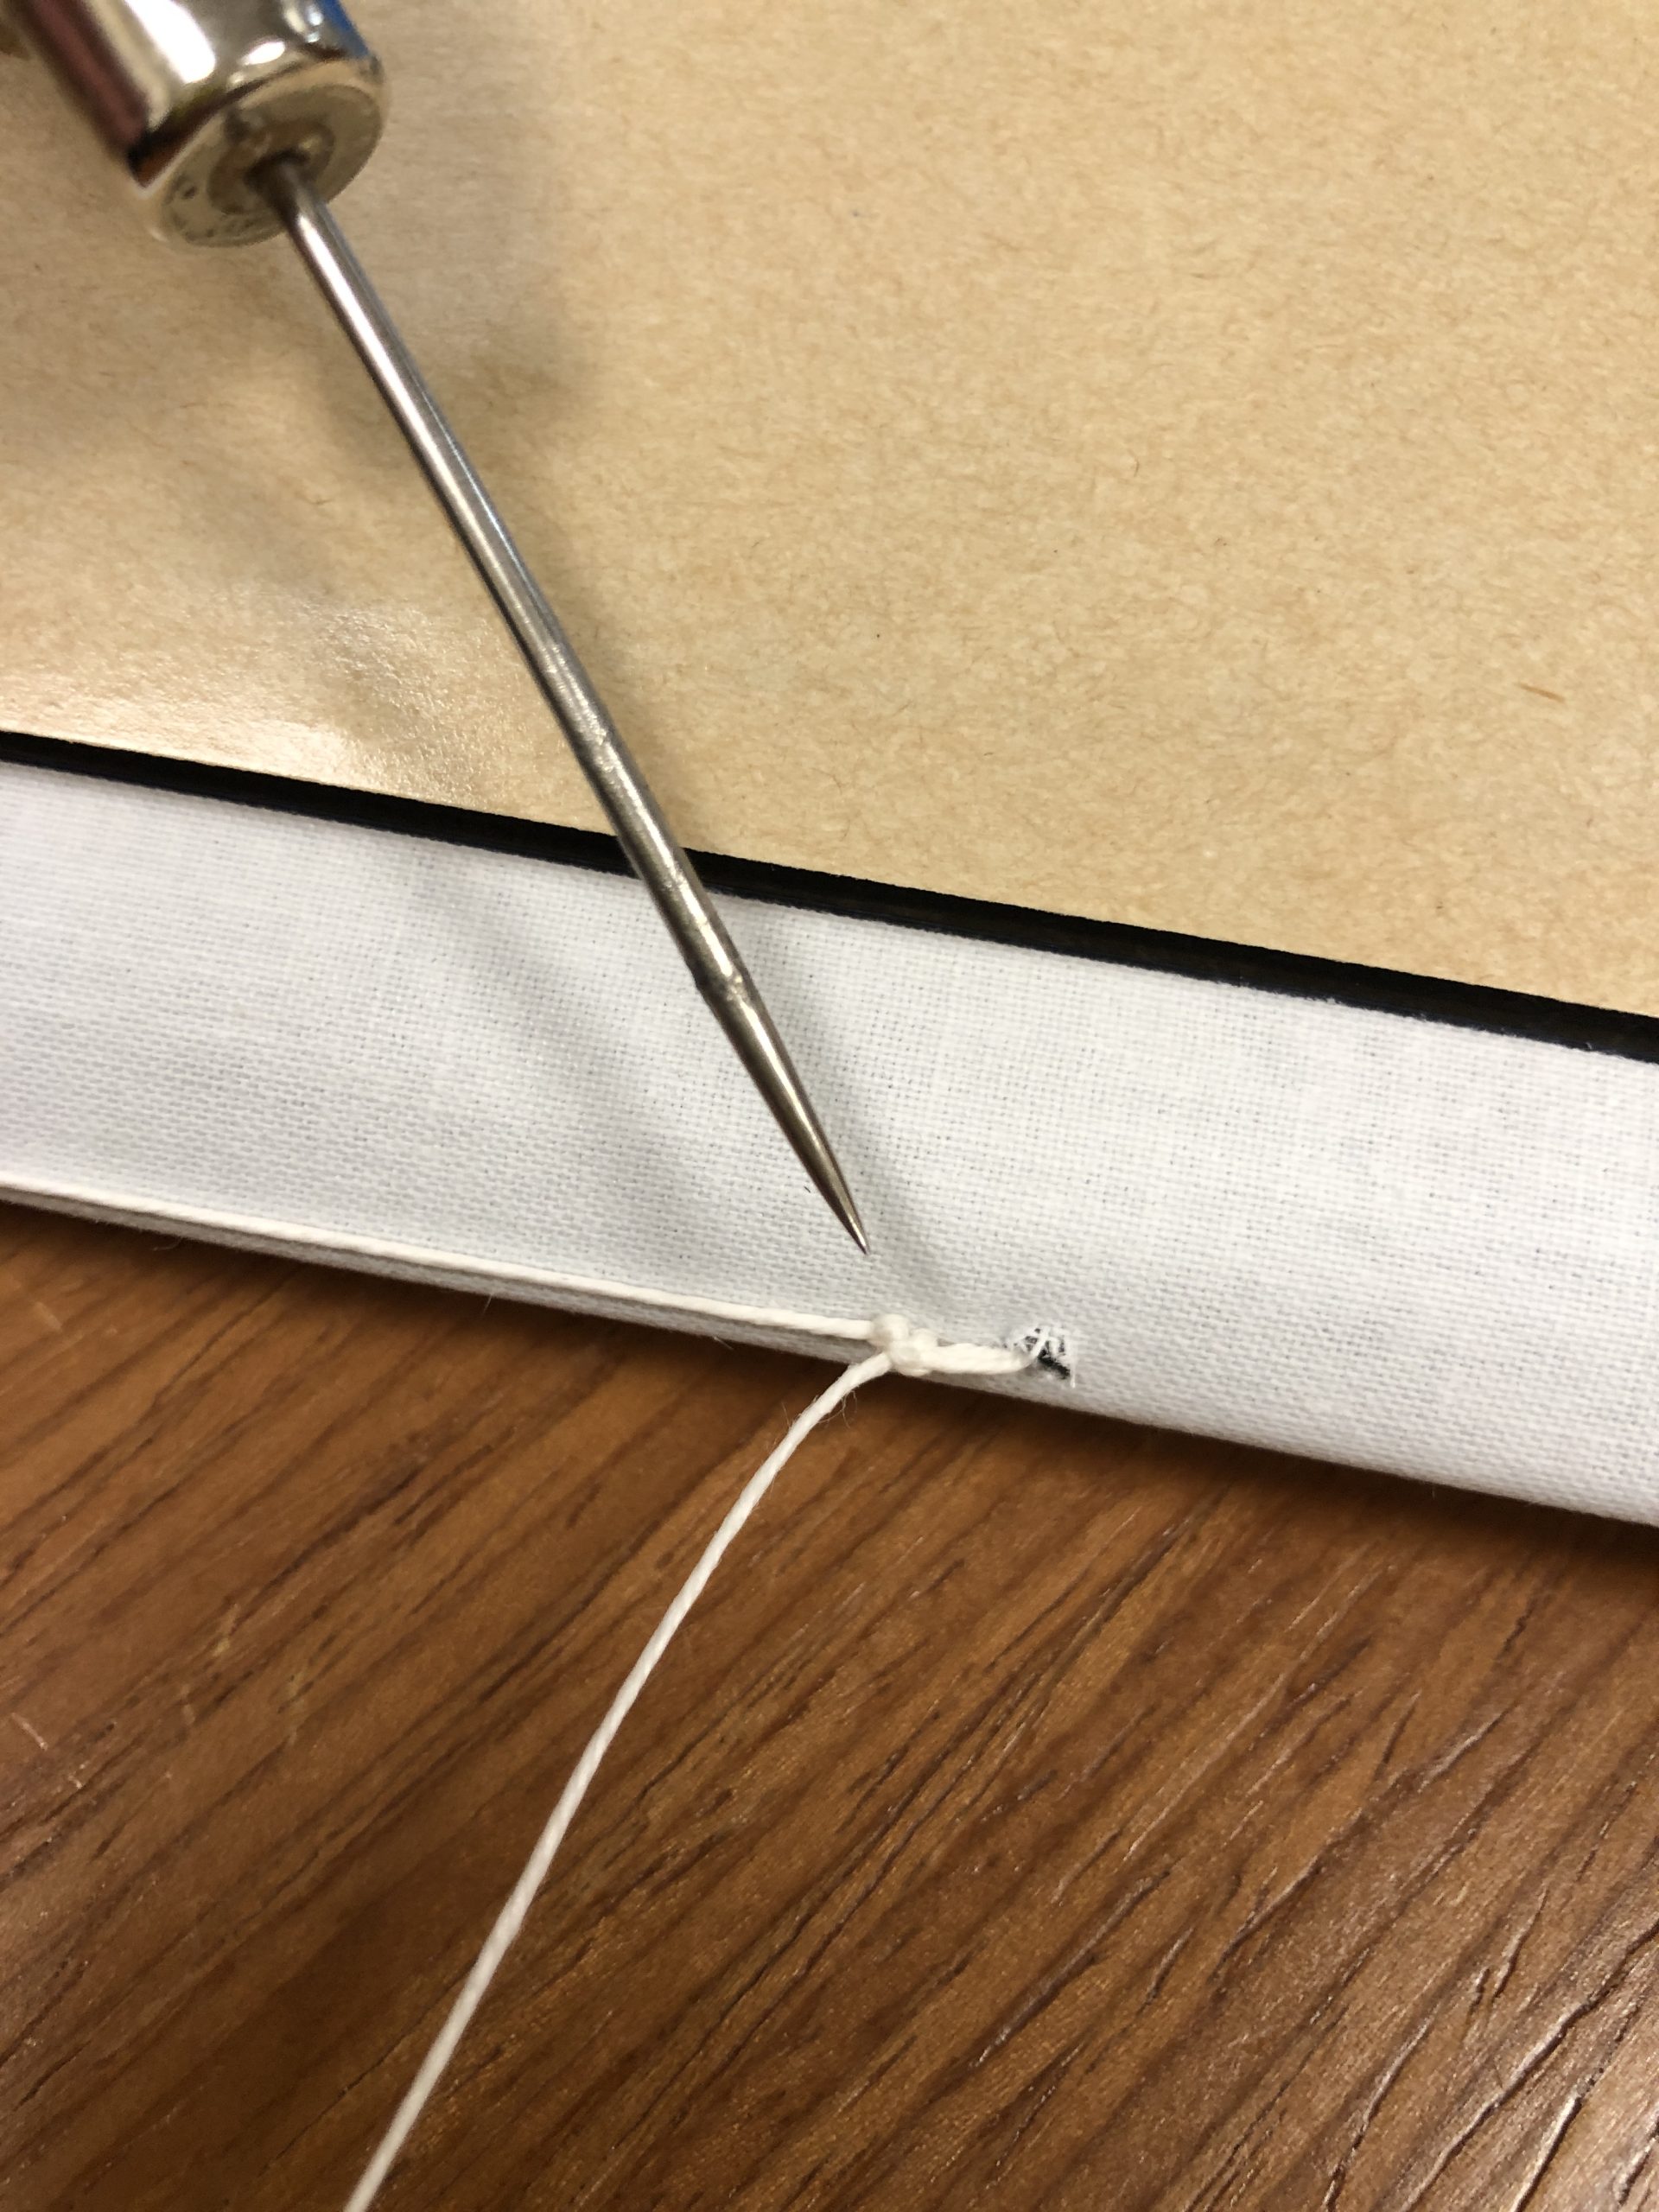
People asked if we had instructions, which of course has been on my to-do list for a while. So I created this short video demonstrating how we sew these. There is no narration, only ambient noise. Some day I will write up the instructions, but until then, hopefully you can use this video and the quick explanation below to see our method. Once you do three or four, you get the hang of it and it goes really quickly. At the 05:40 mark you can see the “shake test.” These are firmly attached as long as your sewing is tight, and you have the full function of the spiral.
The quick explanation:
With an awl, punch sewing stations. Each station consists of two holes, one on either side of a wire. 3-5 stations is adequate unless your pamphlet is very large.
Starting at the top, go in through the back and through a wire loop. Go out and back in again, wrapping the wire twice.
Pull tight, and tie a square knot. Go to the next sewing station and do the same, wrapping the wire twice. Loop the needle under the thread at the spine to create leverage when tightening, and continue along until the end.
At the end, once you have looped the wire twice and tightened the thread, loop the needle under the thread above and tie a square knot.
Finish the pamphlet by removing the paper and wrapping the spine around neatly. Remove the protective blue film. Voila!
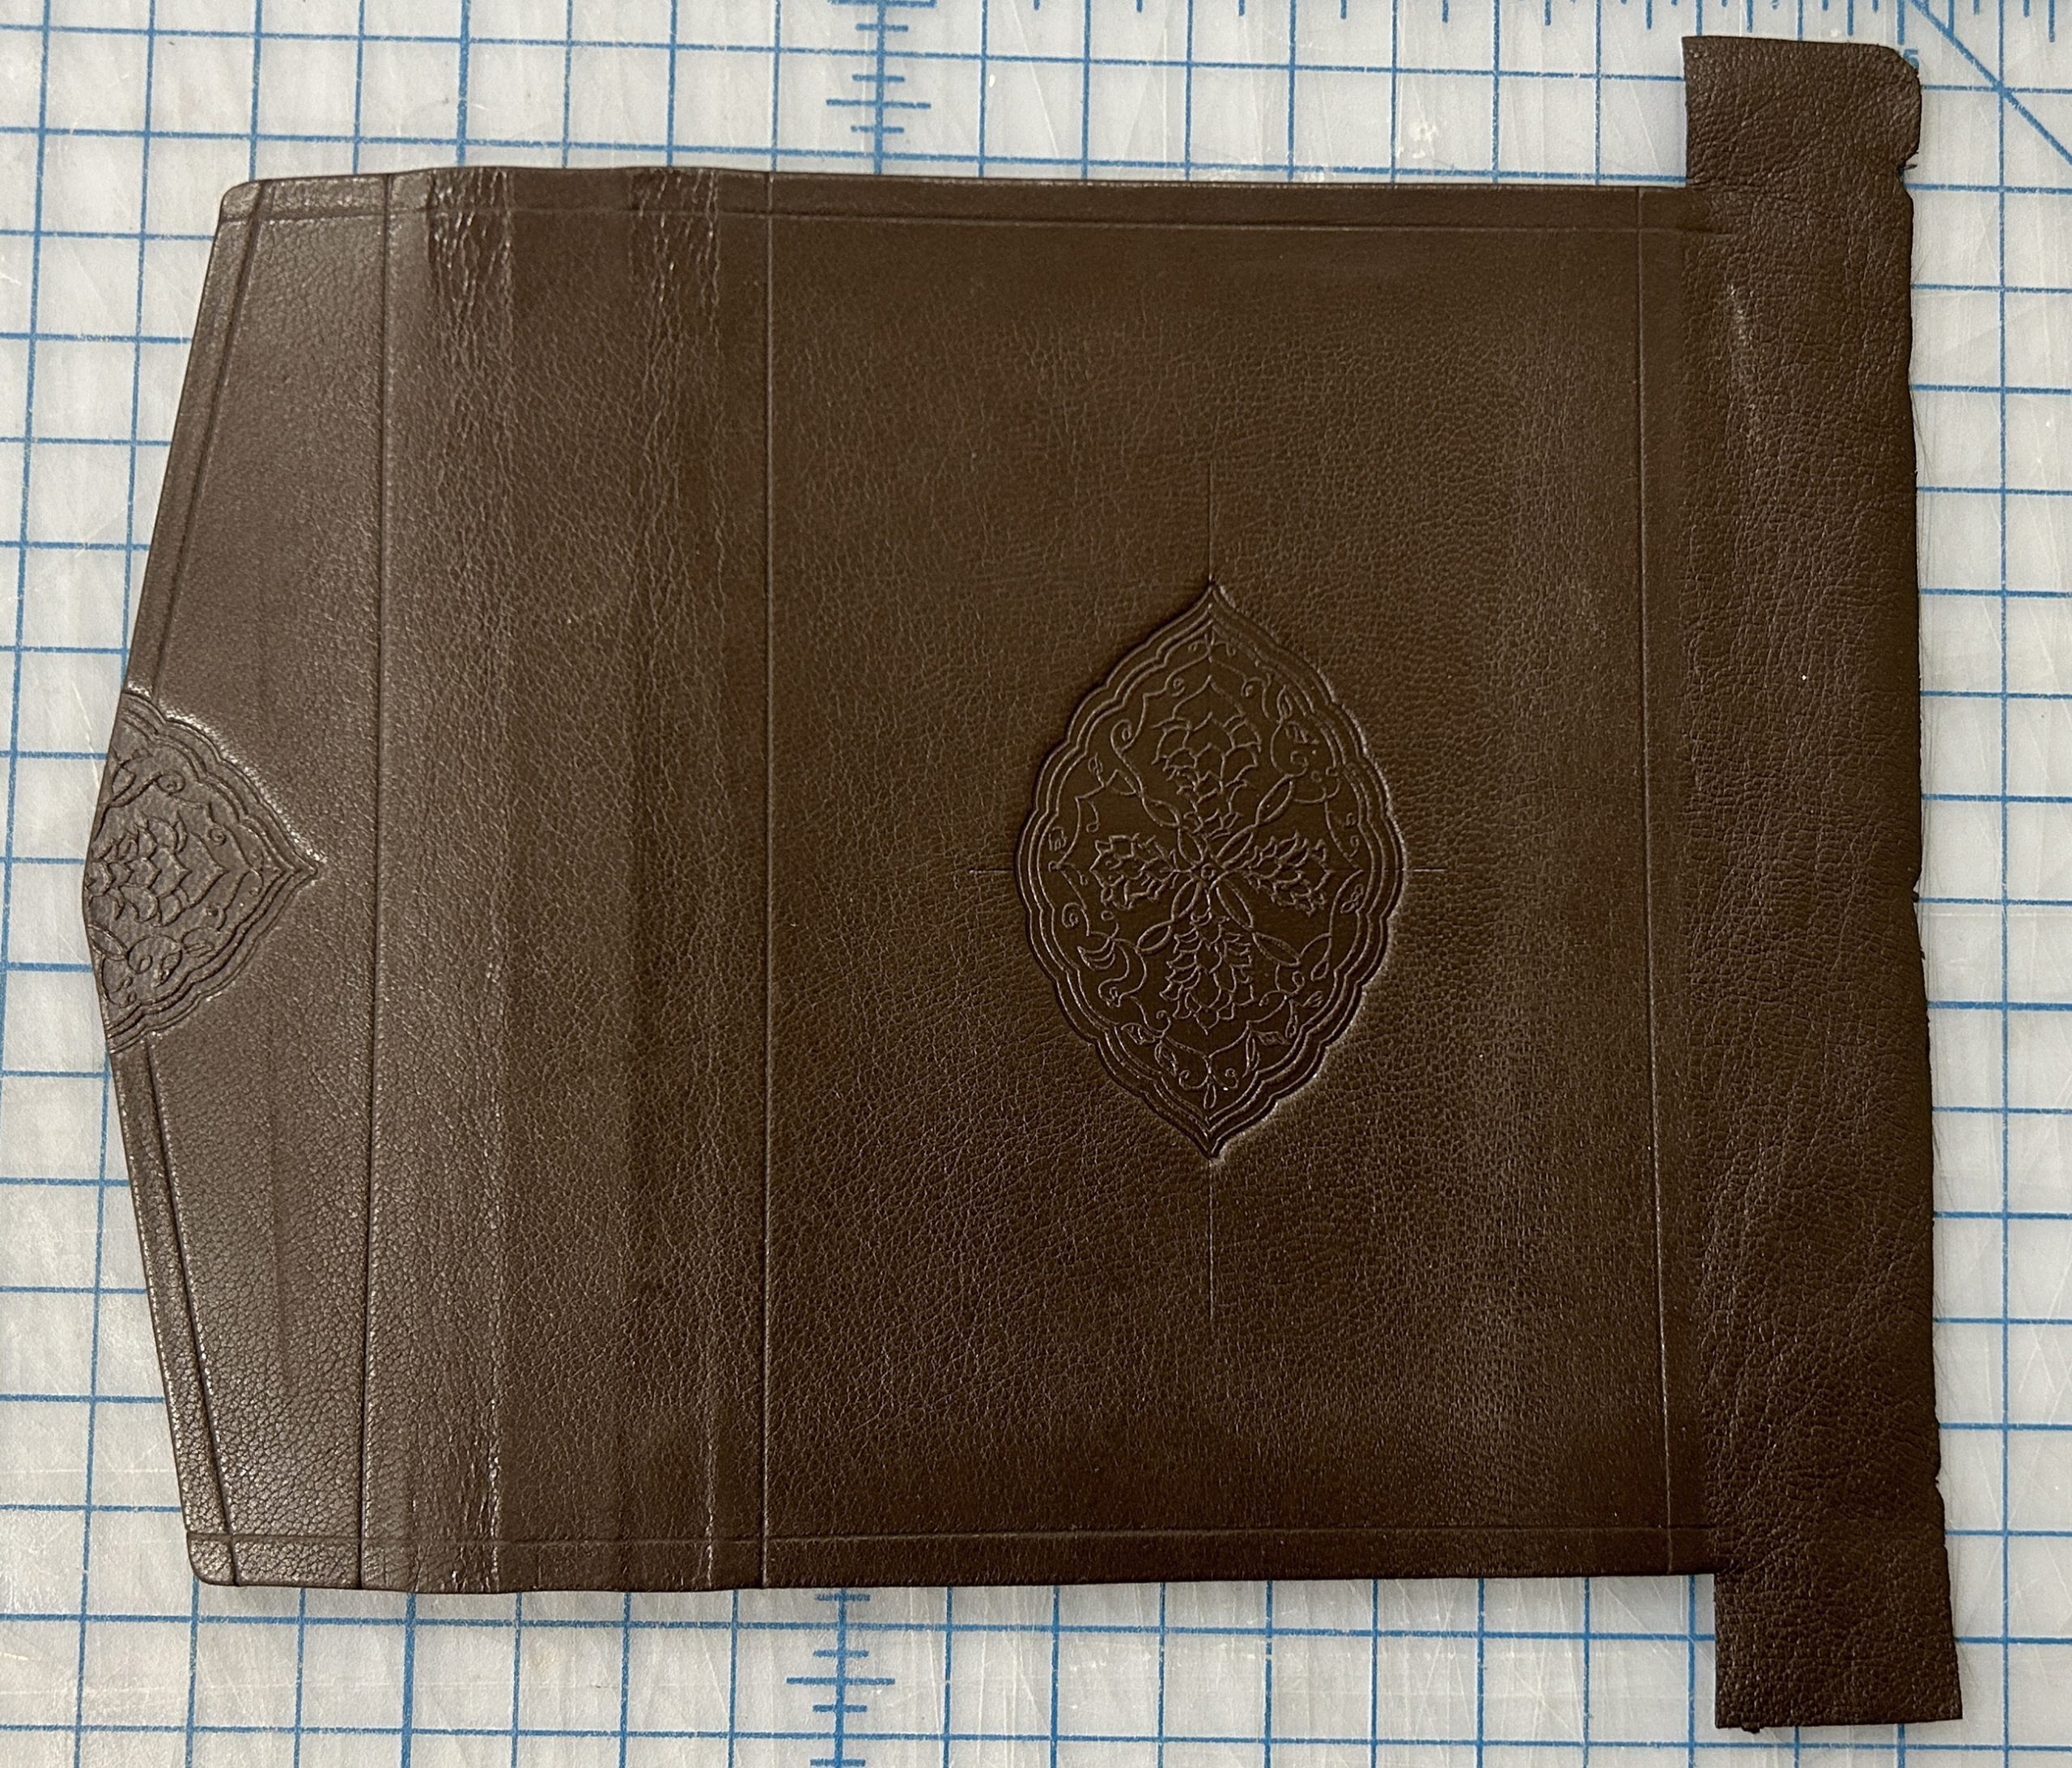
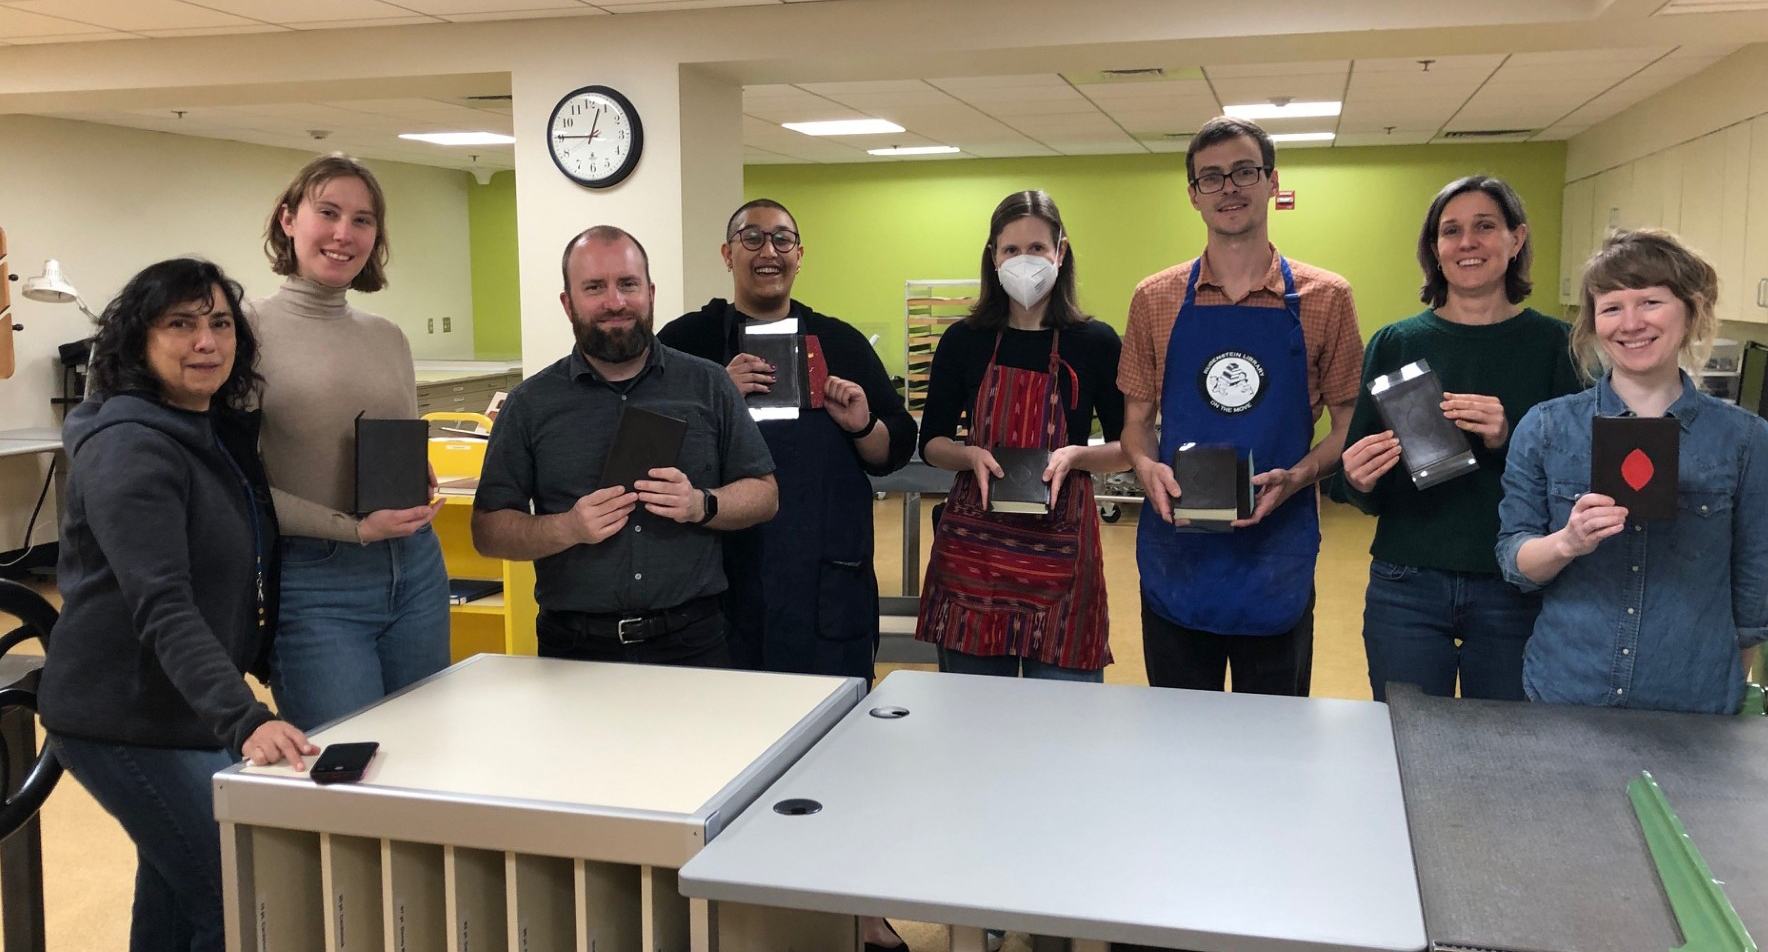
Duke University Libraries recently hosted an Islamic Bookbinding workshop with instructor Yasmeen Khan, head of Paper Conservation at the Library of Congress. Staff from Preservation at UNC libraries; Duke Conservation Services; and former HBCU library conservation alliance intern, Layla Huff, attended the workshop. During the course of the week, we learned how to construct a Persian bookbinding model that illustrates many of the structural, material, and decorative features of Islamic bookmaking. The models have hand-sewn textblocks, woven silk endbands, gold-sprinkled endleaves, an envelope flap, and goatskin leather covers decorated with a traditional brass stamp. Students personalized their bindings with additional decorative elements like ruled and gold tooled lines, gold paint, and colored leather onlays. We also discussed conservation considerations for Islamic materials with Yasmeen and examined Islamic bookbindings from the Rubenstein Library Collections.
The workshop was generously funded by the TRLN Library Consortium’s IDEA funds. Big thanks to TRLN and to Yasmeen for making this workshop possible!
Considering the great expanse of the Islamic world, there is much variation in bookbinding features associated with diverse cultural traditions and geographic origins. We got the chance to examine and compare Duke’s holdings of rare Islamic manuscripts.
The Rubenstein Library holds Persian items (from India and Iran), Moroccan, Ethiopian, Turkish, and Chinese Uygur bookbinding holdings, as well as others whose geographic origins have not yet been identified. While the Islamic calligraphic manuscript tradition was paramount, the decorative features of bookbindings are also often quite glorious – from intricately painted lacquer bindings to stenciled or cut paper endsheets – these features can give clues about where an item originated and also to whom the bookbinding may have been marketed in the modern book trade.
Arabic Manuscript 020 has the more squarish format typical of Maghrebi bindings from Morocco.
Arabic Manuscript 048, a Chinese Uygur Qur’an, has endleaves decorated with colorful paper cut outs and a decoratively cut envelope flap.
Hosting this workshop reminded us of how important it is to have opportunities to expand our knowledge bases and also to convene with our regional colleagues for much-needed training. With a topic this large, many of us learned how little we knew and how much more there is to learn. It was a good reminder that of how important it is to advocate and care for all materials and it’s easier to do this when one is better informed about the history and unique features of such collections.
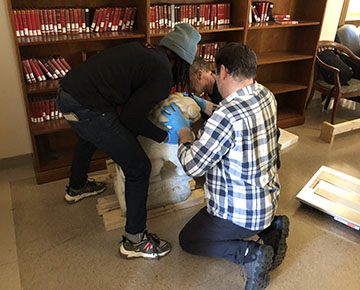
Last week, Crozier Fine Arts was on site to de-install, crate, and move the art and artifacts from the Lilly Library Thomas Room in preparation of the start of renovation this summer. It was incredible to watch this team get all of the work off the walls and into crates in five days.
The custom crates were made off site and shipped to the library. First up was crating the pair of marble lions that stood at the south door of the Thomas Room.
How do you wrangle marble lions? With many steady hands and a lot of shims.
Twinsies!
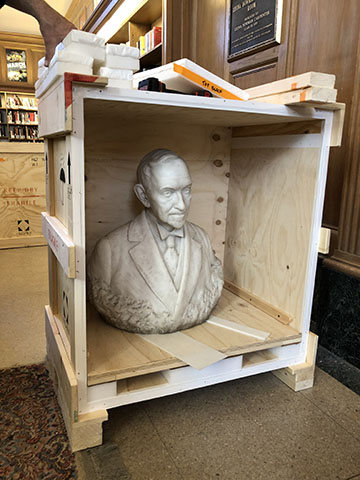
The statue of Benjamin Duke was estimated to weigh about 450 pounds. It took a lot of time, and careful planning, to get it off its platform and into a crate.
Benjamin Duke awaiting his crate.Moving Ben, inch by inch.Ben is ready for his road trip!
We have a lot more photos to share from the week. Until we get them posted, please see these other excellent recaps of the move of the art and artifacts from the Thomas Room. You can read more about the upcoming Lilly Closure and Renovation here.
The ancient Greek mathematician Euclid is widely known as the father of geometry, and his 13 book treatise, Elements, was one of the most famous mathematical texts in antiquity. The original text (written around 300 BCE) is no longer available to us, but it was widely copied and translated into many different languages over the centuries, with the first English translation appearing in 1570 CE. There have been many editions of the book as scholars analyze and retranslate extant manuscript copies, along with early commentaries and annotations.
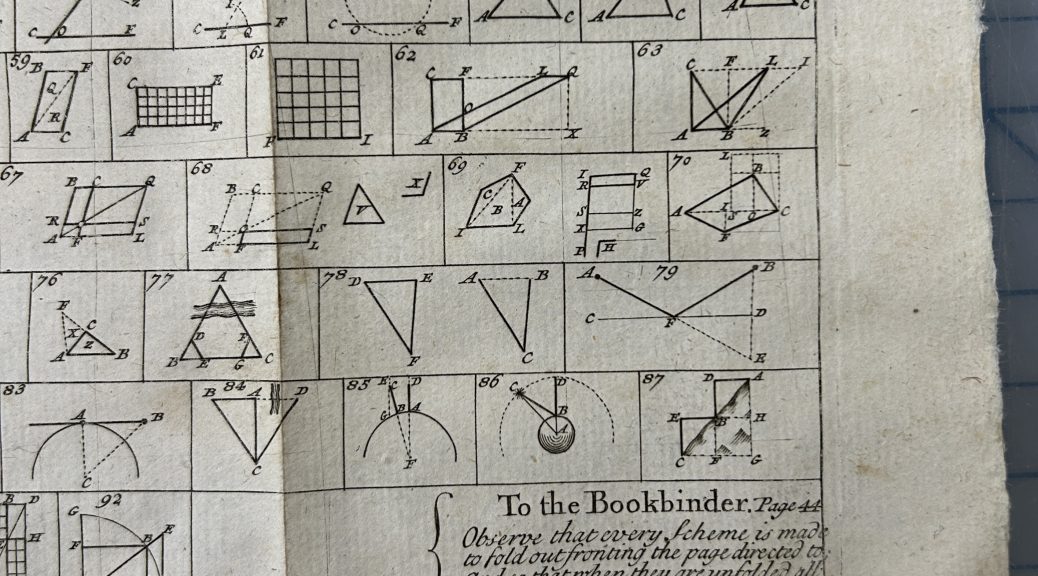
This 1719 English edition recently came across my bench with detached boards and powdery leather, fairly common condition problems for a leather trade binding from this period. The textblock was a bit dirty, with grime building up particularly at the folded engravings. As I was surface cleaning the first of them, I noticed some interesting instructions for the bookbinder included at the bottom of the print:
“To the Bookbinder. Page 44 Observe that every Scheme is made to fold out fronting the page directed to; And so, that when they are unfolded all y figures may ly clear out of the Book.”
The binder did successfully follow the instructions to make the diagrams visible “clear out of the book.”
It’s a useful arrangement to have the sheet extend that far out, so as the reader is going through the steps used to construct an object using a straightedge and compass, they can view the entire diagram and follow along visually. Otherwise, if the diagrams were bound in the usual way, the recto of one page might obscure the diagram you were looking at and you would be forced to flip back and forth.
What I love about these simple instructions is that they provide a little glimpse into the design and production of this object. Many tradespeople contributed to making the book, but they were working in different places and at different times. Including instructions for assembly in the prints is very helpful. For books sold in sheets, the printer or book seller may never meet the binder and be able to explain how it should be assembled. Had the book come to the lab in a worse state, with broken sewing or parts detached, that little note might also be useful for me.
I love finding things inside books. We even have a category on Preservation Underground called “What We Find In Books.” Photographs, notes, flowers, printers waste…they all tell a story. But what if we put something inside a book intentionally?
We wanted to conduct an experiment that would compare the environment inside a book compared to the the environment of the stacks. Luckily we have a discarded book that already has a small hole cut out for a datalogger. I made the hole bigger to accommodate an Onset HOBO dataloggers. While this book now has less of a cellulosic load and may not compare exactly to other “whole” books, I think it will give us some interesting data.
The book is quietly gathering temperature and humidity data every 15 minutes. We will report our findings at a later date. Until then, happy environmental monitoring!
In the first blogpost of our series introducing the Conservation Documentation Archive (CDA), I wrote at length about the needs for creating documentation during our work and the various forms in which it takes. Unfortunately, ingesting those materials into the Duke Digital Repository was not as simple as migrating digital files from one platform to another. A lot of work went into preparing each record, and today I’d like to share some more of the details and considerations that went into that process.
Our “hard copy” documentation has always been stored in a filing cabinet, organized by fiscal year, with the files of each treatment contained in a paper folder. As record keeping practices and technology changed over the years, we began producing our reports and images digitally and saving them to shared network storage provided by the university. The digital files are similarly organized in folders by fiscal year and treatment number.
Preservation of our born-digital records has long been on our minds: it’s imperative that conservation treatment documentation persists for use by future custodians of the item (see AIC Guidelines for Practice #28 and commentary). Electronic records require regular, proactive maintenance in order to remain usable over long periods of time. The shared network drives are regularly backed up, but the integrity of the files are not checked as part of that process. If files were to become corrupted or deleted, we might not know for some time and our records could be lost.
Documents that are stored in a human-readable format, on the other hand, have advantages for long-term preservation. Their storage requirements are pretty minimal (a cool, dry place), and they require no active maintenance or special equipment to access them. AIC’s Guidelines for Practice state that if the maintenance of electronic documentation records cannot be ensured, the conservation professional must create and maintain hard copies of that documentation using the most permanent materials available (see Guideline #28, Commentary B). The adage often used in libraries and archives is “Lots of Copies Keep Stuff Safe”, abbreviated LOCKSS.
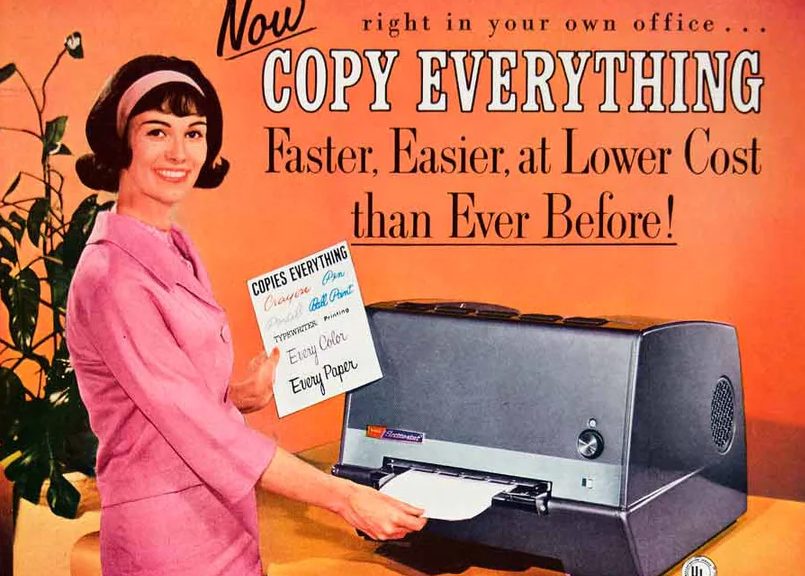
American Photocopy Equipment Company (1963)
Since we already have a method for storing hard copy records, we’ve been printing representative copies of our digital records and storing them in the filing cabinet. The reports are black and white electrostatic prints from our office copier (see Batterham, 2008). We also select a small number of representative before and after images, arrange them four to a page and then print them with pigment-based inks on Epson glossy photo paper using an Epson SureColor P800 inkjet printer.
The 35 mm slides in our legacy documentation are a bit of an exception. While they can be viewed with just a light source and magnification, special equipment is required in order to work with them easily. The colors of those slides have also shifted over time – and will continue to do so (Weidner 2012). “Benign neglect” isn’t a viable preservation strategy for this media.
Kodak slide and film viewer
The Duke Digital Repository offers a number of advantages over our past record storage strategies. Many of these are outlined in the Digital Preservation Policy, including regular monitoring of records for fixity and version control, maintenance of multiple copies in different locations, and control over who can edit, move, or delete materials and metadata. In addition to providing a better preservation environment, the digital repository also offers an improved mechanism for access by scholars using the collection. Rather than requesting a copy of paper records from our filing cabinet, library users can just view the records themselves online. In order to make that kind of access possible, however, we needed to get all of our documentation in order.
Our records underwent several phases of work to prepare them for ingest into the repository. Thanks to support from the Lyrasis Catalyst Fund, we were able to outsource the digitization of all of our legacy hard copy documentation, as well as hire a student worker and intern to assist with the large volume of file prep and metadata creation.
With digital records for all of our treatments in one place, we were able to perform a comprehensive review to ensure the files were correctly ordered and labeled. Reports were checked to ensure they were complete, images were rotated to the correct orientation, and a file naming convention was established. Some file formats are better for long-term preservation than others, so the raw DNG files and compressed JPEG derivatives were separated into subfolders; only the uncompressed TIFF images are ingested. Written reports were migrated to PDF format. If the report was born digital (rather than a scanned page), the documents were converted to accessible PDF and saved in the PDF/A format for better long-term preservation.
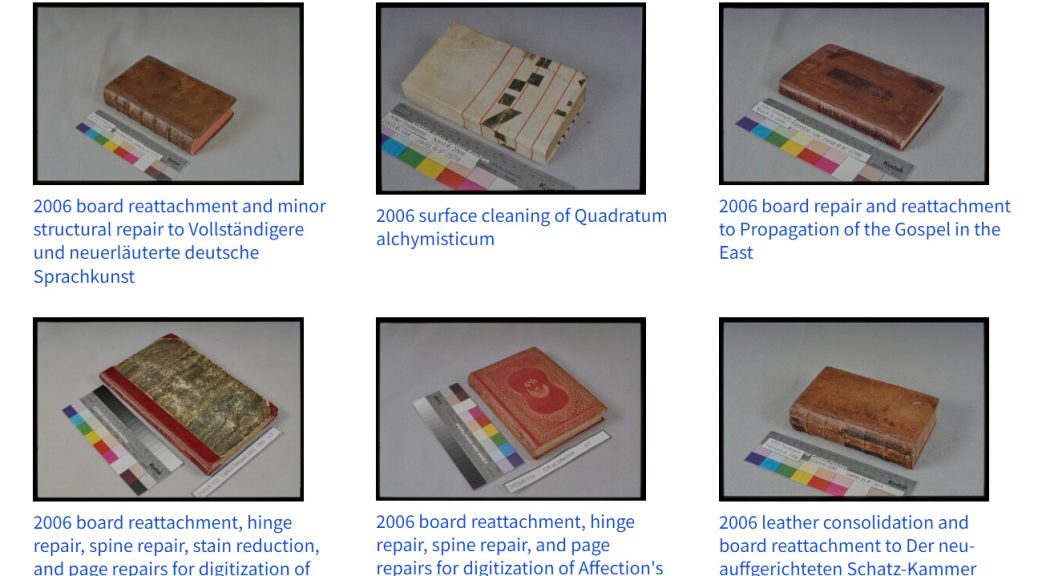
Once ingested, each treatment is organized as a single item in the digital collection, with the associated reports and digital images grouped together. We created metadata for each treatment to better identify and organize the records, and allow users additional access points. A title was created for each treatment, which includes the year the treatment was completed, a brief description of the work done, the workflow through which it came to the lab (if known), and the title of the item being treated (for example, “2016 board reattachment and tissue reback for instructional use of Athanasii Kircheri”). We also produced metadata to describe the culture or geography of the item’s origin, its condition, and the treatment techniques used. Whenever possible we adopted controlled vocabulary terms from theArt & Architecture Thesaurus (AAT) or Ligatus for all of these fields. Description for Duke’s other digital collections already rely on terms from the AAT. A unique identifier (either the BibSys number or archives collection identifier) was verified for each treatment in order to link the digital collection of documentation to the catalog record or finding aid for the item.
It’s important to note that some information or records are not represented in the CDA due to privacy or copyright issues. In all of our digitized reports, the signatures of employees have been redacted. While the email communication between conservators and curators that provides additional context for treatment decisions has been preserved, those files are suppressed from public view. Closed collections and items not owned by Duke University Libraries that we have documented (typically for exhibit loans) are also suppressed.
There was a lot of discussion in the media at the start of 2024 about copyright protections due to a certain culturally significant character entering the public domain. Shout-out to Jennifer Jenkins at Duke Law School for compiling a yearly roundup of works entering the public domain – it’s a really great read. Many of the items that we have treated are still under copyright protection, but there is a good fair use argument for making our treatment images of them available. The images are only used for scholarship, only small portions of copyrighted text are represented, etc. We ultimately decided to suppress certain treatment images of photographic collections, though, as they are fairly high resolution reproductions of the entire work. In those cases our reports are still available. See, for example, this condition assessment for an exhibit loan of a print from the Tom Rankin collection.
To date we have ingested around 1,400 records into the repository, which covers up to the 2016/17 fiscal year. At the moment we are hard at work preparing records from the next 3 fiscal years for ingest. Our eventual goal, once we are caught up, is to have a regular, annual release of records from the previous year.
We have heard that some of our colleagues are already using the CDA for research and instruction. In the next episode of this series, we will dive into the interface and look at some of the ways this collection can be used for research.
Batterham, I., & National Archives of Australia,. (2008). The office copying revolution: History, identification and preservation : a manual for conservators, archivists, librarians and forensic document examiners.
Today we are excited to publicly announce the launch of The Conservation Documentation Archive (CDA). This is the culmination of several years of work to digitize and make available all of the conservation documentation that has been produced as part of caring for Duke’s collections for the last 26 years. Over 1400 records have been ingested into the Duke Digital Repository at this point, with smaller batches of records expected to be added annually. This work was generously supported by a 2021 Lyrasis Catalyst Fund grant and was awarded the inaugural Sandy Nyberg Award. We hope that this archive will become a valuable resource, not only for researchers to access additional information about objects in the collection, but in documenting the standard preservation practices of our institution and the profession at large. A great deal of thought and effort went into building the CDA, so over the coming months we will publish a series of blog posts discussing in greater detail some of our motivations and processes for creating this repository collection.
In the first installment, we will travel back to February 2020, when staff from Conservation Services began discussing this project, to examine the scope of records that needed to be digitized and problems that the CDA is attempting to address.
Readers who are unfamiliar with the details of our work may be asking, “What is all this documentation and why do we need to save it?” The rationale for creating and maintaining documentation is laid out in The American Institute for Conservation’s Guidelines for Practice (see numbers 24-28), one of the core guiding documents for our profession. The purpose of this documentation is to be an accurate and permanent record of our examination, testing, and treatment for any of the objects that come under our care. This could be when an item will be altered as part of conservation treatment, but documentation is often created for condition assessments, like collection surveys or prior to an exhibit loan. Our records attempt to describe the collection material, establish its condition at the time of examination, and help future custodians in their work with the item. When possible, the records we create include both written reports and images.
The format and detail of the treatment reports has varied considerably over the years, depending on the type of object or collection, circumstances, and who produced it. Most of our records were produced by department staff over the years, but some of the records come from vendors or conservators in private practice. Reports typically start with a number of basic fields with identifying information from the catalog or finding aid and name of the examiner and a date for the report. The item’s dimensions are measured and recorded on the form. The report might also include a statement about the justification or goals for treatment.
Next we try to thoroughly describe the object (and accompanying items), including the format, structure, style, and decoration. The report includes what materials are used and if there are any distinguishing characteristics or marks. We also try to capture any condition issues that are observed, including damage or degradation, evidence of past treatment, and risks of additional damage or loss from use. We will note the methods of examination, including any testing and their results. This information informs our proposal for treatment.
Condition section of an Object Treatment form
The proposal for treatment is often a list of potential options, ranging from minimal intervention to very extensive treatment. We typically list the materials we will use, any alternative approaches that might be possible, and the potential risks. The proposal will include an estimate for the treatment time to help with setting priorities and workload. At this stage in the process, we will hold a meeting with the collection curator and other stakeholders to discuss the various treatment options and arrive at the best course of action for the item. This section of the report includes space to document the date of the meeting, the names of staff in attendance, and signatures of the conservator and curator or collection manager.
The remainder of the report describes the treatment itself, such as procedures or techniques and the location and extent of all alterations. If the treatment carried out is in any way different from the proposal, we will note why. This section documents any material that may have been added or removed, including the manufacturer or source for added materials. We list any adhesives or other substances (cleaning agents, solvents, poultices, etc) used in the treatment, including their chemical name and manufacturing source. This information will be most helpful if the item needs treatment again in the future or if any of the alterations need to be reversed for some reason. The date the treatment was completed and the time spent are also recorded here.
Before and after treatment photos
We produce photographs of the item before any alterations are made and after treatment is complete. In some cases we will photograph the object during treatment, too. We follow the AIC Guide to Digital Photography and Conservation Documentation for our photography workflow. The photographs typically show the item positioned on a neutral gray backdrop and include a target or photo checker card and printed label. The target or color checker provides a standard of comparison to help capture scale, direction of illumination, and true color of the item. These targets help us to create consistent before and after images, so that one can more easily compare the changes that occurred during treatment. The label in the photo includes a unique identifier for the item (the lab log number) and date of the photograph. This practice ensures we can always identify the item in the photograph, even if the file names or image metadata are altered or erased.
Conservation Services has been storing legacy documentation produced over the last 26 years in a large filing cabinet. The records for each treatment reside in their own paper file folder. The formats and media of those records have changed with the available technology. In addition to paper reports, our archive of physical media contains 35mm color slides, and inkjet photographic prints. The born-digital documentation is saved in a variety of file formats on networked storage. Reports tend to be saved in Microsoft Word or PDF format, while the images are saved in an archival raw format (DNG), as well as derivative TIFF and JPG versions. The TIFF acts as a preservation-friendly file format, while the JPG is a compressed format that is much easier to scroll through or post on the web. We have been printing paper copies of the forms and representative images as a backup for several years. Some of the older treatment folders hold very small fragments (like remnants of original sewing thread) that could not be reincorporated into the object during treatment. Our current practice is to encapsulate small fragments and store them in the enclosure with the item.
The conservation documentation that we produce has enduring value for both collections research and the history of the library. One of the key principles of the Duke University Libraries Strategic Plan is support and advocacy for openness. Our department has always made our records available to anyone who asked (assuming that access respects donor agreements for restricted collections and confidentiality), but previously there hasn’t been a good mechanism for researchers to know that an item has been treated or that these records exist. Library staff in other departments may not even be aware that we have a cabinet full of reports sitting in our lab.
Survey data from McCann (2012)
This is a fairly common situation across our peer institutions. A 2012 survey by Laura McCann at NYU Libraries indicated that a majority of conservators at research libraries are producing documentation for special collections treatments, but fewer than half are depositing those records into the institution’s archives. Maintaining records of previous treatments is important for making decisions about the item’s care in the future. It also becomes an important record if an item is lost, destroyed in an accident, or becomes inaccessible for other reasons. Improved access to our documentation might help us to evaluate different treatment methods or materials. It might also aid future scholarship into the history of the conservation profession, providing a record of accepted practices for different time periods, and giving more context to our thought processes and rationales for certain treatment decisions.
With this summary of what we are trying to preserve and why out of the way, next we will look at some of the work that went into digitizing the legacy records and creating the necessary metadata for ingesting everything into the Duke Digital Repository. We’ll be taking a break from blogging in December, so look for our next installment in January 2024.
Frey, F. S., Warda, J., & Digital Photographic Documentation Task Force. (2011). The AIC guide to digital photography and conservation documentation. American Institute for Conservation of Historic and Artistic Works.