All posts by Beth Doyle

Revealing Hidden Texts

For months a group of DUL staff including Mike Adamo and Molly Bragg from the Digital Production Center, Josh Sosin and Ryan Baumann from the Duke Collaboratory for Classics Computing, and myself have been discussing the potential use of multi-spectral imaging (MSI) in our work. This week, Mike Toth and Bill Christens-Berry of R.B. Toth Associates were on campus to facilitate two days of MSI imaging.

Day 1: An alternative to scanning mice eyes
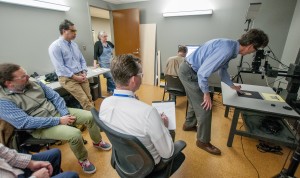
Mr. Toth’s sister, Dr. Cynthia Toth, is an ophthalmologist at the Duke Eye Center. She uses optical coherence tomography (OCT) to scan premature infants’ eyes to detect neurological and visual problems. Dr. Toth and Mr. Toth coordinated time with Dr. Sina Farsiu and his graduate student Guorong Li to image a few papyri from the David M. Rubenstein Rare Book and Manuscript Library. Dr. Farsiu uses OCT in his research. When he isn’t kindly imaging papyri, he is scanning mice eyes. Dr. Farsiu also coordinated time in Dr. Adam Wax’s lab in the Biomedical Engineering Department where we used their OCT scanner to image the papyri using a slightly different set up. Dr. Wax’s team is usually scanning rat esophagi and mice eyes, so a day with papyri was a bit out of their wheelhouse but everyone seemed to enjoy the collaboration. The Raleigh News & Observer was there as well and posted this story.

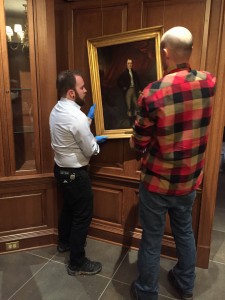
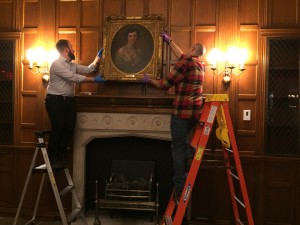
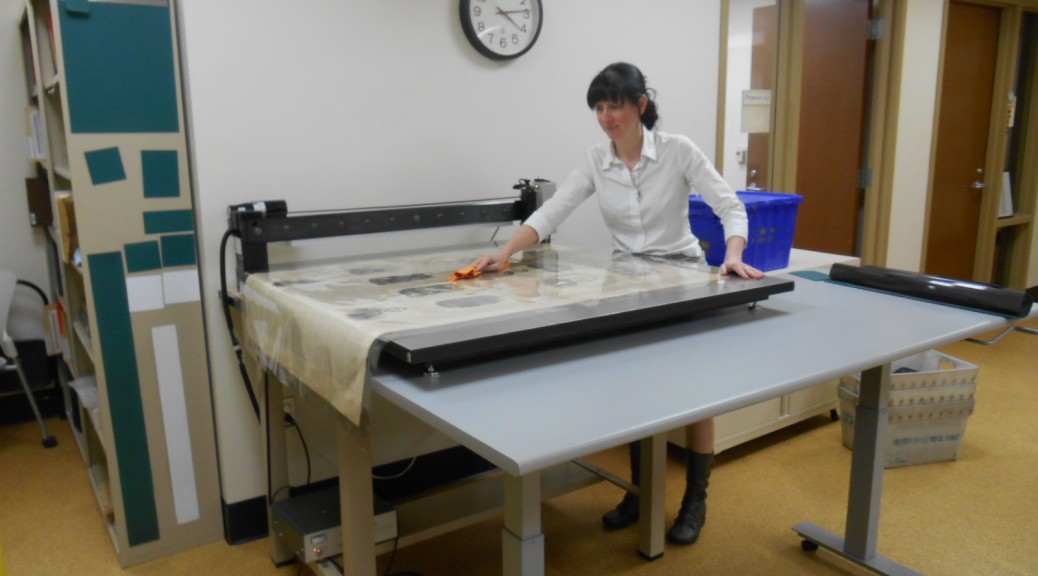
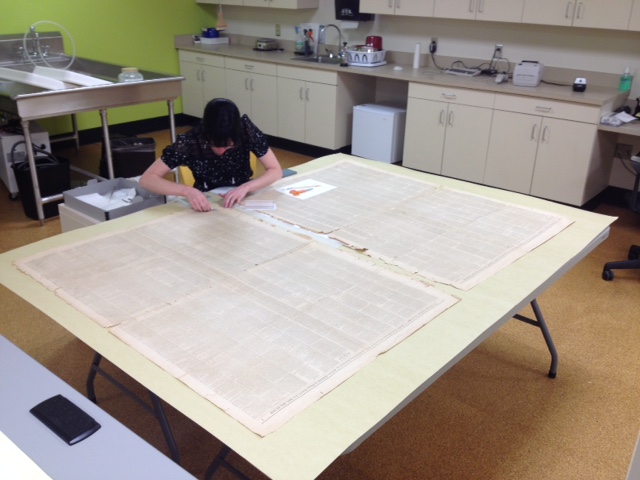
Mike Adamo from the DPC and I escorted the Rubenstein collection materials to the Duke Eye Center and the Biomedical Engineering lab. My role was to provide safe transportation across campus, and to handle the fragile items. Having researched OCT, I felt that this was a safe, non-destructive imaging technique for the papyri. It’s hard to say what the outcome of the OCT scanning will be, but it has potential to reveal hidden media, which is exciting to think about.

(L to R) Dr. Cynthia Toth, Dr. Sina Farsiu, and Mike Toth look at preliminary scans.
(L to R) Dr. Cynthia Toth, Dr. Sina Farsiu, and Mike Toth look at preliminary scans at the Duke Eye Center.

Photo Mar 01, 10 51 53 AM
(L to R) Dr. Farsiu, Guorong Li, and Mike Toth review preliminary scans at the Duke Eye Center.

Photo Mar 01, 12 17 39 PM
Ryan Baumann, Josh Sosin, and two technicians from the Biomedical Engineering Department review preliminary scans.

Photo Mar 01, 12 17 18 PM
Lasers have a lot of parts.

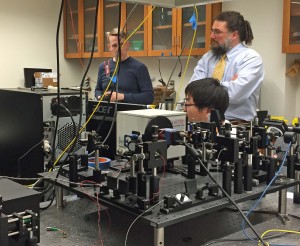
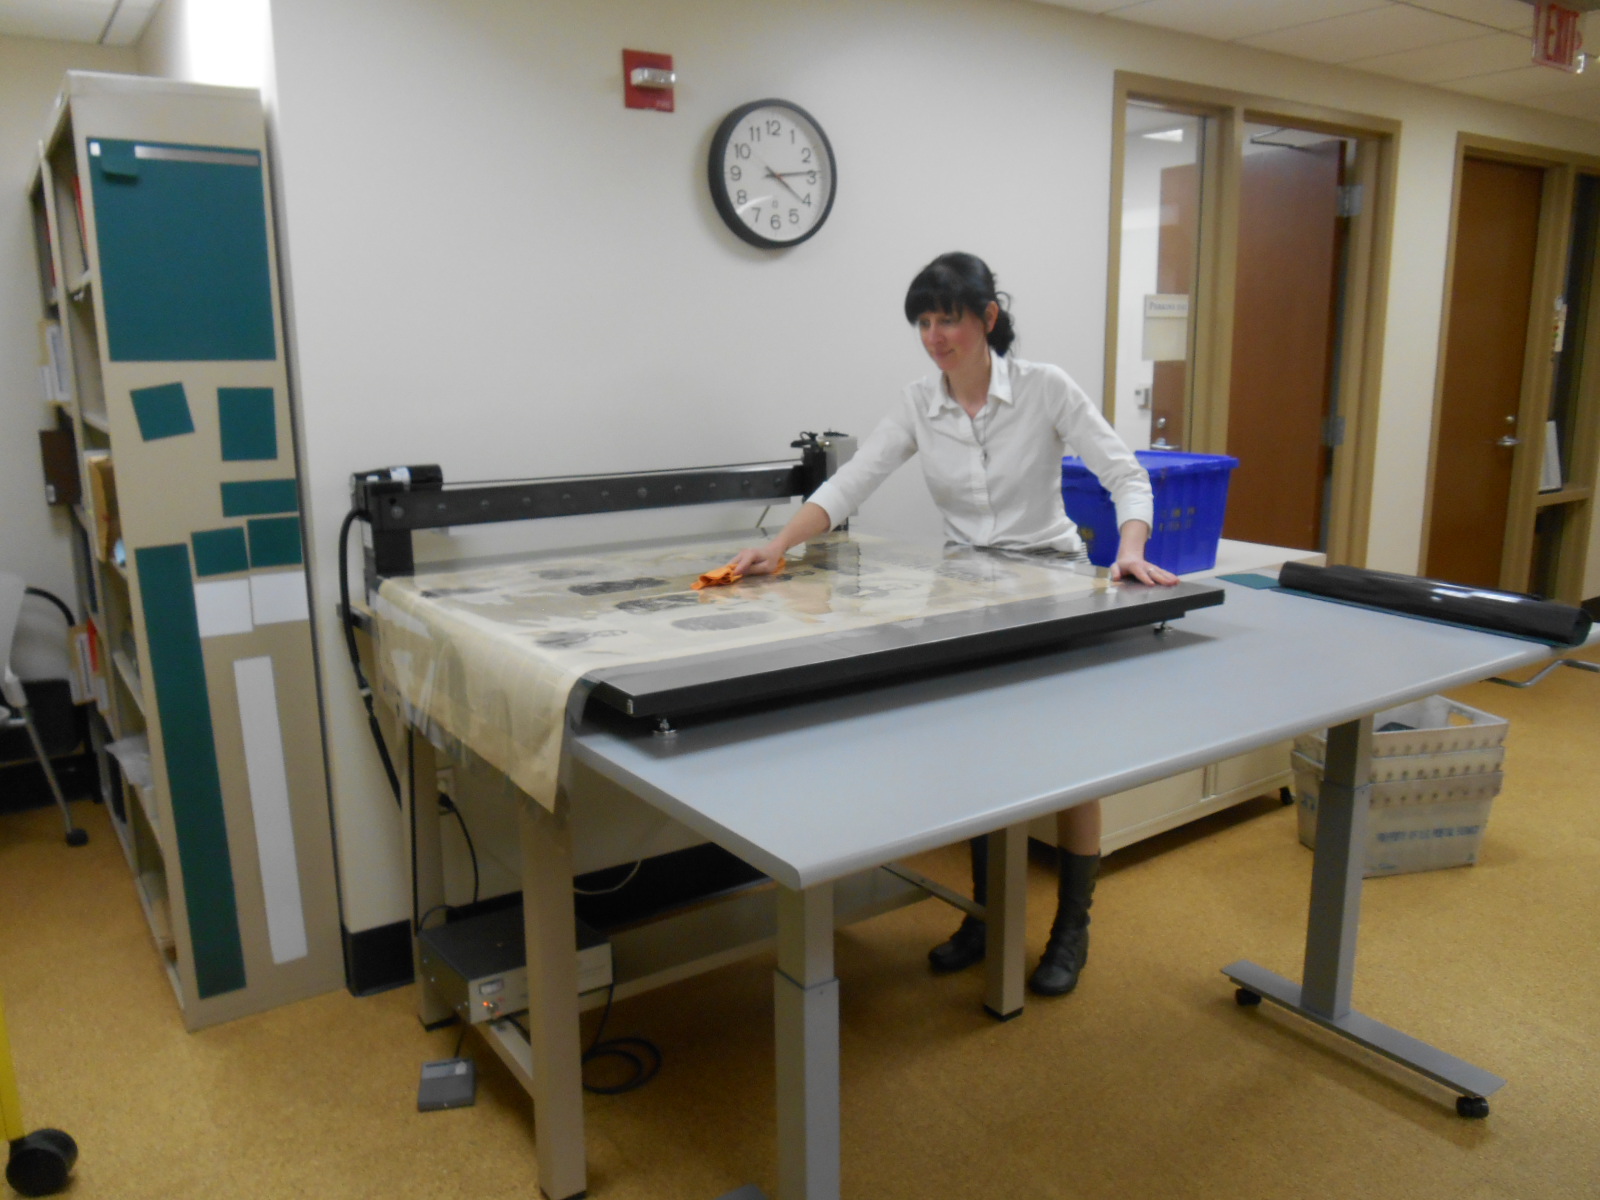
Day 2: MSI Scanning in DPC
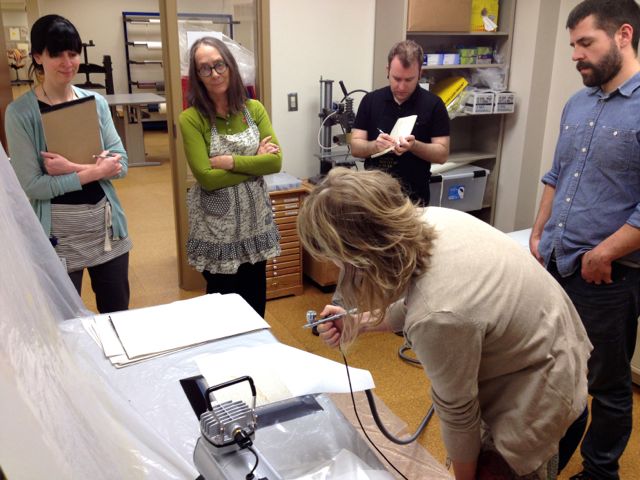
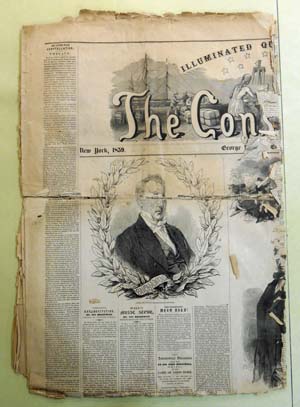
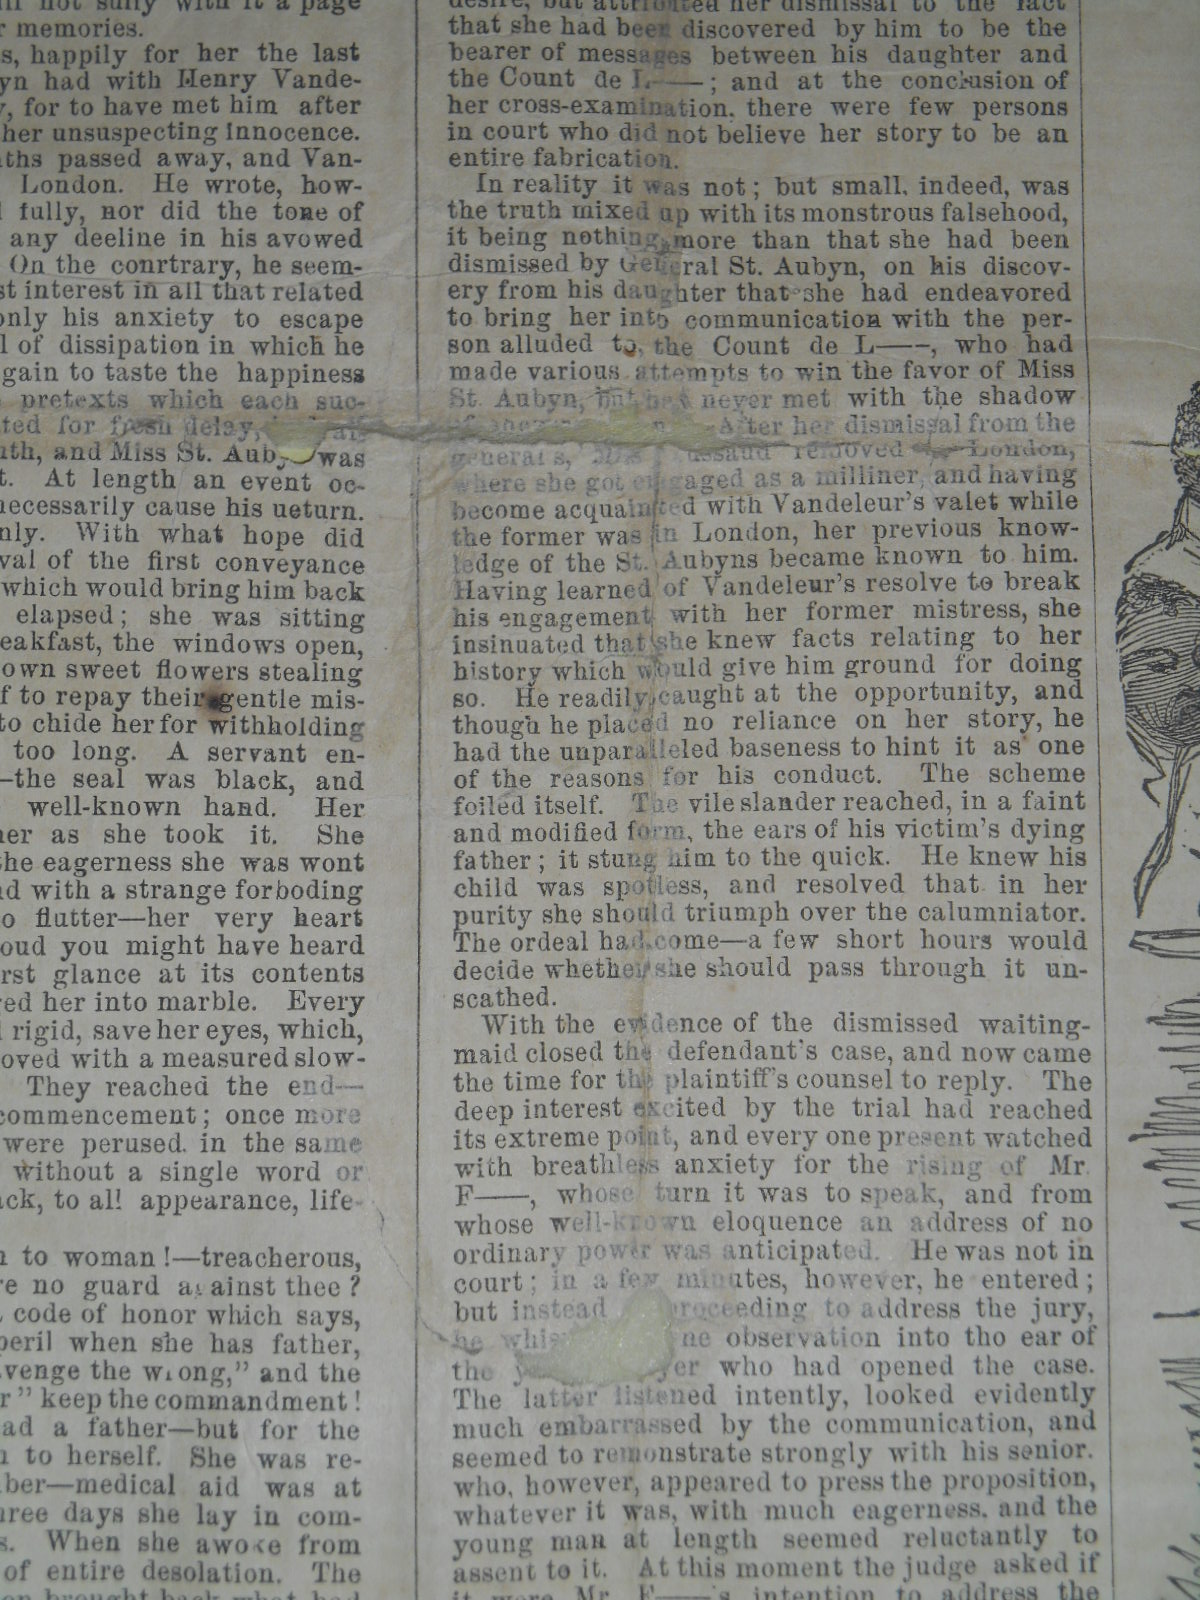
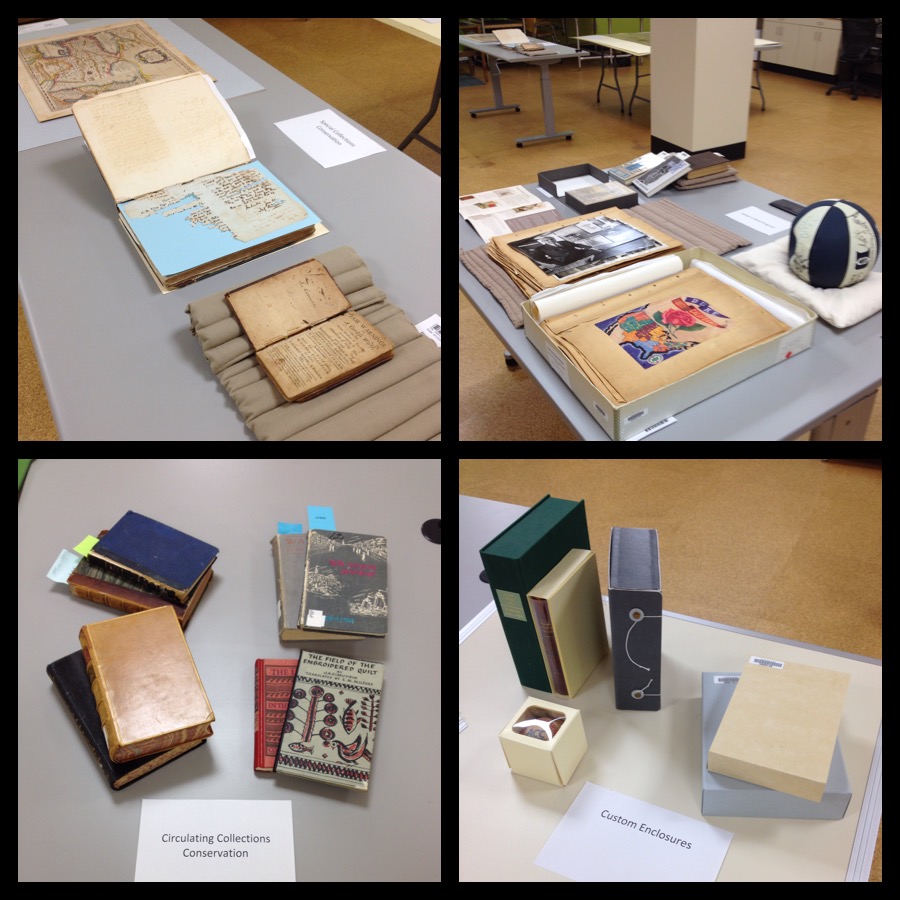
On Wednesday, Toth and Christens-Berry set up their MSI equipment in the DUL Digital Production Center. Their system scans at a variety of UV and IR wavelengths. The Library was interested in testing a range of problems to  see what this system could reveal. The materials we scanned included several papyri with obscured text,  two early Hebrew manuscripts whose writing is almost completely obscured by the condition of the gevil, a bound book with a Latin manuscript paste-down that is obscured by a previously adhered bookplate, and a Greek manuscript that was scraped and written over. All of these items present common problems for researchers using ancient texts.

Photo Mar 02, 10 13 50 AM
Bill Christens-Berry scans a papyrus fragment.

Photo Mar 02, 3 15 50 PM
Bill Christens-Berry shows us preliminary results. You can clearly see writing underneath areas of gesso on this papyri.
DPC doesn't normally have this many people in their camera room. (Photo by Mark Zupan)
DPC doesn’t normally have this many people in their camera room. (Photo by Mark Zupan)


Proof of Concept
The work that we did on Tuesday and Wednesday was meant to provide  “proof of concept” for the conversations that must happen regarding funding, staffing, training, workflows and service expectations if the Library were to develop an MSI scanning workflow.

Conservation is excited about MSI for its potential to discover more about the materials we work on. Having the ability to image in both UV and IR would expand our knowledge of the materials, expose information we can’t see with the naked eye, and enable us to envision better treatments. I think we are all excited for its potential to provide access to materials that right now cannot be easily used or read, such as the Hebrew manuscripts and the hidden texts on the papyri cartonnage. We literally had a “Holy [Cow]” moment when we saw these materials give up their secrets. It gave me goosebumps.

Mike Adamo wrote a blog post for Bitstreams describing their side of this project.

How Hot Is Your Book Drop?

We have two external book drops available to library patrons. The “Bostock” book drop is an aluminum box that sits under an archway between our two library buildings. It is somewhat protected from the elements by being under a stone archway and nestled against the library building. The “Drive By” book drop is a powder-coated steel box located at the back of the library near the parking lot. It sits in a sunny spot and is exposed to the elements. Last fall, a coworker in Circulation came to me with his concerns about the conditions of the books he retrieved from the external book drops. He said they often felt damp and even warm. I thought it would be interesting to put a HOBO datalogger in each of our external book drops to see what was happening inside.

Last August we put one HOBO in the Drive By book drop for a short test. I knew it was likely to be hot and humid in that box. I was eager to see the actual data. My advice? If you aren’t prepared for the truth, do not seek it. At its hottest, the Drive By box  reached 131 degrees Fahrenheit. At its most humid it reached 99% rH.

The graph that no preservation librarian wants to see.That test brought up a lot of questions. Since we were moving into the cooler and drier fall and winter seasons, we decided to do a longer test during the spring semester. This January, we put a HOBO in each of the external book drops and set them to record at the same time and interval rate so we could compare them to each other.

This afternoon I downloaded the data for the past week. This week was a typical North Carolina winter week. We had low temps in the 30F’s and high temps close to 60F. There were rainy days and sunny days.

Temperature readings in both book drops.

book drop rh
Environmental readings in both book drops from Feb. 11 to Feb. 19, 2016.

You can see that even in winter that steel box gets quite warm on sunny days. The humidity levels range from very wet to very arid. The aluminum box has its extremes, but they don’t spike as high as the steel box. It’s interesting to think about how the different metals, and the different locations, may be effecting the interior conditions.

I do not expect external book drops to have perfect preservation environments. I am, however, concerned about the extremes these environments present. I’m sharing this data with the Head of Access and Delivery Services so we can figure out what, if anything, we should recommend to the library in terms of these boxes.

I really love these HOBOs. They are easy to use and reasonably priced, and the data  can be easily downloaded in a variety of ways. Henry wrote a review of these HOBOs recently if you are interested in learning more about them.


A Day in the Life of a Library Conservator

It’s hard to say what a typical day in the conservation lab might be, or what skills you will need when you show up for work in the morning. What makes library conservation challenging is that you need to know about not only books and paper objects, but paintings, art on paper, furniture, sculpture, indigenous and folk art, photographs, analog and digital A-V materials, media of all kind from the dawn of mark-making, etc. The list of what we need to know is endless because libraries and archives collect broadly, and the conservation needs of these collections can be complex. This list doesn’t even cover the parts of library conservation that include budgeting, planning, managing people, environmental monitoring, attending meetings, and all those things that keep the Conservation program running smoothly.

Yesterday I was reflecting on the life of a collections conservator as were doing some out-of-the-ordinary work.  I was asked to write condition reports for the three portraits in the exhibits suite. I’m not a paintings conservator, but I do know how to look at an object and describe its condition in enough detail that someone can understand the state of that object now, and determine if any changes occurred in the future. I found the Canadian Conservation Institute’s excellent reference materials online regarding evaluating paintings to be very helpful in my evaluation. I have also collected condition data on the two historic pieces of furniture in that room. I didn’t find a CCI document on writing condition reports for furniture, but they do make available a lot of furniture care and handling information. We have no paintings or furniture conservators on staff, but my skills are such that I can describe them for our records and help facilitate their conservation should the need arise.

When they were ready to go back on the wall, Henry Hebert from Conservation, and Ben Bridgers from Exhibits, rehung the portraits.

Photo Feb 04, 10 24 04 AM
Hanging Dr. Mott’s portrait.

Photo Feb 04, 10 36 47 AM
Hanging Mrs. Mary Duke Biddle’s portrait.

Once the portraits were hung, Henry and Ben, with Val Gillispie, Duke University Archivist, helped reposition the Virginia Woof desk in the Michael and Karen Stone Family Gallery. The desk is part of the newly acquired Lisa Unger Baskin Collection and is now on display as part of the “Heralding The Way to a New World” exhibit. The final thing to do was to help get the lighting levels adjusted for the desk.

woolf desk move
Repositioning the Virginia Woolf desk.

This morning, we helped put the book collections on the shelves that line the exhibits suite. It took about an hour and a half and eight people to finish the job. The exhibits suite is now ready for the weekend’s events.


Tube Caps Part II: Adventures in Cutting!

By Rachel Penniman, Senior Conservation Technician

In my last blog post I showed the design process for creating caps for rolled storage tubes. After going through multiple versions of potential designs I had found a model that used a minimal amount of material and still created an effective cap. Unfortunately I had also discovered the woes of trying to cut perfect circles by hand.

1 Tube Cap v3 parts
Tube Cap Version 3.0 ready for assembly

Initially I looked into getting a circular mat cutter but even with that specialized tool, it still looked tricky to use and time consuming.

Fortunately I work with a group of creative individuals so while I was bemoaning the difficulty of cutting circles, Henry suggested I look into getting them laser or die cut. Huzzah! That reminded me of an article I’d read about a makerspace on campus called the Innovation Studio. Makerbots, Shopbots, and Printerbots, oh my! After communicating with Chip and Vinny, the nice folks who run the iStudio, they assured me their equipment that would have no problem cutting our corrugated board.

From the description on the iStudio webpage:

“The Epilog Zing is a desktop-style 30 watt CO2 laser cutter. It can operate in two different modes: raster and vector. Raster mode is for engraving into the surface of materials. You can take photographs/images/text/etc. and use the software to engrave into a variety of materials, including wood, some plastics, some metals, and acrylic. Vector mode is for cutting custom shapes through thin materials by using a slow moving, high powered laser.”

Lasers are exciting!

The iStudio is conveniently located just across the street from the library. So Tedd and I brought some templates of the parts I needed over to the iStudio and they helped us draft up a vector drawing to my exact specifications in Solidworks.

My carefully measured templates

The vector drawings got inserted into a CorelDRAW page and then the file was sent as a print job to the Epilog Zing.

Vector drawing and print settings

Our first attempt very quickly yielded an expertly cut circle but the laser caused scorch marks on the board.

Nicely cut but it smelled like a campfire and left ash on my fingers

The cutting action of the laser can be altered by adjusting its speed and/or power so Tedd and I continued adjusting until we found a good setting that cleanly cut the board without being so overpowered to cause scorch marks.

Testing out the laser with different settings

In the end we found a setting of 50% speed and only 20% power made the perfect cut. The board still had a slightly burned scent to it even with the power so low, but leaving the parts in our fume hood overnight took care of that. Because the laser works by vaporizing the material, I’m not actually sure it’s possible to cut the board without having some smell.

The perfection of these laser cut parts is especially apparent when compared side by side with my hand cut parts, and the laser cut parts are completed in a fraction of the time.

Laser cut on the left, hand cut on the right

One of the great advantages of the laser cutter is that it can take any size board 12×24” or smaller. So even small scraps can be laser cut into cap parts. I have put a new bin under our board shear to collect scraps that would otherwise be destined for the recycle bin. This makes me especially happy because we are able to make almost the entire cap out of material diverted from the recycle bin.

Scrap bin
Scrap bin

After perfecting the method I plan to collect scraps until I’ve got a good pile, then cut out a number of cap parts all at once. Then we can have a supply of parts ready to assemble whenever a new rolled item needs storage. The prototype was an excellent success though and has already been put into use.

Welcoming Tube Cap Version 3.0 to its new home in the stacks

My experience at the iStudio has sparked my interest in other potential uses for laser cutting or engraving. Could this be used for creating other enclosures? Or could we accommodate making more complex enclosures if they could be modeled and cut on this machine?

The folks at the iStudio had a wooden box on display that was cut and engraved on the Epilog Zing. A student using the machine on my first visit showed me a template available for free online that would calculate the cuts for a box of any size including calculating the size to make perfect finger joints.

Wooden box cut and engraved on the Epilog Zing

To me was the lid of this box was even more inspiring. By cutting a series of parallel slits in the wood the flat board became bendable.

Lid cut from a flat piece of ¼” plywood
Bendy!!
Bendy!!

The website for the Epilog Zing has a number of project templates that are free to download. One of the projects is a binding for a book cut from a single piece of wood that utilizes this kind of living hinge for the spine.

Could we cut an archival material with this living hinge method to fabricate a custom cradle for book display with a bendable spine that would accommodate multiple angled openings? Could we create supports for oddly shaped or rounded artifacts in our collection more easily? What other materials could we start using now that we have a tool to easily cut and modify them? Could complex acrylic supports be cheap and easy to make in house now? Or are there new materials that we could consider using now that we have a tool to manipulate them.

And these are all ideas for using just that one tool. How else could we make use of the Shopbot or Makerbots also available for use? A quick review of conservation literature doesn’t yield much being published on the subject yet. I did find one excellent blog post from Indiana University Bloomington Libraries preservation lab about taking a 3-D scan of an item and using their Kasemaker machine to cut out a three dimensional support for a warped panel painting. Surely with so many universities and libraries building maker spaces there must be many other preservation professionals with these tools at their disposal now too.

Has anyone else in the conservation or library world found a good use for this technology? I’d love to hear if anyone else has experimented with laser cutters or Makerbots. If anyone is interested in using my templates to create caps of your very own, I’m happy to share the vector files.

Back to the Drawing Board, or “Tube Cap, Part 1”

By Rachel Penniman, Senior Conservation Technician for Special Collections

In my last blog post I showed an example of a tremendously oversize item that ended up in our super-size flat file storage. Not everything is best stored flat in a drawer. On some occasions we choose to keep an oversize item rolled. The new Rubenstein Library stacks space has cubbies purpose built to house rolled items.

cubby storage
Super-oversize flat storage drawers on the bottom, cubbies for rolled storage on the top.

For protection, we store our rolled items in archival tubes in either a 4.5” or 6” diameter and a 4’, 6’, or 10’ length. However after purchasing a number of 4.5” diameter tubes I discovered that none of our suppliers could provide caps for that size tube. Virtually every other size tube had a corresponding cap, but not this size. What to do? Without caps the rolled items could just slide out the end of the tube defeating the purpose of a protective housing.

With all the materials and know-how at our disposal we decided to fabricate caps in-house. To the drawing board!

Tube Cap Version 1.0.

Our first attempt at making caps were created by cutting a large circle out of archival corrugated board and creasing a smaller circle in the center. Segments of the outer part of the circle are cut and folded up like an old fashioned vegetable steamer basket. The cap is placed on the tube and tape is wrapped around the outside to hold the segments in place.

3 tube cap v1 template
Cap after scoring and cutting.
Bending the segments up like a vegetable steamer basket.


Interior of the assembled cap.

These were relatively quick to produce, though the fit was finicky. It was really difficult to get the sizing just right so it slipped onto the tube without being too loose. Even with the perfect sizing, the little segments would often catch on the lip of the tube making it difficult to put on. They didn’t look terribly professional either. Worst of all, we discovered that over time as they were taken on and off the tubes they became looser and looser.

So I went back to the drawing board and mocked up a different model.

Tube Cap V. 2.0 on a tube.

For the second version I opted instead to try a cap that inserted into the tube instead of one that slid onto the exterior of the tube. I started by building up alternating layers of archival corrugated board and Volara foam to create the round plug. I then wrapped Volara foam around the perimeter of the plug to help it fit snugly inside the tube. A couple of slightly larger round pieces of archival corrugated board created the top of the cap. A strap of Tyvek tape with Velcro at the ends helped to hold the cap securely in place on the tube, and a loop of linen tape through all the layers gave a handle to pull the cap off.

Bottom of Tube Cap V 2.0.
Tube Cap V 2.0 partially disassembled to show layers.

What an improvement! Version 2.0 fit better, stayed in place, held up over time, was easier to insert and remove, and looked pretty spiffy too. In terms of function this model was an A+. But cutting perfect circles out of cardboard is difficult, time consuming, and rough on the wrists. Also no matter how well I measured I could never get all the slots and holes on the circles to line up perfectly. I also wasn’t happy with how much expensive Volara this model used. I considered replacing the Volara with more layers of cardboard but estimated that would require cutting 12 more circles out of board. Too much board use and too much wrist pain!

Back to the drawing board again.

This time I tried to take the parts I really liked from Version 2.0 (the general plug design, the Velcro strap, the linen tape handle) and modify the parts I didn’t (cutting lots of circles out of cardboard).

Tube Cap Version 3.0 (looks almost the same as 2.0 huh?).

While the final product of this version looked almost exactly like Version 2.0 the interior was very different. Rather than layering Volara foam and many circles of corrugated board to create the plug, I created a wall out of a single piece of corrugated board that is attached with double stick tape to only two circles of corrugated board.

Tube Cap Version 3.0 partially disassembled to show layers.
Wall piece after cutting (top) and after creasing and bending (bottom).
Wall attached to one side.

This model reduced the number of circles to I needed to cut from 6 to 3 and greatly reduced the amount of material used overall. I really liked this model and was extremely happy with the function and happier with the small quantity of material needed, but three circles per cap would still take some time to cut by hand.

13 Tube Cap v3

I wonder how other institutions handle capping their rolled storage. Has anyone else found an easy, efficient, archival way to cap their tubes?

Stay tuned for part 2 of the continuing saga of Tube Caps: Adventures in cutting!


Let’s Experiment!

experiment day

Every now and then we take some time to practice new techniques we learn at conferences and workshops. At the 2015 AIC Annual Conference, Erin learned how to use an airbrush and how it could be applied to conservation. Last week she showed us what she learned, and gave us all time to practice with the airbrush. Erin has experimented with tide line removal and tissue toning with the airbrush. We brainstormed other ways we could use this method, too, including consolidation and perhaps spot washing on the suction platen. Have you used an airbrush in your lab? Let us know in the comments how and to what effect.

The ‘Largest Sheet of Paper Ever Made and Printed’

Written by Rachel Penniman, Senior Technician for Special Collections

When two copies of a newspaper arrived in the lab I didn’t expect then to be terribly exciting.

Sigh, another brittle newspaper.

They were folded and as is typical with old, acidic newsprint it had become brittle and split along the folds. After discussion with curator Andy Armacost we decided to carefully unfold and repair the one copy that was in slightly better condition.

02 Copy 2 BT detail
Looks like I’ve got a lot of work ahead of me.

Unfolding the newspaper revealed something quite unexpected: the paper was gigantic! What I expected to be multiple issues folded together was in fact a single extremely large issue.

03 Unfolded BT
I had to use a step stool just to get the entire sheet in the photo.

The Constellation: Illuminated Quadruple Sheet claimed to perhaps be the largest sheet of paper ever made and printed when it was published in 1859 in New York. Created as a one-time, limited edition of 28,000 copies, it had taken ‘eight weeks of unceasing labor of nearly forty persons to produce this MASTODON PAPER!’ To generate one issue, a single sheet of 70X100” paper was printed and folded into four leaves of 35×50” each. In comparison, the massive double elephant folio Audubon Birds of America volumes currently on display in the Mary Duke Biddle room are a paltry 26×39”.

04 the great wonder croppedIn total each copy of The Constellation has 49 square feet of paper! It is made up of 8 pages with 13 columns of text per page, and 48” per column totaling 416 feet of printing. Along with historical articles, essays, stories, and poems, there are four pages with numerous portraits and illustrations. Originally sold for 50 cents an issue, this copy was marked down to only 15 cents. This seems like a really good deal for what adds up to a small book’s worth of reading material.

The title banner and red ink noting the price reduction

Unfolding the paper also revealed the full extent of the damage. The main folds separating one leaf from another had degraded so badly that each leaf was held to the next with only a few inches of weak paper.

The only thing holding these two leaves together are a few inches of paper, habit, and hope.

In order to allow for safer handling and easier storage, I got approval to completely separate each leaf. Working with individual leaves of 35×50” was much more manageable; though I still had to work on two folding tables pushed together with board across the top in order to have a large enough flat work surface.

Feeling a bit like Lily Tomlin’s Edith Ann character

Very carefully, bit by bit, I flattened the creases and mended the tears using a very thin toned Japanese tissue paper and wheat starch paste making the repairs almost invisible. Wherever possible, I reattached loose fragments of paper that I found loose in the old folder. With 49 square feet of paper work on, I did mending on and off for many weeks.

Tears along the folds
Tools of the trade: a tile for brushing out paste, Remay and blotter, acrylic blocks, bean bag weights, brush, Teflon folder, tweezers, scissors, and toned Japanese paper
Can you spot the mends? No? Good!

After mending, each leaf was encapsulated between sheets of Mylar using our ultrasonic welder. See this previous blog post for a video of our encapsulator in action.

It’s so big I had to drape it off the edge of the encapsulator and weld it in sections.

Now that it’s finally finished, this huge newspaper is the perfect candidate for storage in the Rubenstein Library’s new super oversize cabinet drawers. It actually looks tiny in comparison to this large flat file drawer.

The new super oversize cabinets in the Rubenstein Library are ready to handle the biggest items.

Part of a description of the newspaper on the back page reads:

The Publisher does not wish to conceal the honorable pride which he feels in presenting this magnificent sheet to the public. It is the off-spring of Invention, Taste, Enterprise and Herculean Industry; it is without a compeer or rival; and he believes it will never be excelled. It cannot be surpassed in typographical beauty – in its artistic splendor – in its general imperialism of thought and design. It will be the pride of every true-hearted American, and the wonder of the world; and those who are so fortunate as to obtain a copy will obtain a curiosity which they will keep and treasure with the utmost care.

I am very proud to have been able to help provide this curiosity with the utmost care its publisher desired. Though to be honest I would be happy to take a break from such oversize items and work on miniatures for a while.


Link to catalog page:


Grand Opening Tours of the Underground

Today is the grand opening of our renovated building. There are many VIP’s and donors here today to see the new spaces and to hear speeches from dignitaries. We gave a behind the scenes tour for 17 people. While it is more fun to have staff here during tours to talk about their work, it was still a fun and engaging morning.

conservation work

I set up four zones of work to show. Clockwise from the top left are: special collections conservation, Adopt-a-Book Program, custom enclosures, and circulating collections conservation. People were really interested in each section. They were especially interested in the giant newspaper that Rachel is repairing. Rachel is writing on a blog post about that, so stay tuned. It is an incredible thing.

The mark of success? Two books got adopted today! Now I need to go update that page and find some more adoptable items to put on the list.