By Rachel Penniman, Senior Conservation Technician
In my last blog post I showed the design process for creating caps for rolled storage tubes. After going through multiple versions of potential designs I had found a model that used a minimal amount of material and still created an effective cap. Unfortunately I had also discovered the woes of trying to cut perfect circles by hand.
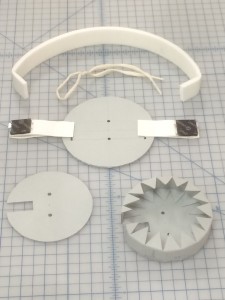
Initially I looked into getting a circular mat cutter but even with that specialized tool, it still looked tricky to use and time consuming.
Fortunately I work with a group of creative individuals so while I was bemoaning the difficulty of cutting circles, Henry suggested I look into getting them laser or die cut. Huzzah! That reminded me of an article I’d read about a makerspace on campus called the Innovation Studio. Makerbots, Shopbots, and Printerbots, oh my! After communicating with Chip and Vinny, the nice folks who run the iStudio, they assured me their equipment that would have no problem cutting our corrugated board.
From the description on the iStudio webpage:
“The Epilog Zing is a desktop-style 30 watt CO2 laser cutter. It can operate in two different modes: raster and vector. Raster mode is for engraving into the surface of materials. You can take photographs/images/text/etc. and use the software to engrave into a variety of materials, including wood, some plastics, some metals, and acrylic. Vector mode is for cutting custom shapes through thin materials by using a slow moving, high powered laser.”
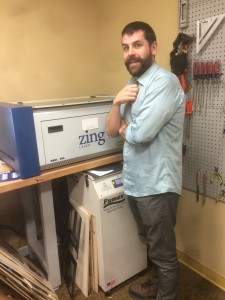
The iStudio is conveniently located just across the street from the library. So Tedd and I brought some templates of the parts I needed over to the iStudio and they helped us draft up a vector drawing to my exact specifications in Solidworks.

The vector drawings got inserted into a CorelDRAW page and then the file was sent as a print job to the Epilog Zing.

Our first attempt very quickly yielded an expertly cut circle but the laser caused scorch marks on the board.
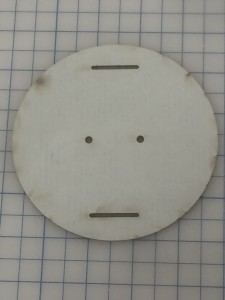
The cutting action of the laser can be altered by adjusting its speed and/or power so Tedd and I continued adjusting until we found a good setting that cleanly cut the board without being so overpowered to cause scorch marks.
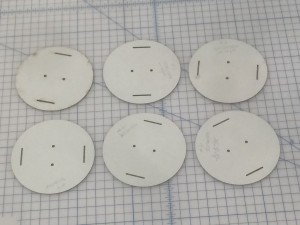
In the end we found a setting of 50% speed and only 20% power made the perfect cut. The board still had a slightly burned scent to it even with the power so low, but leaving the parts in our fume hood overnight took care of that. Because the laser works by vaporizing the material, I’m not actually sure it’s possible to cut the board without having some smell.
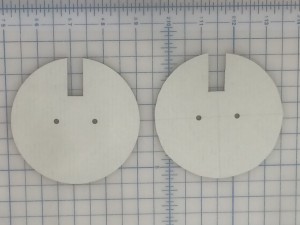
The perfection of these laser cut parts is especially apparent when compared side by side with my hand cut parts, and the laser cut parts are completed in a fraction of the time.
One of the great advantages of the laser cutter is that it can take any size board 12×24” or smaller. So even small scraps can be laser cut into cap parts. I have put a new bin under our board shear to collect scraps that would otherwise be destined for the recycle bin. This makes me especially happy because we are able to make almost the entire cap out of material diverted from the recycle bin.
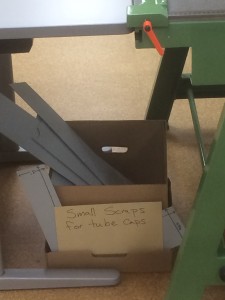
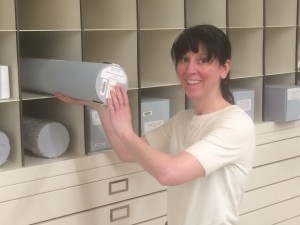
After perfecting the method I plan to collect scraps until I’ve got a good pile, then cut out a number of cap parts all at once. Then we can have a supply of parts ready to assemble whenever a new rolled item needs storage. The prototype was an excellent success though and has already been put into use.
My experience at the iStudio has sparked my interest in other potential uses for laser cutting or engraving. Could this be used for creating other enclosures? Or could we accommodate making more complex enclosures if they could be modeled and cut on this machine?
The folks at the iStudio had a wooden box on display that was cut and engraved on the Epilog Zing. A student using the machine on my first visit showed me a template available for free online that would calculate the cuts for a box of any size including calculating the size to make perfect finger joints.
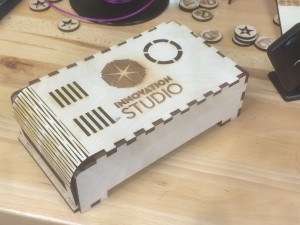
To me was the lid of this box was even more inspiring. By cutting a series of parallel slits in the wood the flat board became bendable.
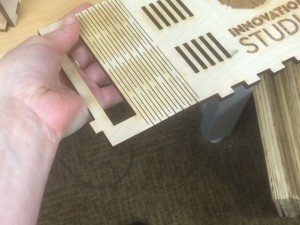
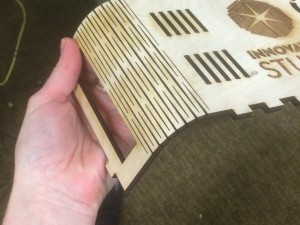
The website for the Epilog Zing has a number of project templates that are free to download. One of the projects is a binding for a book cut from a single piece of wood that utilizes this kind of living hinge for the spine.
Could we cut an archival material with this living hinge method to fabricate a custom cradle for book display with a bendable spine that would accommodate multiple angled openings? Could we create supports for oddly shaped or rounded artifacts in our collection more easily? What other materials could we start using now that we have a tool to easily cut and modify them? Could complex acrylic supports be cheap and easy to make in house now? Or are there new materials that we could consider using now that we have a tool to manipulate them.
And these are all ideas for using just that one tool. How else could we make use of the Shopbot or Makerbots also available for use? A quick review of conservation literature doesn’t yield much being published on the subject yet. I did find one excellent blog post from Indiana University Bloomington Libraries preservation lab about taking a 3-D scan of an item and using their Kasemaker machine to cut out a three dimensional support for a warped panel painting. Surely with so many universities and libraries building maker spaces there must be many other preservation professionals with these tools at their disposal now too.
Has anyone else in the conservation or library world found a good use for this technology? I’d love to hear if anyone else has experimented with laser cutters or Makerbots. If anyone is interested in using my templates to create caps of your very own, I’m happy to share the vector files.

