
By Rachel Penniman, Senior Conservation Technician for Special Collections
In my last blog post I showed an example of a tremendously oversize item that ended up in our super-size flat file storage. Not everything is best stored flat in a drawer. On some occasions we choose to keep an oversize item rolled. The new Rubenstein Library stacks space has cubbies purpose built to house rolled items.

For protection, we store our rolled items in archival tubes in either a 4.5” or 6” diameter and a 4’, 6’, or 10’ length. However after purchasing a number of 4.5” diameter tubes I discovered that none of our suppliers could provide caps for that size tube. Virtually every other size tube had a corresponding cap, but not this size. What to do? Without caps the rolled items could just slide out the end of the tube defeating the purpose of a protective housing.
With all the materials and know-how at our disposal we decided to fabricate caps in-house. To the drawing board!
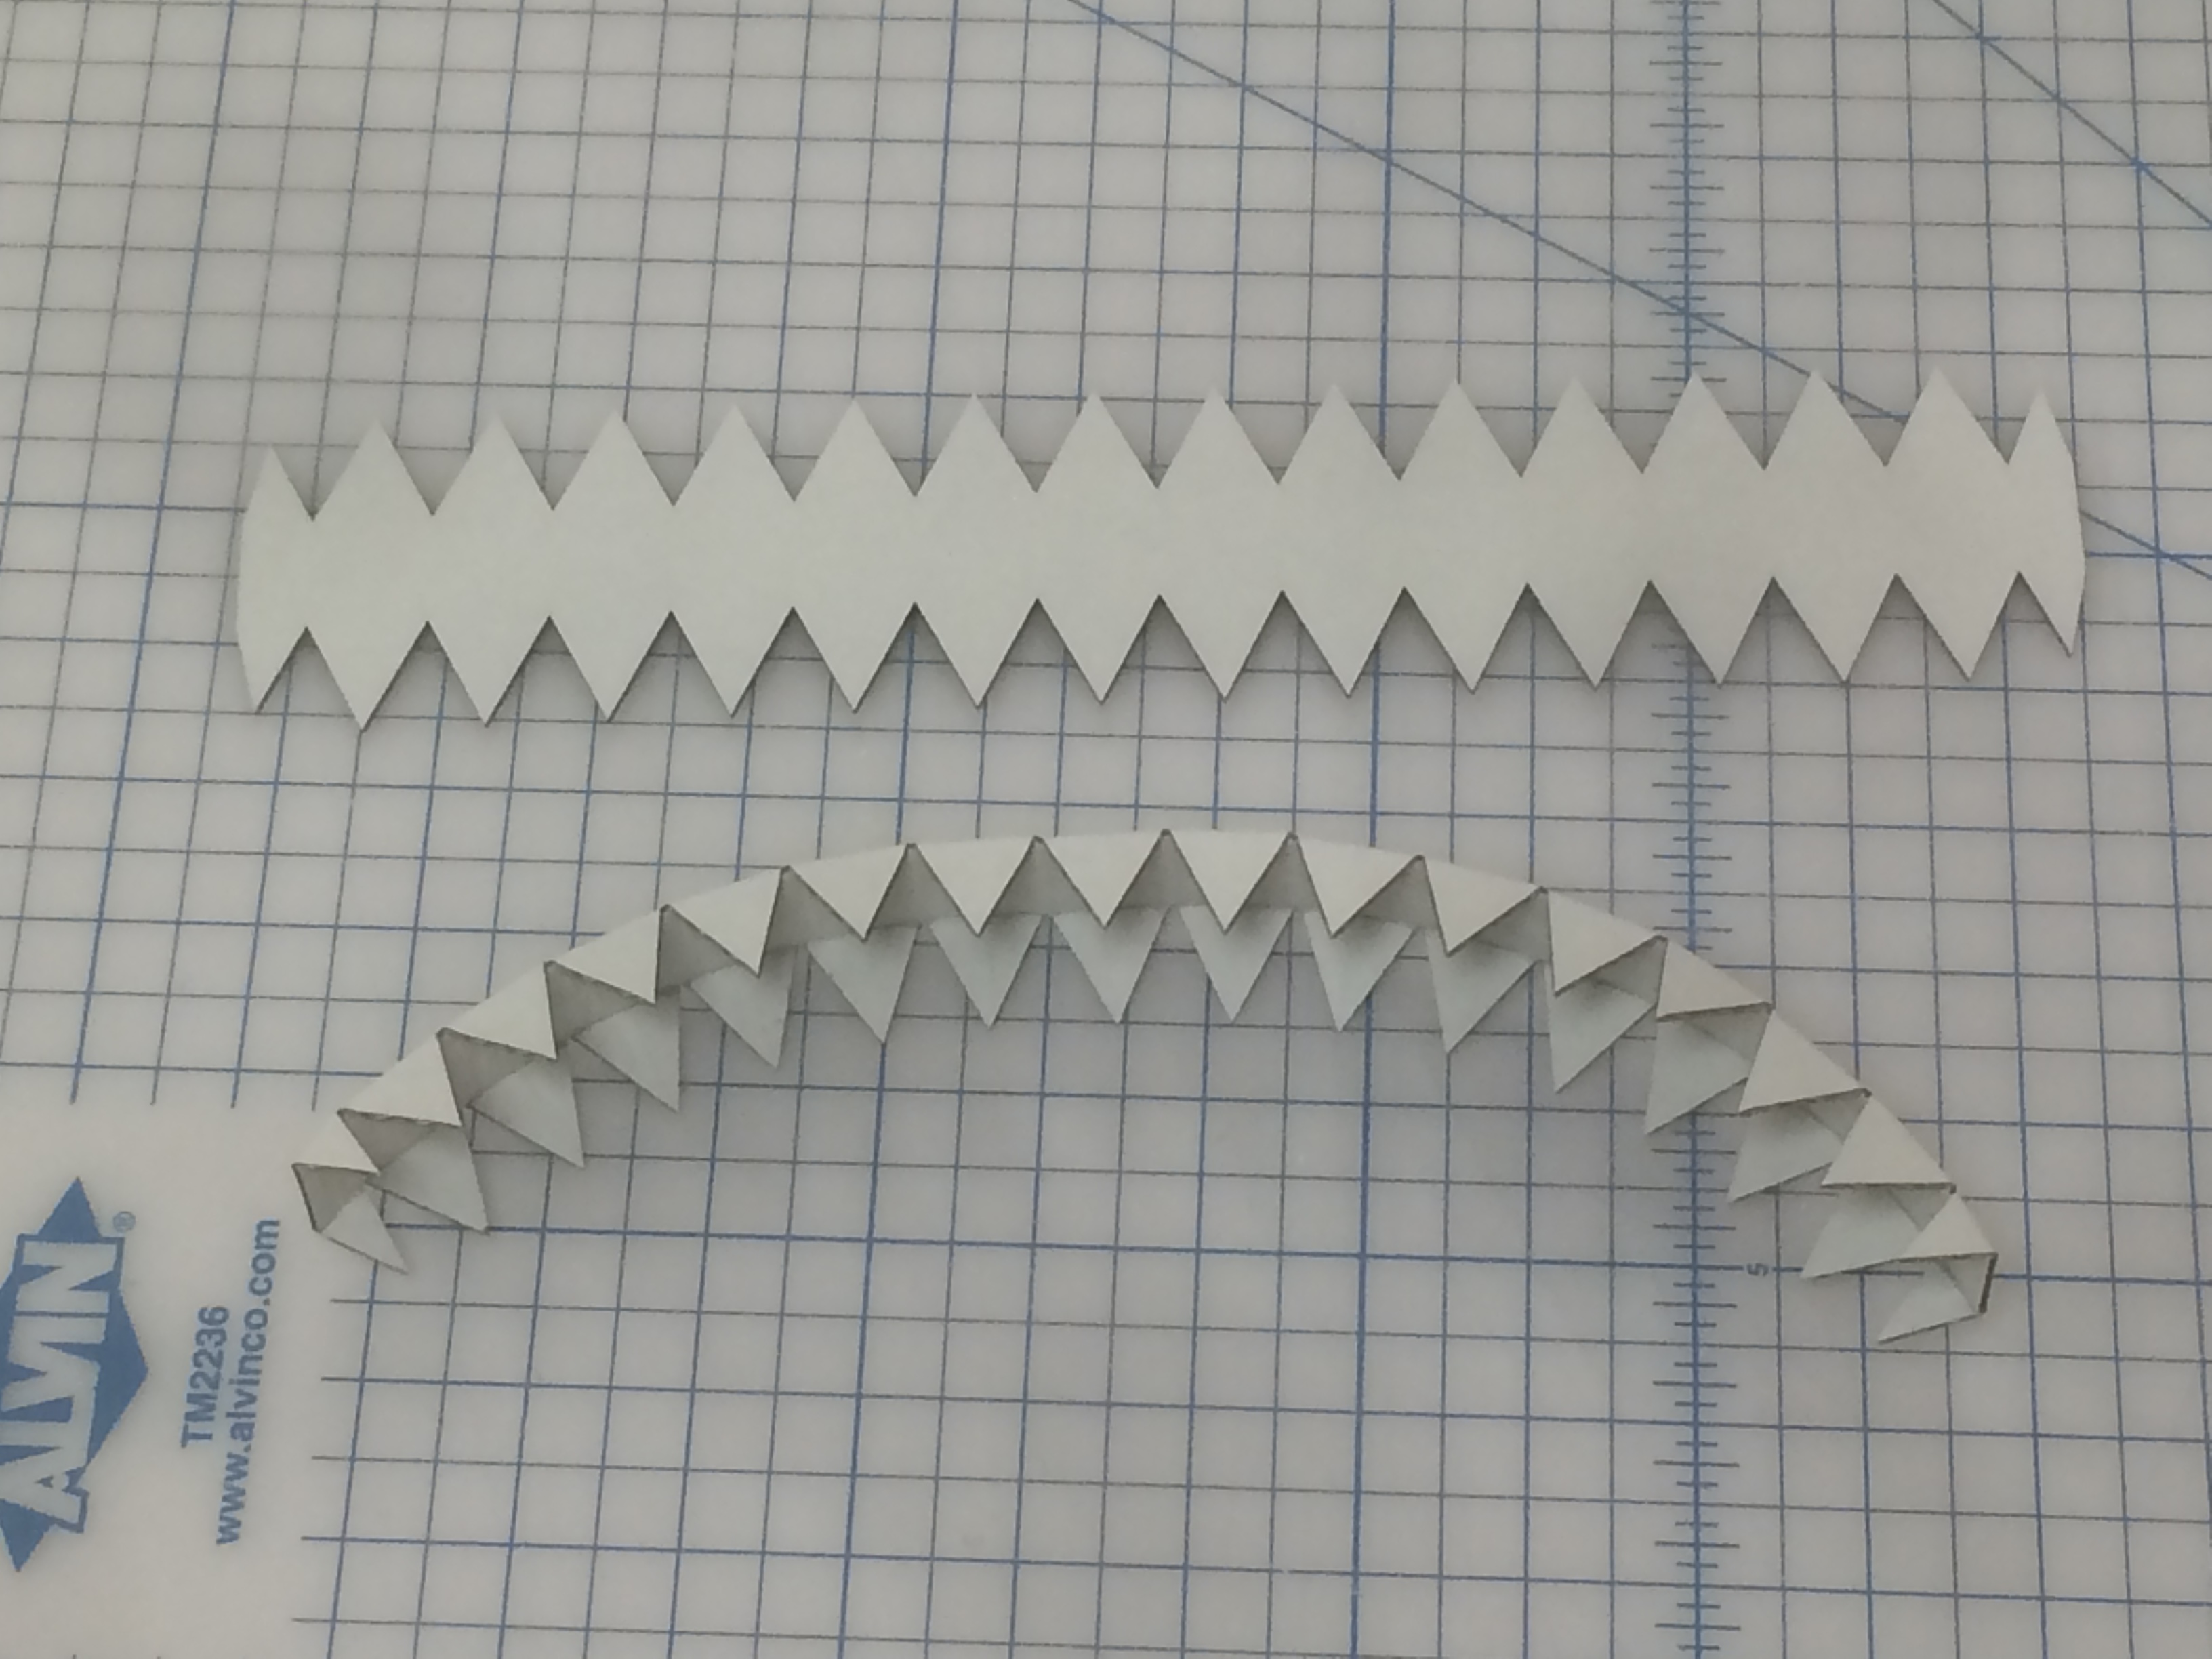
Our first attempt at making caps were created by cutting a large circle out of archival corrugated board and creasing a smaller circle in the center. Segments of the outer part of the circle are cut and folded up like an old fashioned vegetable steamer basket. The cap is placed on the tube and tape is wrapped around the outside to hold the segments in place.

These were relatively quick to produce, though the fit was finicky. It was really difficult to get the sizing just right so it slipped onto the tube without being too loose. Even with the perfect sizing, the little segments would often catch on the lip of the tube making it difficult to put on. They didn’t look terribly professional either. Worst of all, we discovered that over time as they were taken on and off the tubes they became looser and looser.
So I went back to the drawing board and mocked up a different model.
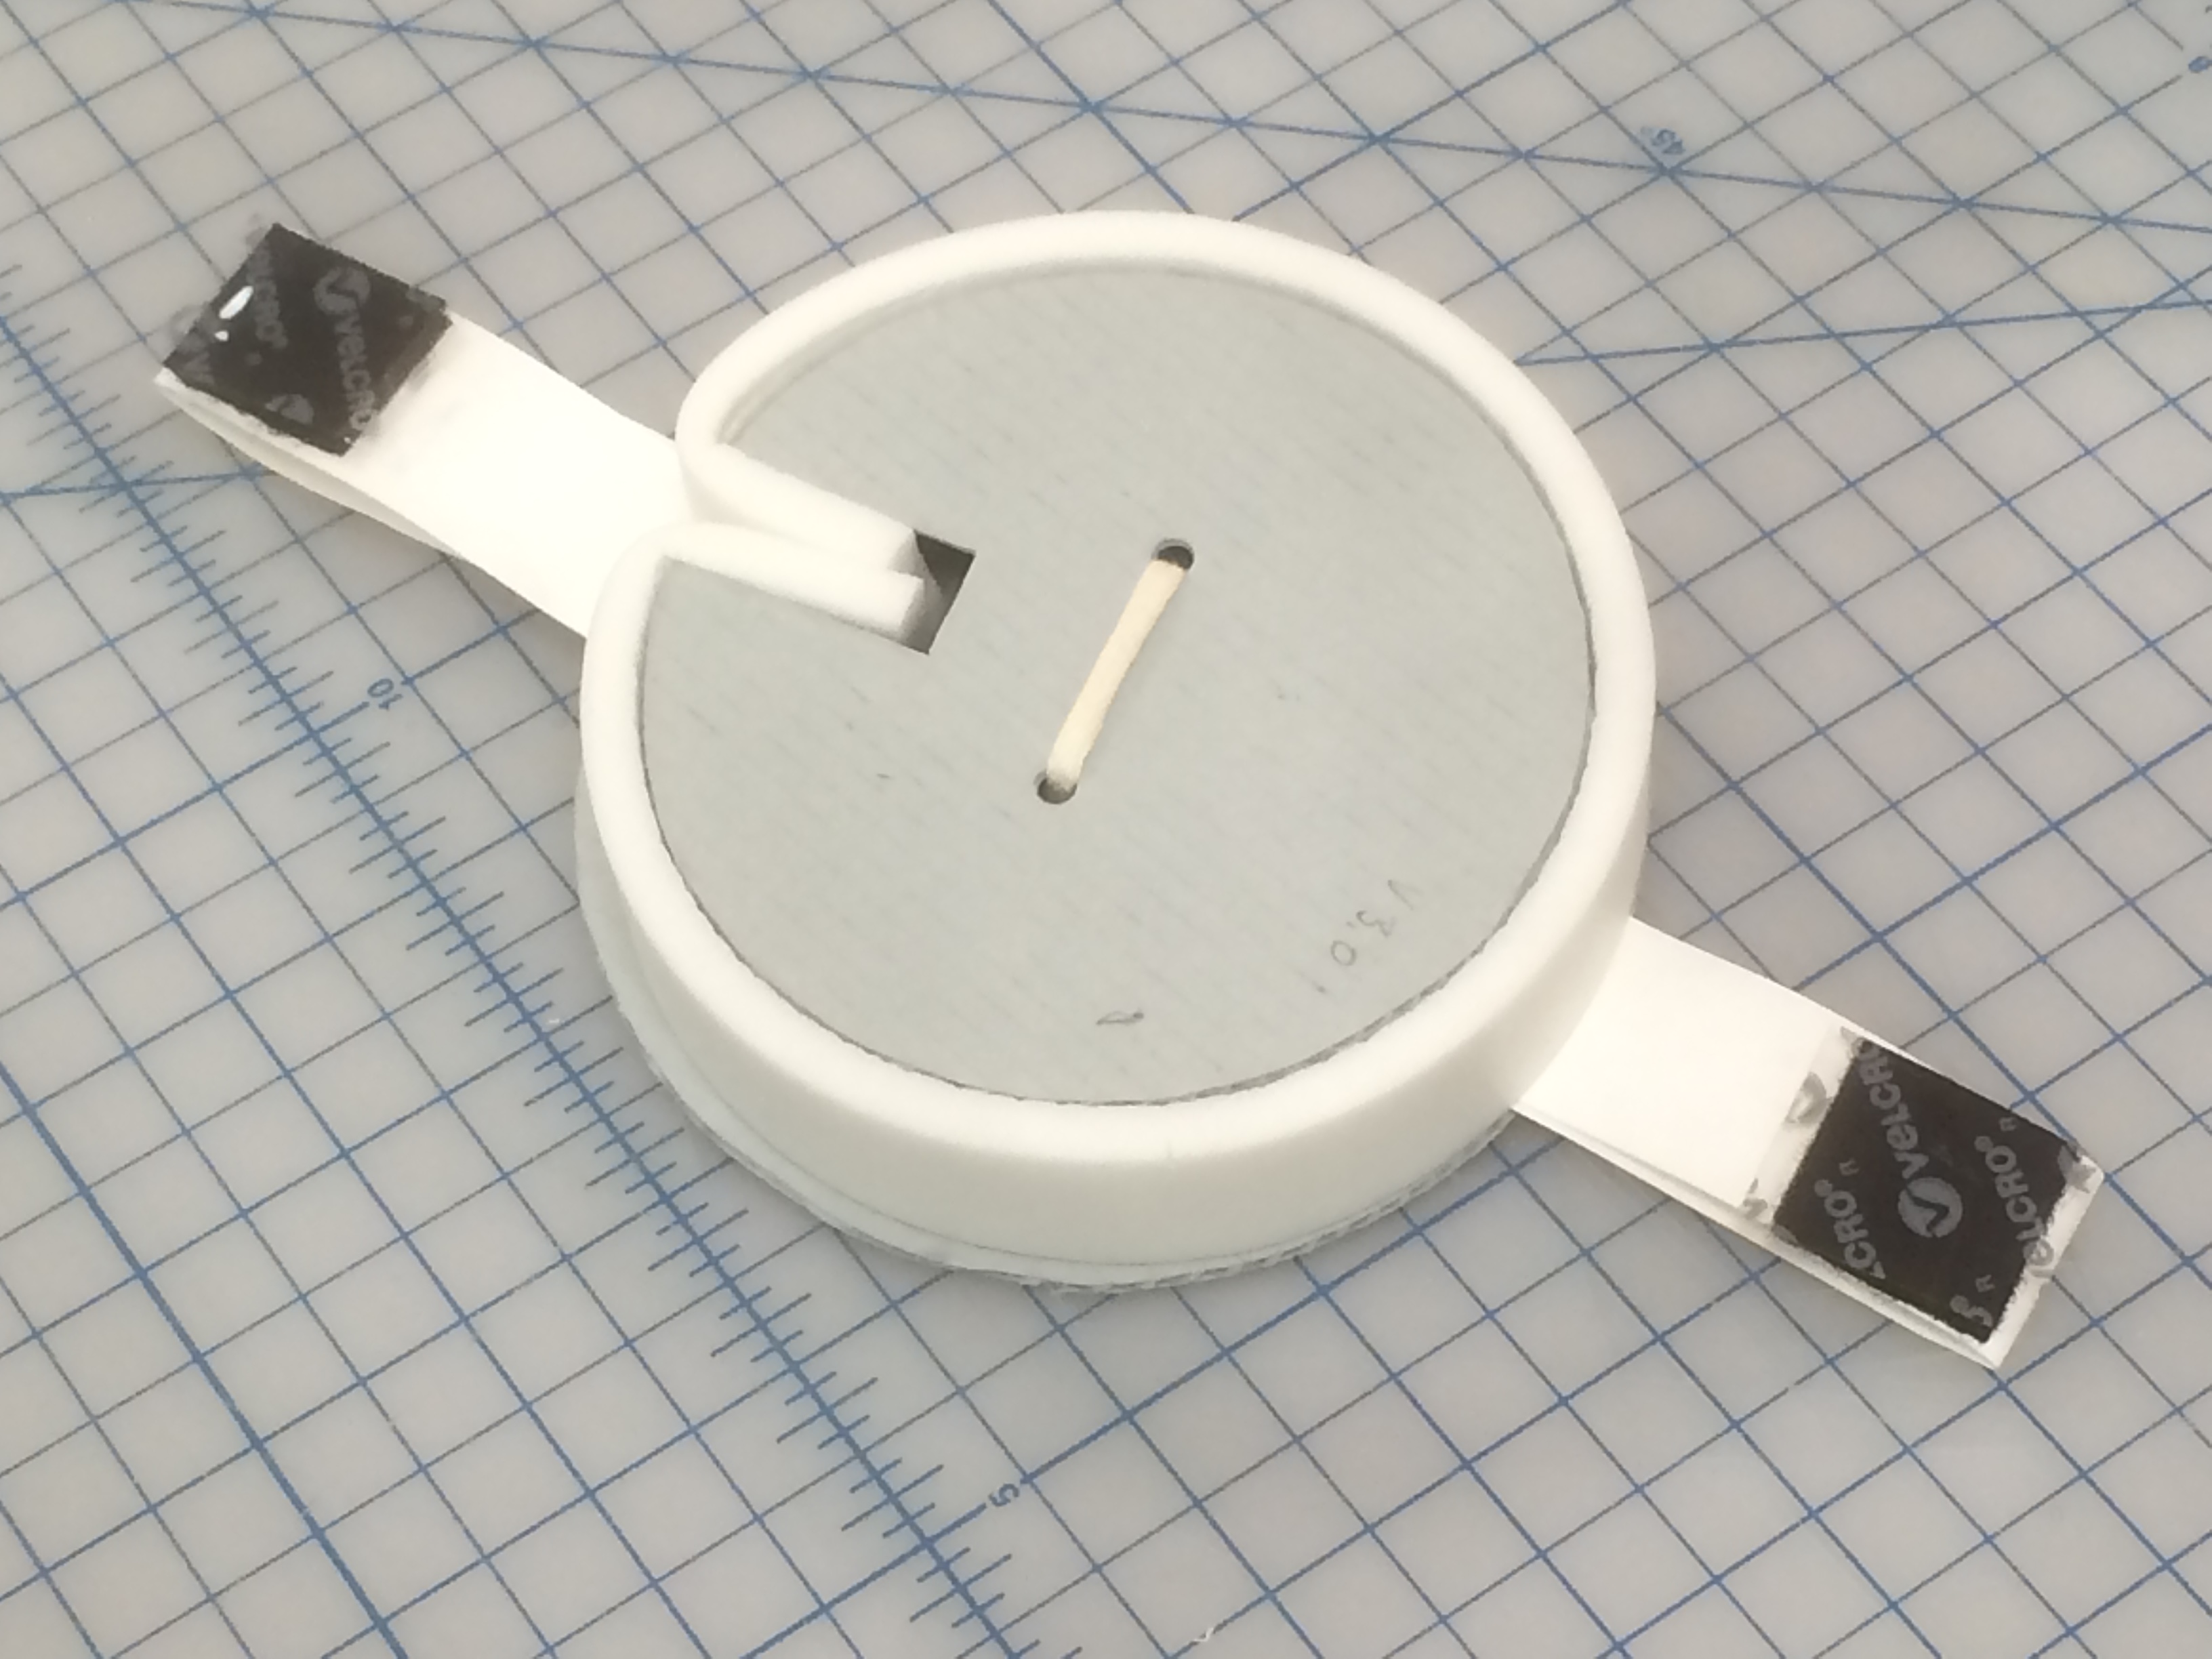
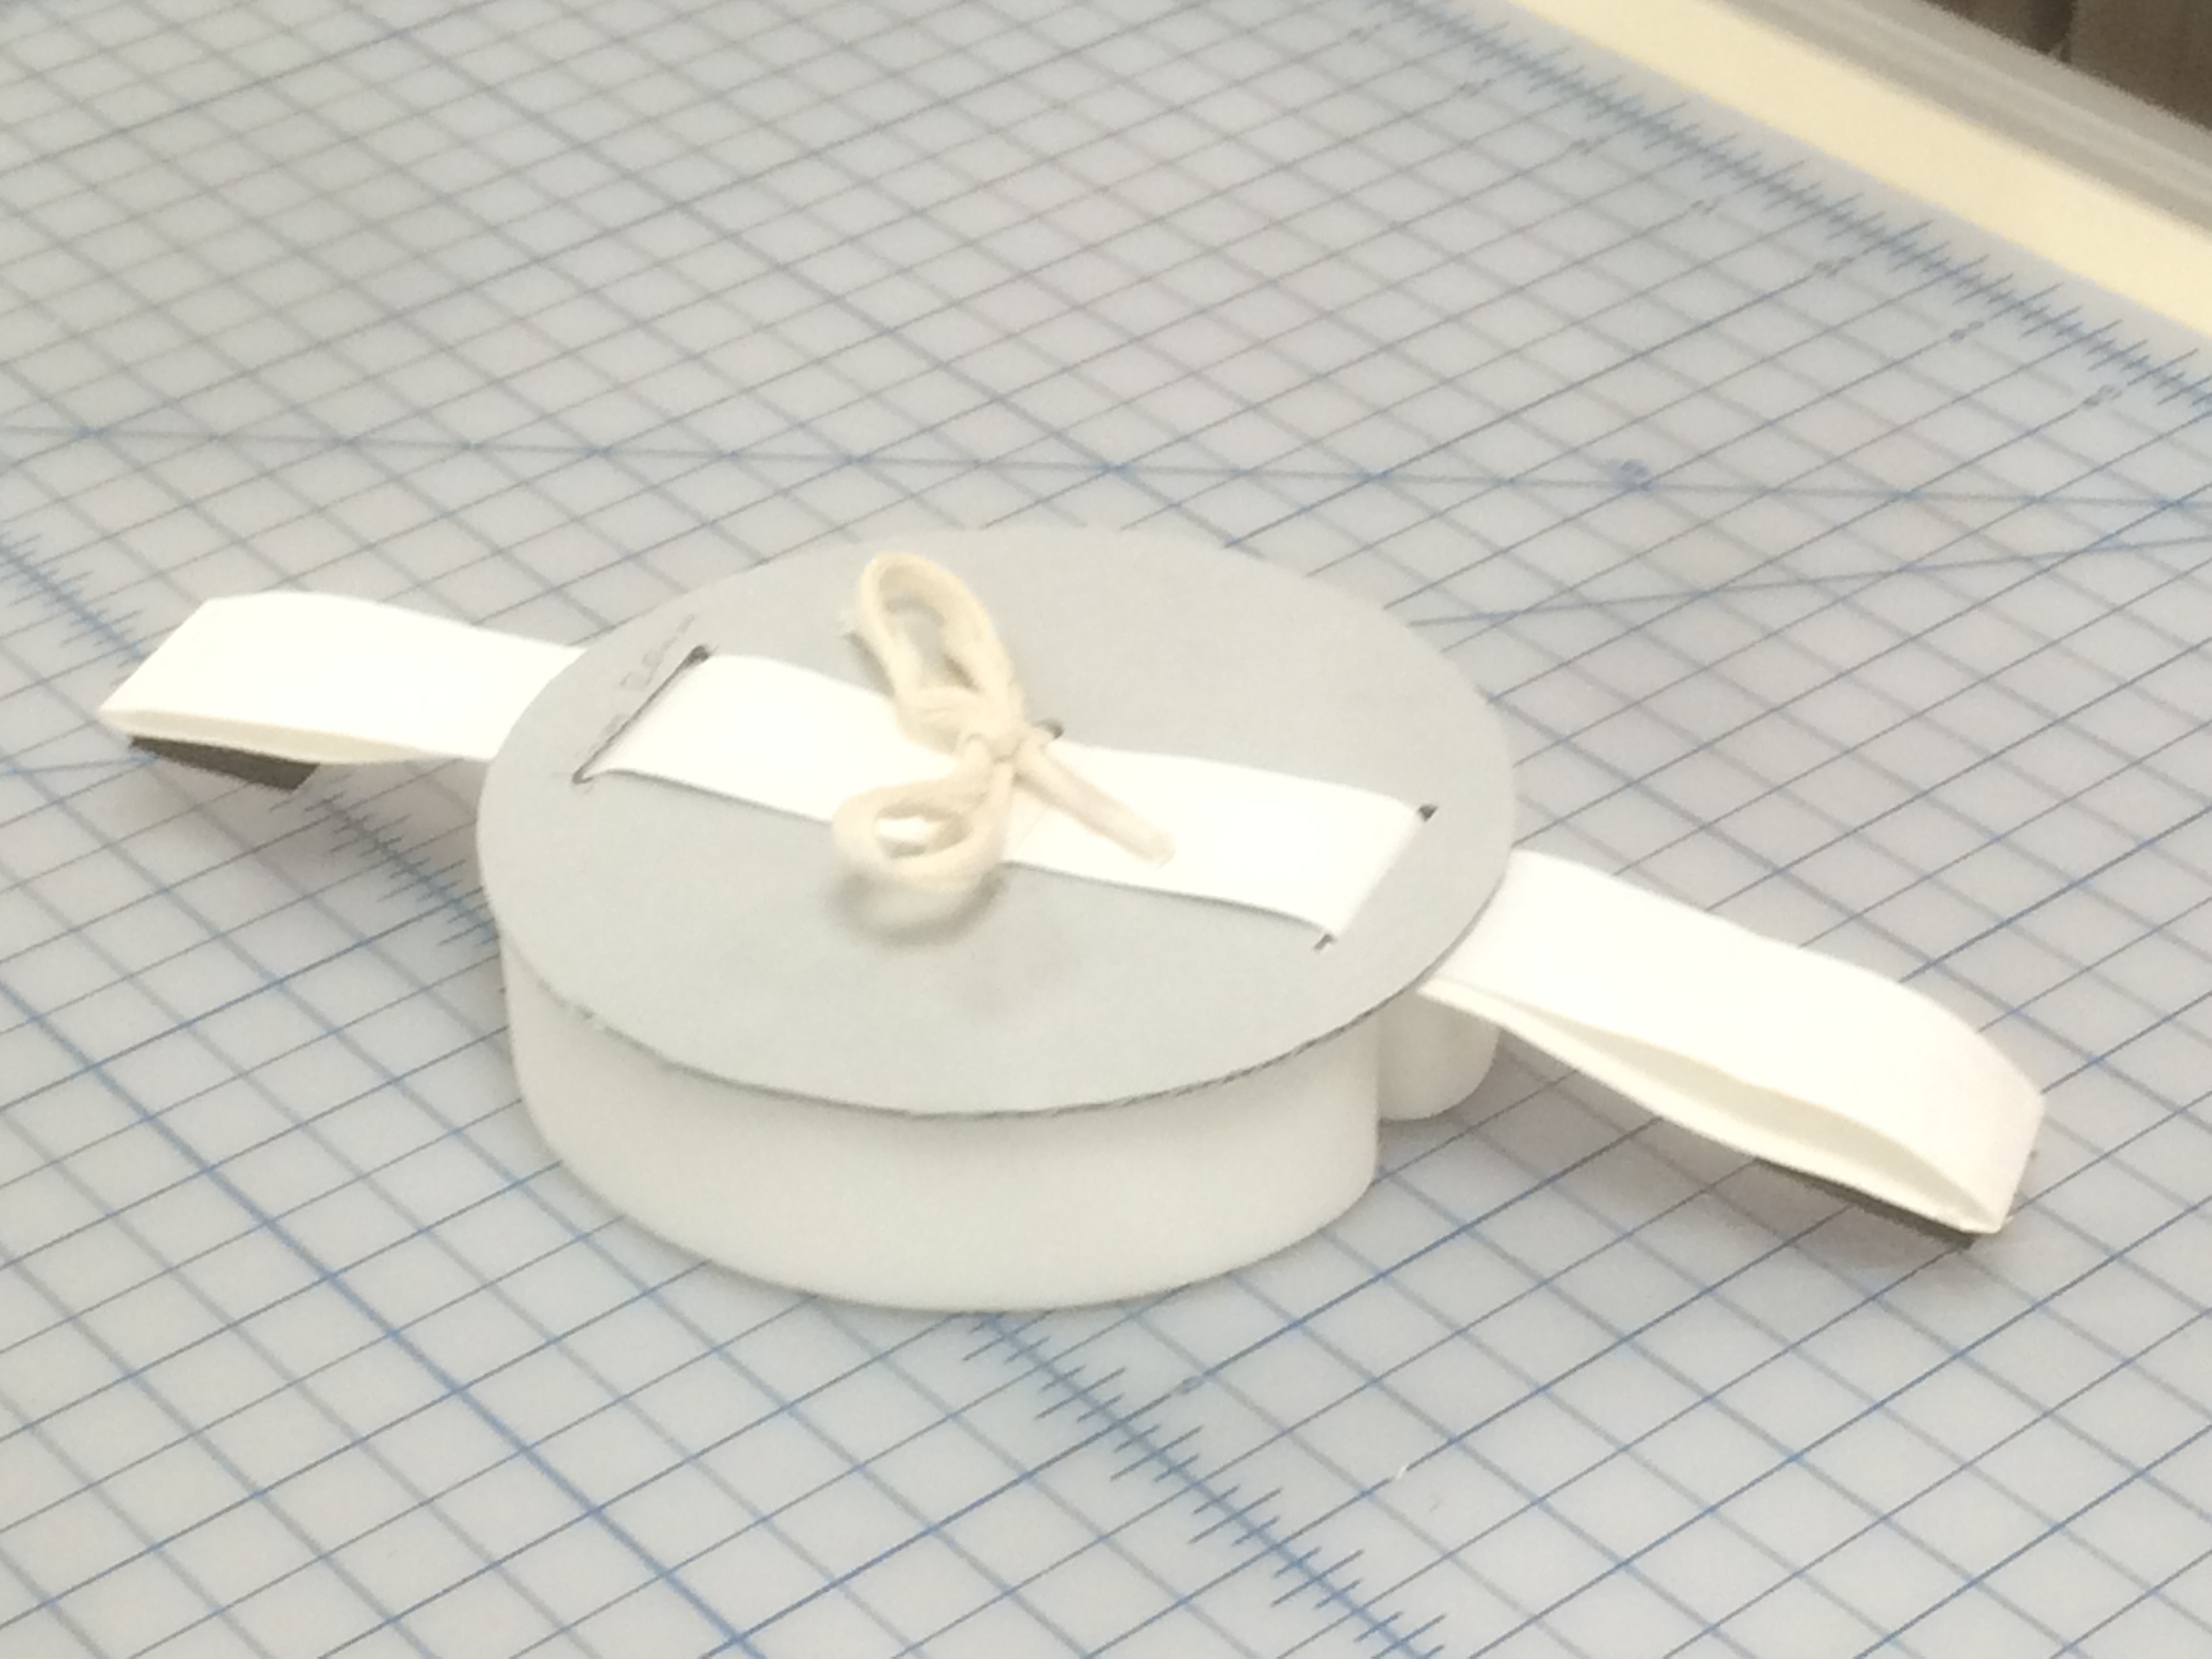
For the second version I opted instead to try a cap that inserted into the tube instead of one that slid onto the exterior of the tube. I started by building up alternating layers of archival corrugated board and Volara foam to create the round plug. I then wrapped Volara foam around the perimeter of the plug to help it fit snugly inside the tube. A couple of slightly larger round pieces of archival corrugated board created the top of the cap. A strap of Tyvek tape with Velcro at the ends helped to hold the cap securely in place on the tube, and a loop of linen tape through all the layers gave a handle to pull the cap off.


What an improvement! Version 2.0 fit better, stayed in place, held up over time, was easier to insert and remove, and looked pretty spiffy too. In terms of function this model was an A+. But cutting perfect circles out of cardboard is difficult, time consuming, and rough on the wrists. Also no matter how well I measured I could never get all the slots and holes on the circles to line up perfectly. I also wasn’t happy with how much expensive Volara this model used. I considered replacing the Volara with more layers of cardboard but estimated that would require cutting 12 more circles out of board. Too much board use and too much wrist pain!
Back to the drawing board again.
This time I tried to take the parts I really liked from Version 2.0 (the general plug design, the Velcro strap, the linen tape handle) and modify the parts I didn’t (cutting lots of circles out of cardboard).
While the final product of this version looked almost exactly like Version 2.0 the interior was very different. Rather than layering Volara foam and many circles of corrugated board to create the plug, I created a wall out of a single piece of corrugated board that is attached with double stick tape to only two circles of corrugated board.
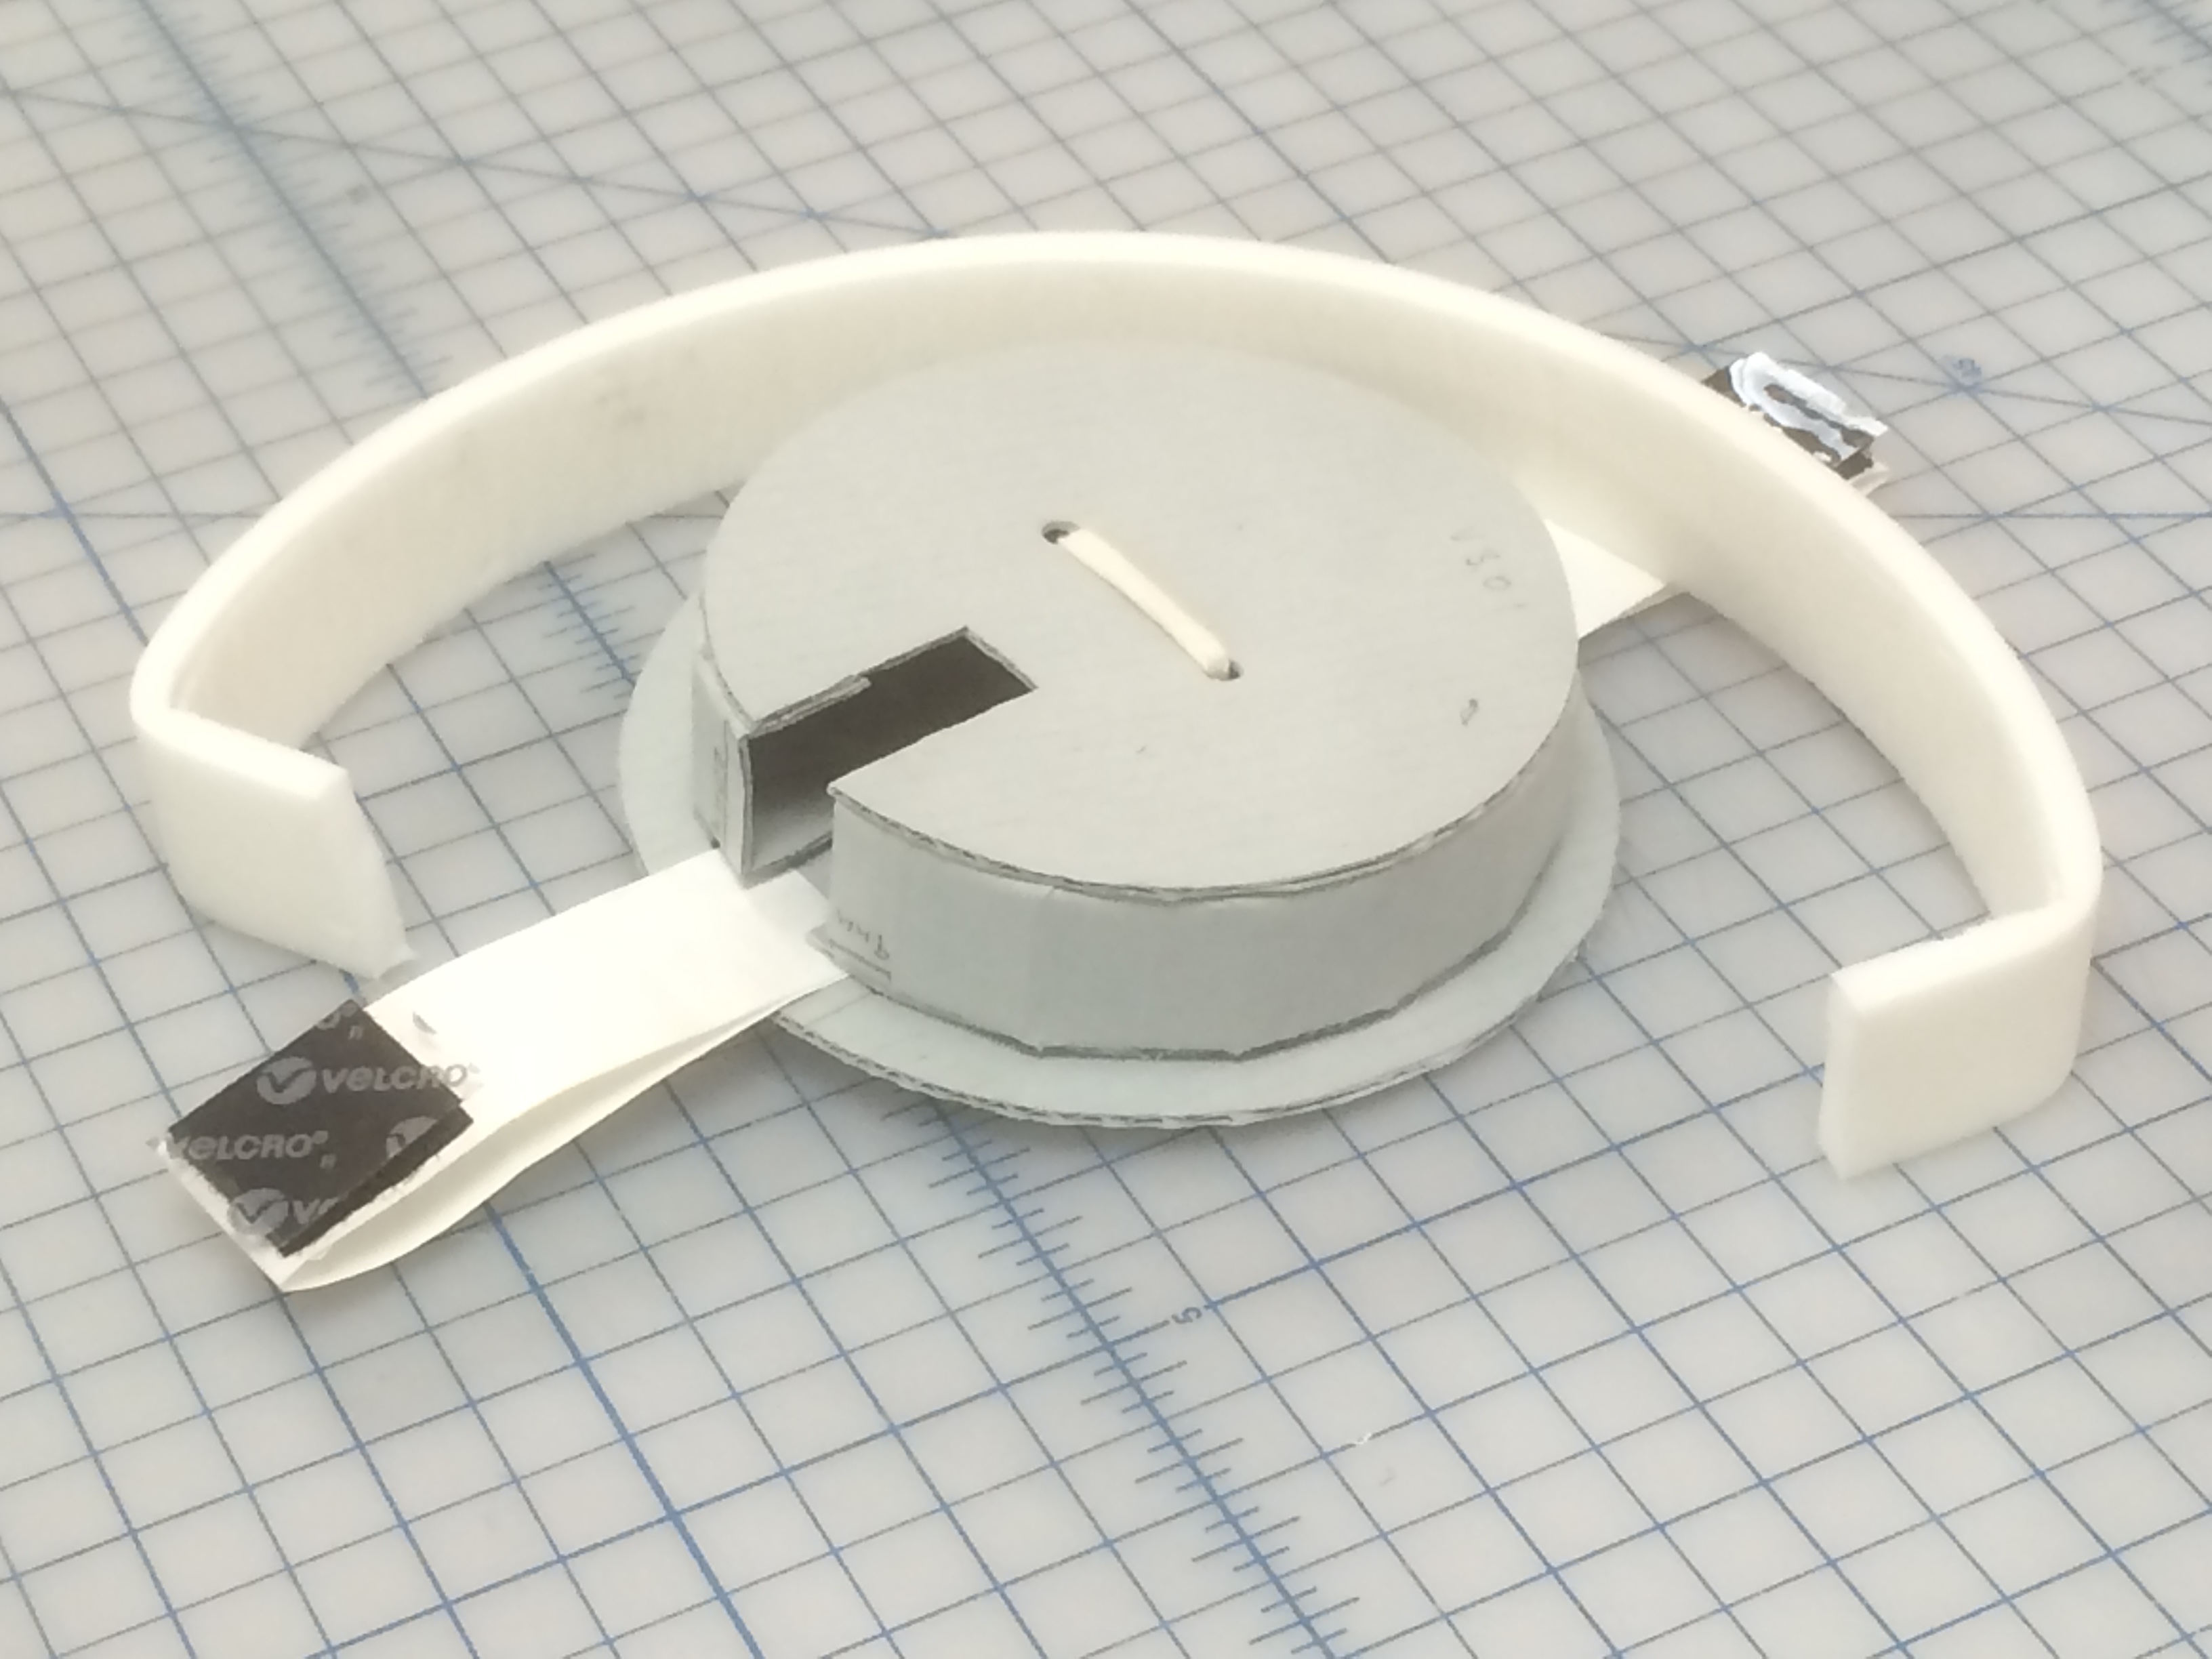

This model reduced the number of circles to I needed to cut from 6 to 3 and greatly reduced the amount of material used overall. I really liked this model and was extremely happy with the function and happier with the small quantity of material needed, but three circles per cap would still take some time to cut by hand.
I wonder how other institutions handle capping their rolled storage. Has anyone else found an easy, efficient, archival way to cap their tubes?
Stay tuned for part 2 of the continuing saga of Tube Caps: Adventures in cutting!