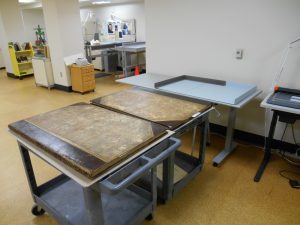
Pro-tip: Use folding tables stacked two-high for drying wet books with a more compact footprint.
This morning I stacked two of our folding tables on top of each other to allow the tops to dry before putting them away. It occurred to me we could have created this two-tiered drying table to dry the wet books we got this week. We could dry the same number of books using half the floor space. Alternatively, we can dry twice as many books on the same footprint if we had four tables, in two stacks of two. I need to remember this for next time. I think it would work as long as you were sure there was enough air flow around all the tables. Am I the last person to come up with this?
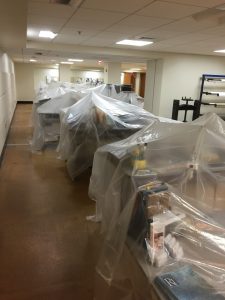
We got a lot of rain in the wee hours of Monday morning. Housekeeping alerted the library, and our Preservation Officer and Head of Security sprang into action. The rain found its way from the roof down three levels to the sub basement. Most of the damage was to ceiling tiles, carpeting and equipment.
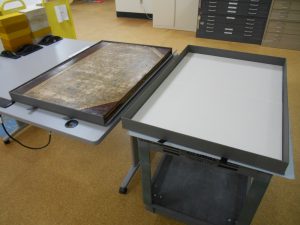
It could have been worse. Less than 100 collection items got wet. We set up drying stations in the lab and in the fume hood-room and quickly got to work. At one point we ran out of fans and put out a request to our colleagues. Within minutes we had more than enough to get the job done. We had to take only one book to the freezer.
Rachel setting up drying stations in the fume-hood room.
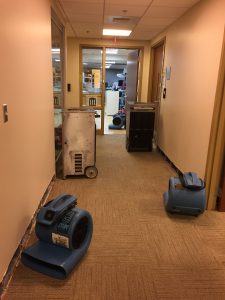
Unfortunately the water found its way inside the walls of the Digital Production Center, Conservation and our disaster supply closet (oh the irony). Our vendor had to pull the baseboards out and cut holes in the wall to allow air to get inside to dry the drywall.
Disaster supply closetConservation Lab
We had more rain Tuesday night with additional moisture seeping through the walls. Looks like we will be working undercover for a while until they track down the problem. We’ve had some good practice at this sort of thing, so we know how to be productive even though the lab is a mess.
Disaster in the disaster supply closet.Outside our front door, before pulling up the carpet.
We are hoping for drier weather in the days to come, but July and August are our rainy seasons so anything can happen. Until then, we will do what we can and stay vigilant for more leaks.
*I realize this video has been said to be staged, but it is still pretty accurate to how we felt on Monday morning.
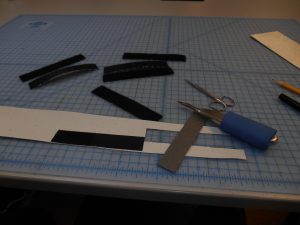
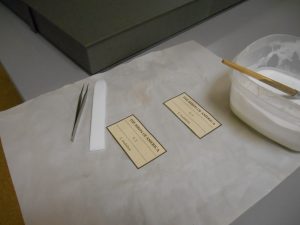
Yesterday we took a break from repair work to make heat set tissue. We followed the NARA recipe, tweaking as needed. We set up an assembly line to make quick work of it. We made about fifty sheets that varied in color and weight. We have some big digitization projects coming in, so it will be good to have a stockpile of this tissue ready to go.
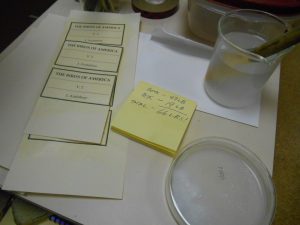
This poor pamphlet got split in half when it got caught in the mobile shelving. It seems rather metaphorical. Can Conservation put the European Union back together again? Maybe. Or maybe we will just replace it with another copy. If only the other EU split could be solved so easily.
Welcome to Part Two of EXTREME ENCLOSURES: Miniatures.
If you ever want to feel like some sort of extreme being (a giant, perhaps, or even better: Andre the Giant), you may want to take a gander at the tiniest books that Rubenstein Library has to offer: the miniatures. The raw power you feel when holding five leather bound books in the palm of your hand is astounding. Rubenstein has almost two hundred miniature books. These little guys, known as The Minis, are often bullied by the notorious “big boys of the stacks.” Once again, Conservation has to step in to take care of at-risk books. We needed to help the Minis bulk up so they are not beat up by larger books or lost in the wild (albeit highly climate controlled) world of the stacks.
Do not let the sense of “being huge” go to your head when handling the miniatures.
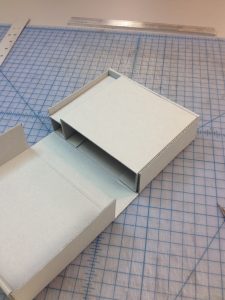
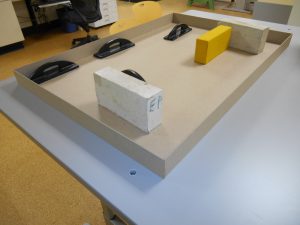
The miniatures had previously been housed in folders within document boxes; usually a dozen or so in each box. One may handle multiple volumes before finding the one they wish to access. Once the desired volume is finally found, it can be easily lost due to its miniscule size. To facilitate handling we wanted to house them individually in standard size corrugated clamshell boxes (aka “pizza boxes” or “drop spine boxes.”). First we had to decide on what that standard size would be.
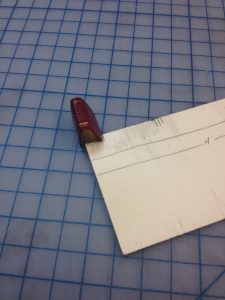
The height of the standard box was set by the 8-inch-high shelves. To determine the width and depth of the standard box, I measured each miniature to find the largest amongst them. I settled on a standard box that would measure 6 inches x 1.75 inches x 4 inches. An added advantage to a standard box is the ability to batch tasks. I would measure, cut, and crease 30 or so clamshells at a time, saving a lot of time.
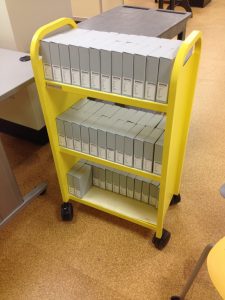
A pride of Minis in their new homes.
The highly sought after “batch stack.”
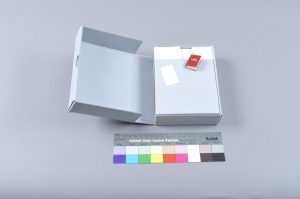
Once I had the standard clamshells figured, I had to determine how to settle the books into their new houses without them rattling around. I wanted to keep the inserts simple and intuitive. After a few experiments, I chose a two-tiered system of spacers made from corrugated board adhered with double stick tape. I added Volara and 10 point card stock tabs to further stabilize when necessary. Watch as this Mini “Addresses of Lincoln” gets a house.
I used the Mini to determine the height and width of the first spacer.Inserting the first spacer with double stick tape.
I used the space left in the box to determine the size of the 2nd spacer.The Mini-Two-Tier-System™.
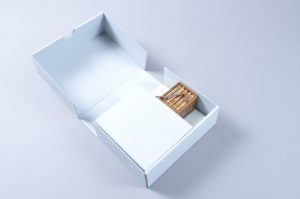
Inserting Volara. Those Minis love a good foam party.
I used the height and width of the Volara recess to determine the tab size.
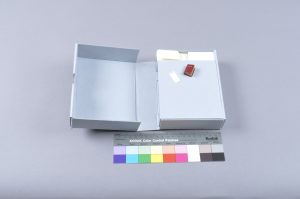
The tab allows for easy retrieval of the Mini.
When finishing up the nearly two hundred enclosures for all these vulnerable Minis I rejoiced. Knowing how intimidating other large volumes can be to the slighter books in the collection, it’s nice to know a conservation technician can make a petite book’s size anxiety just a little less extreme. I am comforted that the Minis now rest easy: safely tucked away in their soft foam and supportive board havens, never to feel lost or intimidated again.
A vulnerable mini prior to receiving a house.
Several adequately housed Minis basking in their new security:
My love of extreme things (extreme sports, extreme reality television) has led me to create a two part blog series: EXTREME ENCLOSURES.
An example of a beloved extreme enclosure, the Boo Box, from “Hook.”
In part one, I will detail the creation of four Andre-the-Giant-sized cloth-covered telescoping boxes for our cherished Audubon’s Birds of America. Part two will chronicle the construction of corrugated clamshell boxes (aka “drop spine boxes” or “pizza boxes”) for the few hundred miniature books held by Rubenstein Library.
Those are some BBB’s (big, beautiful books).
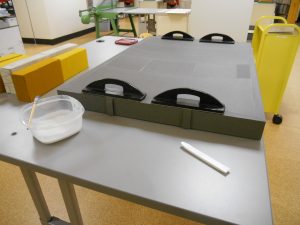
Boxing The Audubons
Audubon’s Birds of America is a four volume set of double elephant folios containing life size prints made from engraved plates. Each volume has a footprint of around 40 inches x 27 inches, and weighs around 47 pounds. When making an enclosure for a book this gigantic there are a few things to keep in mind: the weight of the item after boxing, and the area of the materials needed to construct the box. Measures need to be taken to ensure the box itself isn’t too heavy. Per Beth’s suggestion, I used double-walled corrugated board for the bottom tray. Double-walled corrugated board would lend adequate support while also being significantly lighter than a tray made of double walled binder’s board.
One problem: the sheets of double walled corrugated are not large enough to create a box this big. Using a micro spatula, I peeled one layer off each sheet and laminated two sheets of corrugated together with a Polyvinyl Acetate (PVA) and Methyl cellulose mix.
Peel one layer off the bottom of the top sheet, one layer off the top of the bottom sheet.
Keep adequate weight on the sheet while it dries so as to avoid warping.
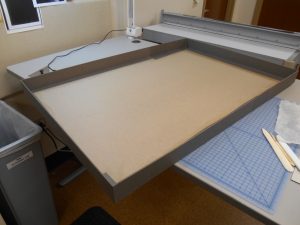
Once the sheet is dry I can construct the bottom tray and cover it with cloth. I chose a tray that had three fixed walls and one collapsible wall that would facilitate removal of the book. Working with wet adhesive and corrugated board was the most frustrating step of all. Unlike binder’s board, corrugated will buckle under pressure from my bone folder. When adhering the cloth, I had to be very careful of how hard I pressed. A ginger touch was key. The corrugated also felt unstable while the adhesive was wet. The inner corners of the tray were especially wonky after getting all the cloth laid down, making me feel as though all was lost. This wonkiness did, however, subside after adequate time had been given for the adhesive to dry. Once dry, the tray was remarkably strong.
‘Tis a rough road, the path of the corrugated…one might even describe it as extreme.
Attaching the collapsible wall.
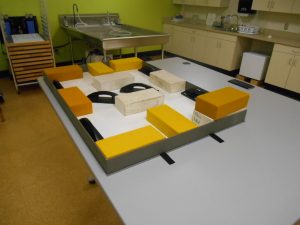
Moving on to the top tray was a reprieve. What a cake walk! The top tray was constructed like any cloth covered box; a single wall of binder’s board. The cloth stuck to that binder’s board like a Californian on a skateboard. The main challenge was adhering large swaths of cloth consistently to avoid air bubbles.
This step was such a cake walk, I had to keep myself from imagining these bricks were cakes.
If I flipped the whole tray over, it resembled an oversized sheet cake.
Next I created Velcro tabs to adhere in between the tray and the outer lip to keep the top and bottom lids securely fastened when the box is handled. I lined the Velcro with book cloth and shaved down the Velcro parts that would be placed in between the tray and the lip to reduce their swell. Making sure the Velcro strips stayed stuck to the tray was an issue. The PVA often had trouble keeping the plasticized Velcro in place, making it easy to dislodge the strips. I found that once the lip had been firmly adhered, the strips stayed in place.
Lining and shaving the Velcro strips.
Adhering Velcro before adhering outer lip.
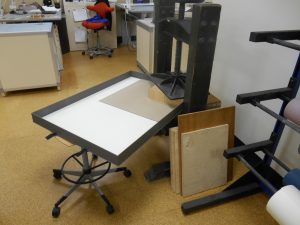
Next comes adhering the outer board to the tray. Because this behemoth would not fit in any of our presses and the area of the tray was impossible to adhere in one go without adequate pressure, I resorted to a multiple-step-adherence-approach. I used brick weights for an initial gluing. Once dry, I had to re-glue each corner, one at a time, and place each corner into the press with blocks. I rigged up an extreme support system for the tray while in the press: a stool.
Step one: Bricks.
Step Two: Press with Duke Stool Support System™
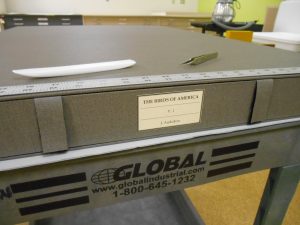
And finally, the finishing touches: labels.
Like an expertly landed kick flip.
Upon fitting the item into the box I weighed the item with its enclosure. It totaled a whopping 66 pounds. The book weighed 47lbs, and the box 19 pounds. Saving a bit of weight on this box kept us from reaching into the twenty-pound range on the enclosure alone.
It fits! No meltdown needed.My first 66 pounder.
But alas, we must always say goodbye. In extreme circumstances, I prefer to keep my eyes closed so as to avoid crying.
Emotions run high.
The Audubon’s have settled down in their new homes. Although they continue to amaze visitors of Duke University with their awe-inspiring depictions of the Birds of America, their bindings are no longer at risk in un-enclosed spaces.
Stay tuned for Part Two of Extreme Enclosures: Extreme Miniatures.
I grew up in Dayton, Ohio. You don’t grow up in that city without knowing two things: the Wright Brothers invented the airplane there and thus Dayton was “first in flight” (sorry North Carolina); and the city suffered a devastating flood in March of 1913. The Great Miami River flooded downtown Dayton killing almost 400 people and displacing tens of thousands. You can still see remnants of the high water mark if you look closely at the historic buildings that survived.
Floods and disasters are never far from a collection conservator’s mind. Just a couple weeks ago the entire American Institute for Conservation’s annual conference was on the topic of disasters. Even our own lab has been flooded during the Rubenstein Library renovation. All this is to say stuff happens, and we always seem to think about it.
Which brings me to my very true story. The other night I had a nightmare that seemed to combine just about every worst-case-scenario event that could happen to a conservator. The scene: the conservation lab. I am in my office and I hear a loud noise above my head. All of a sudden out of the ceiling comes a huge circular saw and it is cutting through my office walls sort of like how Bugs Bunny cut Florida off from the United States.
“No one told me we were under construction,” I said to myself. At the same time, there is water coming from everywhere as if a live water pipe had been cut. It’s coming up fast and we are scrambling to get things out of the way. While all of this is happening, I am trying to conduct a tour through the lab. I said under my breath, “This is about three times the number of people Development told me would be here,” but I carried on because that is what we do, right? I was trying to ignore what was happening around me and get the thirty or so people on the tour to focus on the amazing projects that my conservators were working on. Needless to say, it didn’t go very well. The last thing I remember is thinking, “How will I represent this on our statistics.” Then I woke up.
What does it all mean? Have you had conservation nightmares?
Hurricane Floyd hits the East coast in 1999. Courtesy Earth Observatory website. http://earthobservatory.nasa.gov/Features/FloydIntro/
This week is Hurricane Preparedness Week. Don’t be fooled, just because your institution is inland doesn’t mean you can’t be affected by hurricanes. The remnants of large storms can move inland for hundreds or thousands of miles causing flooding and spawning tornadoes. Hurricane Fran hit landfall at Bald Head Island on September 5, 1996. It’s 115 mph winds carried inland and dumped 8.8 inches of rain in Durham, the highest recorded rainfall at the time. You can still see the remnants of the damage of Fran in some areas of Durham.
The 2016 hurricane prediction forecast is for a very active year. If you didn’t review and update your disaster plan on May Day or during Preservation Week, now is the time. At the very least, update your institutional phone tree and make sure your vendor contacts are updated.
If you have more time to devote to preparedness, check out NEDCC’s D-Plan, a free disaster planning site that allows you to customize your plan to your institution. NEDCC also has a good handbook for developing a community based disaster response called Coordinated Statewide Emergency Preparedness (CoStEP).
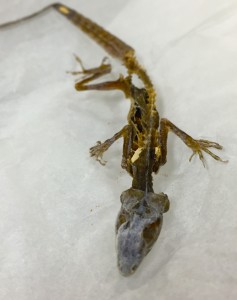
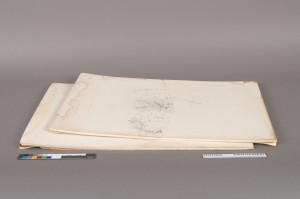
If we discover her other leg, maybe we can reattach it.
This gecko mummy was found in a collection being processed at Smith Warehouse. I suspect she was long gone before the collection came to us.
Geckos are what we call an indicator species. They don’t pose a hazard to your collections per se. She may have crawled into these papers looking for a snack of insects, or a nice place to raise (or deposit) a family.
As we approach Preservation Week at the end of April, it’s a good reminder that you shouldn’t store your collections in basements, garages, attics or outbuildings. Spaces with unregulated environments can harbor unwanted guests looking for a dark, quiet home or a food source.
By Rachel Penniman, Senior Conservation Technician
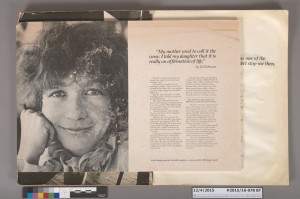
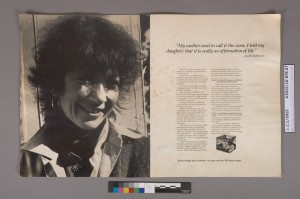
Sometimes items come to the lab that have so many problems we just can’t predict how the treatment will go at first glance. These items from the Reva Korda papers were that kind of challenge.
Mounted advertisements before treatment.
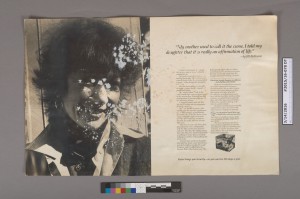
These four advertisements had been mounted onto foam core backing board that was deteriorating and delaminating. They had also been exposed to water which caused mold, warping, and two of the ads stuck to the back of two other ads. Because the ads were stuck together, we couldn’t even see what the bottom two ads looked like.
Mounted advertisements stuck together and warping.
With all the condition issues there were plenty of ways for this treatment to go wrong. The back of the ads could get skinned or tear as I tried to remove the backing boards. The mold could have completely disfigured the lower ads. The ads stuck to the backing boards could be stuck so irreversibly that we would lose parts of the image in trying to separate them. We had a meeting with the curators to discuss the range of options. We decided that because the bottom two advertisements were so completely obscured, it was worth making an effort to separate them even if it resulted in a little bit of loss. I first planned to try mechanically removing the foam core backing boards and separating the stuck ads either mechanically or with a little humidification. If that didn’t work we agreed to have another meeting to discuss more invasive treatments like full immersion in a water or solvent bath.
The first step was to remove as much of the mold as possible with a soft brush and vacuum. Once that was done I started trying to separate the ads from their backing boards. Sometimes conservators really hate how old adhesives turn yellow and brittle with age, but when an adhesive has aged so poorly that it fails completely it can actually make our jobs easier. In this case, on three of the advertisements the dry mount adhesive had become so brittle that with the tiniest bit of pressure I was able to slip a thin metal spatula between the board and the advertisement and it just popped right off. Success! It was very satisfying separating these from their foam core boards. Using a little bit of solvent on swabs I was able to remove most of the yellow adhesive residue from the back of each advertisement.
Back of one advertisement before yellow adhesive was removed and after adhesive was removed.
The fourth advertisement had a different adhesive that felt soft and waxy. Sadly for me, it was still doing its job and was holding the ad firmly to its backing board. In 2014 our lab hosted a photograph conservation workshop taught by Gawain Weaver. We learned a number of methods for removing photographs from mounts. I recognized this waxy feeling adhesive from that workshop and remembered doing tests on how to most easily remove it.
Thank goodness for taking good notes and keeping all my test samples!
By placing the advertisement face down on a piece of blotter on a hotplate on the lowest setting I was able to soften the adhesive so I could separate the final ad off its backing board. More success!
I was able to separate the ads that were stuck together but some of the paper from the foam core board remained stuck to the faces of the ads. This was far better than the alternative where some of the face of the advertisement could have been skinned off though so I considered that a win.
Advertisements that had been stuck on the bottom with paper still attached to the front.
I was able to remove all of the attached paper with water or alcohol on swabs pretty easily. There was still some discoloration from the mold but the alcohol helped to reduce it. Mostly success!
Previously hidden advertisements after the paper was removed.
While these ads still show evidence of their hard life they are now free of their bad mounts, failing adhesive, and separated from each other. The discoloration from mold and water damage will remain, but at least now we can see what had previously been completely hidden. It’s always a happy surprise when something goes smoother and more easily than anticipated. It’s a rare treat. With the very low expectations for the treatment it was an extra special pleasure to be able to show the previously unseen advertisements to the curators.