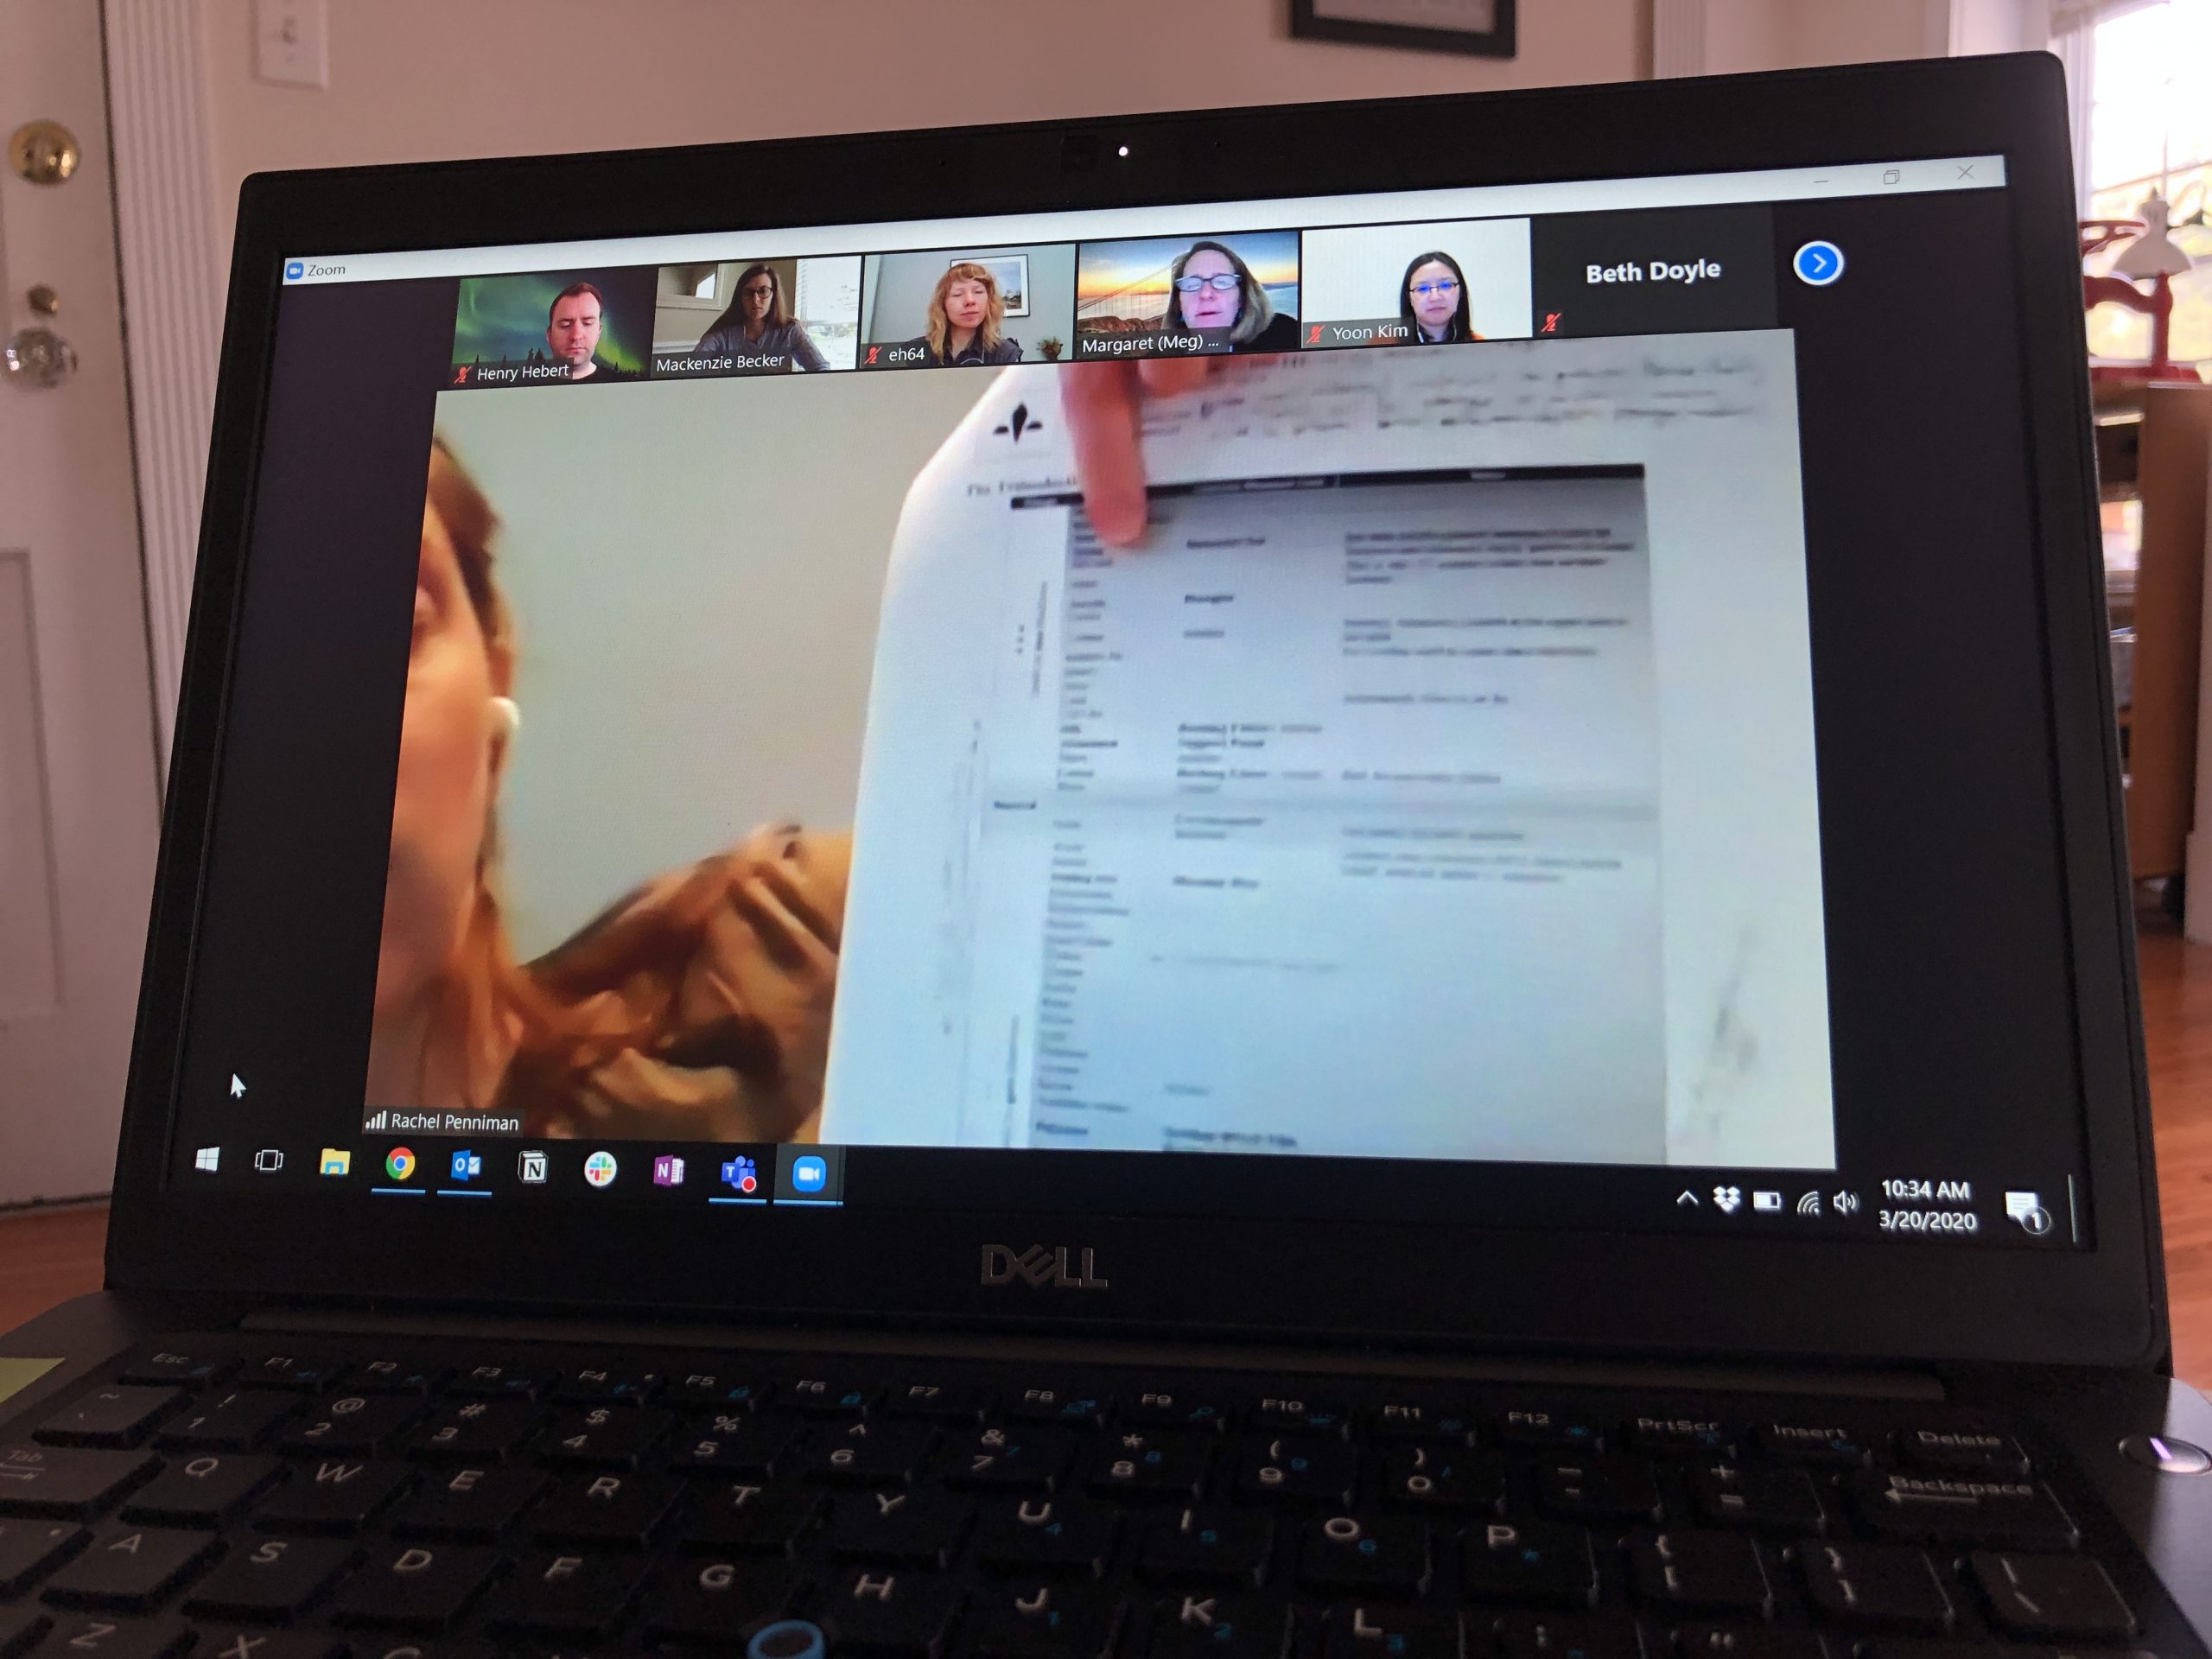
Here Rachel is showing a chart of the Triboelectric series (right before we all remembered we could just share screeens 🙂 ). It’s nice to be able to connect with colleagues so easily, despite everything that is going on.
The library loans a large number of items from various collections to other libraries and museums each year for exhibitions. The typical loan agreement is for a small number of items (usually less than 10), but occasionally we get a loan request that is much larger. It is important to document the condition of each object that is borrowed, and we do this by creating a condition report. Condition reports document any pre-existing conditions of a collection item (or lack thereof) and help to establish the responsible party for any future damage. A good report allows anyone handling the object to check and compare the condition of the item as it is packed and moved between destinations.
There are no standards for the length or format of a condition report. For many years, our reports have taken the form of a simple text document that includes an object’s identifying information, a brief description, and notes about any condition issues. In addition to the report, we take photographs of the object and save them to a networked drive.
This form has served us well until now, but in the next year we are facing some much larger loans. We began to wonder if there was a way to more quickly and accurately document the condition of an item, while still maintaining good record keeping practices. In recent years, a number of conservators have developed methods for adding photographs and digital annotations to their condition reports. With the increased functionality and reduced cost of portable touch-screen devices, the time seemed right to experiment with new documentation methods.
[Click to Enlarge]At the most recent AIC Annual Meeting, I attended a talk by Katrina Rush, Associate Paintings Conservator at the The Menil Collection, on digital condition reporting using Apple devices. While the method she presented appeared viable for our needs, we needed to use hardware and software that could be fully supported by our IT department. We recently acquired a Surface Book 2, which combines the versatility of a laptop and a tablet in one Windows device. The accompanying stylus allows the user to precisely annotate images and the portability means that we can bring it along with the items as they travel. The attached camera could be useful for documenting the item outside the lab.
I began designing a new condition report template in Microsoft OneNote. This program allows us to include all the same information from the old form, as well as insert and annotate images. There are also some handy time-saving features like working checkboxes and timestamps. I have included an example of an item documented with the new form here.
At this stage in development, I am conducting “trial runs” with the new form and device. So far I have not been timing myself, but completing the report seems to go very quickly. For much larger loans, I have successfully tested workarounds using “mail merge” to generate the tables of bibliographic data for many items at once. I’ve found it very easy to fill out the fields and to drag and drop images into the form. While the drawing tools are extensive, it would probably be helpful to develop a standard legend of specific colors to describe common condition issues. Exporting the report to a more preservation-friendly file format (like PDF) is easy enough, but can require some adjustments to keep page breaks from splitting an image.
As this new documentation method gets more use, we will likely continue to adapt it. In the coming months I hope to share some of the lessons we learn and the resulting workflows on this blog.
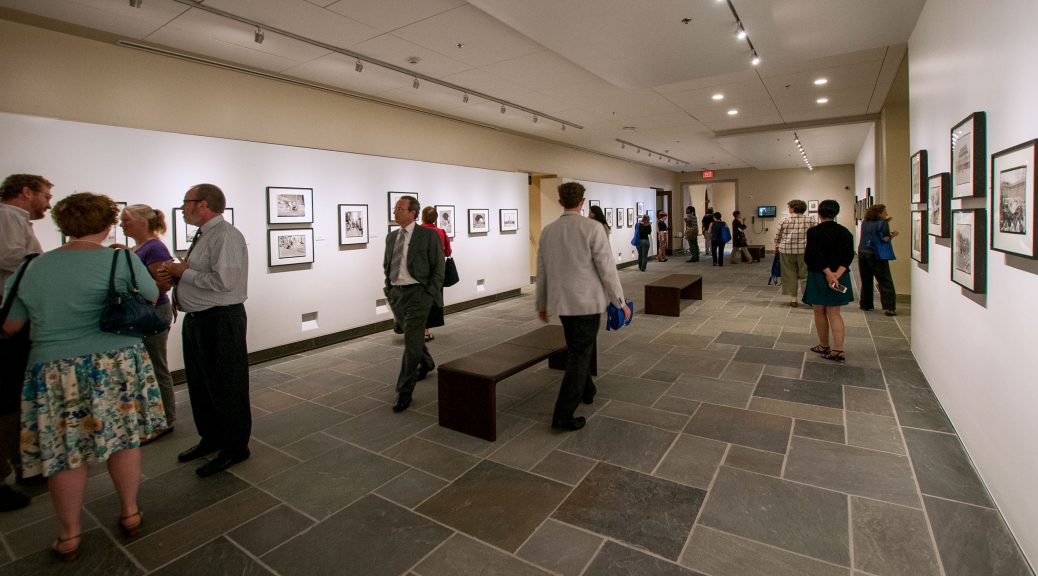
As part of the Rubenstein Library Renovation Project a few years ago, the Special Collections Hallway Gallery was enlarged and rebranded as the Rubenstein Photography Gallery. The 67′ by 25′ space features a different collection from the Archive of Documentary Arts every few months. Because it still functions as a primary route through the building, the gallery provides an inviting environment for visitors to experience the library’s photographic collections.
We have been monitoring the environmental conditions within the space continually since it reopened in 2015. Although the temperature stays very stable in the building throughout the year, we do see some fluctuation in the relative humidity (RH) for the gallery. In the coldest winter months, public spaces tend to become very dry because of the heating systems. The question has been lingering in our minds: what are the environmental conditions that the artwork is experiencing inside the frame? Last fall, a small working group from Conservation, Exhibitions, Preservation, and the Archive of Documentary Arts gathered to design a simple experiment to try and answer this question.
As part of this experiment, we wanted to not only measure the temperature and RH within our normal frames, but see if there was something simple we could do to buffer any changes to those conditions. While there are many options available to change the conditions inside a frame, we determined the easiest (and cheapest) option would be to seal frame contents in a relatively impermeable package.
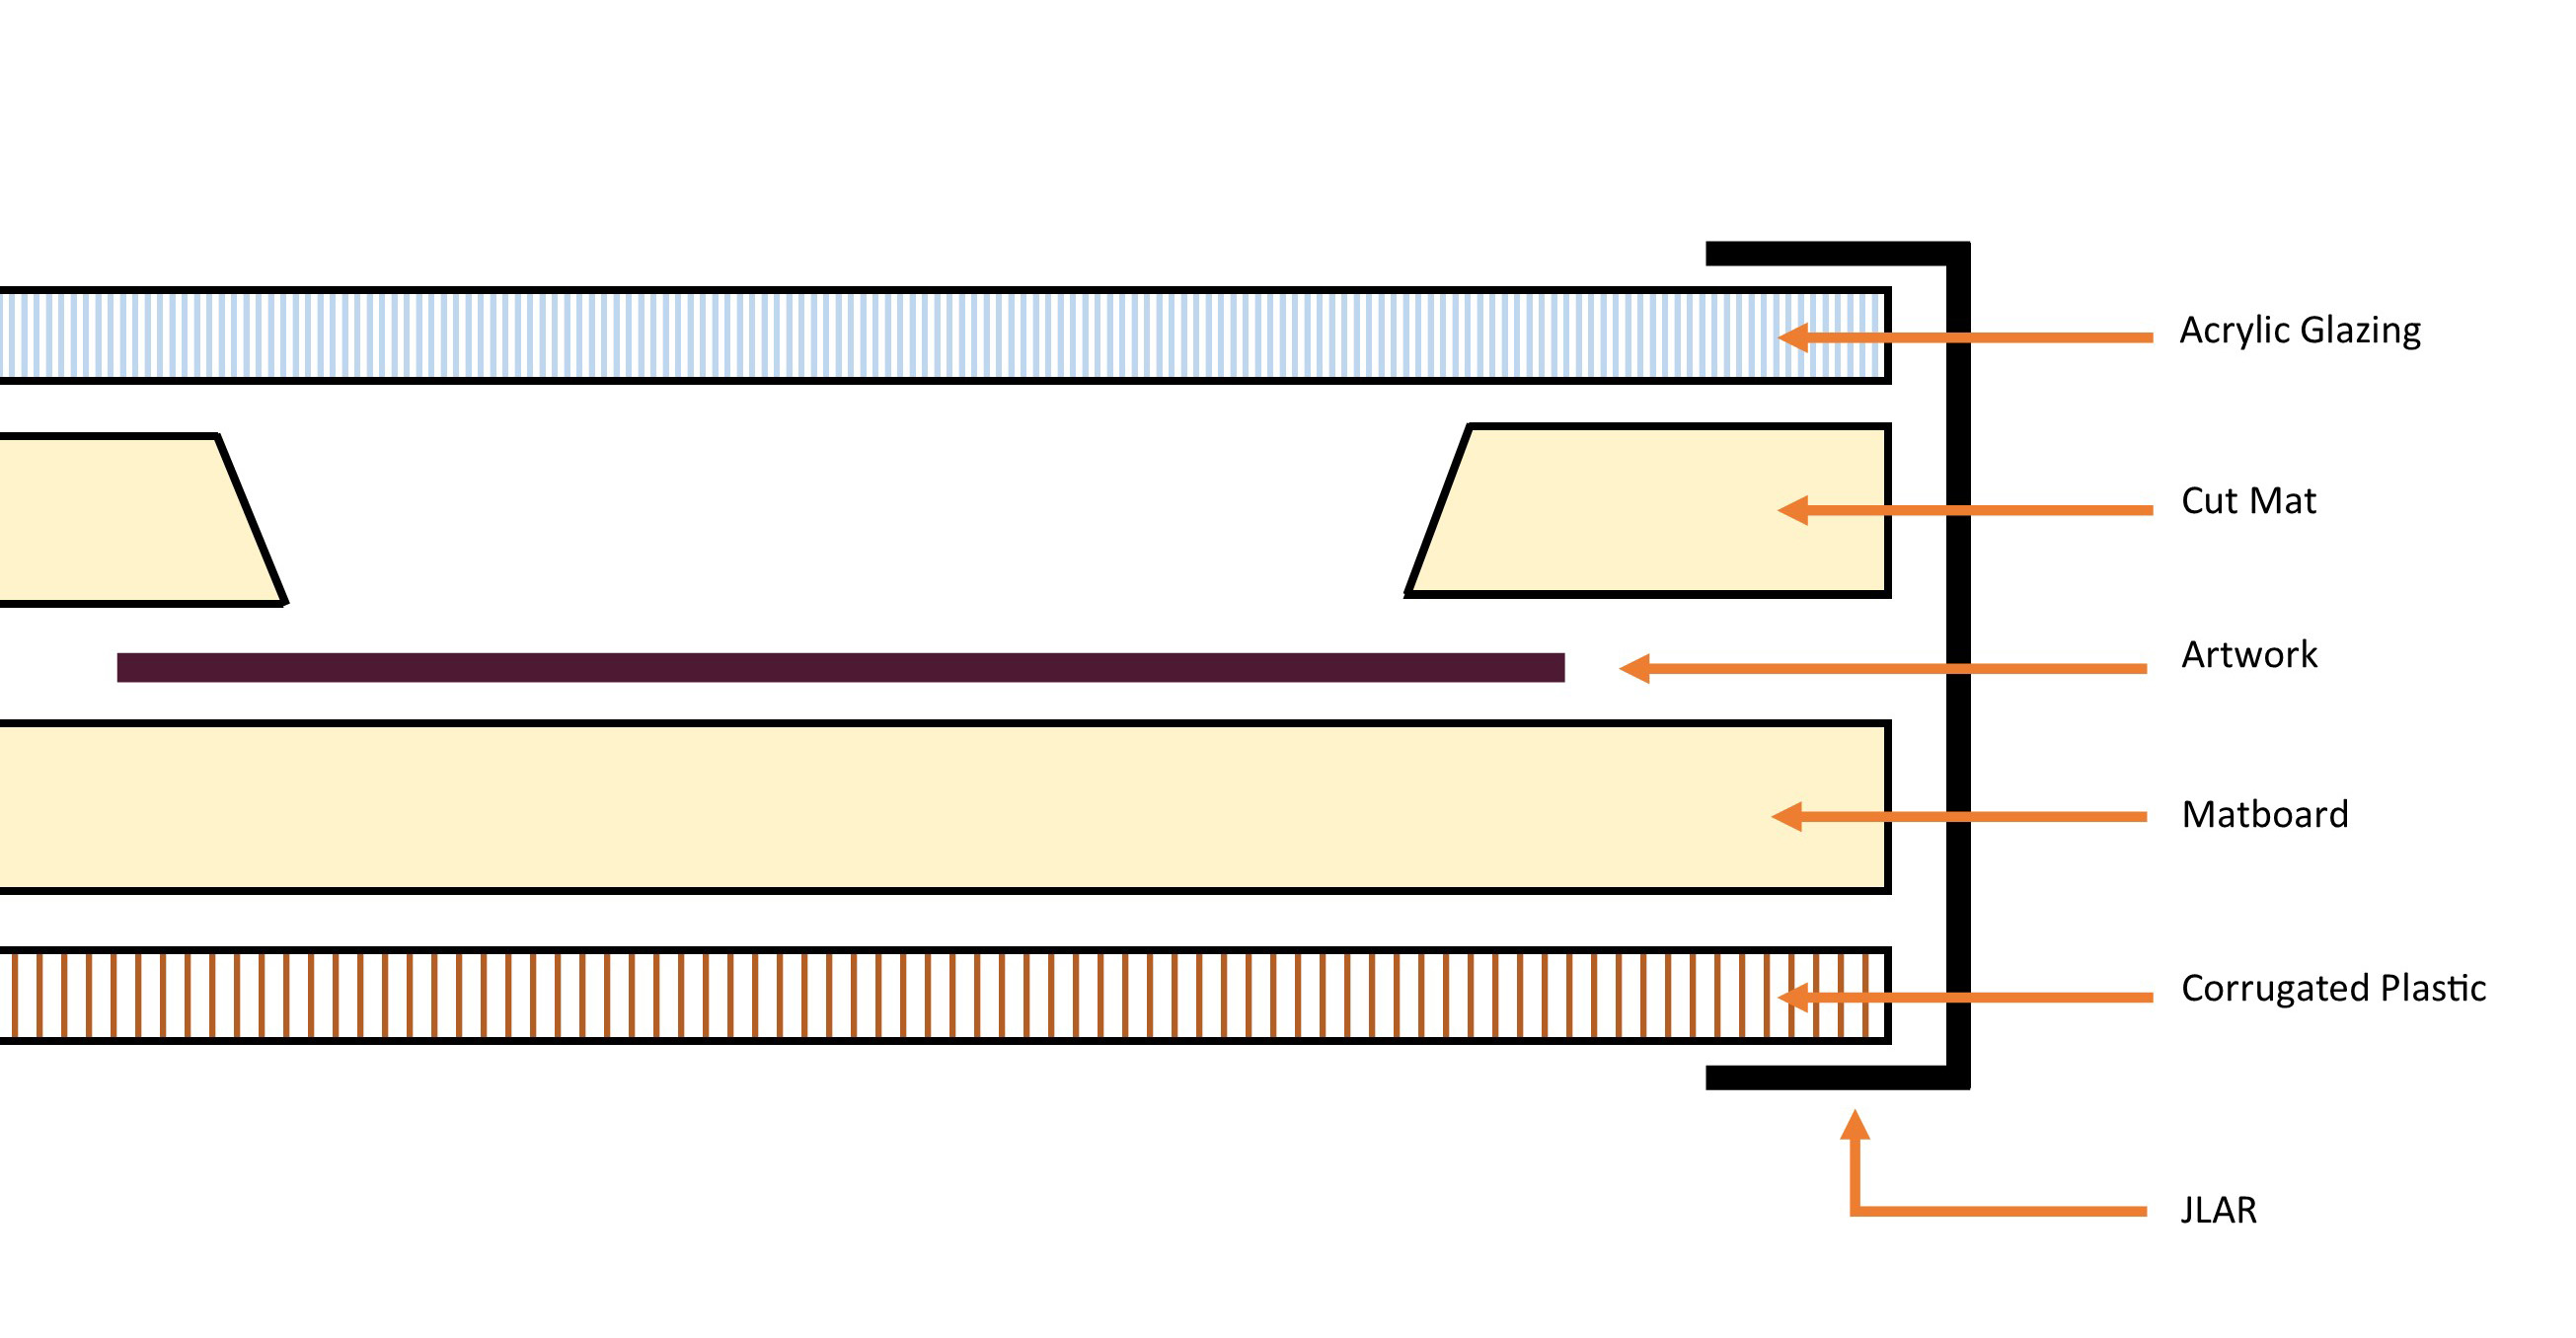
Diagram of sealed frame package
Framed photographs in our galleries include several components inside each frame. The glazing of our frames is a UV-filtering acrylic. Beneath that is a window mat cut to the size of the artwork. The print is mounted to another piece of mat board underneath. At the back of the package is a piece of corrugated board made of white plastic (polypropylene). We hypothesized that by taping the outside edges of this “package” of material with polypropylene tape that the air exchange inside the frame could be significantly reduced and therefore reduce the change in RH. We decided to set up two identical frames for comparison, one with a sealed package and one without.
We acquired two HOBO MX2300 Temp/RH dataloggers with external sensors and I set to work fitting them into two of our standard gallery frames.
The datalogger sensor is much thicker than the art that usually goes inside one of these frames, so I had to build up the thickness of the package with several layers of mat board. I created a central stack of mat board with a window cut to fit the sensor. I chose not to use full sheets of mat board for a couple of reasons:
We have a lot of small scrap pieces already and I didn’t want to waste materials.
Frame packages typically only have one full mat board sheet and window mat inside. Adding five or more full sheets to the package seemed like a lot of additional material, which might act as added RH buffer.
The rate of change between the two frames was the important variable. As long as each package was constructed with the same quantity of material inside, we should be able to get a representative comparison.
An inkjet print with a cut mat and the glazing was placed on top of the sensor. The sensor cable was passed through a hole cut in the corrugated plastic, allowing me to mount the logger to the back of the frame. The contents were all stored in a stable 45% RH environment for several weeks before installation. With the package all together, I sealed up the outer edges as well as the hole in the plastic backing with clear tape. The sealed package was then placed inside the metal and wood frames.
Back of the frames, with data loggers mounted.
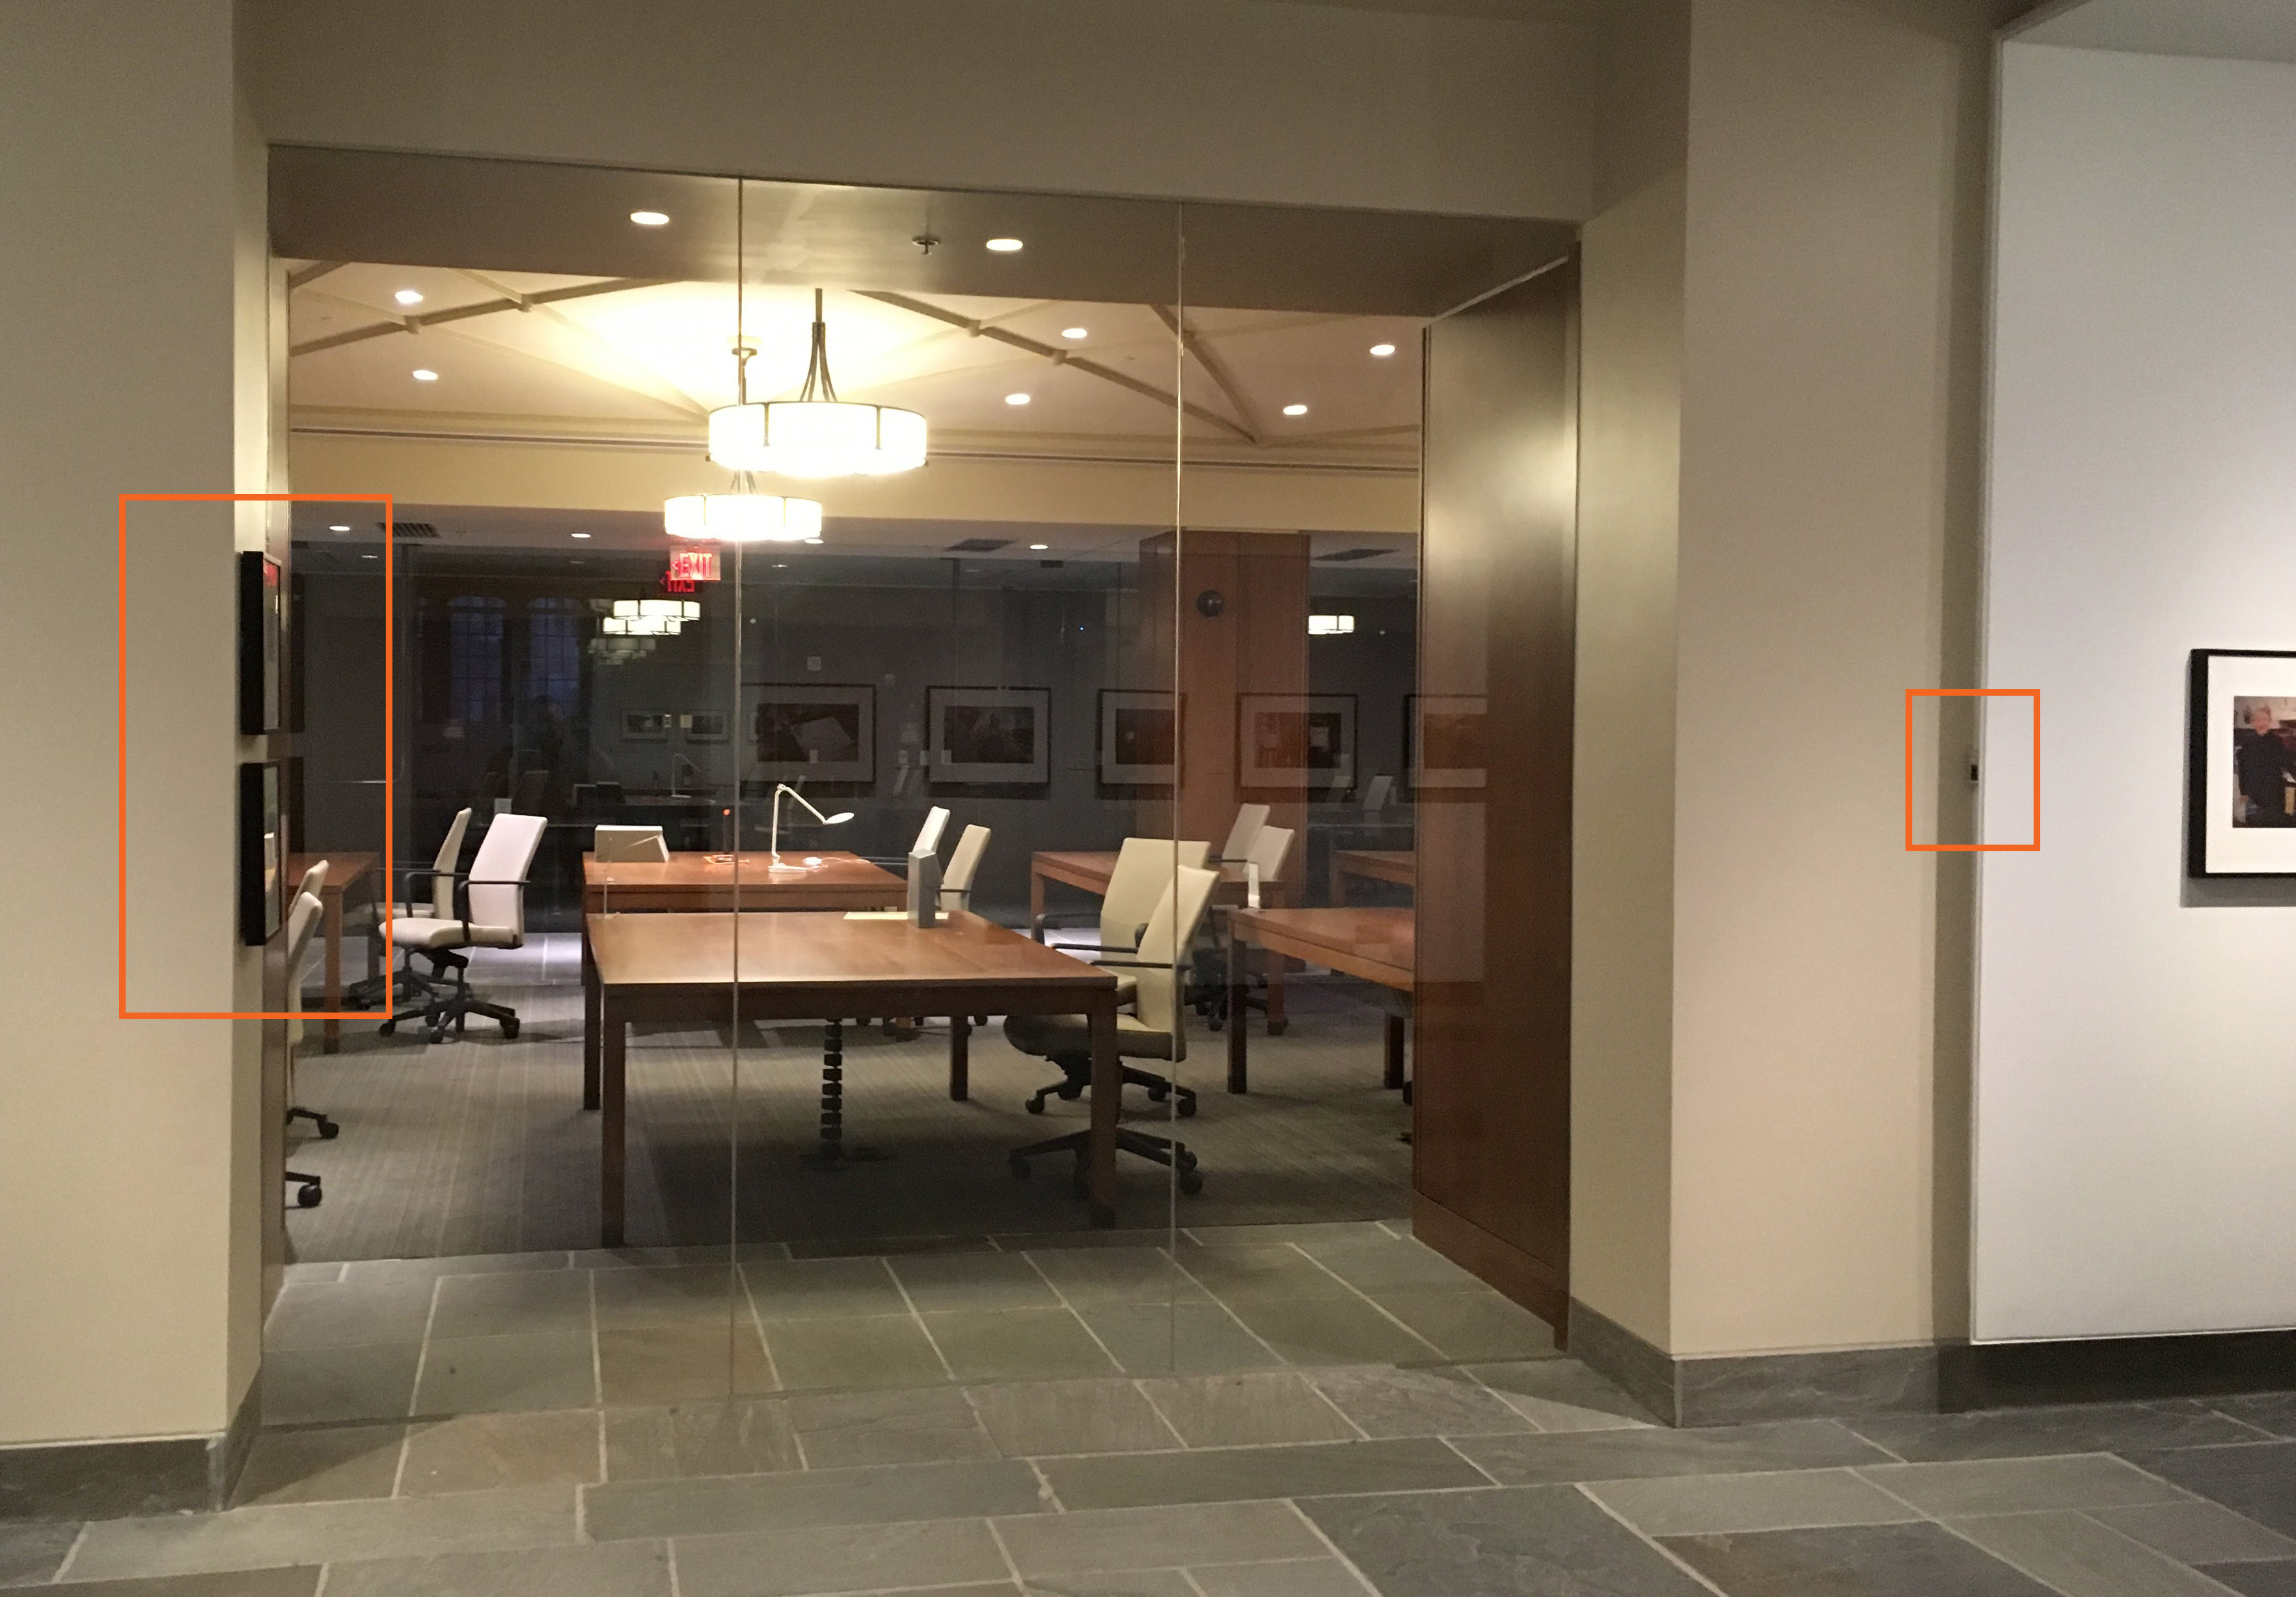
We installed our sealed and unsealed experiment frames in the gallery in early December 2017, along with a new show. The frames were mounted on a small wall, next to the window to our reading room, so as to be less of a distraction from the rest of the exhibit and to be in close proximity to the data logger which monitors the gallery space.
Experimental frames (left) hung inside the alcove, across from the data logger (right).
The inkjet prints we included in each frame had a short description of the experiment so that curious patrons would understand the the purpose of their unusual positioning.
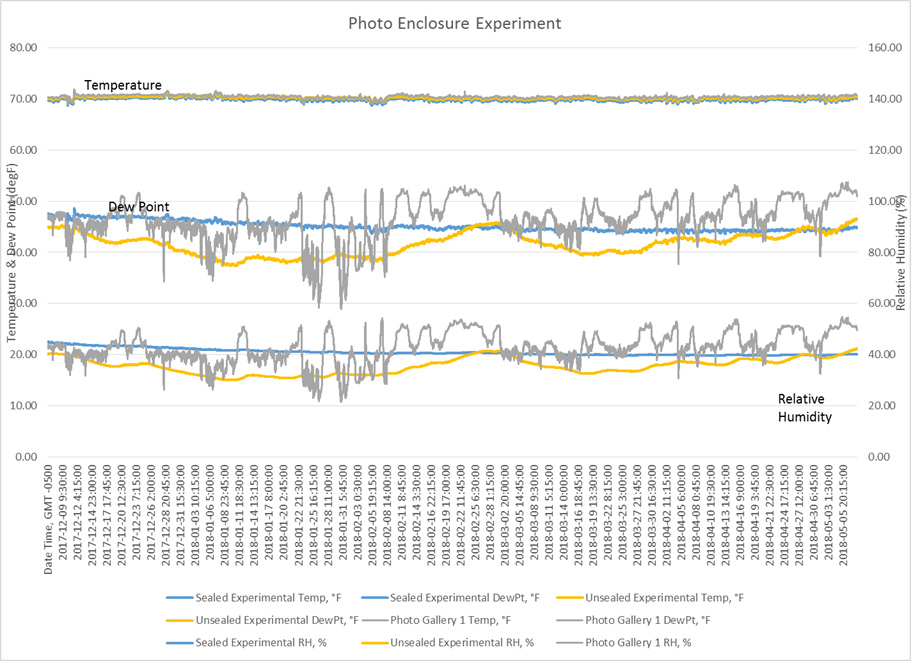
After five months, we took the frames down and compiled all the environmental data. In the graph below, the gallery conditions are marked in grey, the unsealed frame is marked in yellow, and the sealed frame is marked in blue. Temperature values are displayed on the left, while RH values are displayed on the right.
The data confirms that the space maintains temperature very well, staying right around 70 degrees Fahrenheit. The RH in the gallery space does bounce around quite a bit throughout the winter months, fluctuating between around 50% and 20%. Late January 2018 seems to have been particularly volatile.
We were very surprised at how well each frame responded to the conditions in the gallery. Even inside the unsealed frame, we see a significant smoothing out of the RH graph: the over 30 point spread of the gallery RH is reduced to around 12% change in the unsealed frame and the contents did not drop below 30% RH. The sealed frame package performed very well, with only about 6% overall RH change in 5 months.
While the methodology of this experiment does have flaws, it is an inexpensive and adaptable approach to measuring environmental conditions. We can be reassured that our normal framing practices protect prints from drastic changes, even in the most volatile months. We can also take the relatively simple and cost-effective step of sealing the frame package to provide additional protection for more sensitive materials. This experiment has raised questions of how other methods, such as sealing the frame package differently or adding pre-conditioned board, might compare. It is likely that our investigations will continue, so that we can make the best choices for our collections.
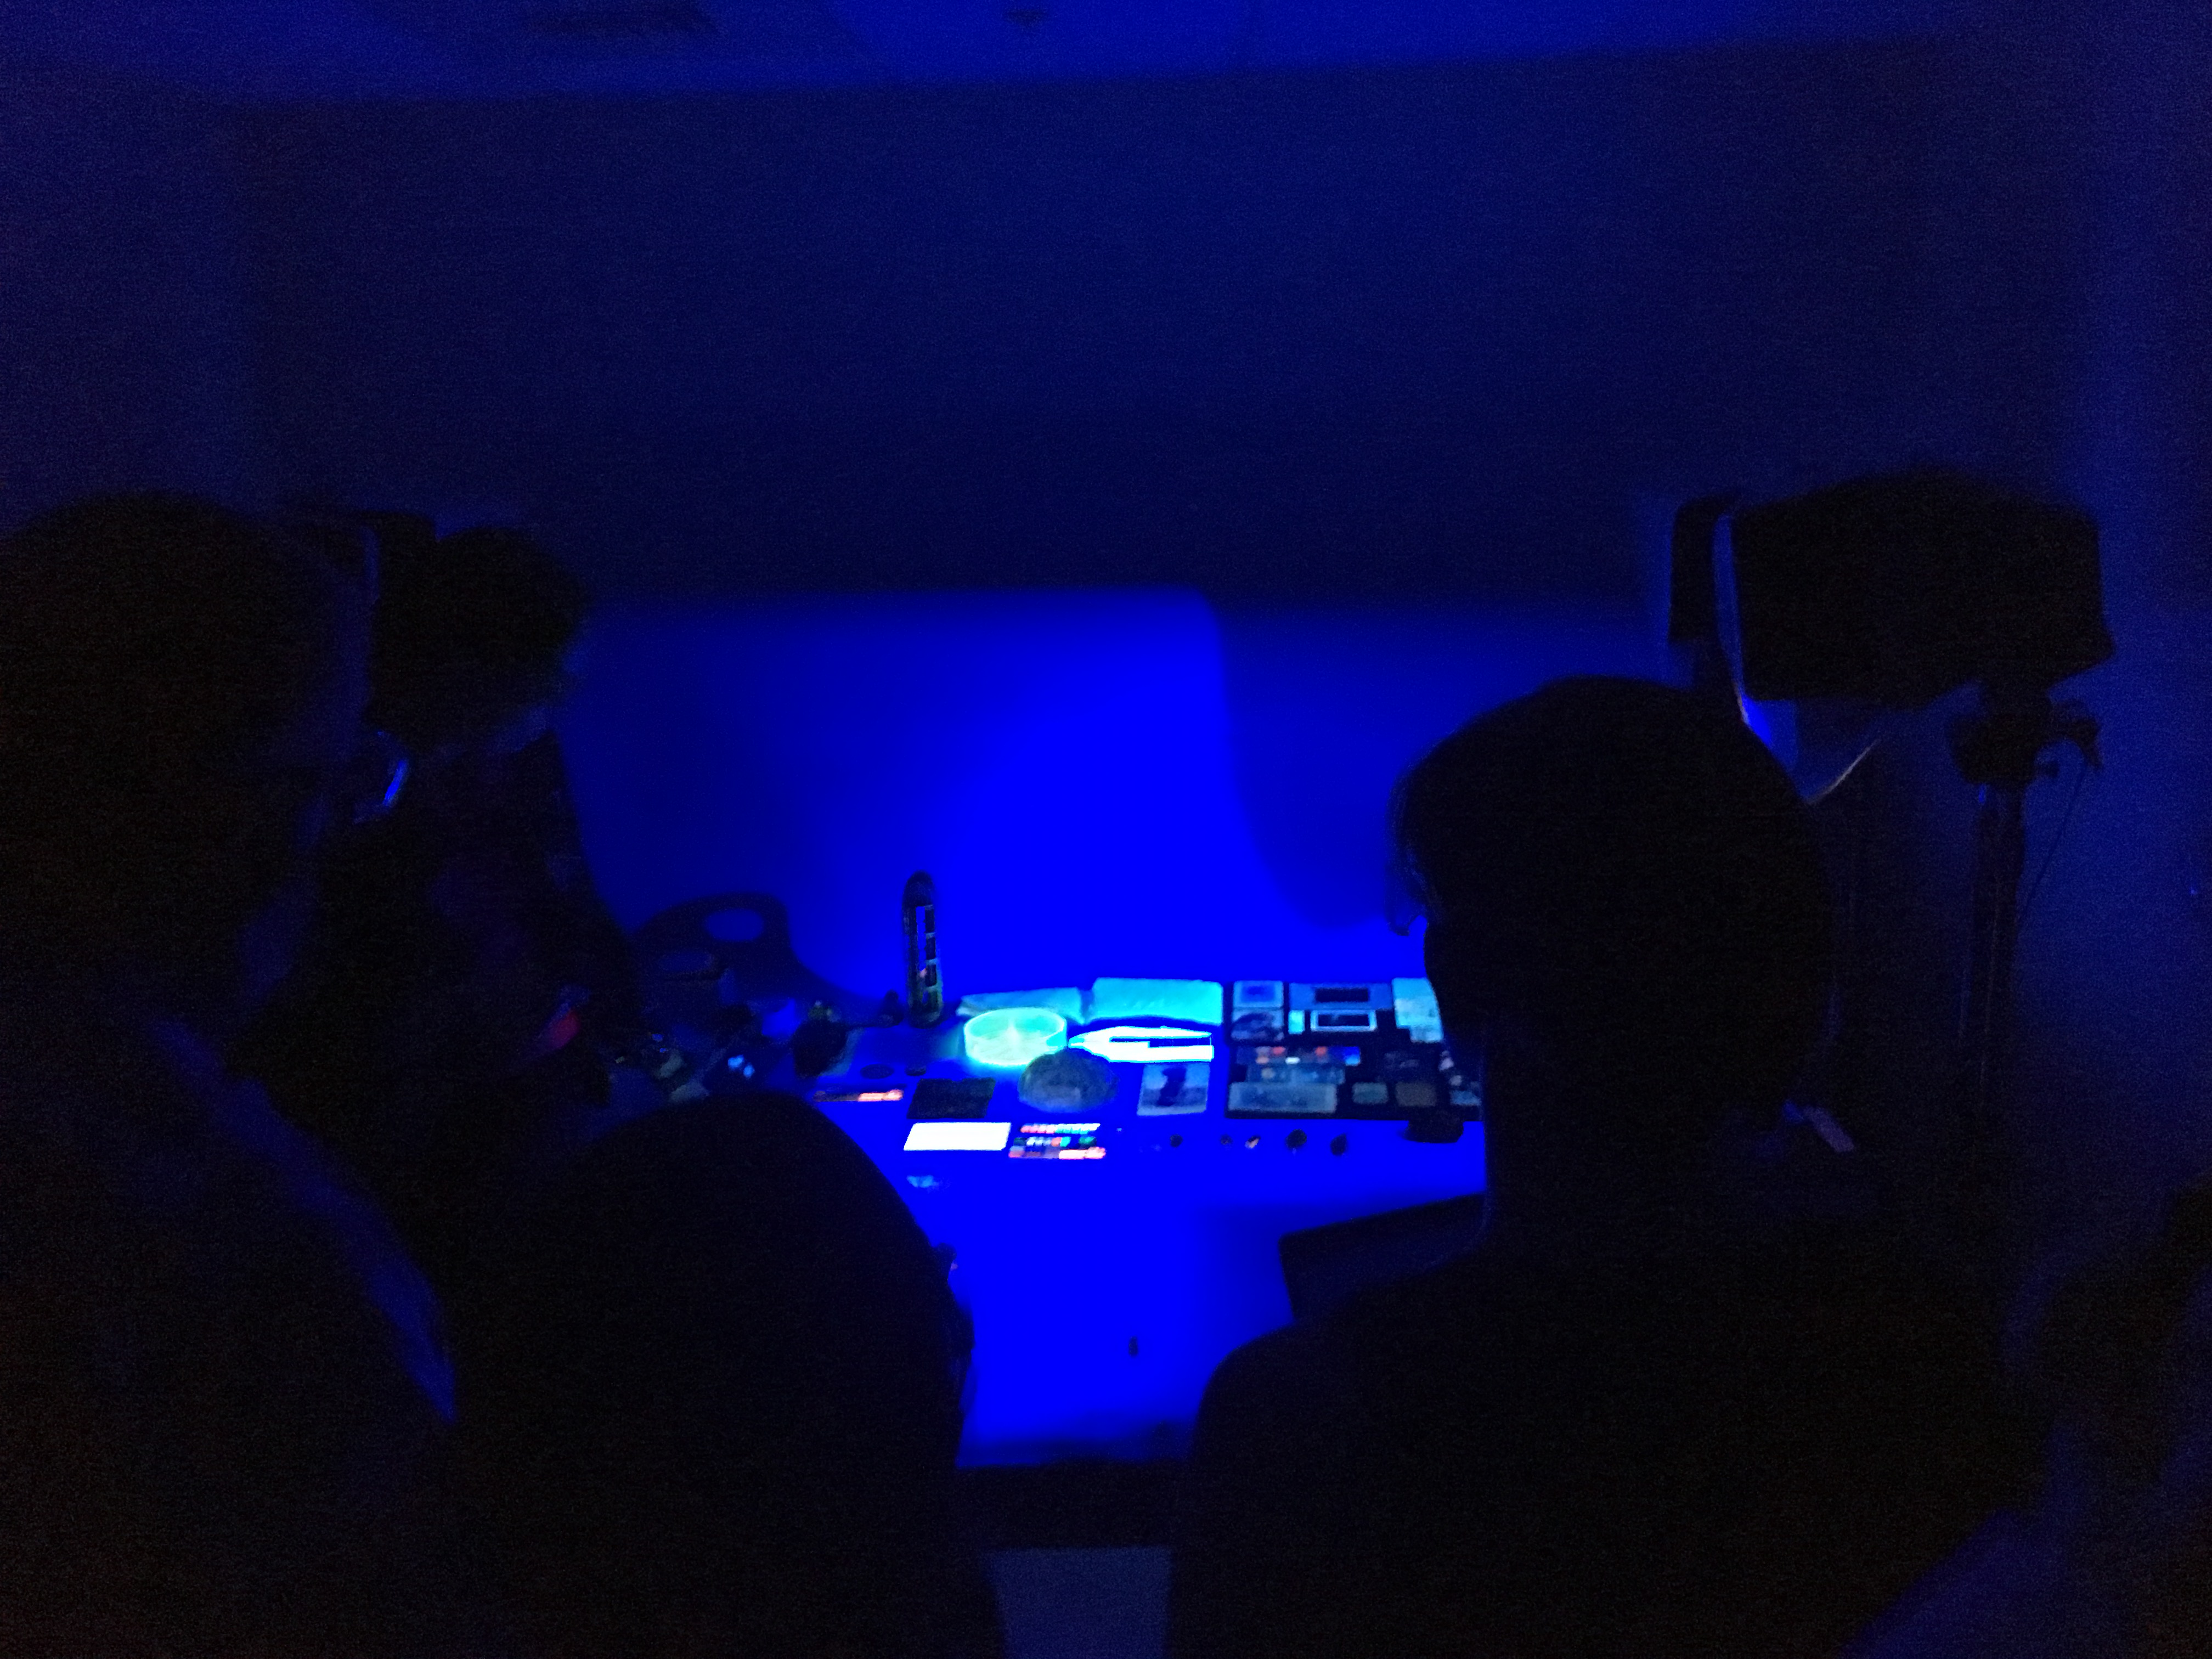
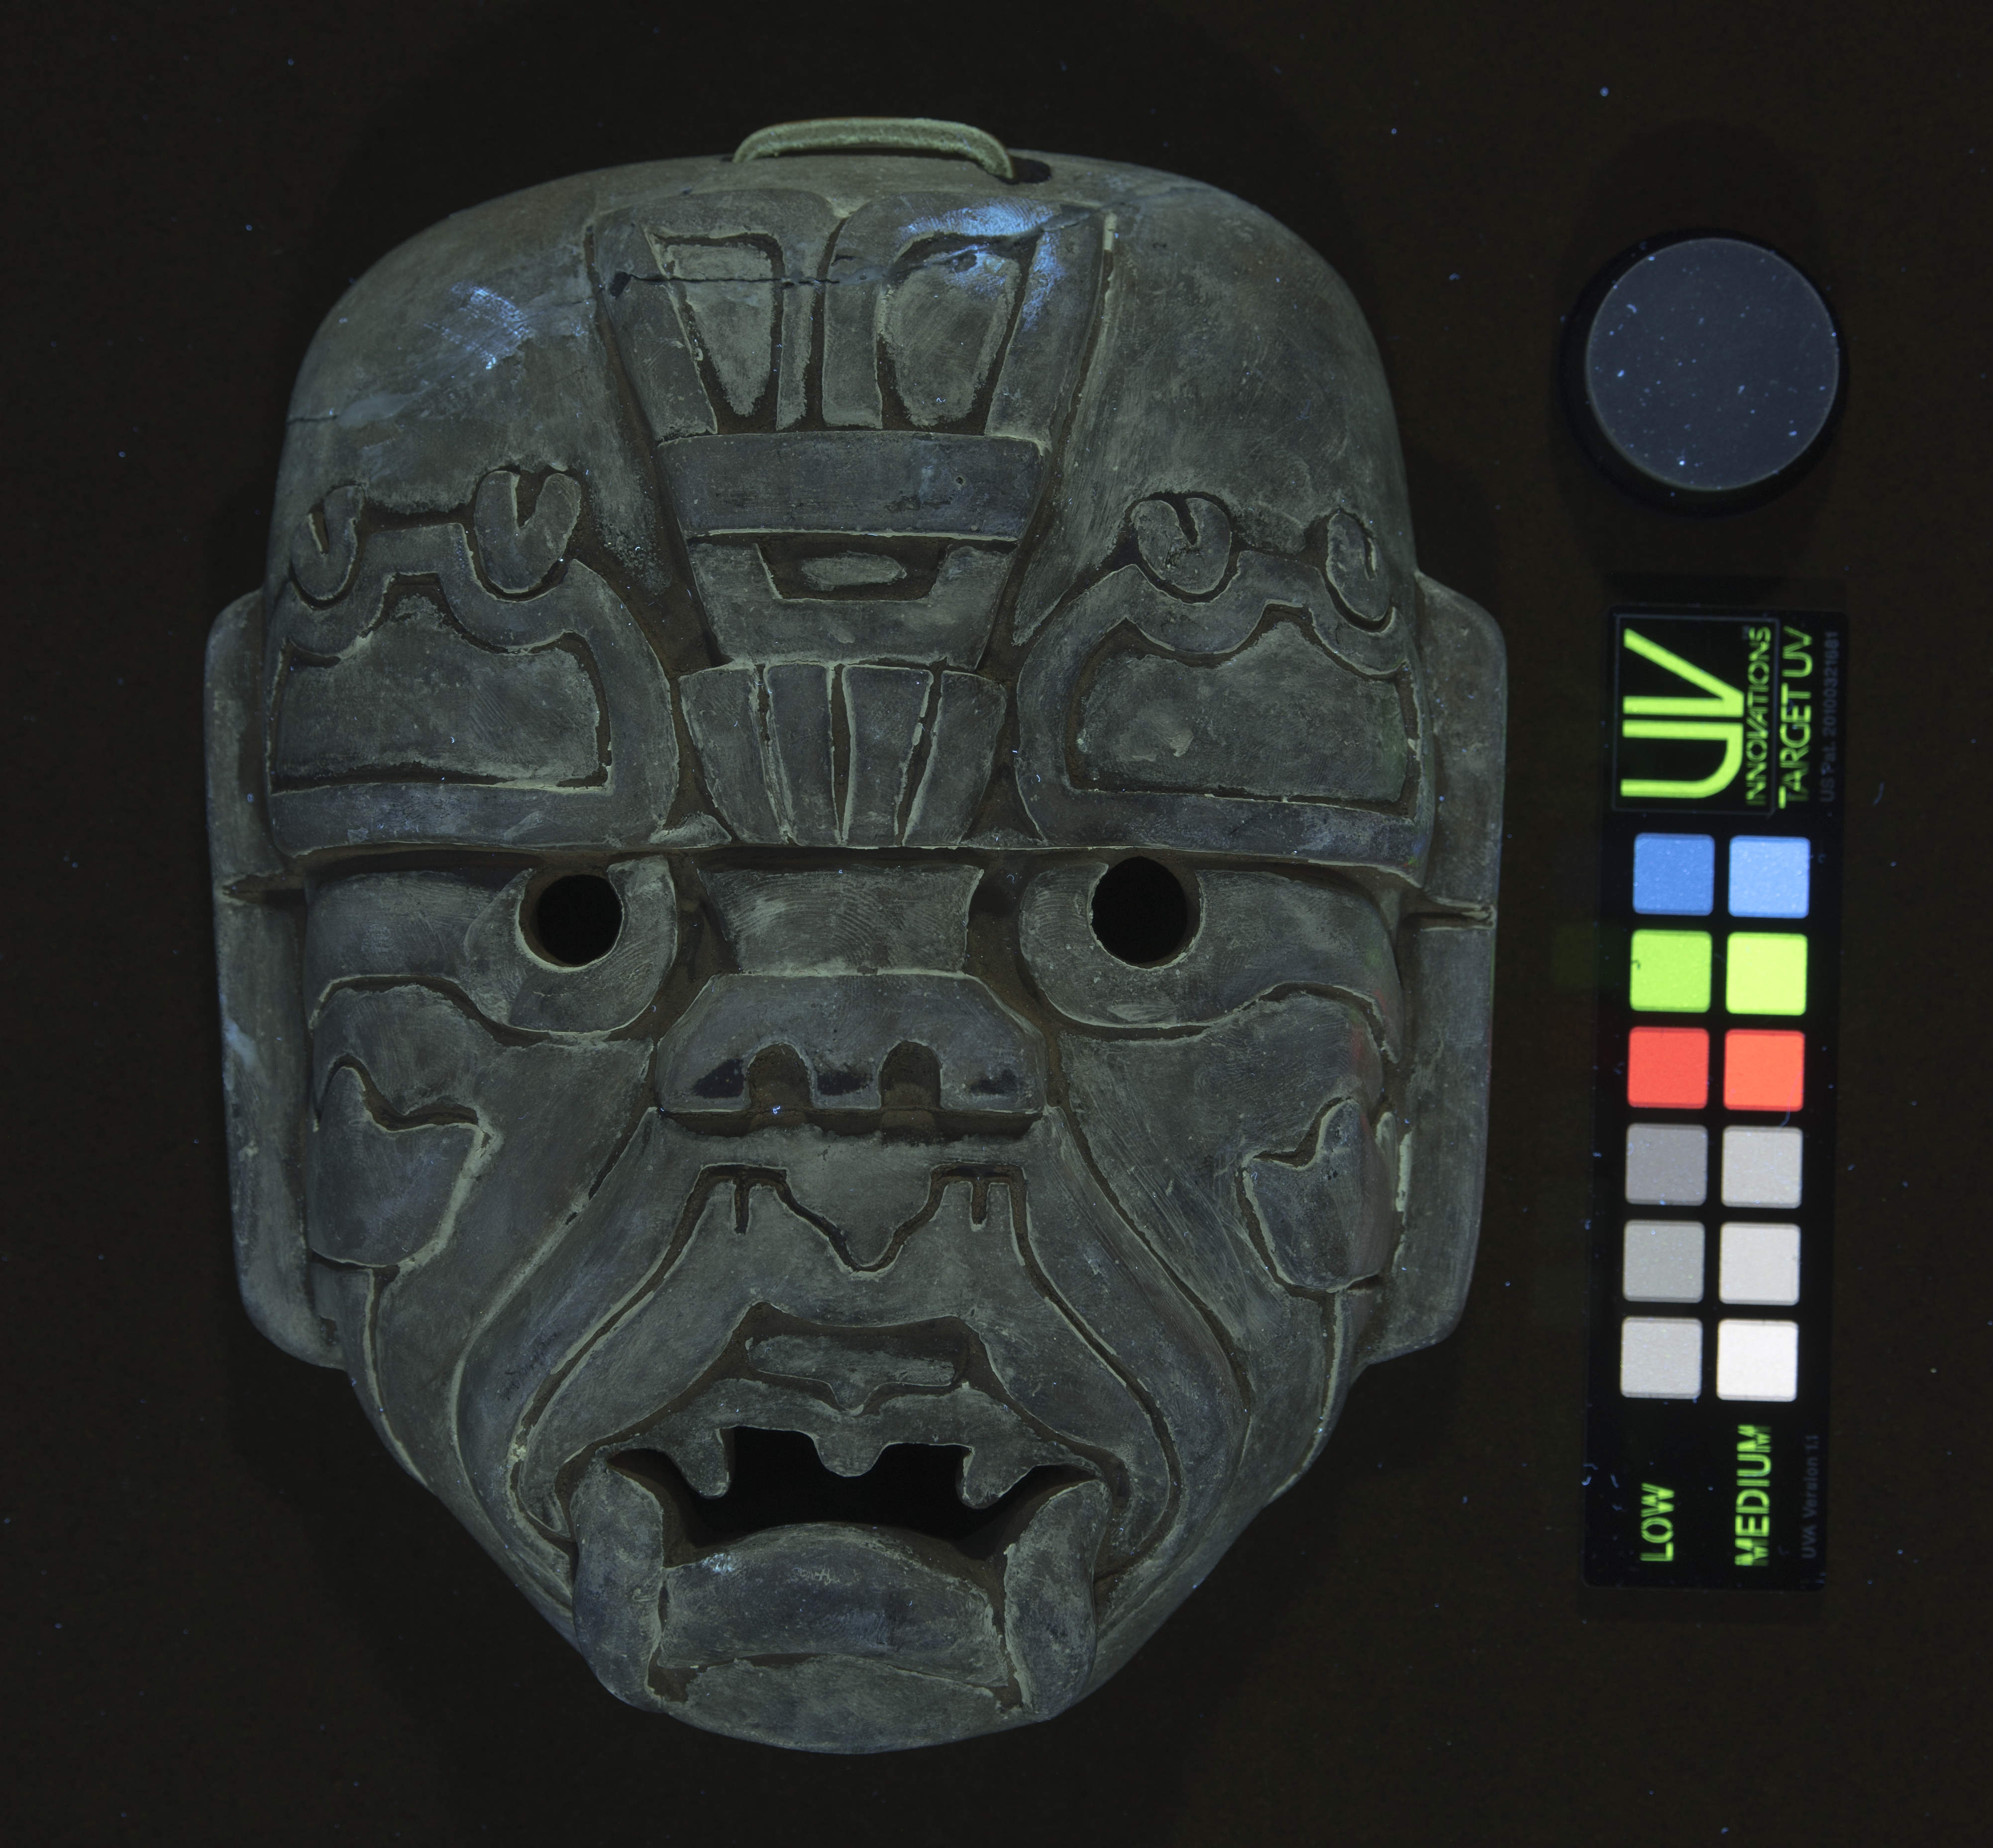
Late last week our lab hosted a 3-day workshop, taught by Jennifer McGlinchey Sexton, on Tools and Techniques for UV / Visible Fluorescence Documentation. Colleagues from libraries and museums around the country joined three DUL staff members to learn about the necessary equipment and to develop practical skills in capturing UV/visible images for use in conservation.
A great deal of the discussion centered around equipment. We looked at several kinds of UVA lamps that are currently on the market and talked about the filtering necessary on both lamps and cameras to reduce infrared and visible light. We also went over some methods for testing the quality of the lamp.
Capturing UV/visible images can be challenging and while standards have been widely adopted in recent years for conservation imaging under normal illumination, the same is not so true for UV documentation. Jennifer described several workflows for setting the white balance and selecting the best camera exposure settings using either home-made or standardized fluorescent color targets.
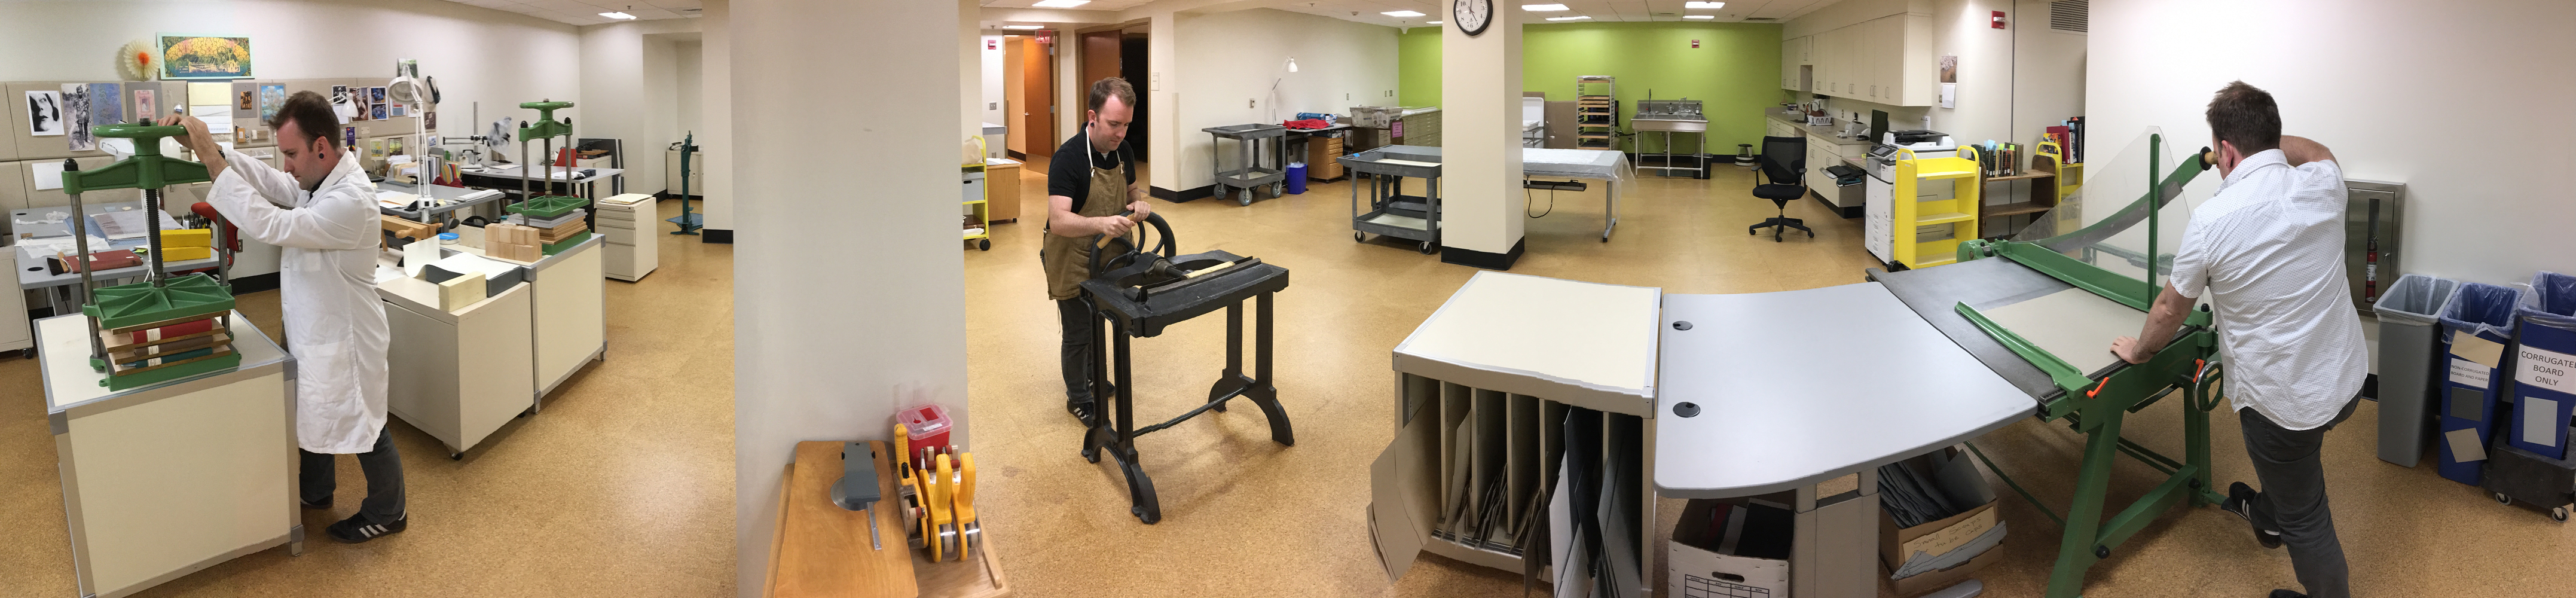
We had converted both our normal photo-doc space and the “dirty room” (our mold remediation and chemical storage space) into imaging work spaces, so the workshop participants were able to break up into two groups and practice. It was very useful to have two spaces and enough equipment that everyone could try the process several times and ask questions.
This workshop was a great opportunity to learn exactly how to add UV/visible to a conservation program’s documentation capabilities. It gave the participants a grounding in both the functionality of the equipment and a framework for consistently producing high quality images. For the Duke library staff who participated, this workshop also added some perspective to the work we have done in the last year or so with Multispectral Imaging.
We are so thankful to Jennifer McGlinchey Sexton for teaching, to Tess Bronwyn Hamilton for assisting, and to FAIC for sponsoring such a great experience!
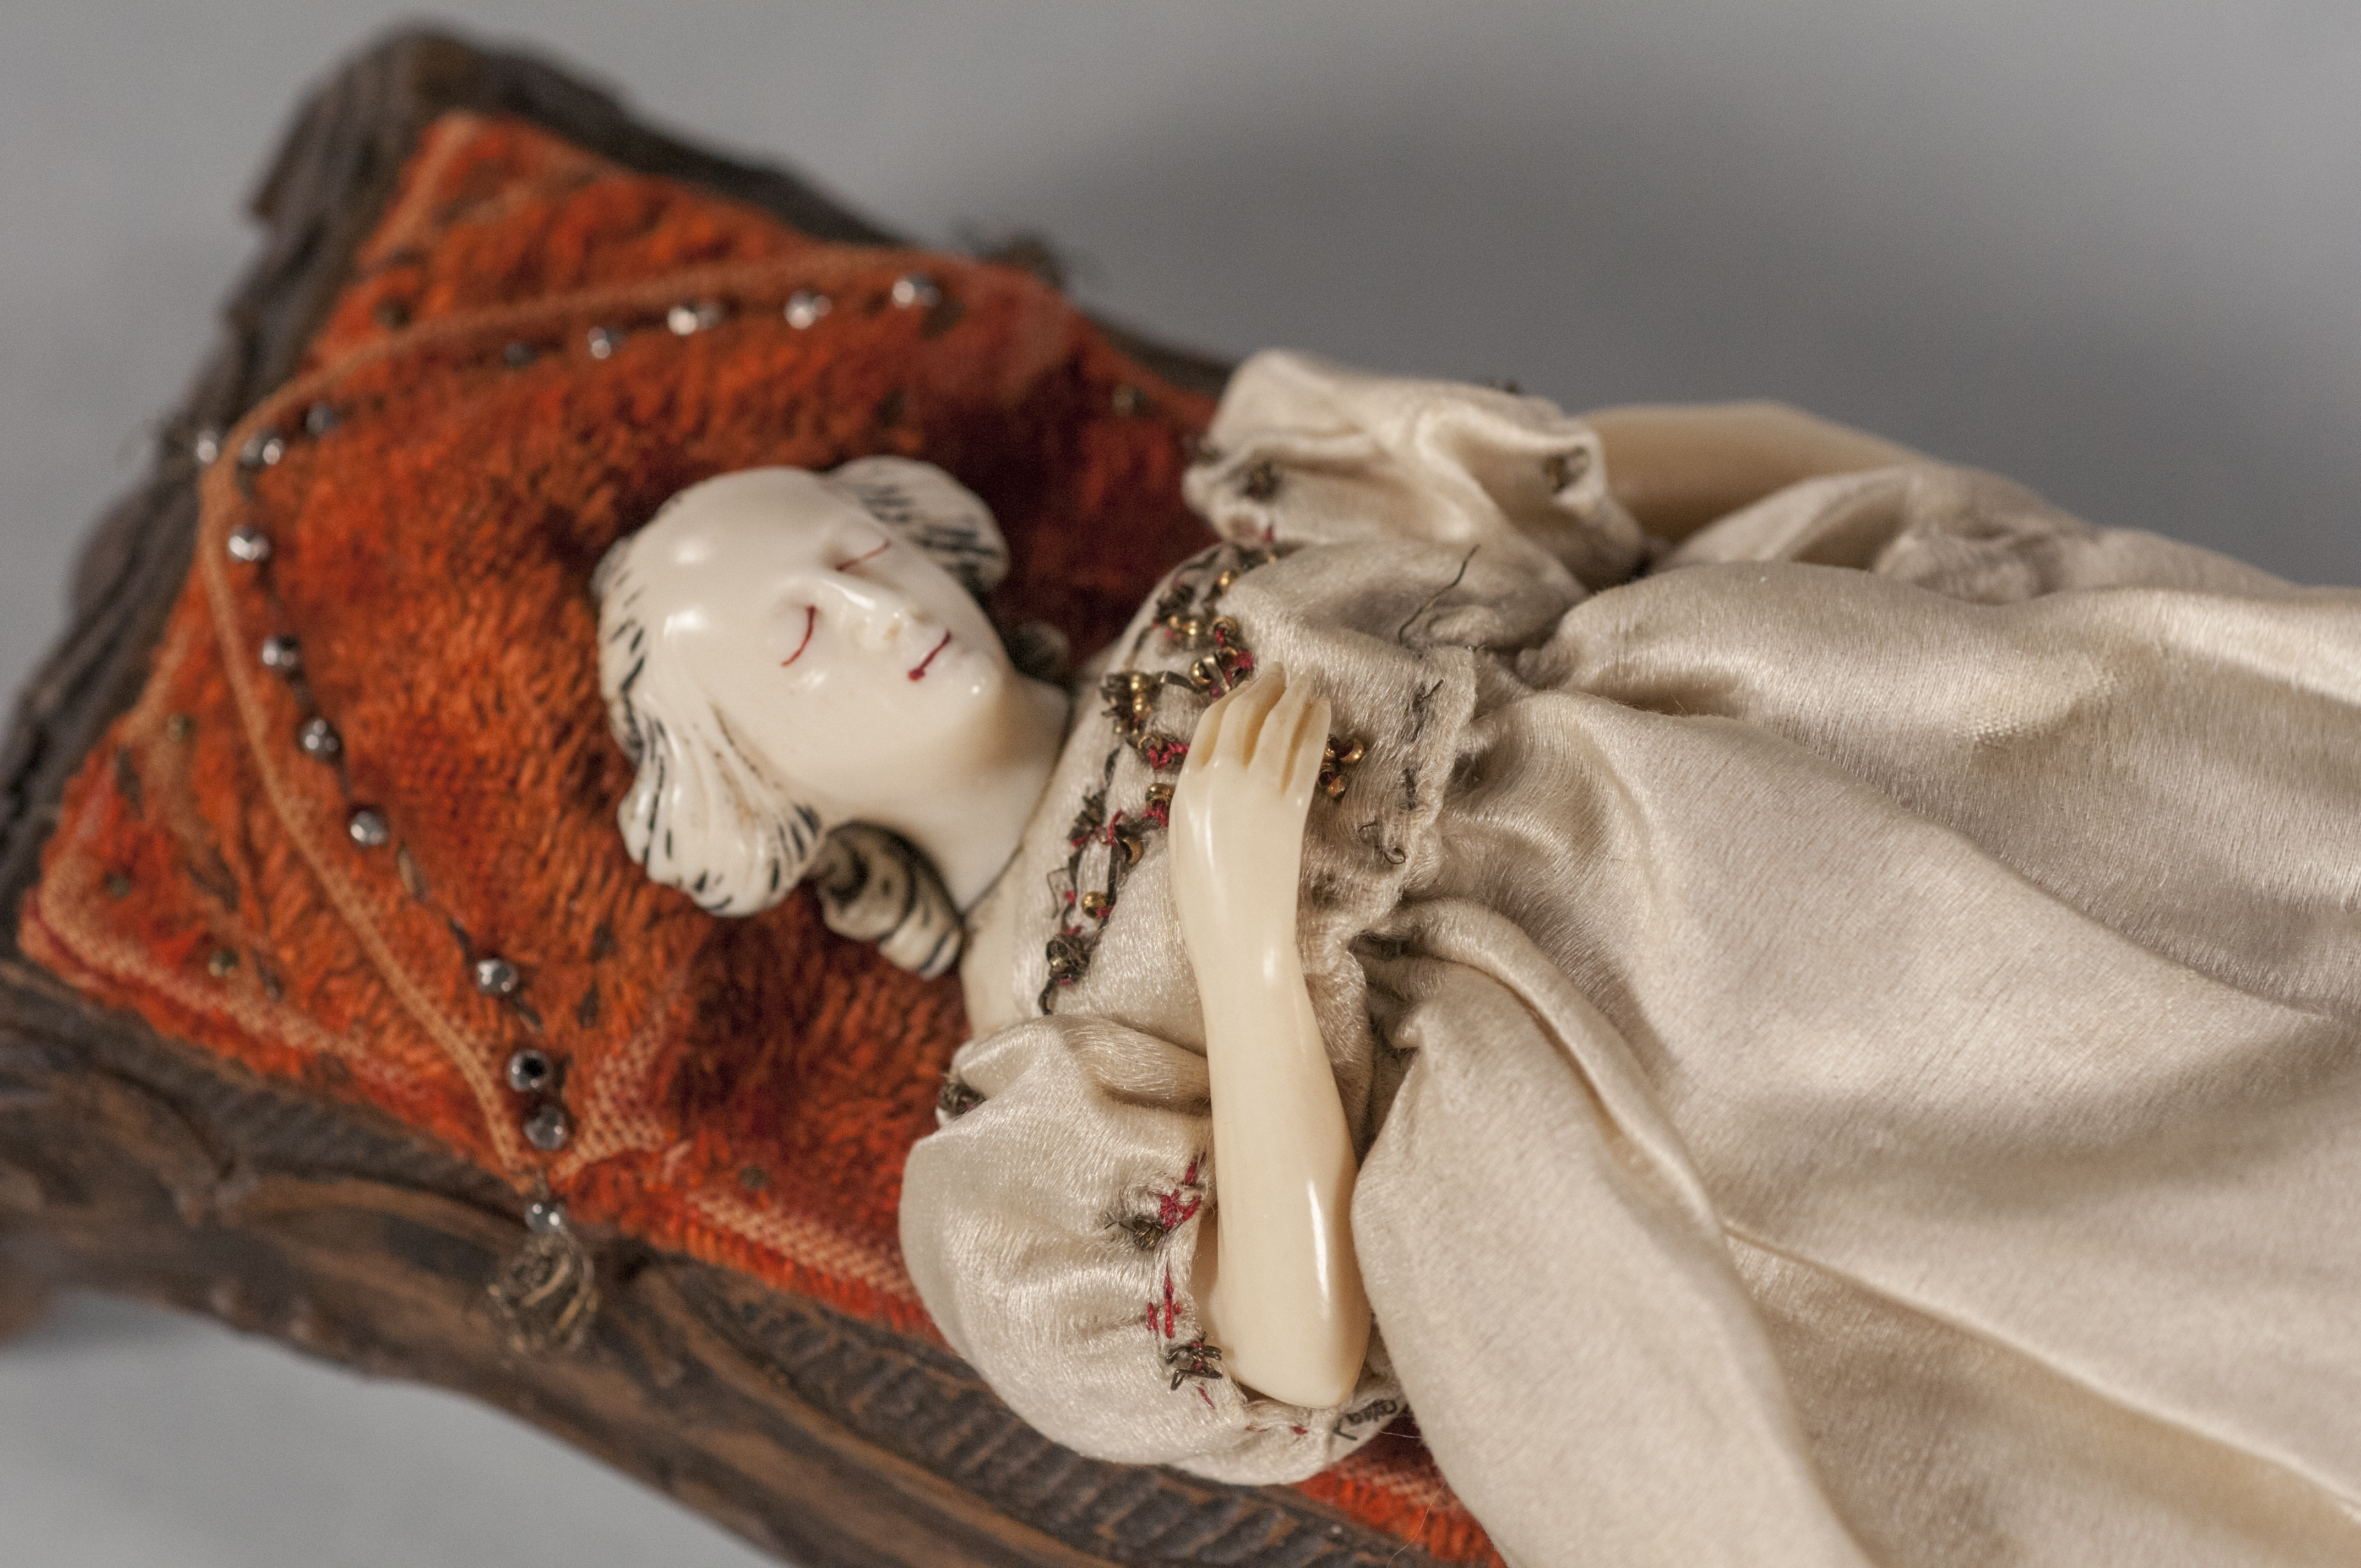
Conservator Erin Hammeke has been working with History of Medicine Curator, Rachel Ingold and SMIF Research and Development Engineer, Justin Gladman to facilitate the scanning of our 22 ivory manikins using a High Resolution X-ray Computed Tomography Scanner (Micro CT scanner). These high resolution 3-D scans allow us to see internal components of the manikins, thoroughly document them and their component parts, and also to create 3D printed models to allow for unfettered access and handling of surrogate manikins by patrons. So far, we have imaged over half of the collection of 22 manikins to date over 7 imaging sessions.
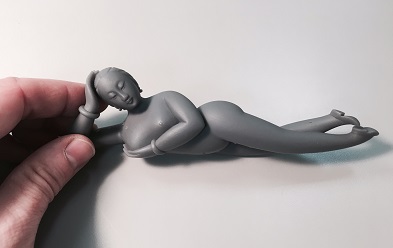
Conservation’s support for this project has been a team effort. First we researched the safety of the process for ivory and component parts. Then we thought through the logistics of ensuring their physical safety and security during imaging. Over the past year, Conservation Specialist, Rachel Penniman has been carefully boxing each of the manikins in terrific custom padded artifact boxes (see Quick Pic: Boxing Near-Naked Ladies) to assist with their safe transport to the SMIF facility on campus. After transport to SMIF, Erin unpacks the manikins and removes their parts before securely wrapping them in low density material to support the manikin during the 20-30 minute scan. Thanks to Beth for sewing custom foam supports for this project!
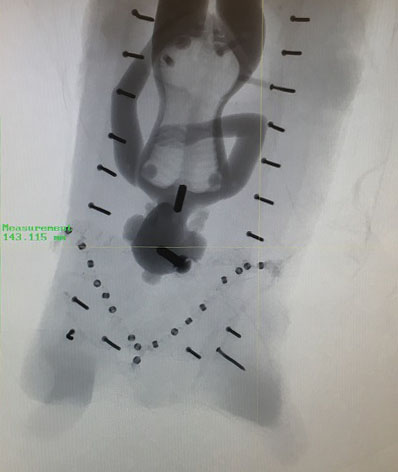
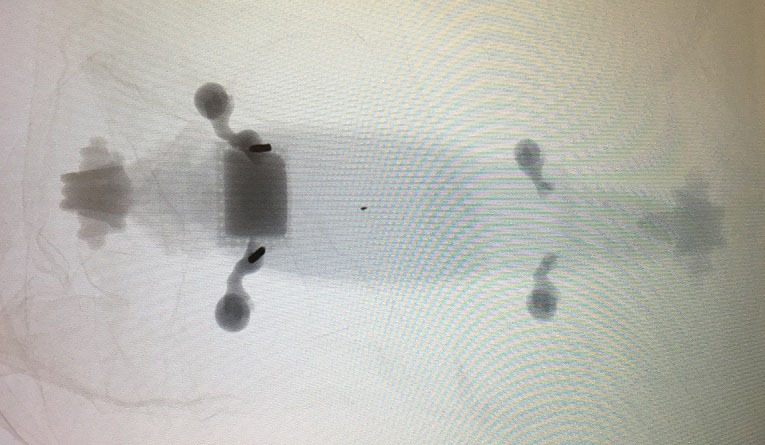
Smaller, removable internal organs are imaged in separate scans to enable an adjustment to the scanning resolution and isolation of the component parts in the digital scan and 3D print.
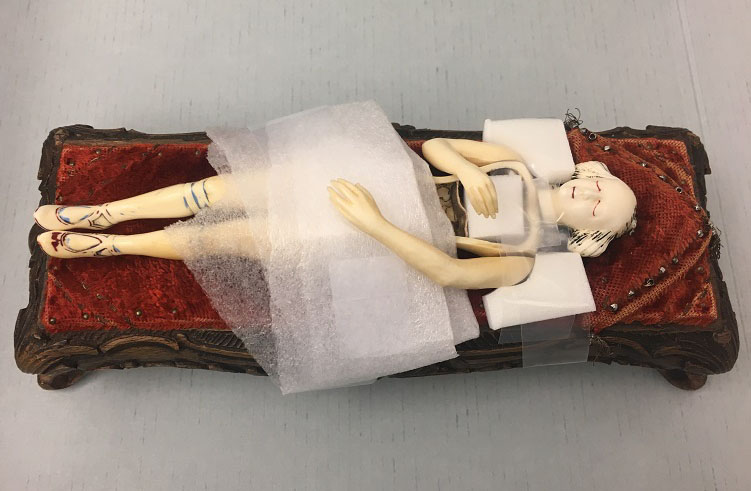
This photos shows some of the ways in which Erin strapped and supported a manikin with a loose arm during scanning, as well as still images from the scan that show internal metal fasteners and repairs that are not visible upon external examination.
And here is an example of a 3D print of one of our solid manikins showing fantastic detail.
Keep an eye out for a more in depth Duke News story about the project by science writer Robin Smith, PhD.
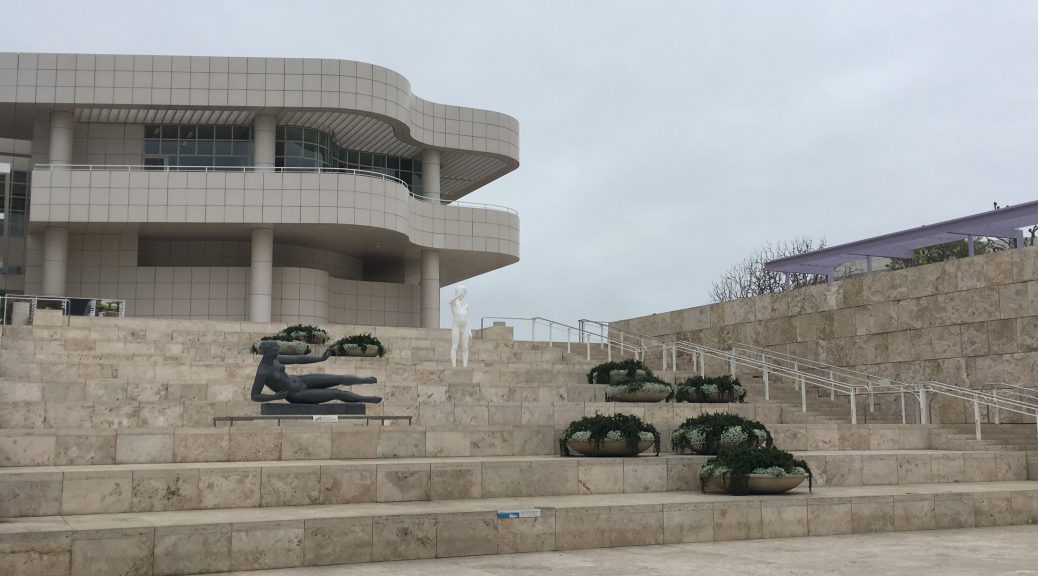
On a gloomy Los Angeles morning earlier this week, I rode a driver-less tram up to the Getty Center to attend a one day seminar on Microfade Testing (MFT).
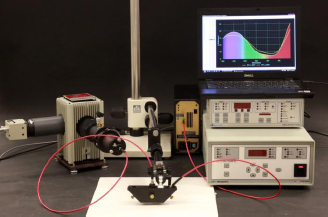
Speakers from institutions around the world discussed how they have been using this technology in recent years to support exhibits programs and make informed decisions about safely displaying cultural heritage material. The seminar concluded with demonstrations of several designs of MFT equipment, like the system pictured below.
It was such a delight to talk with other conservators about how they are using technologies like this in their own institutions. While I was able to learn a great deal about the application and some limitations of MFT, many questions remain about how we might successfully implement it here at Duke. In the meantime, the seminar highlighted some research opportunities that we can begin pursuing with technology we already have on hand, like multispectral imaging.
By Rachel Penniman, Senior Conservation Technician
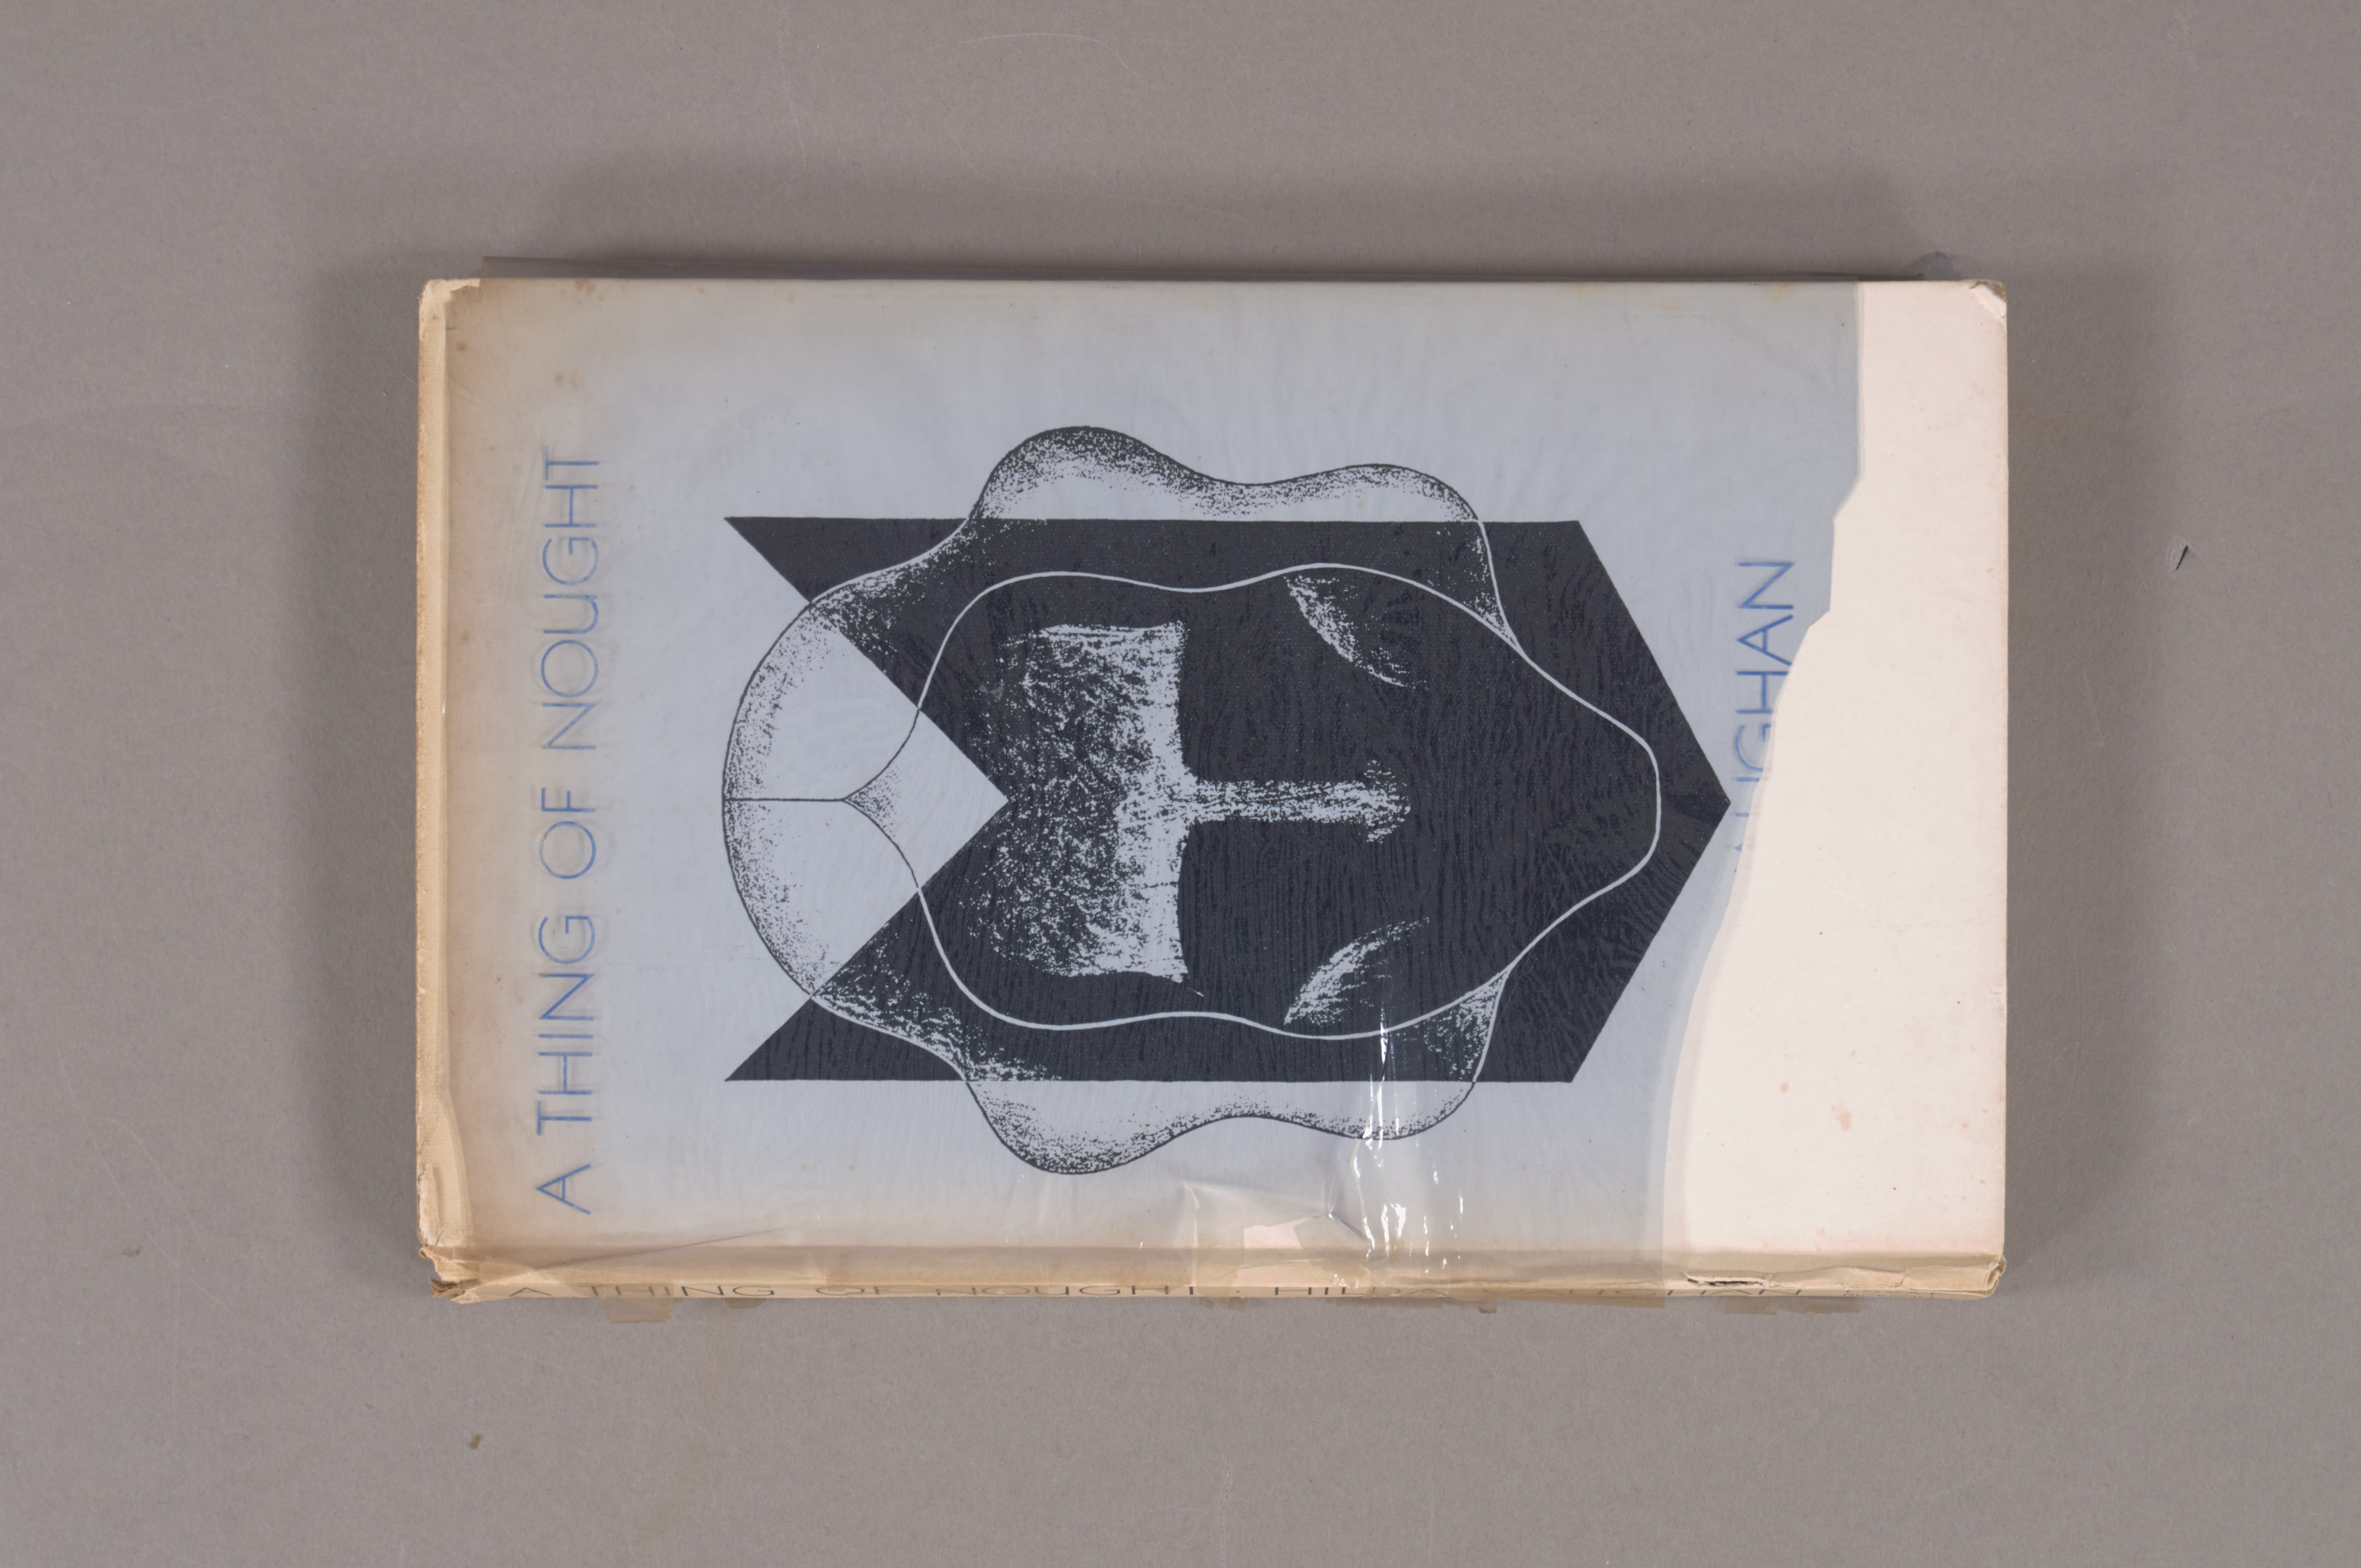
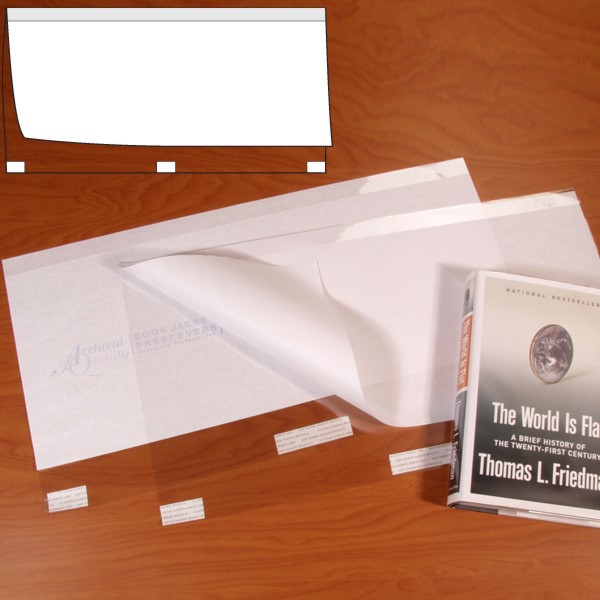
This copy of Hilda Vaughan’s ‘A Thing of Nought’ was sent to the conservation lab to have a box made to protect the fragile dust jacket and cover. The illustration and lettering printed directly on the front board is visible through a transparent, blue tinted plastic dust jacket that is itself printed with the title and author’s name.
Unfortunately the poor quality plastic of the dust jacket has not aged well. Small pieces of the plastic dust jacket were in danger of flaking off with every movement and could hardly be handled safely. In order to keep the dust jacket on the book but still allow for handling of the item, Curator Andy Armacost had the idea of using a dust jacket protector similar to the type sometimes used on our general collections items. This traditional style of dust jacket cover has a Mylar front and a paper backing that wrap around the dust jacket to protect it from wear.
Slim-Fold Book Jacket Covers, University Products
This would have the benefit of completely surrounding the plastic dust jacket and preserving all of its parts while allowing it to stay in place on the book and be handled. The trouble is that the paper backing on this kind of product would obscure what was printed directly on the book’s cover. So I attempted to create my own dust jacket cover where the paper backing was printed with a copy of the original boards.
I tried black and white photocopies of the cover on white paper and colored papers. They gave a similar idea of the original cover design, but I was really hoping for something more detailed and accurate.
Photocopy on white paper, photocopy on cream paper, and original cover
I tried again using our photodocumentation setup to take a color photograph of the cover but when I printed out the image the color didn’t match the original at all.
Printed color photograph and original cover
Senior Conservator Erin Hammeke had previously used a tool developed by Victoria Binder to make a color accurate printed reproduction for use in an exhibit so I decided to look into that. Victoria’s article in Topics in Photographic Preservation entitled ‘Digital Fills for Photographs with Glossy Surfaces’ discusses using the Action feature in Photoshop to automatically make variations on settings like midtone color, exposure, and saturation in an easily printable contact sheet. I wasn’t looking to create a fill for a photograph, but color matching a printed image to an original was exactly what I needed. By using Victoria’s Actions Set I could easily print contact sheets with up to 15 variations on a single page, and pick the one that looked closest to the original without wasting reams of paper.
I adjusted my image in Photoshop according to the best results from the contact sheets. The printed photograph gave all the detail of the appearance of the original board decoration and the adjustments made the color an almost perfect match when printed.
Printed photograph before color correction, after color correction, and original cover
The original plastic dust jacket was placed over the printed reproduction of the book cover and a piece of Mylar was folded around both. When the jacket assembly is put on the book the visual effect is very similar to the original.
Interior of the jacket assembly around original cover
Because the cover isn’t attached in any way to the book, a researcher can simply unfold the jacket assembly and view the original book cover decoration beneath.
Final dust jacket assembly next to original cover
I’m so happy with how this project turned out. The original plastic dust jacket is much easier to handle safely, the original appearance of the item is retained, and all of the parts can still be kept together.
I have been trying to catch up on some reading lately and just finished a wonderful collection of essays titled Roger Powell, the Compleat Binder. If you are interested in early manuscripts, I would definitely recommend that you give it a read – but one article in particular provided an excuse for some fun experimentation with broader book binding and book conservation application.
Robert Espinosa published a paper on a rigid board, laced structure for potential use as a conservation rebinding in the early 1980s, and a heavily revised version of this article appears in Roger Powell. In this second version, Espinosa expands upon his discussion of hand spun sewing supports.
(Illustration by Jane Dalrymple-Hollo)
Sewing supports are just one of many components in a sewn binding that can influence the action of a book, as illustrated in Tom Conroy’s excellent article The Movement of the Book Spine. Choosing the right combination of sewing supports, sewing structure, and spine linings can make a big difference in the resulting binding. We keep a selection of commercially-made linen cord on hand, but sometimes, when creating a new binding or replacing a damaged sewing support, they don’t quite meet the needs of the book. I decided to give Espinosa’s method a try.
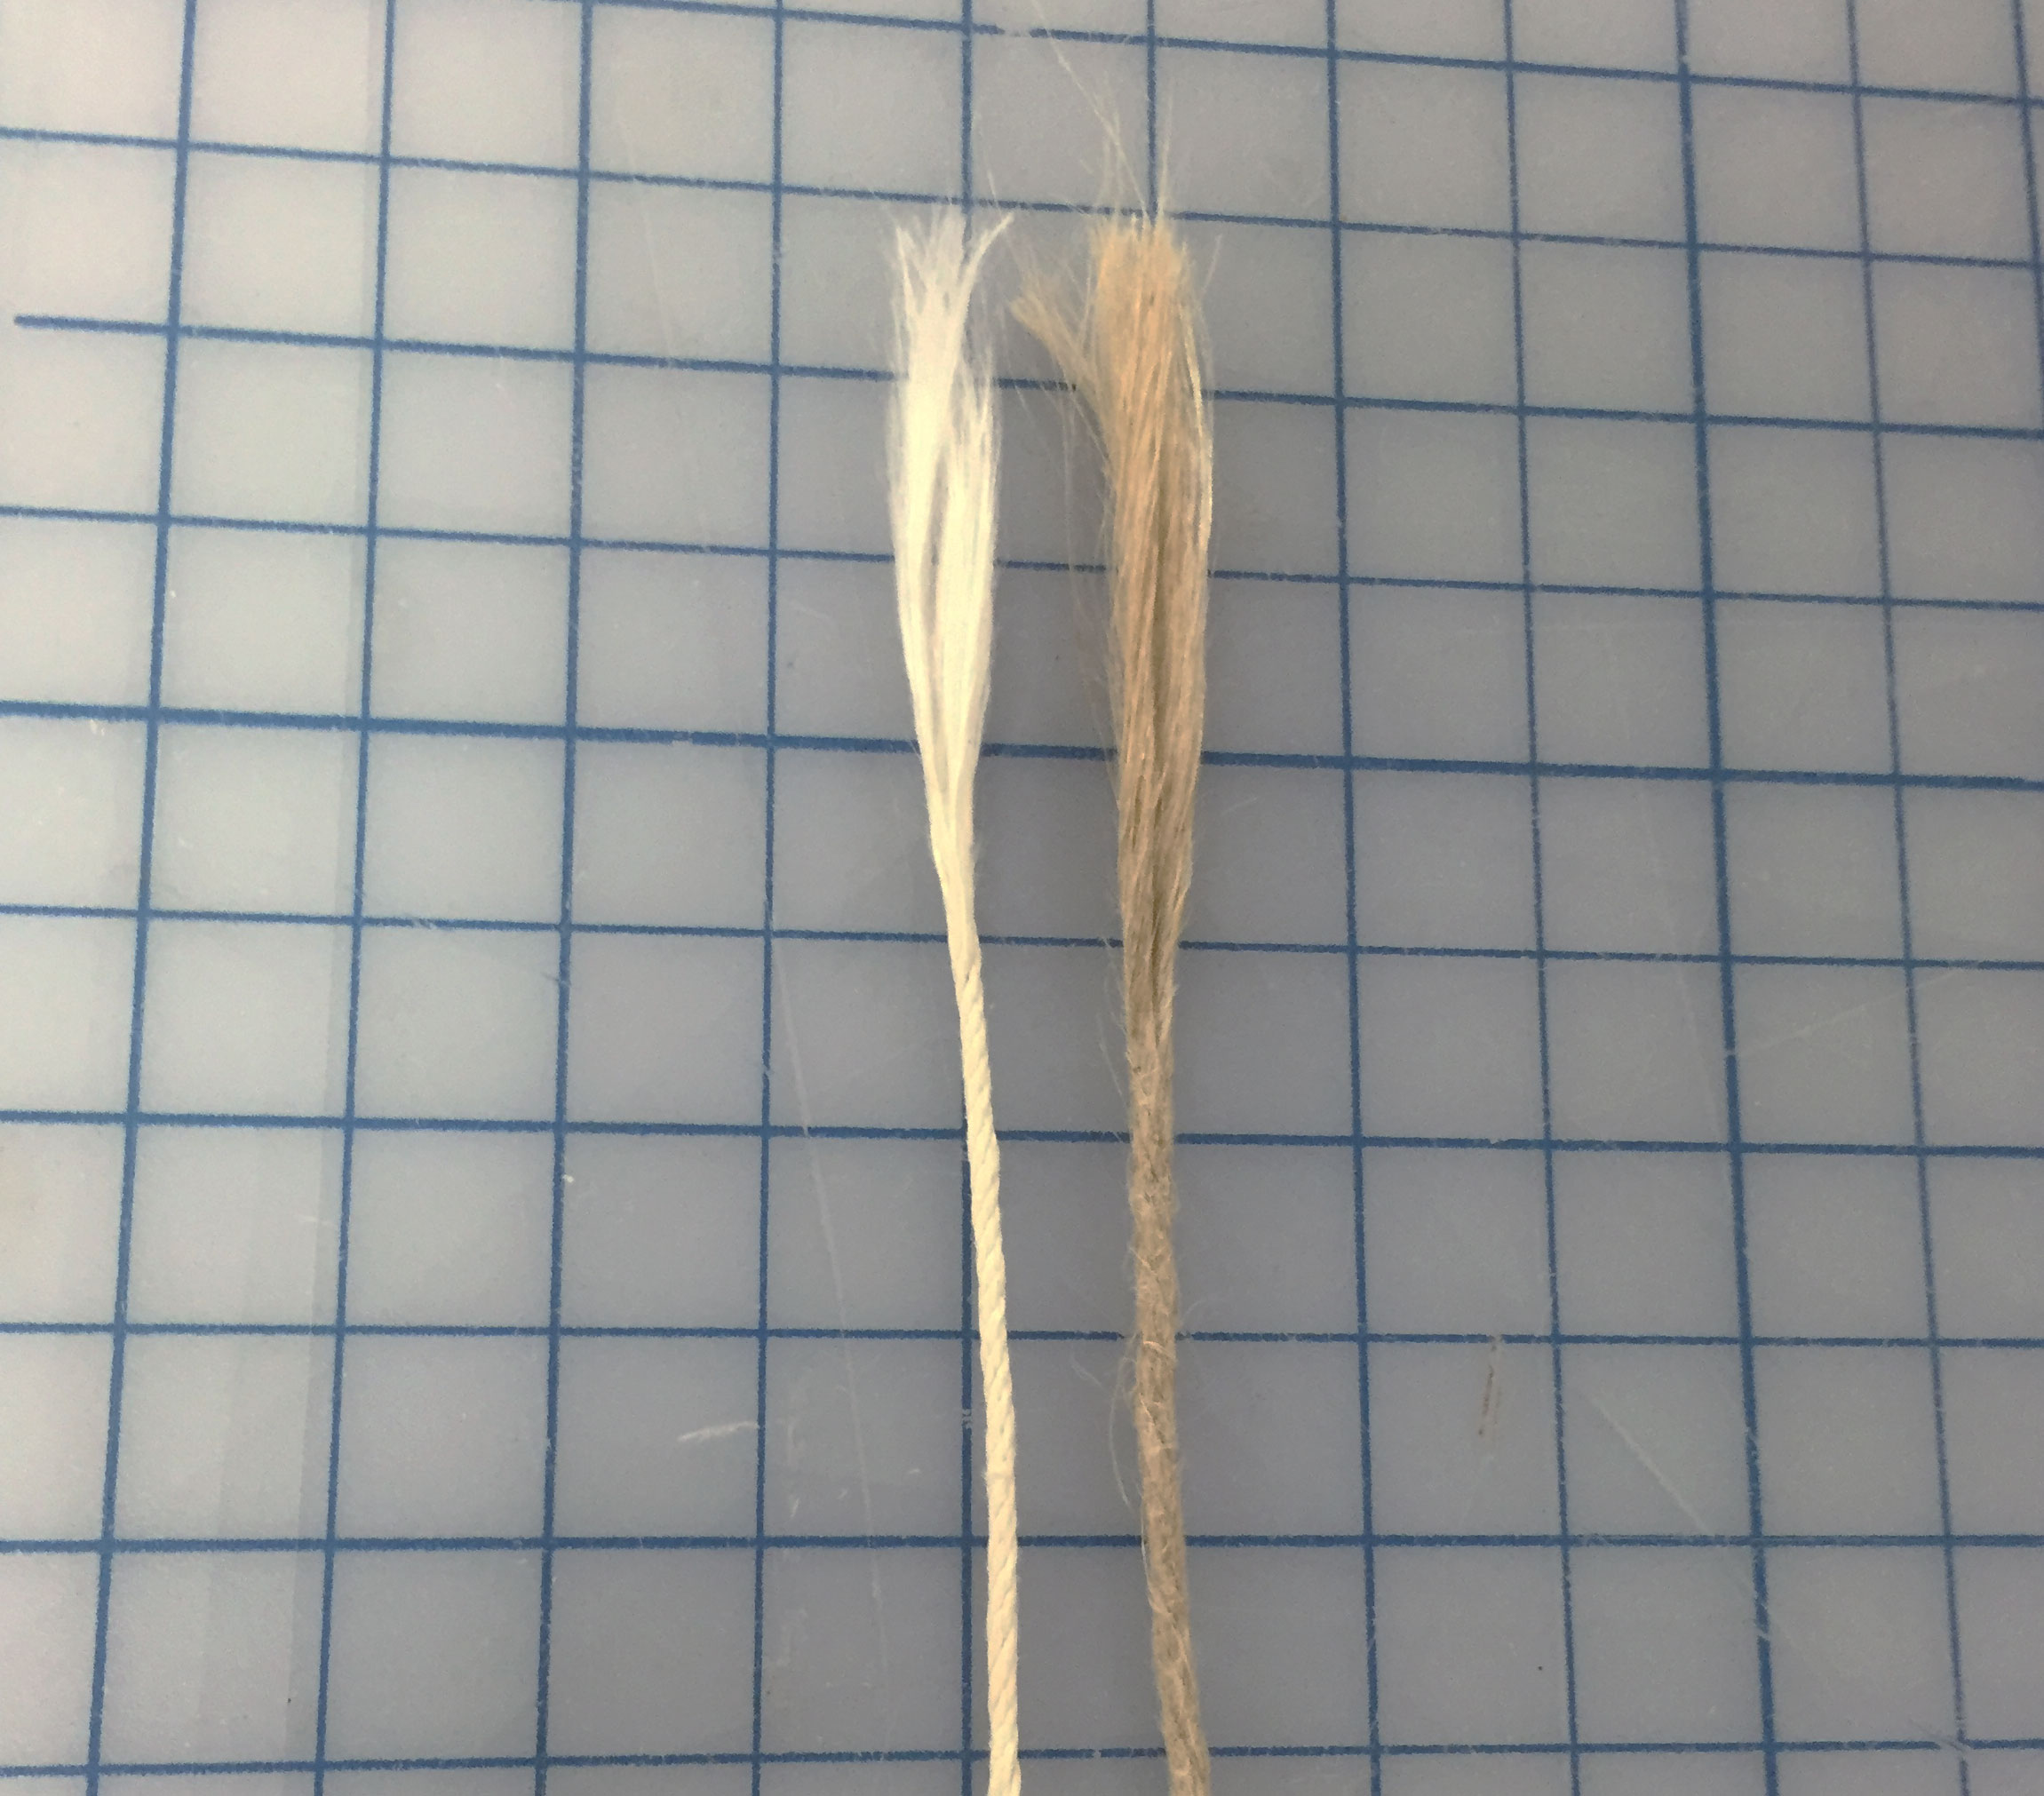
The process starts off with a length of 18/3 Coats Barbour linen thread, tied together at the ends and doubled to create a length of four threads. I have stretched that piece over two needles in the image below to hopefully illustrate the starting configuration.
I dampened the thread a bit to soften some of the sizing and make it more flexible. I needed something to hold one end firmly while the other was twisted, so I just looped one end over a wall-mounted cabinet door handle. Next I tightened a small screw hook into the chuck of a cordless drill. Now I just needed to figure out which direction to twist. Since the thread I was using has an “S” twist, the cord (or hawser-laid rope) would need have a “Z” twist. With one loop of the threads over the cabinet handle and the other over the hook of the drill, that meant it the drill should turn counter-clockwise (or in the “reverse” setting). Even going pretty slowly, I was able to wind approximately 3 feet of cord in about 10 seconds.
The result is about half the diameter of the smallest 4-ply cord we have on hand and frays out nicely. Using this method, one could create a custom cord to any specification simply by adjusting the thickness or number of strands of the starting thread.
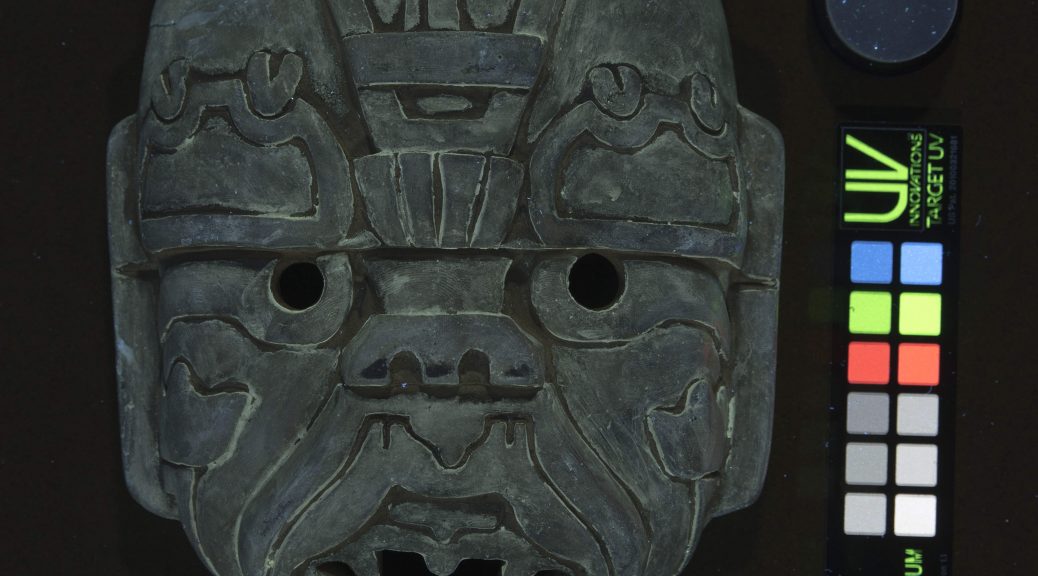
Some recent acquisitions are in the lab this week for rehousing. We thought it would be interesting to peak at this small piece of illuminated parchment under ultraviolet light and a palimpsest became clearly visible. You never know what information may be hidden under normal lighting! For more examples, see previous posts on Preservation Underground and Bitstreams on multispectral imaging.