Sewing Models: Pandemic Edition

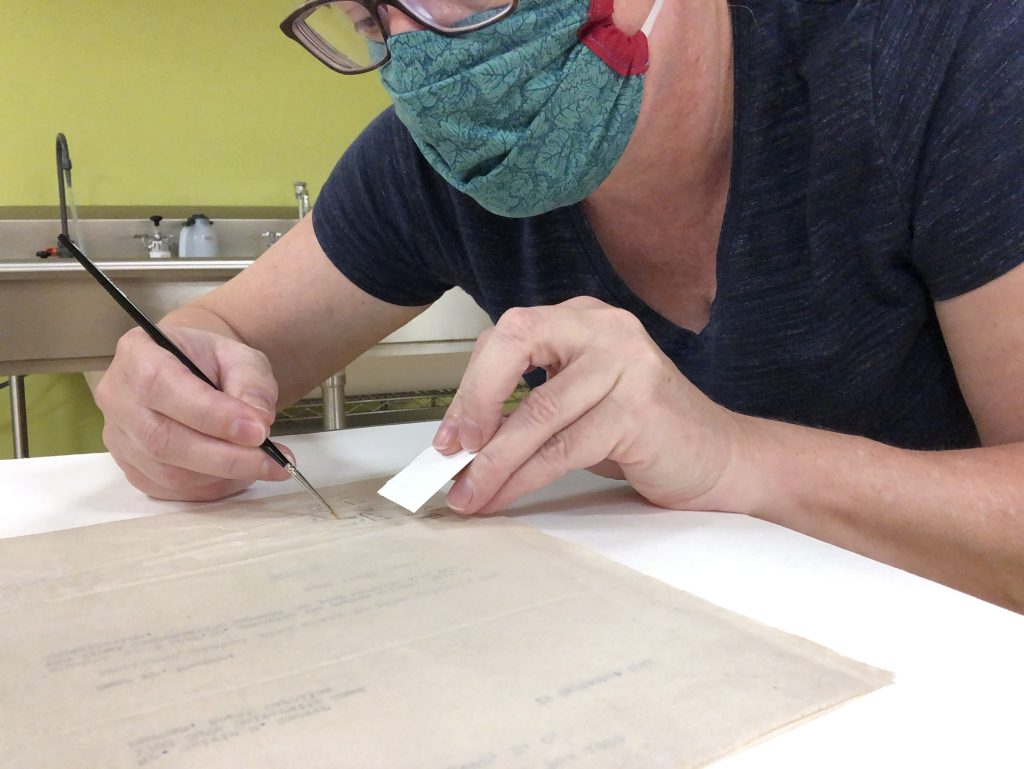
By Mary Yordy, Senior Conservation Technician

At the beginning of the quarantine, practical arrangements to retain connectivity to my desktop at work and forge other forms of digital connectivity with my workplace kept me busy. I researched questions about surface contamination of books and paper, I cleared out and organized files and reviewed hundreds of informative links and tutorials I’d neglected to study in my usual routine, wherein I’m juggling the day-to-day demands of my bench work against the influx of digital resources. But weeks became months, and I am used to seeing the results of a day’s work mounting up in the book press or filling shelves. Though I was diligent in my hours at home, after around six weeks I needed to produce something tangible, and I wanted it to be relevant to the life of the lab.

Work runs along a fulcrum from past to future that is understood collectively and concretely. Without that, it’s hard not to suspect we have become shadow boxers. How do we create assets for a post-epidemic future we cannot fully know? How do we make decisions about value and use without knowing what the future holds or when it will start? Luckily for me, the perfect project appeared under my fingertips late one night, going through my files at home: “Sewing Samples–2006.” Preserved within it were the beginnings of a project that related to the early history of the lab, one had the potential to provide knowledge to future workers in our craft.

The file held a collection of cards made during one of the early in-house workshops Beth Doyle taught for the three technicians on staff at the time: me, Rachel Ingold, and Diane Sutton. Beth taught us basic and more complex sewing methods, stitches and knots used in bookbinding. Recalling that day, sitting around an old library table in the 2006 lab, threw the impressive developmental span of Duke Library Conservation in sharp relief.

Sewing sample cover

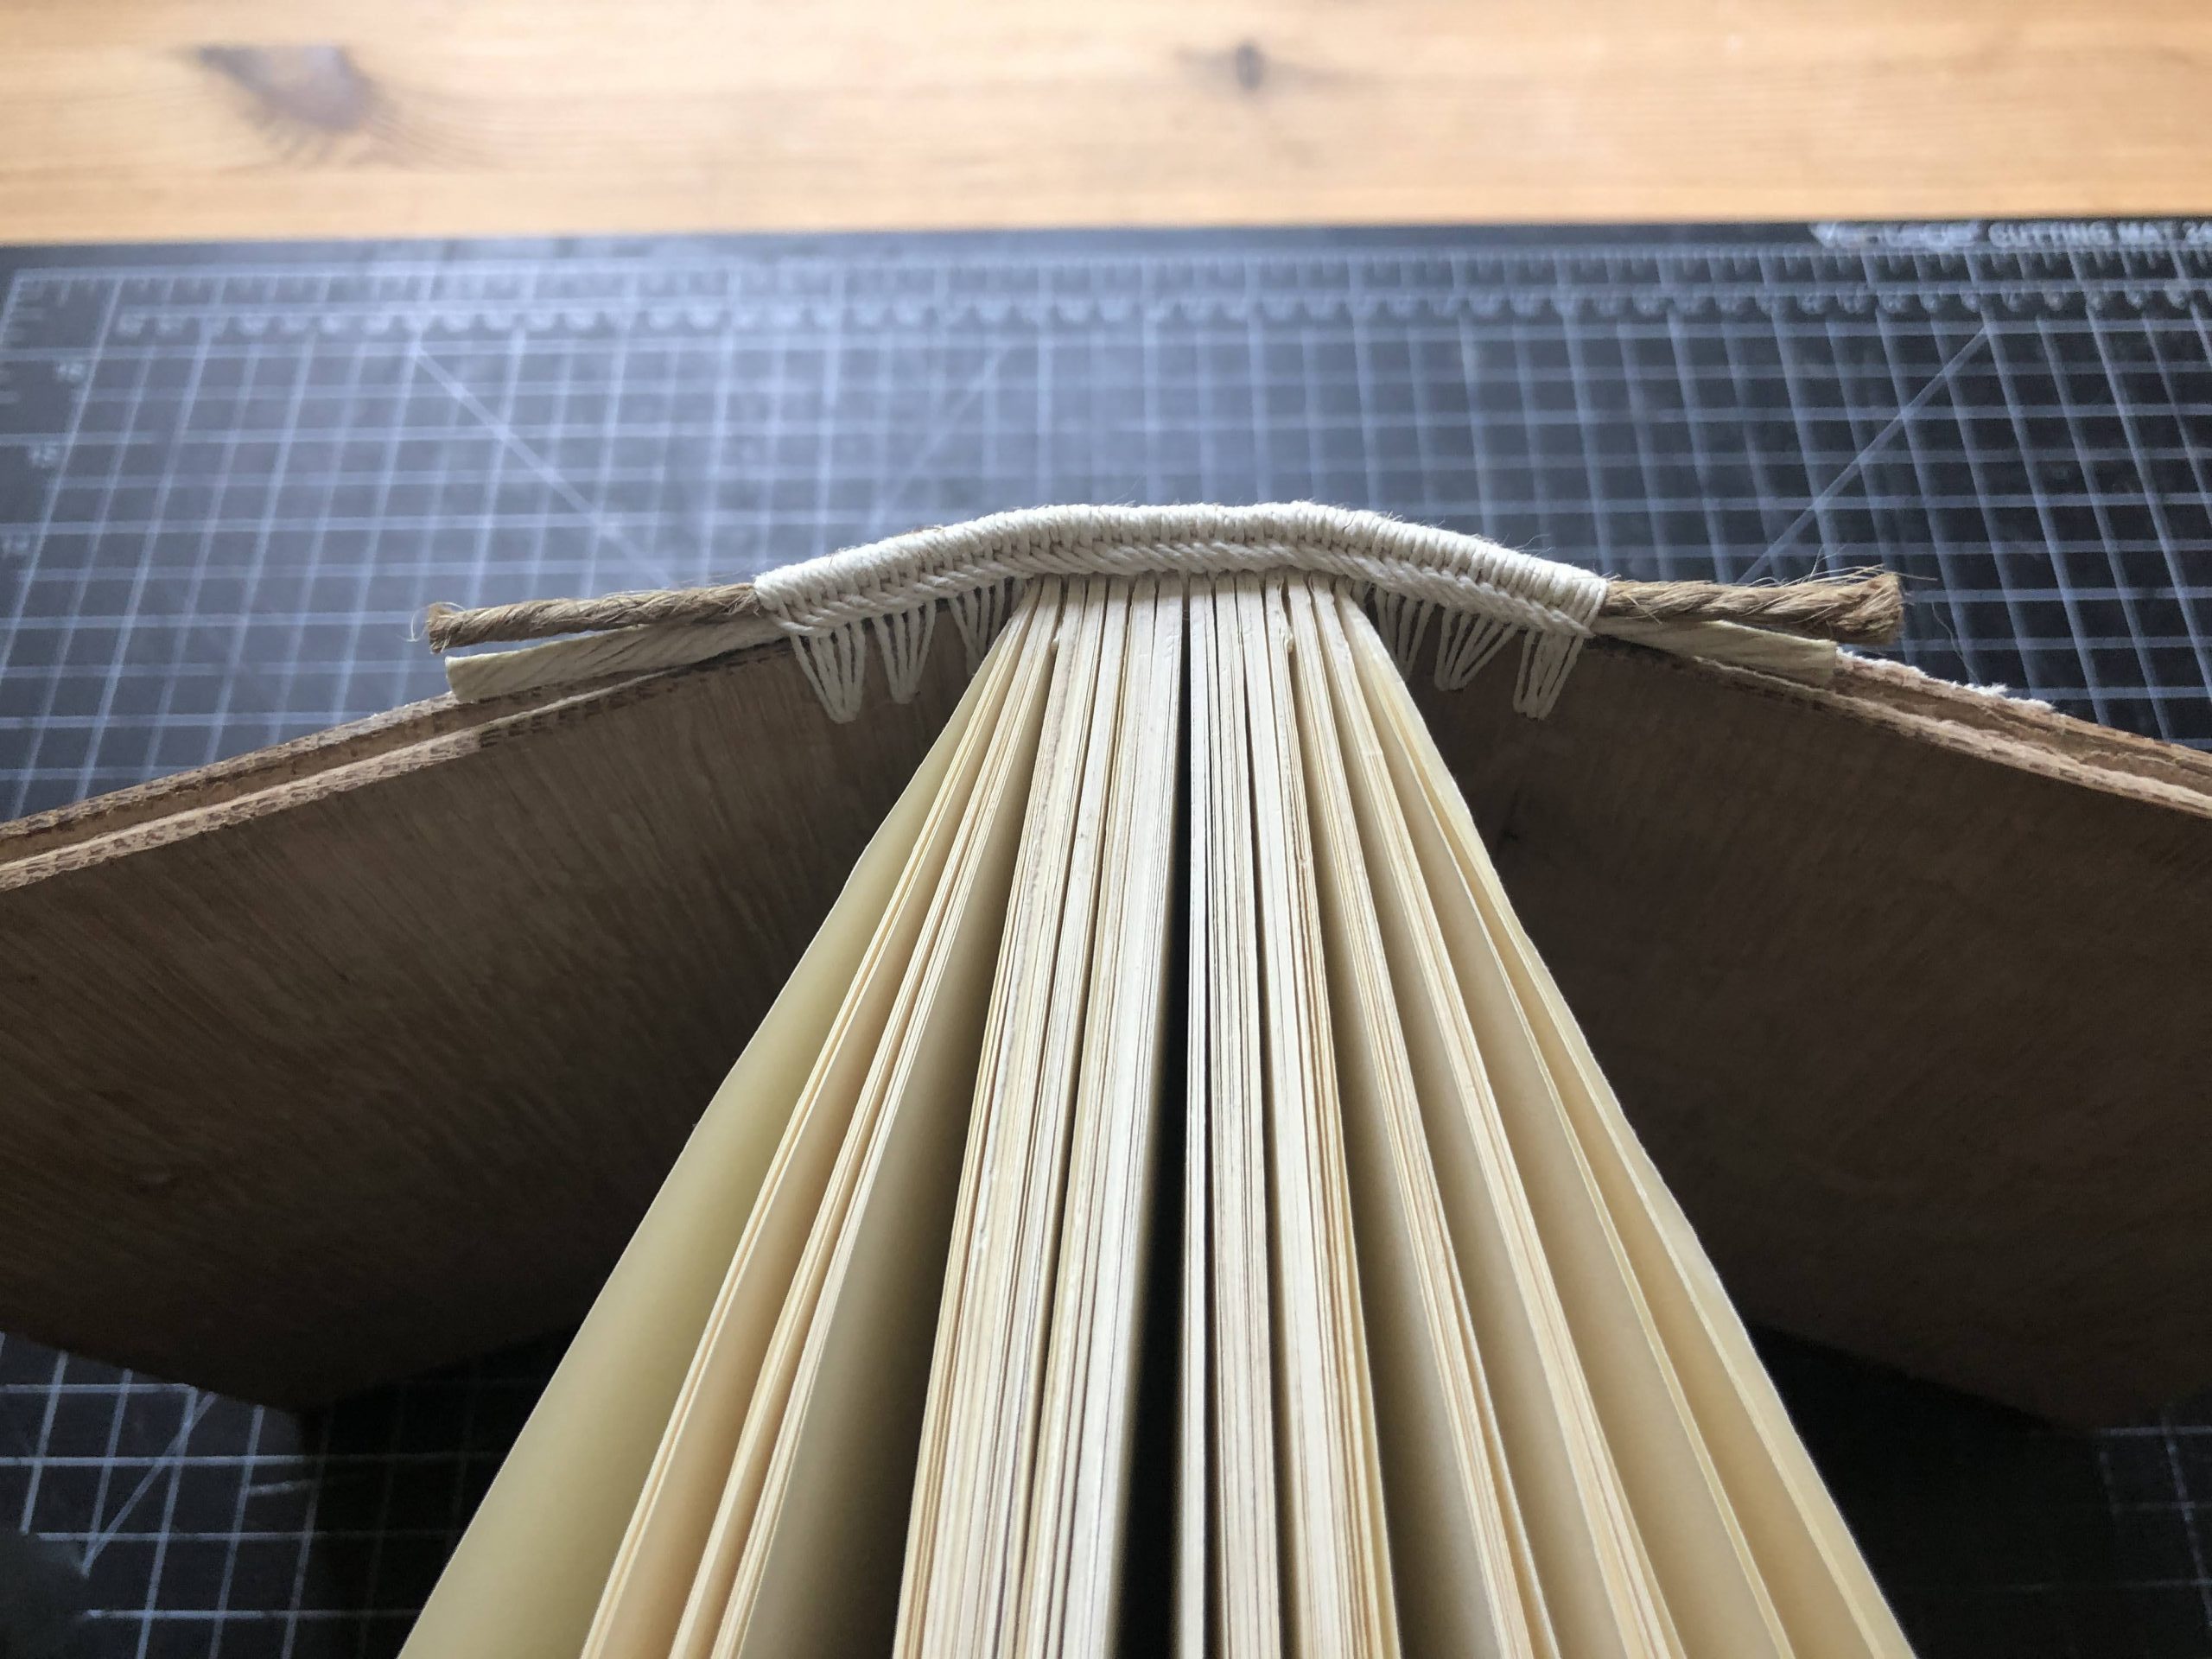
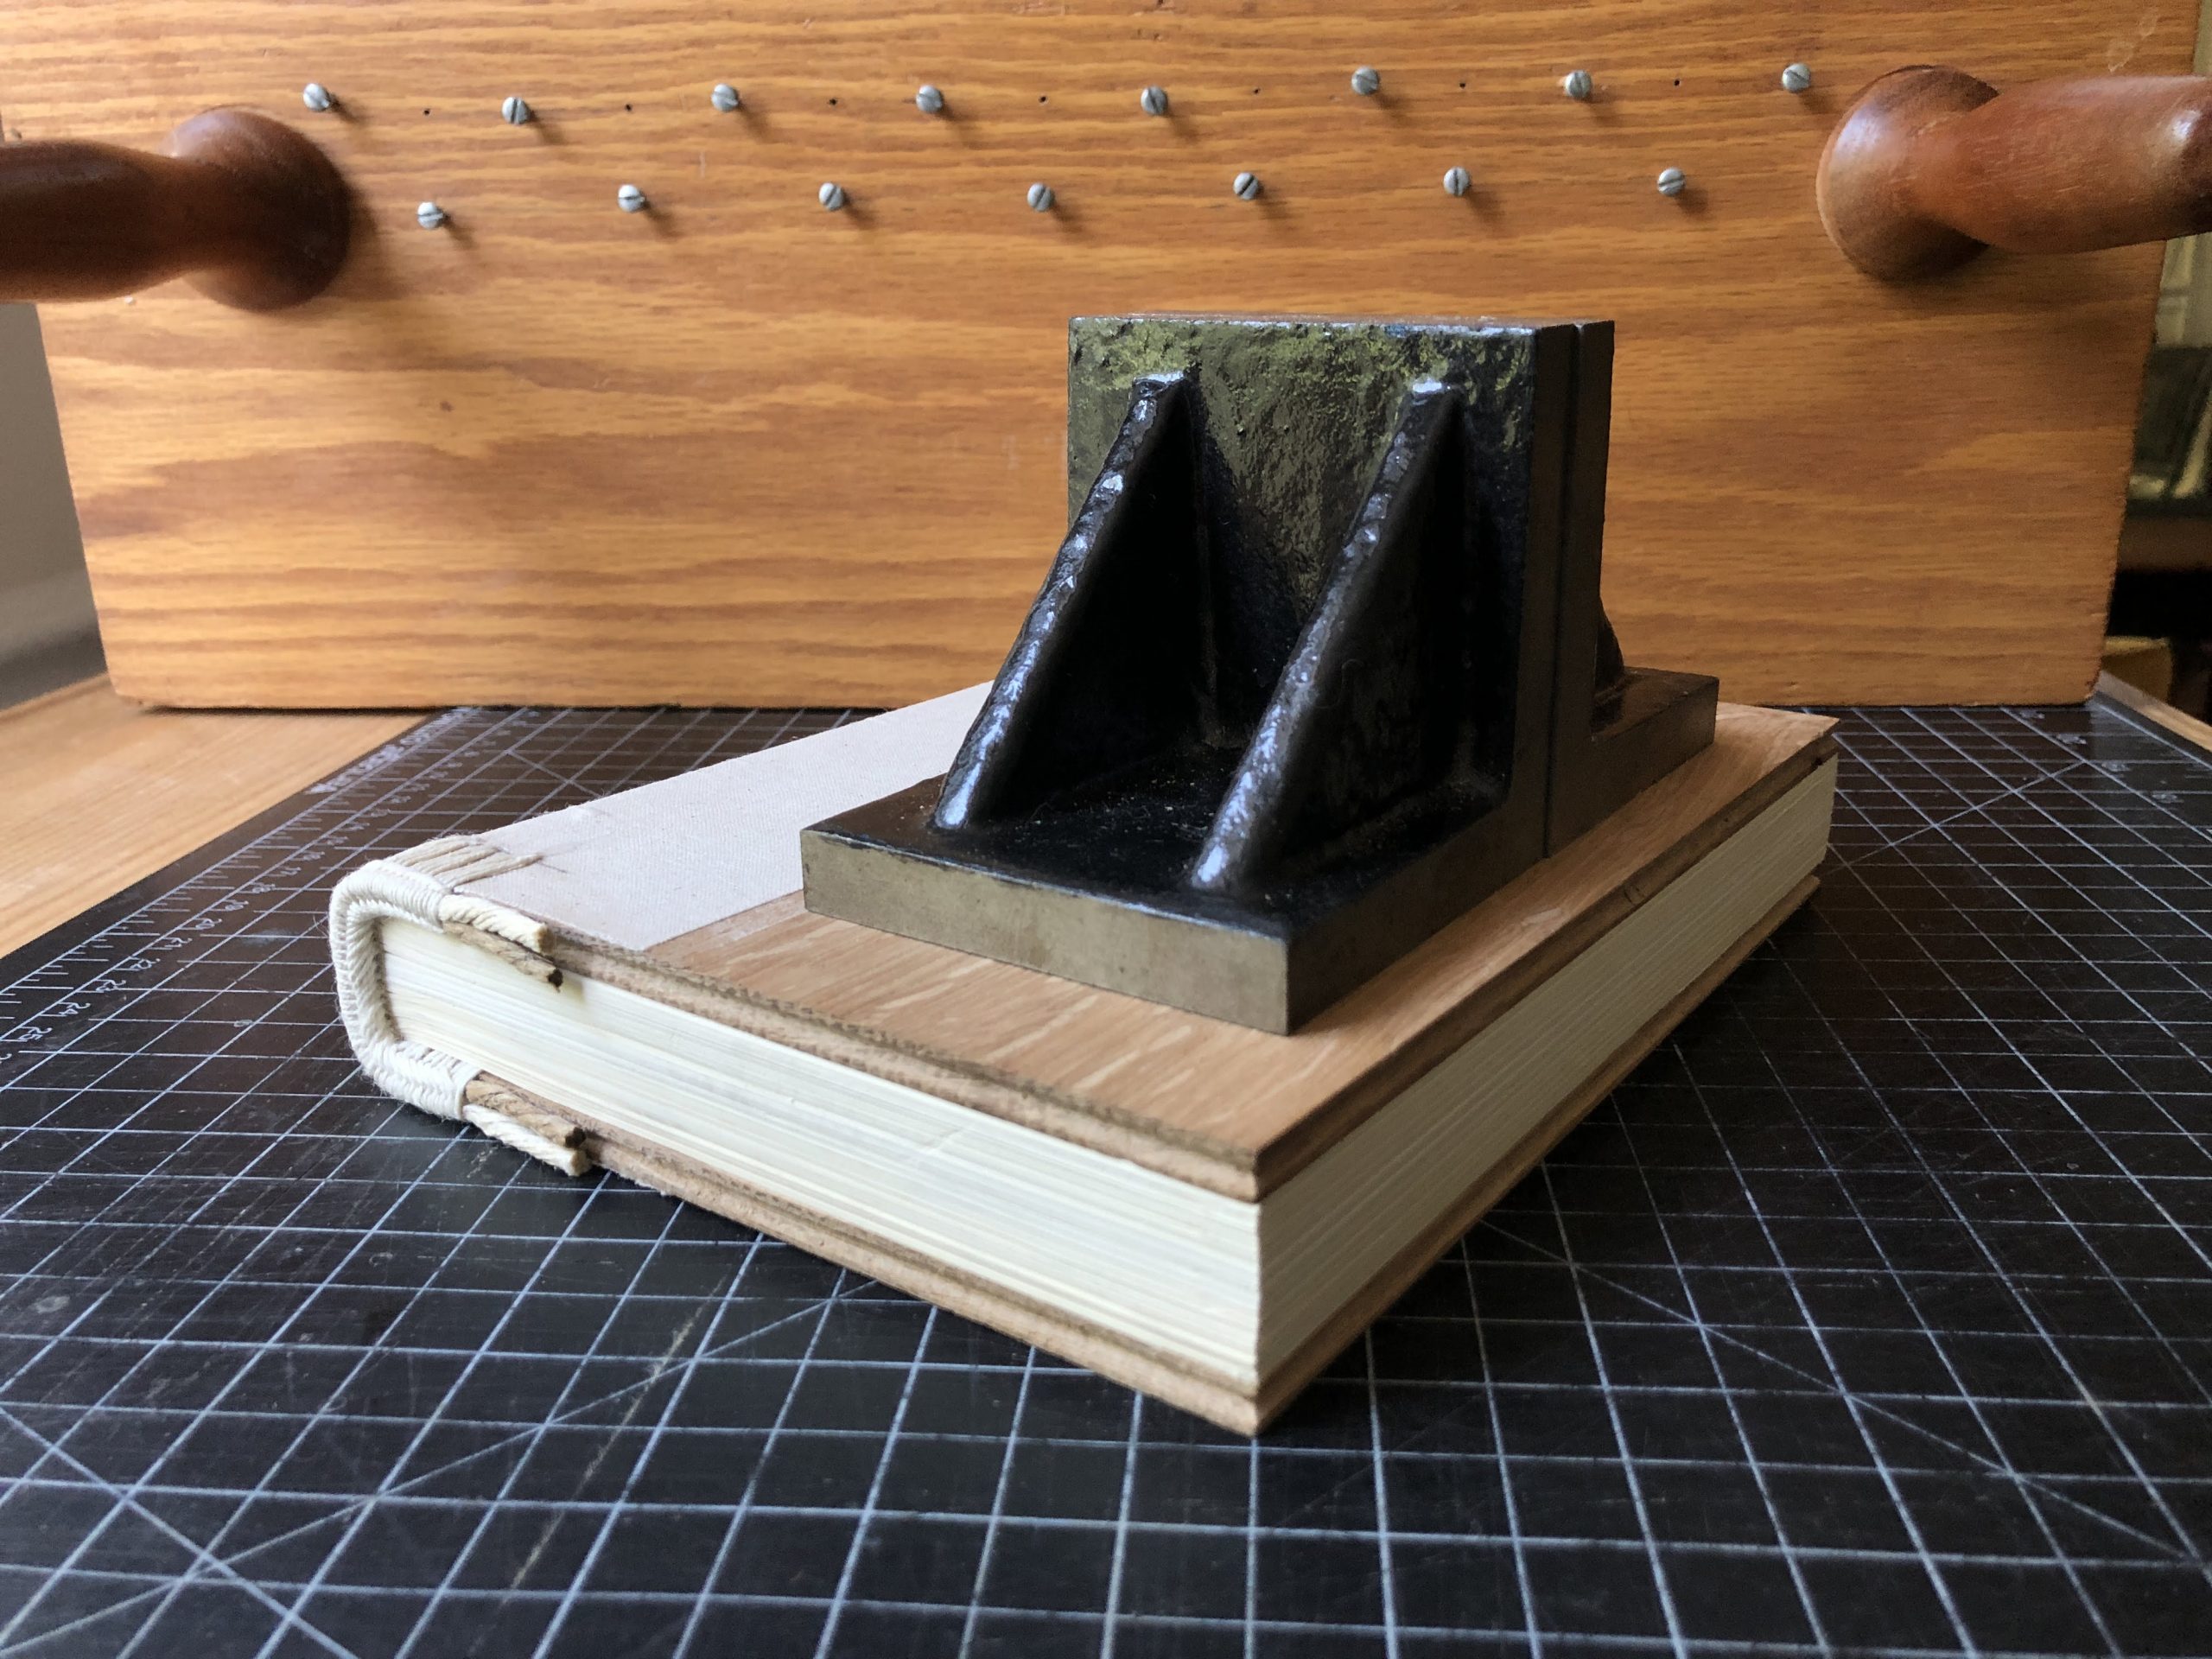
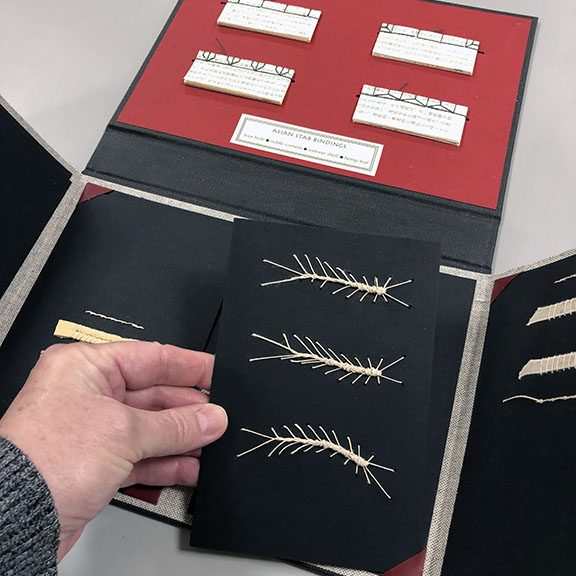
In addition to the samples sewn that day on index cards, there was a nearly complete set of the stitches sewn onto black paper folia in the folder. I had never completed this more advanced solo project based on Beth’s original workshop. The idea was to make something visually appealing, complete, and inclusive of additional visual information to orient a beginner to the application of the stitch in 3-dimensional structures.

Left side fully open according fold sewing sample book.


Inside front cover with stab binding and other sewing samples.


Stab binding cards.

Stitch sample cards made in the course of workshops work well as memory prompts for people who have already learned them. However, for beginners, the flattening of the sewing process onto a card and the need to infer structural information can make them a little baffling. I had come across this file once or twice before and verified that it was a worthy goal.  But mid-quarantine, the project felt like more than that: it was like an arc from the beginnings of the lab, through this time of mass uncertainty, to the future gaze of someone beginning to learn bookbinding.

Caterpillar sample card.


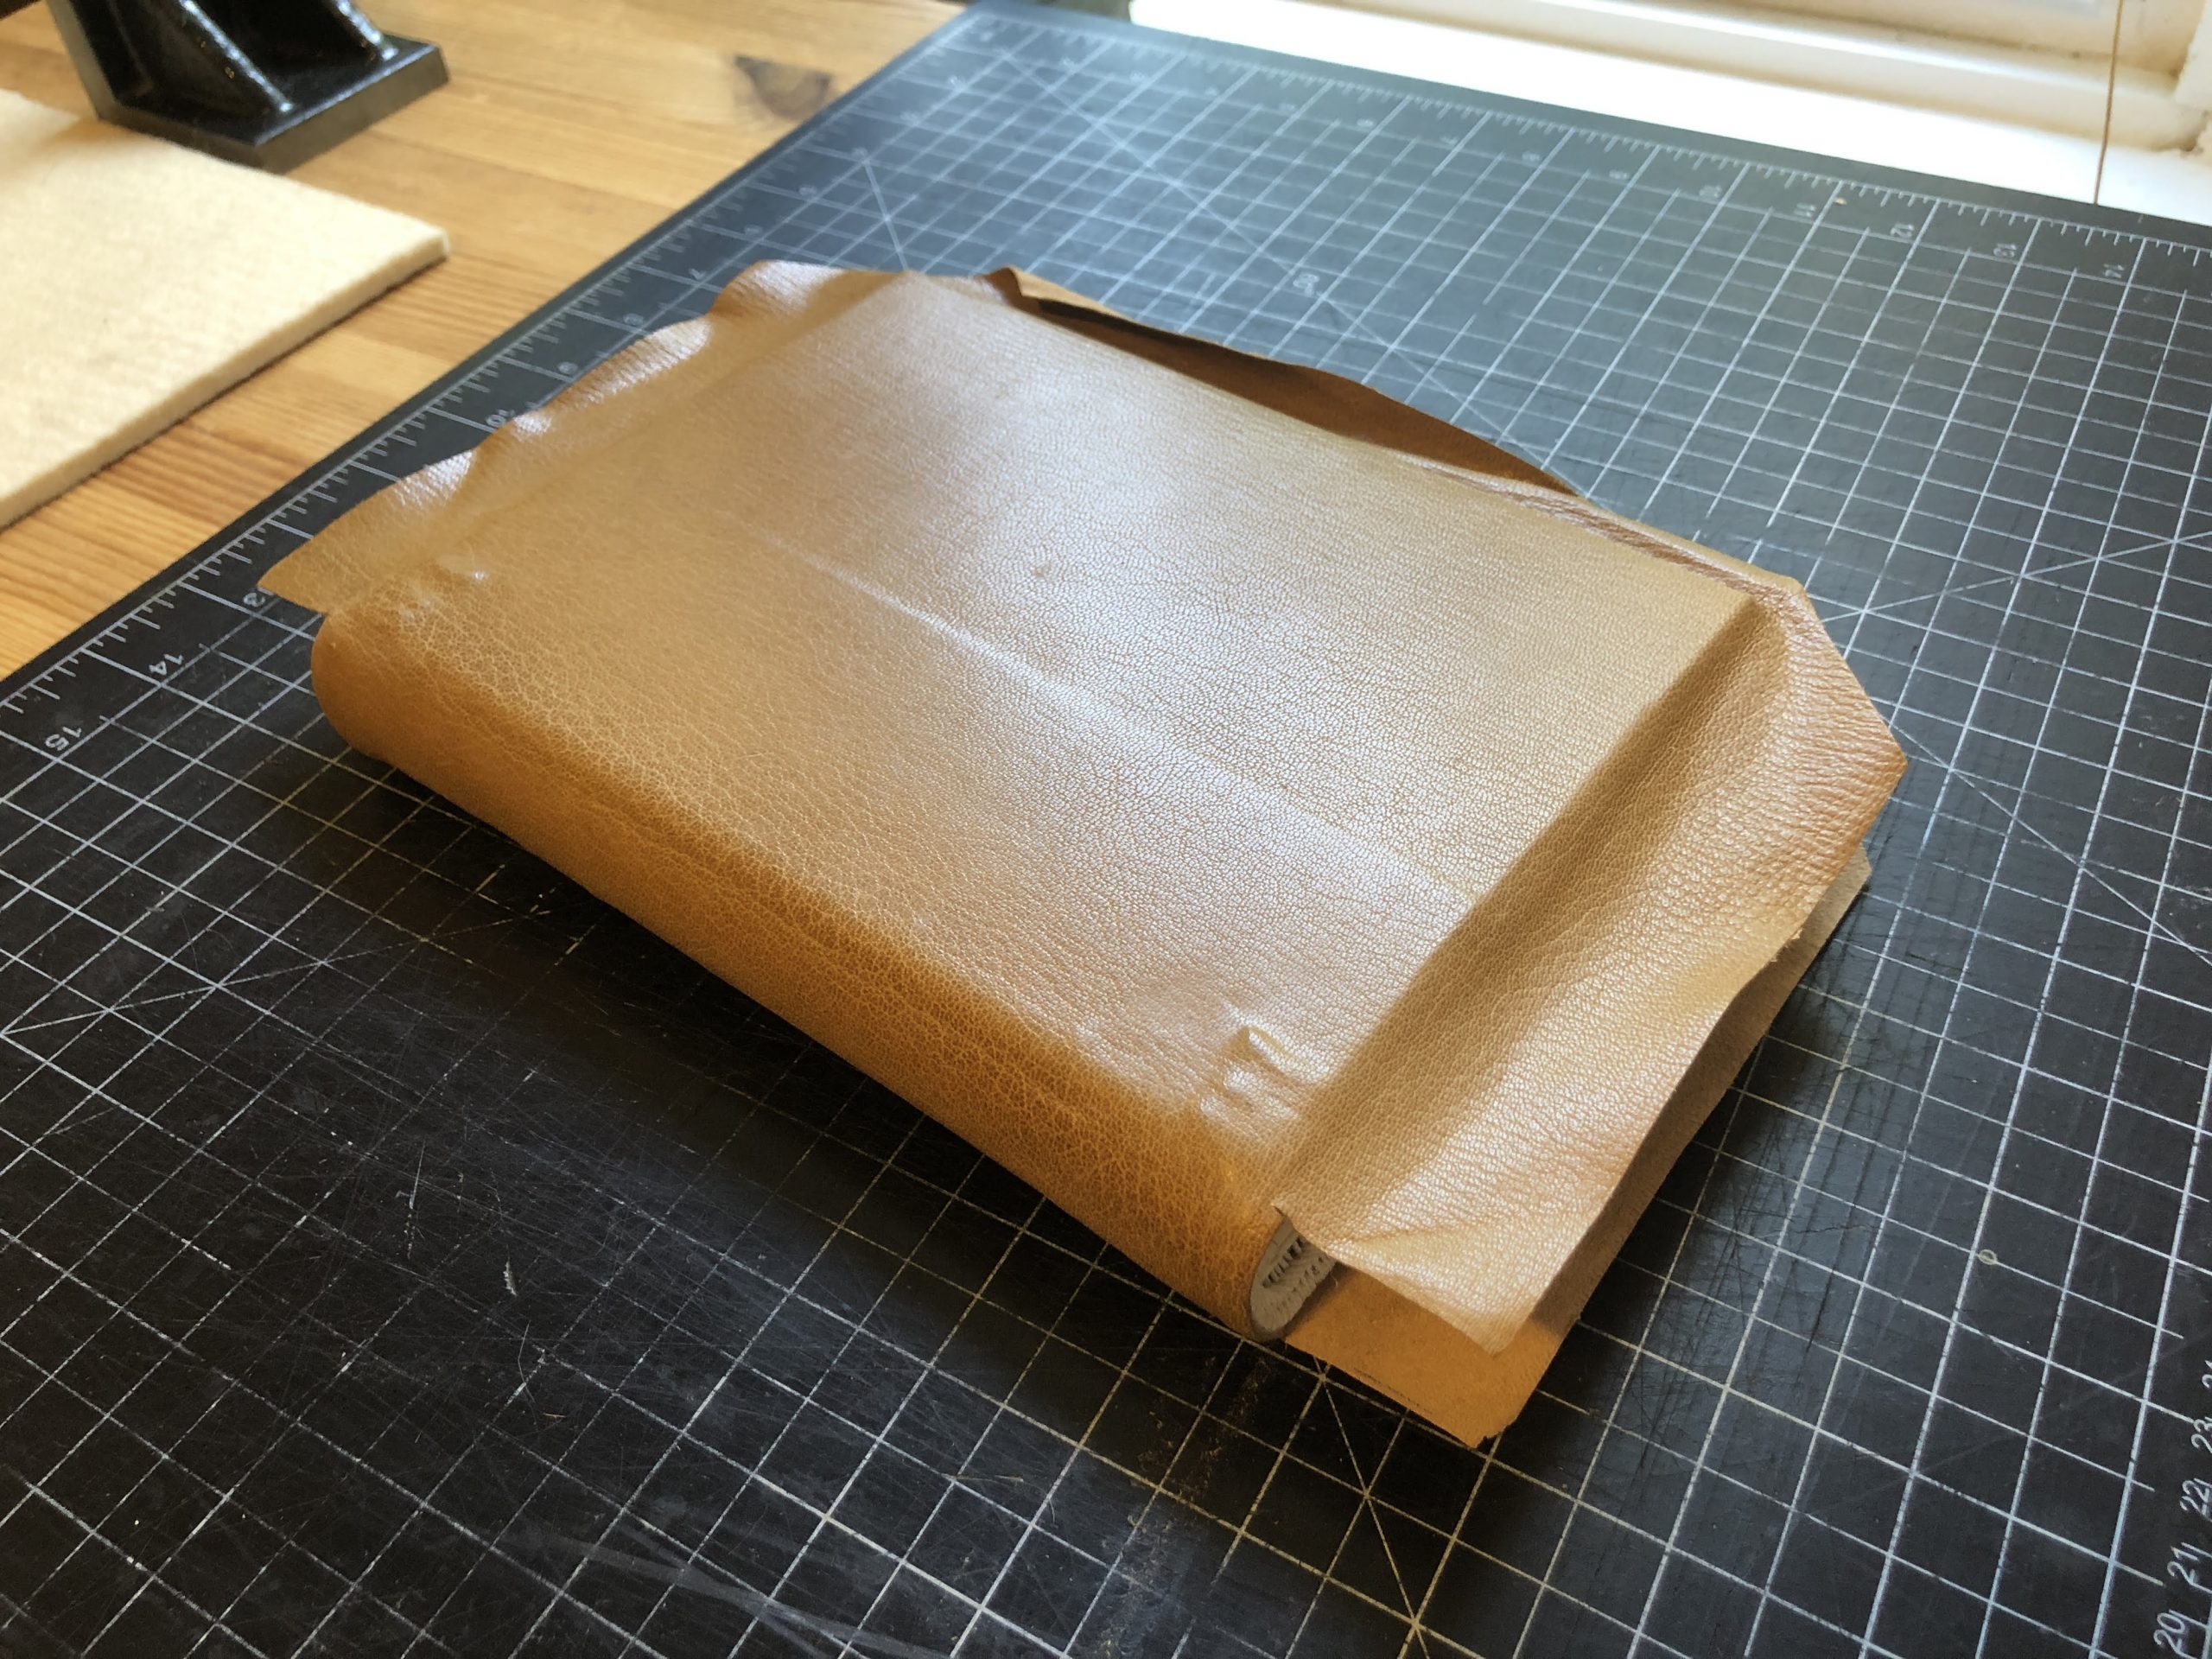
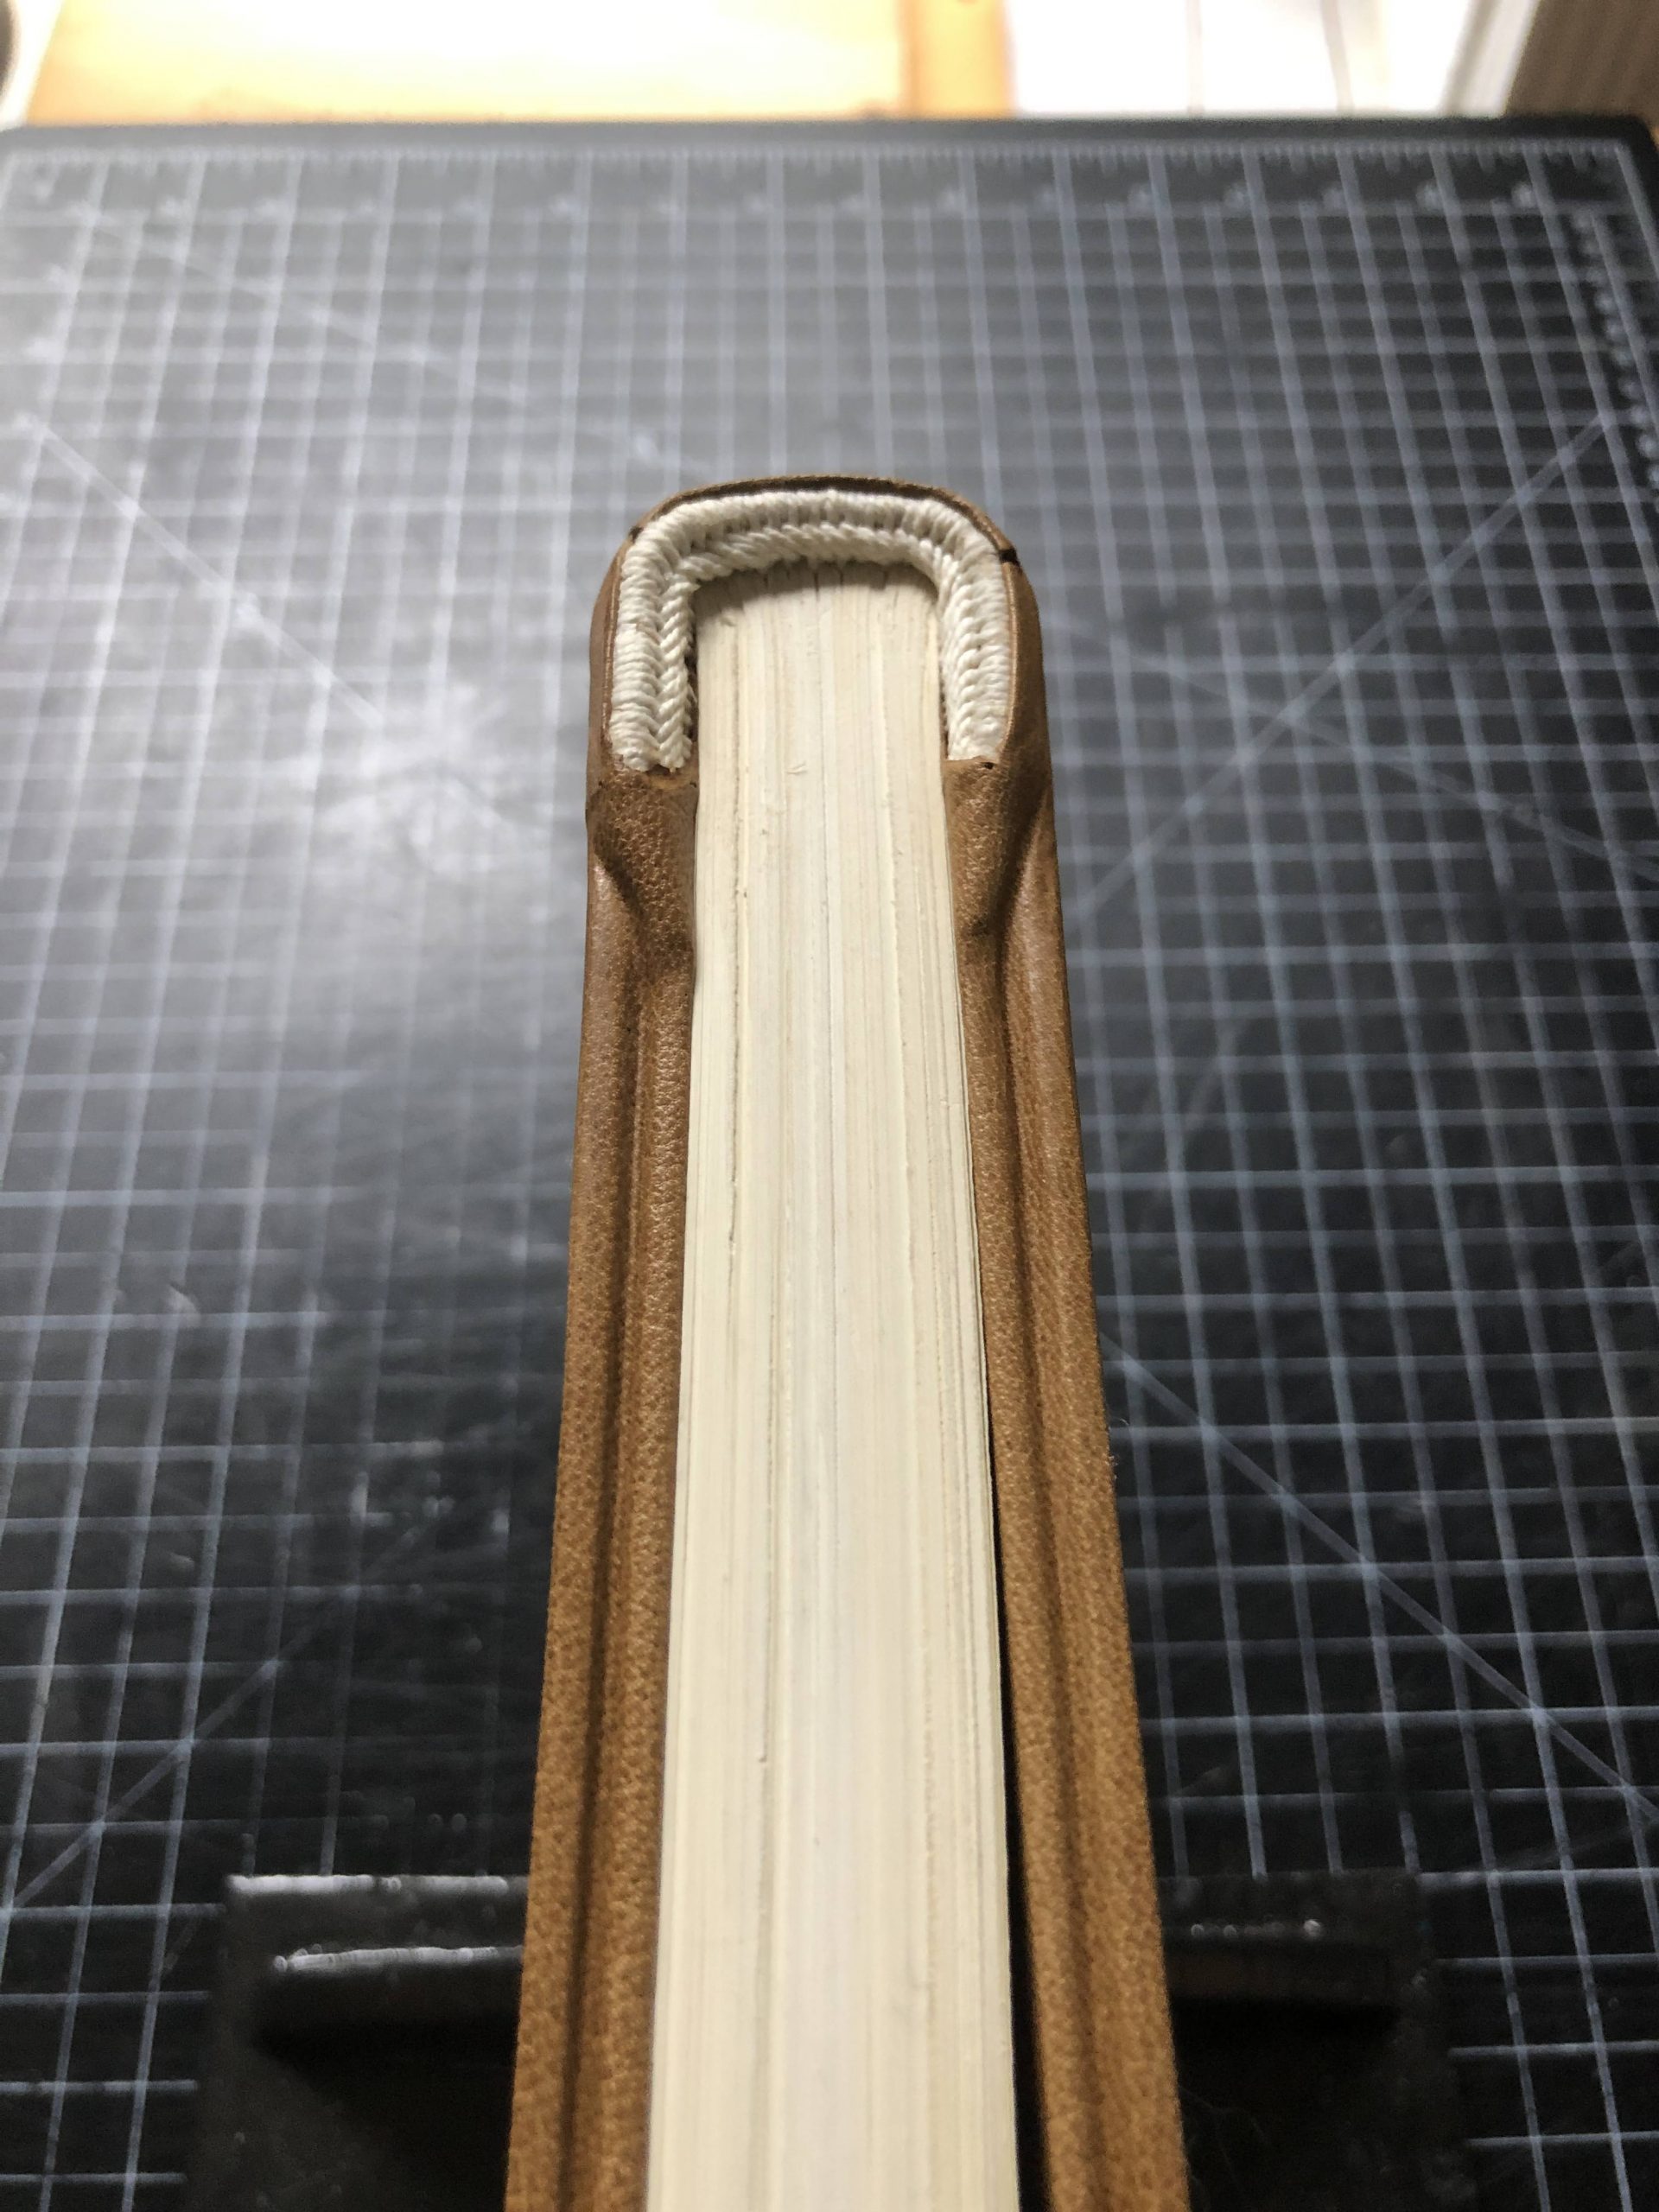
I finished sewing all of the samples on the face of black folia, located other visual information needed to design inserts for each folio, and built a gate-format accordion album in a hard case to hold them all.  There are 8 spaces on the back of the fold outs so additional samples can be added–there are always more stitches to learn.

Caterpillar sample card (inside).

Return to Campus, part 2

We are slowly getting back to a “new normal” for the lab. Lab staff have returned on a two-day-on/three-day-off weekly schedule to allow for social distancing. We have new lab cleaning protocols in place for shared equipment, we are wearing masks, and we are figuring out how to navigate the building to avoid people as much as possible. We have also brought back the work we took to the secure stacks while we were away.

book trucks with conservation work to be done
They’re baaaaack!

Our current priority is to do repairs to support the Library’s “digital first” initiative. This means we are prioritizing repairs for digital imaging requests from faculty and patrons for the fall semester. We are also working on some exhibit prep and general collections repair. It feels really good to be back in the office and at the bench, even if it is for a shortened week.

Erin repairing items prior to digitization.

Look at These Labels

by Erin Hammeke, Senior Conservator

Archival boxes with picture labels of objects inside.

We get pretty excited about labels in the Conservation Services department, as evidenced by this post, and this one. Apart from spine labels, we frequently add signage to our enclosures to provide information about what’s inside and how it should be handled.

We often add picture labels to the outsides of our enclosures, particularly those containing fragile objects. We find these labels cut down on browsing and give and idea of what’s inside.

Picture labels can be created fairly quickly by capturing at relatively low resolution and under normal lighting conditions. We photograph items on a white background in our digital photographic documentation studio. Using the levels adjustments in Photoshop, select the white eyedropper and then select the white background. This usually causes the background to disappear and makes for a cleaner looking label.

Examples of object labels

We add in handling information specific to the item, such as HANDLE WITH GLOVES or CAUTION: SHARP!

We also print of sheets of small labels with common handling concerns, such as CONTAINS GLASS, FRAGILE, HEAVY. This makes for quick and easy labeling of boxes that otherwise wouldn’t get a special photo label.

Label that reads "Heavy"

Label that reads "Fragile"

We’ve even had luck playing with clip art to make some useful handling labels.

Label for a "two person lift", including the weight of the box.

Infographics

Graphic label showing how to move the object.


Label describing how to use enclosure with attached cradle.

Sometimes you need a simple and specific way of demonstrating how to handle an item, and narrative text or clip art just won’t cut it. We’ve had some luck creating infographic style labels using this process:

  • Take a high resolution photo of the action/item you’d like to have pictured in your infographic label.
  • In Photoshop, open your image and create a new layer on top of the image.
  • On the new layer you’ve created, trace the elements with a drawing tool. Working at 100% or higher, and using the smoothing settings will help to improve any jagged or rough-looking lines in your drawing.
  • Copy the layer with the drawing and paste it onto a new blank canvas with a white background. Make any final adjustments to your drawing, keeping in mind that it doesn’t have to be perfect.
  • Reduce the size of your drawing without reducing the file quality. Most of these images will not be printed out very large, so pick a label size, such as 2 x 4” and resize the drawing so it fits on that label. You will find that most imperfections in the drawing will not be noticeable when the drawing is resized.


Visions of the Alhambra

by Erin Hammeke, Senior Conservator

Title page of Alhambra

I recently finished repair on these two double folio volumes, concluding a multi-year project. I performed dry cleaning and page repair, in- situ sewing repair, board reattachment, leather rebacking, and leather corner repair. Working on two volumes this size and weight (35lbs each) proved to be both an engineering challenge and a physically demanding project. I came up with some solutions for a few of the challenges presented while treating these very large volumes that I’ll share here.

This two volume set by the architect Owen Jones documents the decorative surfaces at the Alhambra Palace in Grenada. The texts are most well-known for their beautiful, large-scale color lithographic plates.

Color lithograph Plate 1 in Alhambra

Front board with leather spine and corners and marbled paper over the boards.

The volumes were bound in half-style bindings with green sheepskin covering and marbled paper sides and endleaves. The boards were detached and the sheepskin was in poor condition, with many tears and large losses. We decided to remove all of the leather up to the gold tooled areas. After attaching the boards with the use of many clamps (my favorite tools!), and prepping the spine with sufficient linings and sham bands, it was ready for covering.

Large clamps affixed to the book's boards at the spine.

Relined textblock spine and book boards without leather.

I selected goatskins for the new leather and calculated that I would need three skins to cover both volumes’ spines and large corners. I dyed them to match the original – another challenge when working at this scale!

The sheepskin remnants were very thick, and did not take well to paring down and thinning. I was worried about having a smooth transition between the old and new leathers where they overlap. I realized I needed to pare the new leather to accommodate the old, but I didn’t want to lose the strength or dyed color of the hair side of the new goatskin. A piece from our Scharf-Fix that I’ve never used before provided the perfect solution. The kit comes with assorted roller sizes and we’ve only really ever used the full size (28mm) for edge paring.

Using one of the smaller rollers (13mm) along the meeting edges of the leather allowed me to take a step out of the flesh side that could accommodate the thick sheepskin remnants. I used the full-sized roller to clean up the stepped bevel by working it perpendicularly and off the edge.

Pared edge of leather, from the suede side.

Leather in the Scharffix paring machine

During covering, I worked this bevel in with my bone folder creating a precise step for the original leather to sit into and making for a flush transition.

New leather inserted under the original.

After adding new stamped leather spine labels, I created sleds that the heavy bindings can be moved on, hopefully protecting the covers from damage from being dragged across reading room table tops.

Finished book inside enclosure

Have you discovered other uses for the variously sized Scharf-Fix rollers? What are your tips for repairing oversized and heavy bindings? We’d love to know!

Quick Pic(s): Return to Campus

Yesterday was my first day back in the lab since mid-March and it was a bit surreal. The university was still in full operation the last time that I visited the library, so I wasn’t quite sure how it would look these days. Here are a few scenes from my day:

Unlimited parking!
The halls are eerily quiet, and there are new hand sanitizer stations.
Lots of new signage everywhere.
Bench, sweet bench!
My lunch companion. Even the squirrels are starved for social interaction.

The library building is still closed, it’s clear that a lot of people have been working hard to prepare for a phased reopening. I’m looking forward to working with collection material again – even if it’s just a few days a week.

FY2020: By the Numbers

It’s annual statistics time! As you can imagine Covid-19 struck a blow to our productivity in terms of conservation work. We have all been busy working from home improving documentation, learning new skills through online resources like the ICON Together At Home Webinar Series, and the Guild of Bookworkers generous online offerings during the spring, and of course we are all Zoom masters now.

FY2020 by the Numbers

609 Book repairs
671 Pamphlet bindings
8 Treatments: Other (objects, textiles, etc.)
154 Flat Paper repairs
4,956 Protective enclosures
419 Disaster recovery
4 Exhibit mounts
216.5 Hours in support of Exhibits (meetings, treatment, installation, etc.)
129 Digital preparation repairs
36.25 Hours in support of Digital Projects (meetings, consultations, handling, etc.)

43% of production was for Special Collections
57% of production was for Circulating Collections

80% of work was Level 1 [less than 15 minutes to complete; 4,298 items]
17% of work was Level 2 [15 minutes – 2 hours to complete; 925 items]
3% of work was Level 3 [2 – 5 hours to complete; 146 items]
0% of work was Level 4 [more than 5 hours; 31 items]

Our enclosure workflow is still the largest percentage of output. This trend will continue once the enabling work for the Lilly Renovation Project begins. We hope that will start this fiscal year, but budgetary constraints due to Covid-19 may see that work put on hold temporarily.

Other Things We Did Last Year
  • We hosted 25 tours of the lab totaling 90 people
  • We presented 35 Care and Handling Training sessions to DUL staff totaling 34 people
  • We hosted our third HBCU Library Alliance/University of Delaware-Winterthur conservation intern.
  • We worked on some cool things like the Encyclopedia Britannica 11th Edition (Mary), installed the Baskin Exhibit at the Grolier Club in New York City (Henry), listened to Erin’s lunchtime talk on Swiss Anabaptist Bindings that is now published in Suave Mechanicals v. 6,  learned more about the paintings in the Lilly Library (Rachel), and welcomed Jovana Ivezic as our new Senior Technician.
  • We had three awesome students this year: Selena, Leah, and Ally. Just before we were sent home our pre-program volunteer, Mackenzie, started working with us. Unfortunately, we are not able to bring any of them back this fall due to Covid-19 restrictions but we are looking forward to that possibility in the spring.
  • We surpassed a quarter million items coming through the lab this year. With FY2021 we are now at 268,696 items through the lab since 2002. It’s an amazing feat. I am so proud of our staff, students and volunteers that help make Conservation happen at DUL.


Byzantine Binding at Home

I have been very grateful to have the option of working from home over the last couple of months as we weather this pandemic, but I still really miss working at the bench and doing treatment. It looks like we may be able to return to the lab soon, so I wanted to start a bit of manual dexterity practice in my spare time to prepare – like doing a home workout for my hands. I’ve wanted to make a model of a Byzantine binding for some time now, and this seemed like the perfect opportunity.

The Byzantine binding style originated in the tenth century and is commonly characterized by unsupported chain-stitch sewing, wooden boards with channelled edges, textblock edges trimmed flush with the boards, and protuding primary endbands. The Rubenstein Library holds a number of Greek manuscripts bound in this style, which can be seen in the Early Manuscripts digital collection. It can be difficult to create a satisfactory model of a binding without being able to closely examine a historical example, but I thought it would be a useful exercise to make an attempt. Michael Burke’s 2010 presentation at the Guild of Book Workers Standards of Excellence seminar and Greenfield & Hill’s Headbands: How to Work Them (1990) were my primary references for this first attempt.

I already had most of the materials necessary to make the model at home, so I started with folding and pressing some wove paper to make the textblock. I only ended up with 13 sections of 6 folios with the paper I had on-hand, but I would have preferred the textblock to be a bit thicker. Five recessed sewing stations were cut into the folds of the sections using a scalpel. I purchased 1/4″ quarter-sawn white oak boards from Colophon Book Arts Supply.

Folded sections with recessed sewing stations and wooden boards.

I trimmed the textblock to fit at head and tail, thinking it would be easier to square up while sewing. In the future I will just leave all edges long and plough in-boards after sewing.

The boards were drilled for the board attachment and endbands using a hand drill. I used chisels to cut V-shaped grooves into the head, tail, and fore-edge of each board and shaped the spine edges with a hand plane.

Boards drilled, channeled, and shaped.

Normally, the sewing for a book will start at one side (e.g. the front board or first section) and proceed through the textblock to the other (e.g the lower board or last section). In the case of Byzantine bindings, however, the textblock can be sewn in two halves and then lashed together at the middle. For this model the boards were attached to the textblock through the primary sewing, which allows for a very tight attachment. After the two halves are linked together and the boards are closed, the book rounds and backs itself. After sewing and getting the spine into shape, the textblock was pasted up with wheat starch paste and lined with undyed cotton.


The Greek endband for this model contains two cord cores (one a bit thinner than the other) and is sewn with the same thick (12/3) linen thread that I used for the textblock. It is anchored into the boards, as well as the center of each section in the textblock. This endband is pretty straightforward, once you get the hang of it- but it did take me several failed attempts to get something that looked correct and consistant.

Sewn endband

With the endbands done, I trimmed the fore-edge of the textblock flush with the boards and prepared for covering in leather.

Every historical example of a Byzantine binding that I have seen so far is covered in a dark brown leather, although I’m sure there are is some variation. The closest that I had in my personal stockpile is a light brown goatskin from Harmatan. In an effort to make covering the channeled board edges a little easier, I flat pared the turn-in areas fairly thin using the Schärffix® leather paring machine I have at home (my spokeshave is at the lab). This method was very quick but I will approach it differently next time (more on that later). The leather was pasted out and adhered to the spine and boards. When the leather had dried, I cut the turn-ins at the spine edge of the boards and turned-in at the spine.

The textile spine lining and endband anchoring through the boards are pretty prominent after covering.

So far each of these steps has been pretty straightforward and familiar, but here is where things get a bit dicey. The instructions I had for forming the endcap area around the protruding endbands are pretty general and the digitized copies of historical bindings available online don’t show this part of the binding very well.

My decision to pare the turn-ins uniformly thin has given me some pretty wimpy-looking endcaps, but sometimes the best way to learn something new is to just try it and learn as you go.

A very rough looking “trial-and-error” endcap

After the second endcap, I have a better idea of how the covering can be done – but I still need to work out the paring and cuts exactly. Looking at variations on original Byzantine bindings will also help. The thinner leather did make covering those channeled board edges very easy, though!

Covering the board corners was another area that could be handled in a number of ways. For simplicity sake, I decided to go with a straightforward mitered corner, as seen in the library’s Greek MS 60. I find the easiest way to make this corner is to cut through both layers of the overlapped turn-in with a knife, remove the excess leather, and line the turn-ins up again.

Mitered corner

Now that the book is covered, I will be working on a fore-edge closure. I had pre-drilled the lower board prior to covering with 3 holes for a braided leather strap. A brass pin will be mounted into the fore-edge of the front board as a catch.

Model making is a useful exercise for learning how a binding is assembled and how the different components function together. By manipulating the model, you can sometimes get a sense of where a particular structure performs well and where it becomes stressed and may fail. This side project has provided a welcomed diversion over the last couple of weeks, providing a “low stakes” project that I can use to experiment and test my hand skills. While I do feel a bit rusty after a few months away from the bench, it feels good to get in a little practice.  I’m already looking forward to making my next model, after the library has reopened and I’ve had an opportunity to compare some items from the collection.

Digital Project Prep in the Time of Quarantine

Like many other libraries we are pushing to get as much material digitized and online for fall term instruction as possible. Conservation, however, is not yet back on site but our services are still needed. I came in this week to work on some items that needed humidifying and flattening, and to do some quick repairs to get these camera ready.

removing rusty staples
Removing rusty staples.

This collection had a lot of rusty staples that needed removal.

testing media
Testing solubility of media.

There are several Western Union telegrams and other correspondence that were crumpled and torn that are too fragile for imaging. These had a variety of media that looked suspect including early mimeographs, stamp ink, copy pencil, and other writing inks. These were tested prior to humidification.

humidifying crumpled paper
Humidifying chambers.

Even though the media was somewhat sensitive to water it felt OK to humidify these as long as I kept watch over them to make sure there was no media migration. I started with one telegram to see how it responded to humidification. When that went well the remaining items were put into the chamber for a few hours to relax. They were then dried under felts overnight.

Since these were very modern materials we decided to use our home-made heat set tissue for the repairs. These were stabilized and sent over to the Digital Production Center for imaging today.

It feels good to be working in the lab again, although a bit strange to be here with no one else around. Hopefully soon it will be safe enough to bring more of the Conservation staff back to the lab. Until then we will have to see each other in Zoom.

zoom tip
Zoom tip: Create a face near the camera to talk to so you don’t stare at yourself all of the time.

Loan Documentation Revisited

It’s a hard to believe, but over a year ago now I posted about our new method for documenting collection material going on loan. I’ve learned a lot about the technology in that time and would like to share some of those lessons, in case others are considering adopting the method. While the system I described back then did work well to document the necessary information on a compressed schedule, ultimately some of the tools present problems for reformatting and long-term digital storage of the reports.

In my previous post, I outlined some of the benefits of using Microsoft OneNote for generating reports:

  • Full access to the software is included in our institution’s Office 365 license.
  • It seamlessly works with other Microsoft products, like Excel, which we often use to manage collection metadata for projects.
  • Annotation of images can be done right inside the application. When off-site, it was very quick to photograph objects using the Surface Book’s camera and make drawings directly in the report.
  • Organization of pages and visually managing the workflow is easy. I applied a standard naming convention to each report and then organized them into sections based on their status within the project. Kind of like a Kanban board.

While creating and using documentation inside OneNote worked well, getting that same information out without disruption presents a bit of a problem. I think a lot of these issues stem from the way the application handles page layouts and images inside pages.

A new page defaults to an “auto” size, which is essentially a standard page width with infinite length. This allows you to create a document of whatever size you need and, at first, seems pretty great.

How finished reports look inside OneNote.

When the page is exported as a PDF or printed, the application inserts page breaks as needed. Sometimes this works out, but more often I found that the images are broken up.

That same report exported to PDF. Notice the page breaks and image shift under the annotations.

My first thought for resolving this was to set the page size as standard letter and carefully lay out the report to fit within the margins of each sheet. Surprisingly though, a “page” within OneNote can’t contain multiple “sheets”. When your report gets longer than the standard 11″  of page height, the content just starts to move off into a grey void.

A report inside a Letter-sized page, with content running off the page. Image shift also occurred when the sheet size was changed.

When you convert this page to a PDF, page breaks are inserted in the same way they would be for an “auto” sized page. I’m puzzled why the application was designed this way.

Another major problem I found was that the horizontal position of the image tends to shift slightly left when the the page is exported or printed (see examples above).  The is extremely frustrating, when you’ve taken great care to put your annotations in specific locations and I could not find a way to fix it. Unlike a lot of other Office products, the image and overlaid annotations can’t be grouped in OneNote. I have found two workarounds for this problem after the report is converted to a PDF:

  1. Luckily, the annotations remain in the same position to one another. If the image isn’t split by a page break, I was able to use Adobe Acrobat Pro DC to edit the PDF and just slide the underlying image back into place under the annotations.
  2. If the image was split by page breaks, I found it quicker to use the Snipping Tool in Windows to copy the image and annotations out of OneNote in the correct orientation and save them as a single JPG.  I would then delete the fragmented image and annotations out of the PDF report with Acrobat Pro and replace them with the snipped image.

Obviously, these workarounds come with the additional cost of an Adobe (or other PDF editor) license.

The fixed report PDF

In light of these issues, how will my approach to loan documentation change in the future? Some key aspects will remain the same. For example, the Surface Book 2 performs very well for writing the report and creating accurate image annotations. I also think the overall design of the form was good.

A major change will be to annotate images in a separate application and save them as a derivative image file. This will take some additional time to set up on the front end, but will create fewer issues further down the pipe. I have created a draft template in Adobe Photoshop, which contains my photo documentation of the item and a standard annotation key in separate layers. The automation tools within Photoshop could be used to create batches of these annotation-ready images for large numbers of loan items at once.

Photoshop template with photodoc and annotation key in separate layers.

For future loans, I will also retire Microsoft OneNote from the workflow. It is important that we be able to easily convert our documentation to PDF and print a hard copy for preservation purposes. OneNote’s export problems, particularly for annotated images, require a lot of time and effort to correct on the back end. The useful features, like check boxes and timestamps, are not an equal trade off. What software will replace it? I don’t know for certain yet, but it will definitely be a word processing application where content stays in position during printing and export! Microsoft Word will probably be fine, but we could also probably use Google Docs. I think the composing application matters less with the annotations saved in a single image file.

Duke University Libraries Preservation