
I have been very grateful to have the option of working from home over the last couple of months as we weather this pandemic, but I still really miss working at the bench and doing treatment. It looks like we may be able to return to the lab soon, so I wanted to start a bit of manual dexterity practice in my spare time to prepare – like doing a home workout for my hands. I’ve wanted to make a model of a Byzantine binding for some time now, and this seemed like the perfect opportunity.
The Byzantine binding style originated in the tenth century and is commonly characterized by unsupported chain-stitch sewing, wooden boards with channelled edges, textblock edges trimmed flush with the boards, and protuding primary endbands. The Rubenstein Library holds a number of Greek manuscripts bound in this style, which can be seen in the Early Manuscripts digital collection. It can be difficult to create a satisfactory model of a binding without being able to closely examine a historical example, but I thought it would be a useful exercise to make an attempt. Michael Burke’s 2010 presentation at the Guild of Book Workers Standards of Excellence seminar and Greenfield & Hill’s Headbands: How to Work Them (1990) were my primary references for this first attempt.
I already had most of the materials necessary to make the model at home, so I started with folding and pressing some wove paper to make the textblock. I only ended up with 13 sections of 6 folios with the paper I had on-hand, but I would have preferred the textblock to be a bit thicker. Five recessed sewing stations were cut into the folds of the sections using a scalpel. I purchased 1/4″ quarter-sawn white oak boards from Colophon Book Arts Supply.

I trimmed the textblock to fit at head and tail, thinking it would be easier to square up while sewing. In the future I will just leave all edges long and plough in-boards after sewing.
The boards were drilled for the board attachment and endbands using a hand drill. I used chisels to cut V-shaped grooves into the head, tail, and fore-edge of each board and shaped the spine edges with a hand plane.

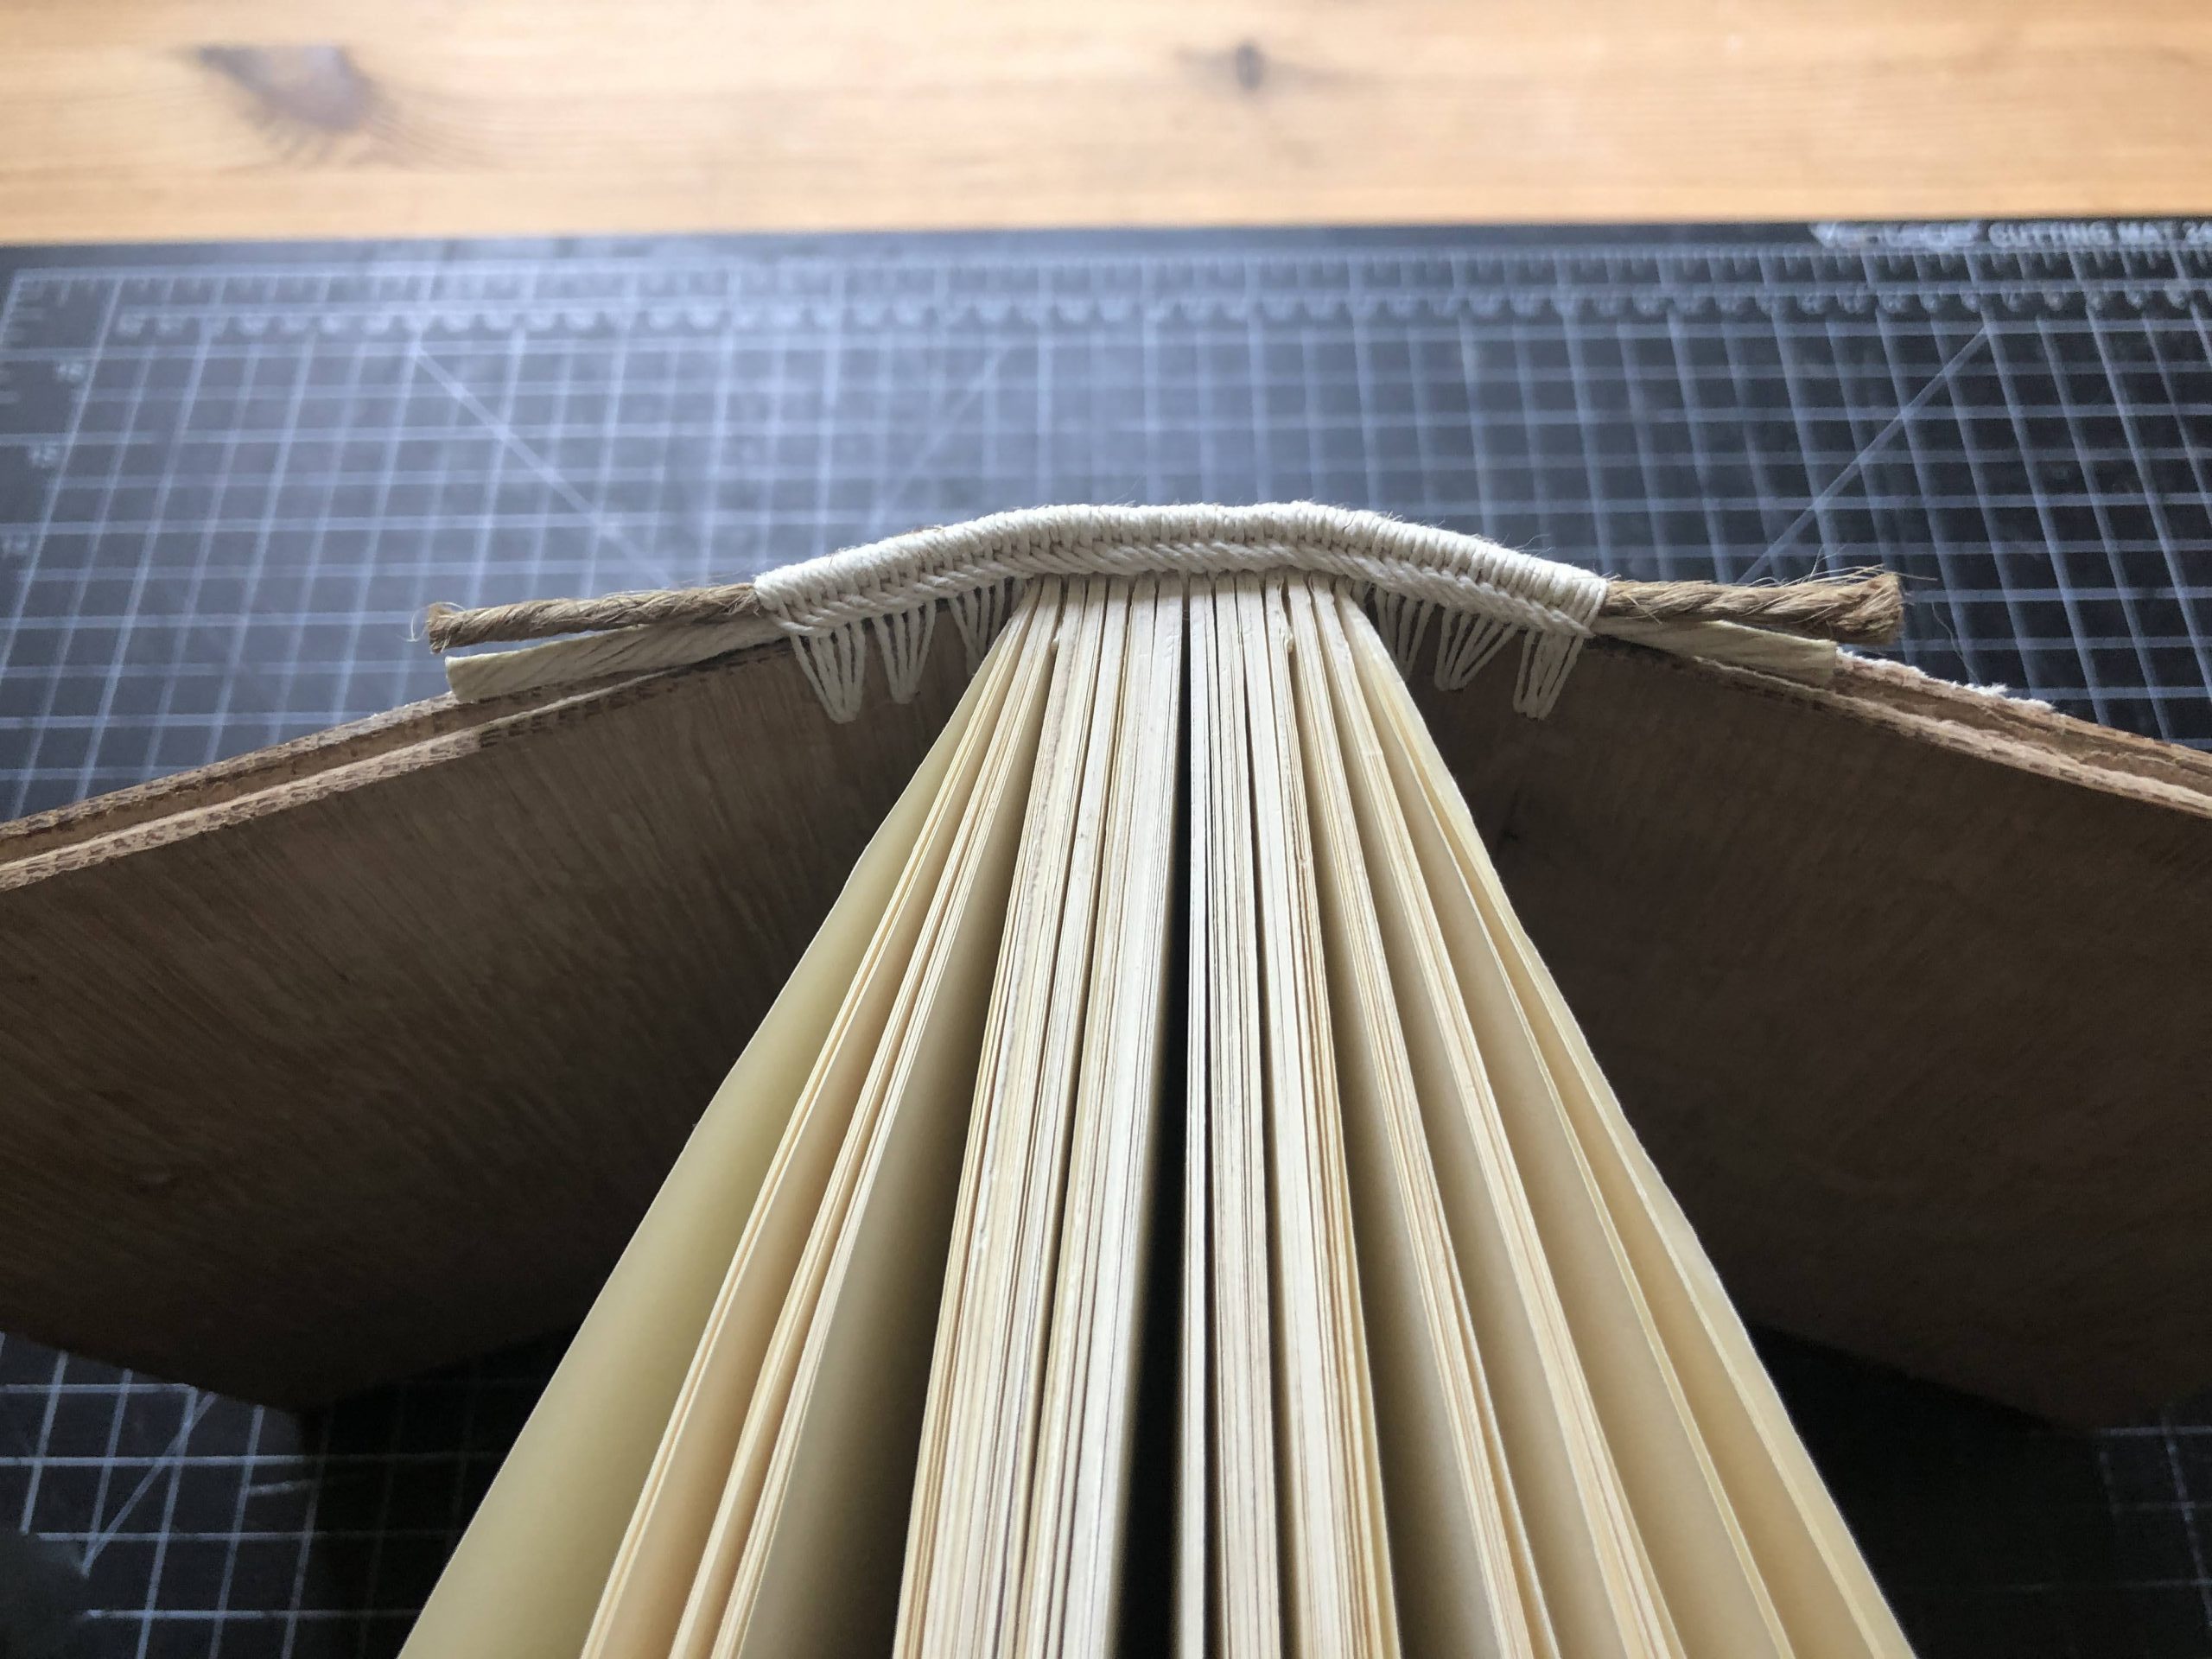
Normally, the sewing for a book will start at one side (e.g. the front board or first section) and proceed through the textblock to the other (e.g the lower board or last section). In the case of Byzantine bindings, however, the textblock can be sewn in two halves and then lashed together at the middle. For this model the boards were attached to the textblock through the primary sewing, which allows for a very tight attachment. After the two halves are linked together and the boards are closed, the book rounds and backs itself. After sewing and getting the spine into shape, the textblock was pasted up with wheat starch paste and lined with undyed cotton.


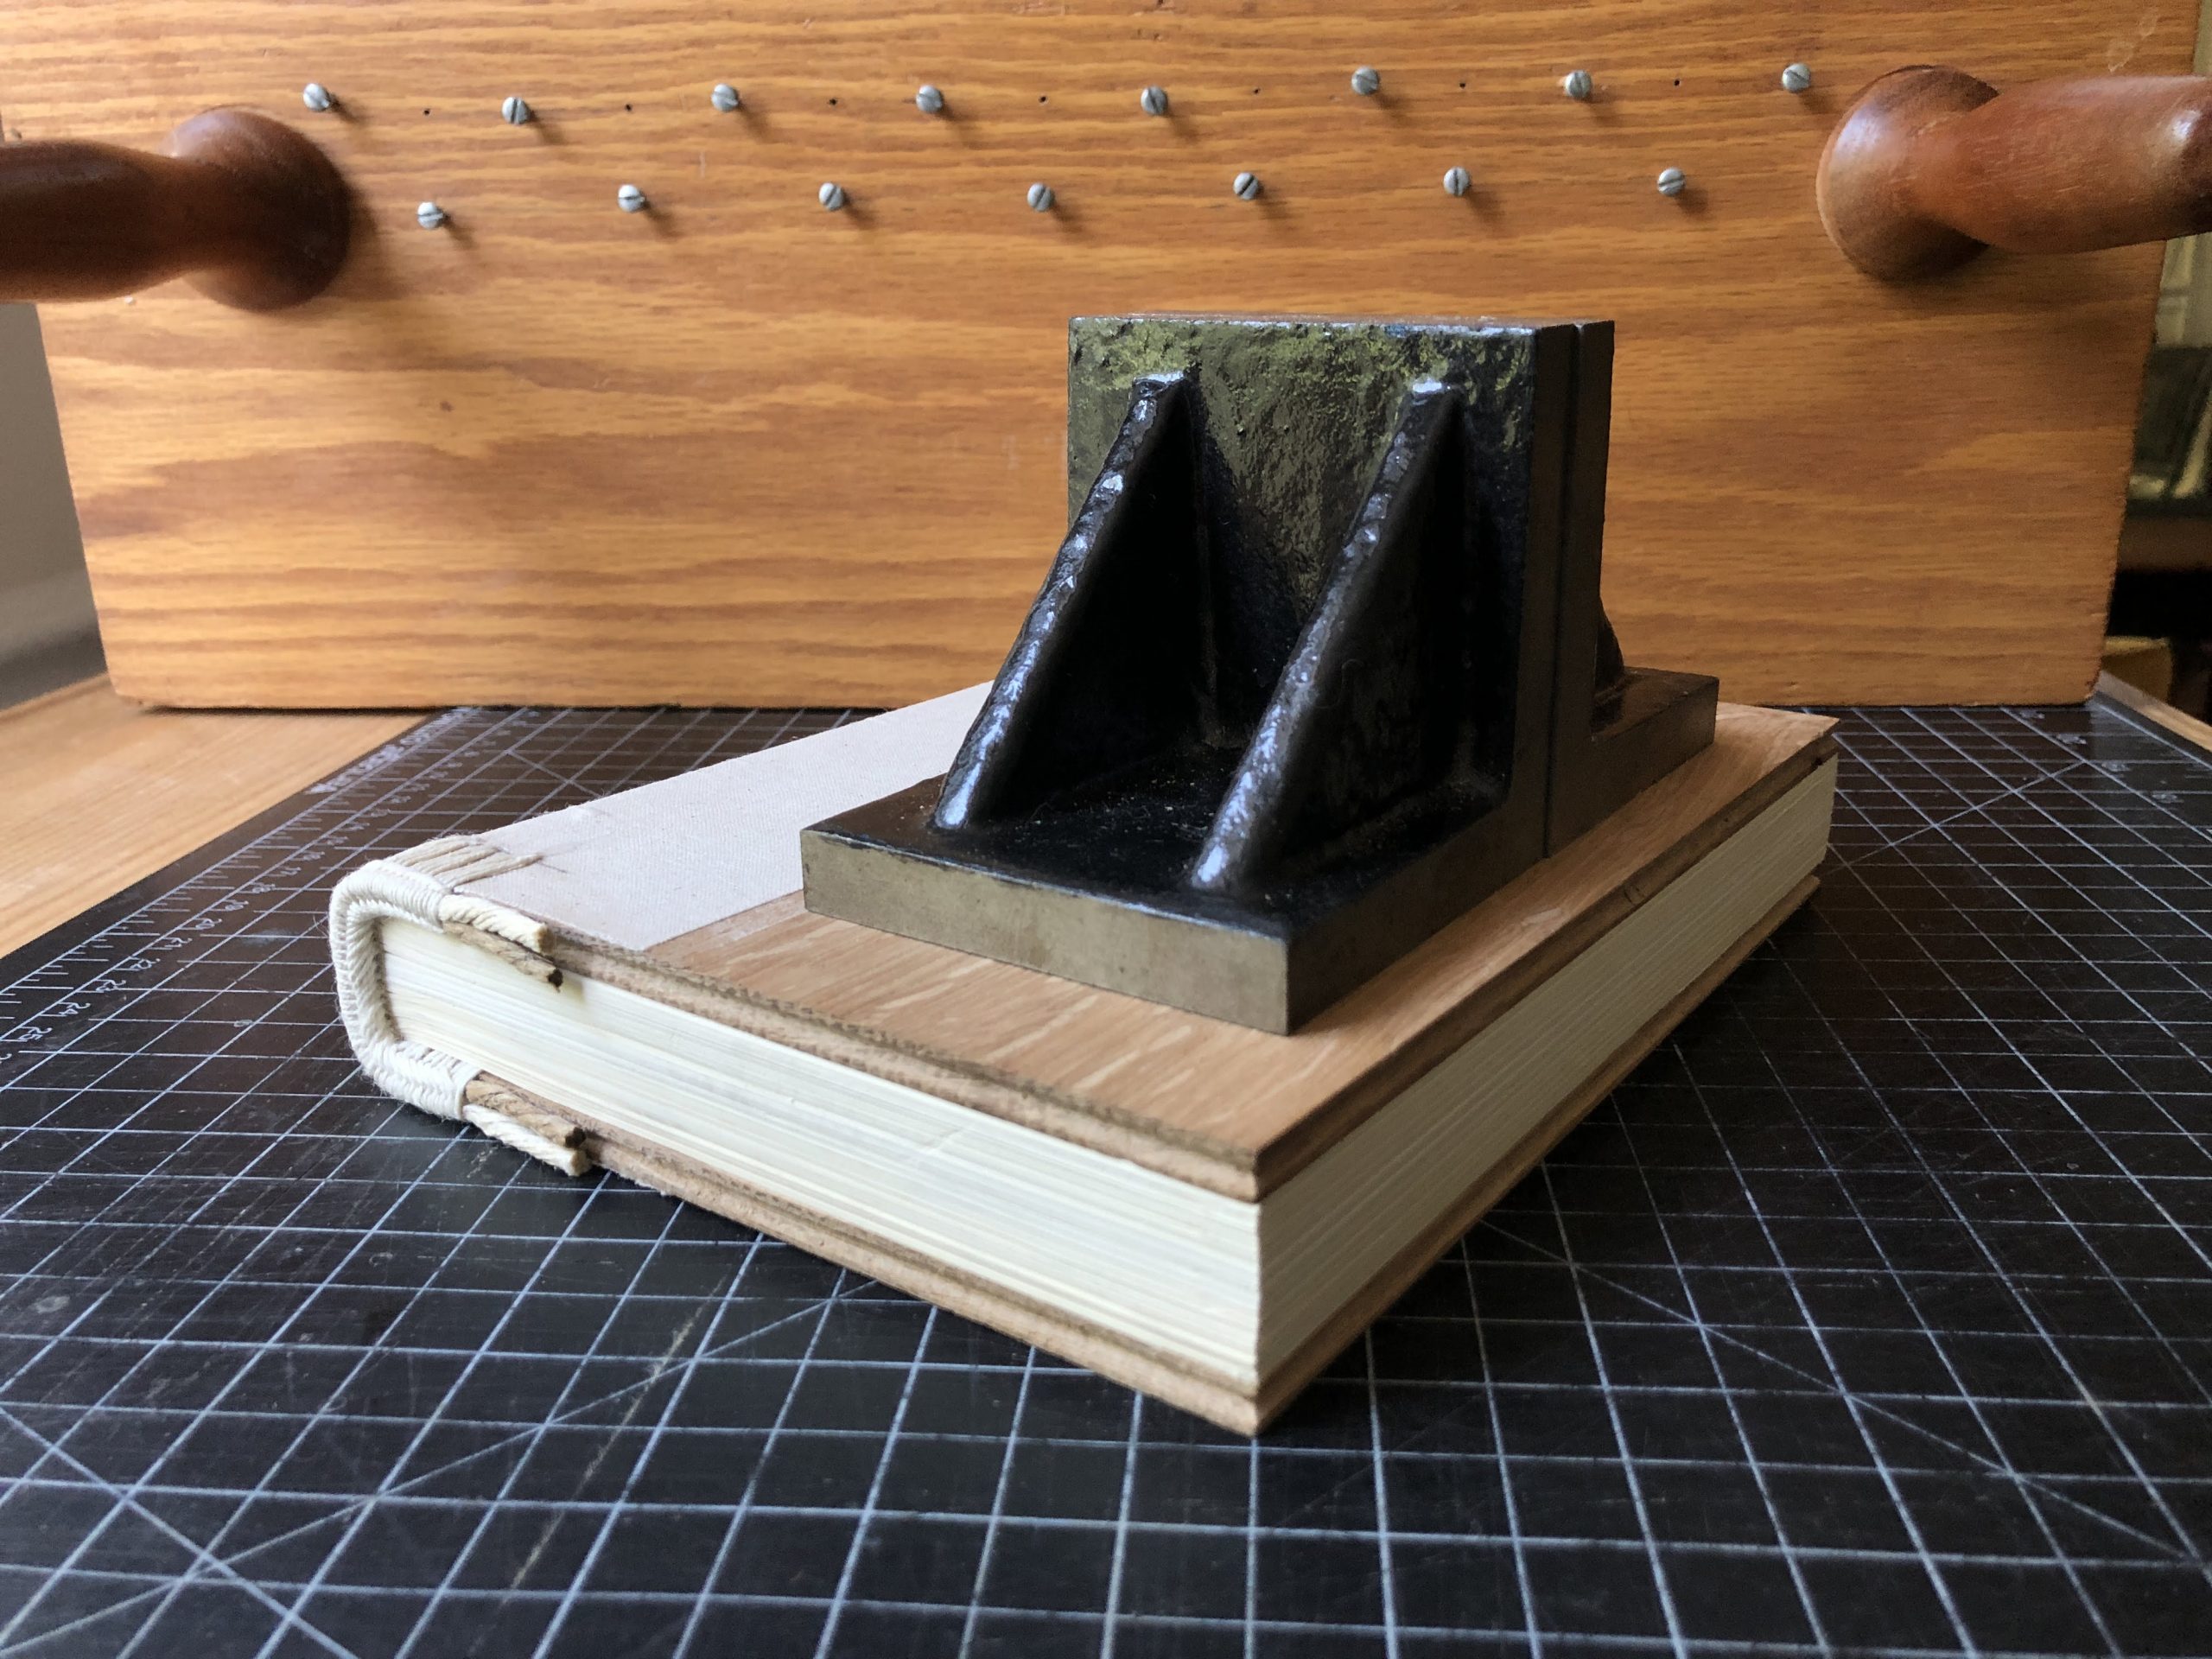
The Greek endband for this model contains two cord cores (one a bit thinner than the other) and is sewn with the same thick (12/3) linen thread that I used for the textblock. It is anchored into the boards, as well as the center of each section in the textblock. This endband is pretty straightforward, once you get the hang of it- but it did take me several failed attempts to get something that looked correct and consistant.
With the endbands done, I trimmed the fore-edge of the textblock flush with the boards and prepared for covering in leather.
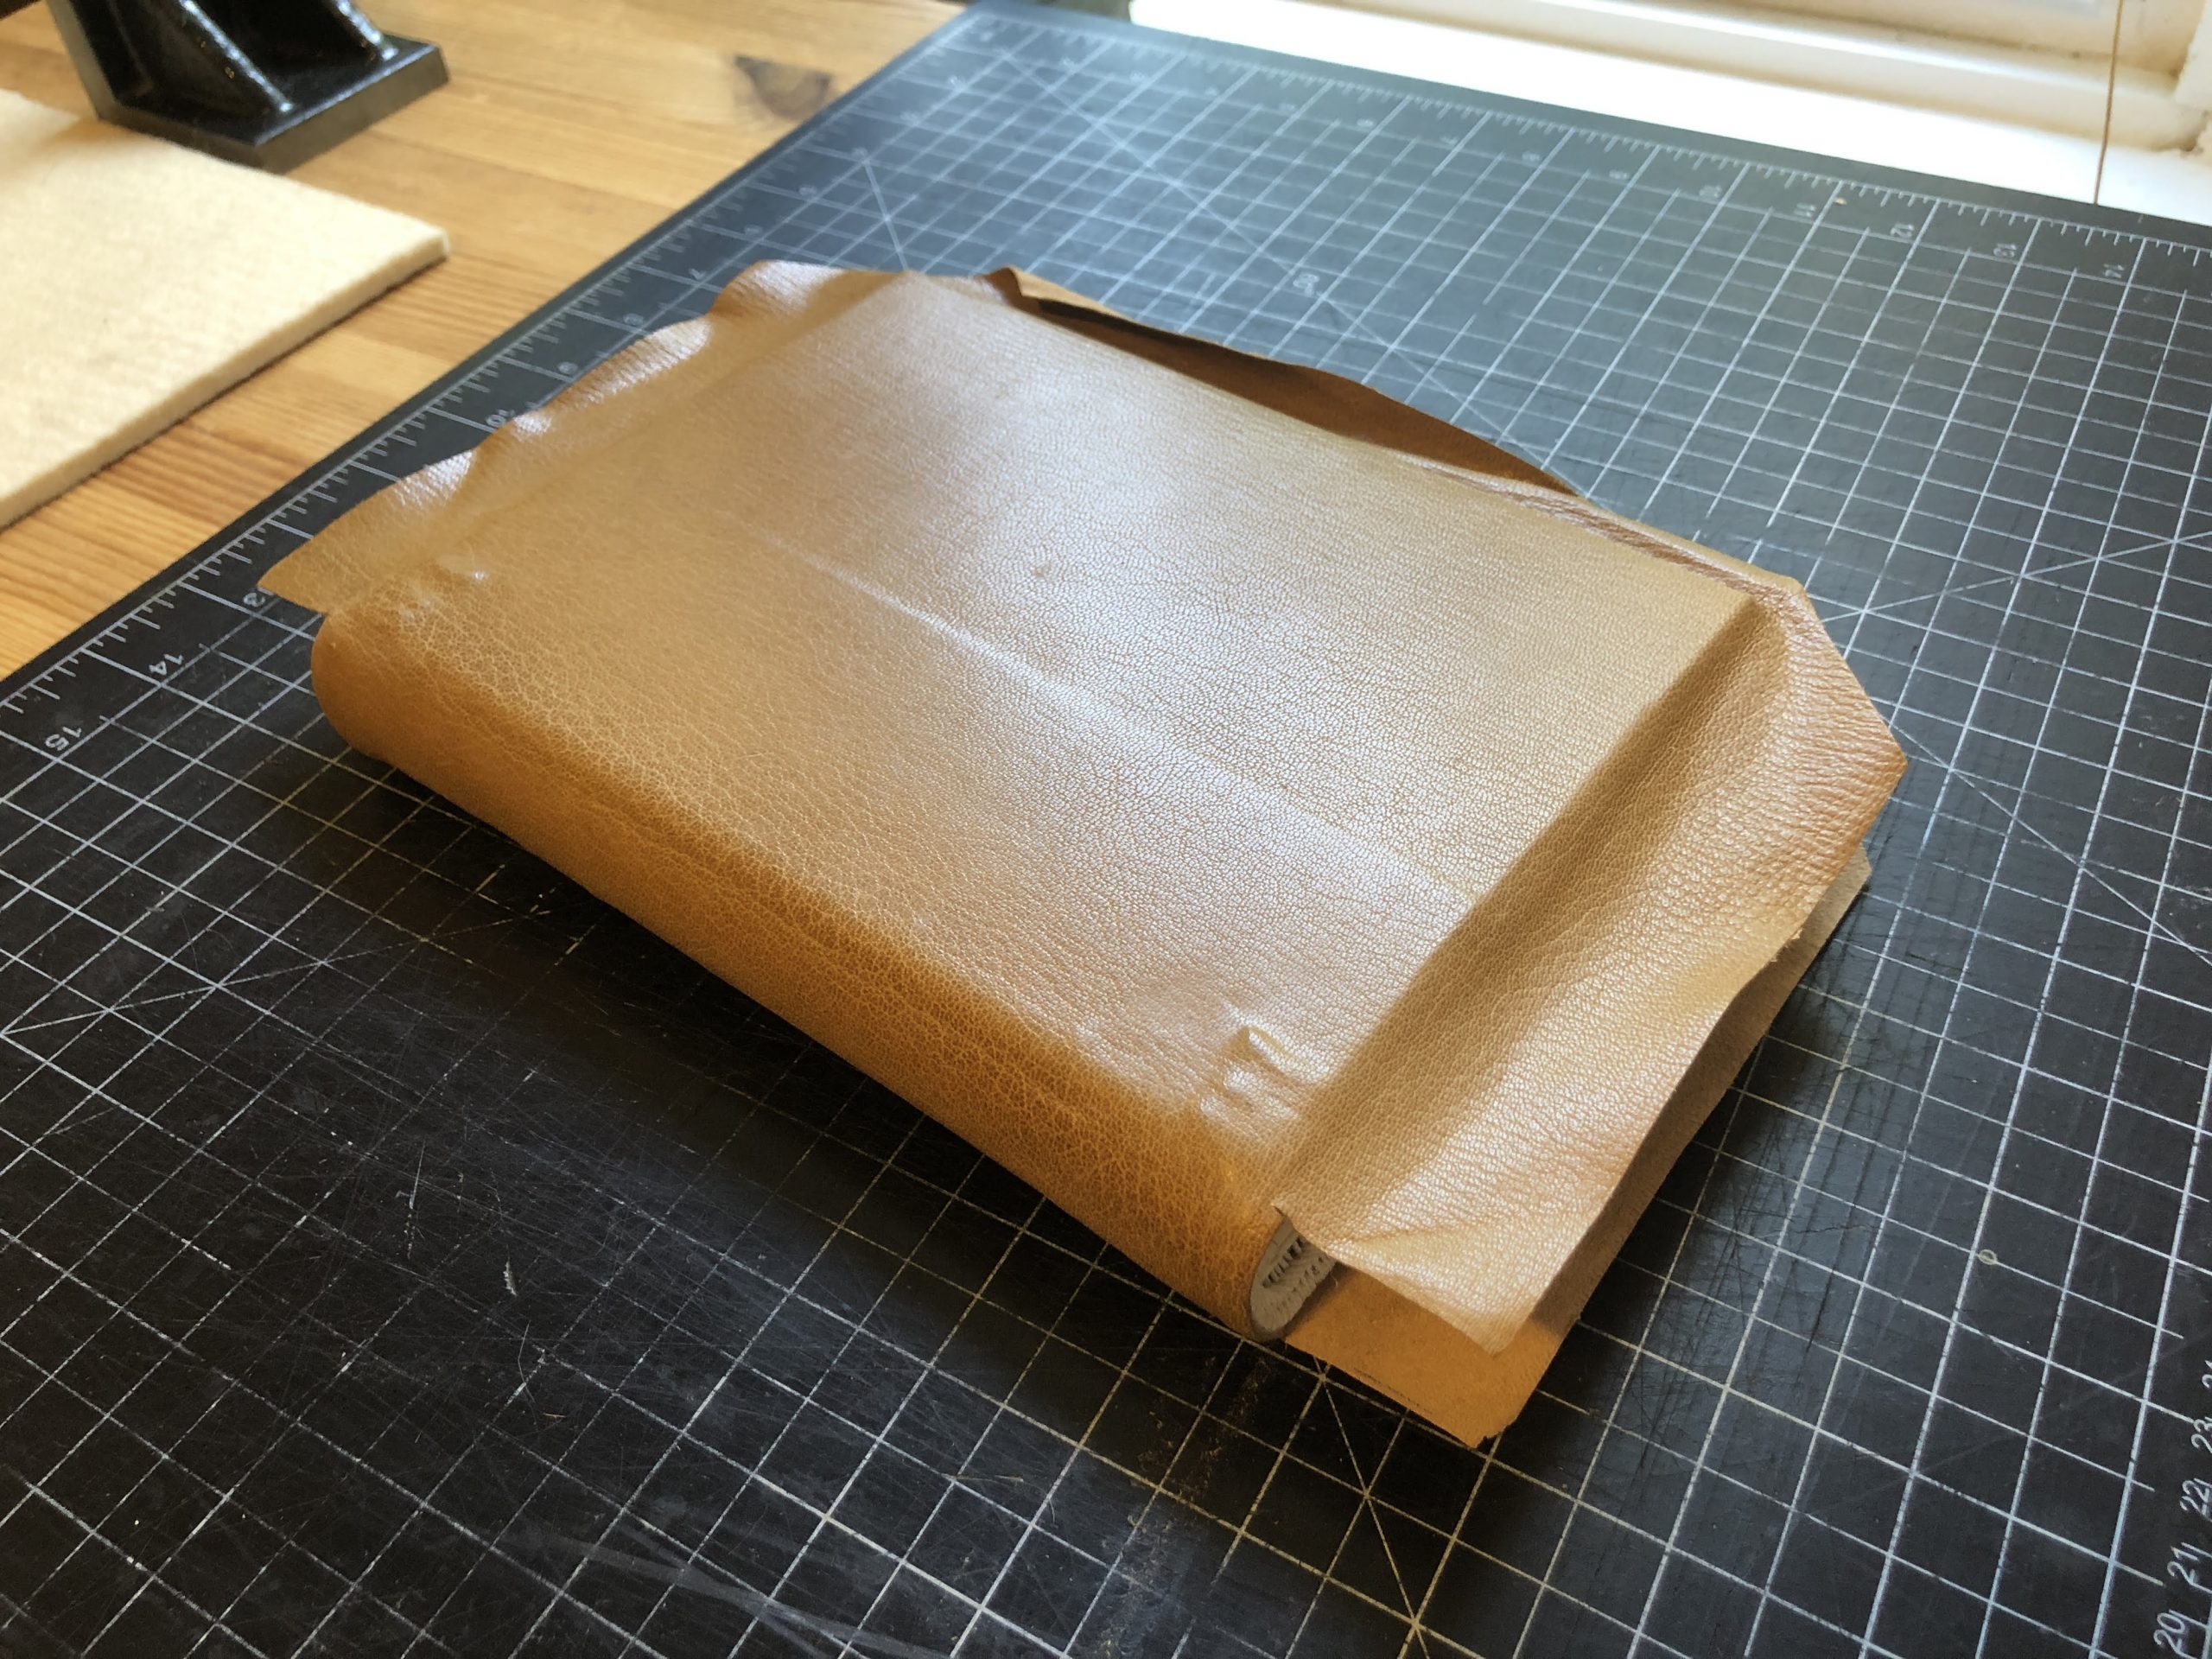
Every historical example of a Byzantine binding that I have seen so far is covered in a dark brown leather, although I’m sure there are is some variation. The closest that I had in my personal stockpile is a light brown goatskin from Harmatan. In an effort to make covering the channeled board edges a little easier, I flat pared the turn-in areas fairly thin using the Schärffix® leather paring machine I have at home (my spokeshave is at the lab). This method was very quick but I will approach it differently next time (more on that later). The leather was pasted out and adhered to the spine and boards. When the leather had dried, I cut the turn-ins at the spine edge of the boards and turned-in at the spine.
So far each of these steps has been pretty straightforward and familiar, but here is where things get a bit dicey. The instructions I had for forming the endcap area around the protruding endbands are pretty general and the digitized copies of historical bindings available online don’t show this part of the binding very well.

My decision to pare the turn-ins uniformly thin has given me some pretty wimpy-looking endcaps, but sometimes the best way to learn something new is to just try it and learn as you go.
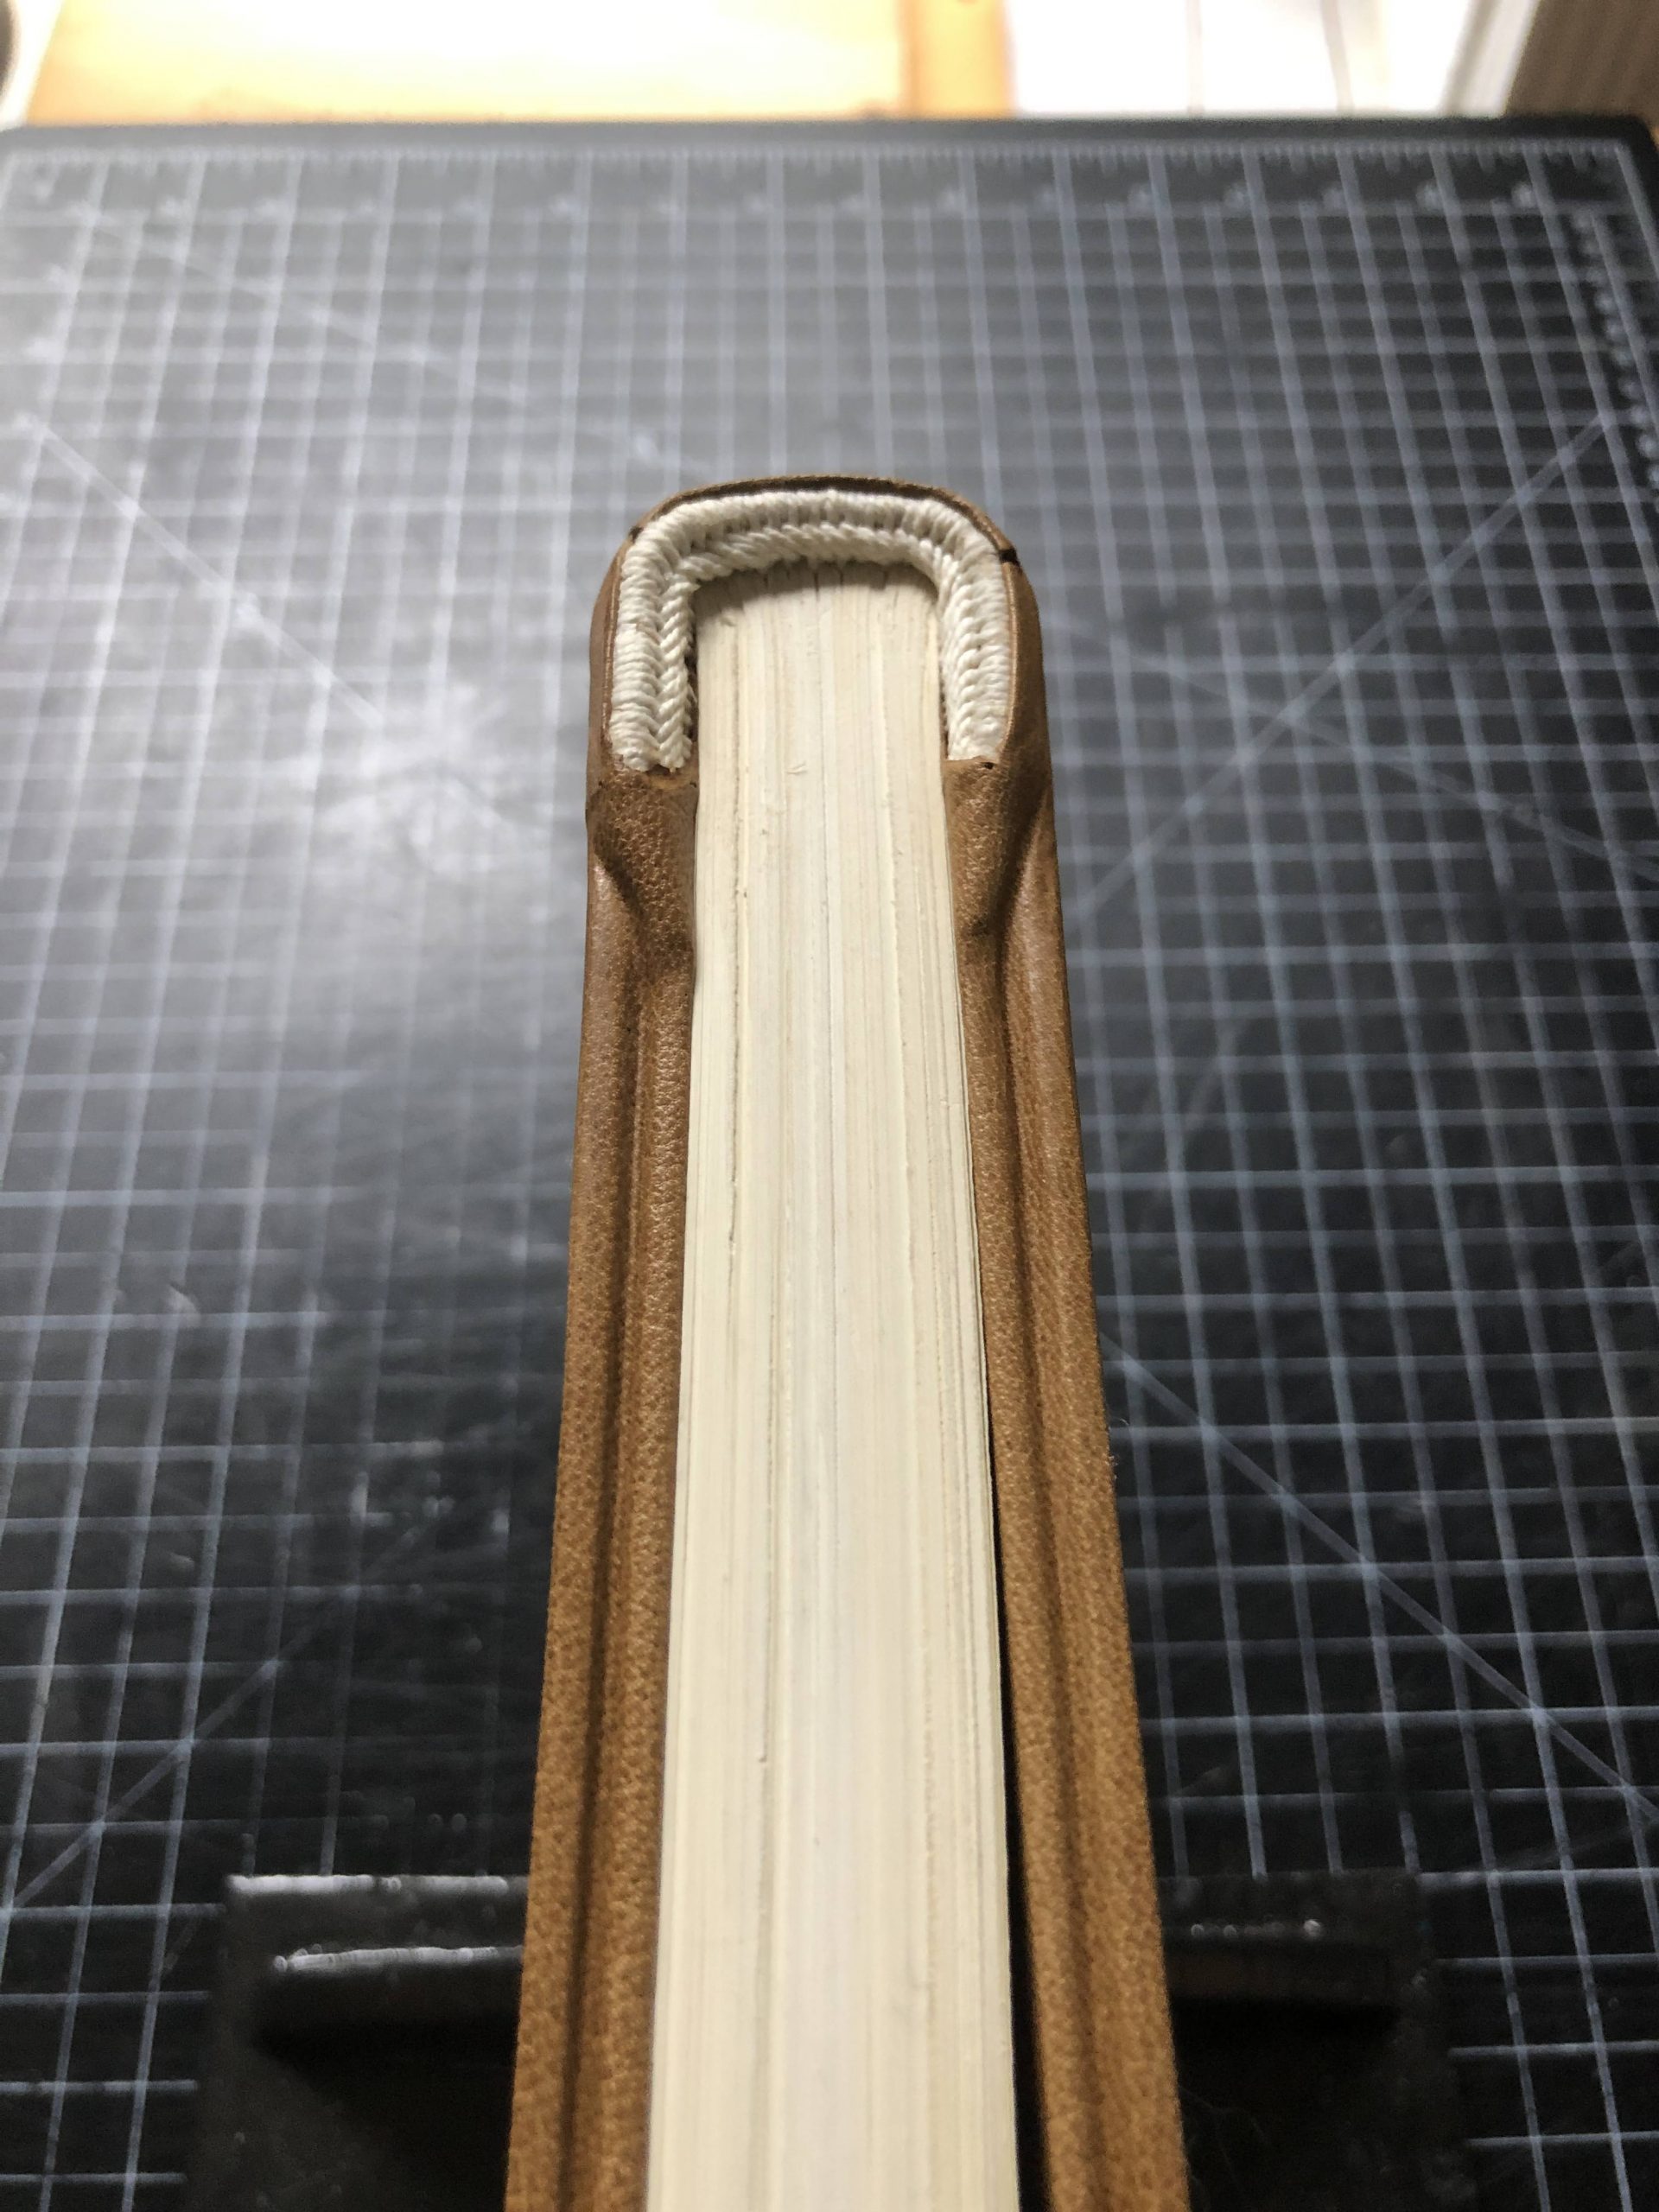
After the second endcap, I have a better idea of how the covering can be done – but I still need to work out the paring and cuts exactly. Looking at variations on original Byzantine bindings will also help. The thinner leather did make covering those channeled board edges very easy, though!
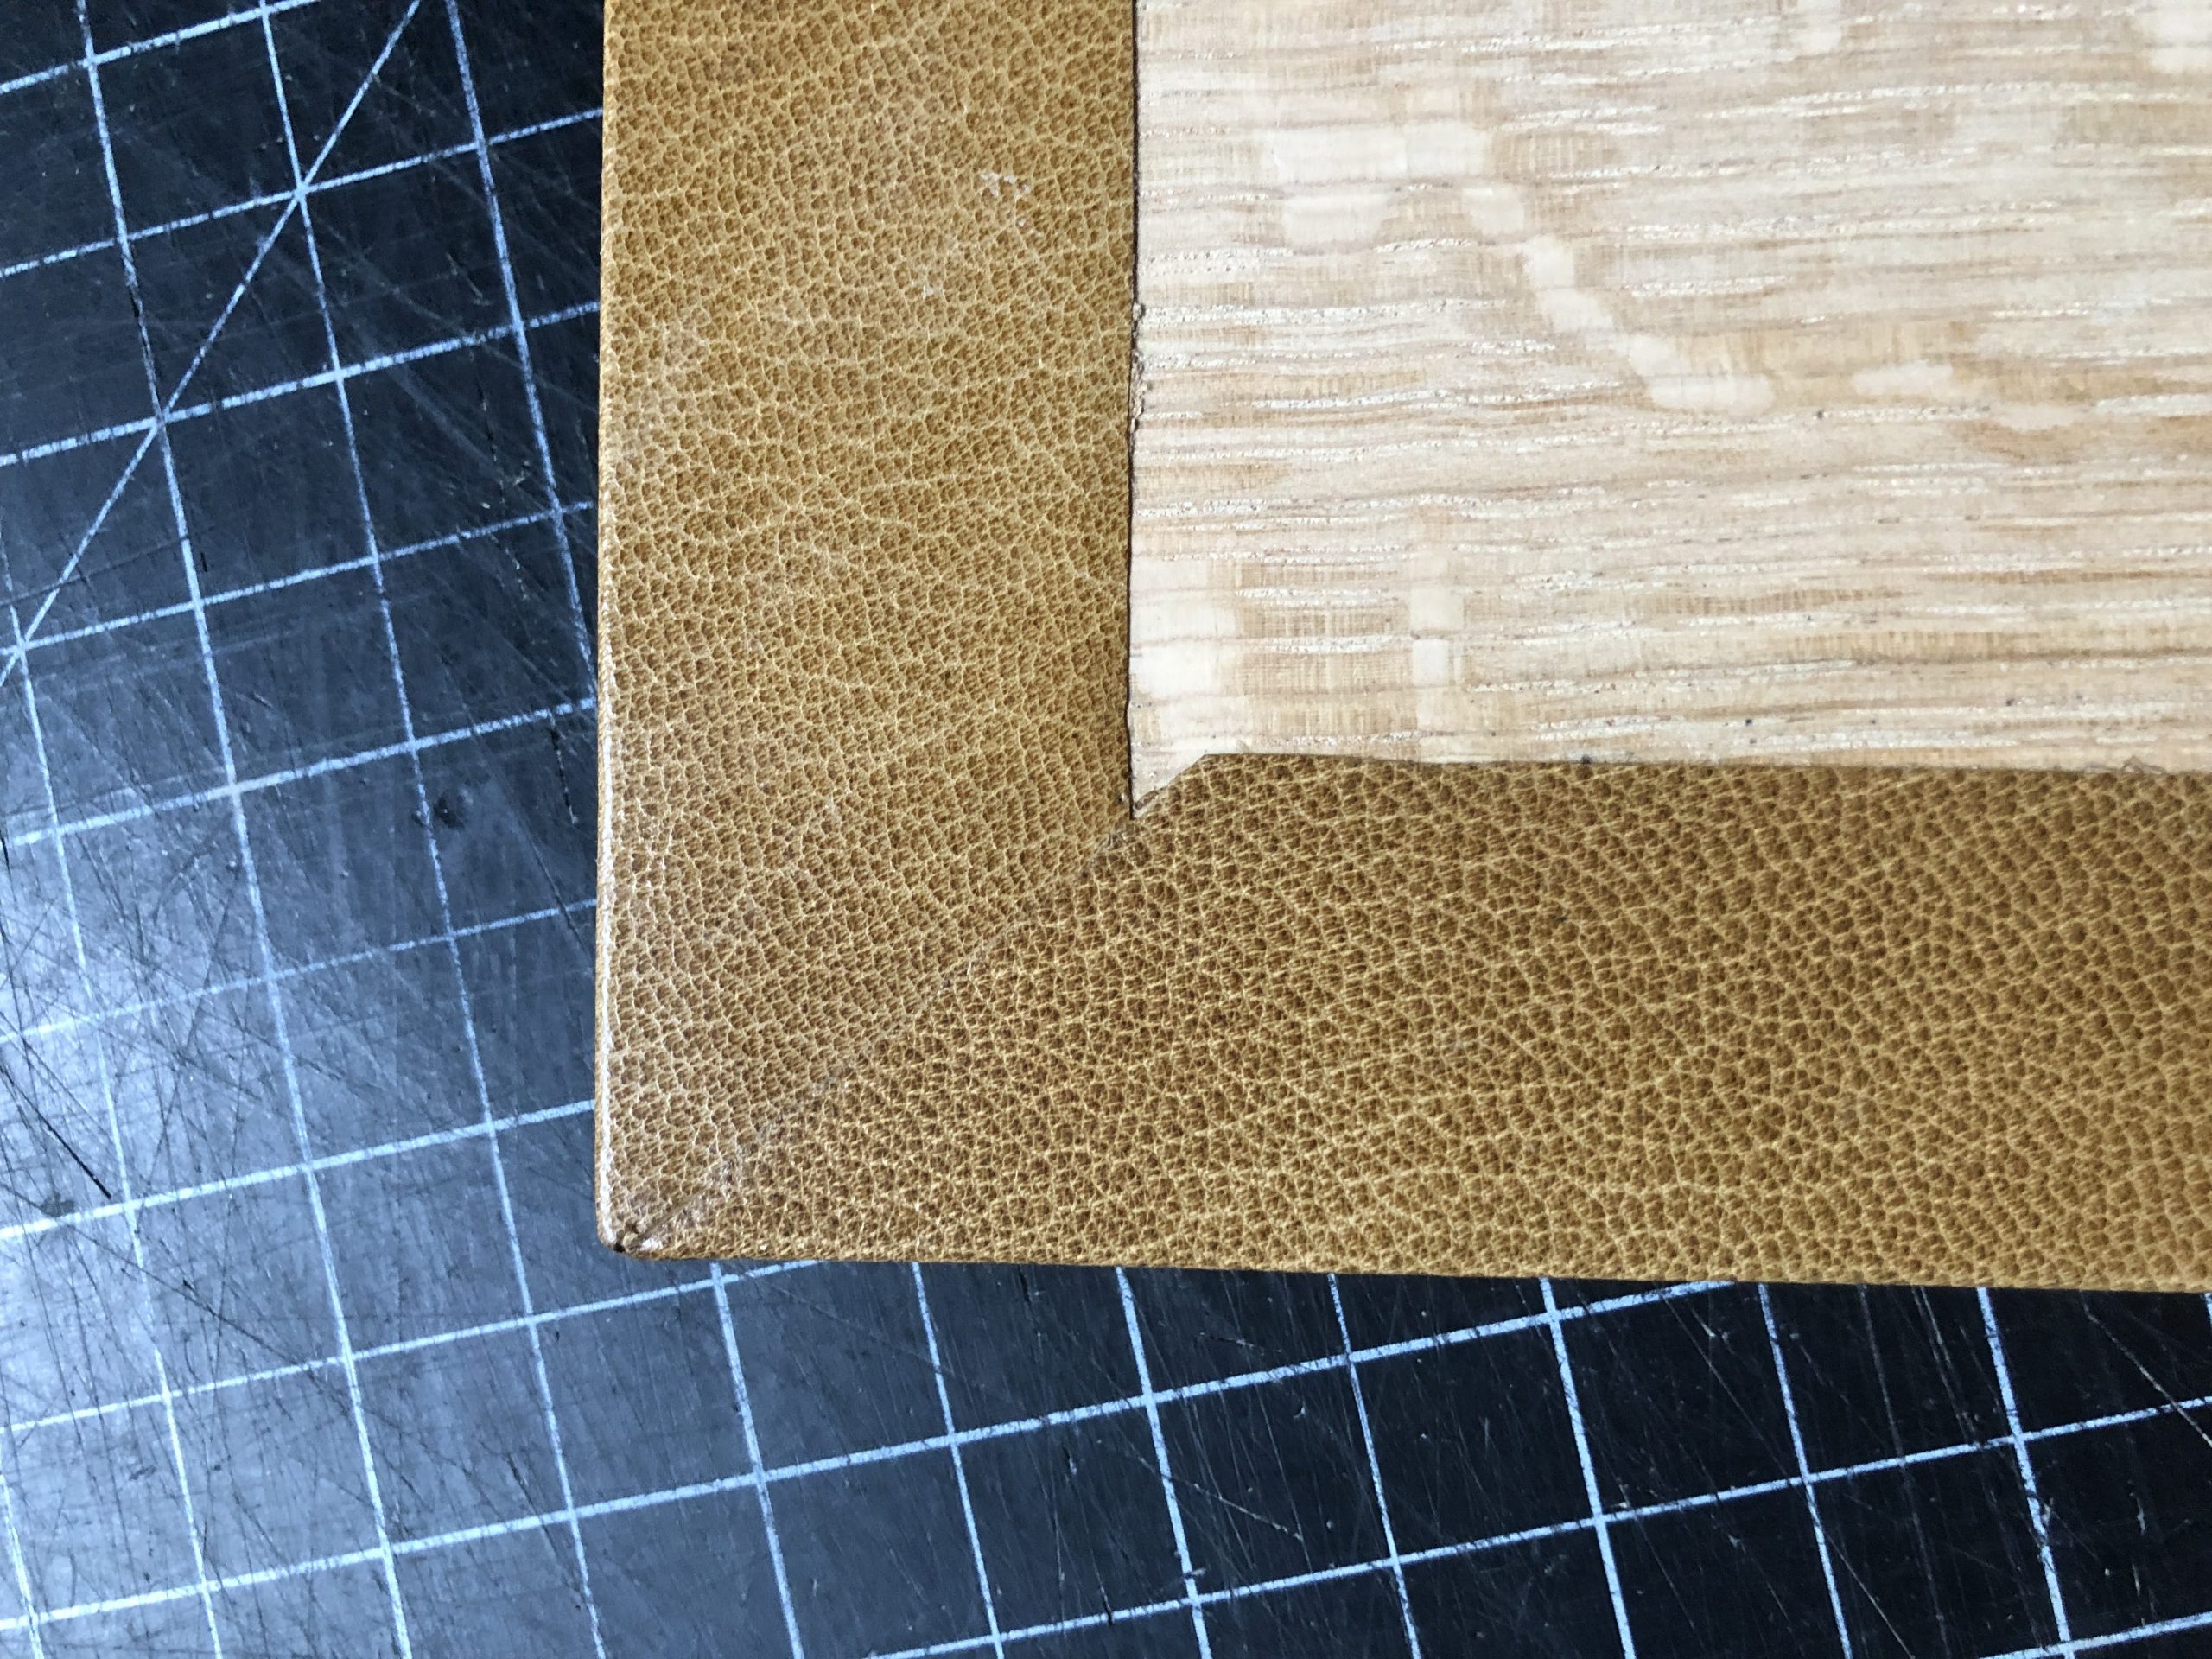
Covering the board corners was another area that could be handled in a number of ways. For simplicity sake, I decided to go with a straightforward mitered corner, as seen in the library’s Greek MS 60. I find the easiest way to make this corner is to cut through both layers of the overlapped turn-in with a knife, remove the excess leather, and line the turn-ins up again.
Now that the book is covered, I will be working on a fore-edge closure. I had pre-drilled the lower board prior to covering with 3 holes for a braided leather strap. A brass pin will be mounted into the fore-edge of the front board as a catch.

Model making is a useful exercise for learning how a binding is assembled and how the different components function together. By manipulating the model, you can sometimes get a sense of where a particular structure performs well and where it becomes stressed and may fail. This side project has provided a welcomed diversion over the last couple of weeks, providing a “low stakes” project that I can use to experiment and test my hand skills. While I do feel a bit rusty after a few months away from the bench, it feels good to get in a little practice. I’m already looking forward to making my next model, after the library has reopened and I’ve had an opportunity to compare some items from the collection.
Fabulous Work Henry! But wait: what do you mean ’rounds and backs itself’? I know you are referring to the lashing together of the two halves lending to the rounding, just wondered if there’s advice about the section sewing tension, etc. that might also be in play.
Thanks, Mary! Yes, you bring up an important point. I think the sewing tension plays an important role in forming the shoulder of the textblock. If there is a tight connection between the board and the first (or last) section, the backing naturally forms when the book is closed. And this seems to be the advantage of sewing the textblock in two halves: it’s easier to get even tension and form matching shoulders at the front and back of the textblock that way. It’s probably possible to achieve by sewing from one board, through the textblock, and into the other – but I think it would be tough to lace that second board on as tightly.