Category Archives: Tools and Equipment

Large Marge Rides Again

This spring has been pretty busy and keep forgetting to post an update on “Large Marge“, our new standing press. She had been in storage for a while before arriving here and needed a bit of TLC before we could start using her. We also needed some help from our colleagues in Facilities to create a modification for the base.

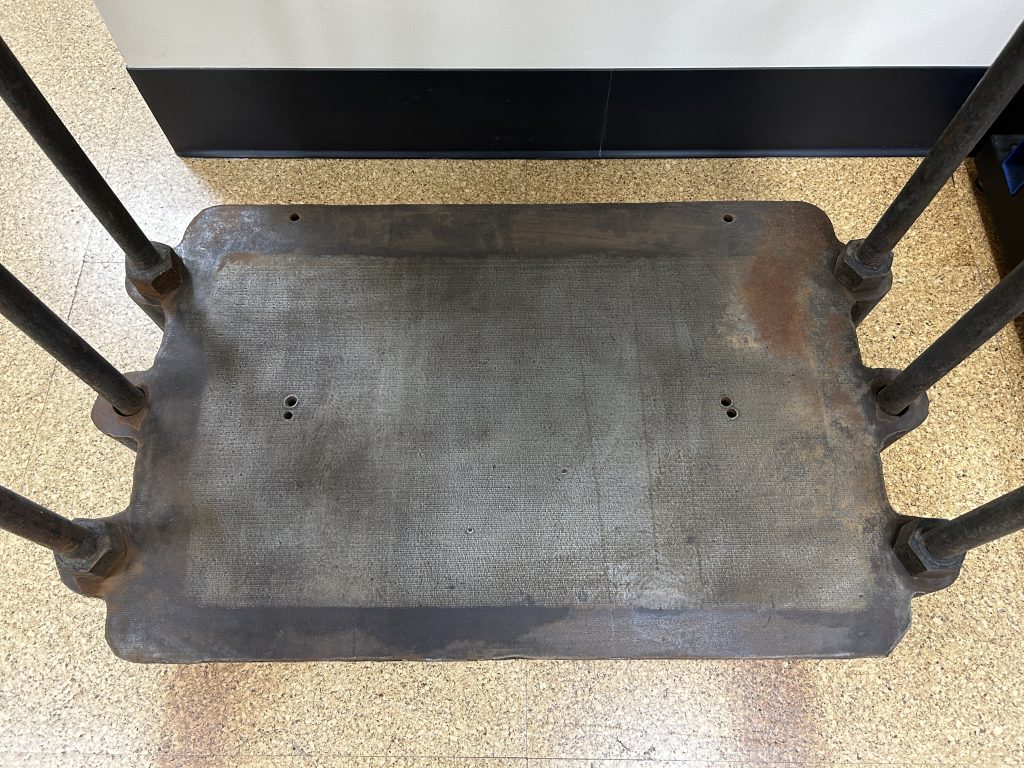
After vacuuming off the cobwebs and giving all the parts a quick brushing, I wanted to address the rust that had started accumulating on the base and support rods.

Bottom of press with some rust
Before
Bottom of press after cleaning and waxing
After

The rust was pretty superficial, so I was able to remove it with steel wool. I applied a thin layer of Bowling Alley Wax to all of the surfaces to prevent further oxidation.

Before and after of bottom of press showing rust removal
Before and after scrubbing and waxing.

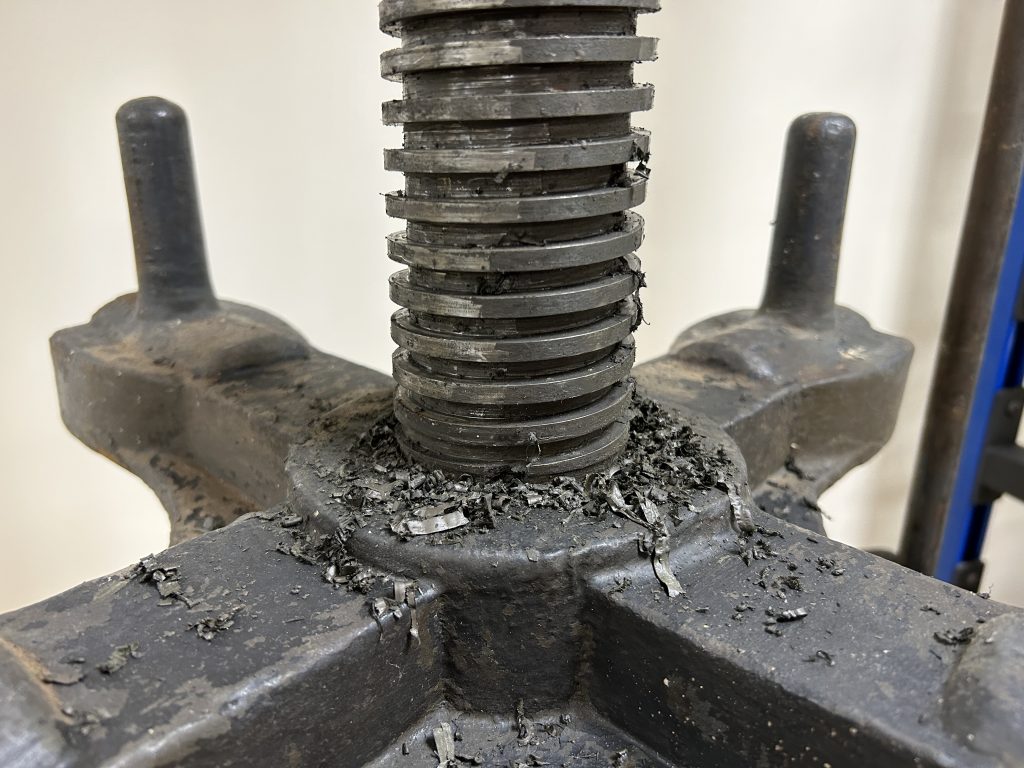
The next thing that needed addressing was lubricating the threads of the large screw. The grease inside the threaded flange was still functional, but all of the lubricant exposed to air had completely dried out. I found the easiest way to remove it was to scrape it off the threads with a micro-chisel.

The press screw showing dried lubricant being scraped off
Scraping off the old grease

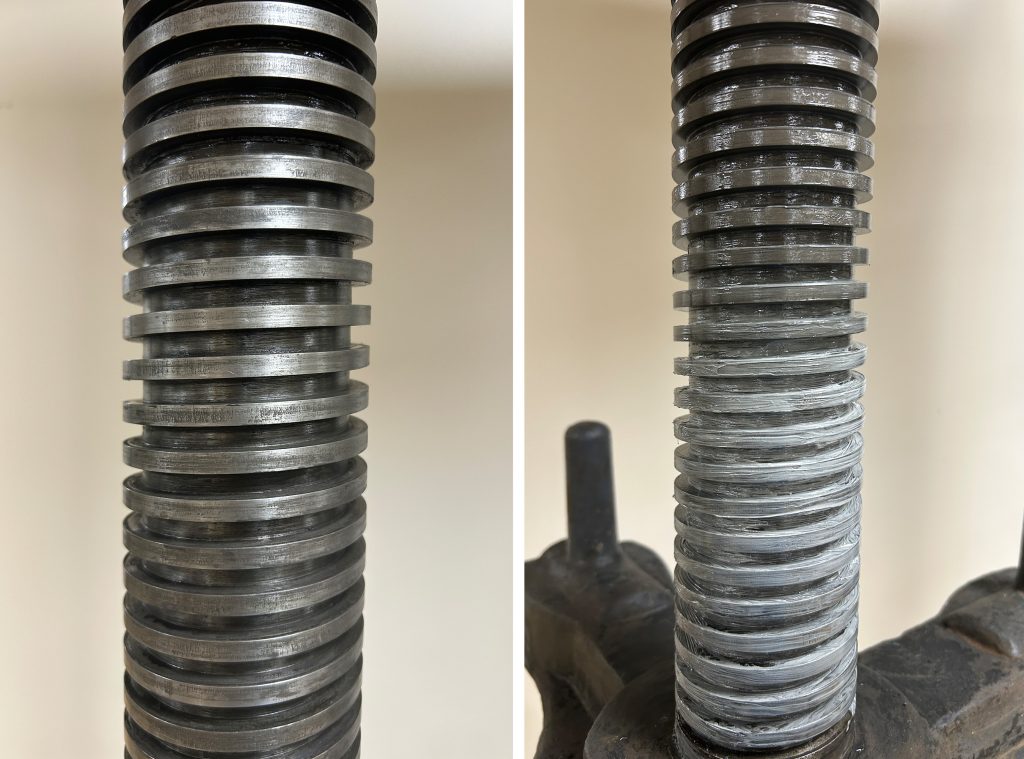
Once the screw was clean, I added some new lithium grease and then raised and lowered the platen a couple of times to spread it across the threads evenly.

side by side images of the press screw after cleaning and then with new lithium grease applied

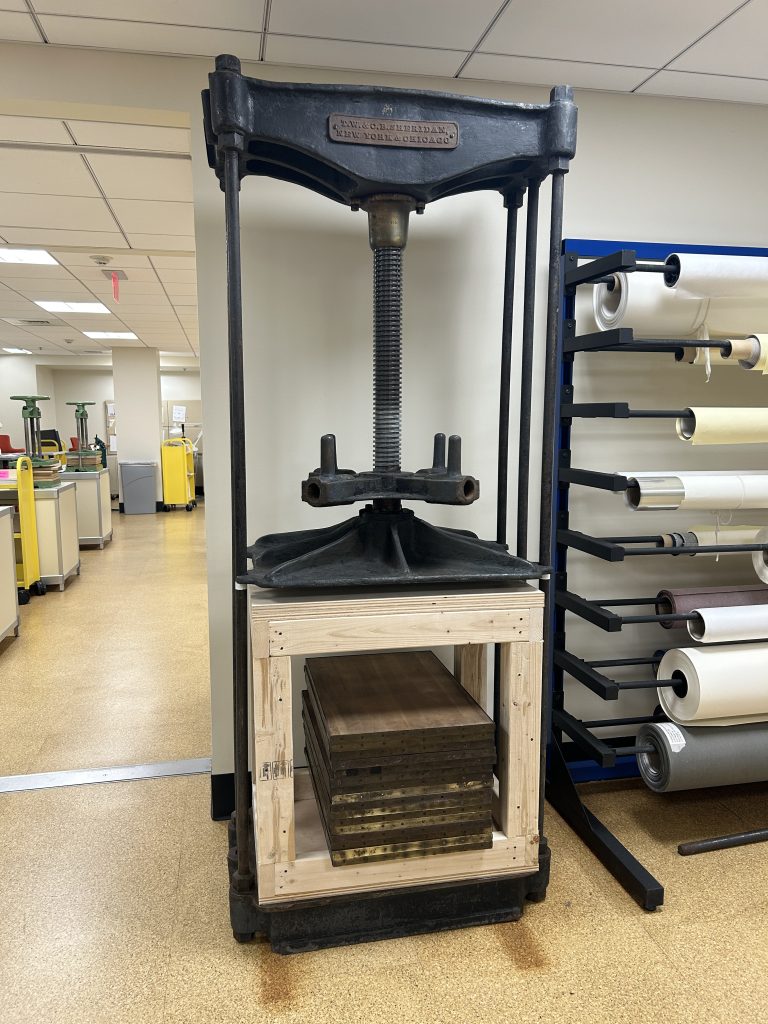
The most important addition to Marge was a modification to the base. These presses were designed for edition work with many books being stacked between pressboards and loaded in at once. This means that with the platen in its lowest position, there is still about 30″ of daylight between the base and platen. Since we are only pressing one item at a time, we needed to raise that bottom surface up.

full image of press with new wooden platform and stack of press boards. Thankfully one of the carpenters in Duke’s Facilities Management Department was able to build a box that fits exactly inside the gap. The box is reinforced to withstand the full strength of the press, even when someone is using the extended arm to tighten it. An added bonus is that all of the pressboards can be stored inside.

I’m looking forward to putting this press to use, particularly for building clamshell boxes for folio and double folio-sized books. Books of that size are often very heavy and difficult to move around, so they can benefit from the added protection of a cloth-covered enclosure.

A Tiny Press Calls for a Tiny Book

Over the past year, I’ve been working on an exhibit revolving around the work I do in Conservation Services and the Collection Services Division as a whole. As luck would have it, Beth has this wonderful miniature book press that fit perfectly into the display case I was in charge of designing.

But what is a book press without a book to press? With that in mind, I took this opportunity to make my first miniature book.

First, I made a tiny book block.

I left the paper longer than it needed to be so that I could weigh the pages down while I sewed it all together. Once that was done, I decided it would be nice to try and round the spine. This proved to be a bit difficult with the normal tools we use for rounding.

I felt I was more likely to just crush the entire spine with the hammer than actually round it. A Teflon folder made for a safer option for this tiny spine.

Next, I needed to trim the book block to a more appropriate size. I started to cut it with just a scalpel and a ruler, but as you can see that wasn’t really going well or looking particularly nice.

I decided instead to try to trim the book in a more traditional method. This meant placing the book block into a press and using a sharp, flat blade to cut across the pages evenly.

This was much more successful and I ended up with a nice and neat book block.

After that, I covered the spine with a Japanese tissue for strength. Then I added a textile spine lining as well as a paper lining for additional support.

Now I could make the covers, which ended up being the easiest part of this whole process.

The hardest part came next, which was casing the book block into the covers. Because the book is so tiny, it was difficult to make sure the book didn’t move out of place as I glued up the paper that would connect the book block to the covers.

I eventually managed to figure it out and put the book in a press to dry flat.

I have to say it looks a bit silly in the full-sized press.

But once it was dry, the book was done!

It certainly fits in much better with a press its own size.

You can check out this tiny press with its tiny book, along with the rest of the great displays my colleagues put together, in the exhibit The Library Uncovered: Behind the Scenes with Collection Services that is currently open to the public in the Jerry and Bruce Chappell Family Gallery in Perkins.

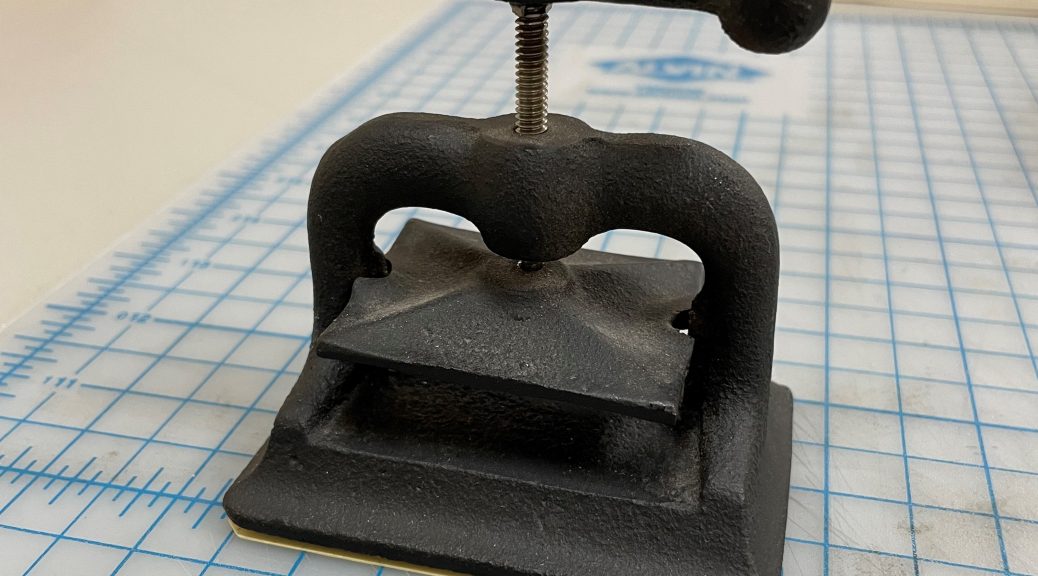
Quick Pic: New Press Day

Today we welcomed a new resident to the lab. Everyone, meet our new T. W. & C. B. Sheridan Co. standing press!

Pictured here absolutely dwarfing our W.O. Hickok press.

We will need to clean the new Sheridan up a little before we can put her to use, but in the meantime we’ve decided to call her  “Large Marge” in honor of the late Alice Nunn. Stay tuned for our forthcoming press glow-up!

Be sure and tell them. Large Marge sent you.


Making Delrin Tools

Regular readers of Preservation Underground know that we spend a lot of time thinking and talking about tools. The variety and sometimes repetitive nature of our work requires a great many of them and we regularly experiment with new designs or materials to find implements that are more effective or ergonomic. Tool collecting can also be a little addictive.

A bone folder was probably the first bookbinding tool I ever purchased and remains one of the most used items at my bench. I’ve acquired or made many folders over the years of different shapes, sizes, and materials (like Teflon, metal, or nylon) and was amused to read that Jony Ive included a bone folder in his list of top 12 tools. It’s also the only reasonably priced tool on that list.

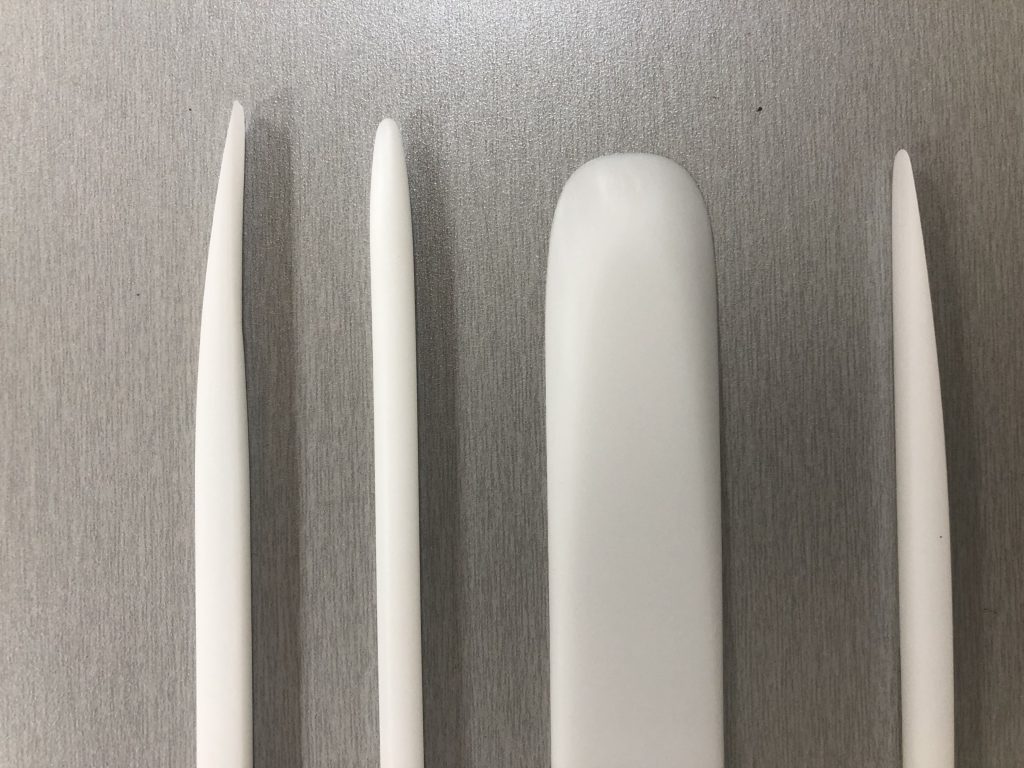
We have been using Delrin lifters in the lab for a few years now and Delrin folders have been growing in popularity in the bookbinding and conservation community, so I have been interested in making one. Luckily, during the pandemic, Rachel Penniman was able to attend a virtual workshop taught by Jeff Peachey on making Delrin and bamboo tools. We were able to set aside some time recently so that she could share what she learned in the workshop and we could all try making our own.

Delrin is a Dupont product that has a number of helpful properties for conservation work. It has a low coefficient of friction, but is stiffer than Teflon. It exhibits chemical and fatigue resistance and can also be very flexible when shaped to a thin tip. Peachey has written a great deal about the advantages of delrin folders and lifting tools.

The material can be purchased in a variety of sheets and bars, so there are many options for creating tools of different shapes. We started the day by looking at existing tools from our personal collections to discuss the features that we like or don’t like and how we might be able to make a better version from the Delrin stock.

Some of our starting tool blanks.

Delrin is easily shaped with cutting tools or abrasives and doesn’t come with the same health risks as shaping Teflon. A facemask and proper ventilation should still be deployed to avoid inhaling the dust.

Pictured above: box cutter, file, cabinet scraper, wooden bench hook, various grit sandpaper.

We were lucky to have good weather, so we set up an outside work space by the library loading dock. Views of the nearby Chapel were a bonus.

Shaping takes some time, so it was helpful to have clamps and wooden bench hooks on hand to support the work in progress.

Can we call this a Delrin “preform”?

After sawing, filing, scraping, and sanding for a few hours, we had produced a number of new tools. The nice thing about this material is that if you don’t like the shape you have produced, you can always shave it down some more or cut off the end and start again.

Now that I’ve gotten a feel for working with Delrin, I’m looking forward to experimenting with some larger, more rigid tools.

Our New Golden Devil

We had the opportunity to order some additional brass type for our Kwikprint hot foil stamping machine recently, thanks in huge part to donors to our Adopt-a-Book program.  The additional sizes of type will give us more options when we need to make labels for new bindings, rebacked spines, or enclosures.

Along with the type, we were also able to get a small custom die of the reading devil who adorns the roof of the von der Heyden Pavilion – and it looks pretty amazing.

Reading devil, stamped in gold. Now that it’s in the machine and heated up, I will be spending the next hour looking around the lab for anything that I can stamp. The back of my Moleskine notebook was the first thing to go.

moleskin notebook stamped with reading devil

Now no one’s office supplies are safe! What should we stamp next?

Keeping It Together

Keeping it together can be a real challenge these days. There are many effective strategies for maintaining one’s mental health, but unfortunately this blog post isn’t about any of that. This blog is about library and archives materials. So I’m here to share a simple system for keeping it together when you are working on a textblock in need of some major intervention.

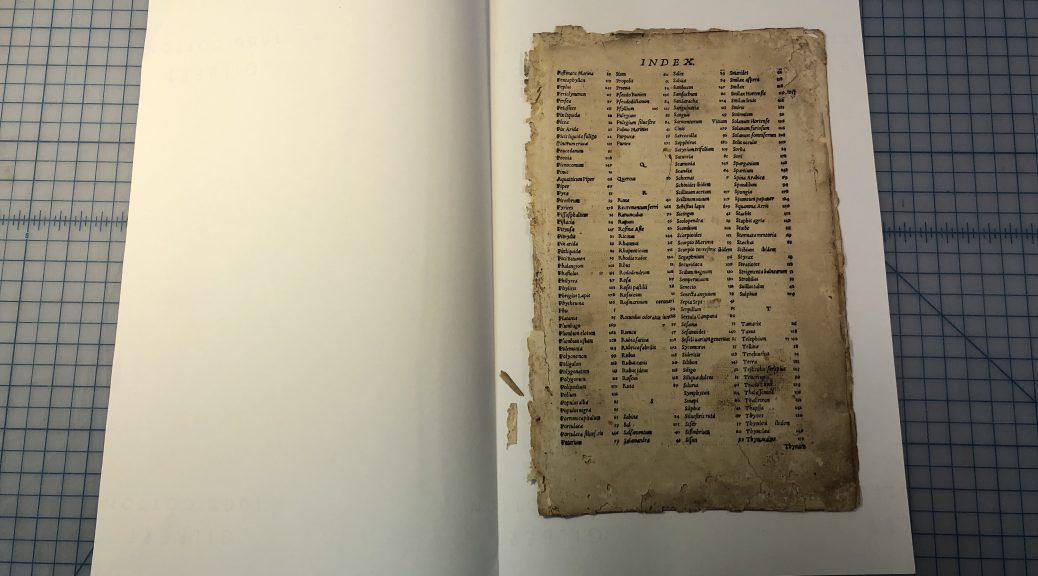
For the past several months, I’ve been working on (and writing about) a 16th century German book which has a number of problems. The textblock was already in pieces, but then it had to be taken apart completely for treatment. I was worried about keeping all the little bits organized, so that nothing would be lost or put in the wrong order as it underwent this long and multi-stage process.

As part of the pre-treatment documentation process, I collated the book using a digital copy of the same edition hosted by the Bavarian State Library. Early books are not paginated in the same way as modern ones, so you have to look for other clues to maintain the correct order. To help, I numbered each leaf in pencil before disbinding. The textblock is organized into sections of three folios. Some of the folds are intact with a little damage, but many of them have split entirely, leaving individual leaves. Each separated section was placed into a numbered paper folder, including any separated little bits of paper from that section.

Throughout the treatment, I have been trying to work on one section at a time to keep all the parts in easily manageable groups. This was true for washing, resizing, and mending.

Since all of the sections are composed of three folios, I started making marks on the outside of the paper folder to keep track of what I had finished in each packet. For example, in the mending and guarding stage it is best to work from the inside of the section to the outside. It can be a rather drawn out process of adding mends, then leaving them to dry under weight. I would cross out the number 3 as I finished the most interior folio, proceeding through the entire textblock before starting on the middle folios. Over the course of a couple of weeks doing this, it was very easy to just look through the stack of folders and see where to continue.


The first two sections have the most losses, so I’m still finishing some of the stabilization/infills on those – but overall the textblock is looking much improved!

(still in process, but you can compare to the “before” photo to see the progress)

There are probably many strategies for keeping the different parts of your treatments organized, but I have found this low-tech one to be very straightforward and helpful for books at least. What strategies/tools do you use?

MacGyver-ing the Big Books

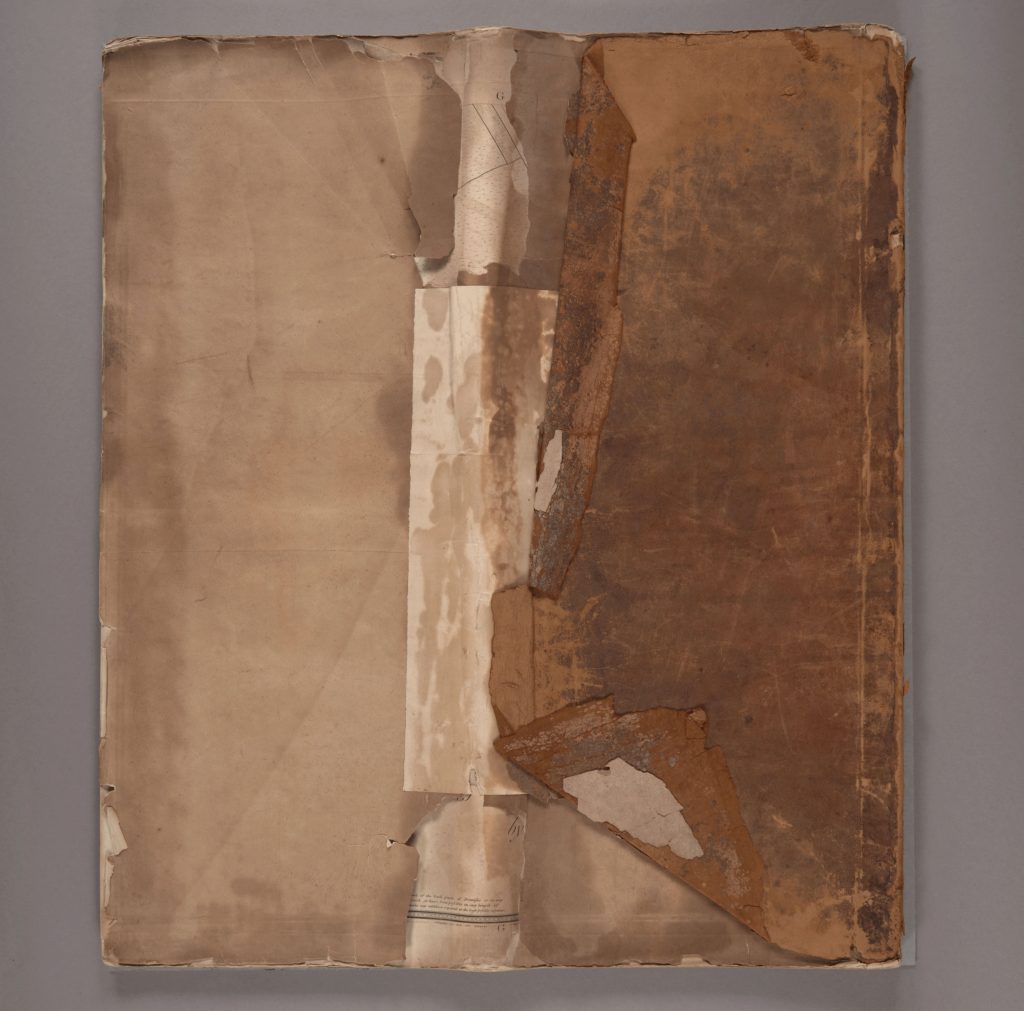
Oversized books come with a lot of handling and treatment challenges. Just moving and opening them can be physically demanding and former owners may not have had a good place for storage. This atlas of London street maps from 1799 measures approximately 26″x22″. Prior to acquisition, it had been rebound in a modern limp leather binding and, in attempt to make it easier to transport or store, had been folded vertically in half. The leather became very chemically degraded and the outward-facing rear cover was torn off.

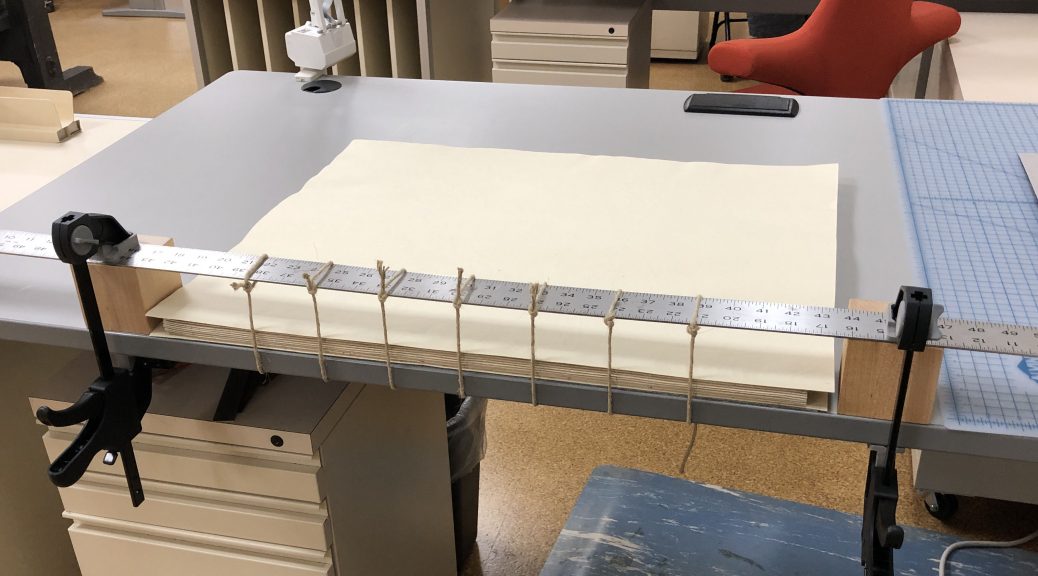
I’ve spent the last several months piecing the broken, brittle maps back together and now it is ready for some new covers. We’ve written on Preservation Underground before about boxing some of the biggest bindings in the collection and treatment of double folios. As in those cases, a lot of the specialized equipment we have in the lab is too small for books of this size. At times like these, you just have to put on the appropriate theme song, channel Richard Dean Anderson, and gather up all the clamps in the lab.

Resewing a book on raised cords requires that some tension be put on the sewing supports. We typically employ a sewing frame to hold them in the correct position during this process, but even the large wooden one we have in the lab is a bit too short. Luckily we have a very long, rigid metal ruler and uniform wooden press blocks to take its place.

I will be constructing a new binding with rigid boards for this atlas similar to another copy in the collection, and that requires some rounding and backing of the textblock spine. This process is traditionally done with a flat-faced hammer, in a lying press or job backer. The textblock spine is actually composed of compensating guard strips of flexible paper, to which the maps have been mounted. This allows me to reshape the atlas textblock safely. These guards also made the sewing process much easier, as I could just sew through them instead of a full-sized folio.

Our job backer is, again, about 4″ too short for this book to fit inside – so I attempted to recreate one with press boards and deep-throated C-clamps.

It had to be clamped to the table to allow me to tap with a wooden block between the raised bands and shape the spine. I had to adjust the center clamp as I moved from head to tail, then flip the entire contraption to get each side.

It ended up being fairly effective. With some temporary working boards laced on, you can see the gentle round and small textblock shoulder that is formed.

The atlas will get endbands and a strong linen spine lining before the final board attachment. The laced on, rigid boards will provide the protection and strength that such a large book requires. Although I’m sure those clamps will be needed again before it is finished.

My New Favorite Tool

By Rachel Penniman, Conservation Specialist

This tip is shamelessly stolen from a blog post by Satomi Sasaki Verhagen on The Book & Paper Gathering and I cannot thank them enough for writing about this wonderful tool.

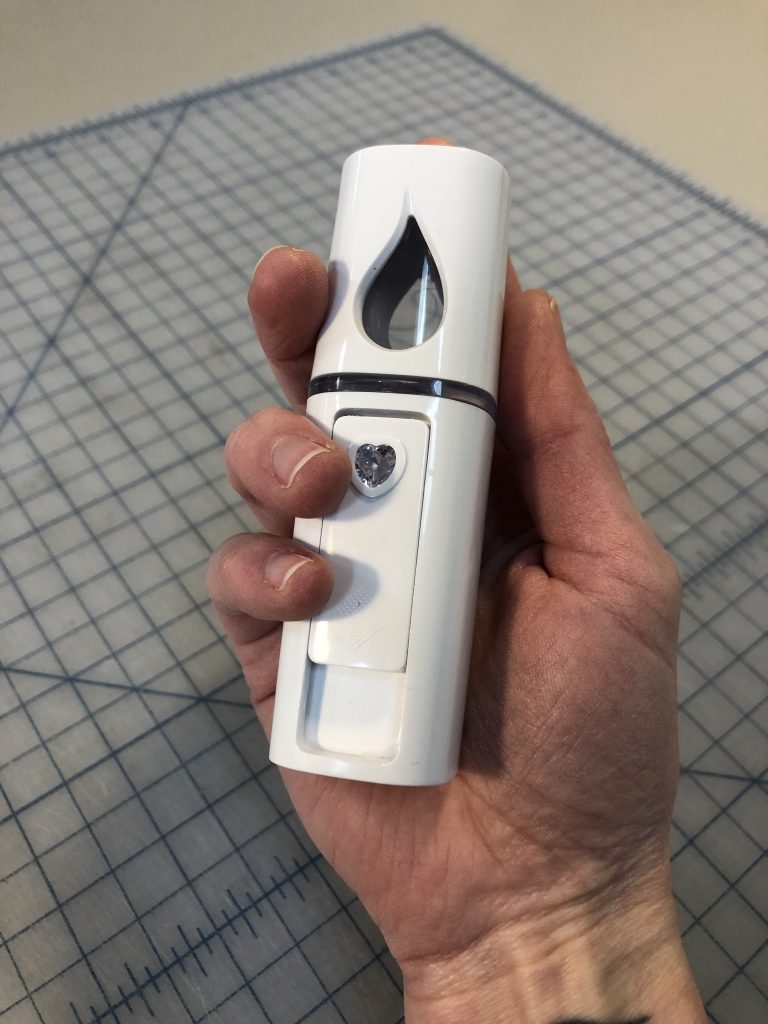
It’s a mini, handheld humidifier that creates a very fine mist (click here for a short video) perfect for localized humidification. It looked so useful in their blog post I ordered one right away and had fun playing around with it when it arrived.

Now over a year later I’ve finally had a chance to use it on a treatment project. I blame working from home for not finding a use for it earlier.

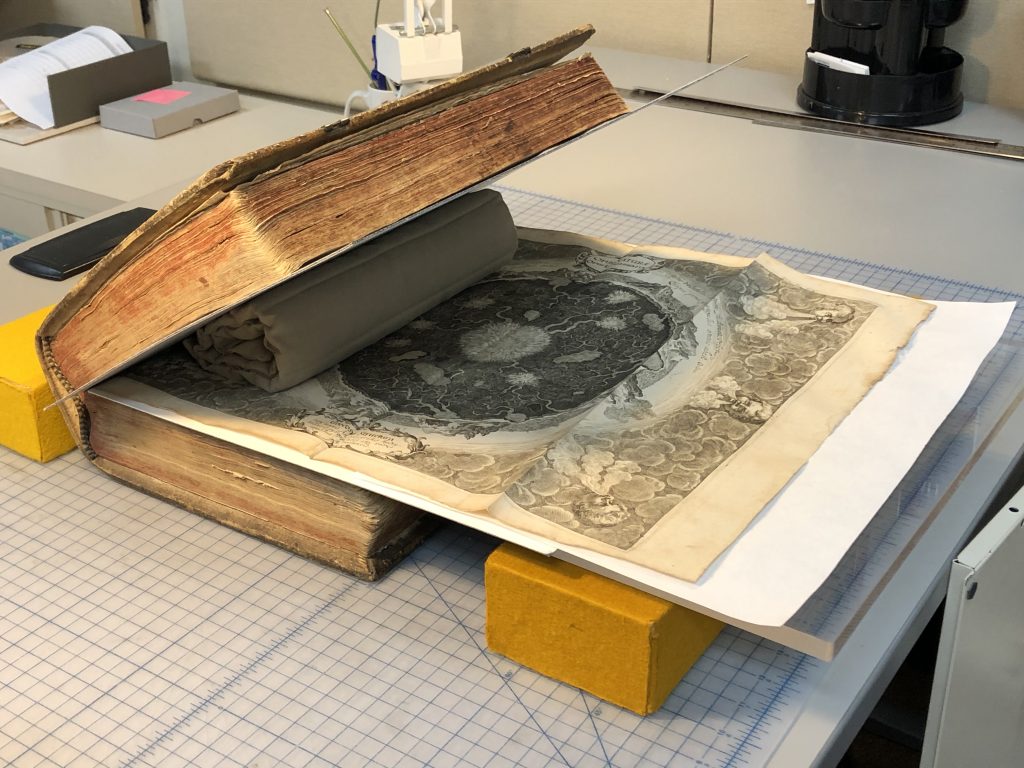
We recently got a large vellum binding with many creased and torn fold outs that needed flattening and mending. The binding was stiff and allowed for only a very small opening angle. Mini-humidifier to the rescue. I was able to very lightly humidify just the localized areas of creasing to flatten and realign them before mending. It worked beautifully. Because the little humidifier doesn’t create a very large spray of mist it was easy to direct and keep only in the areas I wanted. Also, it creates such a small amount of moisture that it worked very slowly so it was easy to control how humid each area got.

It wasn’t perfect though. If left running it could build up condensation around the nozzle especially when held at an angle. I found I had to hold a paper towel around the base to prevent any of these drops of condensation from falling on the page I was humidifying. Regularly turning the humidifier off and blotting drops of water off from around the nozzle helped manage condensation build up. The battery didn’t last very long but it is rechargeable and charged very quickly while I was at lunch.

Overall I was so happy with how this tool works and will definitely be using it again.

Graining Our New Litho Stone

When paring leather for book bindings or book repair, it is essential to have a flat, smooth surface on which to work. The parts of the leather that will be turned-in, particularly around the endcaps of the book, must be made very thin and often with a long, gradual bevel. Uneven paring will visibly show after being adhered, so it takes some care and practice to get it right. Paring on the right surface allows you to feel any variation in the leather with your fingertips and take off more material as needed. You also need to work on a material that is hard enough to not be cut up by the paring knife. Many materials (such as glass, marble, or granite) are used for this work surface, but one of the more common is lithographic limestone. Limestone won’t dull a blade as quickly as other stones. It also absorbs water, so I like using it as a work surface for the whole process of covering in leather.

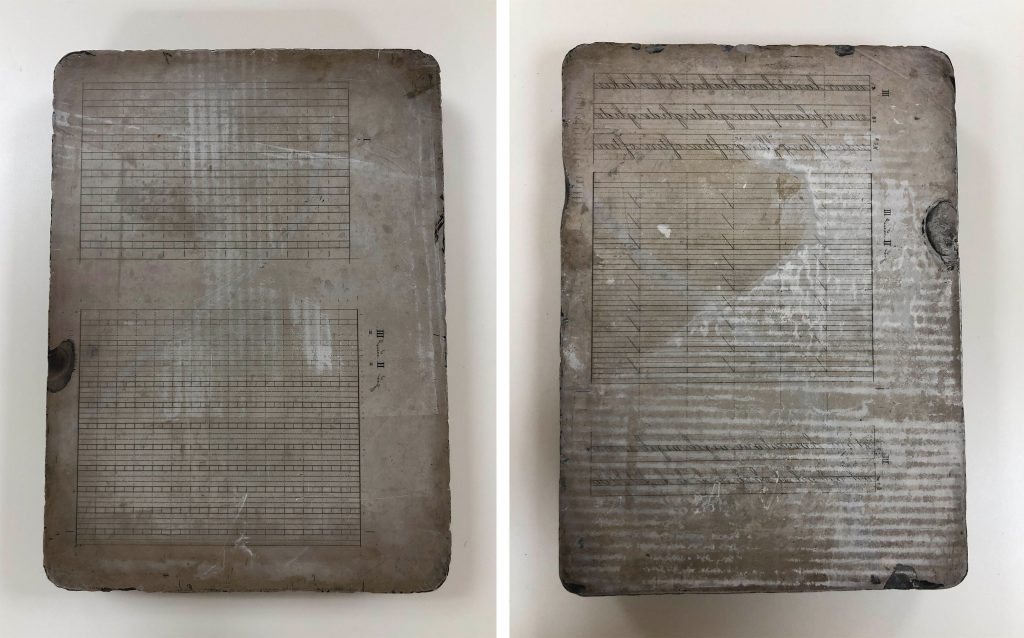
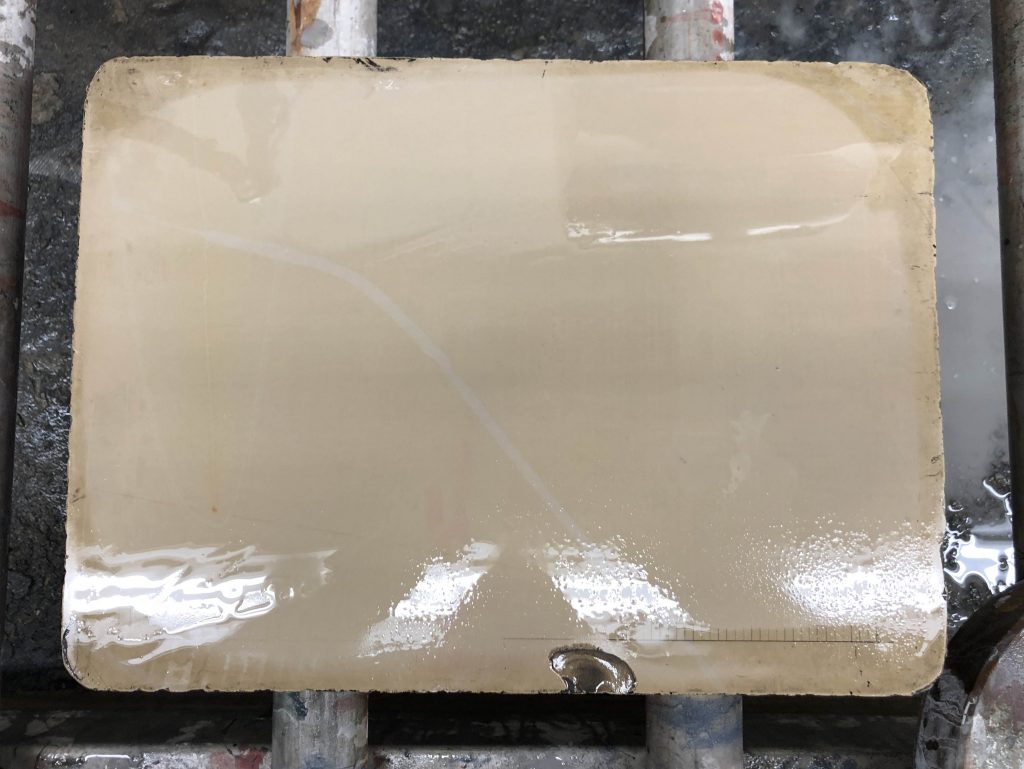
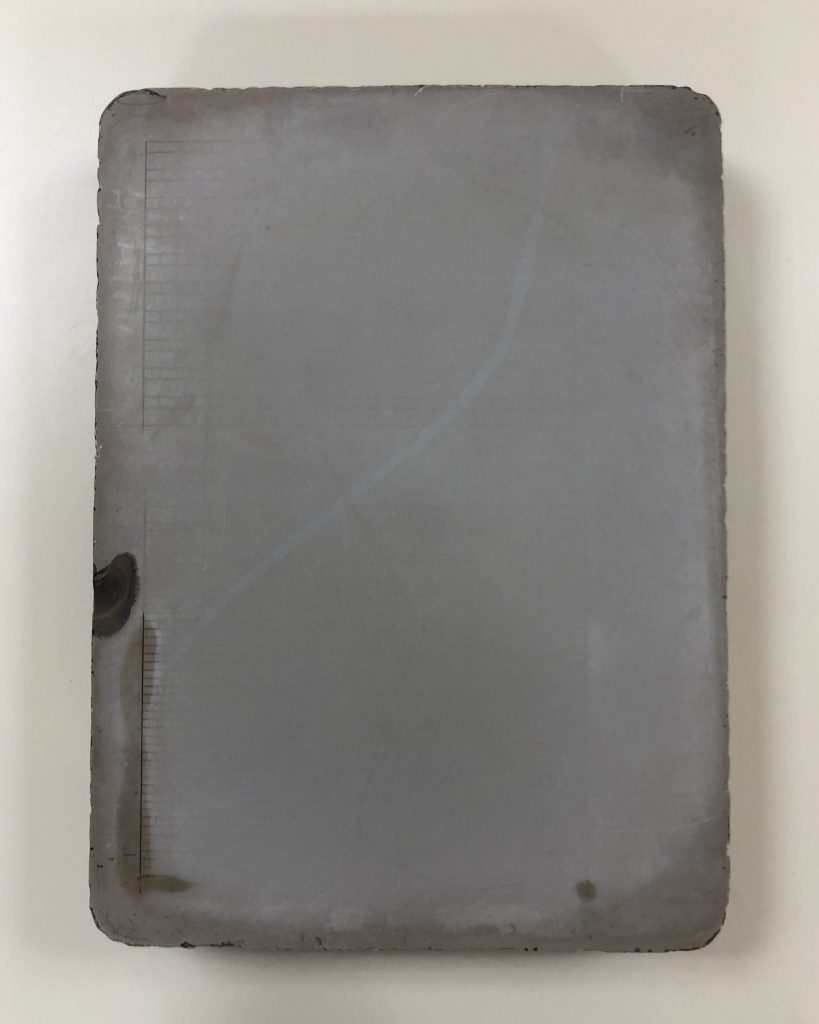
Our new stone. We’ll call the image on the left the “Top” of stone and the image on the right the “Bottom”.

The lab recently acquired this small lithography stone, which was used as a printing plate for what appears to be a worksheet for practicing handwriting. The printing image on the “bottom” of the stone includes examples of short words with ascenders and descenders: land, lakes, plan, glide, plan, fling, often, etc.

The stone was pretty flat, but had a number of scrapes and scratches that could mask problems with paring work. I wanted to remove those before we began using it. Luckily there is a standard method and a lot of resources available to help me do that.

When a stone plate has been printed for the last time, it must be refinished (or “grained”) to remove the old image and prepare the surface for a new drawing. I consulted The Tamarind Book of Lithography to see what we would need to do to prepare the stone. This is a great resource that includes a lot diagrams and step-by-step instructions. Luckily Duke’s Department of Art, Art History & Visual Studies had the equipment to grain a stone and they allowed me to bring the stone over to the studio.

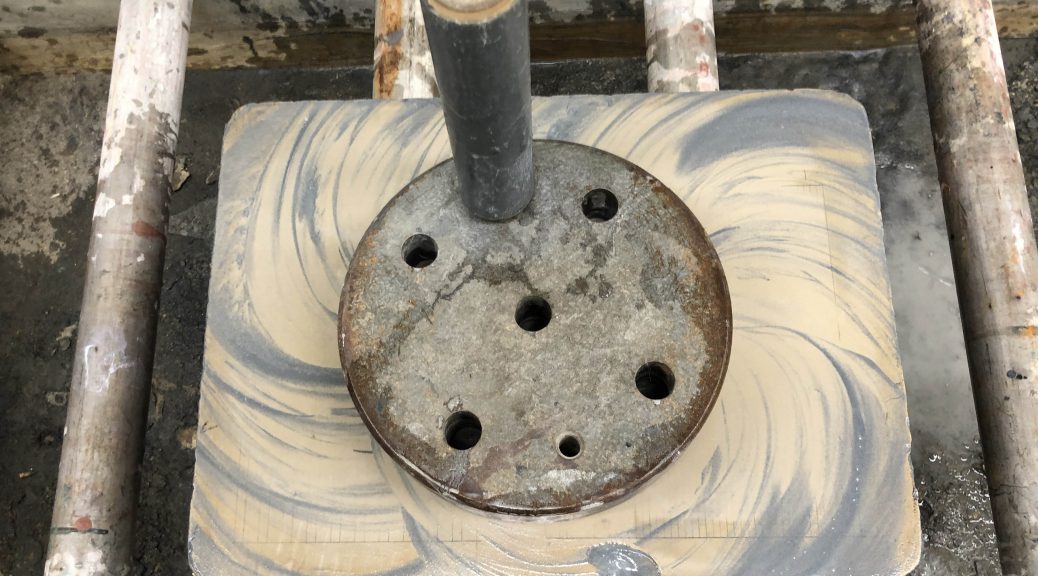
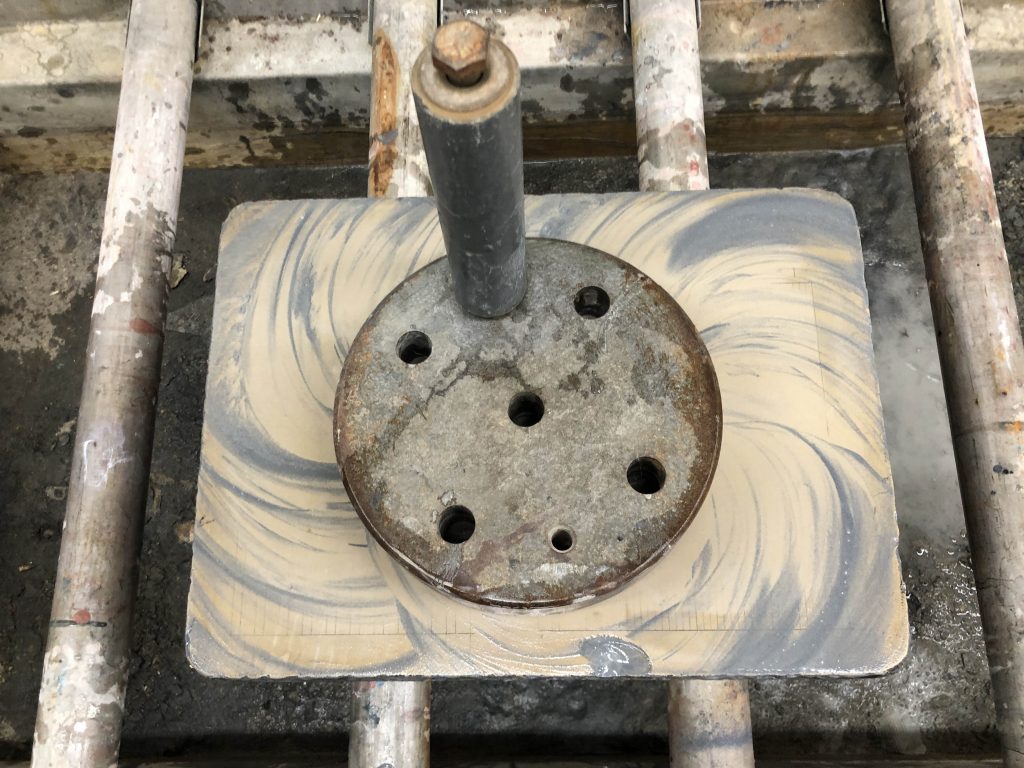
The process was fairly simple and kind of fun to do. With the stone sitting on top of the graining sink, I poured a little water over the top of the stone to act as a lubricant and then added some course carborundum grit (silicon carbide) for the abrasive.

A heavy piece of round steel with a handle, called a levigator, is then used to spin over the stone surface to start grinding it down.

I tried taking a video of the process, but it was a little hard for me to hold the camera steady while using the levigator. You can get a much better overhead view in this video from California State University Stanislaus:

The spinning continued until I had worked up a fairly thick stone sludge.

The stone is washed clean and the process is repeated until enough of the surface has been removed. 

Printers will continue graining with increasingly fine grits to get a very fine surface for drawing – but that didn’t seem necessary for our purposes. I believe the outside edges of the stone surface are also filed by the printer to keep them from showing up as an artifact in the print, so the patina and ghost of the original print are still visible around the outside of our stone. I decided to stop at this point because some of the edges were starting to get sharp. We’ve got a sizable chip on one side that needs to be avoided anyway.

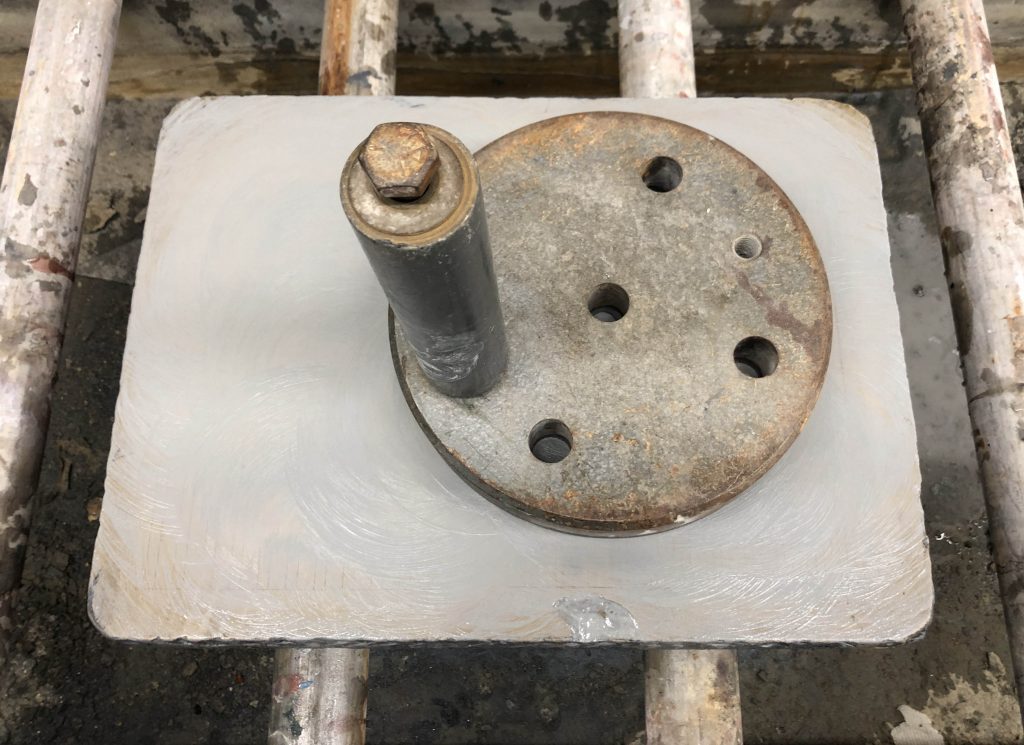
The top after graining and drying

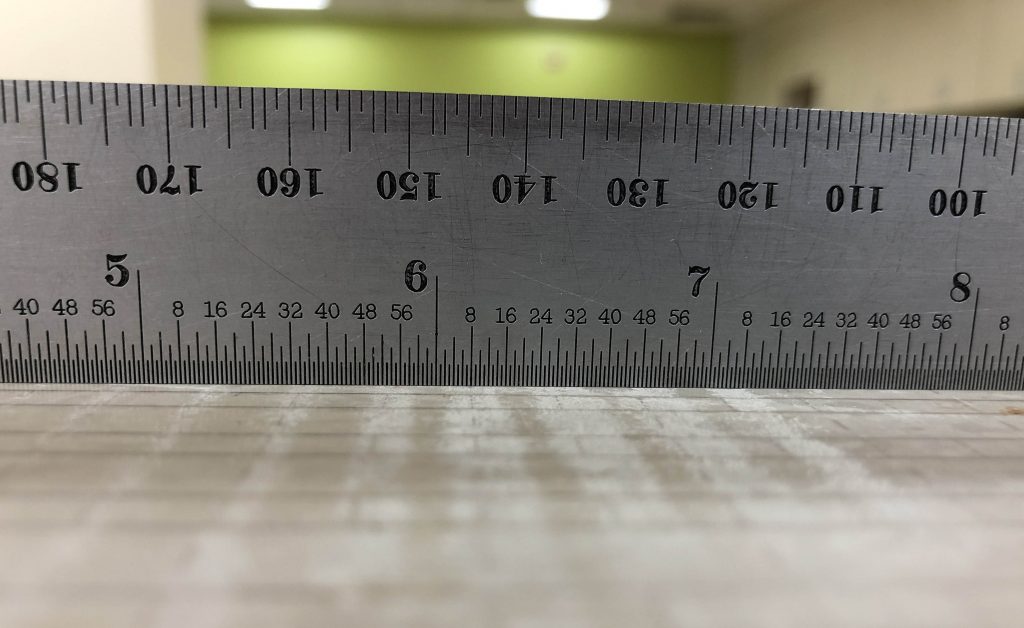
I’m pretty pleased with the results. The print image still remains on the bottom of the stone, so we can keep some evidence of what the stone was used for previously. The stone is fairly heavy (40-50 lbs by my guess), so it now lives on a wheeled cart so it can be easily moved around the lab as needed.