
We use several different tools and strategies at the Duke Libraries to ensure that our web interfaces are accessible. Our aim is to comply with WCAG 2.0 AA and Section 508 guidelines.
One of our favorite accessibility checking tools in our toolbox is the axe DevTools Browser Extension by Deque Systems. It’s easy to use, whether on a live site, or in our own local development environments while we’re working on building new features for our applications. Simply open your browser’s Developer Tools (F12), click the Scan button, and get an instant report of any violations, complete with recommendations about how to fix them.

Now, it’s one thing to make software compliant; it’s another to keep it that way. Duke’s Web Accessibility office astutely notes:
Keeping a website compliant is a continuous effort. Websites are living things. Content changes, features are added. When a site becomes compliant it does not stay compliant.
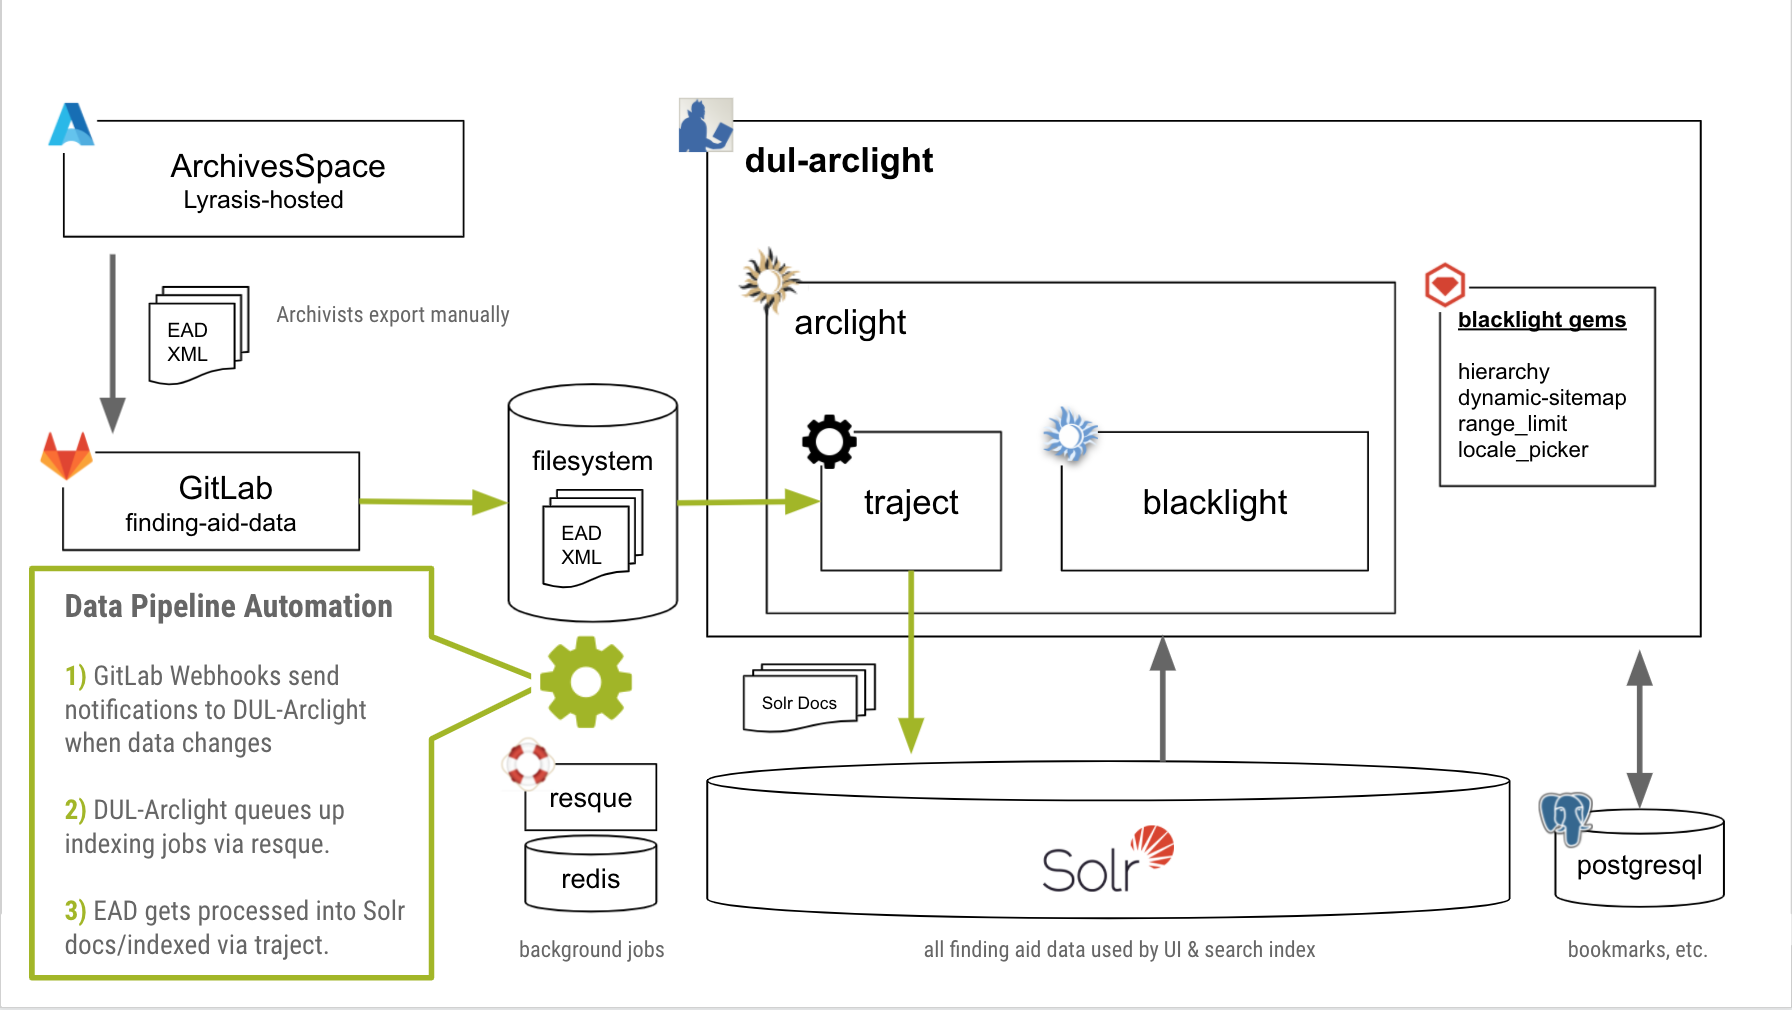
One of the goals we set out to accomplish in 2021 was to figure out how to add automated, continuous accessibility testing for our ArcLight software, which powers our archival finding aids search and discovery application. We got it implemented successfully a few months ago and we’re pleased with how it has been working so far.
The solution: using the Deque Systems Axe Core RSpec gem, along with a Selenium Standalone Chrome Docker image, in our GitLab CI pipeline.
Say what?
Let me back up a bit and give some background on the concepts and tools upon which this solution depends. Namely: Continuous Integration, RSpec, Capybara, Selenium, and Docker.
Continuous Integration
For any given software project, we may have several developers making multiple changes to a shared codebase in the same day. Continuous Integration is the practice of ensuring that these code changes 1) don’t break any existing functionality, and 2) comply with established guidelines for code quality.
At Duke Libraries, we use GitLab to host code repositories for most of our software (e.g., our ArcLight application). It’s similar to GitHub, with built-in tooling for DevOps. One such tool is GitLab CI/CD, which we use to manage continuous integration. It’s common for us to configure pipelines to run automated tasks for each new code branch or tag, in at least few stages, e.g.: build > test > deploy.

For accessibility testing, we knew we needed to add something to our existing CI pipeline that would check for compliance and flag any issues.
RSpec Testing Framework
Many of our applications are built using Ruby on Rails. We write tests for our code using RSpec, a popular testing framework for Rails applications. Developers write tests (using the framework’s DSL / domain-specific language) to accompany their code changes. Those tests all execute as part of our CI pipeline (see above). Any failing tests will prevent code from being merged or getting deployed to production.
![]()
There are many different types of tests. On one end of the spectrum, there are “unit tests,” which verify that one small piece of code (e.g., one method) returns what we expect it to when it is given different inputs. On the other, there are “feature tests,” which typically verify that several pieces of code are working together as intended in different conditions. This often simulates the use of a feature by a person (e.g., when a user clicks this button, test that they get to this page and verify this link gets rendered, etc.). Feature tests might alternatively be called “integration tests,” “acceptance tests,” or even “system tests” — the terminology is both squishy and evolving.
At any rate, accessibility testing is a specific kind of feature test.
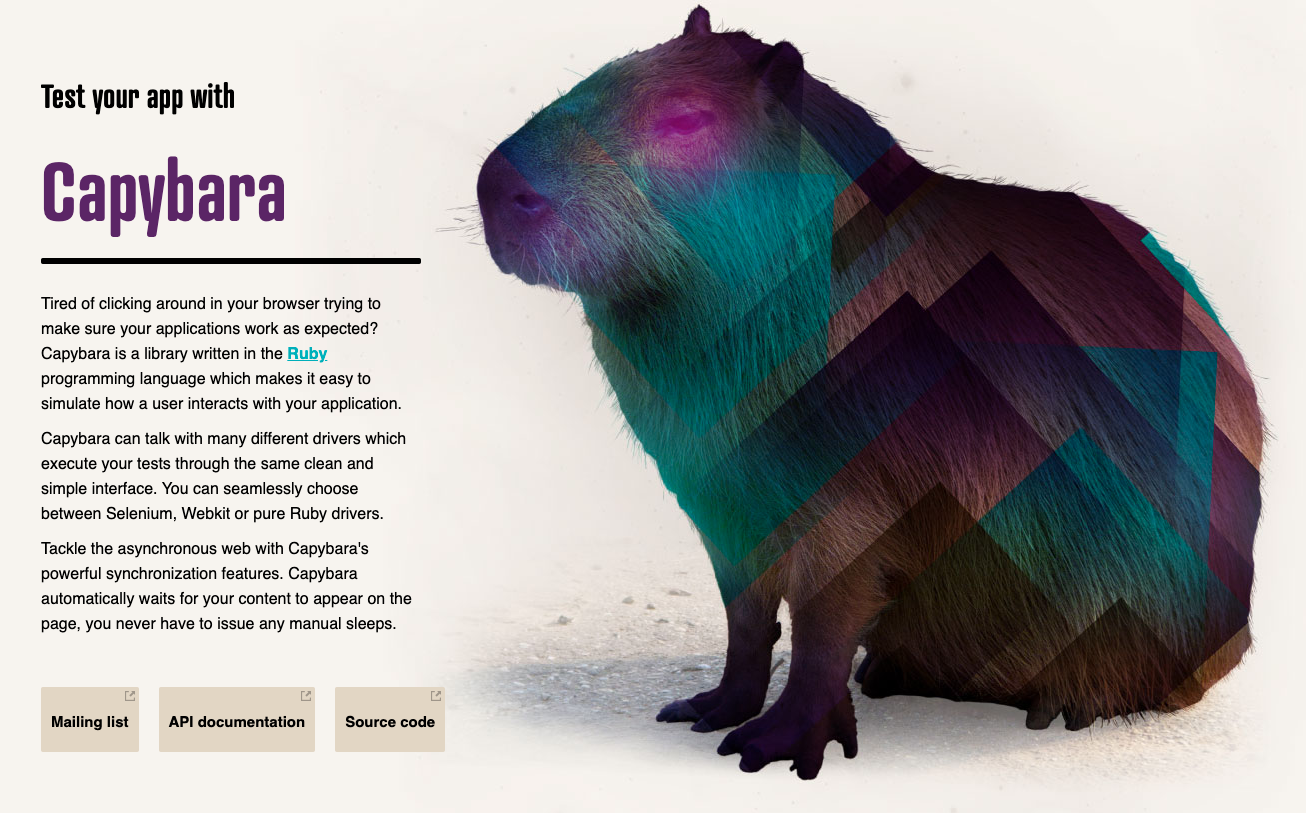
Capybara
On its own, RSpec unfortunately doesn’t natively support feature tests. It requires a companion piece of software called Capybara, which can simulate a user interacting with a web interface. Capybara brings with it a DSL to visit pages, fill out forms, or click on elements within RSpec tests, and special matchers to check that the page is behaving as intended.
When configuring Capybara, you set up the driver you want it to use when running different kinds of tests. Its default driver is RackTest, which is fast but it can’t execute JavaScript like a real web browser can. Our ArcLight UI, for instance, uses a bunch of JavaScript. So we knew that any accessibility tests would have to be performed using a driver for an actual browser; the default Capybara alone wouldn’t cut it.
Selenium
Writing code to drive various browsers was probably a nightmare until Selenium came along. Selenium is an “umbrella project for a range of tools and libraries that enable and support the automation of web browsers.” Its WebDriver platform gives you a language-agnostic coding interface that is now compatible with all the major web browsers. That makes it a valuable component in automated browser testing.

The best way we could find to get Capybara to control a real browser in an RSpec test was to add the selenium-webdriver gem to our project’s Gemfile.
Docker
Over the past few years, we have evolved our DevOps practice and embraced containerizing our applications using Docker. Complex applications that have a lot of interwoven infrastructure dependencies used to be quite onerous to build, run, and share. Getting one’s local development environment into shape to successfully run an application used be a whole-day affair. Worse still, the infrastructure on the production server used to bear little resemblance to what developers were working with on their local machines.
Docker helps a dev team configure in their codebase all of these system dependencies in a way that that’s easily reproducible in any environment. It builds a network of “containers” on a single host, each running a service that’s crucial to the application. Now a developer can simply check out the code, run a couple commands, wait a few minutes, and they’re good to go.
The same basic setup also applies in a production environment (with a few easily-configurable differences). And that simplicity also carries over to the CI environment where the test suite will run.
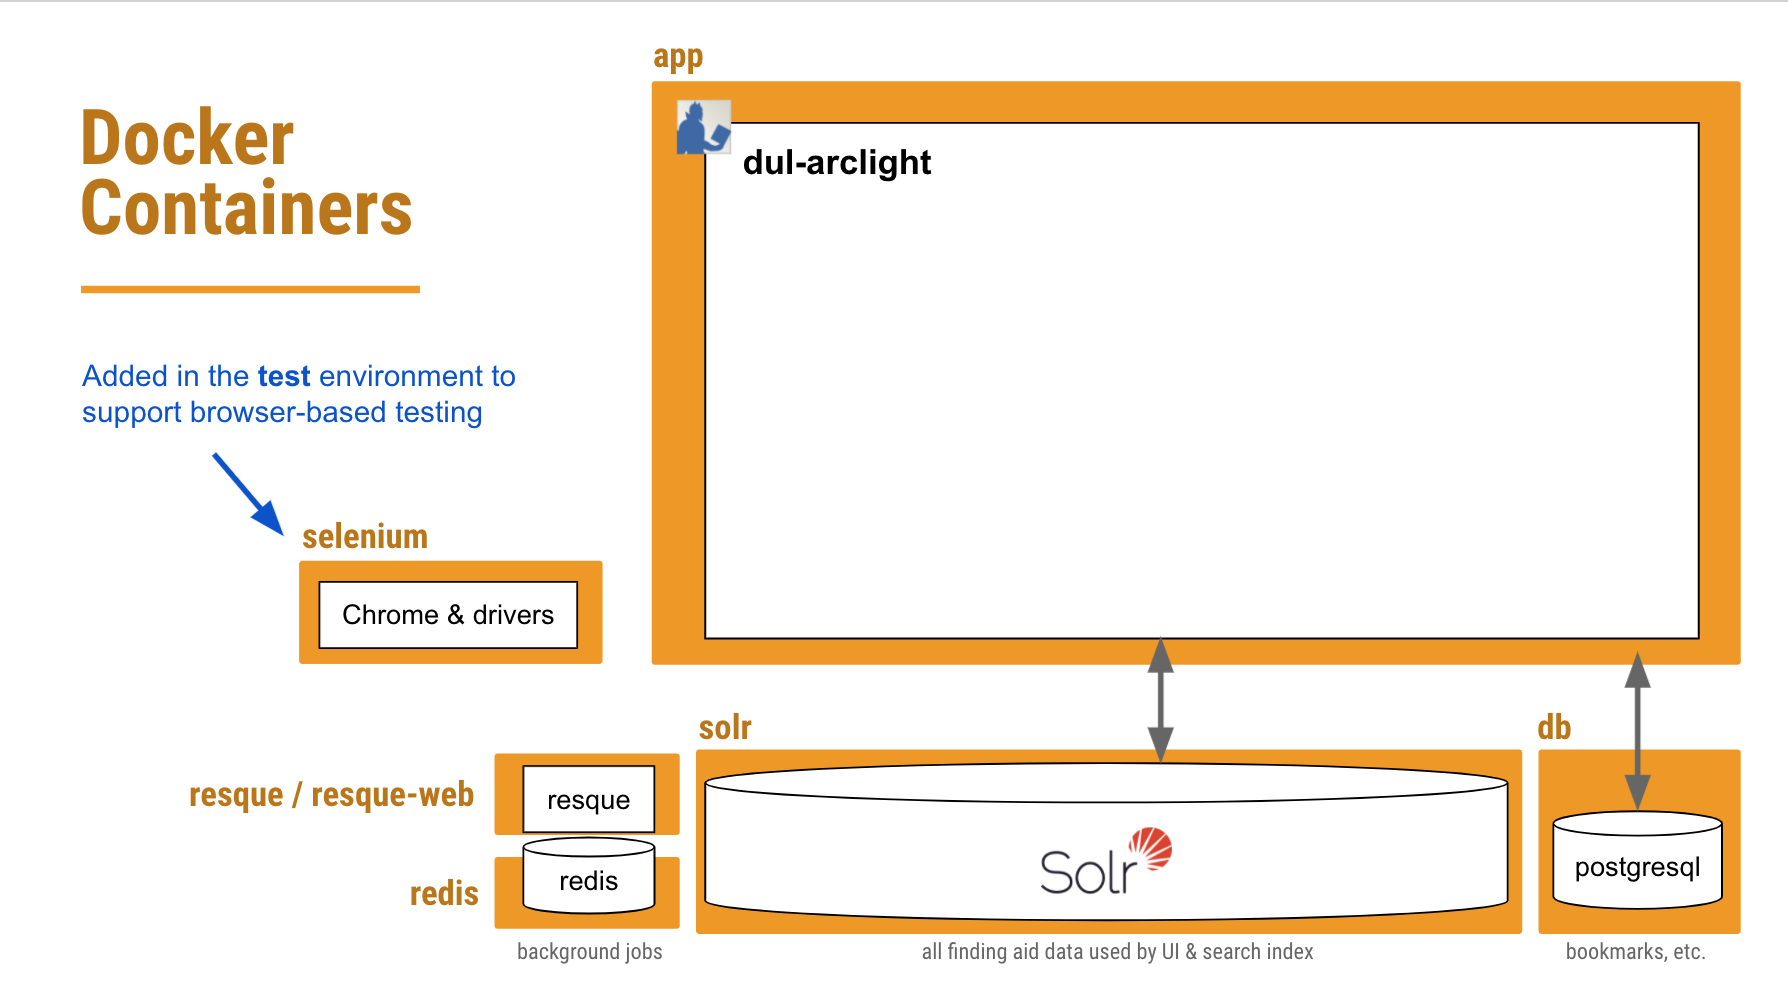
So what we needed to do was add another container to our existing Docker configuration that would be dedicated to running any JavaScript-dependent feature tests — including accessibility tests — in a browser controlled by Selenium WebDriver.
Keeping this part containerized would hopefully ensure that when a developer runs the tests in their local environment, the exact same browser version and drivers get used in the CI pipeline. We can steer clear of any “well, it worked on my machine” issues.
Putting it All Together
Phew. OK, with all of that background out of the way, let’s look closer at how we put all of these puzzle pieces together.
Gems
We had to add the following three gems to our Gemfile‘s test group:
group :test do
  gem 'axe-core-rspec' # accessibility testing
  gem 'capybara'
  gem 'selenium-webdriver'
end
A Docker Container for Selenium
The folks at Selenium HQ host “standalone” browser Docker images in Docker Hub, complete with the browser software and accompanying drivers. We found a tagged version of their Standalone Chrome image that worked well, and pull that into our newly-defined “selenium” container for our test environments.
services:
  selenium:
    image: selenium/standalone-chrome:3.141.59-xenon
    ports:
      - 4444:4444
    volumes:
      - /dev/shm:/dev/shm
    environment:
      - JAVA_OPTS=-Dwebdriver.chrome.whitelistedIps=
      - START_XVFB=false
[...]
Since this is new territory for us, and already fairly complex, we’re starting with just one browser: Chrome. We may be able to add more in the future.
Capybara Driver Configuration
Next thing we needed to do was tell Capybara that whenever it encounters any javascript-dependent feature tests, it should run them in our standalone Chrome container (using a “remote” driver). The Selenium WebDriver gem lets us set some options for how we want Chrome to run.
The key setting here is “headless” — that is, run Chrome, but more efficiently, without all the fancy GUI stuff that a real user might see.
Capybara.javascript_driver = :selenium_remote

Capybara.register_driver :selenium_remote do |app|
  capabilities = Selenium::WebDriver::Remote::Capabilities.chrome(
    chromeOptions: { args: [
      'headless',
      'no-sandbox',
      'disable-gpu',
      'disable-infobars',
      'window-size=1400,1000',
      'enable-features=NetworkService,NetworkServiceInProcess'
    ] }
  )

  Capybara::Selenium::Driver.new(app,
                                 browser: :remote,
                                 desired_capabilities: capabilities,
                                 url: 'http://selenium:4444/wd/hub')
end
That last URL http://selenium:4444/wd/hub is the location of our Chrome driver within our selenium container.
There are a few other important Capybara settings configured in spec_helper.rb that are needed in order to get our app and seleniumcontainers to play nicely together.
Capybara.server = :puma, { Threads: '1:1' }
Capybara.server_port = '3002'
Capybara.server_host = '0.0.0.0'
Capybara.app_host = "http://app:#{Capybara.server_port}"
Capybara.always_include_port = true
Capybara.default_max_wait_time = 30 # our ajax responses are sometimes slow
Capybara.enable_aria_label = true
[...]
The server_port, server_host and app_host variables are the keys here. Basically, we’re saying:
-
Capybara (which runs in our
appcontainer) should start up Puma to run the test app, listening on http://0.0.0.0:3002 for requests beyond the current host during a test. -
The
seleniumcontainer (where the Chrome browser resides) should access the application under test at http://app:3002 (since it’s in theappcontainer).
Some Actual RSpec Accessibility Tests
Here’s the fun part, where we actually get to write the accessibility tests. The axe-core-rspec gem makes it a breeze. The be_axe_clean matcher ensures that if we have a WCAG 2.0 AA or Section 508 violation, it’ll trip the wire and report a failing test.
require 'spec_helper'
require 'axe-rspec'

RSpec.describe 'Accessibility (WCAG, 508, Best Practices)', type: :feature, js: true, accessibility: true do
  describe 'homepage' do
    it 'is accessible' do
      visit '/'
      expect(page).to be_axe_clean
    end
  end

  [...]
end
With type: :feature and js: true we signal to RSpec that this block of tests should be handled by Capybara and must be run in our headless Chrome Selenium container.
The example above is the simplest case: 1) visit the homepage and 2) do an Axe check. We also make sure to test several different kinds of pages, and with some different variations on UI interactions. E.g., test after clicking to open the Advanced Search modal.
The CI Pipeline
We started out having accessibility tests run along with all our other RSpec tests during the test stage in our GitLab CI pipeline. But we eventually determined it was better to keep accessibility tests isolated in a separate job, one that would not block a code merge or deployment in the event of a failure. We use the accessibility: true tag in our RSpec accessibility test blocks (see the above example) to distinguish them from other feature tests.
No, we don’t condone pushing inaccessible code to production! It’s just that we sometimes get false positives — violations are reported where there are none — particularly in Javascript-heavy pages. There are likely some timing issues there that we’ll work to refine with more configuration.
A Successful Accessibility Test
Here’s a completed job in our CI pipeline logs where the accessibility tests all passed:

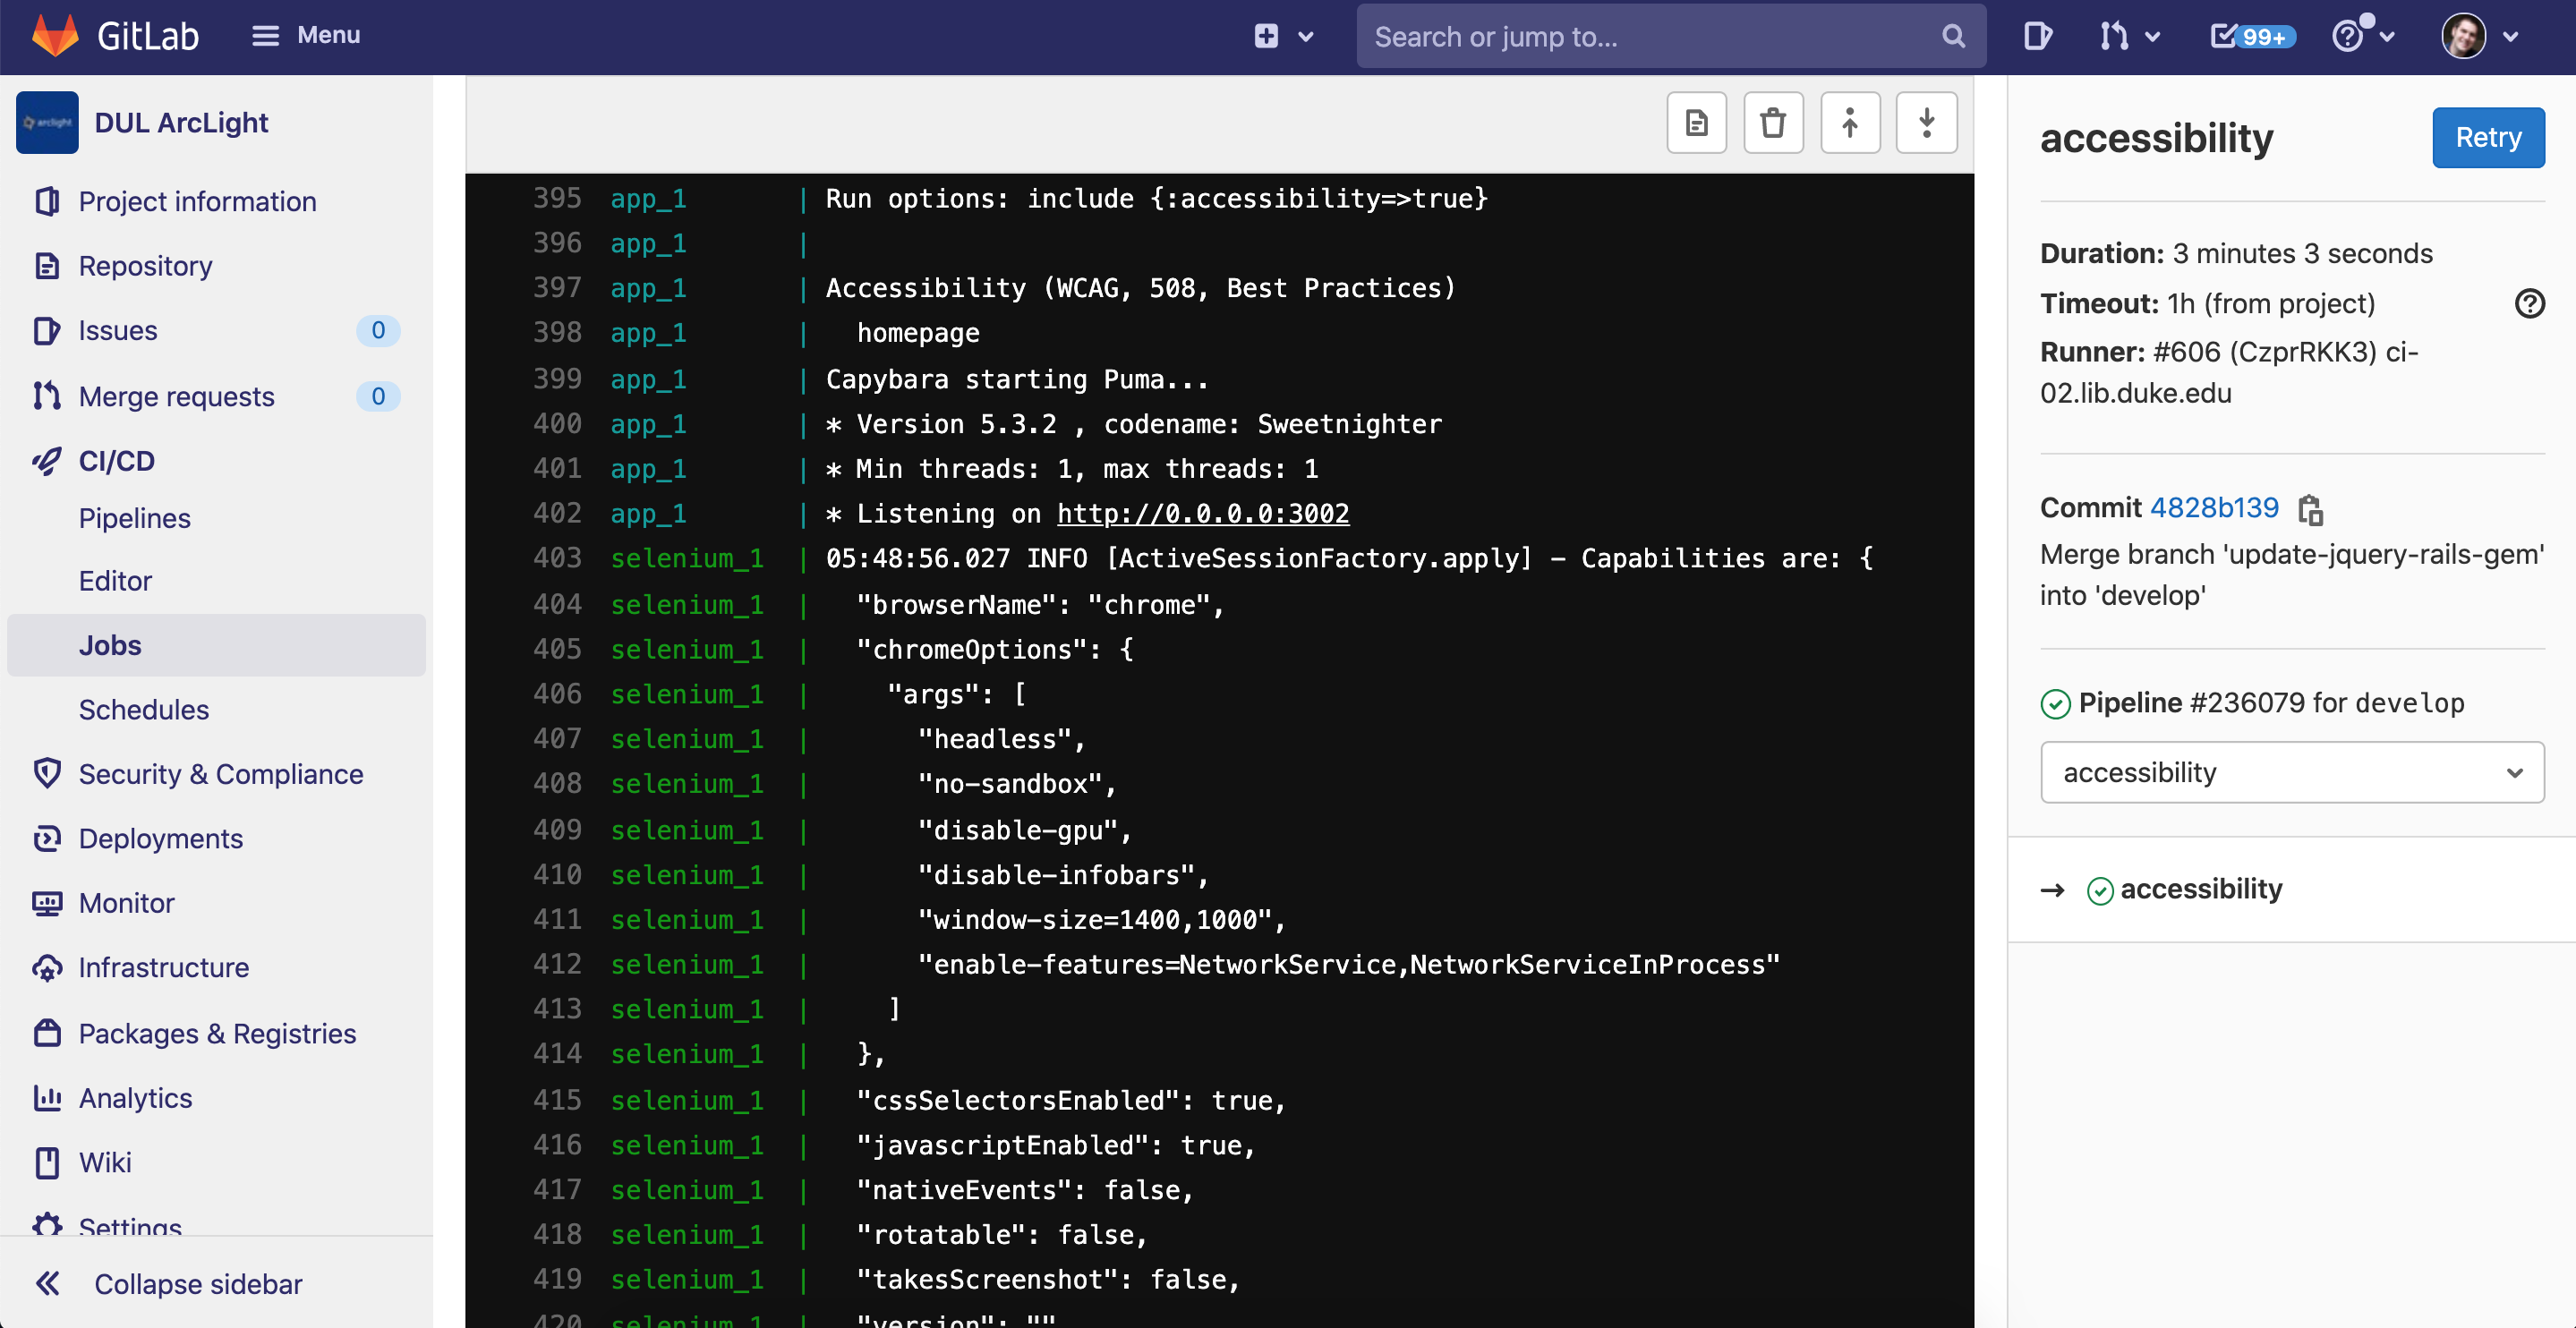
Our GitLab CI logs are not publicly available, so here’s a brief snippet from a successful test.
An Accessibility Test With Failures
 Here’s a CI pipeline for a code branch that adds two buttons to the homepage with color contrast and
 aria-label violations. The axe tests flag the issues as FAILED and recommend revisions (see snippet from the logs).
Concluding Thoughts
Automation and accessibility testing are both rapidly evolving areas, and the setup that’s working for our ArcLight app today might look considerably different within the next several months. Still, I thought it’d be useful to pause and reflect on the steps we took to get automated accessibility testing up and running. This strategy would be reasonably reproducible for many other applications we support.
A lot of what I have outlined could also be accomplished with variations in tooling. Don’t use GitLab CI? No problem — just substitute your own CI platform. The five most important takeaways here are:
- Accessibility testing is important to do, continually
- Use continuous integration to automate testing that used to be manual
- Containerizing helps streamline continuous integration, including testing
- You can run automated browser-based tests in a ready-made container
- Deque’s open source Axe testing tools are easy to use and pluggable into your existing test framework
Many thanks to David Chandek-Stark (Duke) for architecting a large portion of this work. Thanks also to Simon Choy (Duke), Dann Bohn (Penn St.), and Adam Wead (Penn St.) for their assistance helping us troubleshoot and understand how these pieces fit together.
The banner image in this post uses three icons from the FontAwesome Free 5 icon set, unchanged, and licensed under a CC-BY 4.0 license.
REVISION 7/29/21: This post was updated, adding links to snippets from CI logs that demonstrate successful accessibility tests vs. those that reveal violations.