Writing software for the web has come a long way in the past decade. Tools such as Ruby on Rails, Twitter Bootstrap, and jQuery provide standard methods for solving common problems and providing common features of web applications. These tools help developers use more of their time and energy to solve problems unique to the application they are building.
One of the costs of relying on libraries and frameworks to build software is that your project not only depends on the frameworks and libraries you’ve chosen to use, but these frameworks and libraries rely on still more components. Compounding this problem, software is never really finished. There are always bugs being fixed and features being changed and added. These attributes of software, that it changes and has dependencies, complicates software projects in a few different ways:
- You must carefully manage the versions of libraries, frameworks, and other dependencies so that you ensure all the pieces work together.
- Developers working on multiple projects may have to use different versions of the same libraries and packages for each of their projects.
- If you’re working with a team of developers on a project all members of the team have to make sure their computers are set up with the correct versions of the software and dependencies of the project.
Thankfully, there are still more tools available to help manage these problems. For instance, Ruby Version Manager (RVM) is a popular tools used by Ruby on Rails developers. It lets the software developer install and switch between different versions of Ruby. Other tools, such as Bundler make it possible to define exactly what version of which Ruby Gems (Ruby software packages that add functionality to your own project) you need to install for a particular project. Combined, RVM and Bundler simplify the management of complex project dependencies. There are similar tools available for other programming languages, such as Composer, which is a dependency manager for PHP.
While many of us already use dependency managers in our work, one tool we haven’t been using that we’re evaluating for use on a new project is Vagrant. Vagrant is a tool for creating virtual machines, self-contained systems that run within a host operating system. Virtual machines are software implementations of a computer system. For instance, using a virtual machine I could run Windows on my Mac hardware.
Vagrant does a few things that may make it even easier for developers to manage project dependencies.
- With Vagrant you can write a script that contains a set of instructions about what operating system and other software you want to install in a virtual machine. Creating a virtual machine with all the software you need for a given project is as then as simple as typing a single command.
- Vagrant provides a shared directory between your host operating system and the virtual machine. You can use the operating system you use everyday as you work while the software project runs in a virtual machine. This is significant because it means each developer can continue to use the operating system and tools they prefer while the software they’re building is all running in copies of the exact same system.
- You can add the script for creating the virtual machine to the project itself making it very easy for new developers to get the project running. They don’t have to go through the sometimes painful process of installing a project’s dependencies by hand because the Vagrant script does it for them.
- A developer working on multiple projects can have a virtual machine set up for each of their projects so they never interfere with each other and each has the correct dependencies installed.
Here’s how to use Vagrant in the most minimal way:
- Download and install VirtualBox
- Download and install Vagrant
- In a terminal window type:
vagrant init hashicorp/precise32 - After running the following command you will have downloaded, set up, and started a fully functional virtual machine running Ubuntu:
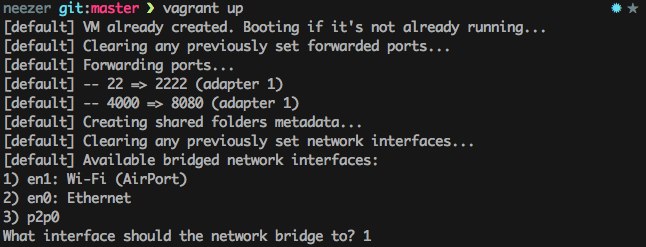
vagrant up - You can then connect to and start using the running virtual machine by connecting to it via SSH:
vagrant ssh
In a more complex setup you’d probably add a provisioning script with instructions for downloading and installing additional software as part of the “vagrant up” process. See the Vagrant documentation for more details about provisioning options.
We’re considering using Vagrant on an upcoming project in an effort to make it easier for all the developers on the project to set up and maintain a working development environment. With Vagrant, just one developer will need to spend the time to create the script that generates the virtual machine for the project. This should save the time of other developers on the project who should only have to install VirtualBox, copy the Vagrant file and type “vagrant up.” At least, that’s the idea. Vagrant has great documentation, so if you’re interested in learning more their website is a good place to start.


![By Fco.plj (Own work) [CC-BY-SA-3.0 (http://creativecommons.org/licenses/by-sa/3.0)], via Wikimedia Commons By Fco.plj (Own work) [CC-BY-SA-3.0 (http://creativecommons.org/licenses/by-sa/3.0)], via Wikimedia Commons](http://blogs.library.duke.edu/bitstreams/files/2014/12/Vagrant-246x300.png)
