Category Archives: Conservation

1091 Project: Portrait of the Student Technician

1091 graphicThis month on the 1091 Project we discuss an essential part of almost every conservation department, student technicians. Without our students we could not keep up with the sheer amount of materials that come to the lab. This week is spring break, so I can’t show you pictures of our wonderful students, KellyNoel, Kaiti and Jessica (on loan from ERSM for a project), but I can tell you about the work they do and what we look for in a good student assistant.

Students in the lab do a lot of boxing, pamphlet binding and CoLibri covers.
Student work, finished and in-process.
Student Workflows

Our students start out learning how to bind pamphlets, make simple enclosures, create CoLibri book jackets, make pockets and do simple repairs such as tip ins, cut pages, and binding musical scores. They also help with the tracking and physical moving of materials.

If the students have the abilities and interest they can  learn more complicated repairs and enclosures. These might include recasing or rebacking books, or making four-flap or corrugated clamshell boxes for fragile materials. We have had a couple students who stayed for several semesters and because they had the skills and interest, they were able to learn multiple conservation rebinding techniques and cloth-covered clamshell boxes.

Newspaper project
Newspapers ready for boxing.

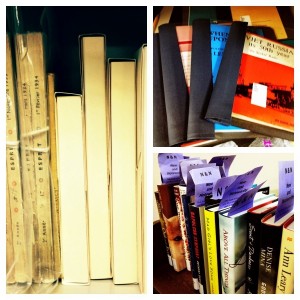
We currently have students helping specifically with renovation projects. These students are primarily getting the newspapers ready to go to the Library Service Center. This involves jogging brittle paper into place, fitting the bindings into pre-made boxes, and making spacers in the boxes so the brittle papers don’t shift around during transit. This is a very labor intensive, dirty and repetitive project but all of our students are working hard to meet our fast approaching deadline.

What We Look When Hiring Student Technicians

Most of our students are undergraduates, but every now and then we hire a graduate student. We of course like it if they have state or federal work study, but that isn’t a requirement. We prefer to get the right student with the right skills regardless of their funding. Occasionally we will get a UNC-SILS student who wants to intern with the department and we will work with them to develop a project that fulfills their school requirements but also helps us move our department forward.

There are basic job requirements that are listed in all of our positions including being able to use sharp instruments and large binding equipment safely, lifting heavy boxes and moving full book trucks, and being able to work in a potentially dusty or moldy environment.

Beyond that, what I look for when I interview students is the ability to learn quickly and be productive, to work independently but to know when to ask questions, and to have a good attitude and work well with a diverse staff. It is rare that we find students who have bookbinding experience, so I look for interests or past work history that involve eye-hand coordination and attention to detail. It might surprise you that gamers have very good eye-hand coordination, students with musical backgrounds are excellent at following instructions, and research science students are amazingly skilled at detail-oriented work. If you are a student, you don’t need to be a crafty person or an art major to work here. We can teach you the skills you need to be successful if you have the ability to learn the craft.

Let’s head over to Parks Library Preservation to read about their students.

1091 Project: The Good, The Bad, the Past Repairs

1091 graphic

This month on the 1091 Project we discuss old repairs, when to remove them and when to leave them alone. Sometimes the decision to undo an old repair is an easy one, sometimes not, and sometimes it really is a conundrum because there are valid arguments to be made on both sides. Let’s look at some recent items that have been brought to our attention, and be sure to check out Parks Library Preservation’s post.

Old Repairs: The Good

A “good” repair is one that is sympathetic to the original object in both form and function. It may not be immediately obvious that something has been fixed, but it shouldn’t be so transparent that it hides the fact that damage occurred. In a perfect world, a trained eye would catch it upon close inspection, but the lay-person might not realize it unless you pointed it out.

prior repair
Fugitive Sheet: Prior repair on lower right corner of sheet. Note the in-painting of the printed border.

bleau atlas
Bleau Atlas, prior fill also has new media applied to fill in the map.

The repair on the lower right corner of one of our Fugitive Sheets (top left) is a prime example of a good repair. The color of the newly incorporated paper matches the existing paper very well, and the border was even simulated to provided as to not disturb the eye with a break in the printing.

You can see a similar repair in one of our Bleau Atlas volumes (top right). Here you can see a well-crafted fill that includes the application of new media to fill in the illustration where that information was lost. We may not do that level of infilling today, but you cannot deny it is an effective repair that if removed may effect the way the object is interpreted.

Old Repairs: The Bad

Taped binding
A DIY repair that does more harm than good.

I think nothing says “bad repair” like packing tape. We’ve talked about this before, but it is good to reiterate that self-adhesive tape of almost any kind is very damaging to books and can be difficult to remove.

Because of the damage these sorts of tapes cause, it easy to decide to remove the tape and give the book a more sympathetic and reversible repair.


spine repair
An old library repair done with “book tape” with infilled title.

“The Open Polar Sea” is the sort of prior repair that makes it a little more difficult to decide what to do. This repair was clearly done with care and it is still holding. It is not reversible and will likely result in some scarfing when/if we remove it.

The real issue is how much time do we spend undoing these repairs? There are so many in our stacks. If the repair is holding up and not causing further damage, is it better to spend our limited time and resources on these knowing that they ultimately will do damage to the book, or do we work on items that are in more immediate danger of losing materials if they are not repaired? I tend to lean towards the latter, but the argument is worth having, and the decision changes based on a lot of factors (ye olde “value, use, risk, resources” discussion).


Old Repairs: The Past (With Provenance)

The four pictures below represent prior repairs that we would likely not choose to remove because they are

  • well executed
  • not significantly harming the original
  • still functioning as repairs
  • traditional to a time or type of material
  • tell a significant story about the life of the object

If one of these repairs were to fail, then we would address the problem in a more modern way, that is by using stable methods and materials that would not harm the original materials either physically or chemically, that would be visually sympathetic to the original structure and components, and would be reversible later if the repair failed.

Ethiopic MS 5_3
Ethiopic codex with damaged board, repaired by sewing the two halves together.

ethiopic scroll
Ethiopic scroll, repaired traditionally by stitching the two sides of the tear together with heavy sewing thread.

leather book repair
Leather patches carefully stitched to the binding to repair a damaged spine.

Ethiopic MS 30_2
Tear in the leather is carefully sewn back together. This may have been done at the time of binding to make a usable piece of leather, rather than repaired later as a result of damage.

Deciding on removing an old repair is both objective and subjective. The decision is based on your knowledge of the physical and chemical nature of the original materials as well as the repair materials. It also helps to know the collection and the provenance of the item. Luckily we have great working relationships with all our curators and together can make sound treatment decisions when we come across these sorts of quandaries.

Why I Hate Mr. Clippy

paperclips
Rusted paperclips after removal.

Maybe “hate” is too strong of a word. A better title might be “Mr. Clippy provides conservators with job security.” Paperclips, staples, and rubber bands all damage archival materials either mechanically (i.e. creasing, wrinkling) or chemically (i.e. rusting, leaching acidic compounds) resulting in brittle paper, tears, accretions, staining and losses.

While there is an art to removing rusty fasteners, the results are often disappointing and require additional treatment to reattach pieces, fill losses and stabilize weakened paper. Of course, all of this can be avoided by using better processing protocols. But in this age of “More Product, Less Process,” I fear we are creating a monster that future conservators will have to slay.

Manuscript Processing Best Practices (from a conservator’s point of view)

As a library conservator I understand the complicated nature of processing collections and the resources needed to do so. I can’t say “never use paperclips” because, let’s face it, we process hundreds of collections every year containing thousands of pieces of paper and sometimes those pieces of paper need to stay together. We also have to do this processing on a tight budget, and often with student or volunteer labor who may not be well versed in handling fragile materials. So, we need a continuum of options and best practice guidelines to help minimize damage while maintaining efficient workflows.

Remove original fasteners
NEDCC has a great tutorial on how to carefully remove all kinds of fasteners. Yes, it takes time and practice but it saves more time and effort in the future.

Use non-invasive methods to keep papers together
Instead of clipping multi-page manuscripts together, put the loose sheets into a separate file folder. If the papers must be with other items within a file folder, use a buffered-bond paper folder or a polyester sleeve (trade names Melinex and Mylar) to keep them separate from other papers.

Use better paperclips and avoid text
Paperclips should only be used on modern, flexible, non-brittle paper. If the materials are at all damaged or brittle, put them into a paper or polyester sleeve.

If your organization can afford stainless steel paperclips, use them since they have a smooth surface and will not rust. Plastic paperclips are an alternative to metal. These plastic clips are made of polystyrene, which will become brittle and break over time but they won’t rust. White ones are best if you can find them.

When clipping papers together, try to avoid clipping over any informational content. If in the future you try to remove the clip and it takes a chunk of manuscript with it, at least you will have avoided a loss of information.

paperclip rulesProtect paper with paper (or polyester)
Whatever paperclip you use, create a barrier between the clip and the manuscript. An easy and affordable way to do this is with a strip of buffered-bond paper or a piece of polyester. Simply cut a strip about 1-2 inches wide by about 4 inches long. Fold it in half lengthwise and place it over the manuscript pages so that one “leg” is on each side of the stack of paper. Then put the paper clip over the strip. This creates a barrier between the clip and the object.

These are my suggestions. If you have any tips or paperclip policies to share, please add them in the comments section. I always like to hear what other institutions do to solve problems like Mr. Clippy.


What’s In The Lab: A Magical And Foreboding Book

Written by Erin Hammeke, Special Collections Conservator

I was sorry to see this item go back to the stacks last week! A German book of magical secrets, Clandestine Hausvaterliteratur (Jacob Biernauer; 1818) is a recent acquisition to the History of Medicine Collection. It contains information on astrology, superstitions, ghosts, spells, and recipes for poisons, gunpowder, and blond hair dye, amongst others.

The vellum cover was likely added by a previous owner of the text who may have inscribed the cover with a foreboding skull image. The cover was quite animated when it first came to us and, reacting to a dry climate, the skin contracted and became wildly distorted. Additionally, its corners had been chewed, likely by rodents. Here it is, before and after treatment.

Before Treatment

After Treatment


Small Gifts Can Make A Difference

Bound newspapers (before boxing)
Chicago Tribune (1906) newspapers before boxing.

‘Tis the season to give thanks for all that we have. In that spirit, we would like to express our appreciation for one of our donors, Mike Plaisance, for his generosity over the past several years. Mr. Plaisance has given to the Library every month since May, 2008.

His gifts have helped us purchase enclosures for the bound newspapers in the American Newspaper Repository. These enclosures protect the contents from environmental changes, and keep the bound volumes safe during transport between the Rubenstein Library reading room and the Library Service Center where this collection is housed.

While Mr. Plaisance’s gift is not the multi-million dollar contribution that we usually publicize, smaller gifts like these add up and can really make a difference. Mr. Plaisance’s monthly contribution has been a meaningful and useful gift, and has helped us protect and preserve this high-use collection. Thank you Mr. Plaisance!!

bound newspaper after boxing
If a newspaper is slightly smaller than the box, we custom fit a spacer to keep it from “swimming” inside during transportation.
Bound newspapers after boxing
Chicago Tribune (1906) after boxing.


1901 Project: A Lab With A View (Or Not)

This month on the 1091 Project we take a look at our physical lab spaces, how they are set up and how our location impacts our work. The Verne and Tanya Roberts Conservation Lab is located on Lower Level 1 of Perkins Library, Room 023. We share this level with The Link, Digital Production Center (DPC), Preservation, and Shipping and Receiving.

When you enter the lab you will see that the work benches are aligned along the left wall; the large equipment such as the board shears, job backer, cloth roll storage and standing press are in the center of the room; the washing sink, clean-up sink, flat file storage, rolling work table, ultrasonic polyester welder, and sorting shelves are to the right. We have several rooms within the space including a “dirty room” with fume hood, sink, Kwikprint and work table; the department head’s office; a store room for supplies; and a photo documentation room. This space opened in 2008 and was purpose-built as a conservation lab as part of the Perkins Project. You can see a virtual tour on Flickr, and there is a video near the end of this post.

Challenges

One of the challenges in designing the layout of the lab was the fact that we have several large columns in weird places around the room that cause bottlenecks in the flow of traffic through the space. Since these columns are holding up the building, we had to work around them to arrange the space to accommodate large equipment and the need to move materials through the room.

Another challenge is navigating full book trucks through so many self-closing doors. If I could wave a magic wand and go back in time, I would invent the automobile ask for doors that open automatically in response to motion or the wave of your foot. The doors would also be wide enough to easily accommodate a truck of large, flat objects or supplies.

What Works

Having the benches in a row encourages interaction between the staff. Being close to each other allows for easy collaboration and discovery, it’s easy to ask for opinions or to see what projects everyone is working on. It also allows for a more flexible space as you can use an empty bench behind you as a temporary landing space if you need to.

lab staff working

The separate spaces for the dirty room and photo documentation room allows that work to happen away from the main lab. For example, when someone is vacuuming mold in the fume hood, or taking pictures of their objects in the photo documentation room, the noise and visual disturbance is reduced and makes for a happier workplace.

One of the benefits of the renovation was getting upgrades in ergonomic equipment and features. We have a cork floor that is easier to stand on all day, sit-to-stand benches that raise and lower at the push of a button, and special chairs (designed for dental hygienists) that are comfortable and supportive when you have to sit for long periods. We also have daylight balanced lights, which not only helps in color matching but are brighter and more cheerful to be under (in my opinion) when you have no windows in your space.

On Being In The Basement

Being in the basement has its disadvantages and advantages. We have to push carts through several doors, around many corners, and into an elevator to retrieve materials from the stacks. Driving book trucks safely around obstacles like these can be tricky.

People also find it difficult to find the lab on this floor. Unfortunately there are two rooms on this level with the same room number (one in Perkins Library and one in the adjoining Bostock Library). Bostock 023 is a computer training room, so we often have students ringing our doorbell expecting the lab to be their classroom. I tell students applying for jobs, “If you can find the lab, you have cleared one hurdle to being hired.”

The biggest advantage to being in our space is…our space. In our previous location our supplies were on pallets on the floor in a public hallway that went through the middle of our two work rooms. The photo documentation setup was in my office, which was difficult for everyone. We had no room for a fume hood or washing sink. We now have a physical space that allows us to provide a higher level of service and to work more efficiently. I quickly shot a video of our lab early this morning before everyone arrived. Sorry about the wobbly picture but you get the idea of what the space looks like.

httpv://youtu.be/0rXaSVhOUpY

The best thing about our space is that it is a gem in the crown of our renovated library. Our lab, the staff and the work they do have become one of the highlights of library tours. It is really fun to invite people “behind the scenes” to show off the great people I work with and the amazing things they do for the collections. Thanks for visiting us. Be sure to head over to Parks Library Preservation to read about their space!

Quick Pic: The Halloween Edition

Happy Halloween everyone! To celebrate we would like to introduce you to “Fred” as we have named him. This German anatomical model dates to the 1930’s or 1940’s and is from the History of Medicine Collection.

Fred comes complete with removable lungs, liver and intestines, just the thing for today’s festivities. Jennifer is figuring out how to build a box for him to keep all his guts in place.

Have a safe Halloween! Watch out for zombies lurching and little children crossing the streets, and brush your teeth after you steal share your kid’s candy.

1091 Project: Interview With A Conservator

httpv://youtu.be/jn1adLnJqvU

This month as part of the 1091 project we are presenting an interview with our paper conservator, Grace White. Regular readers will remember that Grace joined the staff last year. Since then, she has worked on a variety of things including some very, very large WWI posters; she curated an exhibit on the tools of the trade; and has helped with a lot of the renovation prep, including the papyri rehousing project. Grace also writes the quarterly “What’s In The Lab” series for the Devil’s Tale.

In this interview, Grace discusses what she does, how she came to the conservation profession, her favorite treatment as well as her favorite tool. Check out our other staff interviews from our “10 Years, 10 People” series, and be sure to click over to Parks Library Preservation for their interview!

A Very Busy Year for Conservation Services

Conservation’s FY2012 annual report in a tweet.

As anyone in the lab will tell you, I love statistics. I wrote last year about the Conservation Department’s fiscal year 2011 statistics, I thought I would write about fiscal year 2012.

  • We have seven staff members, one of whom works only on the renovation project; seven students, five of whom worked on the renovation project; and two volunteers.
  • We repaired or rehoused 20,512 items from the collections last year.
  • Of that number, over 14,000 were enclosures, over half of these were renovation related.
  • 62% of our output was for Rubenstein Library; 24% for Perkins/Bostock; the remaining work was for our branch libraries.
  • We also presented two papers at AIC, served on ALA committees, participated in several library committees, gained skills in conserving papyrus and transparent papers, and Jennifer earned her MLIS (yea Jennifer!).
  • We had an 11% increase in unique visits to Preservation Underground; a 9% increase in overall page views; we passed 400 Facebook followers; have more than 500 images on Flickr; and we helped start the library’s Pinterest account.
Trends We Are Tracking
Exhibit preparation and installation.
  • We are doing more preparation and conservation work  in support of the Exhibits Program. We expect this upward trend to continue as we expand our program as part of Rubenstein Library renovation.
  • In FY2011 we started separating out stats for work we do to support digitization projects. Last year that total was 656. We expect this workflow to increase as our digitization program expands in the future.

Since fiscal year 2003, we have repaired or rehoused over 132,000 items from the library’s collections. This year we celebrate Conservation’s 10th year of service to the library. It is an honor to work with such an amazing, dedicated and fun group of people. Thanks to everyone in Conservation for their hard work!