All posts by Henry Hebert

The Case of the Oily Book

by Erin Hammeke, Senior Conservator

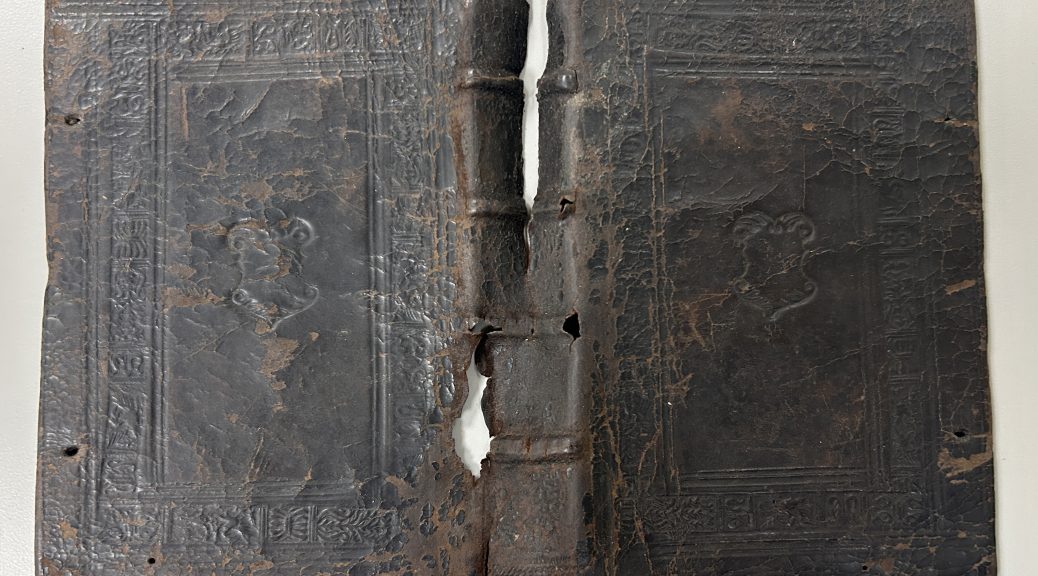
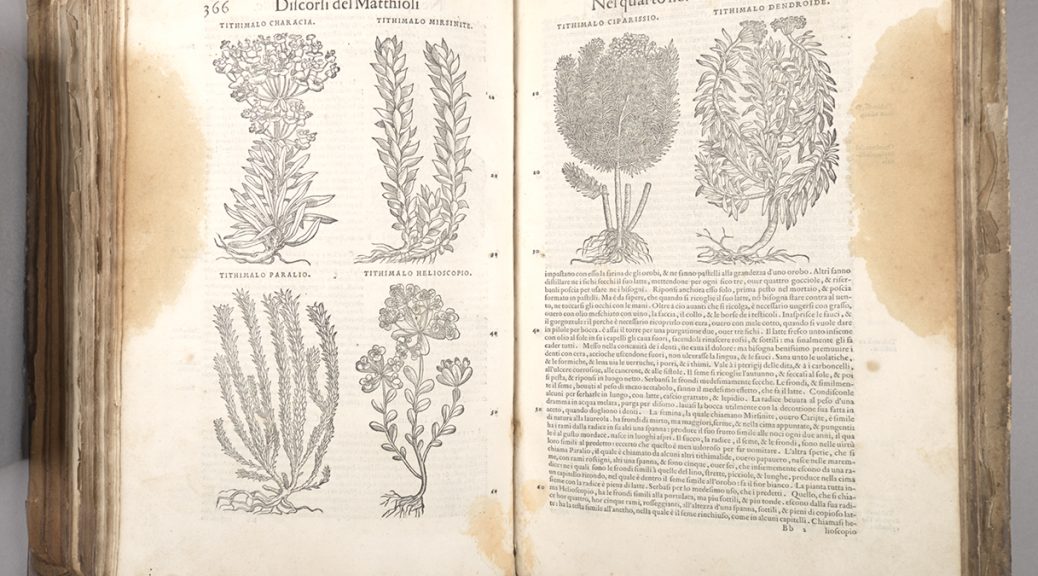
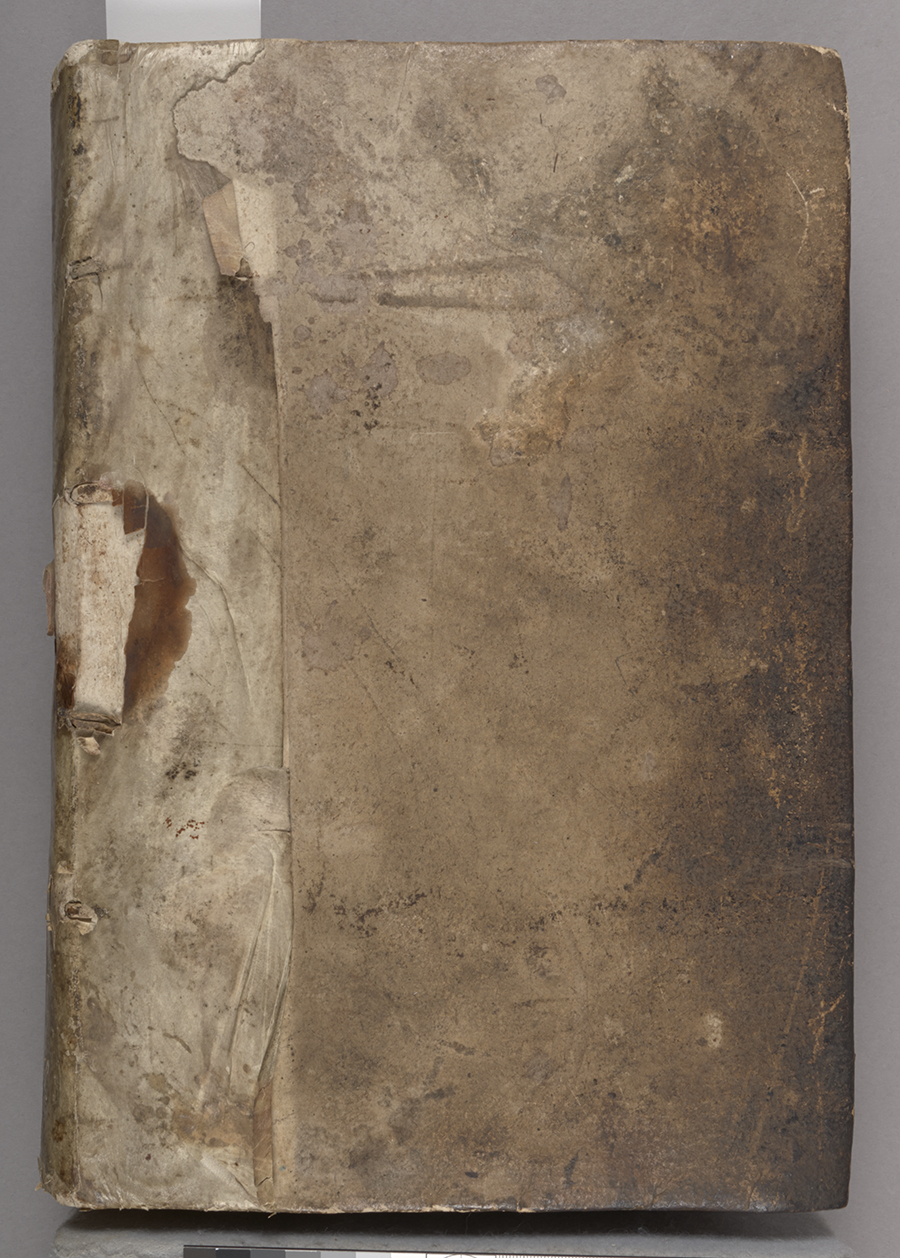
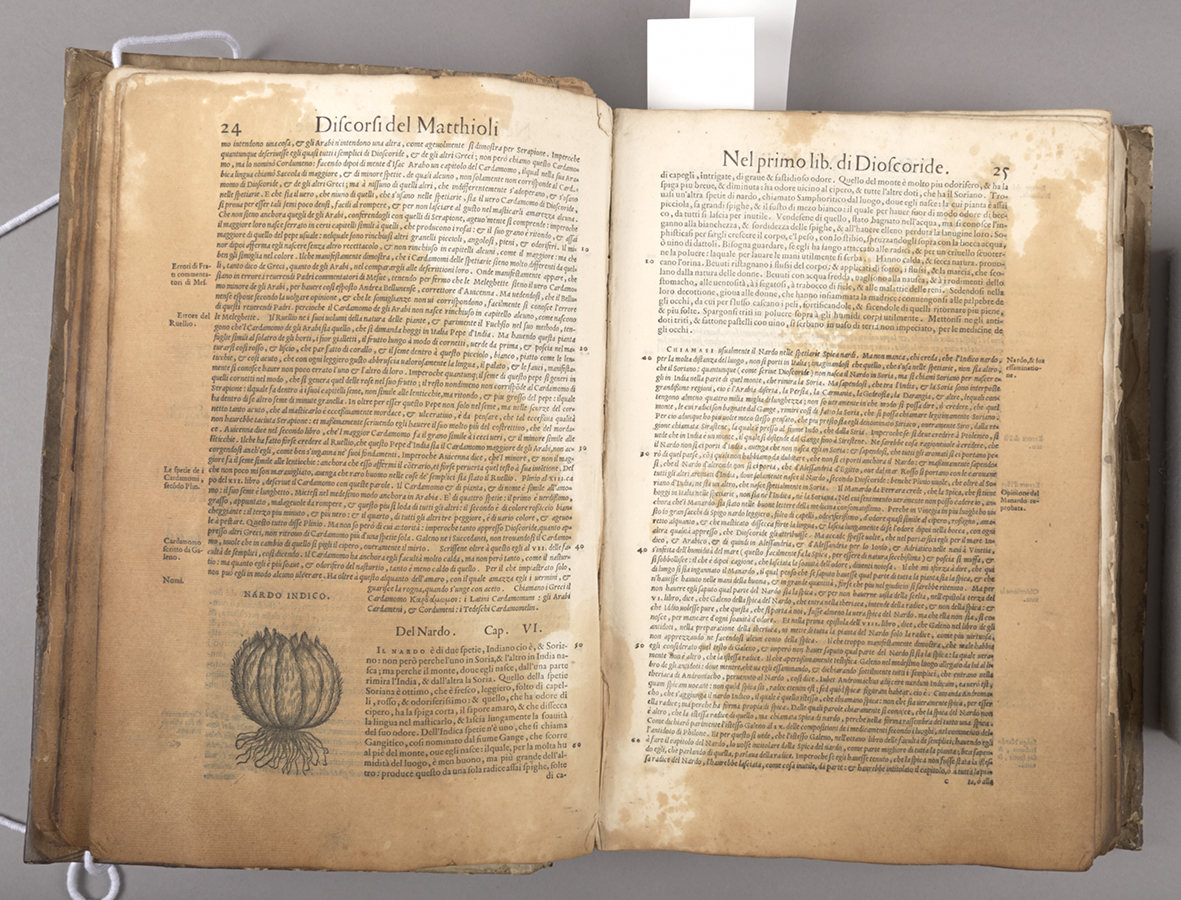
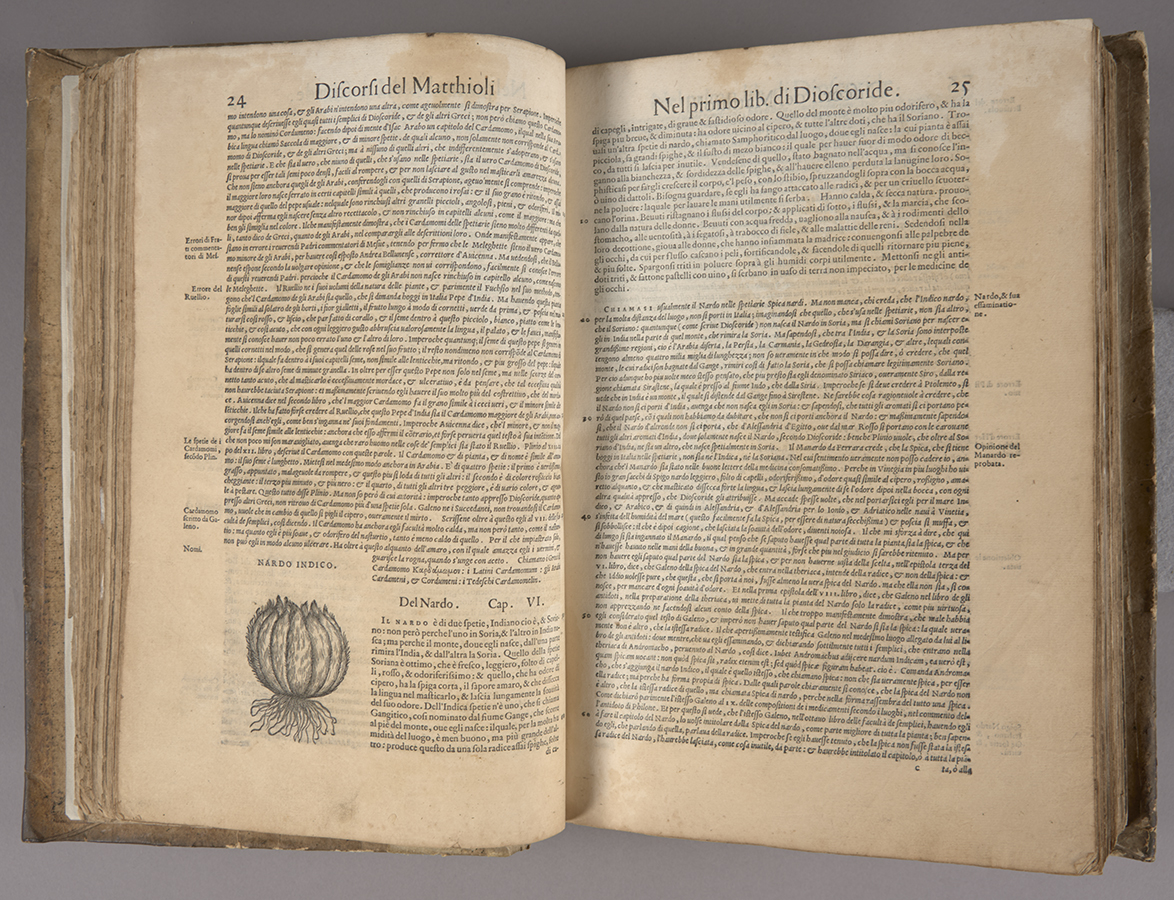
We’re preparing to launch another batch of treatment documentation in the CDA, and the process has reminded me of one of the most complicated, and ultimately, one of my favorite treatments from over the years. I discorsi di M. Pietro Andrea Matthioli, medico senese, … is an early Italian natural medicine text, printed in Venice in 1557. It contains lovely woodcut illustrations of animal and plant species that offered medicinal remedies. Rubenstein Libraries’ copy was acquired for the History of Medicine Collection in 2016 from a family in the Piedmont region of North Carolina.

Image showing the open title page of I discorsi di M. Pietro Andrea Matthioli, medico senese
Title page, before treatment
An image showing the front cover of the binding, with dark staining from handling on the fore-edge and damage to the parchment strip covering the spine.
Binding, before treatment
A two page spread in the interior of the text, with woodcut illustrations of plants and dark yellow stains at the fore-edges of both pages.
Partial staining and plant images, before treatment

When we acquired it, about one quarter of the text and a portion of the early paper binding had long been saturated with oil, and there was less severe oil staining throughout. It was so soaked with oil that the pages were slightly transparentized and were becoming stiff and blocking together. This video demonstrates the condition and handling challenges it presented when we first received it [SOUND ON].

The text was bound in an early paper binding with a parchment spine overlay. The sewing was broken in places and pages were coming loose. Initial testing found that the oil was soluble in a couple of different solvents but I found that of the few I tested, ethanol moved only the oil but not the printing ink. With this information and considering other factors, the curators and I agreed that it was appropriate to disbind the text and to use solvent baths to remove as much of the oil from the paper as possible.

Working in our fume hood, I treated the most oil-stained sections of the text with multiple ethanol baths, which significantly drew out oily residues and moderately reduced the staining, a result that the curators were ultimately pretty happy with. These solvent baths were followed by water baths and then resizing, since the previous immersions removed most of the original sizing.

Saving some of the residual oil in ethanol, I was able to analyze it with Fourier Transform Infrared Spectroscopy (FTIR) at the SMIF facility on campus. Conservation scientists in at the Winterthur Museum in Delaware were able to identify the residue as palm oil, along with an unknown plasticizer. These results ultimately didn’t impact the conservation treatment, but the information does present another interesting detail in understanding the curious life of this item. After treating the text, I mended it and resewed it, and was able to rebind it in the original binding.

A two page spread of the text, showing a small illustration of a barrel cactus and dark staining all across the pages before conservation treatment.
Staining before treatment
The same two page spread after treatment, showing significant lightening of the oil stains.
After solvent treatment

I Discorsi… is likely to be on display in an upcoming exhibit on early botanical texts. You can also see further images and details of this treatment in the CDA, here. Many thanks to Dr. Mark Walters, Dr. Chris Petersen, and Dr. Jocelyn Alcantara-Garcia for their assistance in oil analysis and identification.

Box Girls on Boxing Day

Keeping a large circulating collection in usable shape means you are often so busy fixing or boxing books to get them back on the shelf that you don’t have time to look at the contents. When a first edition of Mary Van Kleeck’s Women in the Bookbinding Trade came into the lab, however, we all stopped to take a look.

Two photographs of bindery workers. "Box girls" in the upper photo, case makers in the lower photograph

This book, originally published in 1913, is a fascinating look into the working conditions for women in the binding trade around the turn of the century. Margaret Olivia Sage had used the considerable wealth amassed by her late husband to form the Russell Sage Foundation in 1907 for “the improvement of social and living conditions in the United States”, specifically by using scientific research to advocate for progressive reforms. The foundation funded a series of studies which documented the condition of women’s work in important trades in New York City. The 1900 US census reported that over a quarter of women bindery workers were employed in the city, so the location offered a sizable sample to extrapolate conditions across the United States.

Table and bar graph depicting the number of persons engaged in bookbinding in the united states by decade.

The turn of the century was an important period of transition for the binding trade. Work that was traditionally done completely by hand had become more mechanized in the late 19th century, and the number of women working in the trade was growing rapidly.  Binderies were typically gender-segregated, with women relegated to less skilled and lower wage work, like folding, gathering, and sewing textblocks and endbands. In most cases, all of the forwarding, covering, and finishing work was done by men. Van Kleeck’s book includes a lot of photographs, which offer a look at the conditions of the workspaces, the roles assigned to each gender, and the shift from fully manual to machine-assisted labor during this time.

Van Kleek notes that the introduction of more capable binding machines displaced a lot of workers in the book trade, shifting them to lower wage work or out of a job entirely. The author describes the case of one woman who learned to operate a folding machine, allowing her to double her weekly wages to $9.00. Within a few years a newer machine arrived that made multiple machine operators obsolete. She was transferred to hand folding, which was harder physical labor and only paid 4 cents per 100 sheets. Working as quickly as possible she could only earn $7.00 per week (p. 51).

As a side note, this page caught my eye when I realized that the heads of the people in the bottom photo had just been drawn in. I’m not entirely sure why – maybe they were a bit blurry because the camera exposure was long and they were moving quickly? Was it to anonymize the workers, or to make them look more the part?

20th century photoshop

It is so interesting to see photographs some of these machines in action. The technology was advancing pretty rapidly in this period and most of these models no longer exist. Some versions can be seen at the American Bookbinders Museum in San Francisco.

In the finishing department, women were often only found laying gold leaf onto covers, rather than operating stamping machines or gilding the edges of textblocks.

The introduction of electric lights in the late 19th century allowed businesses to operate at all hours. Without labor protections (and a supreme court actively hostile to organized labor), many factory workers were forced to work long hours. Van Kleek notes that binderies are legally classified as factories, and despite state laws barring any woman over the age of 16 from working more than 60 hours, workers regularly reported 14 hour shifts, 6 days a week. The book describes workers commuting to and from dangerous neighborhoods in the early hours of the morning. As a result, young women regularly went missing. The study also records rampant child labor violations in the book trade.

I think we can all relate to “artificial light all day”

By examining the details of Mary Van Kleek‘s work, one can follow a line directly from this book to the establishment of the modern work week and labor protections we enjoy today. Van Kleek began working for the Sage Foundation shortly after its founding as the secretary of the Committee on Women’s Work. There she was mentored and trained by prominent labor activists like Florence Kelley and Lilian Brandt. Her research for this publication and others like Artificial Flower Makers (1913) and Wages in the Millinery Trade (1914) was  instrumental in the passage of New York state labor laws limiting working hours in 1910 and 1915. During WWI, Van Kleek was appointed by Woodrow Wilson to lead the new Women in Industry Service group in the Department of Labor. That group published a report that became the basis for the Fair Labor Standards Act of 1938, which established the eight-hour workday, five-day workweek, a federal minimum wage, overtime pay, and prohibited child labor.

An Adorable Fire Hazard

We’ve written before (many times) about the unusual and sometimes problematic objects that we find in books. Scrapbooks tend to be the worst offenders for this situation. In most cases, the inserted object is either damaging the pages around it or too bulky and deforming the book. In the case of this scrapbook from the Mary Duke Biddle Trent Semans family papers, though, the problem item poses a danger to the collections around the scrapbook, too.

Several of the scrapbook pages have paper matchbooks mounted to them. Much like the ticket stubs that appear alongside, the printed matchbook is a keepsake to remember a special occasion. These matches come from a Longchamps restaurant, where Mary dined before attending a show. The exterior of this matchbook is a metallic gold, but the real design highlight appears inside.

The matches are shaped and printed to look like rows of little chefs!

This scrapbook dates from the 1930s, so these are probably “safety matches” – meaning they cannot ignite without the contacting the striking strip on the cover of the matchbook. They are also quite old at this point, and may not even light using the strip. There is still a risk to the collection, however, so Rachel Penniman did some research to determine the best way to make them safe before rehousing the scrapbook.

There are a couple of options for dealing with matches in a collection. The quickest solution is to physically remove the matches. In another example from the same scrapbook (pictured above), the bottom of the matchbook and all the individual matches were torn off before mounting. If all of the matchbooks were treated this way, then we wouldn’t have to worry, but a lot of information would be lost.

One of the individual matches (already used) is also taped to this page, so we can see that Longchamps used more than one chef design in their matchbooks.

Clipping off just the match head could also be a good solution for removing the potential for ignition while retaining more of the original material. If the matches in these books were more of a plain design, that could be a viable option here, but we just couldn’t bring ourselves to decapitate the little chefs. Luckily, there was another way.

Our colleagues at Northwestern University have developed a method for coating the match heads to prevent lighting. To treat the match heads, Rachel applied three coatings of a matte acrylic medium: one dilute layer to penetrate and then two coatings of undiluted acrylic to form a protective layer. After the coating had cured, the scrapbook was ready to be boxed and returned to the stacks. The acrylic medium is not tacky when dry, so it will not stick to the matchbook cover or facing scrapbook pages when the book is closed.

One of the major challenges of caring for a large research collection is the wide variety of objects and materials that are contained within it. When confronted with potentially harmful items like these matchbooks, it is so helpful to read about how other conservators have dealt with them.

Some Boxes Are Just Too Fancy

One of the first lines of defense for a damaged book is a well-fitting enclosure. It can prevent loss of any loose pieces or additional strain on weaker binding materials from handling during shelving.  Many of the books in special collections were boxed long ago or before their acquisition. When those items come into the lab for treatment, we evaluate the box for fit, function, and artifactual value to determine if it should be retained or replaced.

Lately I’ve been working on a 1545 edition of The  Byrth of Mankynde from the Josiah Charles Trent History of Medicine collection. Originally published in 1540, this book is the oldest manual for midwifery printed in English. It contains several copper plate engravings of anatomy – apparently some of the first in England to be produced by roller press. My favorites are the figures of fetuses in utero, which look more like babies floating in light bulbs or balloons.

The book had been boxed decades ago in a very nice quarter-leather slipcase, with a shaped spine and false raised bands to make it look like a binding when sitting on the shelf. The maroon goatskin has been tooled in gold to mark the title, author, and publication information on the spine and along the “boards” where the leather meets the red cloth.

Slipcases can be damaging to a book if they fit too tightly, often causing abrasion on the boards as the book slides in and out. This slipcase avoids those problems with a 4-flap enclosure, which can be removed with a red ribbon pull tab on the fore-edge. Unfortunately that ribbon has started to split and is barely hanging on at this point.

The inside of the 4-flap is covered with a red marbled paper that matches the colors of the other materials very well. It even includes small metallic flakes that sparkle a little as you open the box.

The interior of the slipcase is covered with the same marbled paper.

While these decorative papers really enhance the visual appeal of the box, they can present a number of problems for the book itself. Often the dyes or pigments used in colored papers can rub off onto a book through normal handling; if the binding material is lighter in color you might see some staining on the board edges.

The bigger risk from these colored materials, though, is if the box ever gets wet. Much like a red sock in a load of white laundry, water-soluble dyes can easily transfer to the pages of the book and cause staining that may be impossible to remove.  I worried that in a water event this box could turn all those little lightbulb babies bright pink.

An easy way to test for solubility is with a basic water drop test. Immediately after placing a very small drop of water onto the surface of the marbled paper, I used a piece of clean blotter to wick it up. Looking at the scrap of blotter, you can see if there was any discoloration or transfer of the solubilized media. You can repeat this process a couple of times with larger drops, left for a longer duration.

I could see some transfer of red to the blotter when the water was in contact with the marbled paper for only a few seconds. The same test on the cloth produced a far more dramatic result.

I appreciate the quality of craftsmanship that went into making this enclosure. A lot of effort was put into making a very deluxe box for this significant and valuable book. The leather is pared well and the titling is very clean. The maker clearly spent time selecting leather, cloth, and marbled paper that went together. Unfortunately all those fancy materials present too much of a risk to the book and will need to be replaced. While the cloth-covered boxes that we make are pretty visually plain, that’s actually one of their strengths. The lack of decoration or color is often the safer choice… and you don’t want your box to outshine the book anyway.

When Items Keep Getting Bigger

Some treatments require a lot of coordination with our colleagues over in special collections to ensure that that they have a good permanent home in the stacks.  We construct custom housing to meet the specific needs of the item for storage, but we also need to be sure that the enclosure we design will actually fit on a shelf and can moved from the stacks to the reading room. Sometimes the description and shelving location in the catalog also need to be updated if the item changes size during treatment.

This 17th century English indenture and deed is a recent example that left the lab much larger than it arrived. It came to us folded up in a relatively small package, measuring around 7″ square. It unfolded into a pretty large (20″ x 30″) manuscript legal document, written in ink on parchment with the remains of five parchment strips and wax seals along the bottom. The earliest text dates from 1620, with five individuals (Symon Courte, Edward Pyne, Thomas Alcastle, Humfree Quicke, and yeoman John Hare) granting property rights in West Monkton to two people (Baldwine Wallet and yeoman Richard God). Additional text on the back dated 57 years later grants further inheritance of property rights to Robert Alcastle (Thomas Alcastle’s grandson and executor of his father’s estate).

Before treatment, photographed in raking light to emphasize the folds.

The bottom edge of the parchment is folded over so that the five parchment strips can lace through two layers and be held securely in place. The parchment strips were twisted together and rough balls of red wax were affixed to stop the strips from being removed. Some of the signatories wrote their names across both the document’s folded lower edge and the visible square of the parchment strip as an authentication or security measure.

The document was folded both vertically and horizontally several times to make storage easier, but it made opening and reading the document quite a challenge. The parchment has a strong memory and will fold back onto itself without being weighted down. Yellowed adhesive residue from pressure sensitive tape was visible along the top edge – maybe used as a previous mounting solution. The wax seals had also became quite banged up over the years, so only one of the wax balls remained intact. The broken remains of another had been wrapped in a thin textile and tied onto the parchment strip with string. Little bits of red wax would sometimes fall out of the pouch when handled.

After treatment, photographed in raking light.

After dry cleaning the front and back of the parchment and removing as much of the tape residue as I could, I performed some minor flattening of the parchment sheet. My goal was to flatten it enough that the document would lay open on its own, while still retaining the evidence of how it was folded up for storage.  I didn’t want any more fragments of the broken wax seal to be lost, so I took the remains out of the textile pouch and wrapped them in a little pleated package of soft Japanese paper, adhered closed with wheat starch paste. This seamed like a better solution than sealing them in some kind of stable plastic, like polyethylene, since the paper doesn’t crinkle so loudly. I tucked the package back inside the textile wrapping and secured it closed with some small stitches thin linen thread, toned to match.

My goal for the enclosure design was to protect all the different parts of the document, and also to help hold it flat should there be any changes in relative humidity. Boxes for parchment covered books often use of a restraining flap, so I thought something similar could be employed here with a rigid portfolio.

I knew this enclosure would be stored flat on the shelf, but I still didn’t want the document to move around too much inside – to protect the surface from abrasion, but also so as not to risk further damage to the parchment strips and wax. I cut a sheet of paper just a bit bigger than the dimensions of the document, then affixed wide paper corners to hold it in place. This was mounted to a sheet of matboard, which also had a sheet of E-flute corrugated board laminated to the back. This makes the matboard stiffer without adding much weight. Soft twill tape was laced through the board around where the two remaining wax seals were hanging, so they could be tied down and would not bounce around inside the box when it is served to a patron in the reading room.

The portfolio top flap is also made of laminated sheets of matboard and blue corrugated, with a Tyvek tape hinge along the top edge that attaches it to the bottom board. All of the corners were rounded and the bottom edge of the top flap’s matboard was sanded to take off the hard edge.

The custom sized portfolio ended up being larger than any of our standard metal edge boxes, so I created a custom fit telescoping lid box out of corrugated to hold it. Unfortunately we also don’t stock corrugated sheets large enough – so I had to join two sheets together with tyvek tape to make either the base or the lid. A third piece of corrugated was glued to the outside of both the lid and the base to stop the tape join from flexing when the box was lifted or tilted. The enclosure got a photo label at the bottom corner to help with identifying it on the shelf.

Removing the document from this enclosure to examine both front and back is fairly easy. After untying the twill tape, the parchment can be gently lifted out from under two of the paper corners, and then you can fully slide the document out. It actually requires two people to flip it over, since it is so large. While making this enclosure, I made sure to check that it wasn’t too large for the bigger shelves in the stacks and that it could fit through a standard-width door while resting on a cart.

Islamic Binding Workshop with Yasmeen Khan

by Erin Hammeke, Senior Conservator

Duke University Libraries recently hosted an Islamic Bookbinding workshop with instructor Yasmeen Khan, head of Paper Conservation at the Library of Congress. Staff from Preservation at UNC libraries; Duke Conservation Services; and former HBCU library conservation alliance intern, Layla Huff, attended the workshop. During the course of the week, we learned how to construct a Persian bookbinding model that illustrates many of the structural, material, and decorative features of Islamic bookmaking. The models have hand-sewn textblocks, woven silk endbands, gold-sprinkled endleaves, an envelope flap, and goatskin leather covers decorated with a traditional brass stamp. Students personalized their bindings with additional decorative elements like ruled and gold tooled lines, gold paint, and colored leather onlays. We also discussed conservation considerations for Islamic materials with Yasmeen and examined Islamic bookbindings from the Rubenstein Library Collections.

The workshop was generously funded by the TRLN Library Consortium’s IDEA funds. Big thanks to TRLN and to Yasmeen for making this workshop possible!

Staff around a table observing endband sewing

Staff gathered around tables receiving instruction on bookbinding techniques.

Endband sewing in progress

Endband sewing finished

Leather covered board with blind tooling and stamping, before attaching to the textblock.

Finished binding in 3/4 view Considering the great expanse of the Islamic world, there is much variation in bookbinding features associated with diverse cultural traditions and geographic origins. We got the chance to examine and compare Duke’s holdings of rare Islamic manuscripts.

Library staff around a table examining historical examples of Persian and North African bindingsThe Rubenstein Library holds Persian items (from India and Iran), Moroccan, Ethiopian, Turkish, and Chinese Uygur bookbinding holdings, as well as others whose geographic origins have not yet been identified. While the Islamic calligraphic manuscript tradition was paramount, the decorative features of bookbindings are also often quite glorious – from intricately painted lacquer bindings to stenciled or cut paper endsheets – these features can give clues about where an item originated and also to whom the bookbinding may have been marketed in the modern book trade.

Arabic MS 20 open to to show square-shaped page format

Arabic Manuscript 020 has the more squarish format typical of Maghrebi bindings from Morocco.

Arabic Manuscript 048, a Chinese Uygur Qur’an, has endleaves decorated with colorful paper cut outs and a decoratively cut envelope flap.

Everyone's finished book on one tableHosting this workshop reminded us of how important it is to have opportunities to expand our knowledge bases and also to convene with our regional colleagues for much-needed training. With a topic this large, many of us learned how little we knew and how much more there is to learn. It was a good reminder that of how important it is to advocate and care for all materials and it’s easier to do this when one is better informed about the history and unique features of such collections.

A group photo of all workshop participants standing, holding their finished book

To the Bookbinder.

The ancient Greek mathematician Euclid is widely known as the father of geometry, and his 13 book treatise, Elements, was one of the most famous mathematical texts in antiquity. The original text (written around 300 BCE) is no longer available to us, but it was widely copied and translated into many different languages over the centuries, with the first English translation appearing in 1570 CE. There have been many editions of the book as scholars analyze and retranslate extant manuscript copies, along with early commentaries and annotations.

A brown leather book sitting on a table surface in 3/4 view, showing detached boards. This 1719 English edition recently came across my bench with detached boards and powdery leather, fairly common condition problems for a leather trade binding from this period. The textblock was a bit dirty, with grime building up particularly at the folded engravings. As I was surface cleaning the first of them, I noticed some interesting instructions for the bookbinder included at the bottom of the print:

“To the Bookbinder. Page 44 Observe that every Scheme is made to fold out fronting the page directed to; And so, that when they are unfolded all y figures may ly clear out of the Book.”

The binder did successfully follow the instructions to make the diagrams visible “clear out of the book.”

It’s a useful arrangement to have the sheet extend that far out, so as the reader is going through the steps used to construct an object using a straightedge and compass, they can view the entire diagram and follow along visually. Otherwise, if the diagrams were bound in the usual way, the recto of one page might obscure the diagram you were looking at and you would be forced to flip back and forth.

What I love about these simple instructions is that they provide a little glimpse into the design and production of this object. Many tradespeople contributed to making the book, but they were working in different places and at different times. Including instructions for assembly in the prints is very helpful. For books sold in sheets, the printer or book seller may never meet the binder and be able to explain how it should be assembled. Had the book come to the lab in a worse state, with broken sewing  or parts detached, that little note might also be useful for me.

CDA Episode 2: Prepping for Ingest

In the first blogpost of our series introducing the Conservation Documentation Archive (CDA), I wrote at length about the needs for creating documentation during our work and the various forms in which it takes. Unfortunately, ingesting those materials into the Duke Digital Repository was not as simple as migrating digital files from one platform to another. A lot of work went into preparing each record, and today I’d like to share some more of the details and considerations that went into that process.

Our “hard copy” documentation has always been stored in a filing cabinet, organized by fiscal year, with the files of each treatment contained in a paper folder. As record keeping practices and technology changed over the years, we began producing our reports and images digitally and saving them to shared network storage provided by the university. The digital files are similarly organized in folders by fiscal year and treatment number.  

Preservation of our born-digital records has long been on our minds: it’s imperative that conservation treatment documentation persists for use by future custodians of the item (see AIC Guidelines for Practice #28 and commentary). Electronic records require regular, proactive maintenance in order to remain usable over long periods of time. The shared network drives are regularly backed up, but the integrity of the files are not checked as part of that process. If files were to become corrupted or deleted, we might not know for some time and our records could be lost. 

Documents that are stored in a human-readable format, on the other hand, have advantages for long-term preservation. Their storage requirements are pretty minimal (a cool, dry place), and they require no active maintenance or special equipment to access them. AIC’s Guidelines for Practice state that if the maintenance of electronic documentation records cannot be ensured, the conservation professional must create and maintain hard copies of that documentation using the most permanent materials available (see Guideline #28, Commentary B). The adage often used in libraries and archives is “Lots of Copies Keep Stuff Safe”, abbreviated LOCKSS.  

American Photocopy Equipment Company (1963)

Since we already have a method for storing hard copy records, we’ve been printing representative copies of our digital records and storing them in the filing cabinet. The reports are black and white electrostatic prints from our office copier (see Batterham, 2008). We also select a small number of representative before and after images, arrange them four to a page and then print them with pigment-based inks on Epson glossy photo paper using an Epson SureColor P800 inkjet printer

The 35 mm slides in our legacy documentation are a bit of an exception. While they can be viewed with just a light source and magnification, special equipment is required in order to work with them easily. The colors of those slides have also shifted over time – and will continue to do so (Weidner 2012). “Benign neglect” isn’t a viable preservation strategy for this media.

Kodak slide and film viewer

The Duke Digital Repository offers a number of advantages over our past record storage strategies. Many of these are outlined in the Digital Preservation Policy, including regular monitoring of records for fixity and version control, maintenance of multiple copies in different locations, and control over who can edit, move, or delete materials and metadata. In addition to providing a better preservation environment, the digital repository also offers an improved mechanism for access by scholars using the collection. Rather than requesting a copy of paper records from our filing cabinet, library users can just view the records themselves online. In order to make that kind of access possible, however, we needed to get all of our documentation in order.

Our records underwent several phases of work to prepare them for ingest into the repository. Thanks to support from the Lyrasis Catalyst Fund, we were able to outsource the digitization of all of our legacy hard copy documentation, as well as hire a student worker and intern to assist with the large volume of file prep and metadata creation.

With digital records for all of our treatments in one place, we were able to perform a comprehensive  review to ensure the files were correctly ordered and labeled. Reports were checked to ensure they were complete, images were rotated to the correct orientation, and a file naming convention was established. Some file formats are better for long-term preservation than others, so the raw DNG files and compressed JPEG derivatives were separated into subfolders; only the uncompressed TIFF images are ingested. Written reports were migrated to PDF format. If the report was born digital (rather than a scanned page), the documents were converted to accessible PDF and saved in the PDF/A format for better long-term preservation. 

Once ingested, each treatment is organized as a single item in the digital collection, with the associated reports and digital images grouped together. We created metadata for each treatment to better identify and organize the records, and allow users additional access points. A title was created for each treatment, which includes the year the treatment was completed, a brief description of the work done, the workflow through which it came to the lab (if known), and the title of the item being treated (for example, “2016 board reattachment and tissue reback for instructional use of Athanasii Kircheri”). We also produced metadata to describe the culture or geography of the item’s origin, its condition, and the treatment techniques used. Whenever possible we adopted controlled vocabulary terms from the Art & Architecture Thesaurus (AAT) or Ligatus for all of these fields. Description for Duke’s other digital collections already rely on terms from the AAT. A unique identifier (either the BibSys number or archives collection identifier) was verified for each treatment in order to link the digital collection of documentation to the catalog record or finding aid for the item. 

It’s important to note that some information or records are not represented in the CDA due to privacy or copyright issues. In all of our digitized reports, the signatures of employees have been redacted. While the email communication between conservators and curators that provides additional context for treatment decisions has been preserved, those files are suppressed from public view. Closed collections and items not owned by Duke University Libraries that we have documented (typically for exhibit loans) are also suppressed. 

There was a lot of discussion in the media at the start of 2024 about copyright protections due to a certain culturally significant character entering the public domain. Shout-out to Jennifer Jenkins at Duke Law School for compiling a yearly roundup of works entering the public domain – it’s a really great read. Many of the items that we have treated are still under copyright protection, but there is a good fair use argument for making our treatment images of them available. The images are only used for scholarship, only small portions of copyrighted text are represented, etc. We ultimately decided to suppress certain treatment images of photographic collections, though, as they are fairly high resolution reproductions of the entire work. In those cases our reports are still available. See, for example, this condition assessment for an exhibit loan of a print from the Tom Rankin collection

To date we have ingested around 1,400 records into the repository, which covers up to the 2016/17 fiscal year. At the moment we are hard at work preparing records from the next 3 fiscal years for ingest. Our eventual goal, once we are caught up, is to have a regular, annual release of records from the previous year.

We have heard that some of our colleagues are already using the CDA for research and instruction. In the next episode of this series, we will dive into the interface and look at some of the ways this collection can be used for research.


References:

Announcing the Conservation Documentation Archive

Today we are excited to publicly announce the launch of The Conservation Documentation Archive (CDA). This is the culmination of several years of work to digitize and make available all of the conservation documentation that has been produced as part of caring for Duke’s collections for the last 26 years. Over 1400 records have been ingested into the Duke Digital Repository at this point, with smaller batches of records expected to be added annually. This work was generously supported by a 2021 Lyrasis Catalyst Fund grant and was awarded the inaugural Sandy Nyberg Award. We hope that this archive will become a valuable resource, not only for researchers to access additional information about objects in the collection, but in documenting the standard preservation practices of our institution and the profession at large. A great deal of thought and effort went into building the CDA, so over the coming months we will publish a series of blog posts discussing in greater detail some of our motivations and processes for creating this repository collection. 

In the first installment, we will travel back to February 2020, when staff from Conservation Services began discussing this project, to examine the scope of records that needed to be digitized and problems that the CDA is attempting to address. 

Browsing interface of the Conservation Documentation Archive showing a grid of thumbnail images and descriptions of each treatment

Readers who are unfamiliar with the details of our work may be asking, “What is all this documentation and why do we need to save it?” The rationale for creating and maintaining documentation is laid out in The American Institute for Conservation’s Guidelines for Practice (see numbers 24-28), one of the core guiding documents for our profession. The purpose of this documentation is to be an accurate and permanent record of our examination, testing, and treatment for any of the objects that come under our care. This could be when an item will be altered as part of conservation treatment, but documentation is often created for condition assessments, like collection surveys or prior to an exhibit loan. Our records attempt to describe the collection material, establish its condition at the time of examination, and help future custodians in their work with the item. When possible, the records we create include both written reports and images. 

The top of a treatment form, showing several of the bibliographic data fields: call number, lab number, barcode, title, author, publication date, etc

The format and detail of the treatment reports has varied considerably over the years, depending on the type of object or collection, circumstances, and who produced it. Most of our records were produced by department staff over the years, but some of the records come from vendors or conservators in private practice. Reports typically start with a number of basic fields with identifying information from the catalog or finding aid and name of the examiner and a date for the report. The item’s dimensions are measured and recorded on the form. The report might also include a statement about the justification or goals for treatment. 

Next we try to thoroughly describe the object (and accompanying items), including the format, structure, style, and decoration. The report includes what materials are used and if there are any distinguishing characteristics or marks. We also try to capture any condition issues that are observed, including damage or degradation, evidence of past treatment, and risks of additional damage or loss from use. We will note the methods of examination, including any testing and their results. This information informs our proposal for treatment. 

a checkbox form of various condition issues for objects, physical damage, chemical damage, biological damage, historic evidence
Condition section of an Object Treatment form

The proposal for treatment is often a list of potential options, ranging from minimal intervention to very extensive treatment. We typically list the materials we will use, any alternative approaches that might be possible, and the potential risks. The proposal will include an estimate for the treatment time to help with setting priorities and workload. At this stage in the process, we will hold a meeting with the collection curator and other stakeholders to discuss the various treatment options and arrive at the best course of action for the item. This section of the report includes space to document the date of the meeting, the names of staff in attendance, and signatures of the conservator and curator or collection manager.

The remainder of the report describes the treatment itself, such as procedures or techniques and the location and extent of all alterations. If the treatment carried out is in any way different from the proposal, we will note why. This section documents any material that may have been added or removed, including the manufacturer or source for added materials. We list any adhesives or other substances (cleaning agents, solvents, poultices, etc) used in the treatment, including their chemical name and manufacturing source. This information will be most helpful if the item needs treatment again in the future or if any of the alterations need to be reversed for some reason. The date the treatment was completed and the time spent are also recorded here. 

Two photos of the same book in 3/4 view before and after treatment. Color checker and label positioned in the photo by the book.
Before and after treatment photos

We produce photographs of the item before any alterations are made and after treatment is complete. In some cases we will photograph the object during treatment, too. We follow the AIC Guide to Digital Photography and Conservation Documentation for our photography workflow. The photographs typically show the item positioned on a neutral gray backdrop and include a target or photo checker card and printed label. The target or color checker provides a standard of comparison to help capture scale, direction of illumination, and true color of the item. These targets help us to create consistent before and after images, so that one can more easily compare the changes that occurred during treatment. The label in the photo includes a unique identifier for the item (the lab log number) and date of the photograph. This practice ensures we can always identify the item in the photograph, even if the file names or image metadata are altered or erased. 

the large filing cabinet where all the conservation documentation folders are stored


Conservation Services has been storing legacy documentation produced over the last 26 years in a large filing cabinet. The records for each treatment reside in their own paper file folder. The formats and media of those records have changed with the available technology. In addition to paper reports, our archive of physical media contains 35mm color slides, and inkjet photographic prints. The born-digital documentation is saved in a variety of file formats on networked storage. Reports tend to be saved in Microsoft Word or PDF format, while the images are saved in an archival raw format (DNG), as well as derivative TIFF and JPG versions. The TIFF acts as a preservation-friendly file format, while the JPG is a compressed format that is much easier to scroll through or post on the web. We have been printing paper copies of the forms and representative images as a backup for several years. Some of the older treatment folders hold very small fragments (like remnants of original sewing thread) that could not be reincorporated into the object during treatment. Our current practice is to encapsulate small fragments and store them in the enclosure with the item. 

example of an open treatment folder showing a paper report and clear plastic sleeve with twelve 35mm color slides.

The conservation documentation that we produce has enduring value for both collections research and the history of the library. One of the key principles of the Duke University Libraries Strategic Plan is support and advocacy for openness. Our department has always made our records available to anyone who asked (assuming that access respects donor agreements for restricted collections and confidentiality), but previously there hasn’t been a good mechanism for researchers to know that an item has been treated or that these records exist. Library staff in other departments may not even be aware that we have a cabinet full of reports sitting in our lab. 

side by side bar graphs showing 29 of 37 research libraries generating conservation documentation, but only 11 of 37 always or regularly including in archives
Survey data from McCann (2012)

This is a fairly common situation across our peer institutions. A 2012 survey by Laura McCann at NYU Libraries indicated that a majority of conservators at research libraries are producing documentation for special collections treatments, but fewer than half are depositing those records into the institution’s archives. Maintaining records of previous treatments is important for making decisions about the item’s care in the future. It also becomes an important record if an item is lost, destroyed in an accident, or becomes inaccessible for other reasons. Improved access to our documentation might help us to evaluate different treatment methods or materials. It might also aid future scholarship into the history of the conservation profession, providing a record of accepted practices for different time periods, and giving more context to our thought processes and rationales for certain treatment decisions.

With this summary of what we are trying to preserve and why out of the way, next we will look at some of the work that went into digitizing the legacy records and creating the necessary metadata for ingesting everything into the Duke Digital Repository. We’ll be taking a break from blogging in December, so look for our next installment in January 2024. 


References:

Automatic Text Generation Fail

Everywhere you turn lately it seems like tech companies are adding some kind of AI feature to their software. Sometimes these updates are incredibly useful. Other times… not so much.

MS Word automatic alt text generation identifies scroll as toilet paper

We discovered that Microsoft Word will now automatically generate Alt Text (alternative text) descriptions of the images you insert into your documents after it described an Ethiopic scroll as a roll of toilet paper. Clearly the robots have some training to do on cultural heritage materials.

Accessibility settings interface in MS Word, highlighting the checkbox to turn on automatic alt text generationAlternative text is important for making documents more accessible and we make every effort to add it when we can. I’m sure this automatically generated text is accurate enough for stock images and maybe will improve over time, but for the treatment and handling documentation we create it’s really only good for a laugh. We have turned it off rather than risk some ridiculous description being saved in our work. Just open the Options menu and look for either Accessibility or Ease of Access (depending on your version) to silence the machines.