By Rachel Penniman, Senior Conservation Technician
Sometimes items come to the lab that have so many problems we just can’t predict how the treatment will go at first glance. These items from the Reva Korda papers were that kind of challenge.
 |
 |
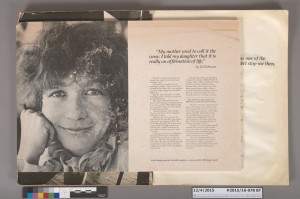
Mounted advertisements before treatment.
These four advertisements had been mounted onto foam core backing board that was deteriorating and delaminating. They had also been exposed to water which caused mold, warping, and two of the ads stuck to the back of two other ads. Because the ads were stuck together, we couldn’t even see what the bottom two ads looked like.
 |
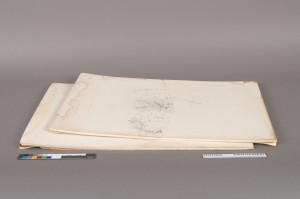 |
Mounted advertisements stuck together and warping.
With all the condition issues there were plenty of ways for this treatment to go wrong. The back of the ads could get skinned or tear as I tried to remove the backing boards. The mold could have completely disfigured the lower ads. The ads stuck to the backing boards could be stuck so irreversibly that we would lose parts of the image in trying to separate them. We had a meeting with the curators to discuss the range of options. We decided that because the bottom two advertisements were so completely obscured, it was worth making an effort to separate them even if it resulted in a little bit of loss. I first planned to try mechanically removing the foam core backing boards and separating the stuck ads either mechanically or with a little humidification. If that didn’t work we agreed to have another meeting to discuss more invasive treatments like full immersion in a water or solvent bath.
The first step was to remove as much of the mold as possible with a soft brush and vacuum. Once that was done I started trying to separate the ads from their backing boards. Sometimes conservators really hate how old adhesives turn yellow and brittle with age, but when an adhesive has aged so poorly that it fails completely it can actually make our jobs easier. In this case, on three of the advertisements the dry mount adhesive had become so brittle that with the tiniest bit of pressure I was able to slip a thin metal spatula between the board and the advertisement and it just popped right off. Success! It was very satisfying separating these from their foam core boards. Using a little bit of solvent on swabs I was able to remove most of the yellow adhesive residue from the back of each advertisement.
 |
 |
Back of one advertisement before yellow adhesive was removed and after adhesive was removed.
The fourth advertisement had a different adhesive that felt soft and waxy. Sadly for me, it was still doing its job and was holding the ad firmly to its backing board. In 2014 our lab hosted a photograph conservation workshop taught by Gawain Weaver. We learned a number of methods for removing photographs from mounts. I recognized this waxy feeling adhesive from that workshop and remembered doing tests on how to most easily remove it.
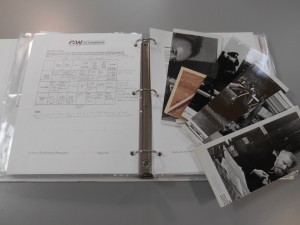 Thank goodness for taking good notes and keeping all my test samples!
By placing the advertisement face down on a piece of blotter on a hotplate on the lowest setting I was able to soften the adhesive so I could separate the final ad off its backing board. More success!
I was able to separate the ads that were stuck together but some of the paper from the foam core board remained stuck to the faces of the ads. This was far better than the alternative where some of the face of the advertisement could have been skinned off though so I considered that a win.
 |
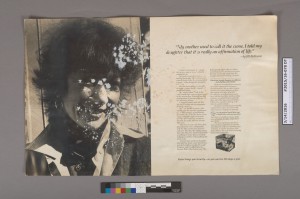 |
Advertisements that had been stuck on the bottom with paper still attached to the front.
I was able to remove all of the attached paper with water or alcohol on swabs pretty easily. There was still some discoloration from the mold but the alcohol helped to reduce it. Mostly success!
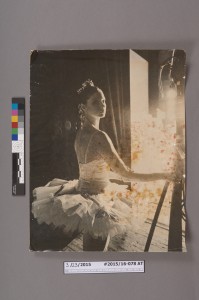 |
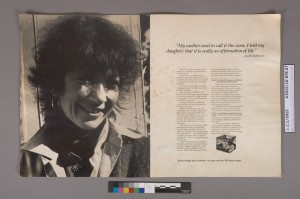 |
Previously hidden advertisements after the paper was removed.
While these ads still show evidence of their hard life they are now free of their bad mounts, failing adhesive, and separated from each other. The discoloration from mold and water damage will remain, but at least now we can see what had previously been completely hidden. It’s always a happy surprise when something goes smoother and more easily than anticipated. It’s a rare treat. With the very low expectations for the treatment it was an extra special pleasure to be able to show the previously unseen advertisements to the curators.


