
Some treatments require a lot of coordination with our colleagues over in special collections to ensure that that they have a good permanent home in the stacks. We construct custom housing to meet the specific needs of the item for storage, but we also need to be sure that the enclosure we design will actually fit on a shelf and can moved from the stacks to the reading room. Sometimes the description and shelving location in the catalog also need to be updated if the item changes size during treatment.
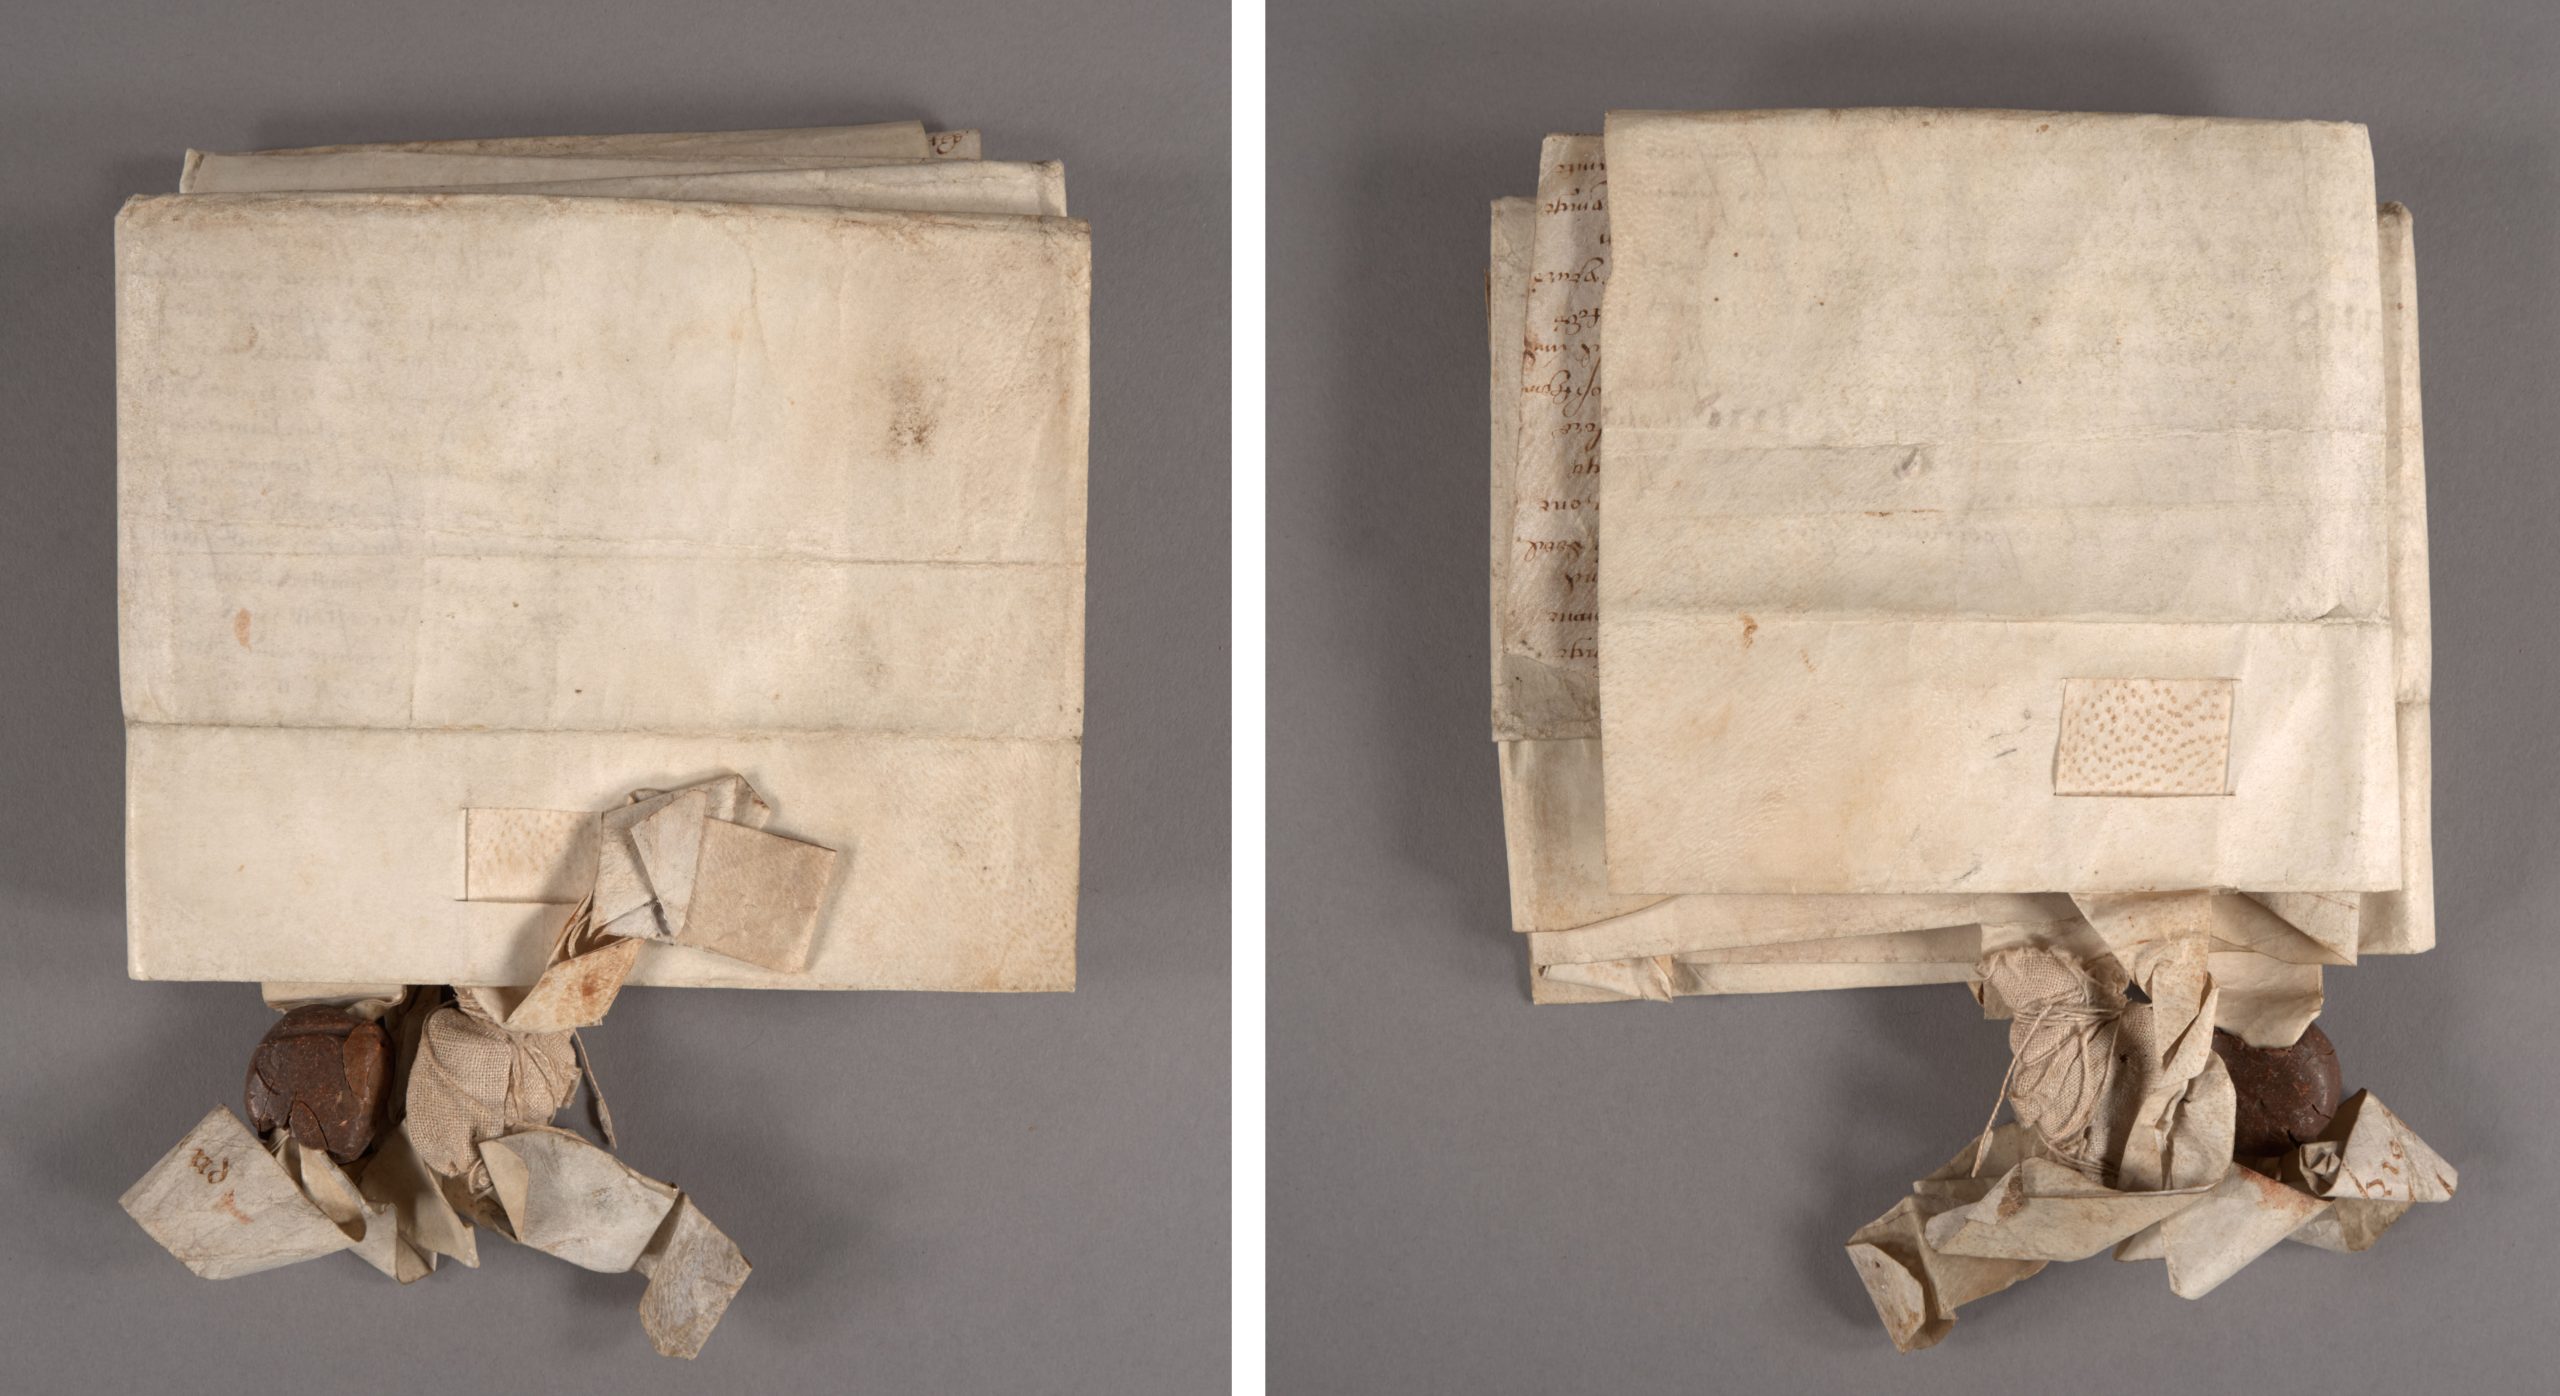
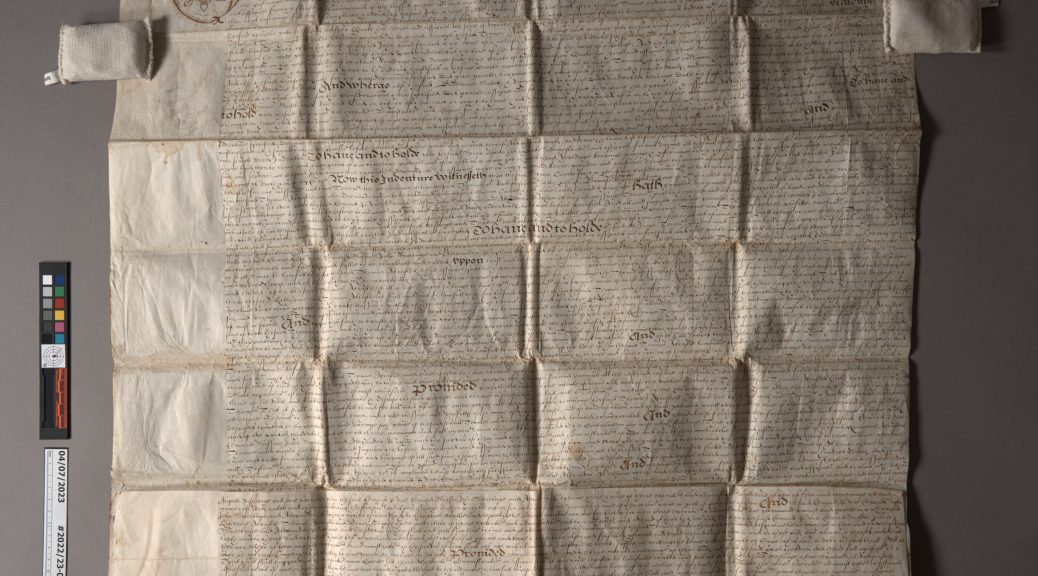
This 17th century English indenture and deed is a recent example that left the lab much larger than it arrived. It came to us folded up in a relatively small package, measuring around 7″ square. It unfolded into a pretty large (20″ x 30″) manuscript legal document, written in ink on parchment with the remains of five parchment strips and wax seals along the bottom. The earliest text dates from 1620, with five individuals (Symon Courte, Edward Pyne, Thomas Alcastle, Humfree Quicke, and yeoman John Hare) granting property rights in West Monkton to two people (Baldwine Wallet and yeoman Richard God). Additional text on the back dated 57 years later grants further inheritance of property rights to Robert Alcastle (Thomas Alcastle’s grandson and executor of his father’s estate).

The bottom edge of the parchment is folded over so that the five parchment strips can lace through two layers and be held securely in place. The parchment strips were twisted together and rough balls of red wax were affixed to stop the strips from being removed. Some of the signatories wrote their names across both the document’s folded lower edge and the visible square of the parchment strip as an authentication or security measure.
The document was folded both vertically and horizontally several times to make storage easier, but it made opening and reading the document quite a challenge. The parchment has a strong memory and will fold back onto itself without being weighted down. Yellowed adhesive residue from pressure sensitive tape was visible along the top edge – maybe used as a previous mounting solution. The wax seals had also became quite banged up over the years, so only one of the wax balls remained intact. The broken remains of another had been wrapped in a thin textile and tied onto the parchment strip with string. Little bits of red wax would sometimes fall out of the pouch when handled.
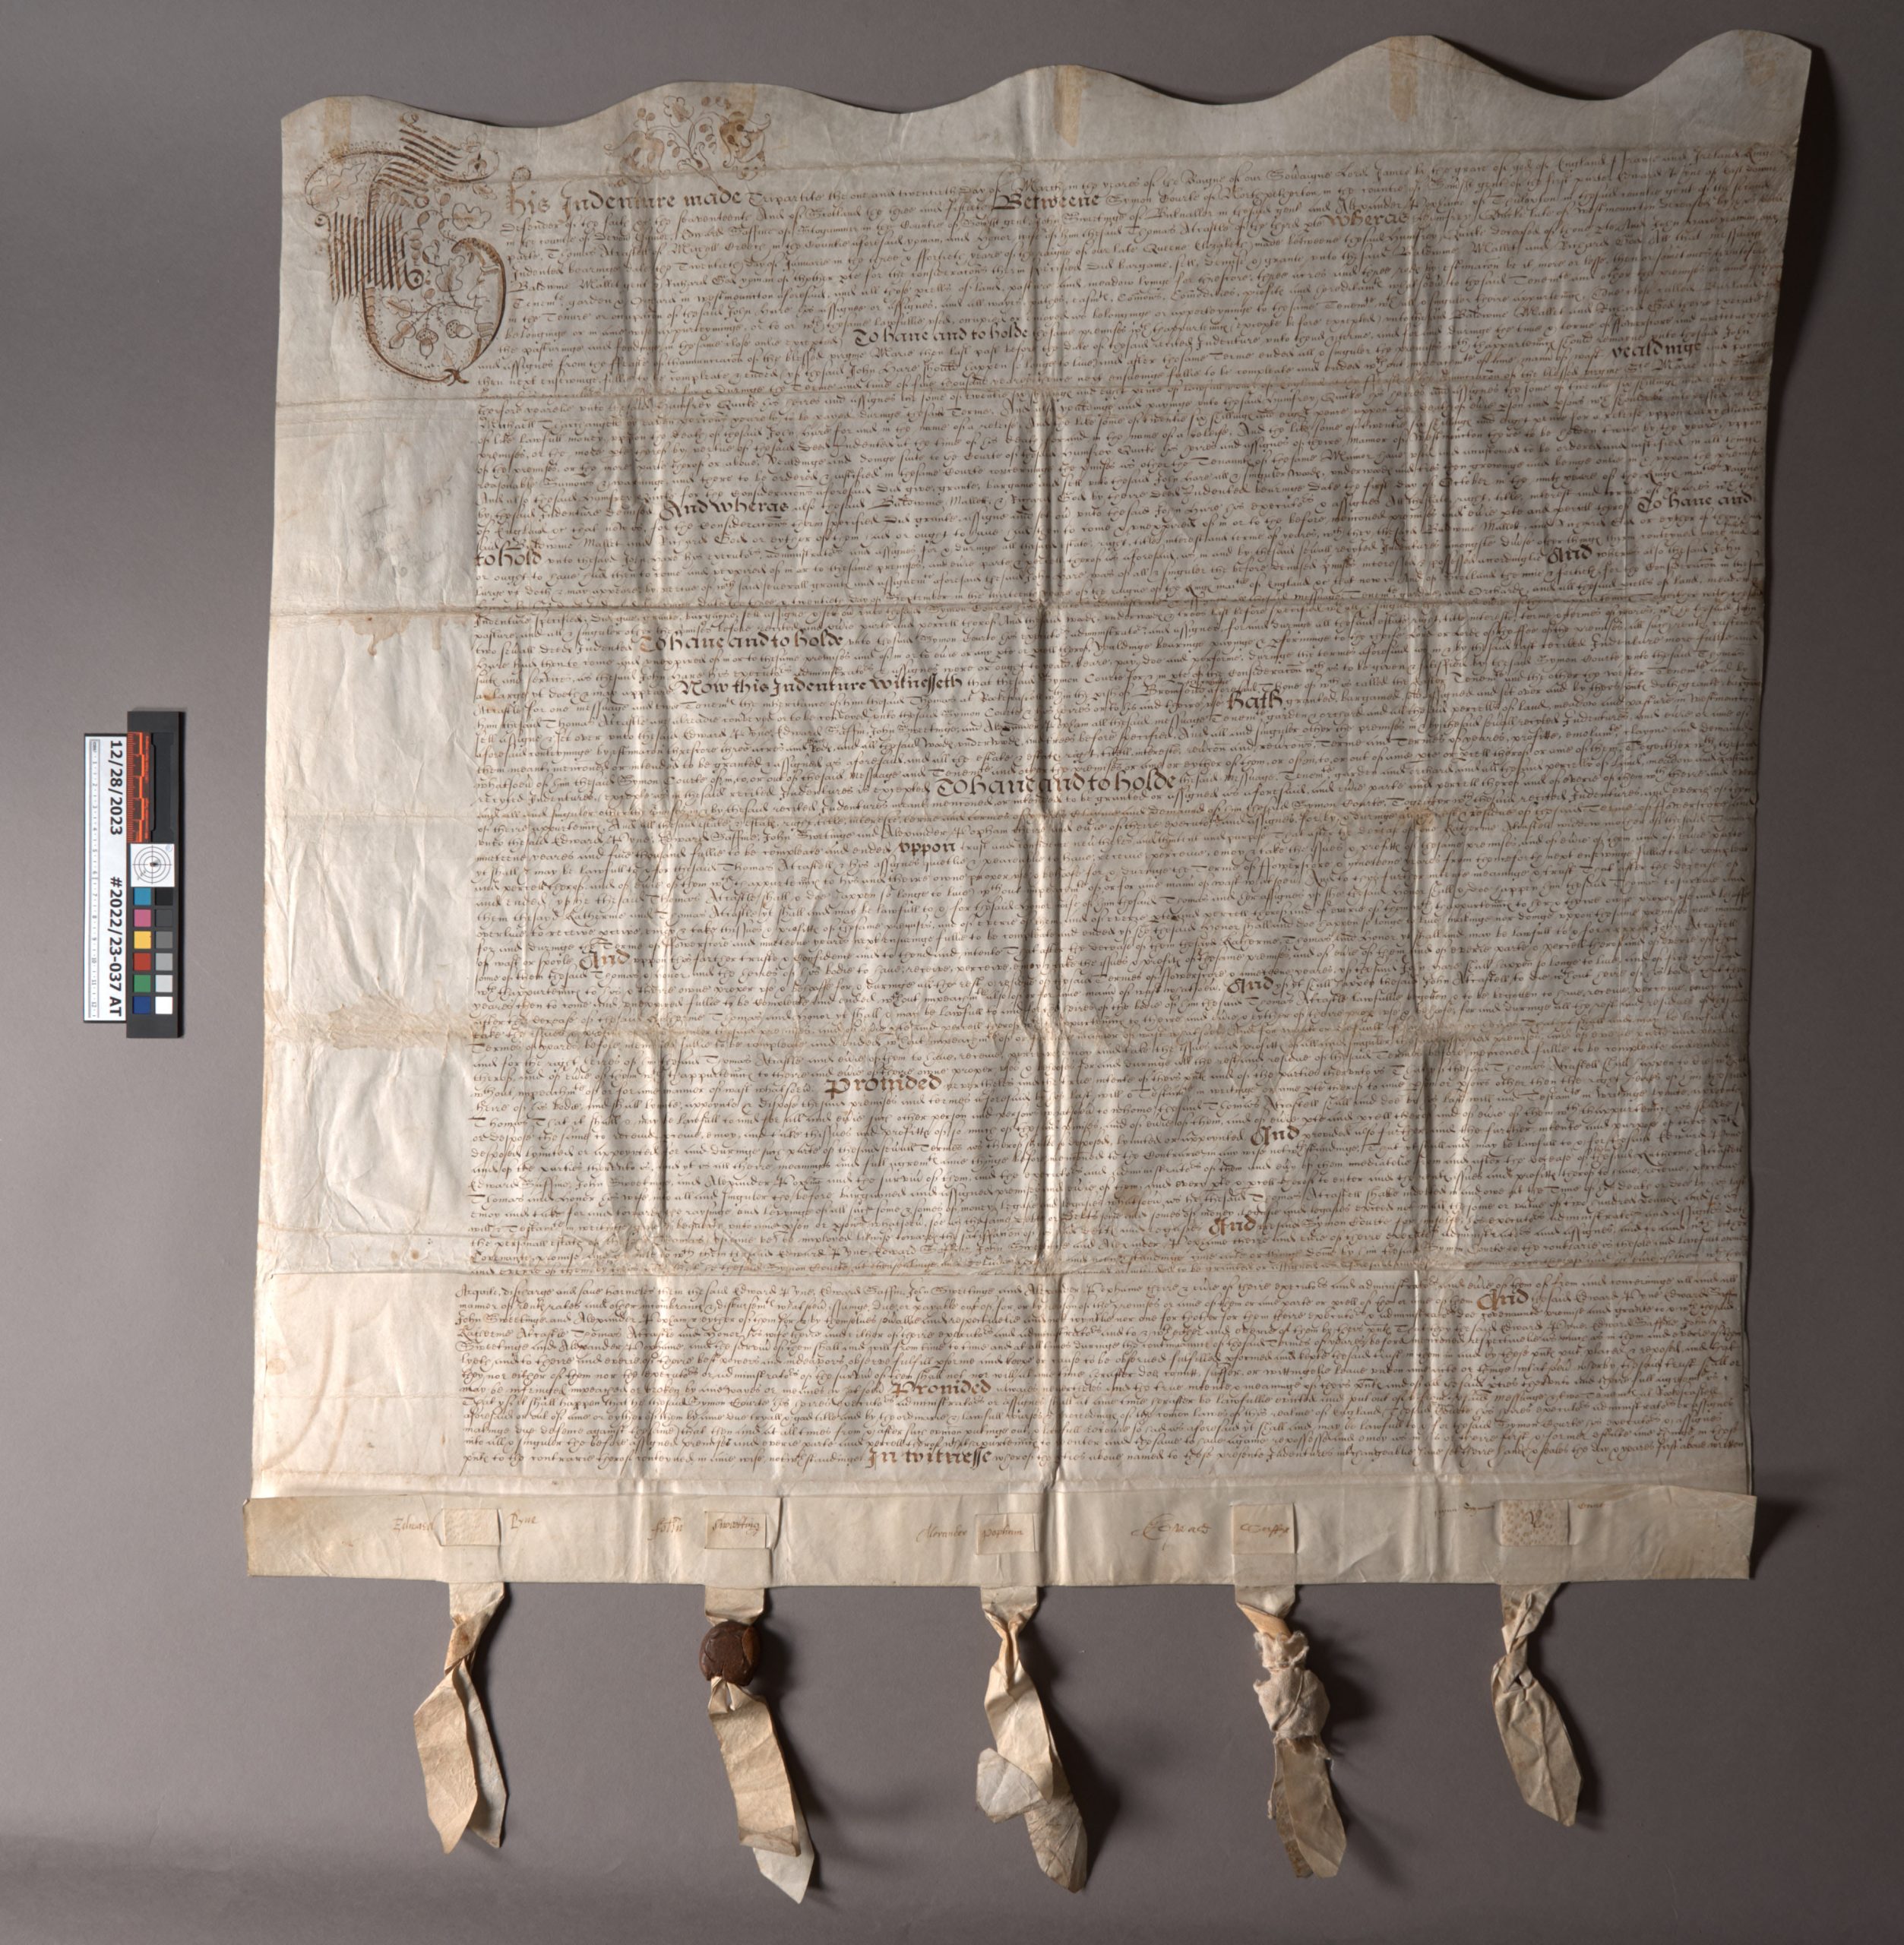
After dry cleaning the front and back of the parchment and removing as much of the tape residue as I could, I performed some minor flattening of the parchment sheet. My goal was to flatten it enough that the document would lay open on its own, while still retaining the evidence of how it was folded up for storage. I didn’t want any more fragments of the broken wax seal to be lost, so I took the remains out of the textile pouch and wrapped them in a little pleated package of soft Japanese paper, adhered closed with wheat starch paste. This seamed like a better solution than sealing them in some kind of stable plastic, like polyethylene, since the paper doesn’t crinkle so loudly. I tucked the package back inside the textile wrapping and secured it closed with some small stitches thin linen thread, toned to match.
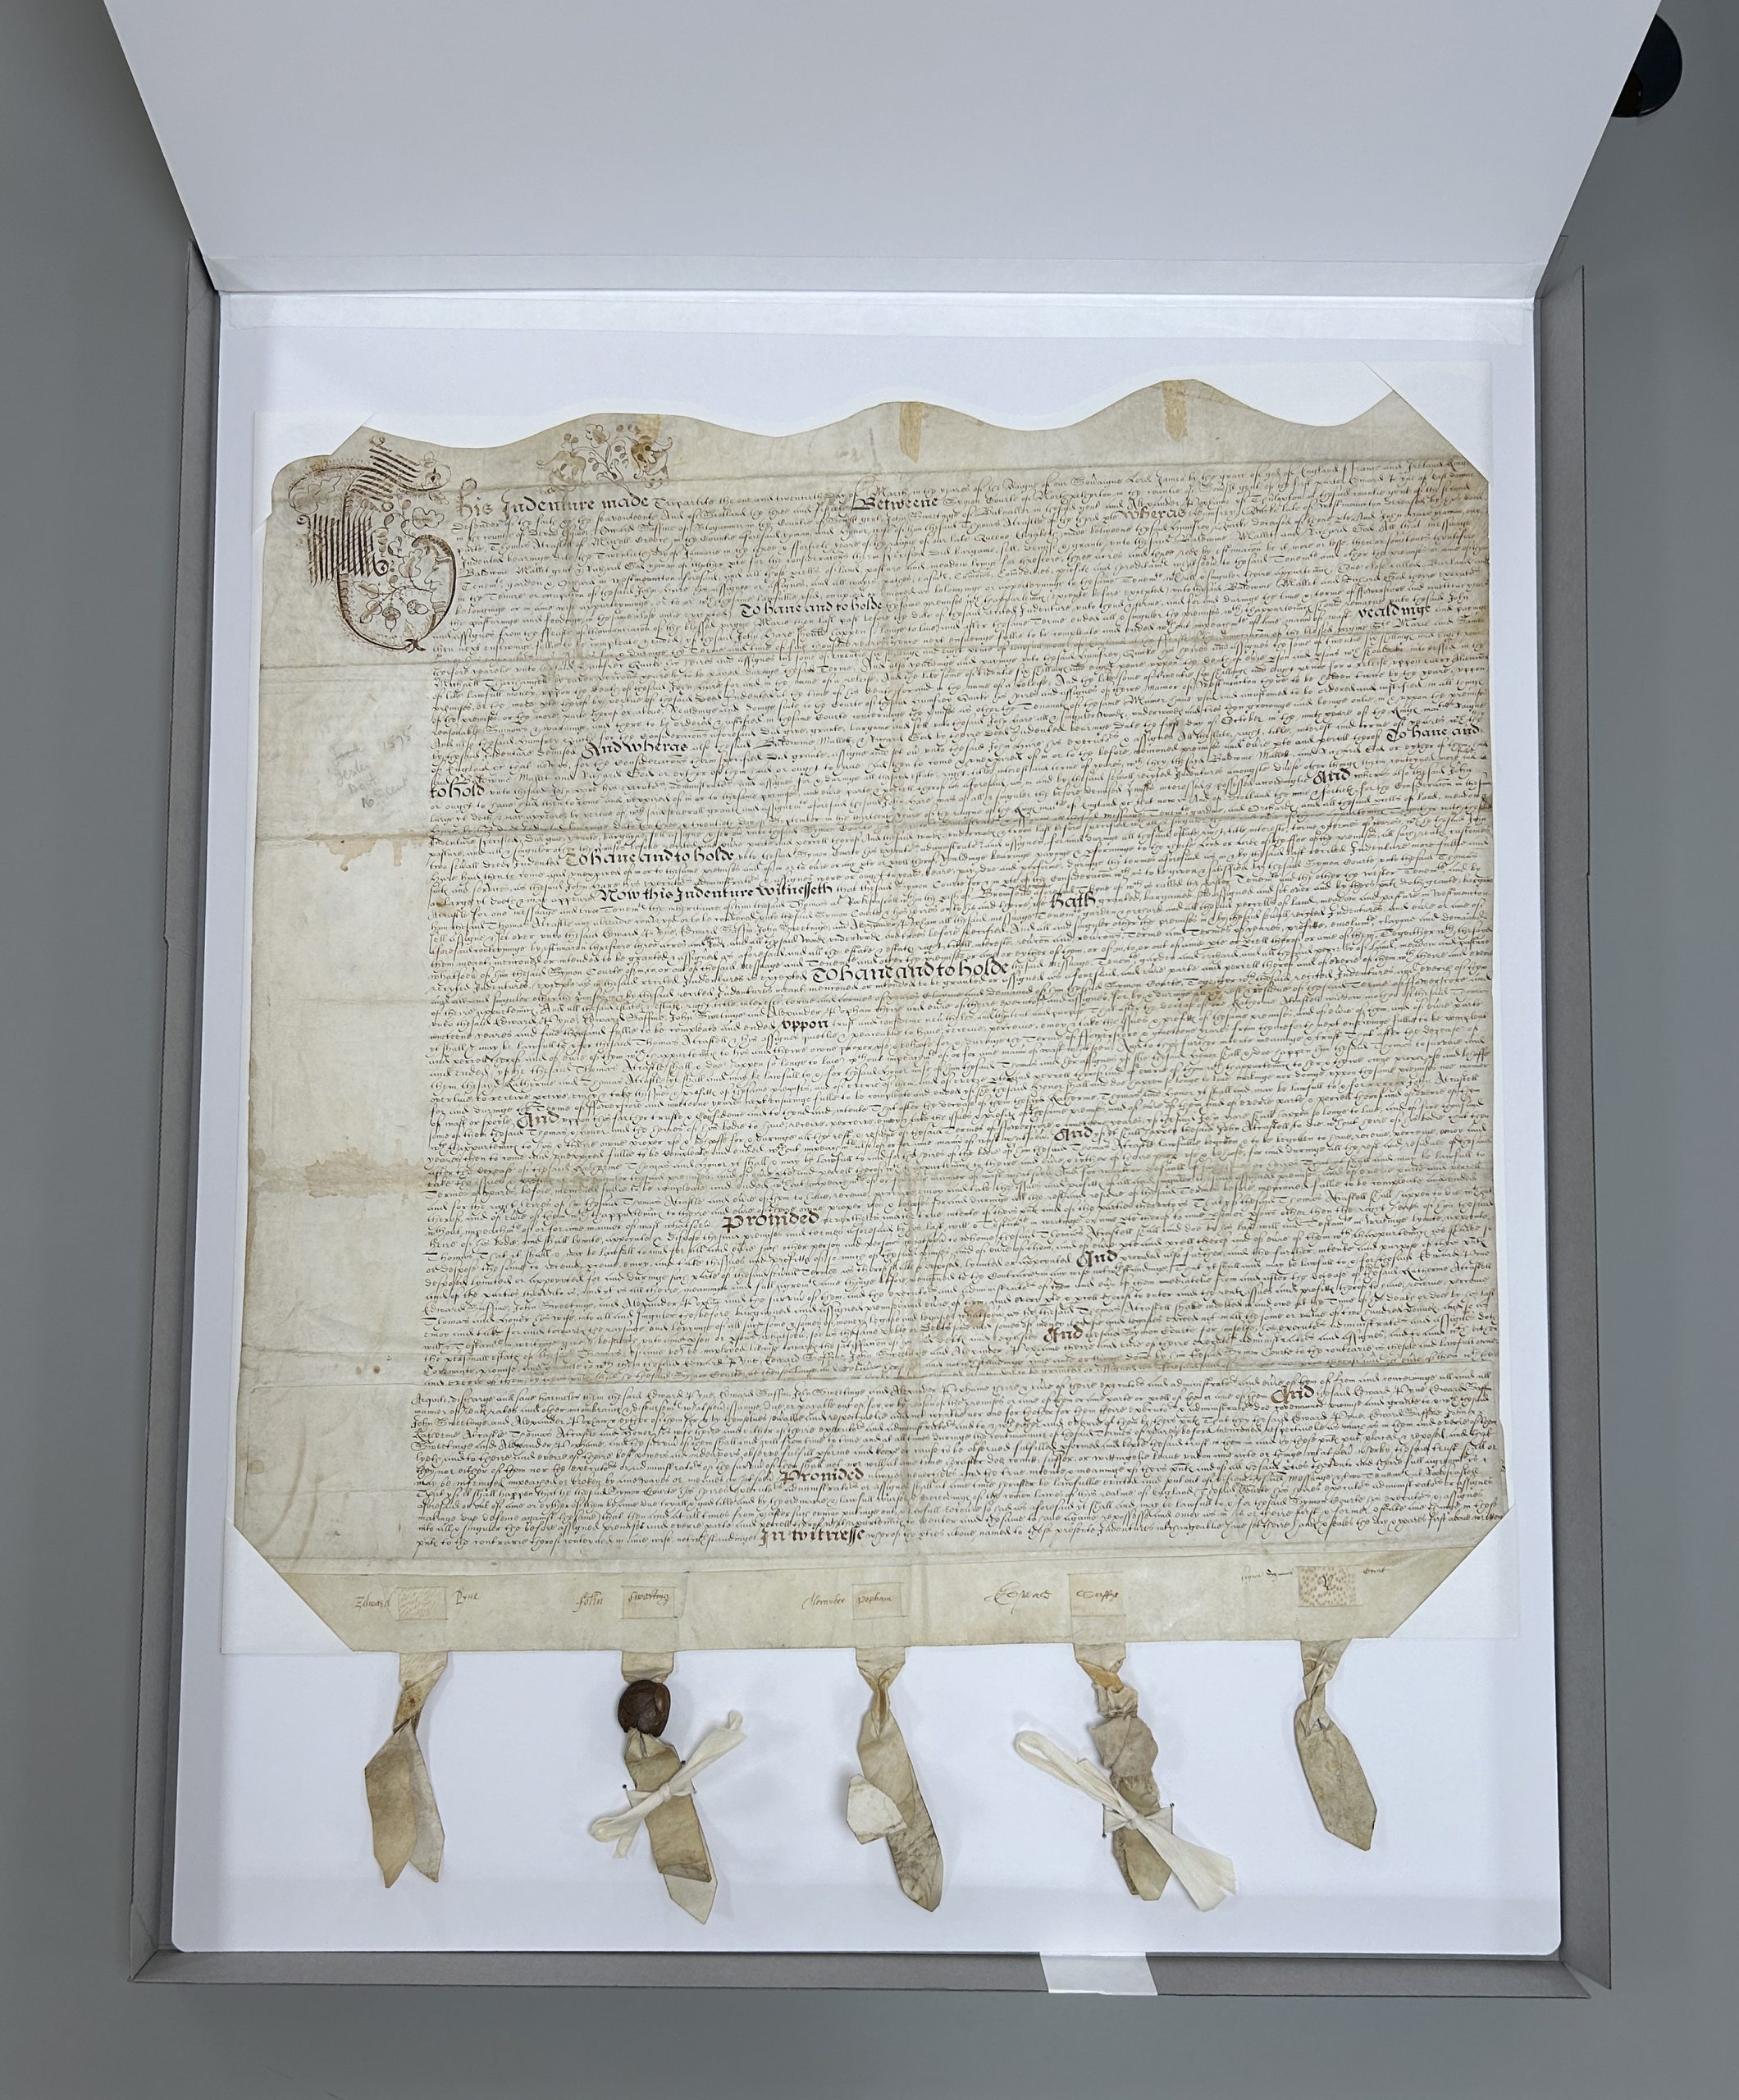 My goal for the enclosure design was to protect all the different parts of the document, and also to help hold it flat should there be any changes in relative humidity. Boxes for parchment covered books often use of a restraining flap, so I thought something similar could be employed here with a rigid portfolio.
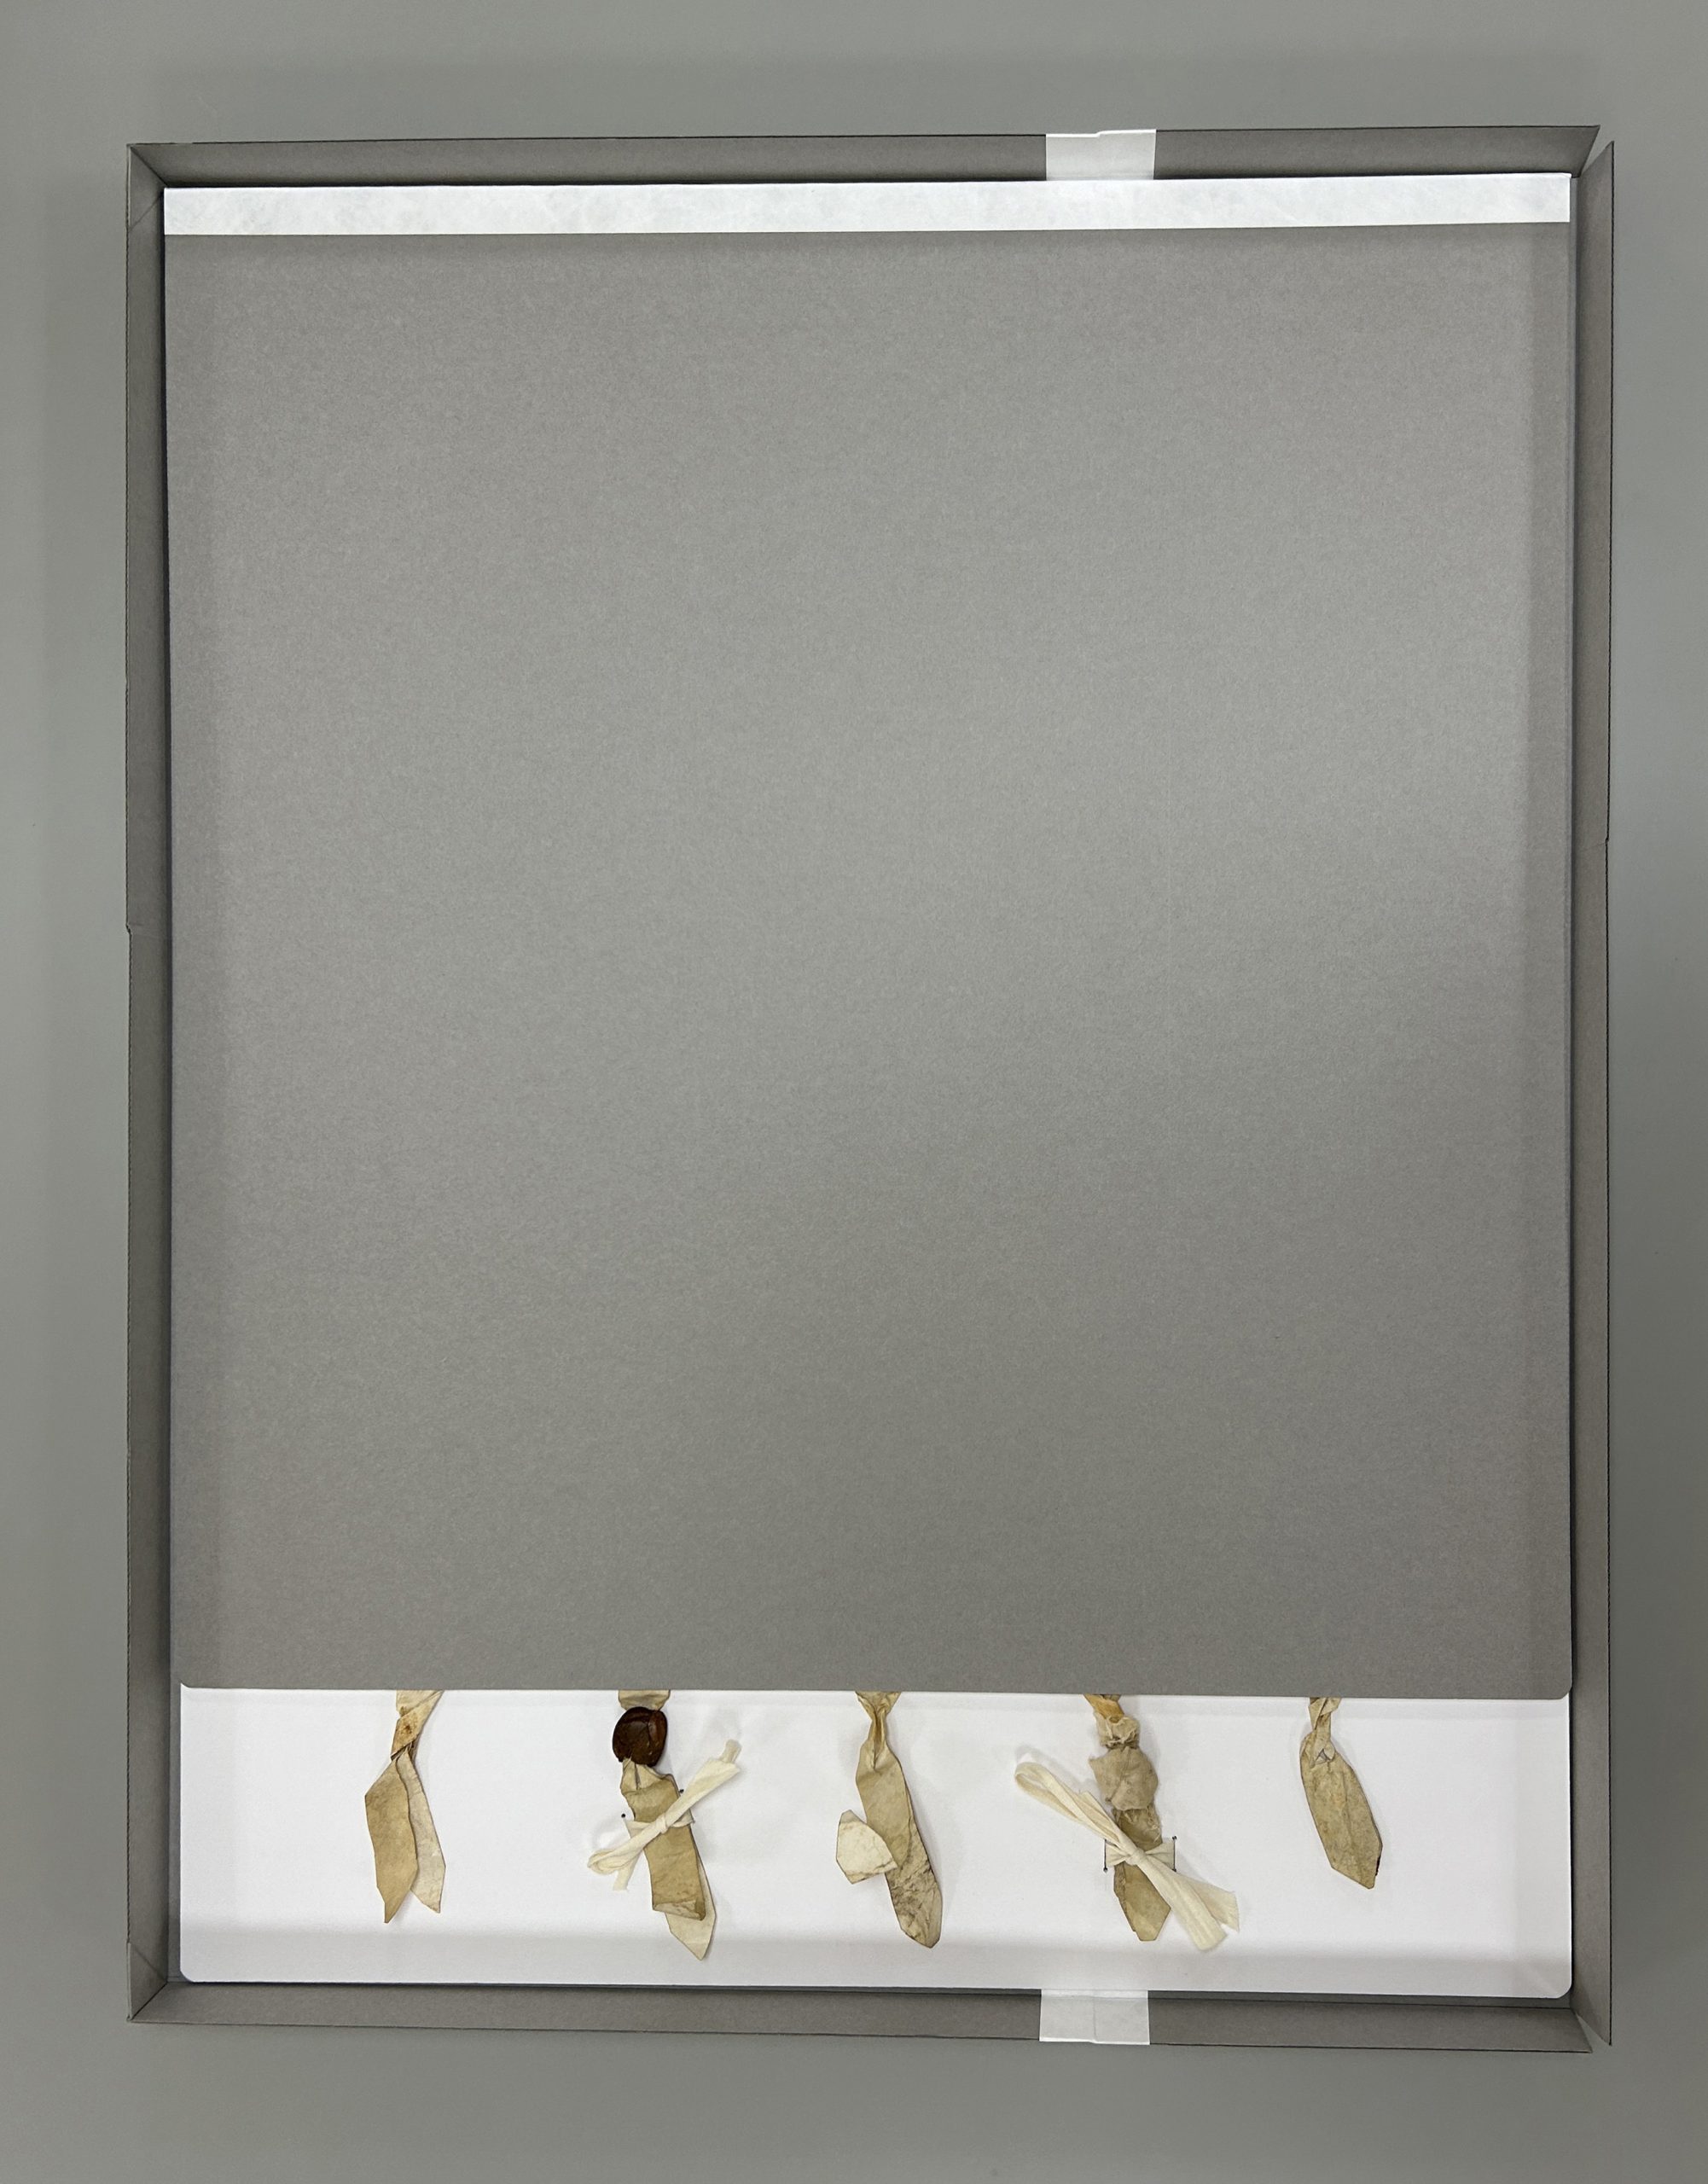
I knew this enclosure would be stored flat on the shelf, but I still didn’t want the document to move around too much inside – to protect the surface from abrasion, but also so as not to risk further damage to the parchment strips and wax. I cut a sheet of paper just a bit bigger than the dimensions of the document, then affixed wide paper corners to hold it in place. This was mounted to a sheet of matboard, which also had a sheet of E-flute corrugated board laminated to the back. This makes the matboard stiffer without adding much weight. Soft twill tape was laced through the board around where the two remaining wax seals were hanging, so they could be tied down and would not bounce around inside the box when it is served to a patron in the reading room.
 The portfolio top flap is also made of laminated sheets of matboard and blue corrugated, with a Tyvek tape hinge along the top edge that attaches it to the bottom board. All of the corners were rounded and the bottom edge of the top flap’s matboard was sanded to take off the hard edge.
 The custom sized portfolio ended up being larger than any of our standard metal edge boxes, so I created a custom fit telescoping lid box out of corrugated to hold it. Unfortunately we also don’t stock corrugated sheets large enough – so I had to join two sheets together with tyvek tape to make either the base or the lid. A third piece of corrugated was glued to the outside of both the lid and the base to stop the tape join from flexing when the box was lifted or tilted. The enclosure got a photo label at the bottom corner to help with identifying it on the shelf.
Removing the document from this enclosure to examine both front and back is fairly easy. After untying the twill tape, the parchment can be gently lifted out from under two of the paper corners, and then you can fully slide the document out. It actually requires two people to flip it over, since it is so large. While making this enclosure, I made sure to check that it wasn’t too large for the bigger shelves in the stacks and that it could fit through a standard-width door while resting on a cart.