
by Erin Hammeke, Senior Conservator

We get pretty excited about labels in the Conservation Services department, as evidenced by this post, and this one. Apart from spine labels, we frequently add signage to our enclosures to provide information about what’s inside and how it should be handled.
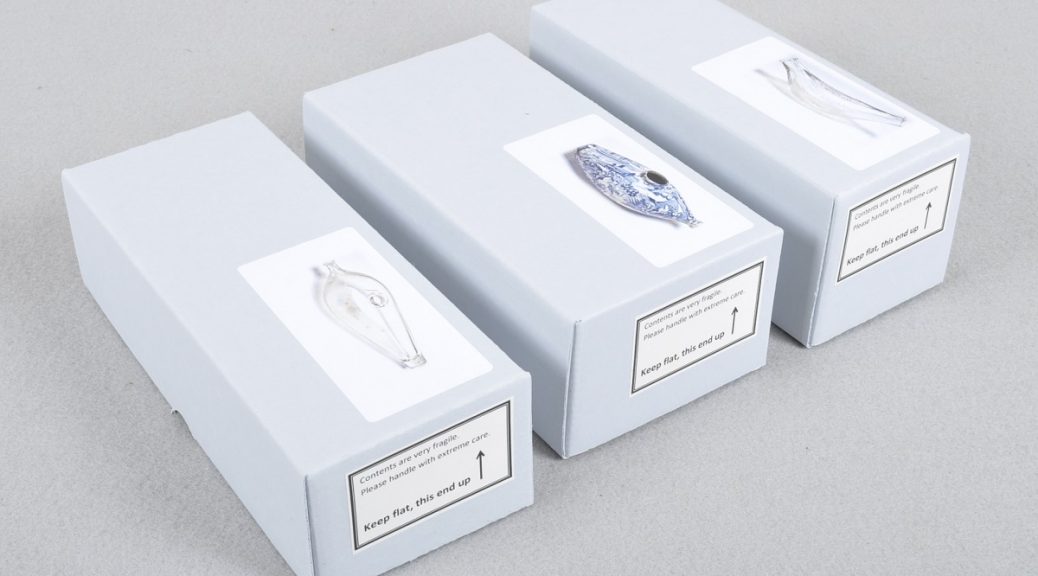
We often add picture labels to the outsides of our enclosures, particularly those containing fragile objects. We find these labels cut down on browsing and give and idea of what’s inside.
Picture labels can be created fairly quickly by capturing at relatively low resolution and under normal lighting conditions. We photograph items on a white background in our digital photographic documentation studio. Using the levels adjustments in Photoshop, select the white eyedropper and then select the white background. This usually causes the background to disappear and makes for a cleaner looking label.

We add in handling information specific to the item, such as HANDLE WITH GLOVES or CAUTION: SHARP!
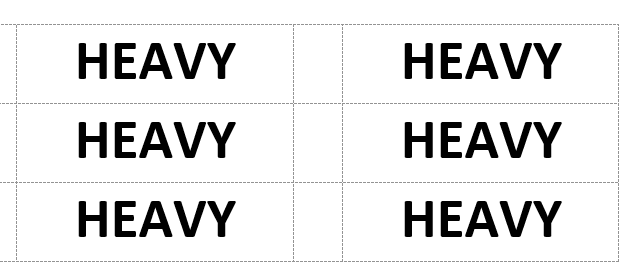
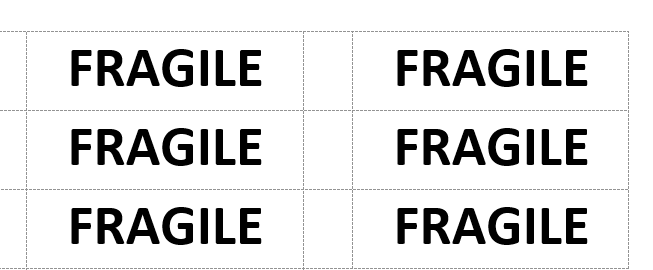
We also print of sheets of small labels with common handling concerns, such as CONTAINS GLASS, FRAGILE, HEAVY. This makes for quick and easy labeling of boxes that otherwise wouldn’t get a special photo label.
We’ve even had luck playing with clip art to make some useful handling labels.
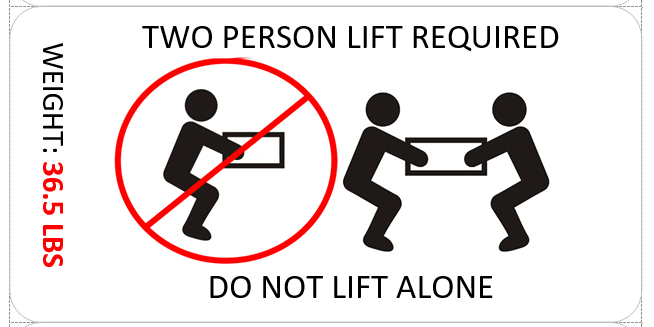
Infographics

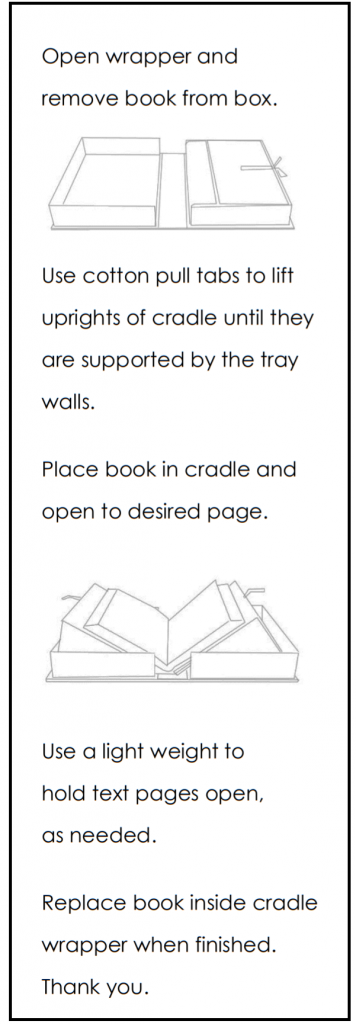
Sometimes you need a simple and specific way of demonstrating how to handle an item, and narrative text or clip art just won’t cut it. We’ve had some luck creating infographic style labels using this process:
- Take a high resolution photo of the action/item you’d like to have pictured in your infographic label.
- In Photoshop, open your image and create a new layer on top of the image.
- On the new layer you’ve created, trace the elements with a drawing tool. Working at 100% or higher, and using the smoothing settings will help to improve any jagged or rough-looking lines in your drawing.
- Copy the layer with the drawing and paste it onto a new blank canvas with a white background. Make any final adjustments to your drawing, keeping in mind that it doesn’t have to be perfect.
- Reduce the size of your drawing without reducing the file quality. Most of these images will not be printed out very large, so pick a label size, such as 2 x 4” and resize the drawing so it fits on that label. You will find that most imperfections in the drawing will not be noticeable when the drawing is resized.
Thanks for this information about your labels. The labels are so great and intuitive. I appreciate you sharing. I hope to be able to use some of these ideas in our library.
You are welcome Craig. Glad you find this helpful. We love labels.