
One can really go down a rabbit hole when it comes to making labels for book enclosures. In addition to considering the layout and typeface, there are a number of materials and printing or gilding techniques that can be used to create one. Stamped leather labels are certainly a nicer option, but require special equipment and are very time consuming to produce.
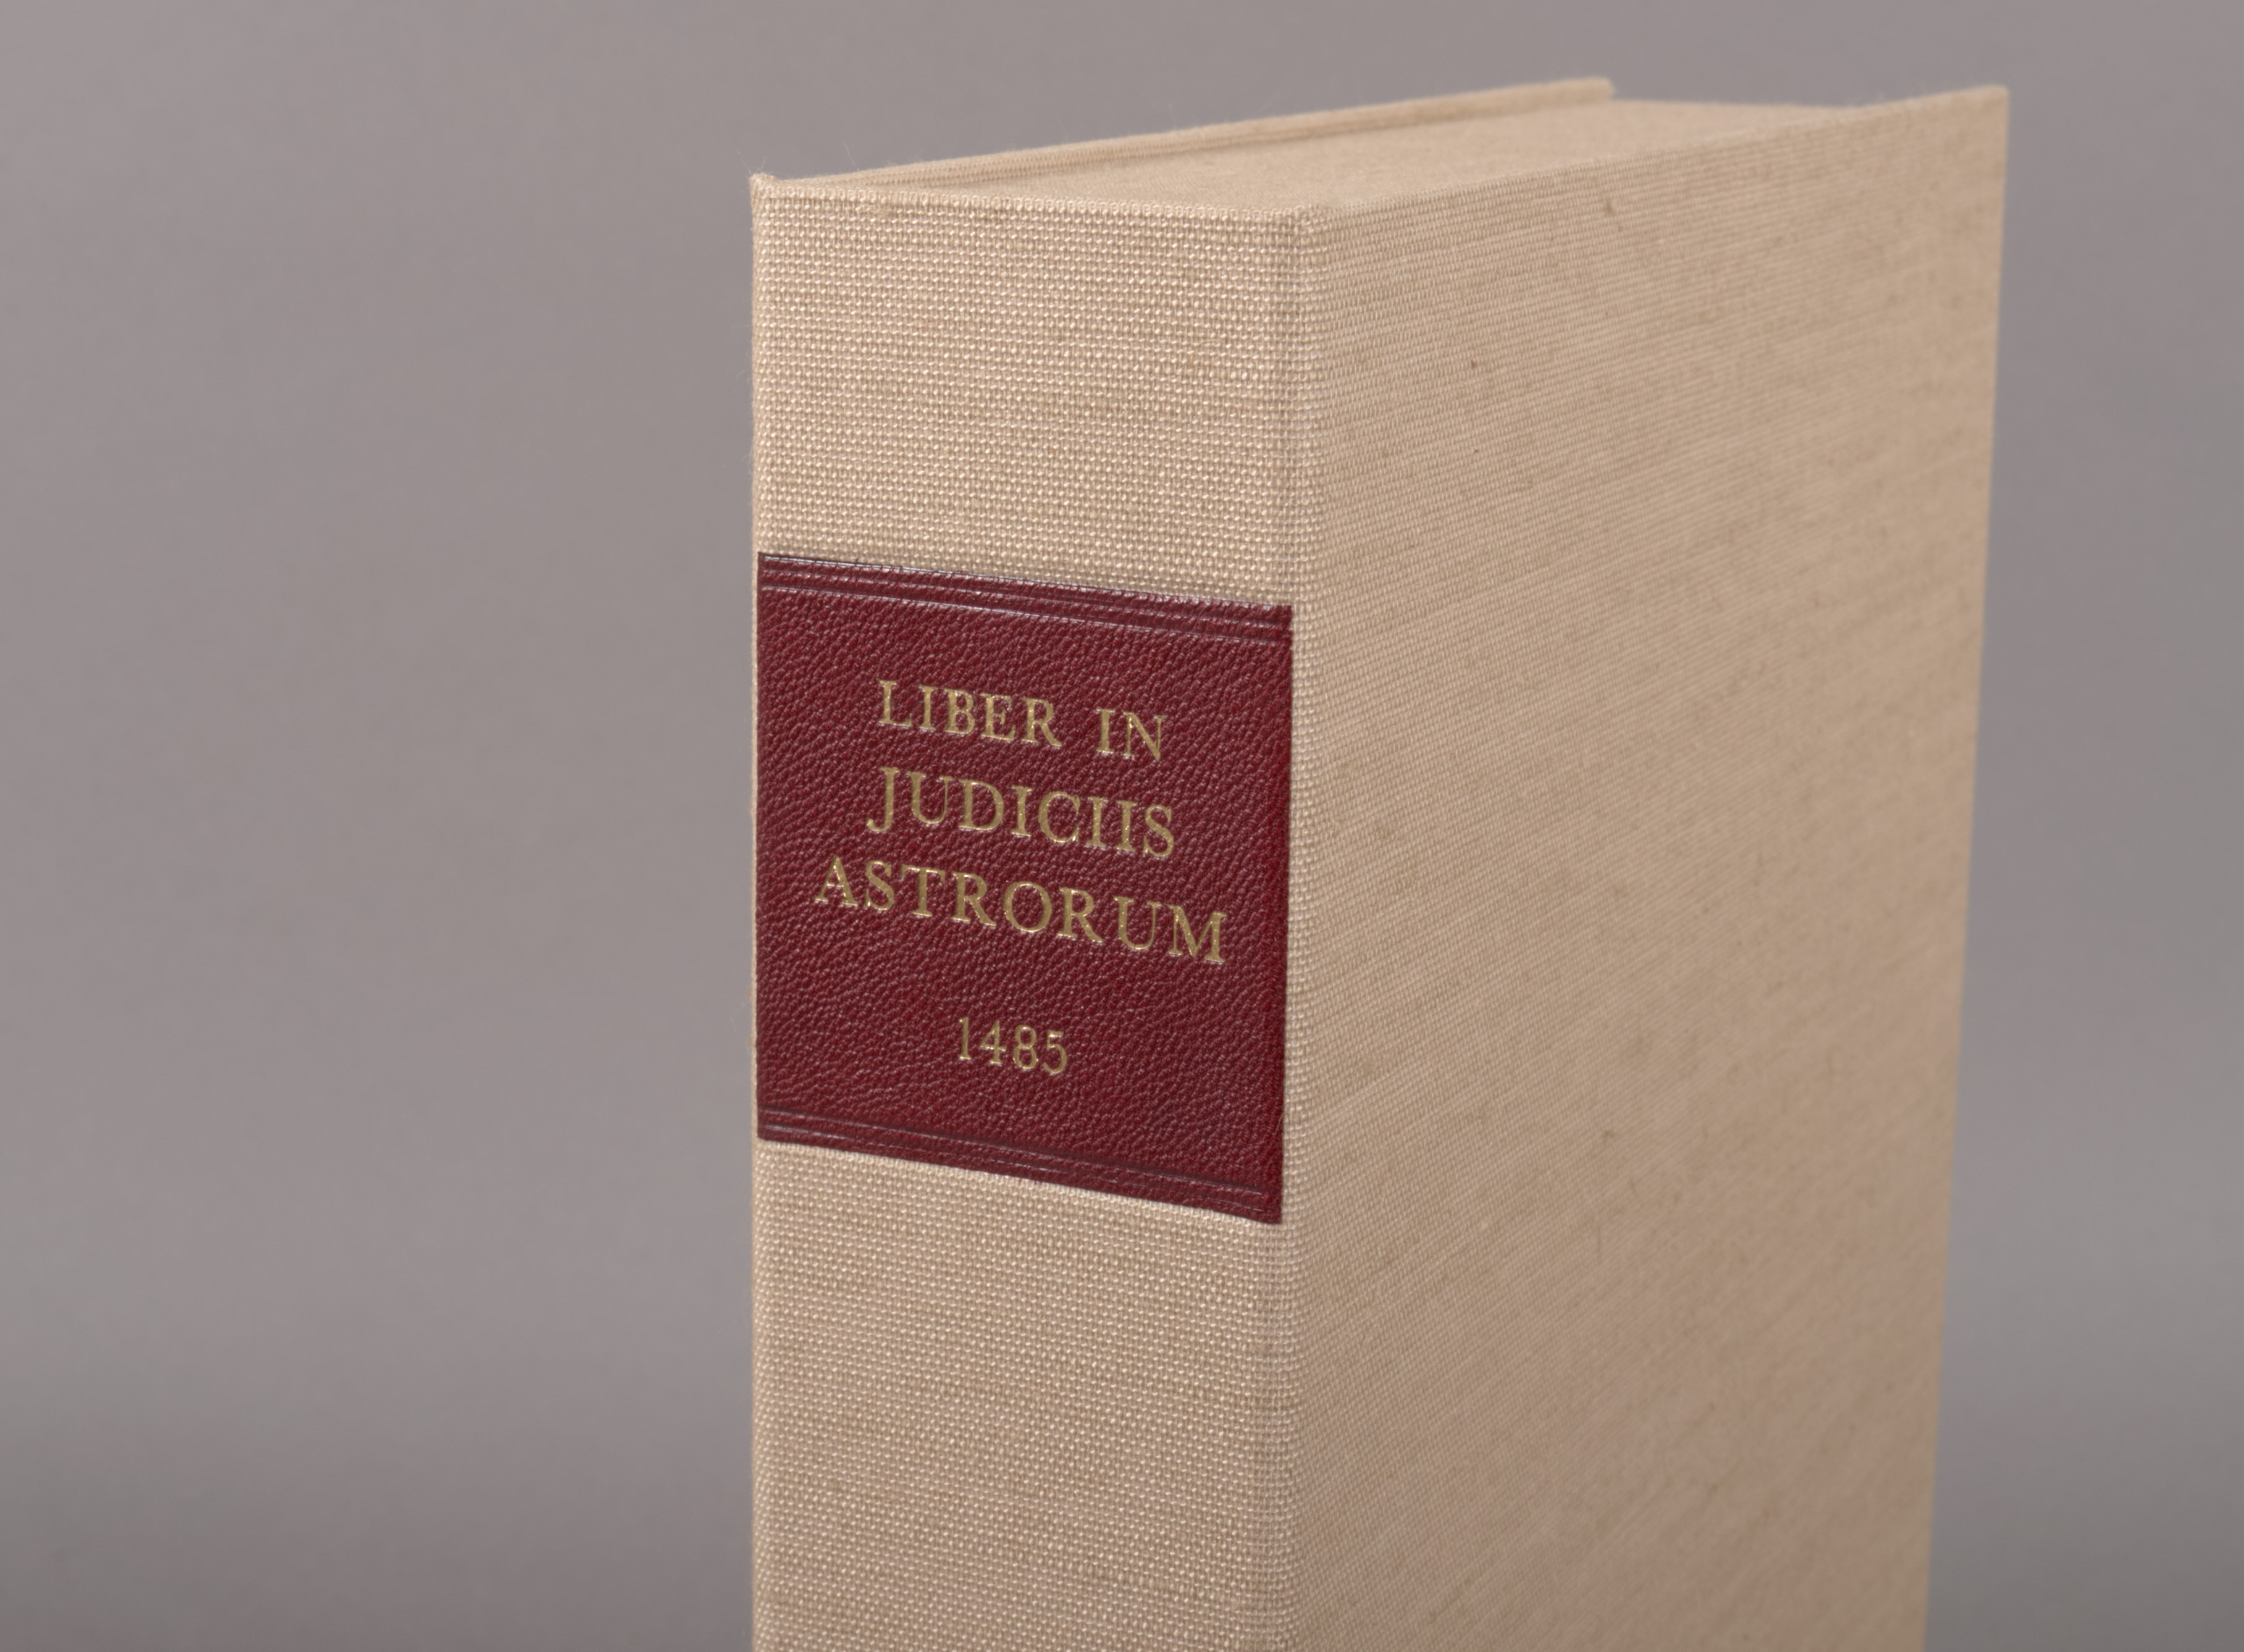
Paper labels are very quick to make, especially in large quantities, and everyone has the necessary equipment. With a little effort in setup, paper labels can look surprisingly good on a box.

One of the major problems I have had with setting up paper labels digitally is the lack of spacing control between lines or between letters that one has with a hot stamp or handle letters. Common word processing software doesn’t make this type of layout work easy; however, I have recently discovered some simple tricks in Microsoft Word that can be employed to achieve a more pleasing arrangement of text.
When setting up a label in Word, I will often start with a simple text box. Before typing any titling text, I set the dimensions of the text box based on measurements from the spine of the enclosure. I will also set the box to have a compound line (thick and thin) to look more like traditional tooling. There is a lot of literature about choosing typefaces and laying out book titling, so I won’t get into any of that here. Let’s just focus on spacing.
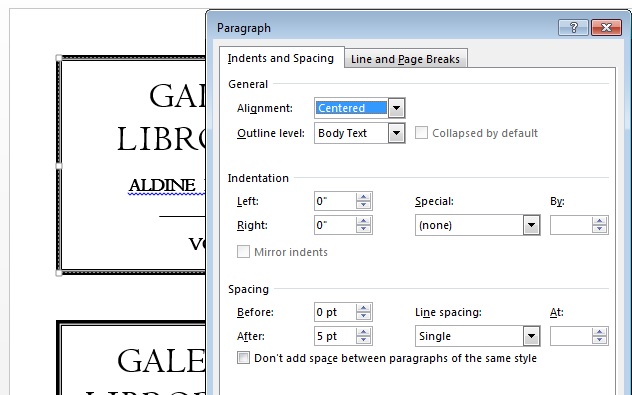
With the text generally arranged and sized to fit, I will start adjusting the spacing between lines, commonly referred to as “leading“. Word seems to default to multiple spacing between lines, so I remove all of that first. With all the text selected, right click and select Paragraph. After setting the line spacing to Single, you can then customize the point spacing after each line to achieve the leading you want.
Next you may need to adjust the spacing between letters, also known as kerning. The example below uses Centaur as the typeface and, on the left, you will see some bigger variation between letter spacing. Compare the “IB” to the “RO” spacing in “LIBRORUM”.
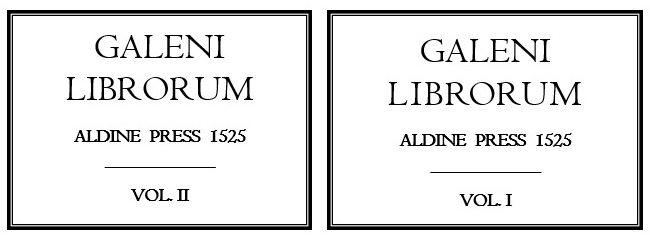
On the right, I have adjusted the letters to have a more uniform appearance. I find this spacing more subtle on a screen, but much more obvious on a printed label for some reason. The kerning is adjusted in a similar way to the leading: with a letter highlighted, right click and select Font. Under the Advanced tab, you can choose Expanded or Condensed spacing and modify it with a number. In this example, I expanded the spacing of the I and B and reduced the spacing for the R. 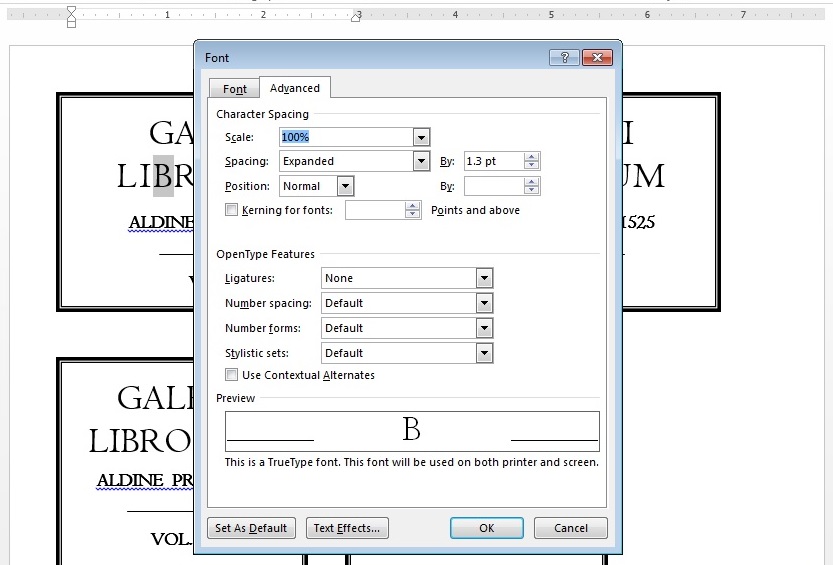
I find that a little consideration to spacing makes a huge difference in the look of my book titling and labels. Hopefully these simple modifications can come in handy for other folks, too.