All posts by Henry Hebert

Micro CT of Many (Mini) Manikins


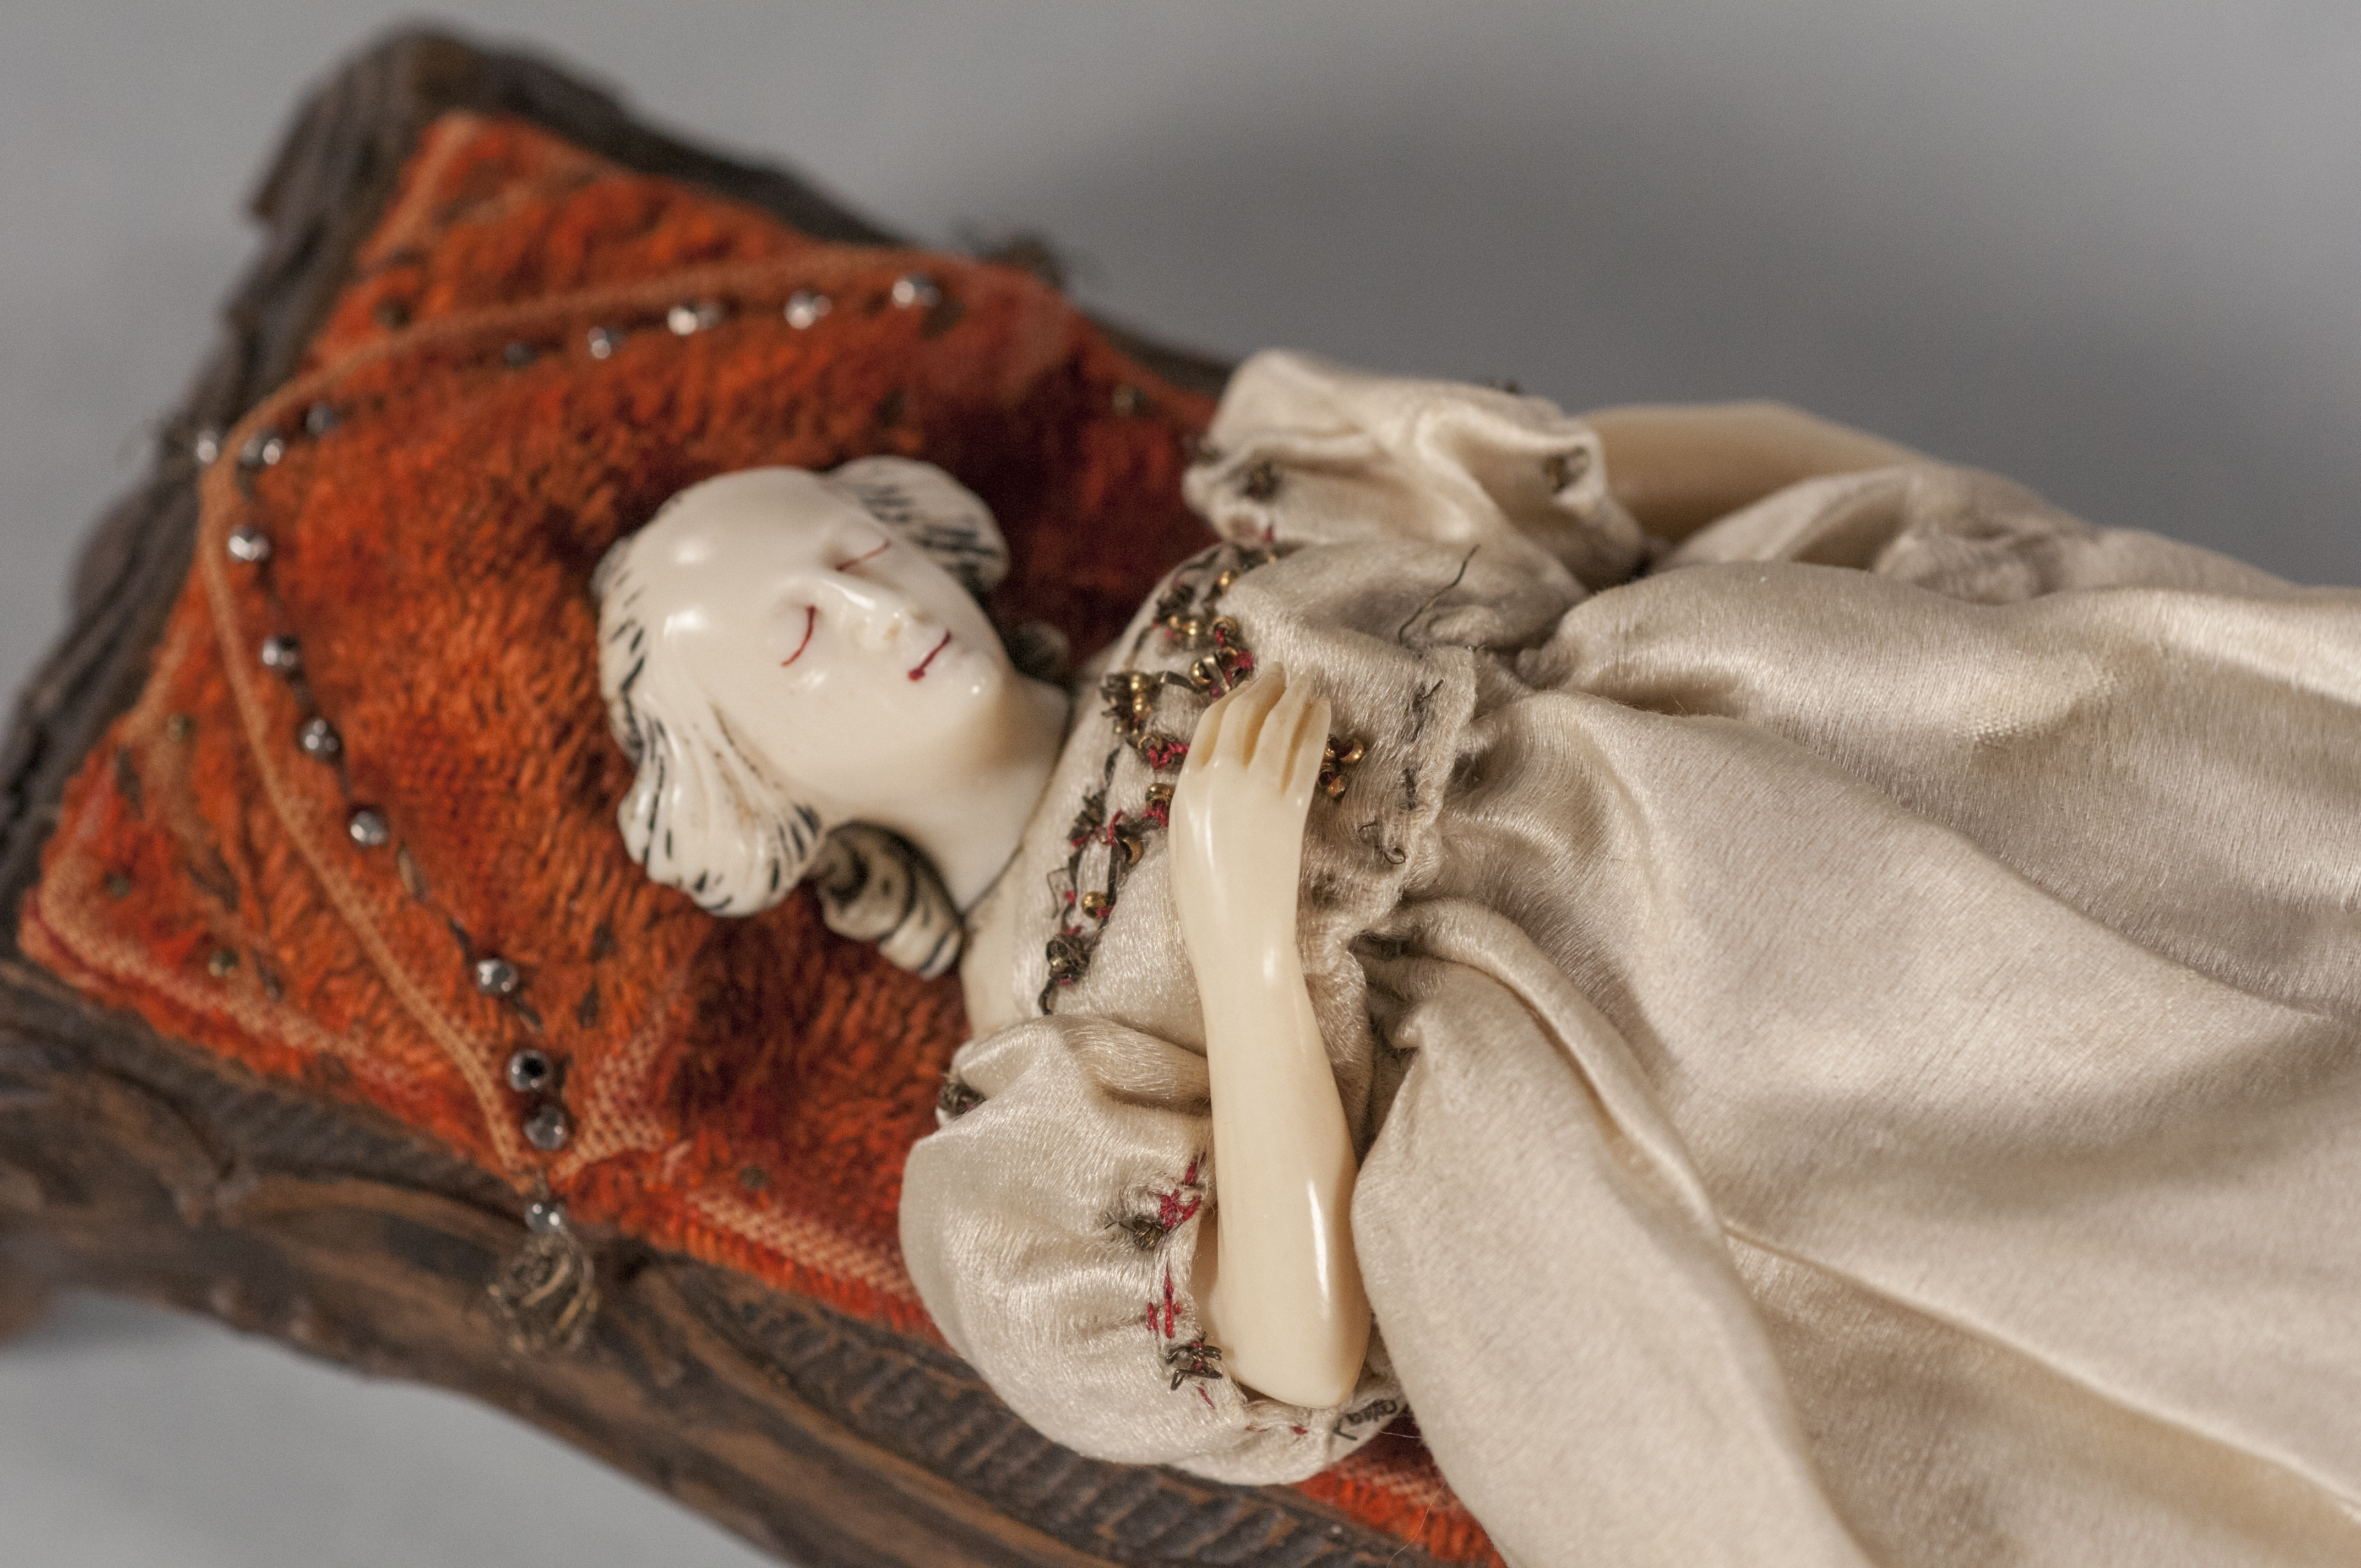
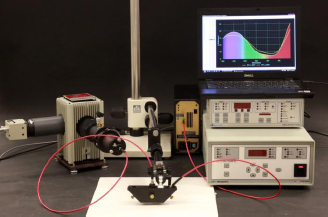
Conservator Erin Hammeke has been working with History of Medicine Curator, Rachel Ingold and SMIF Research and Development Engineer, Justin Gladman to facilitate the scanning of our 22 ivory manikins using a High Resolution X-ray Computed Tomography Scanner (Micro CT scanner). These high resolution 3-D scans allow us to see internal components of the manikins, thoroughly document them and their component parts, and also to create 3D printed models to allow for unfettered access and handling of surrogate manikins by patrons. So far, we have imaged over half of the collection of 22 manikins to date over 7 imaging sessions.

manikin components and repairs

base of manikin with repair

Conservation’s support for this project has been a team effort. First we researched the safety of the process for ivory and component parts. Then we thought through the logistics of ensuring their physical safety and security during imaging. Over the past year, Conservation Specialist, Rachel Penniman has been carefully boxing each of the manikins in terrific custom padded artifact boxes (see Quick Pic: Boxing Near-Naked Ladies) to assist with their safe transport to the SMIF facility on campus. After transport to SMIF, Erin unpacks the manikins and removes their parts before securely wrapping them in low density material to support the manikin during the 20-30 minute scan. Thanks to Beth for sewing custom foam supports for this project!

organs separated from manikin

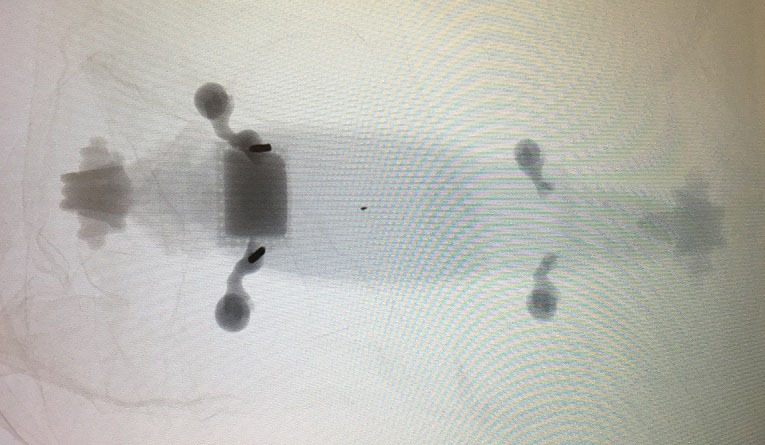
Smaller, removable internal organs are imaged in separate scans to enable an adjustment to the scanning resolution and isolation of the component parts in the digital scan and 3D print.

Ivory manikin on small wooden bed

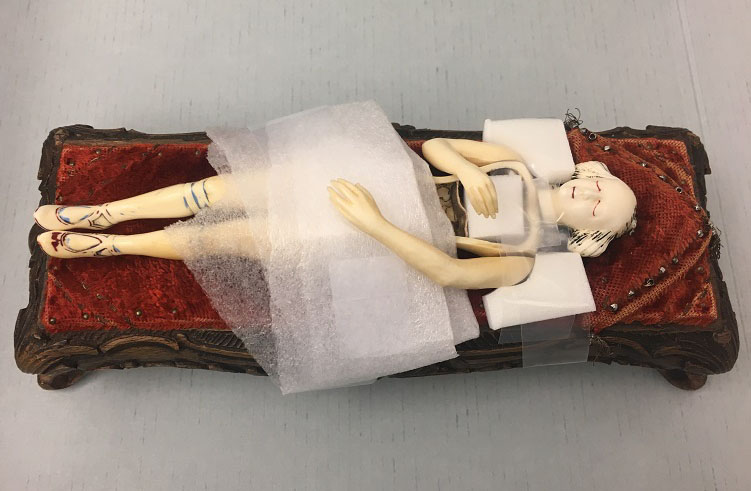
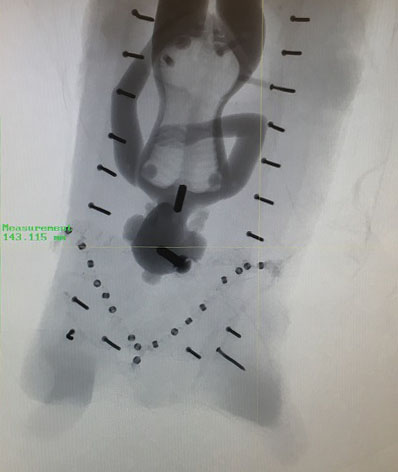
This photos shows some of the ways in which Erin strapped and supported a manikin with a loose arm during scanning, as well as still images from the scan that show internal metal fasteners and repairs that are not visible upon external examination.

3D printed manikin

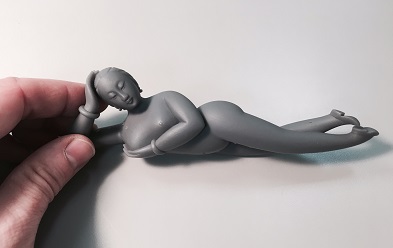
And here is an example of a 3D print of one of our solid manikins showing fantastic detail.

Keep an eye out for a more in depth Duke News story about the project by science writer Robin Smith, PhD.

Vibrant Parchment Repairs

A 12th century Latin manuscript (Latin MS 103) was brought down to the lab yesterday and we all had to stop work for a few minutes to ogle the colorful stitching used to piece together some of the leaves.

Parchment can be oddly shaped or become damaged during production, so it was a common medieval practice to mend or patch the leaves with colorful thread.  Sometimes you can tell that the stitching was done before the scribe started writing. For example, this column of text just continues around the thread.

The colors of the thread are so intense that I began to wonder if they were original. What pigments or dyes could make such a vibrant yellow/green color? A few years ago, Beth had taken Cheryl Porter’s workshop, Recreating the Medieval Palette, and just happened to have the color swatches they made on hand. You can read some excellent reviews of that workshop here and here.

The buckthorn and cochineal are actually pretty close matches to the colors of the thread in our manuscript. Being closed inside a book would also have protected them from light exposure and potentially fading.  If you’d like to see more examples of colorful stitching in medieval books, check out this post from Erik Kwakkel or the post it inspired on Colossal.

Microfade Testing Seminar

On a gloomy Los Angeles morning earlier this week, I rode a driver-less tram up to the Getty Center to attend a one day seminar on Microfade Testing (MFT).

Seminar room showing title screen for Microfade Testing Public Seminar

Speakers from institutions around the world discussed how they have been using this technology in recent years to support exhibits programs and make informed decisions about safely displaying cultural heritage material. The seminar concluded with demonstrations of several designs of MFT equipment, like the system pictured below.

Microfade testing equipmentIt was such a delight to talk with other conservators about how they are using technologies like this in their own institutions. While I was able to learn a great deal about the application and some limitations of MFT, many questions remain about how we might successfully implement it here at Duke. In the meantime, the seminar highlighted some research opportunities that we can begin pursuing with technology we already have on hand, like multispectral imaging.

Nothin’ But Net

by Erin Hammeke, Senior Conservator for Special Collections

We recently treated and housed a collection of 19th century photo albums documenting travels in China by Charles Davis Jameson. Most of the albums had very degraded leather covers that we treated by consolidating with Klucel G, making Mylar wrappers for some, and simply housing in protective enclosures for others. One accordion album posed a particular challenge with its shaped wooden boards and silk covering. The silk cover was shattering and had become completely detached from the front board. We decided to make a wrapper for the loose front cover and house it in an enclosure with the book.

Before treatment photo of photo album front cover.

The back cover, however, was still extant but very tenuously attached.

Before treatment photo of photo album with original silk cover cover shattered and separating from the wooden board, making it vulnerable to damage during handling. 
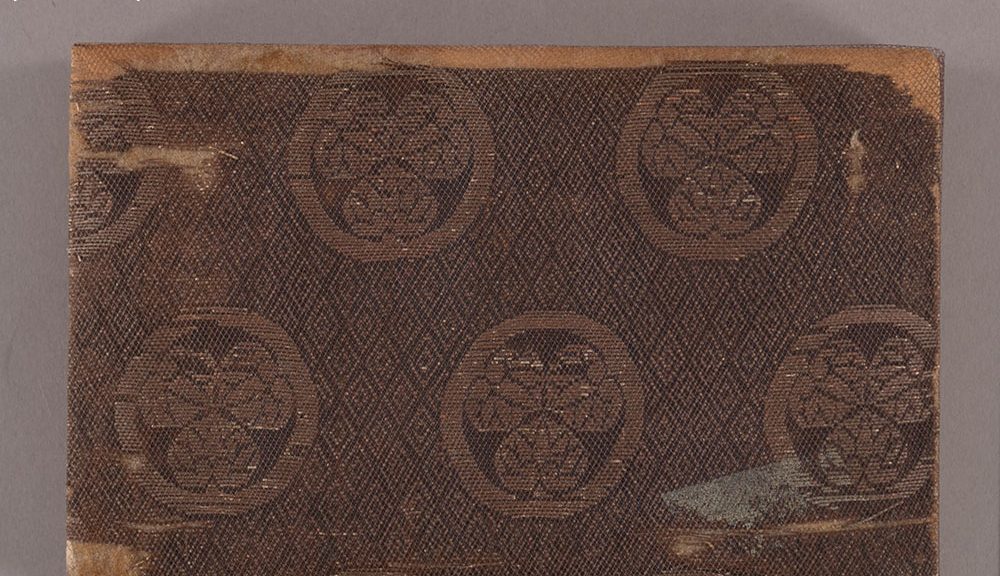
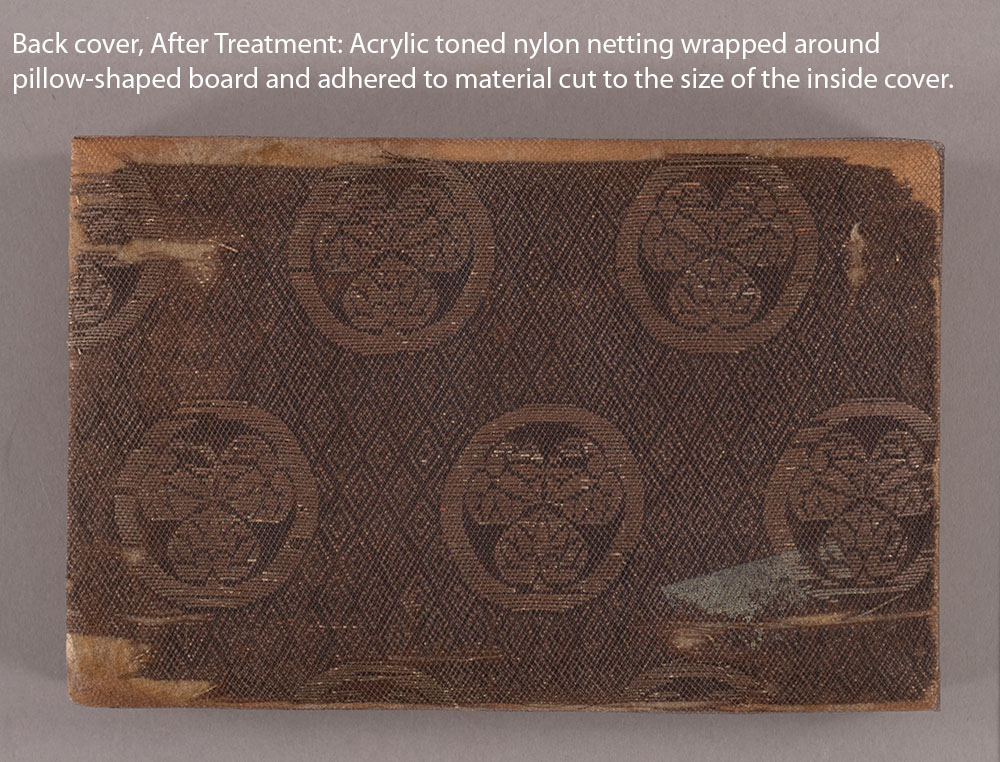
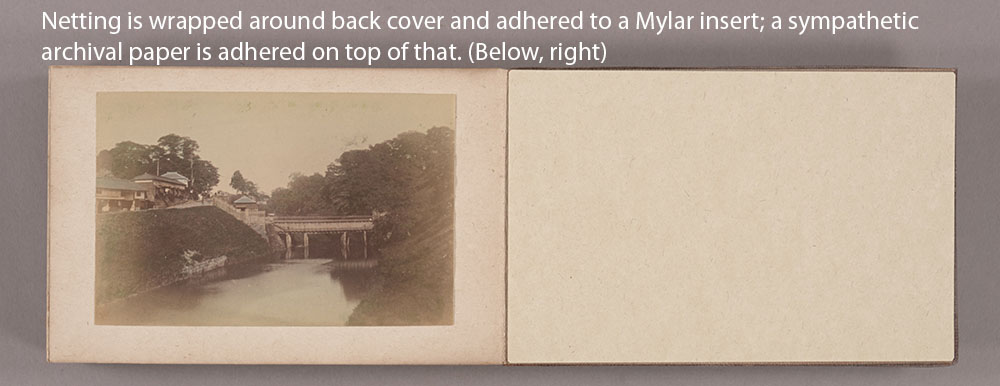
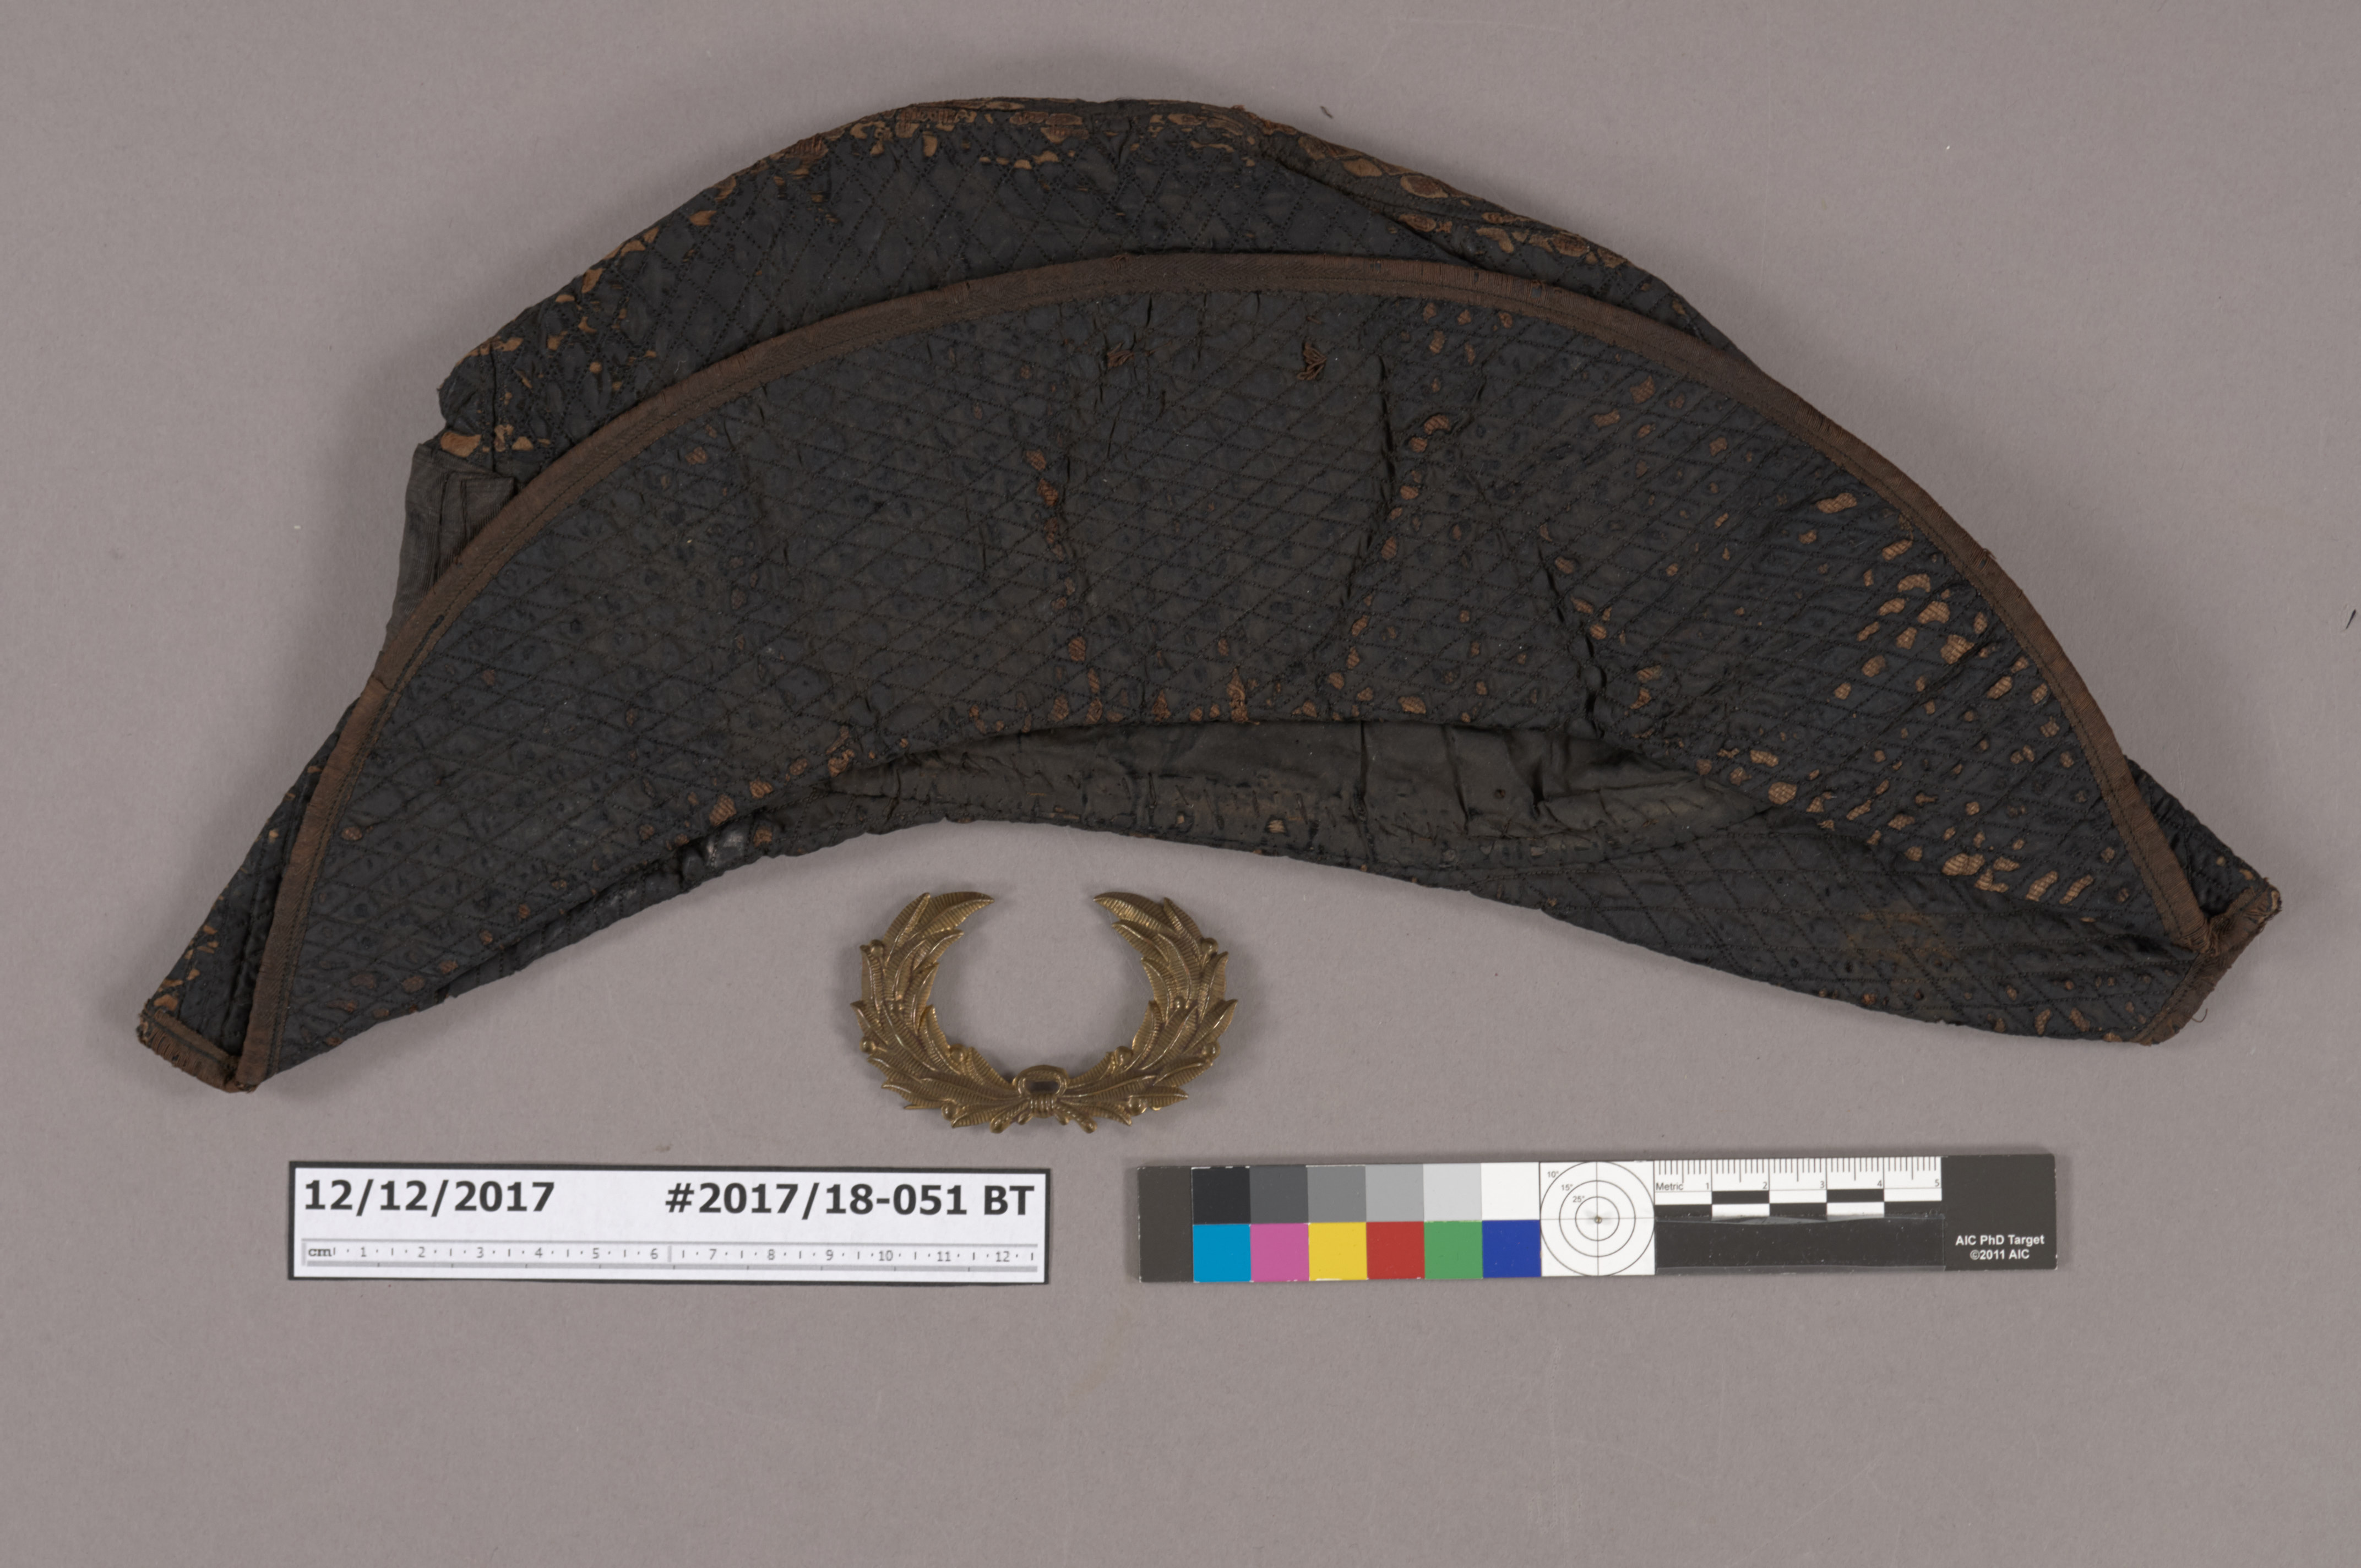
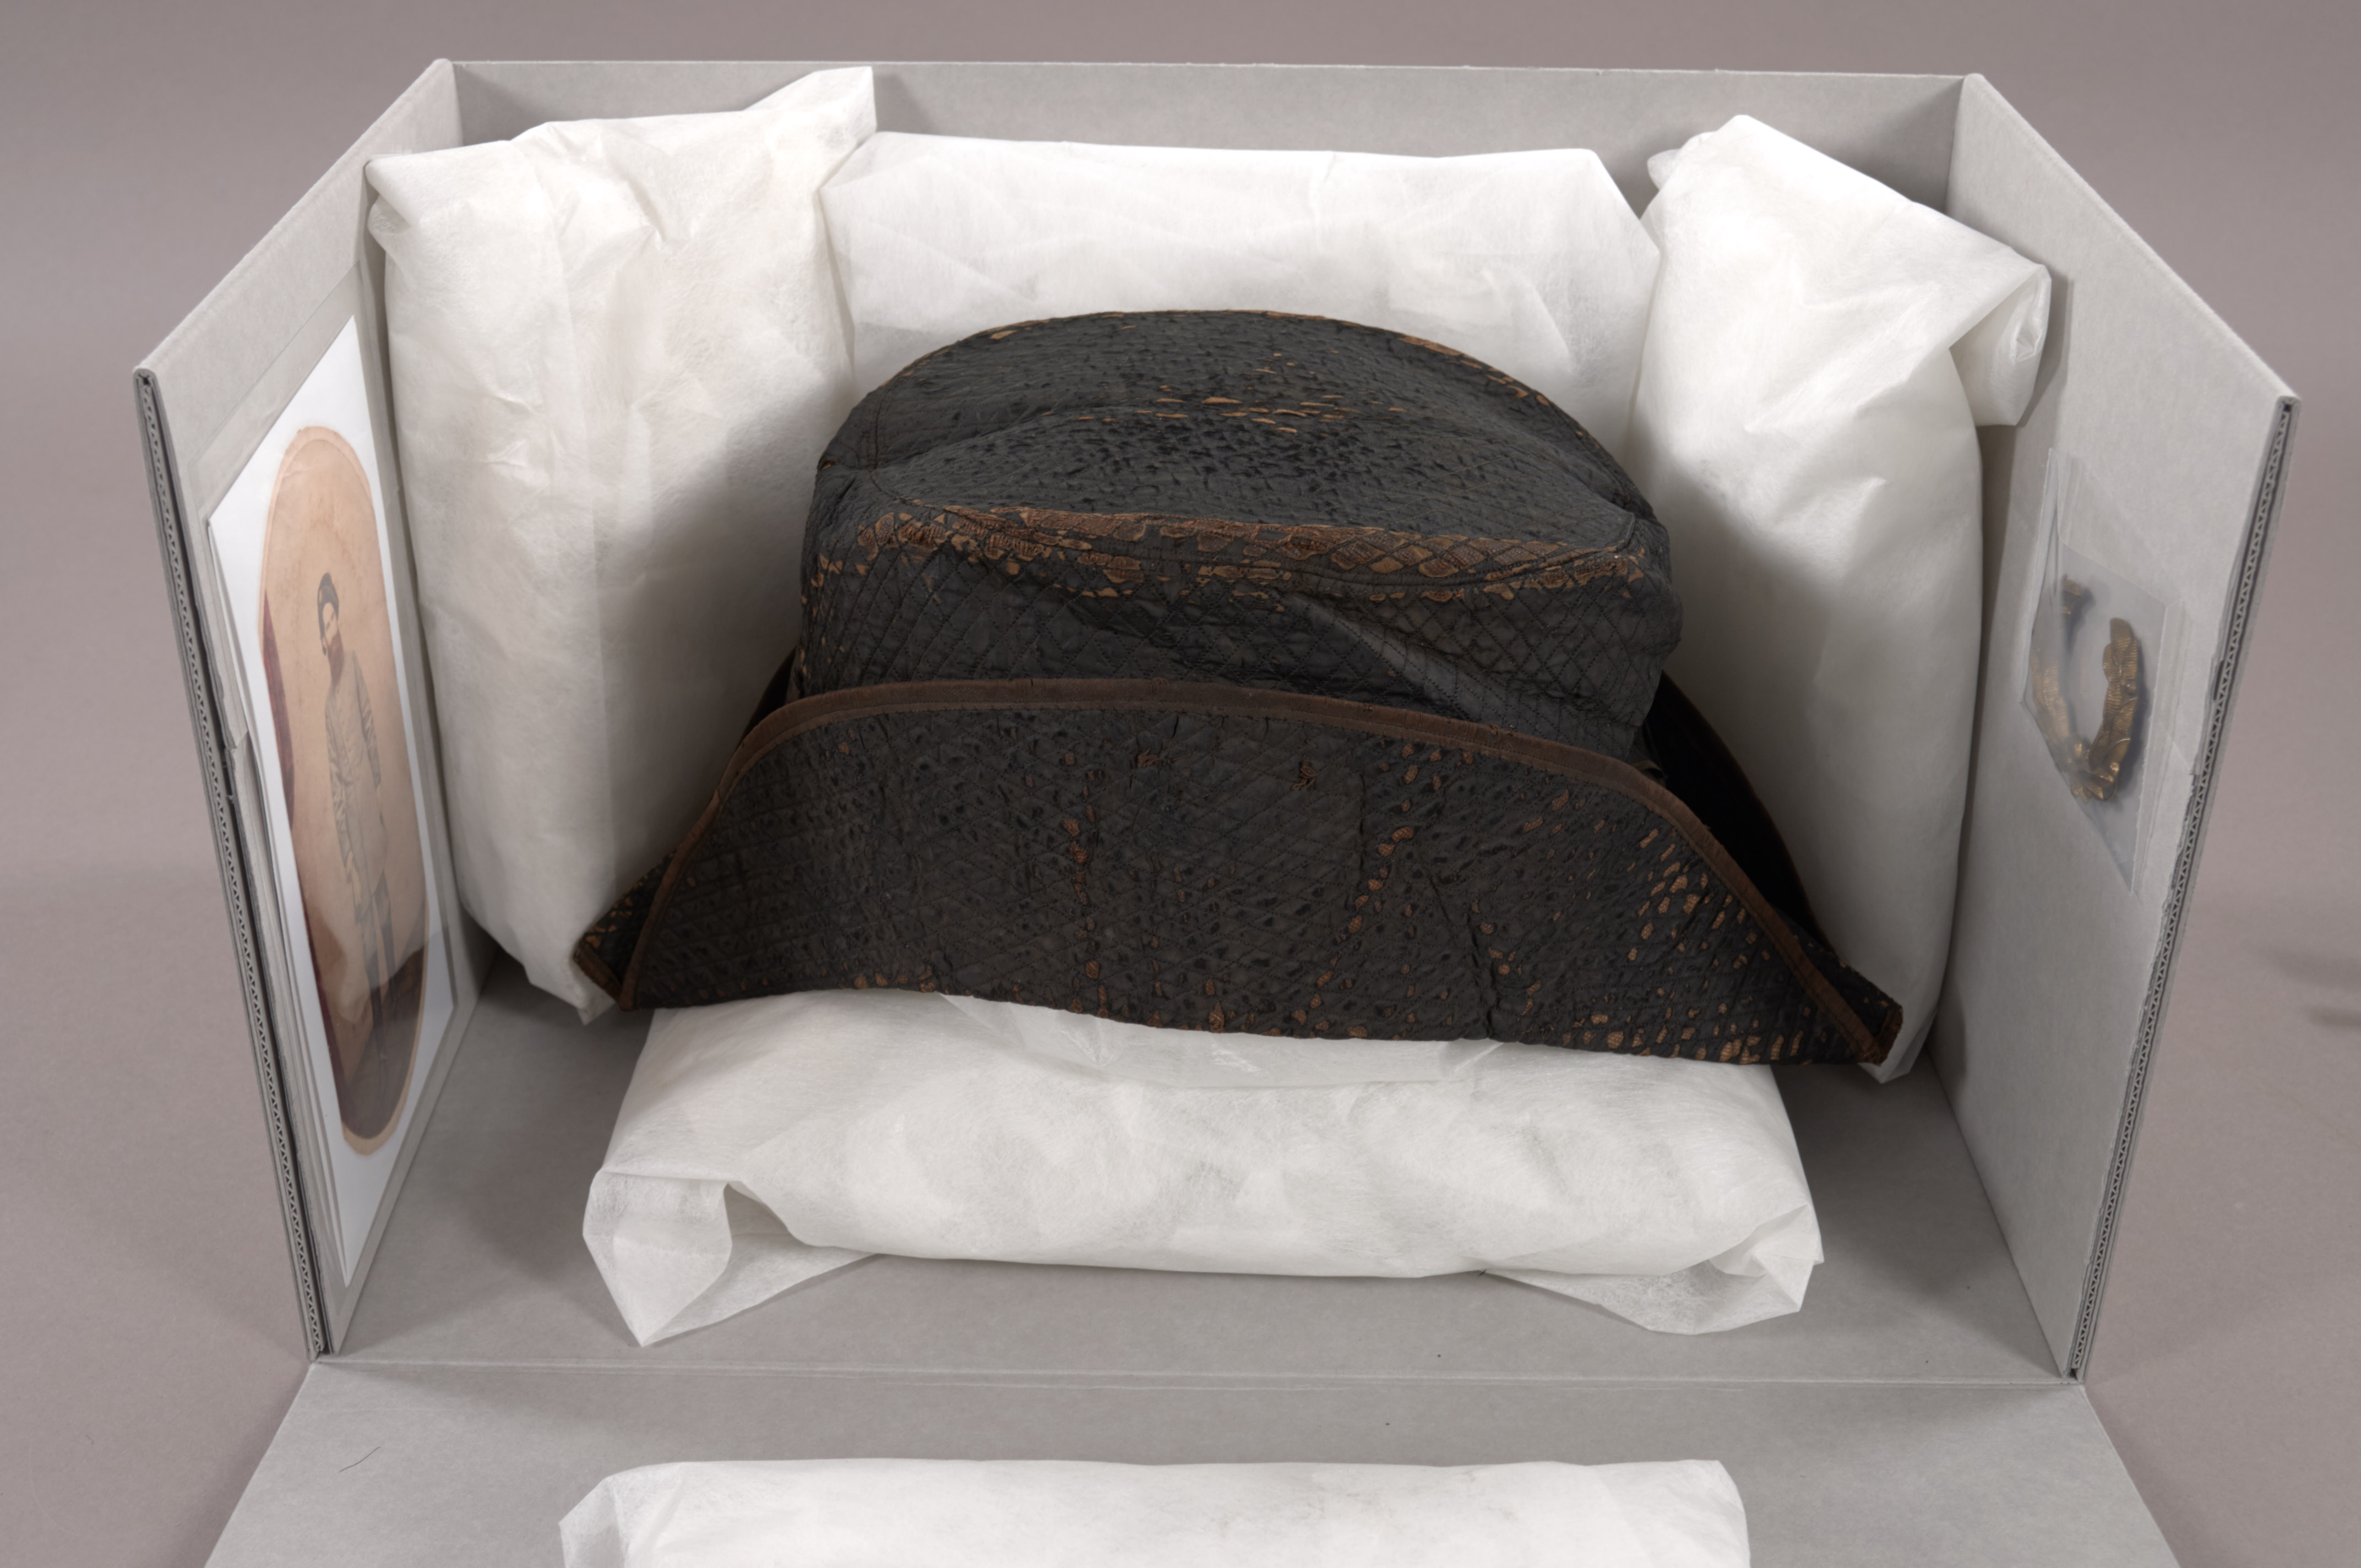
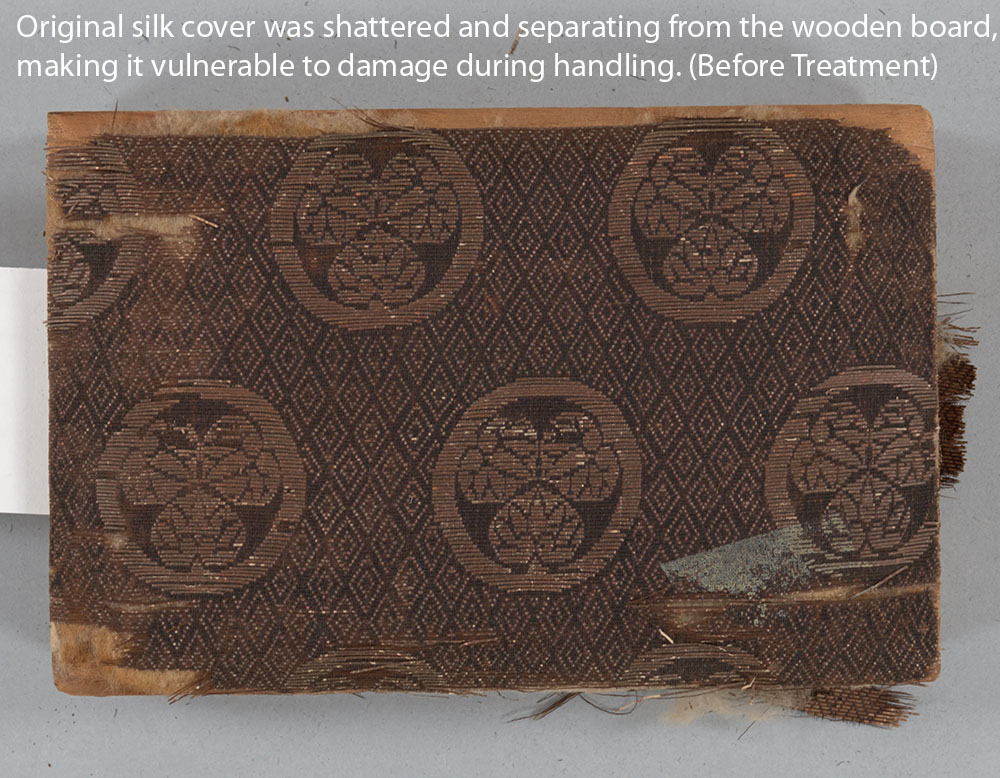
We wanted to find a quick and simple solution to stabilize the rear covering and decided to use a lightweight Nylon netting, toned with acrylic, and wrapped around the silk covering and wooden board to contain and protect it.

Photo album after treatment photo showing back cover with acrylic toned nylon netting wrapped around pillow-shaped board and adhered to material cut to the size of the inside cover.

After treatment detail image of nylon netting over album boards.

The netting was adhered to a Mylar insert, cut to the size of the front cover with 3M ATG transfer tape. A leaf of archival paper that matched the tone and quality of the album paper was adhered with double-stick tape on top, sandwiching the netting between layers of archival material and protecting the facing photograph from abrasion from the netting.

After treatment photo showing netting wrapped around back covered and adhered to a Mylar insert; a sympathetic archival paper is adhered on top of that.

The netting is stretched over the pillow-shaped wooden board and the cut end of the Nylon is left open at the board hinge. We were very happy with this quick and easy solution.

That is One Flat Hat

By Rachel Penniman, Senior Conservation Technician

Recently a researcher notified the Rubenstein Library staff that there was a hat with a pin in an envelope inside the manuscript box containing the James McGowan papers. A hat in an envelope?

Open records box with folders inside.
This box doesn’t look like it would contain a hat

Yes, a hat! Indeed there was a very smashed, Civil War era, silk hat in that box.

Before treatment image of flattened hat.
That is one flat hat

It looked more like roadkill than apparel. I found a photograph of a soldier wearing a similar looking hat in the same collection.

Portrait of Civil War soldier in uniform, wearing a hat.
This hat doesn’t look nearly as flat

I used a humidification chamber to slowly add moisture to the fabric until it became more flexible. Then I was able to add a little padding at a time to reshape the hat. Once the hat was the correct shape I removed it from the humidification chamber and let it slowly return to ambient humidity with the padding still in place.

Hat in humidity chamber
humidifying
Hat in humidity chamber, on foam support.
Reshaping
Humidification chamber sitting in sink.
Humidification chamber

In order to maintain the shape of the hat I made a pillow of non-woven, spunbound polyester fabric that will stay inside of the hat when it returns to storage. The pillow will provide support for the hat and the polyester has a very smooth surface that won’t catch on the fragile silk fibers.

After treatment photo of reshaped hat
This looks more like a hat

I made a custom box to house the hat and created more pillows to provide support and cushion.

Hat in cushioned box with reproduction of photo.

Included in the enclosure are a copy of the photograph from the collection and a pocket for the metal pin. A very special thanks to the keen researcher who noticed this item and brought it to our attention.

Preservation Nesting Boxes

One of my more recent projects has been working on this gorgeous late 19th century Japanese photograph album.

While I’m still dealing with the album itself, today I’d like to briefly share some steps I’ve taken to stabilize the decorative paper box in which the album was originally purchased and stored. When the album came to the library, it was inside the original enclosure, and both album and enclosure were packed in a regular cardboard box with medical underpads as cushioning material.  Unsure of what I was really looking at, I documented the object exactly as it came out of the cardboard box – underpads included!

The underpads do have some merits as packing material, providing both cushioning and a moisture barrier. They are not the best long-term storage materials, though, so we opted to remove them. As you can see, the box was looking a little rough. I removed the photo album and laid out each piece of the enclosure to better see what remained.

The enclosure is  essentially a drop-spine box, covered in decorative red and gold paper. Yellow textile pads are included in the interior of the lid and base to protect the lacquer and ivory covers. The head, tail, and fore-edge of the lid have black woven textile straps and bone pins, which originally fastened to small woven textile loops laced through the lower tray walls. As you can see, several parts of the box are missing and most of the joints have broken. The straps are also broken in several places and very weak.

This enclosure is special because it includes a great deal of information about the album’s provenance. Kusakabe Kimbei (1841-1932) is widely known for these souvenir albums, consisting of hand-colored portraiture and scenic views. Bennet (2006) describes Kusakabe’s (1841-1932) businesses at the two Benten-Dori addresses: 36 functioned as a photography studio, while 27 operated as a shop where composite albums of Kusakabe’s prints were sold (p. 135).

We want to ensure that researchers can open and closely examine the enclosure to see the information on the interior label, but it is not necessary for the heavy photo album to remain inside. The decision was made to create a new padded enclosure for the album and stabilize and store the original enclosure separately.

I began by re-assembling all the box pieces in much the same way I might repair the joints of a paper binding. Using the patterns on the decorative paper, I was able to match all the detached pieces. The original decorative paper was lifted away from the boards and strong handmade paper, toned to match, was adhered underneath with wheat starch paste. I stabilized the remains of the textile straps using toned 60/3 linen thread.

Since the enclosure will not contain the heavy album anymore, the decision was made to just reattach and stabilize the extant materials, rather than recreating the lost walls of the tray and edges of the lid with new board. With only two walls on the bottom tray, I decided to construct a small corrugated box to fit inside and act as additional support. The “filler” box is light weight and can easily be removed by a researcher. This set of two boxes will get a final, outer box to protect the textile straps.

A box, within a box, within a box.


Bennett, T. (2006). Old Japanese photographs: Collector’s data guide. London: Quaritch.

Rolled Textile Storage

Conservation Services is often called upon to create appropriate housing and storage solutions for over-sized textiles in our collections. This very large and currently uncataloged item from the Robert Hill Collection is a recent example.

After some deliberation, the decision was made to store this item rolled on a hollow tube. Our housing method is fairly straightforward: We started with a piece of unbleached cotton muslin, cut larger than the banner in all dimensions, placed on a work surface of assembled tables. The banner was placed in the center. A rigid  tube, about 5″ in diameter and wrapped in high quality paper,  was placed at one end of the muslin (as pictured above). These tubes are constructed of blue/grey barrier board, with neutral pH adhesive, and have passed the Photographic Activity Test. They are available through several suppliers like Gaylord or University Products. With a person at each end of the tube, we slowly rolled the muslin and banner together, being careful to smooth out any distortion or creases as we went. The bundle was then loosely tied up with twill tape.

If dust was a concern in the storage space, we might also wrap in an additional layer of clear polyester.  We will likely add a tyvek label  attached to the twill tape (for example) when cataloging is complete. STASHc (Storage Techniques for Art, Science & History Collections) is a great online resource for potential solutions for housing more cumbersome collection materials, and methods similar to ours can be found there.

Button, Button, Who’s Got the Button?

By Rachel Penniman, Senior Conservation Technician

Not actual collection buttons, just some of the many buttons we have in the lab.


The Rubenstein Library holds a growing collection of political ephemera including many political pins. Over time the library has received multiple additions to the collection and expects to continue collecting more of these items in the future. The collection arrived in batches with a variety of different inconsistent housing methods. At first, conservation had been creating custom built trays with individual spaces for each button as seen in this Duke Today video.

Here is another example from the Terence Mitchell Collection of Tobacco Related Ephemera of the kind of tray we were creating for the buttons.

Mitchell Tobacco Collection

This approach resulted in a really nice custom enclosure for a group of buttons, but was time consuming to create by hand and inconvenient when just one or two new buttons would need to be added to the collection.

After a meeting with Rubenstein Library curatorial and technical services staff to assess the state of the entire collection and discuss goals for the future of the collection I started researching housing options. I remembered seeing a method for housing buttons by pinning them on to foam covered boards but many of our buttons didn’t have their backing pins and there was no way to number individual items using that system. I had also seen a method for housing small artifacts that looked like it could be promising with a little modification.

Now we house each button using a clear 4″ x 5” zip top, virgin polyethylene bag with a 40 point tan barrier board stiffener inside. The bags are either 4 mil or 6 mil so they are strong and provide some cushion. I cut the barrier board to be small enough to easily slip in and out of the bag and I round the corners so they don’t fray or poke through the plastic bag. The pins aren’t attached to the stiffener backing but it provides structure and support for the different sized items. The top of the stiffener can be labeled with an item identification number if needed. Then the bags can either be housed flat in trays or upright in shoebox style archival boxes.

This method makes it easy to house large numbers of buttons quickly and is easy enough for technical services staff to assemble these housings themselves. When one or two new buttons arrive to be added to an existing collection, they can easily be bagged and filed in place in an existing box. It is also still easy for researchers to flip through a box and look at each button without having to handle the actual item. So far we’ve been really happy with this solution and I imagine it could be adapted for housing other small ephemera collections in the future.

Quick Pic: The Longest Manicule


Today, as I was examining some items from the Lisa Unger Baskin Collection, I came across one of the longest armed manicules I’ve ever seen. This mark, whose name derives from the Latin meaning literally “little hand”, is a common annotation meant to draw the readers attention, like a highlight. This one just looks like it belongs to Mister Fantastic. If you’d like to read more about this mark and see other examples, these recent articles from Slate and Atlas Obscura may be of interest.

Digital Fills to the Rescue!

By Rachel Penniman, Senior Conservation Technician

This copy of Hilda Vaughan’s ‘A Thing of Nought’ was sent to the conservation lab to have a box made to protect the fragile dust jacket and cover. The illustration and lettering printed directly on the front board is visible through a transparent, blue tinted plastic dust jacket that is itself printed with the title and author’s name.

Unfortunately the poor quality plastic of the dust jacket has not aged well. Small pieces of the plastic dust jacket were in danger of flaking off with every movement and could hardly be handled safely. In order to keep the dust jacket on the book but still allow for handling of the item, Curator Andy Armacost had the idea of using a dust jacket protector similar to the type sometimes used on our general collections items. This traditional style of dust jacket cover has a Mylar front and a paper backing that wrap around the dust jacket to protect it from wear.

Slim-Fold Book Jacket Covers, University Products


This would have the benefit of completely surrounding the plastic dust jacket and preserving all of its parts while allowing it to stay in place on the book and be handled. The trouble is that the paper backing on this kind of product would obscure what was printed directly on the book’s cover. So I attempted to create my own dust jacket cover where the paper backing was printed with a copy of the original boards.

I tried black and white photocopies of the cover on white paper and colored papers. They gave a similar idea of the original cover design, but I was really hoping for something more detailed and accurate.

Photocopy on white paper, photocopy on cream paper, and original cover

I tried again using our photodocumentation setup to take a color photograph of the cover but when I printed out the image the color didn’t match the original at all.

Printed color photograph and original cover

Senior Conservator Erin Hammeke had previously used a tool developed by Victoria Binder to make a color accurate printed reproduction for use in an exhibit so I decided to look into that. Victoria’s article in Topics in Photographic Preservation entitled ‘Digital Fills for Photographs with Glossy Surfaces’ discusses using the Action feature in Photoshop to automatically make variations on settings like midtone color, exposure, and saturation in an easily printable contact sheet. I wasn’t looking to create a fill for a photograph, but color matching a printed image to an original was exactly what I needed. By using Victoria’s Actions Set I could easily print contact sheets with up to 15 variations on a single page, and pick the one that looked closest to the original without wasting reams of paper.

I adjusted my image in Photoshop according to the best results from the contact sheets. The printed photograph gave all the detail of the appearance of the original board decoration and the adjustments made the color an almost perfect match when printed.

Printed photograph before color correction, after color correction, and original cover

The original plastic dust jacket was placed over the printed reproduction of the book cover and a piece of Mylar was folded around both. When the jacket assembly is put on the book the visual effect is very similar to the original.

Interior of the jacket assembly around original cover

Because the cover isn’t attached in any way to the book, a researcher can simply unfold the jacket assembly and view the original book cover decoration beneath.

Final dust jacket assembly next to original cover

I’m so happy with how this project turned out. The original plastic dust jacket is much easier to handle safely, the original appearance of the item is retained, and all of the parts can still be kept together.