Tag Archives: mold removal

Books Can be Deceiving

As someone who repairs books for a living, the idiom “don’t judge a book by its cover” can have a much more literal meaning than expected. I’m regularly encountering books that seem to need only one kind treatment from the outside, but then have more problems than I realized on the inside. This can be a bit frustrating when you’ve mentally prepared yourself for one kind of project and instead find yourself tackling more than you had planned for. Even so, it is especially satisfying to finish a treatment on a book that you felt was going to be complicated. In today’s blog, I’ll be sharing my most recent encounter with a book that I misjudged.

The Problem

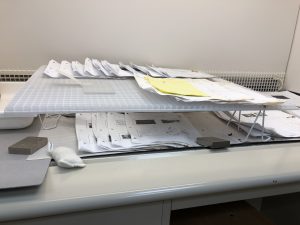
The Perkins Library has a great number of collections of Arabic books like the ones you see below.

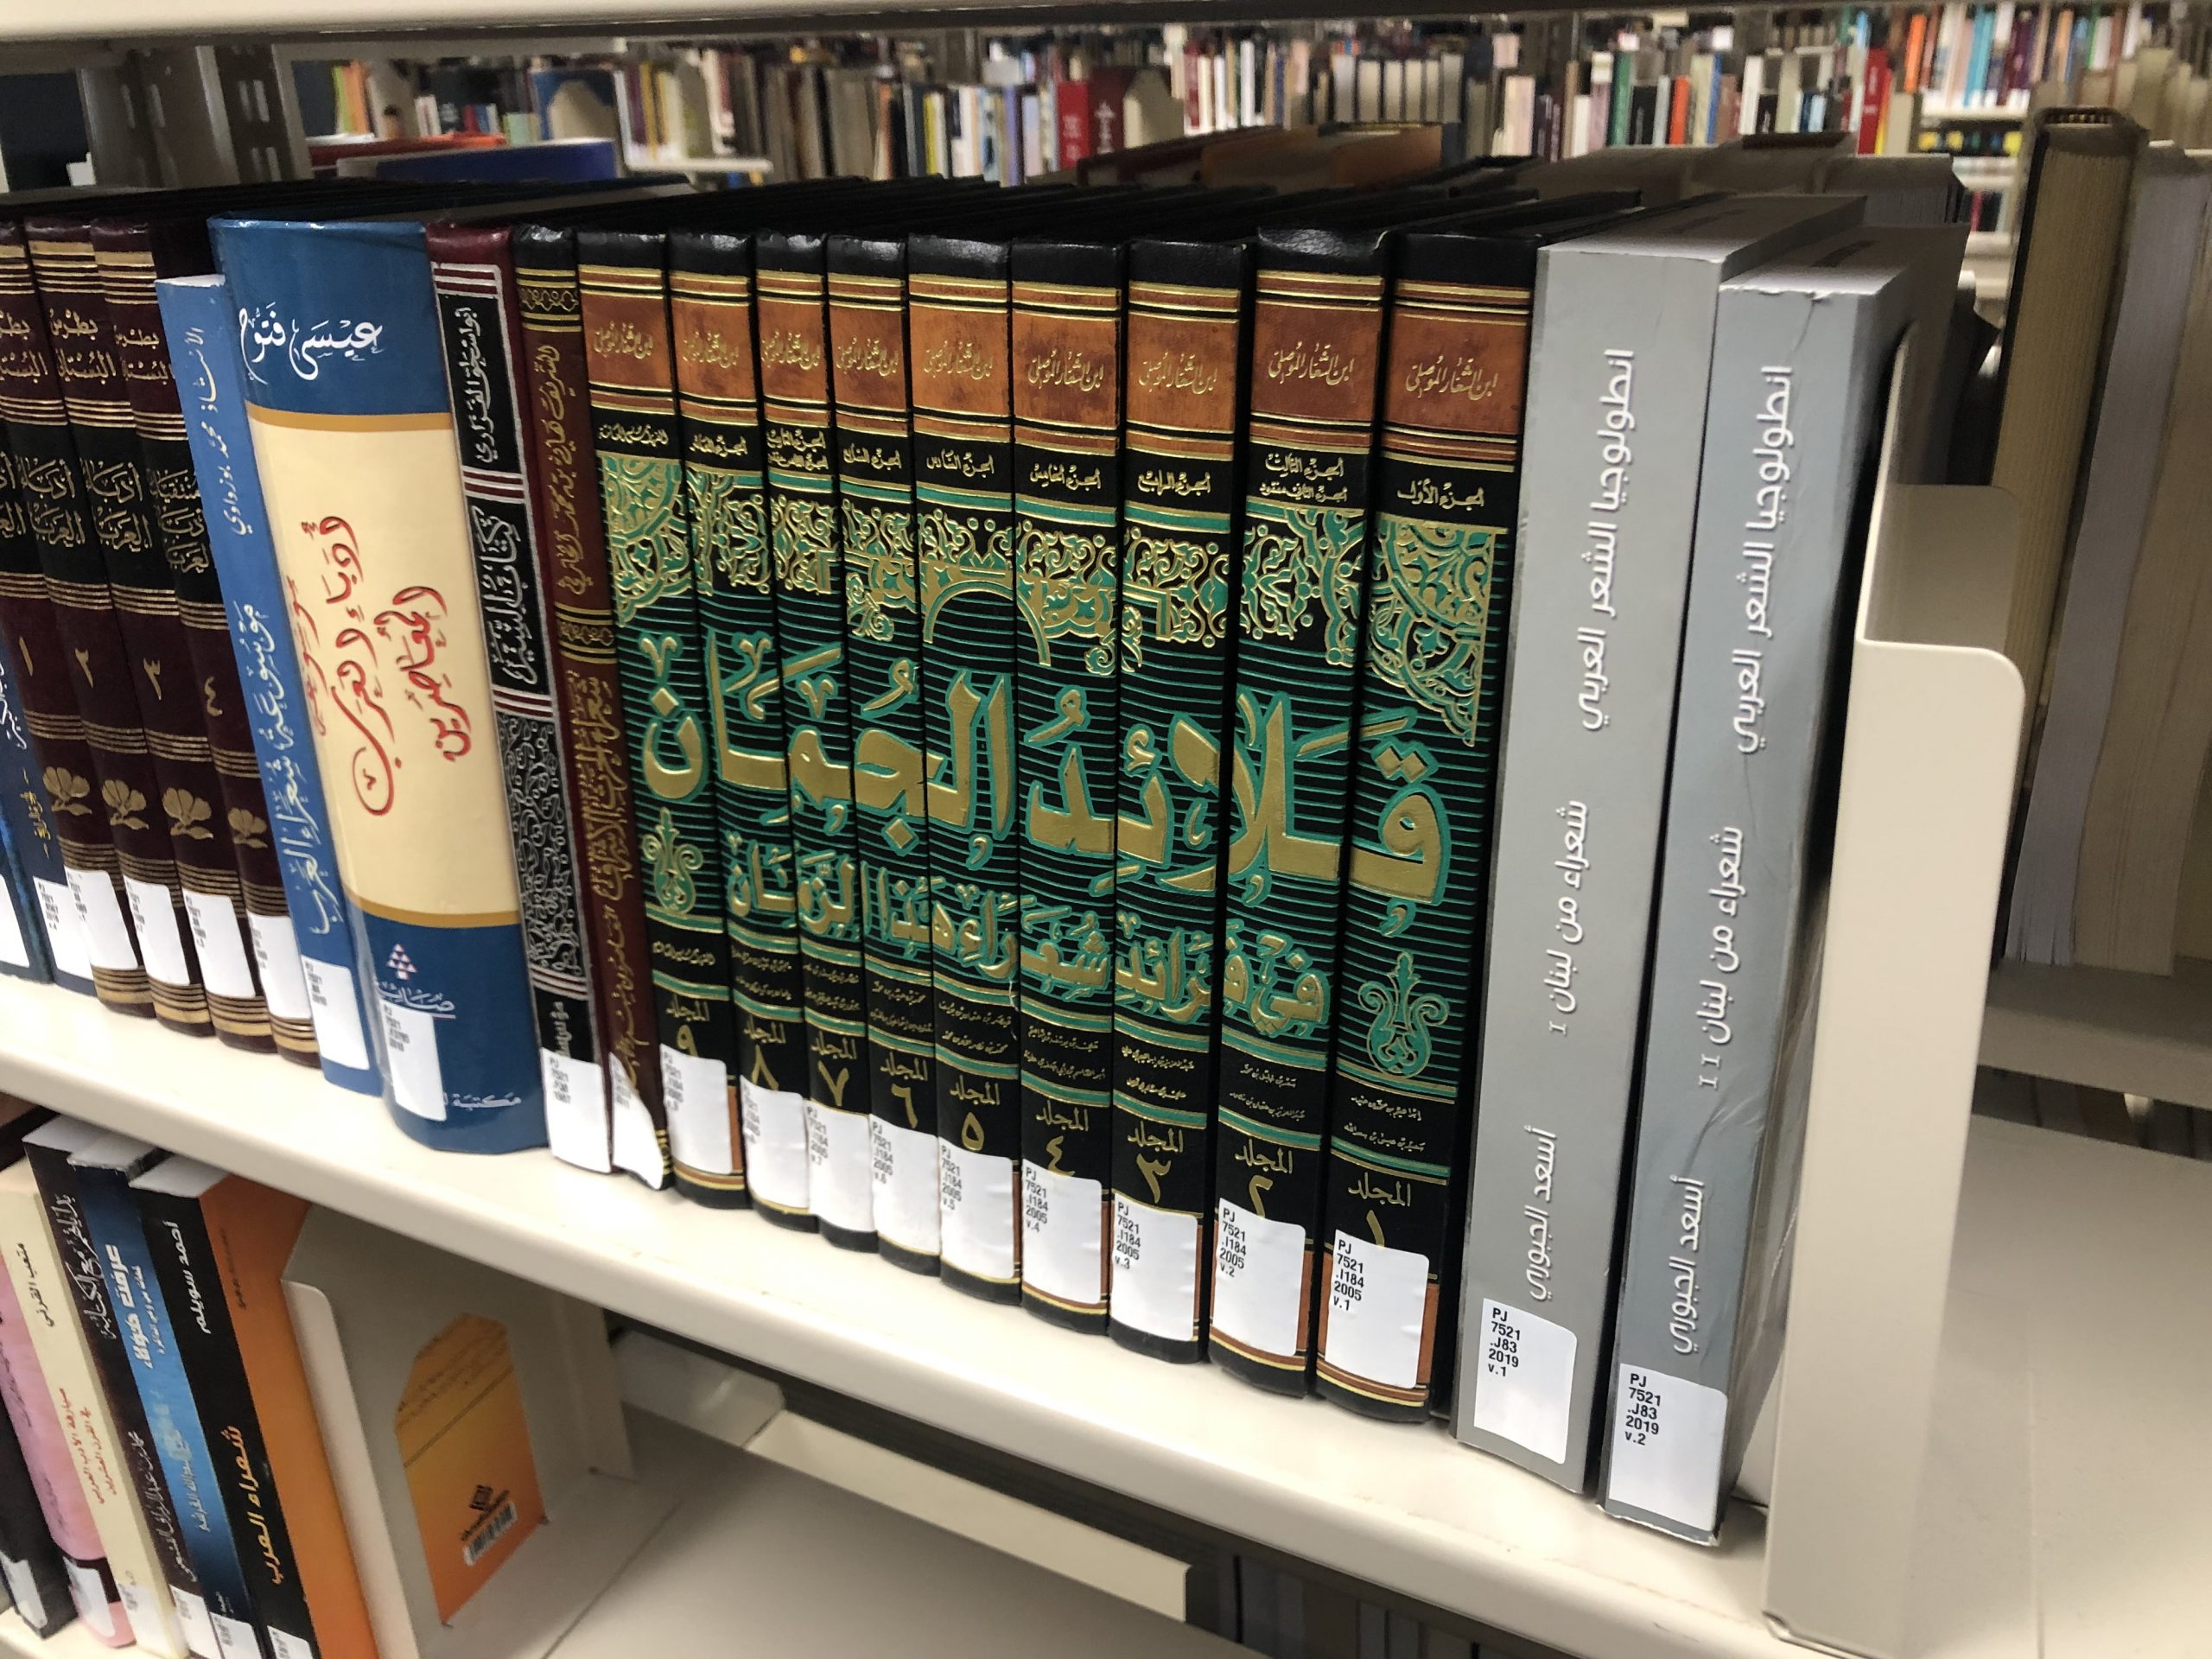
These books are especially striking due to the eye-catching uniformity of their spines. Outside of how aesthetically pleasing they are, there is an added benefit to the fact that all the books are identical in design. Take a look at this collection of books below. Do any of them look different than the rest?

If you happened to notice the fourth book from the left in particular, then you can see what I meant earlier by “an added benefit”. Thanks to the collections precise design, it’s all the more obvious when something isn’t quite right.

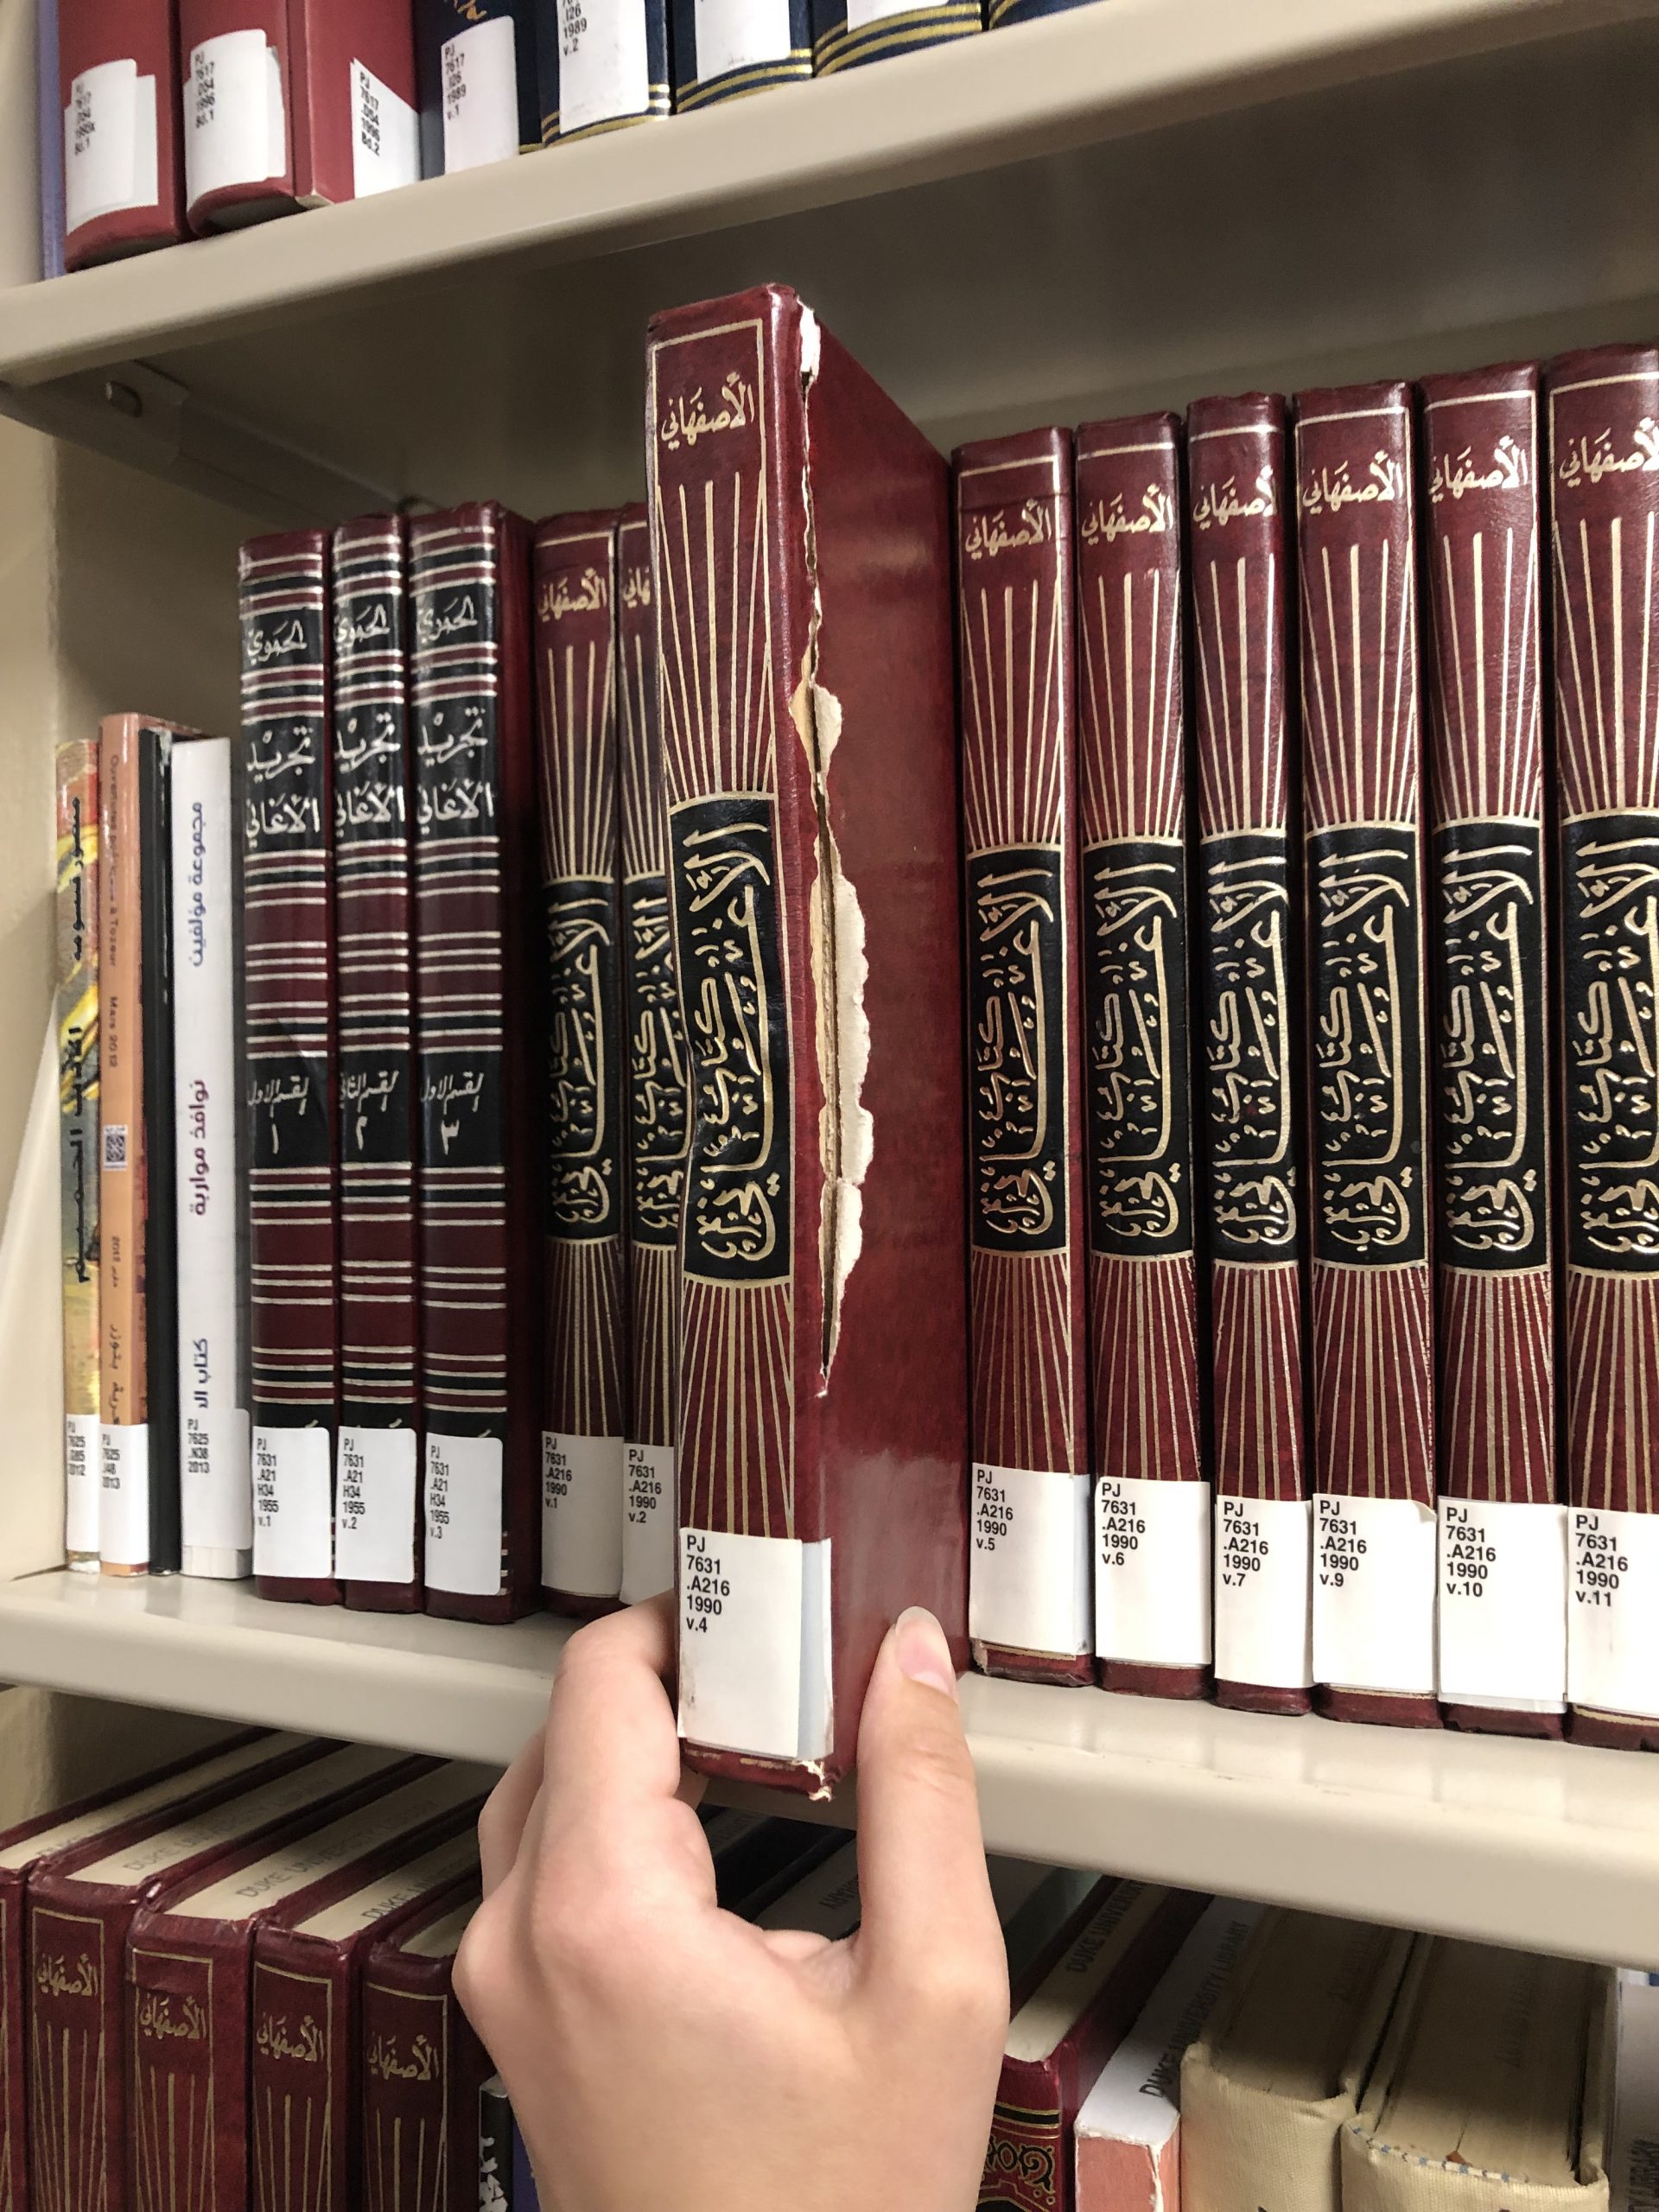
In this case, this poor book seems to have been crushed under something as well as torn along the spine. We certainly can’t leave the book to be handled by patrons in this state, so back to the lab it goes.

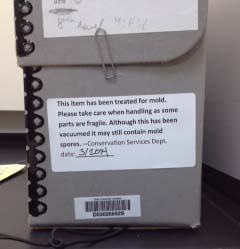
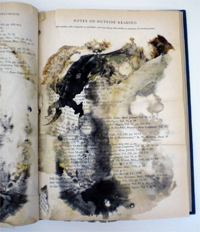
At this point, I had assumed the only problem I was dealing with was the crushed spine of the covers/textblock. Unfortunately for me, I didn’t realize that this book had been through more than just some extreme pressure. Right as you open the book to its title page, you’re greeted by discolored paper and some significant black speckling. The spotting continues a good 20 or so pages.

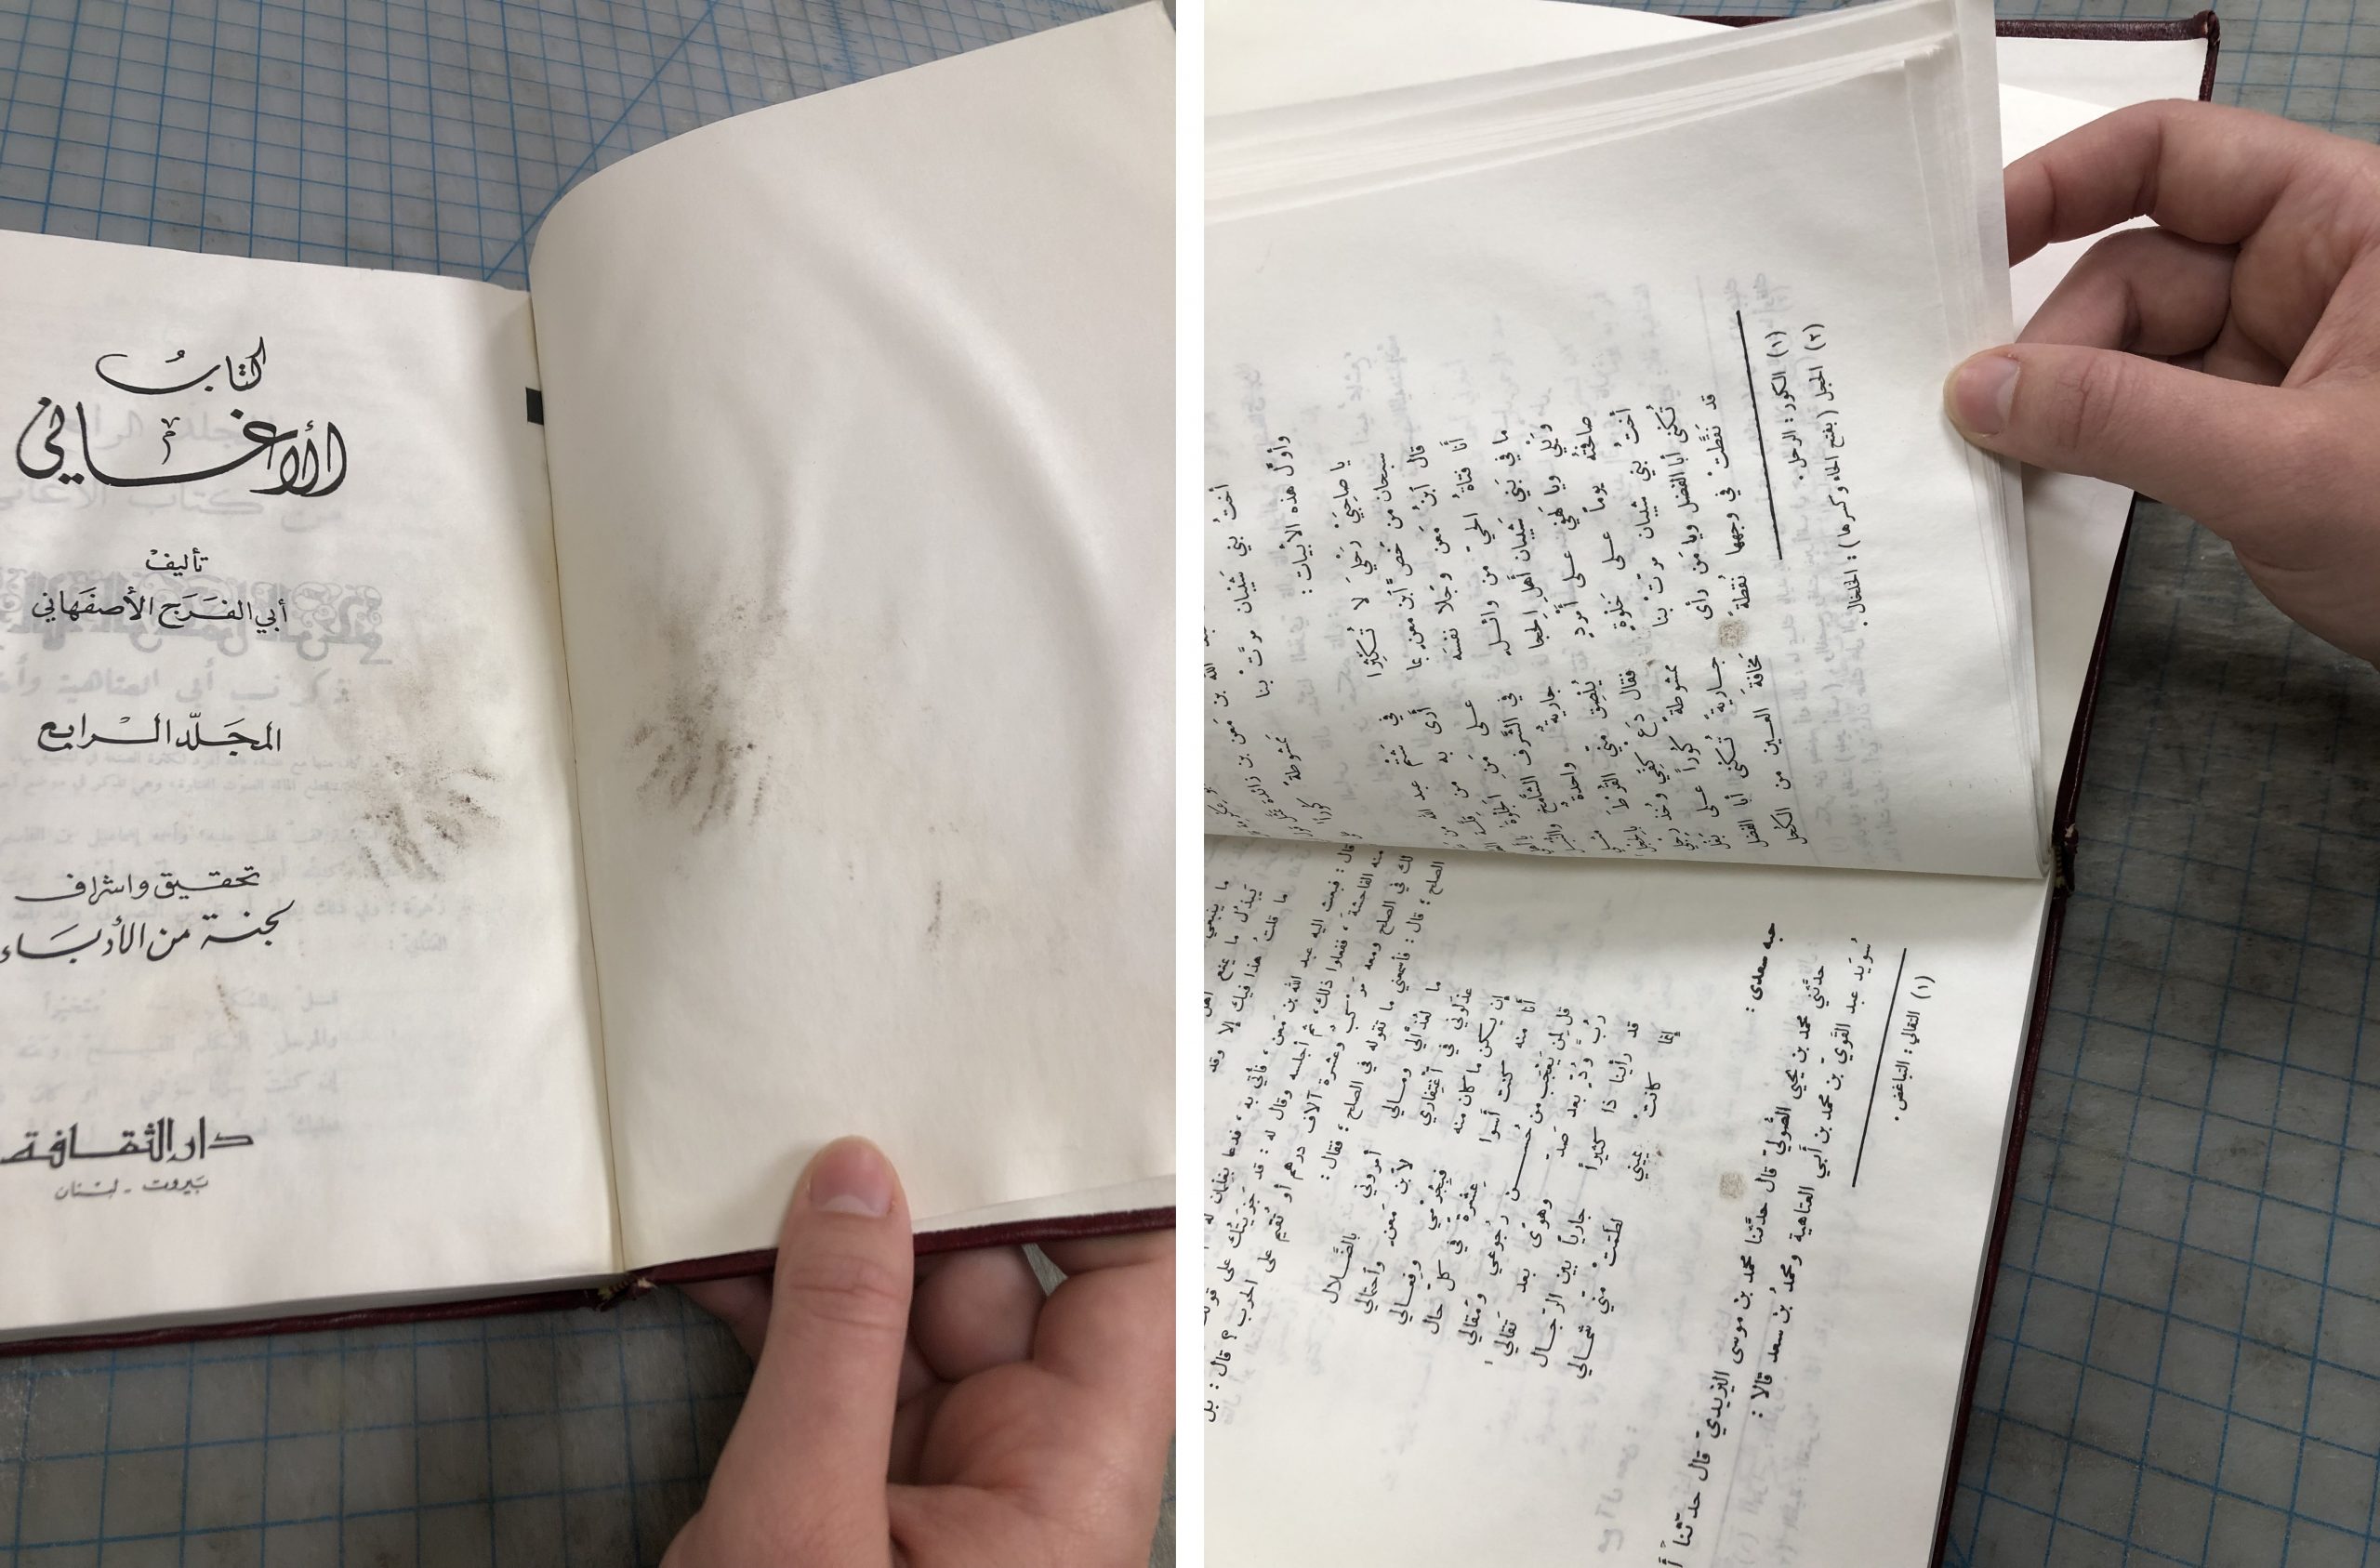
These are the tell-tale signs that not only did the book get wet at some point, but mold had made itself at home here as well.

Now, luckily this isn’t a terrible amount of mold to be dealing with. However, it does mean I have to add several more steps to my treatment before I can tackle the original issue of the crushed spine.

The Solution

Let’s say there hadn’t been any mold in this book. What would my treatment have looked like?

First, I would remove the covers so I could assess the damage done to the spine of the textblock. Once I had addressed that, I would prepare the textblock as I normally would for a recase. Finally, I would repair the covers by making a new spine piece to replace the damaged one, and reattached the textblock to the case.

Now, I will have to remove all of the mold first before I can start anything else.

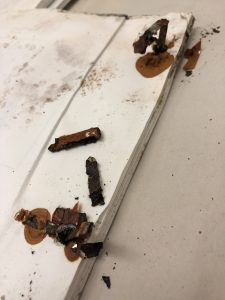
Based on the dry and powdery consistency of the mold, I can tell that it is no longer active and can be safely cleaned by hand. To do so, I used a soot sponge to manually clean the mold and debris off of every page.

You can see the immediate difference before and after using the sponge on the old mold, both on the pages and the sponge itself.

The soot sponge is mostly likely also picking up dirt and dust on the pages as well, but regardless it’s clear the book needed a good cleaning.

Now that the textblock is free of the residual mold, I can finally get to the treatment I had planned at the start. This book will be back on the shelves and ready for patrons in no time!

The “Disaster Wiggle” Redux

Remember our post from May 2020 that introduced “The Disaster Recovery Wiggle?” The Wiggle is back for an encore!

I am working on a large collection of paper and photographic records that were recently acquired. These were stored in a wet garage and came to us damp and actively moldy. Pro tip: don’t store your papers in a wet garage.

I divided the records into packs containing 3-4 folders each, wrapped them in plastic, labeled them well, and put them in the freezer. Each package contains a group of photographs and/or documents that should fit into the fume hood for easy drying. Time warp to almost a year later and I am ready to get these thawed and cleaned.

Remember Freezer Friday? It’s also back. This project takes up the top two shelves.
Step 1: Thawing

I remove one package at a time from the freezer and spread the documents out in the fume hood to thaw. The contents are carefully spread out so that the original order can be maintained. When the pages can be carefully separated, I remove the rusty fasteners.

The metal fasteners have no structural integrity left.

This is a good time to remind conservators that they really should keep their tetanus vaccine up to date.

Step 2: Drying

Many of the packages had too many papers in them to all fit on the deck of the fume hood. I had to figure out a way to expand the available surface area for drying without inhibiting air flow. I figured there must be a way to recreate the double-decker drying we set up in May of 2020 (again with the time warp) but with more airflow.

A diffuser panel makes a great second tier drying rack.

We use diffuser panels as a base in humidity chambers because they are sturdy, but have holes in them that allow moist air to move through the paper. I thought, “Why not reverse the process?” I grabbed a panel, propped it on some supports, and voila! A double-decker fume hood drying rack.

With the double-decker drying rack in place, I needed to be sure the air flow was constant at the top and bottom. I cut two pieces of newsprint, grabbed a couple of Plexi Glas weights, and fashioned a “flag” that could wave in the breeze if it was sufficiently windy. Will it wiggle?

The top rack wiggles!

The top rack had no problem with air flow. But the space below was smaller. Will it wiggle, too?

The bottom wiggles, too!

It does! With the flags gently waving I felt that the air drying could commence.

Step 3: Vacuuming

I’m leaving each package in the fume hood for at least two days to thoroughly dry before vacuuming. Once cleaned, I will re-folder the documents and repeat with the remaining 19 packages in the freezer.

More info on preservation your collections

For more tips on preserving personal collections, see our “Preservation Week: 10 Tips for Your Collections” series.

Tips 1-2: Environment and Enclosures
Tips 3-5: Handling, Display, Facsimiles
Tips 6-7: Disasters and Non-paper collections
Tips 8-10: Preservation/Access, Informed purchasing, DIY repairs


Cleaning Radio Haiti Reel-to-Reel Tapes

cleaning audio reels
Cleaning magnetic audio tapes.

This week we worked with Craig Braeden from Rubenstein Library and Zeke Graves from the Digital Production Center to test a cleaning workflow for moldy reel-to-reel audio tapes we recently received from Haiti.

Conservation doesn’t have expertise in cleaning magnetic media, so this was a chance to learn more about these materials and to do some cross training.

The method is simple enough. While the tape is running you gently hold a piece of Pellon to the tape to remove the mold. What is more difficult is learning to evaluate the tape to be sure it isn’t too fragile for this treatment,  holding the tape with just enough pressure to clean it but not too much to damage it while it is moving through the deck, and watching for splices. Craig brought over an old deck and we set it up in the fume hood in Conservation. Zeke helped clean and repair the tape when we encountered previous splices.

Craig has posted a brief video on the Devil’s Tale about this collection and what it will take to clean, digitize and make it accessible.

moldy audio tape
Moldy tape before cleaning.

audio tape after cleaning
After one cleaning pass.

1091 Project: The Mold Edition

1091 graphic Mold and mold removal is a complex issue. Covering everything you should know about mold would take much more than this blog post. There are good references out there if you are interested in learning more.

Our stacks are fairly well controlled for both temperature and humidity so we don’t find mold growing in the stacks unless there has been an undetected environmental problem. Most often mold is identified during archival processing or at circulation points.

Since 2003 we have removed mold from over 5,900 library items. That number will rise significantly this year as I recently finished drying and cleaning over 1,800 items from a large manuscript collection.

Removing mold

For rare and archival items we will do what we can to clean any mold from the collection. Mold must be dormant before attempting to remove it. Small amounts of materials can be dried quickly in the fume hood. Larger amounts of wet materials are put in the freezer until both the paper and the mold are dry.

Once the mold is dry and powdery, the spores can be carefully removed from the paper’s surface either with a dry cleaning sponge or HEPA vacuum. You must be careful with these techniques since you don’t want to drive spores deep into the paper or damage the already weak paper by being too rough with it. Even after treating the surface spores, there may still be spores imbedded deep in the paper fibers. Staining can also be left due to the “biological output” of the mold. These stains may be difficult or impossible to remove. If necessary, after dry cleaning we may wash the paper in an alcohol/deionized water solution.

When we are finished cleaning an item, we apply a label to the box alerting our patrons to the fact the collection was moldy. We believe it is best practice to alert patrons so that they may determine their own best course of action when handling these materials. The library is happy to provide personal protective equipment (PPE) such as gloves and a mask if anyone is concerned about handling these materials.

mold label
Label alerts patrons and staff to the mold removal.

We will clean circulating items that have mold only on a few pages, or send them to the commercial bindery if the mold is isolated on the covers. If the mold is extensive we will talk to Collection Development to determine if a replacement can be purchased. If it cannot be replaced, we will treat it the best we can, or we may decide collaboratively to remove it from the collection because the damage is too great.

Mold health and safety

You can build up an allergy to mold and some of those allergies can be severe. To avoid that, we make sure we are protected from mold exposure as much as possible.

We work with very moldy items in our fume hood to reduce the risk of spores getting into the lab. We wear protective nitrile gloves and we make sure our face is protected by the fume hood sash. When the project is over, we clean our tools and the fume hood with soap and water, followed by an Isopropyl alcohol wash. We then thoroughly wash our hands.

Removal with sponge 2
Using a dry cleaning sponge to remove mold.*

Removal with vacuum 5
Using a HEPA vacuum and micro tools to remove mold.

If we are working on site somewhere, we wear protective gloves, N-95 respirators, and long-sleeved shirts and pants that can be washed in warm, soapy water. For extra protection, goggles can be worn to protect your eyes. It is best practice to always wear PPE when handling moldy materials.

*I know I’m not wearing gloves in the picture above. Don’t be like me.

How to prevent mold

Mold can thrive in a variety of environments, even in the Antarctic. To reduce the risk of mold in your collections:

  • Keep your papers and books in a cool and dry environment. This means keeping collections out of the attic, basement or shed, and away from leaking pipes or other water sources. Best practice is to keep temperatures from fluctuating beyond 5 degrees of your temperature set point, and keeping humidity within 5% of your humidity set point. For example: if your set points are 65 degrees F and 40% humidity, your environment would be between 60-70 degrees F and 35-40% humidity. Not always practical or possible, but aim for as stable an environment as you can.
  • Control the humidity. If you keep the humidity levels around 30-45%, chances are mold will find it difficult to thrive. Mold can grow in cool temperatures as long as the humidity is high enough (e.g. the veggie drawer in your fridge), so if you have to choose one set point to keep stable, humidity is the one to focus on if you are worried about mold growth.
  • Check in on your collections regularly to see if anything is amiss. While you are looking for potential mold growth, also look for signs of insects and rodents (chewing, droppings, bodies, etc.). Pests like the same conditions as that mold does.
  • For more information, see the NEDCC Preservation Leaflets.

No post about mold would be complete without my favorite moldy item that has come to Conservation. I am talking, of course, about the banana book. Isn’t it something to behold?

banana_book_2

Let’s head over to Parks Library Preservation to see what sort of moldy things they have encountered.