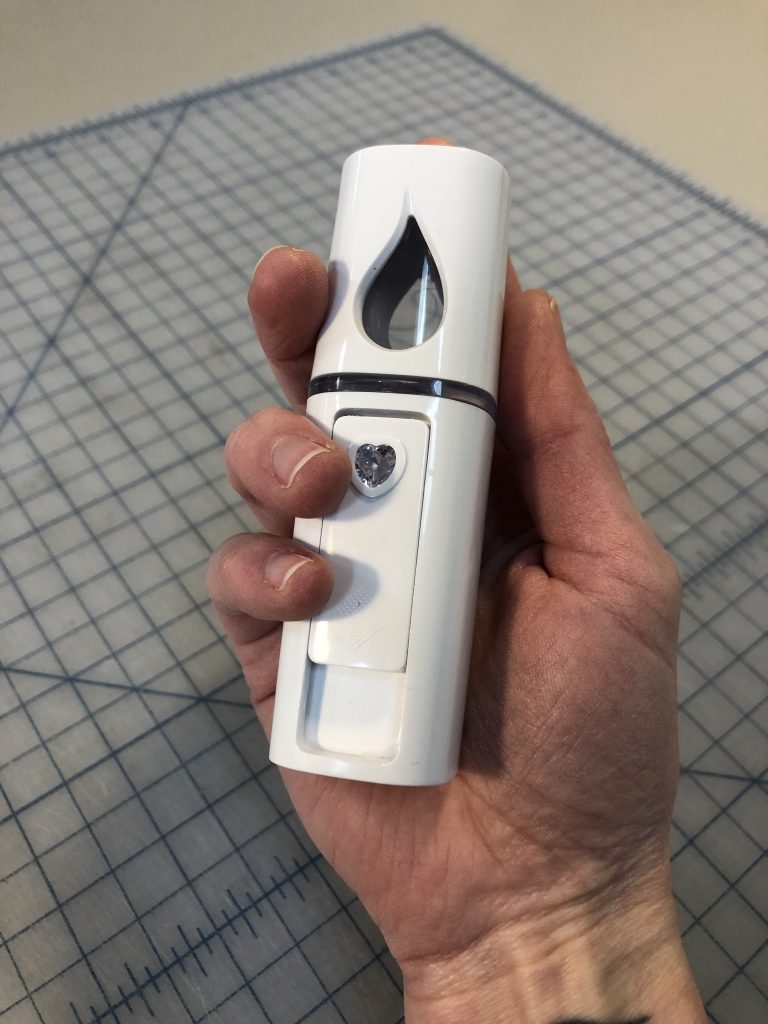
This tip is shamelessly stolen from a blog post by Satomi Sasaki Verhagen on The Book & Paper Gathering and I cannot thank them enough for writing about this wonderful tool.
It’s a mini, handheld humidifier that creates a very fine mist (click here for a short video) perfect for localized humidification. It looked so useful in their blog post I ordered one right away and had fun playing around with it when it arrived.
Now over a year later I’ve finally had a chance to use it on a treatment project. I blame working from home for not finding a use for it earlier.
We recently got a large vellum binding with many creased and torn fold outs that needed flattening and mending. The binding was stiff and allowed for only a very small opening angle. Mini-humidifier to the rescue. I was able to very lightly humidify just the localized areas of creasing to flatten and realign them before mending. It worked beautifully. Because the little humidifier doesn’t create a very large spray of mist it was easy to direct and keep only in the areas I wanted. Also, it creates such a small amount of moisture that it worked very slowly so it was easy to control how humid each area got.
It wasn’t perfect though. If left running it could build up condensation around the nozzle especially when held at an angle. I found I had to hold a paper towel around the base to prevent any of these drops of condensation from falling on the page I was humidifying. Regularly turning the humidifier off and blotting drops of water off from around the nozzle helped manage condensation build up. The battery didn’t last very long but it is rechargeable and charged very quickly while I was at lunch.
Overall I was so happy with how this tool works and will definitely be using it again.
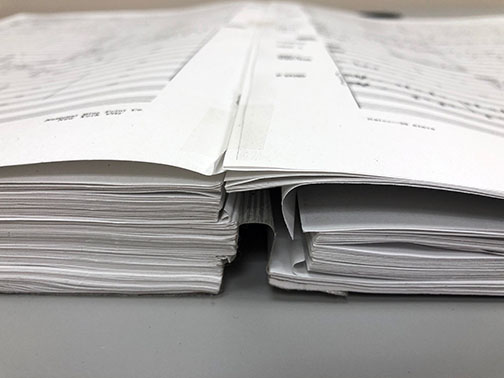
Normally I don’t like to point fingers, but this item came into the lab and I really cannot NOT comment. I don’t know if this is a standard binding method for oversized music scores, but it certainly is a terrible binding for one. “Troubled Island” by William Grant Still is printed in single sheets on 11×17 inch paper and with 339 pages ends up about two inches thick. But the binding…
Does this qualify as a “binding”?
The cataloging record does say “bound with tape,” so warning number one that this is as issued. What the record doesn’t say is that this is bound with strapping tape, the kind with the glass yarn filament embedded in it.
So shiny, so strong.
But wait! There’s more! To create folios the publisher/printer placed three pieces of tape between each single sheet. One at the head, tail, and center of the sheet.
So. Much. Tape.
This is bound for failure on so many levels. And it does not disappoint.
Bound to fail.
I wish I could have a conversation with the publisher about this. Is there a reason this score is bound the way it is? Was the binding meant to be temporary? I really don’t understand any of it, but there must be a reason why they chose to bind this score in this way, right? If anyone knows, please leave the answer in the comments because I am stumped.
End Note 1: “Bound to Fail” would be a great bookbinding contest theme. Or has that been done already?
Quite a bit has been written on this blog over the years about caring for Duke’s sizable papyri collection, so many of our readers will be familiar. For those who may not know about it, the collection was digitally imaged back in the early 1990s and the images are publicly available for research. The Duke Papyrus Archive is a very helpful and well-used resource, but sometimes we get requests to reimage fragments from the collection. It may be that the resolution of the images in the archive is too low for a researcher’s needs, or there is a request to use multispectral imaging to see if additional information can be made legible.
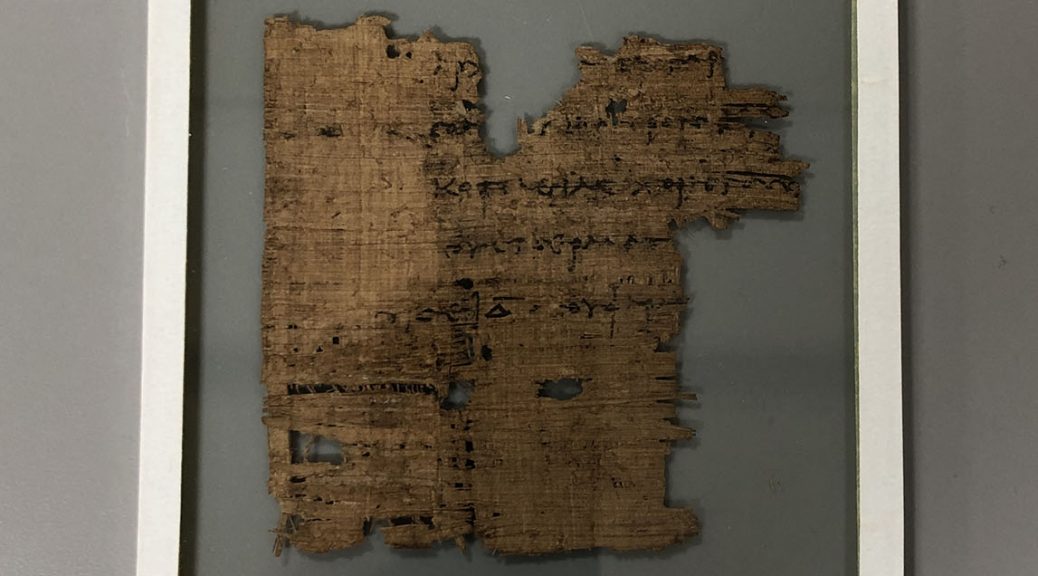
P.Duk.inv 362: Lease of land, 2nd century B.C. Extracted from mummy cartonnage.
As we have mentioned before, each papyrus fragment is stored between two pieces of glass, which are taped around the edges. This housing solution allows the extremely fragile fragments to be safely and easily handled in the reading room, but it does pose some challenges for imaging. Our digital production staff are able to adjust the lighting environment to reduce reflections from the glass, but the glazing package also needs to be very clean both inside and out. Any dust, stray fibers, or residue are clearly visible in the high resolution images we produce. Prior to reimaging, each fragment is examined to determine if any cleaning or additional intervention is required.
Some of the taping on the glass packages is starting to show some wear and tear. White paper tape was used to seal the glazing for many of the fragments and the adhesive may have become desiccated and failed, or the paper carrier may be splitting. Sharp glass corners or edges may also be untaped and exposed.
Re-imaging is a good opportunity to remove the fragment from its glazing, clean the package, remount the fragment, and reseal the package with higher quality materials. The process is pretty straightforward. To begin, the tape is sliced open on all edges with a scalpel and the top piece of glass is carefully lifted away.
Next the papyrus fragment is removed by very gently sliding it off of the bottom glass sheet onto a piece of clean Bristol board. The surface of the board is very smooth, so papyrus fibers along the edge of the fragments do not catch. The fragment may actually be composed of several loose pieces, so I always do a few little test lifts at the edges of the piece with a microspatula first to get a sense of the fragment’s condition. Luckily, this fragment is all in one piece. I like to note the orientation of the fragment in pencil at the corner of the board, just as a reminder when I go to reassemble the package. The fragment is placed in a temporary enclosure for safety and set aside.
The adhesive of the paper tape is water-soluble and comes off of the glass pretty easily. After mechanically scraping off the tape carrier with a scalpel blade, the glass is placed in small plastic tray filled with filtered water so that any remaining residue will soften and can be scrubbed off. I finish cleaning the glass with a 1:1 ethanol and deionized water solution and buff the surface with a cotton pad. To keep it as clean as possible it’s important to clean any working surfaces beforehand and wear gloves.
Before and After Cleaning
With the glass clean and dry, it’s time to transfer the papyrus fragment back. The papyrus fragment is aligned on the lower glass and secured to it using very small pieces of pre-made remoistenable repair tissue (see Baker 2010 for instructions on making the remoistenable paper). When the mounting strips are dry, the upper sheet of glass is placed on top and the edges are taped with Filmoplast SH linen tape. I like to double-up the taping at the corners of the package to ensure that every edge is completely covered.
In the years before the Rubenstein Library renovation, these glass packages were rehoused in uniform rigid portfolios with cut foam padding. Each portfolio has a picture label and small groups of them are stored together in metal edge boxes for easy retrieval. You can see images and read about that rehousing project here. These portfolios are still functioning very well, so the cleaned and retaped glazing package is placed back in it’s custom portfolio and box before being transferred to the digital production center.
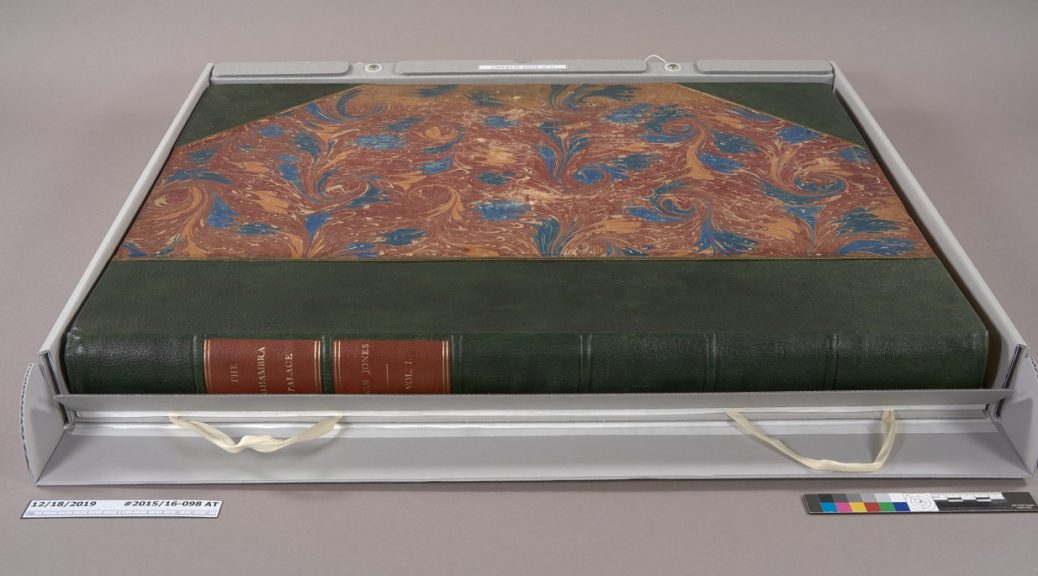
I recently finished repair on these two double folio volumes, concluding a multi-year project. I performed dry cleaning and page repair, in- situ sewing repair, board reattachment, leather rebacking, and leather corner repair. Working on two volumes this size and weight (35lbs each) proved to be both an engineering challenge and a physically demanding project. I came up with some solutions for a few of the challenges presented while treating these very large volumes that I’ll share here.
This two volume set by the architect Owen Jones documents the decorative surfaces at the Alhambra Palace in Grenada. The texts are most well-known for their beautiful, large-scale color lithographic plates.
The volumes were bound in half-style bindings with green sheepskin covering and marbled paper sides and endleaves. The boards were detached and the sheepskin was in poor condition, with many tears and large losses. We decided to remove all of the leather up to the gold tooled areas. After attaching the boards with the use of many clamps (my favorite tools!), and prepping the spine with sufficient linings and sham bands, it was ready for covering.
I selected goatskins for the new leather and calculated that I would need three skins to cover both volumes’ spines and large corners. I dyed them to match the original – another challenge when working at this scale!
The sheepskin remnants were very thick, and did not take well to paring down and thinning. I was worried about having a smooth transition between the old and new leathers where they overlap. I realized I needed to pare the new leather to accommodate the old, but I didn’t want to lose the strength or dyed color of the hair side of the new goatskin. A piece from our Scharf-Fix that I’ve never used before provided the perfect solution. The kit comes with assorted roller sizes and we’ve only really ever used the full size (28mm) for edge paring.
Using one of the smaller rollers (13mm) along the meeting edges of the leather allowed me to take a step out of the flesh side that could accommodate the thick sheepskin remnants. I used the full-sized roller to clean up the stepped bevel by working it perpendicularly and off the edge.
During covering, I worked this bevel in with my bone folder creating a precise step for the original leather to sit into and making for a flush transition.
After adding new stamped leather spine labels, I created sleds that the heavy bindings can be moved on, hopefully protecting the covers from damage from being dragged across reading room table tops.
Have you discovered other uses for the variously sized Scharf-Fix rollers? What are your tips for repairing oversized and heavy bindings? We’d love to know!
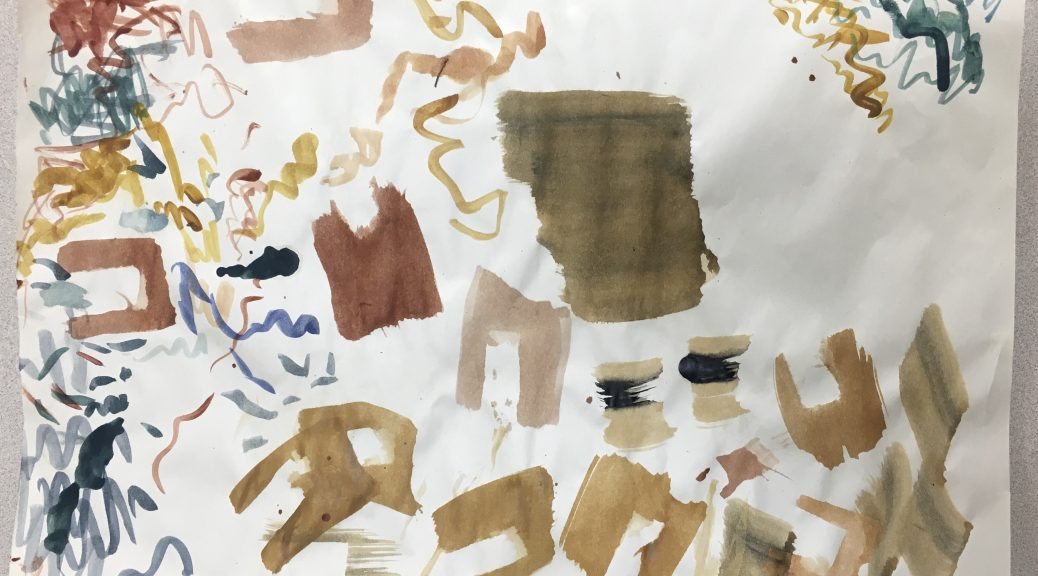
Color matching is a trial and error process. We make up a color mixture, paint it onto little scraps of the paper we’re toning, and let them dry (or you can use a blow dryer to dry them) before making adjustments to the color mixture. In this case, the waste paper was a work of art unto itself.
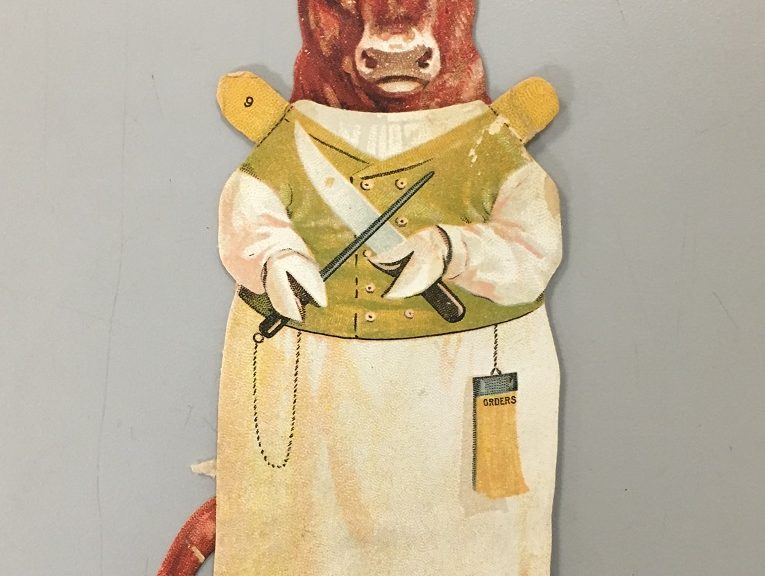
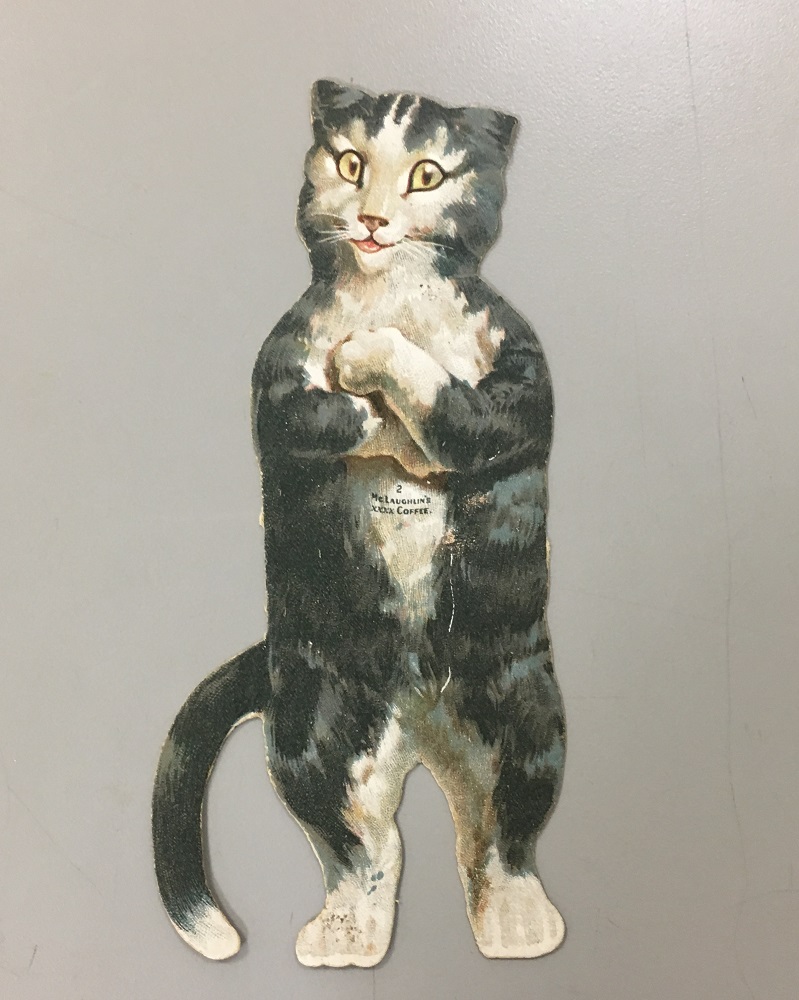
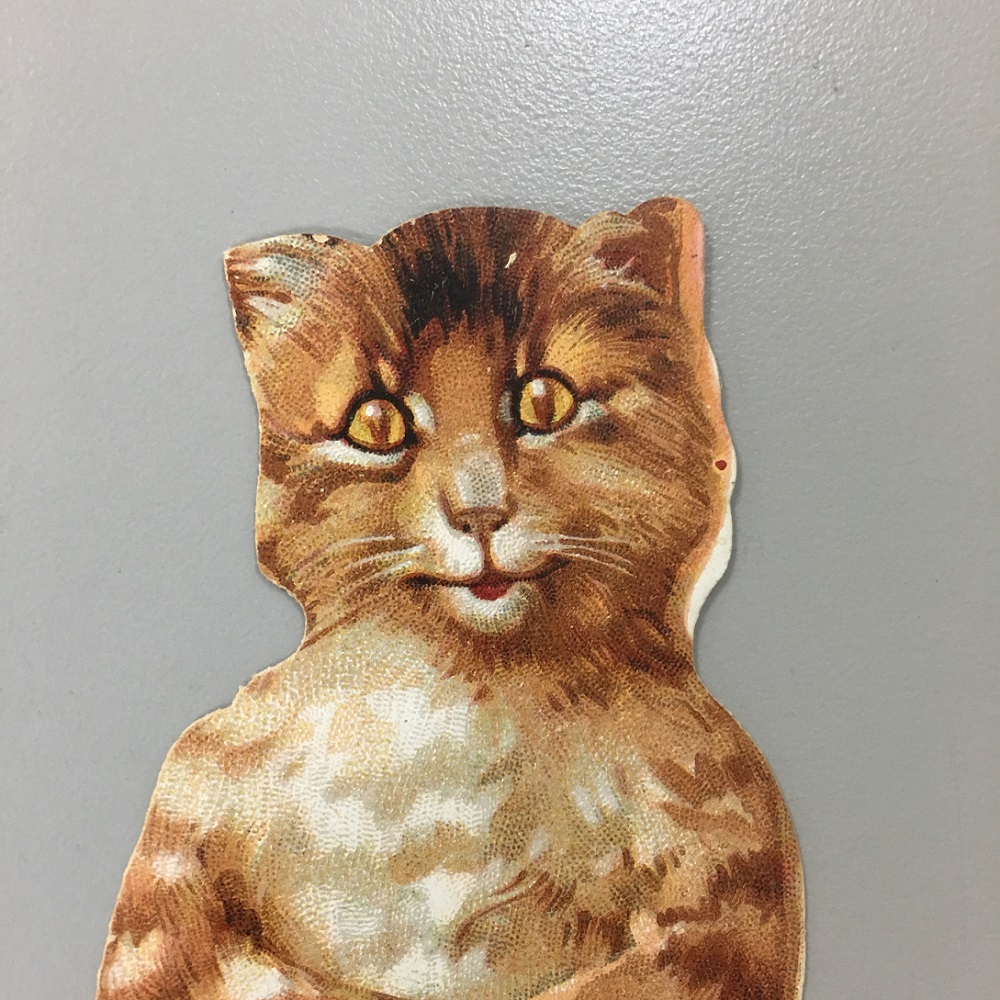
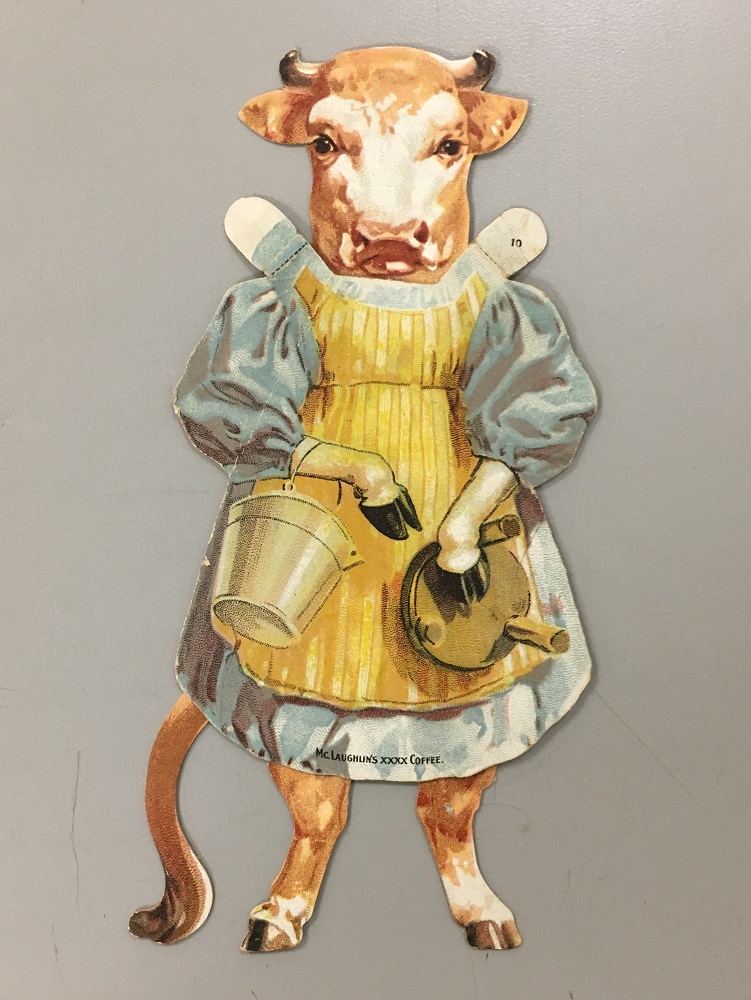
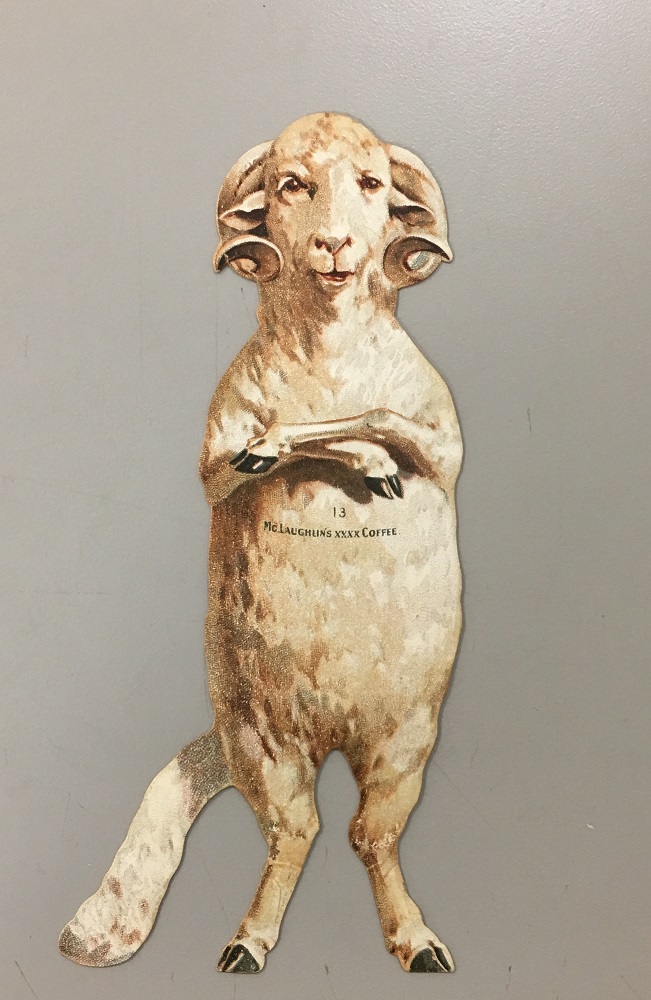
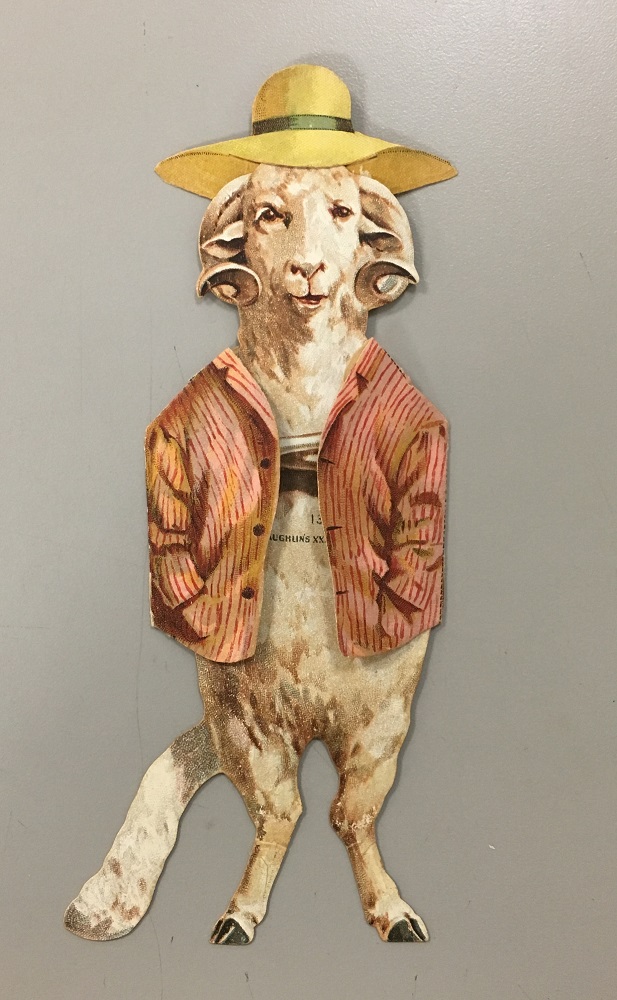
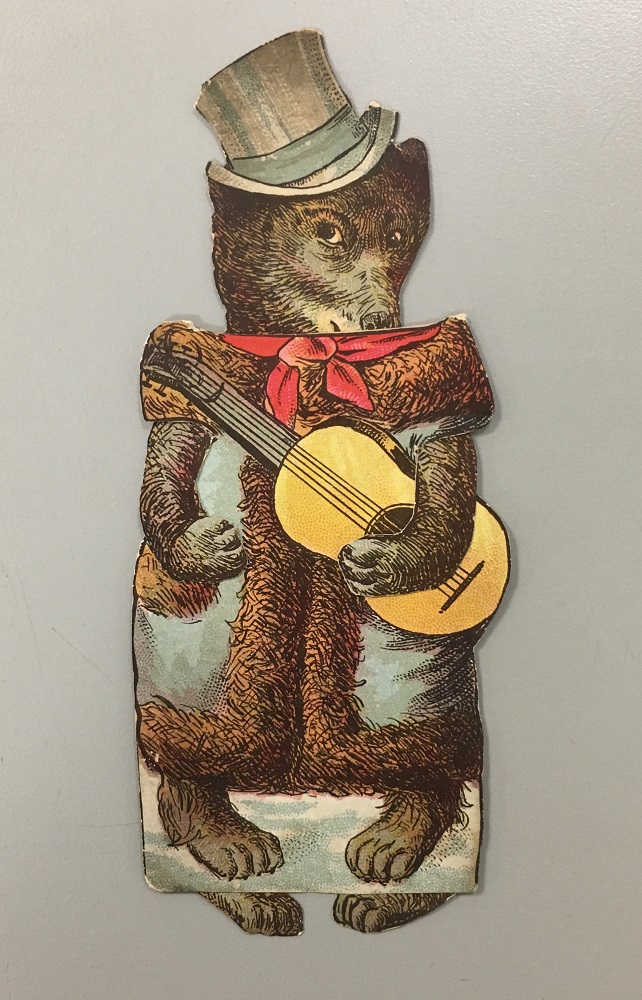
The W.F. McLauglin Coffee Company (1894-1896) produced an assortment of paper dolls, a collection of which are now housed in the Hartman Center for Sales, Advertising & Marketing History. The collection includes standing animals with detachable clothes and was a true delight to create enclosures for. We love the sassy cats, musical bear, and dapper ram!
Even though we’re working from home right now, we thought we’d add to our What’s in the Lab series with some pictures of neat items from the past that we never got a chance to share. It’s nice to revisit these pictures during this time so we can fondly remember all of the cool things that pass through the Conservation lab on a regular basis.
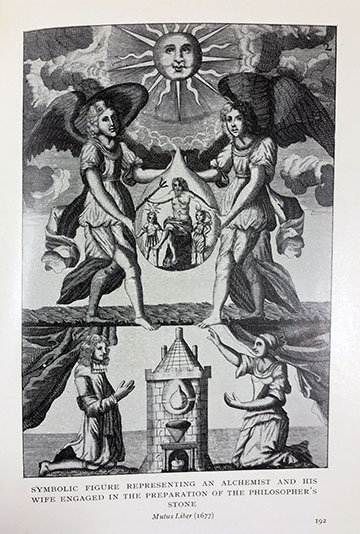
WHAT (WAS ONCE) IN THE LAB: ELECTRICAL HANDBOOK FOR WOMEN
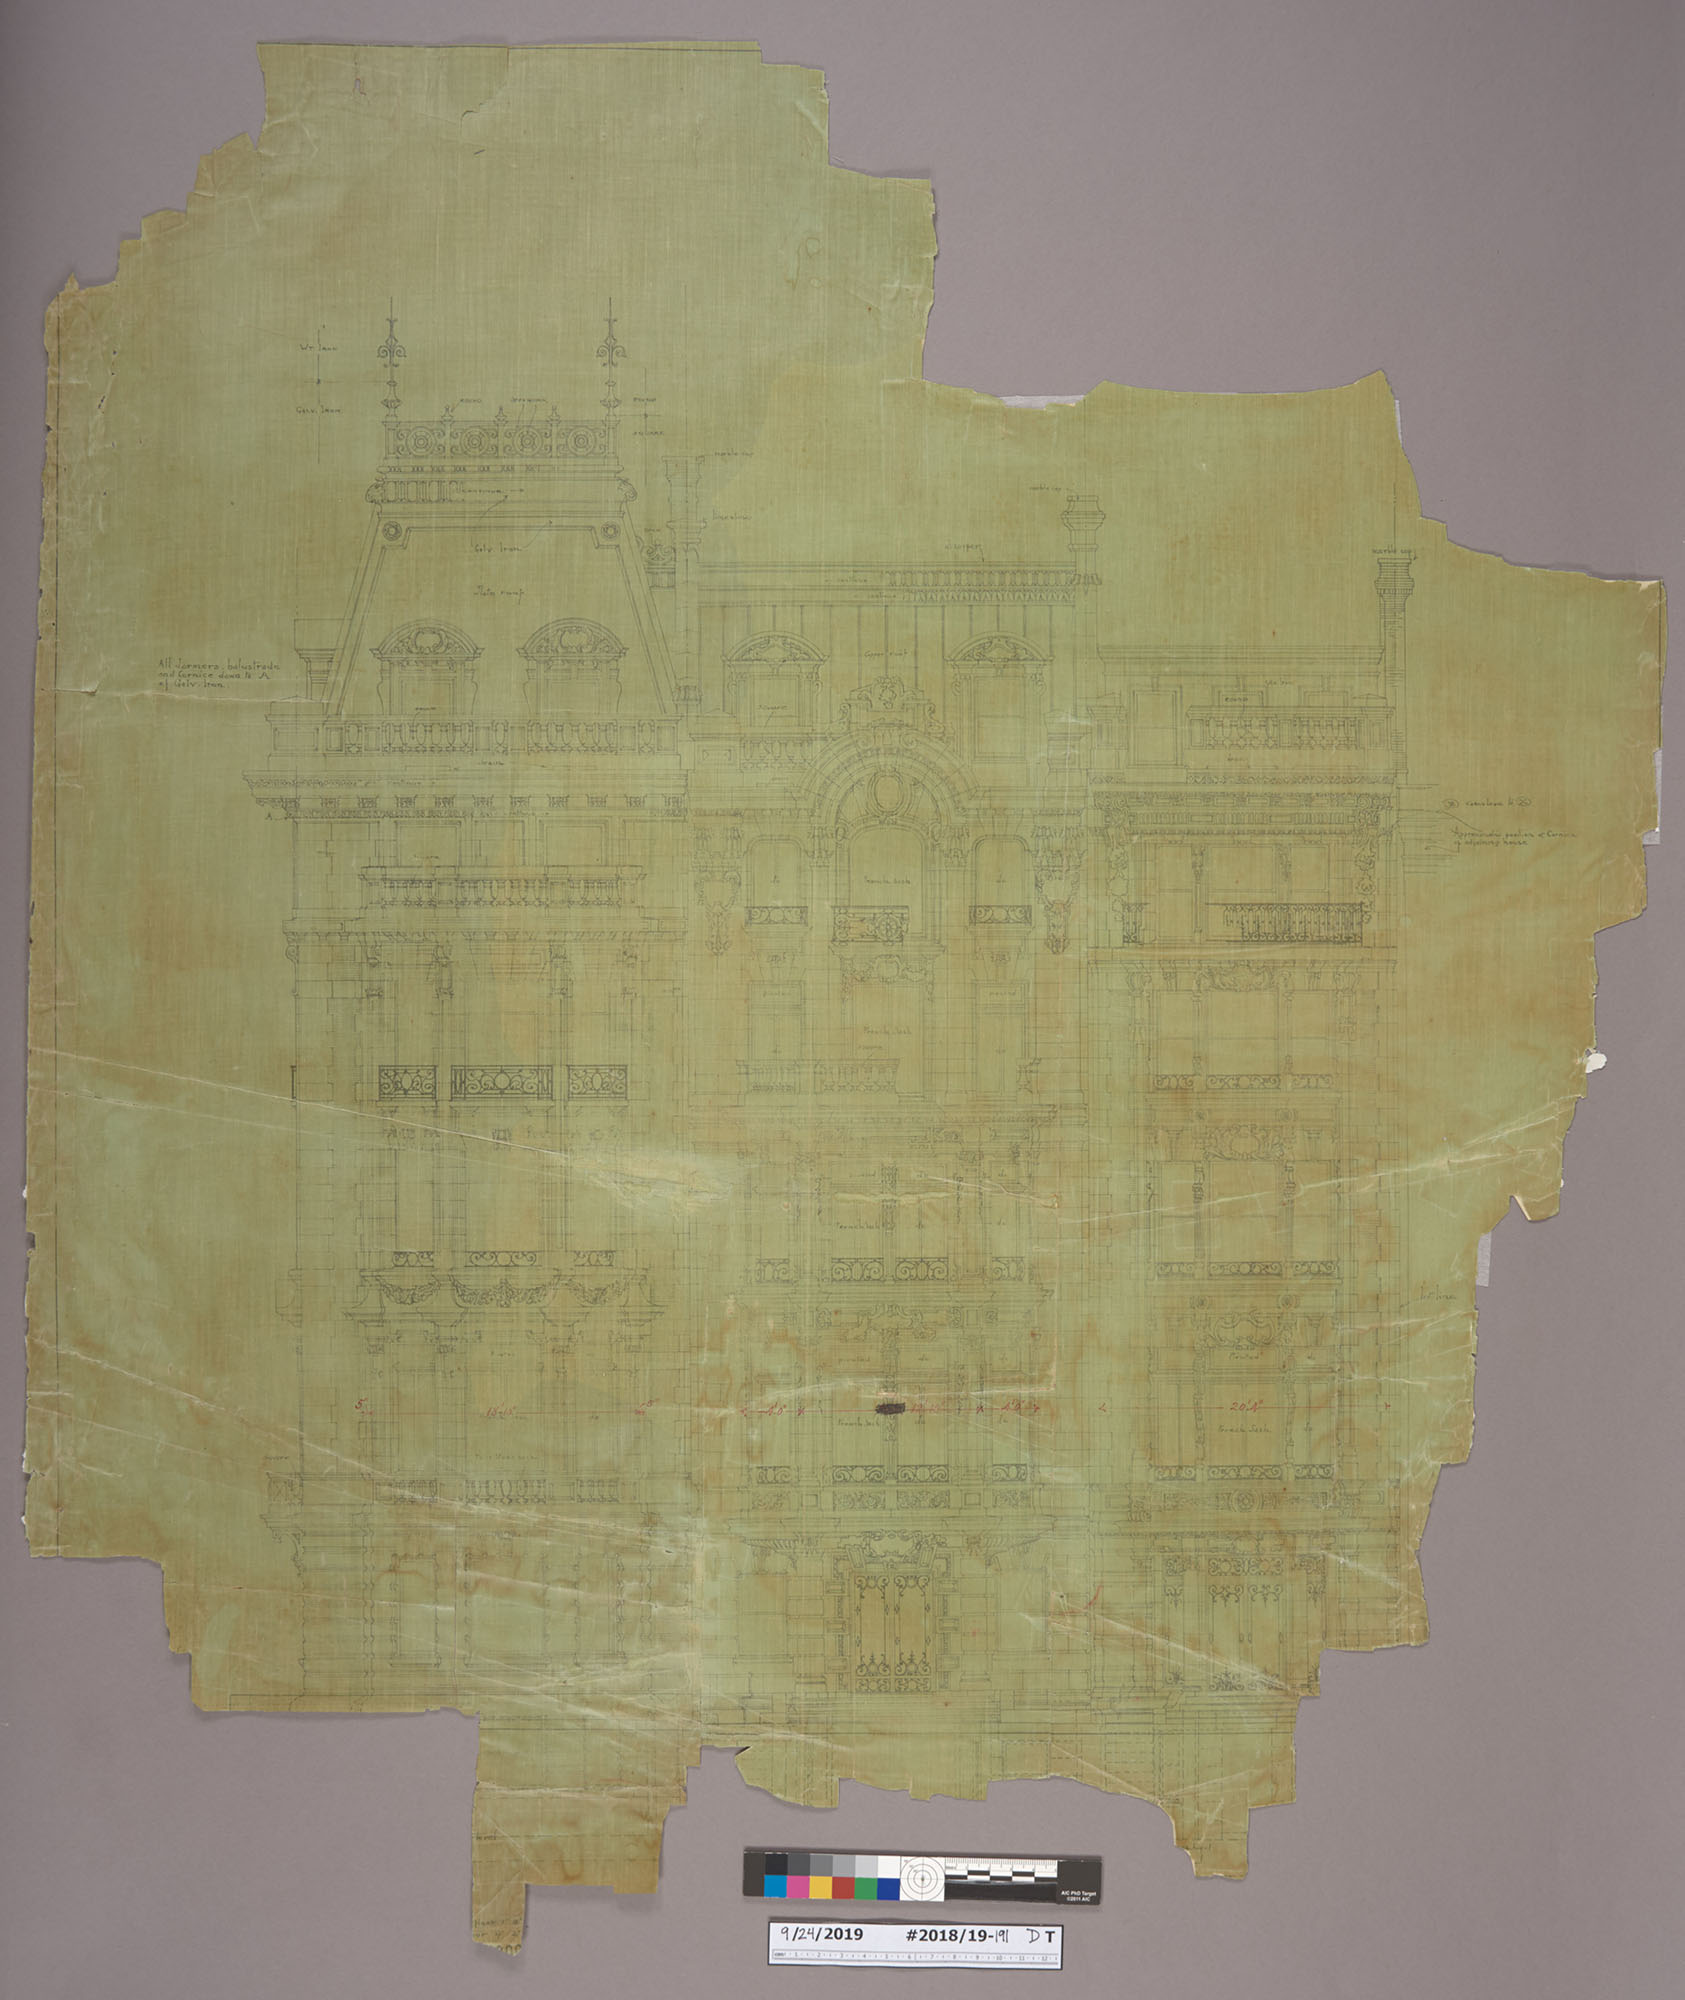
Yesterday, I was going through some collection material from the Duke family that had been transferred to the conservation lab for review and noticed an image of a very familiar-looking building. I knew I had seen it before, but I couldn’t remember where.
1009 5th Ave, circa 1927
It turns out, I had been looking at it for several weeks. Rachel Penniman has been treating architectural drawings of the same building!
And not only that – I had seen it in real life just a few months ago. Known as the Benjamin N. Duke House, this property is located at 1009 Fifth Avenue in Manhattan, just across from The Metropolitan Museum of Art. I had stopped by The Met after we finished our exhibit installation at the Grolier Club back in December. I stared right at it as I was leaving the museum and didn’t know what I was seeing.
The photograph and drawings that we have in the lab depict the matching limestone and red-brick facades of two other buildings along fifth avenue. Sadly, those structures have not survived.
1009 5th Ave, Today
A few years ago, the mansion received considerable attention when Mexican billionaire Carlos Slim listed it through Sotheby’s for $80 million and it became one of the most expensive public listings in New York.
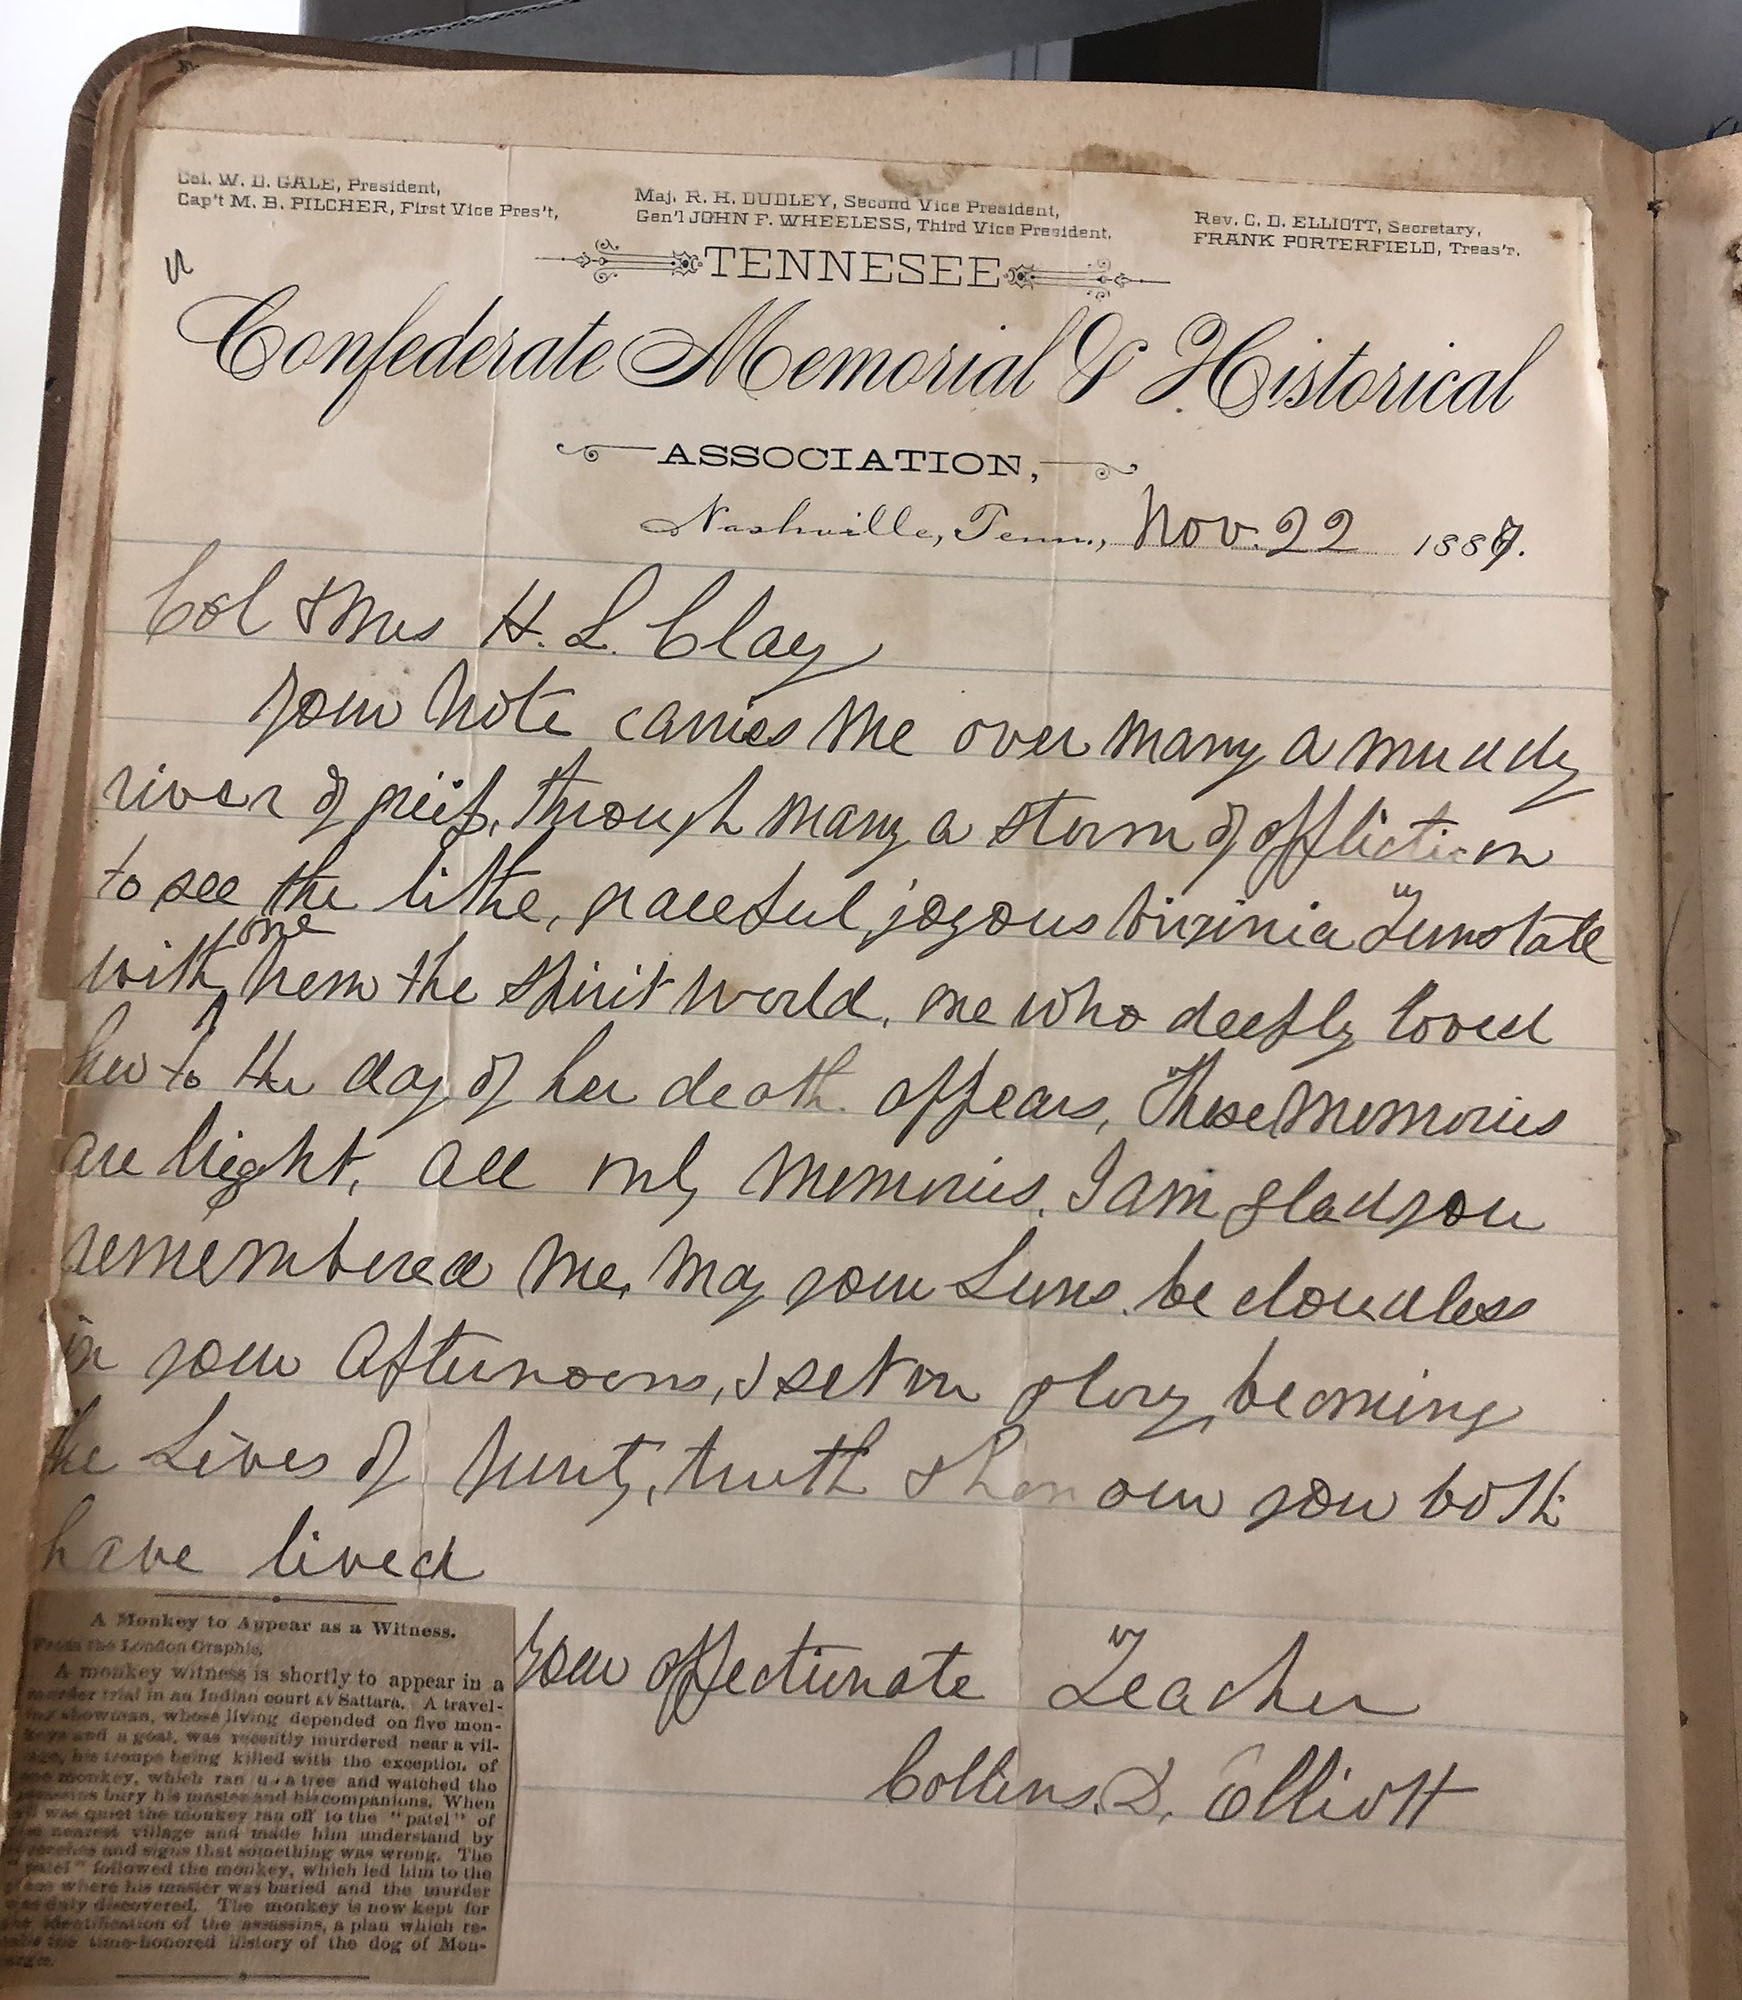
For a more adept criminal, it is probably obvious not to commit a crime in front of another person, as they can be called as a witness in court. Thanks to the scrapbooking efforts of Virginia Clay-Clopton in the late 1800s, today we learned that animals can be witnesses, too!
This scrapbook of Virginia’s (included in the C. C. Clay Papers, 1811-1925) came into the lab the other day for rehousing. It mostly includes correspondence from members of the Clay family in the post-Reconstruction period, but one little newspaper clipping caught our eye.
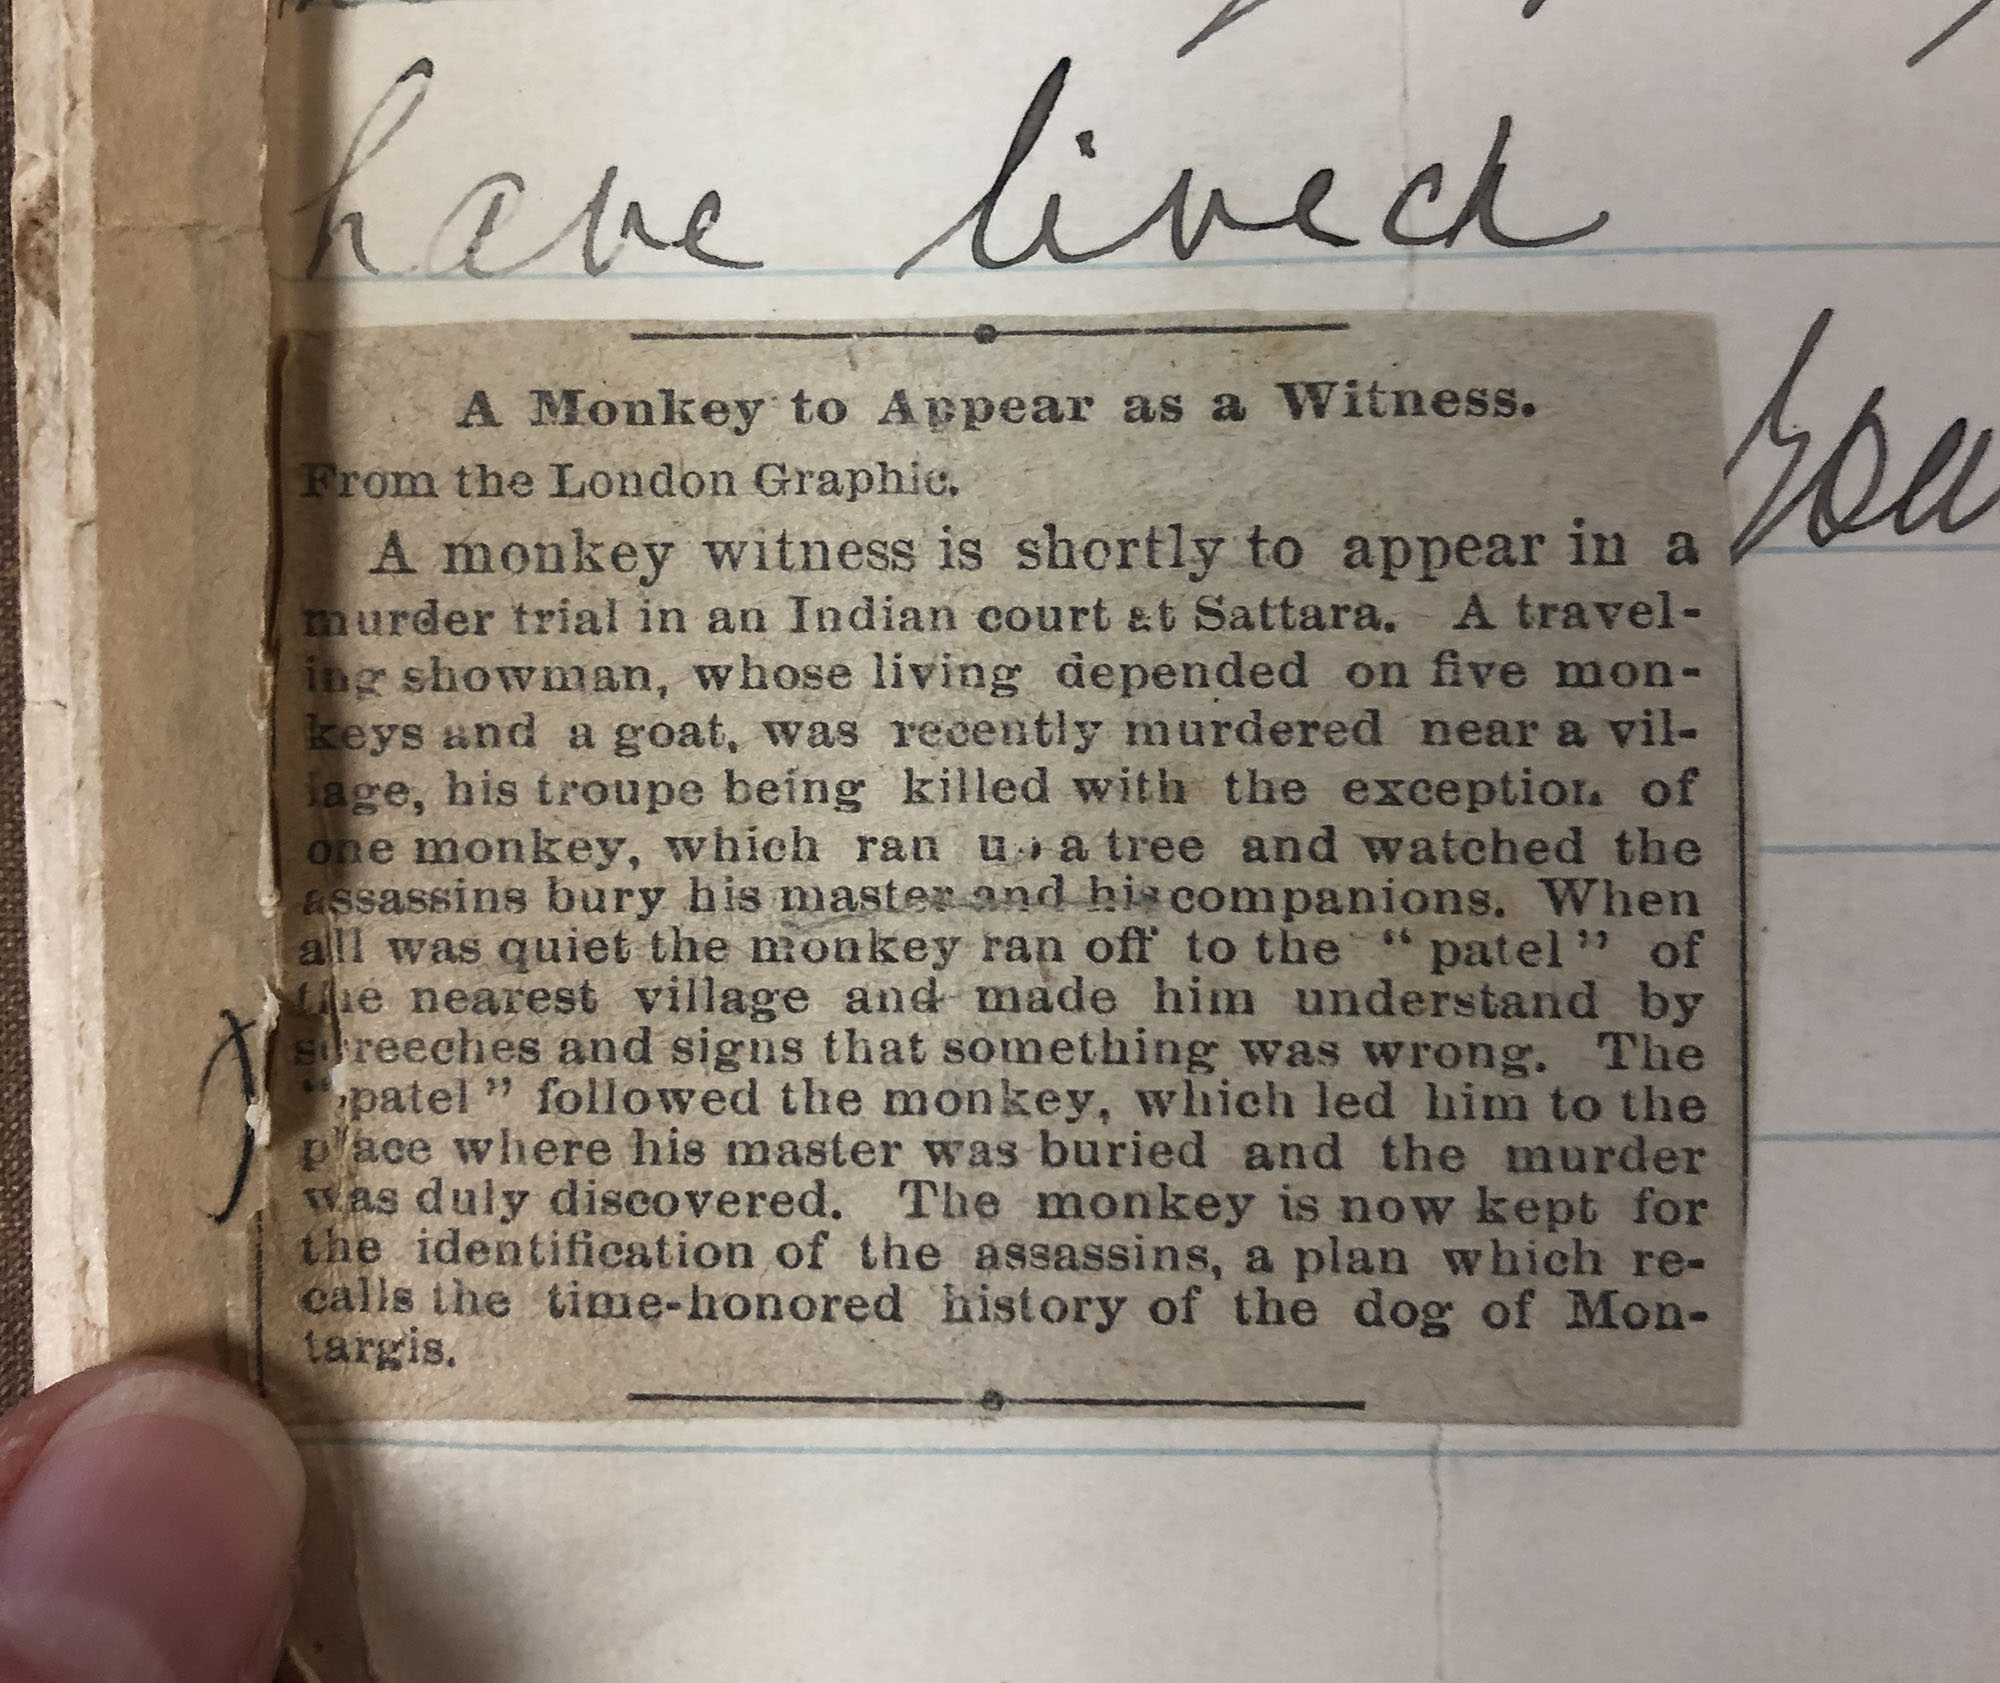
The clipping describes the murder of a traveling showman in India, which was apparently witnessed by one of his monkeys. I could not determine what eventually happened in this particular case, but the monkey was being detained as a witness.
The clipping’s mention of the Dog of Montargis lead us down a rabbit hole of stories about animal witnesses, historical and contemporary. In addition to monkeys and dogs, we read about legal proceedings involving a parrot named Echo, and a cat named Sal Esposito.
Here at the library, our primary position is that you shouldn’t commit crimes. I will leave it to experts in animal law to debate the admissibility of an animal witness – but if you are going to do some crimes, at least make sure there aren’t any monkeys around.


 Now over a year later I’ve finally had a chance to use it on a treatment project. I blame working from home for not finding a use for it earlier.