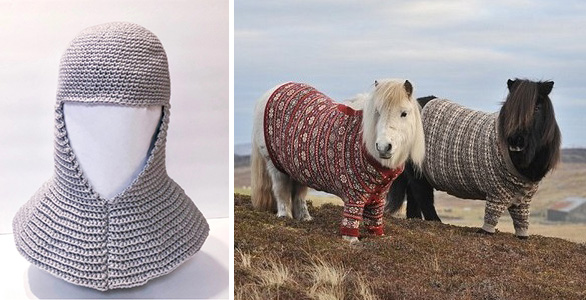
At first glance, though, it kind of looks like they were wearing matching crocheted outfits. I don’t know that such a thing has been done before, but based on the number of images I can find of crocheted chainmail and horses in sweaters, it seems entirely possible.
Today we welcomed a new resident to the lab. Everyone, meet our new T. W. & C. B. Sheridan Co. standing press!
Pictured here absolutely dwarfing our W.O. Hickok press.
We will need to clean the new Sheridan up a little before we can put her to use, but in the meantime we’ve decided to call her “Large Marge” in honor of the late Alice Nunn. Stay tuned for our forthcoming press glow-up!
A lot of different materials go into producing a book’s binding and for centuries bookbinders have used pieces of broken or discarded books to produce new ones. We often find scraps of manuscript or print, on either paper or parchment, used as spine linings, as endsheets, or even as full covers for bindings (see images from the collections of Princeton or Library of Congress here). We often describe this practice as waste (manuscript waste, printer’s waste, binding waste, etc.). Some important texts have only survived because they were reused in this way.
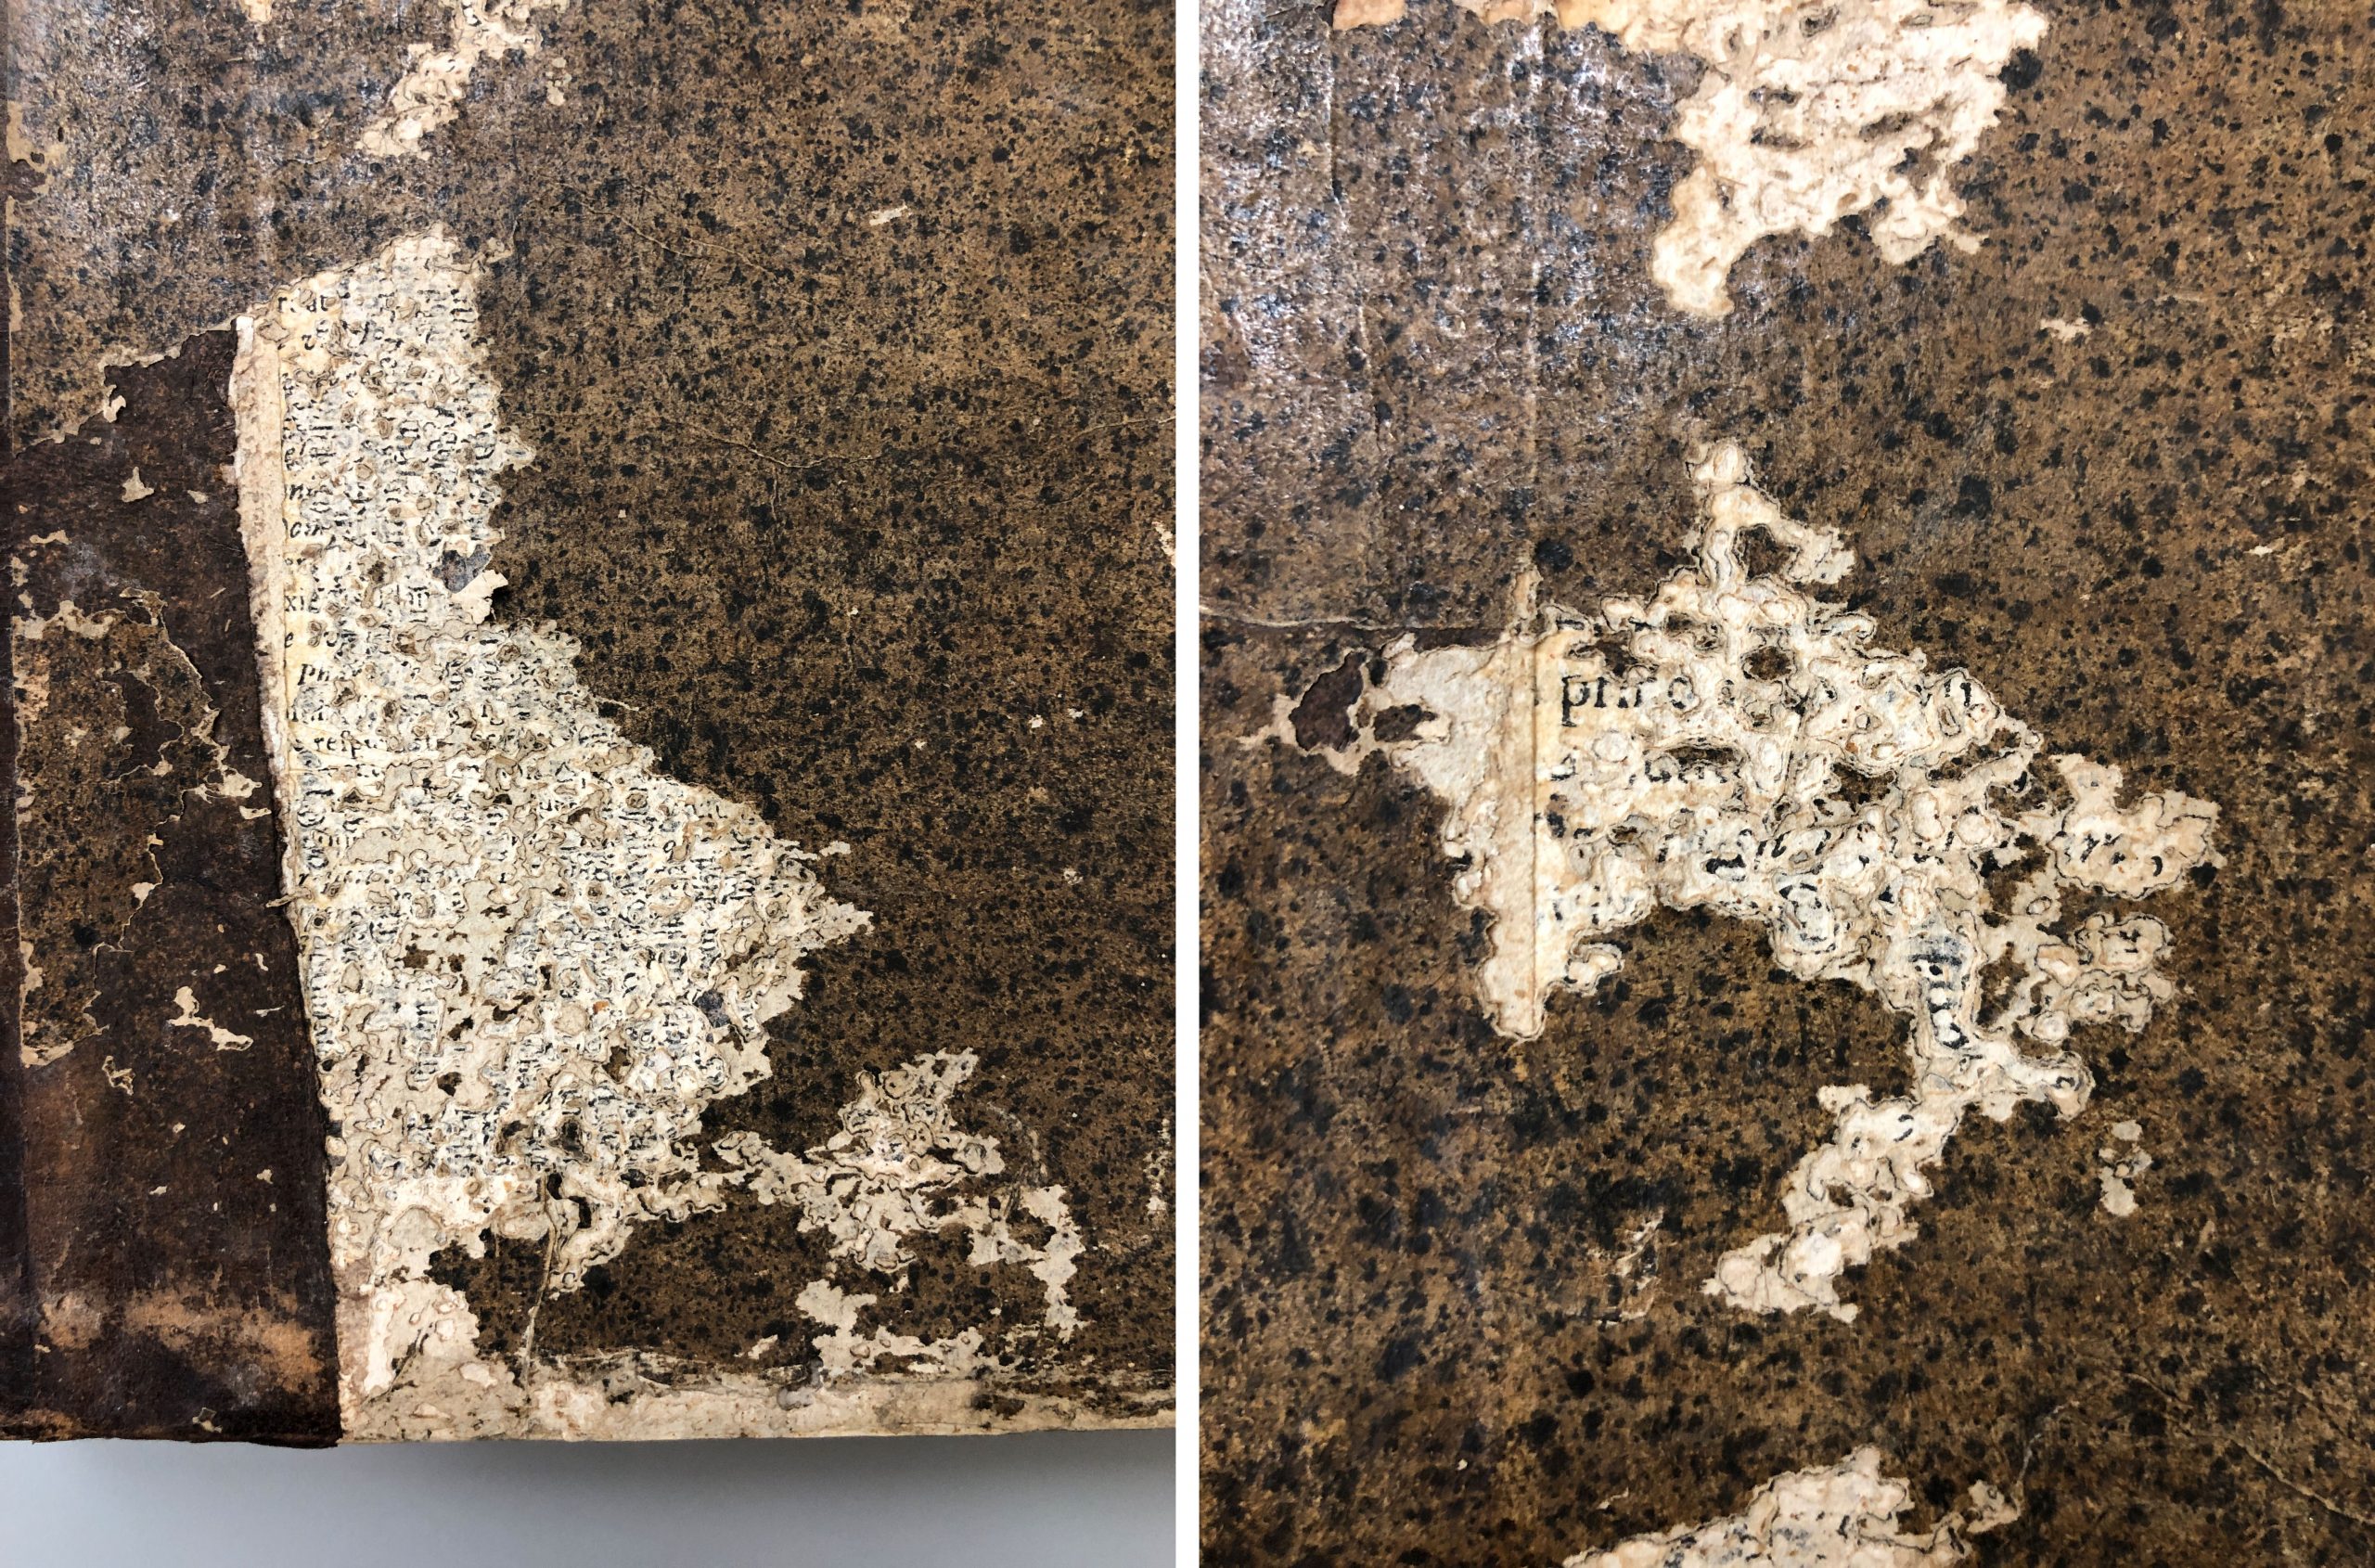
While some examples of binding waste (like covers or endleaves) are immediately obvious, others are only revealed by damage. This early 18th century printed book came in for rehousing recently and shows some of the fascinating things that can be hidden beneath the surface.
In areas where leather corners have come off or the sprinkled brown paper sides have lifted you can see some text peaking through. The book itself is printed in Latin, but the waste used in the binding is in German. This edition was printed in Munich, so it makes sense that a contemporary binding would also include waste in German.
In addition to the mechanical damage to the paper covering material along the board corners and edges, there is also some insect damage along the faces of both boards.
The insects have eaten away at the first several layers of binding material, revealing many layers of print – sometimes in different orientations. It seems our print waste was not just used as a board lining, but the boards themselves are composed of many layers of print laminated together.
I am usually not excited to encounter an insect-damaged book, but in this case the bugs have created a rather beautiful object – almost like a typographic topographical map – and have revealed useful information about its production.
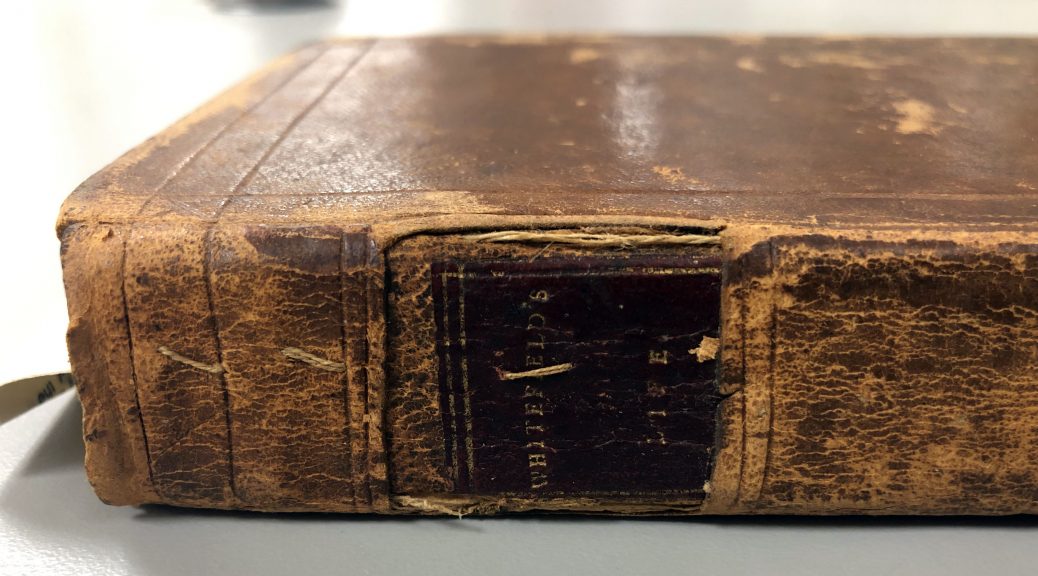
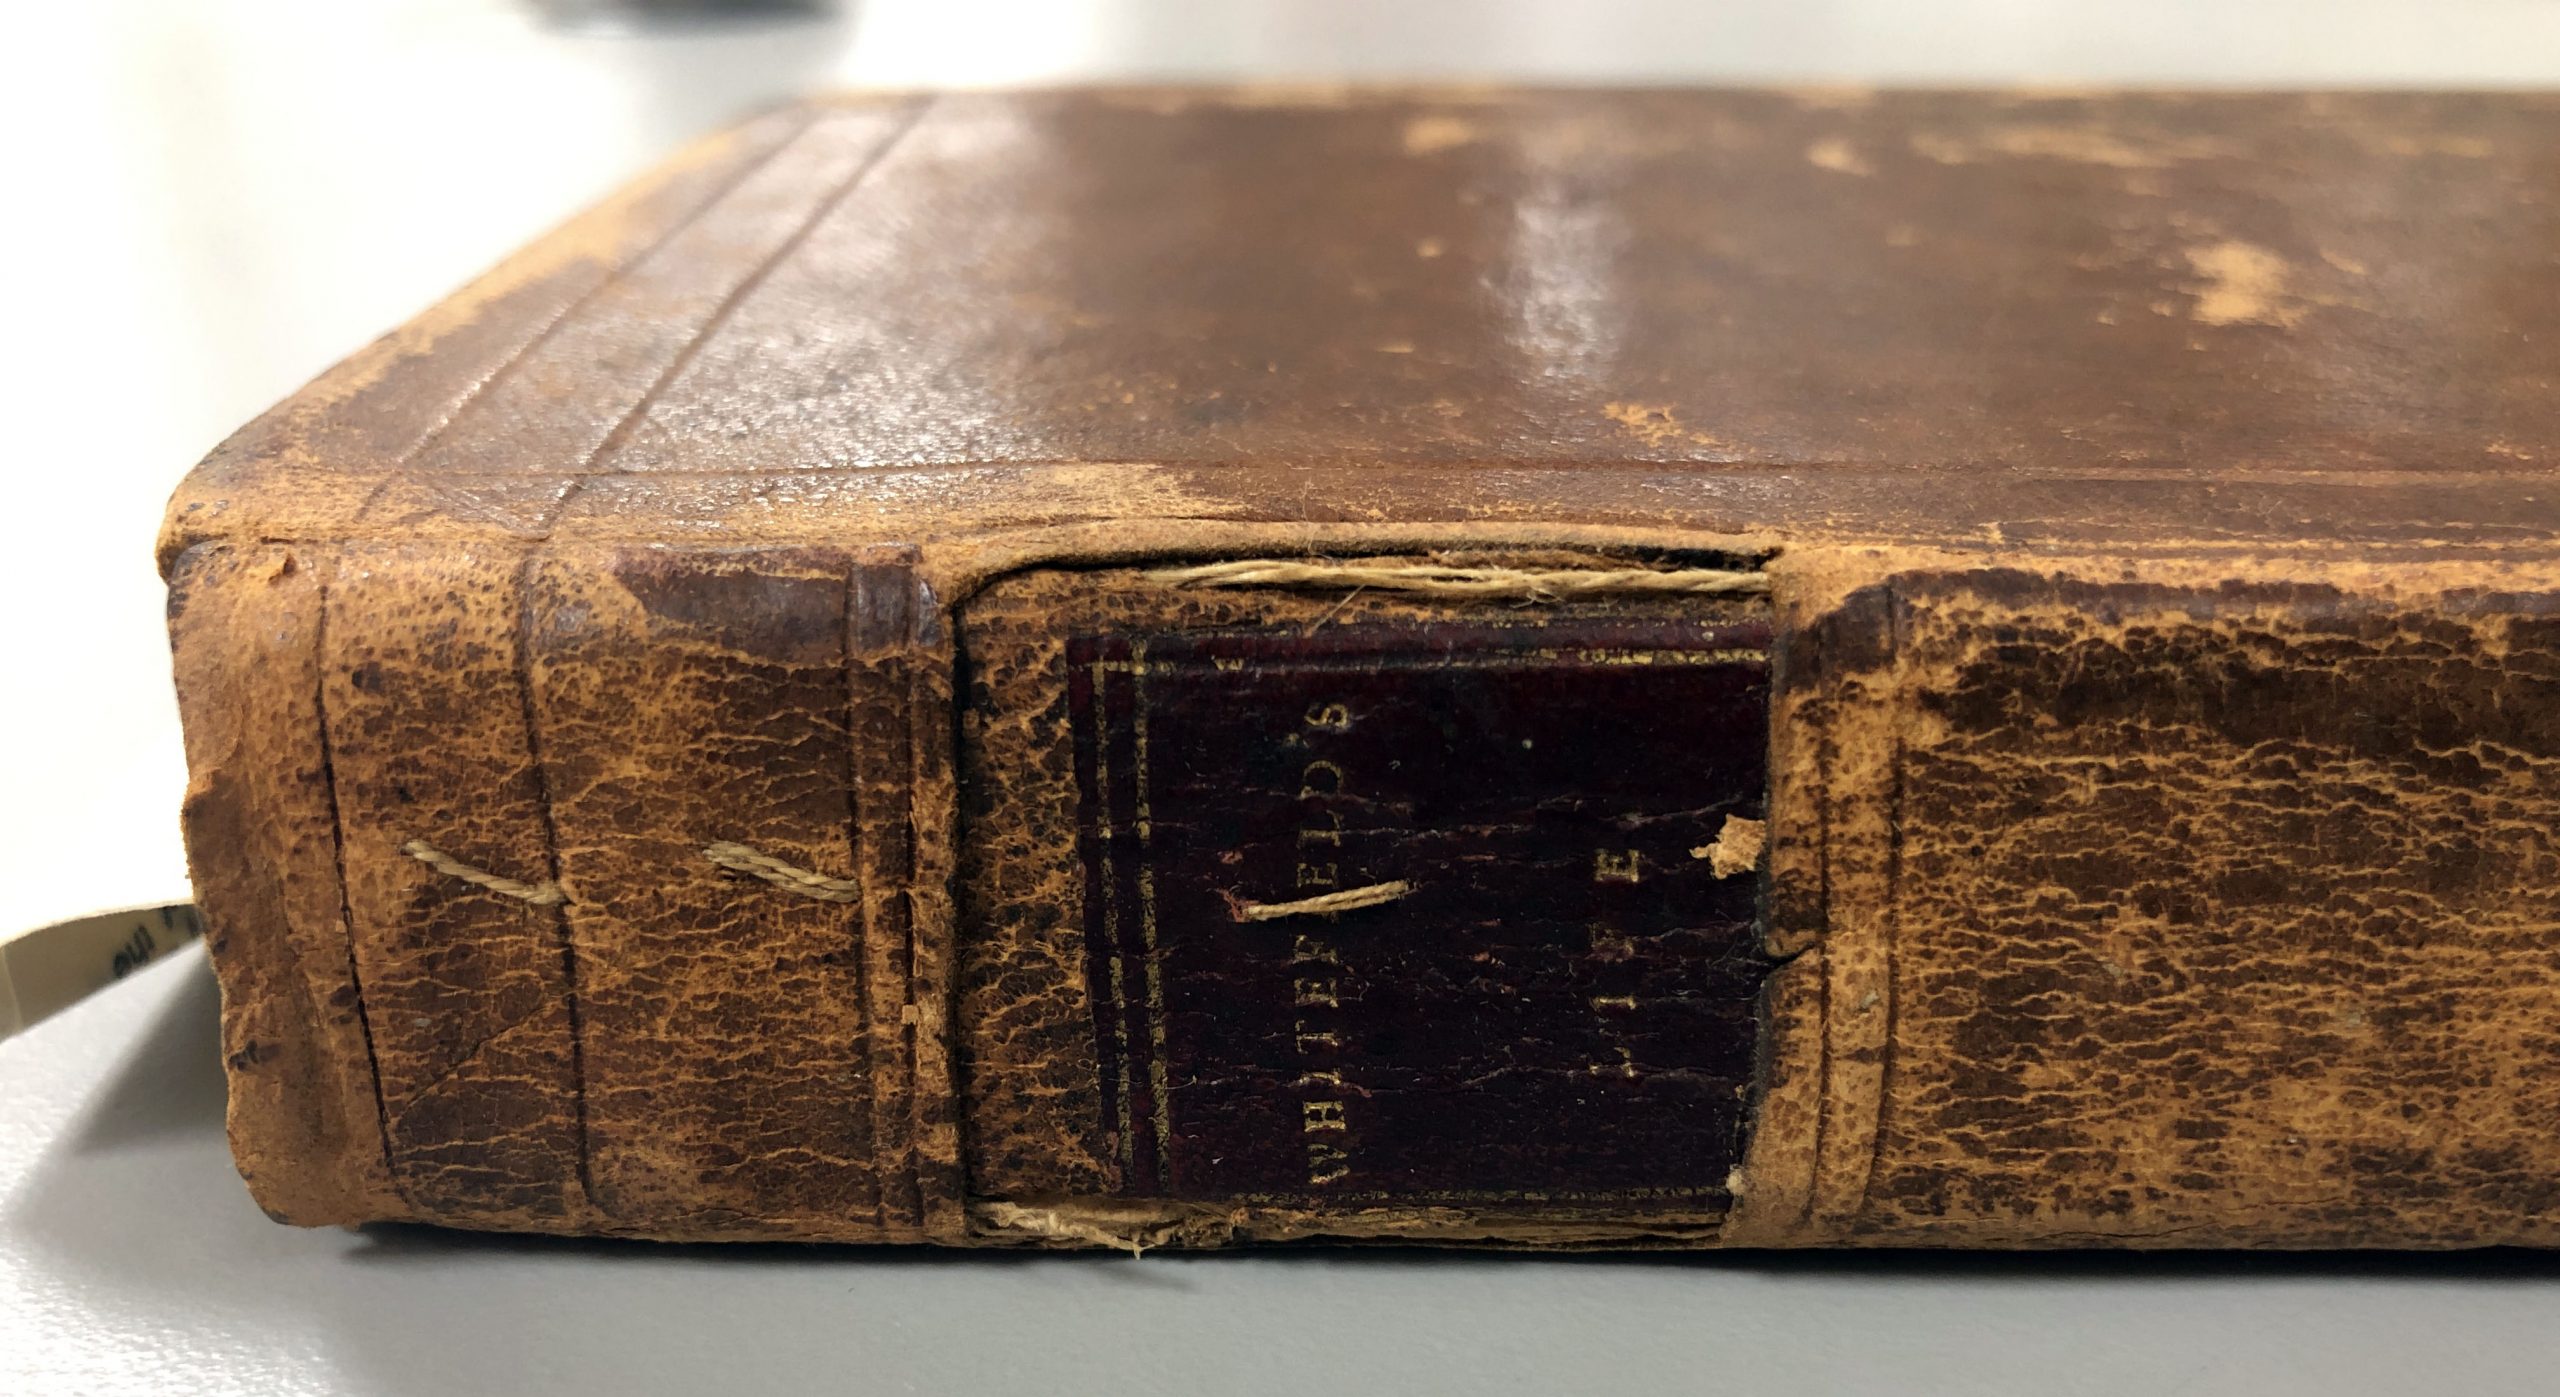
The label on the spine looked like it was sitting inside a little window of leather, and not even very well lined up. Looking closer, you could also see some stitching running vertically along the center of the spine.
We often see examples of home-made repairs for bindings, but I had never seen one like this before. It appears that someone has just swapped bindings from another book!
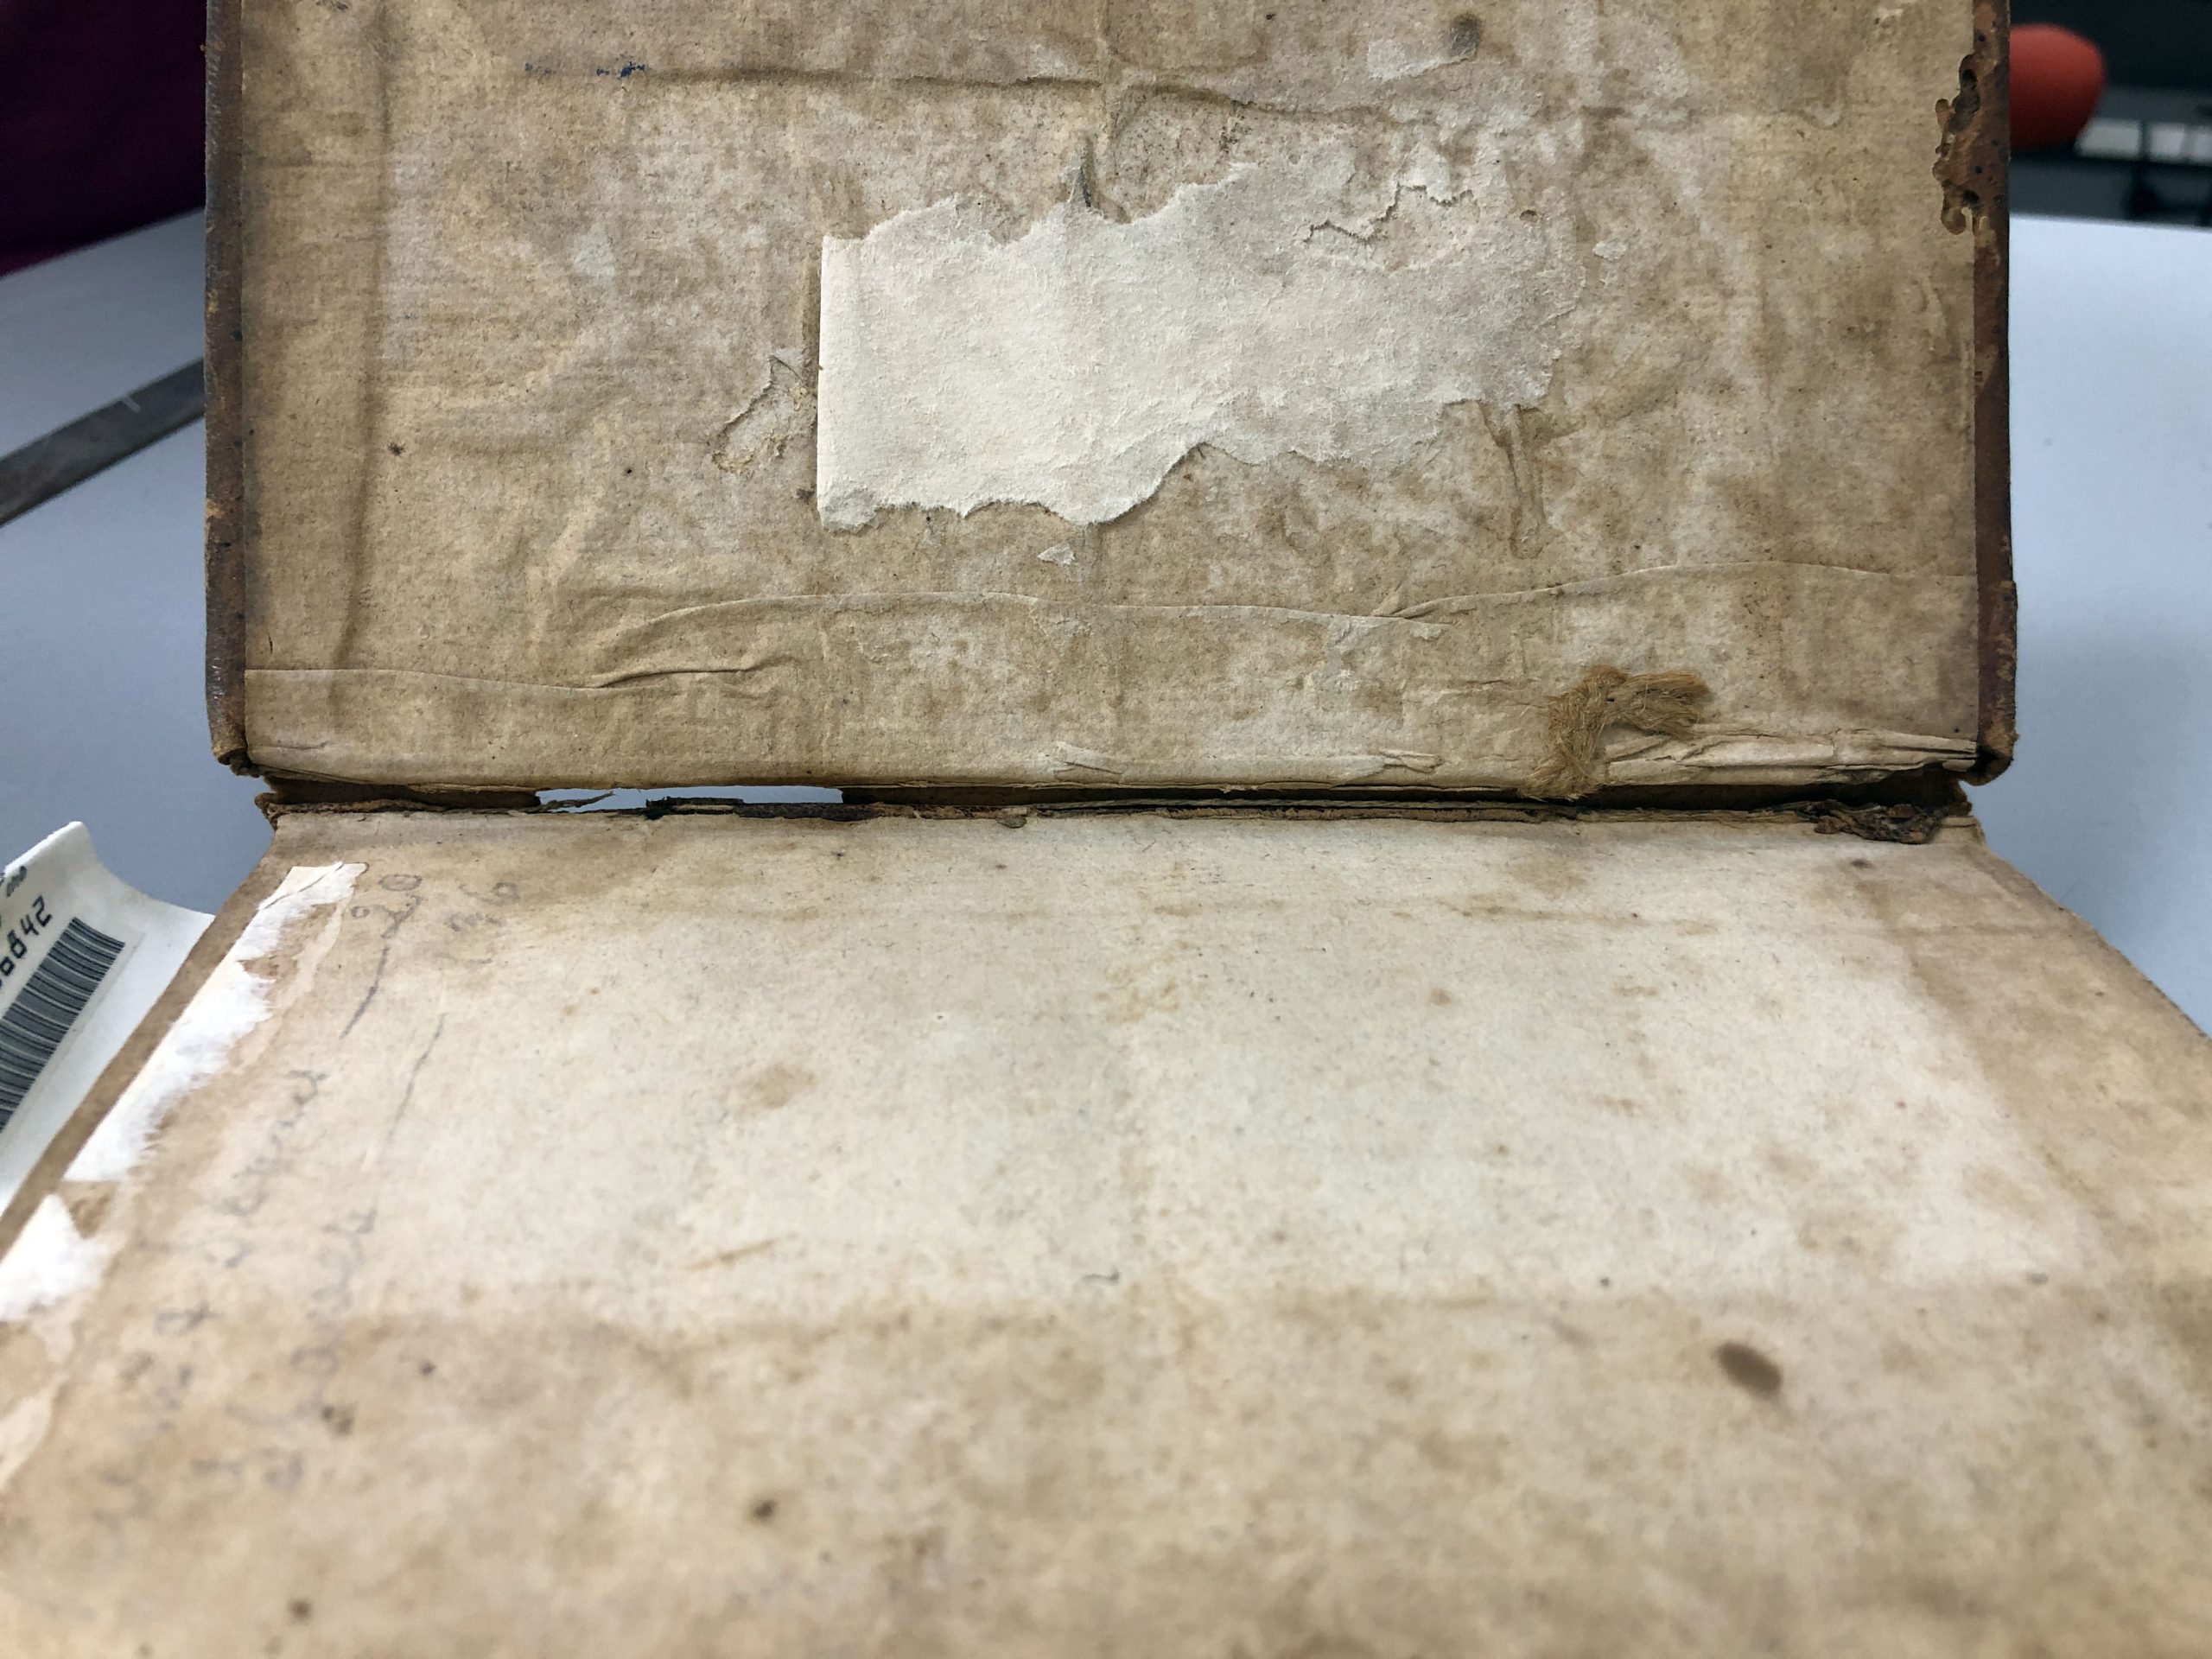
I’m guessing that the original boards had come off of the book and, rather than having it rebacked, a previous owner had just located a similarly sized-volume as a donor. On the interior of the boards, you can see evidence of cord from the previous board attachment. After removing the binding from it’s original textblock, a little window was cut in one of the spine panels to allow the correct titling to mostly show through, and then the new textblock was glued (and sewn) in at the spine. It’s a pretty clever solution, but it must have been difficult to find a donor binding of similar enough size to work. I always enjoy finding evidence of historical repairs and seeing the creative approaches that people have taken to keep their books in usable condition.
Edit: Today I learned that there is a term that could be applied to this item: remboîtage. It is interesting to compare the definitions from Etherington & Roberts and Ligatus (derived from Carter’s ABC for Book Collectors). Most folks would not think of this as an example of a recase, because that term implies putting the textblock back into it’s own binding. Carter’s definition of remboîtage goes to great lengths to describe it as putting a textblock in a more elegant, more desirable, or superior binding. This rather crudely executed swap may be a bit of a stretch for Carter, but one could argue that a functioning binding is more desirable than a broken one.
It’s a really wonderful peek into some of the extremely specialized work that goes into supporting buildings, collections, and services at Duke. Some of the facilities maintenance is more visible in the summer, when classes are out and campus is a little less crowded- but it is nice to read about the different types of skilled labor that are happening behind the scenes. We appreciate the opportunity to share!
Sometimes an object comes through the lab in an enclosure which is not good for long term preservation, but still has artifactual value and should be retained with the item. In these cases, we have to get a little creative in fabricating a new housing that will keep all the parts together in a safe and intuitively usable package.
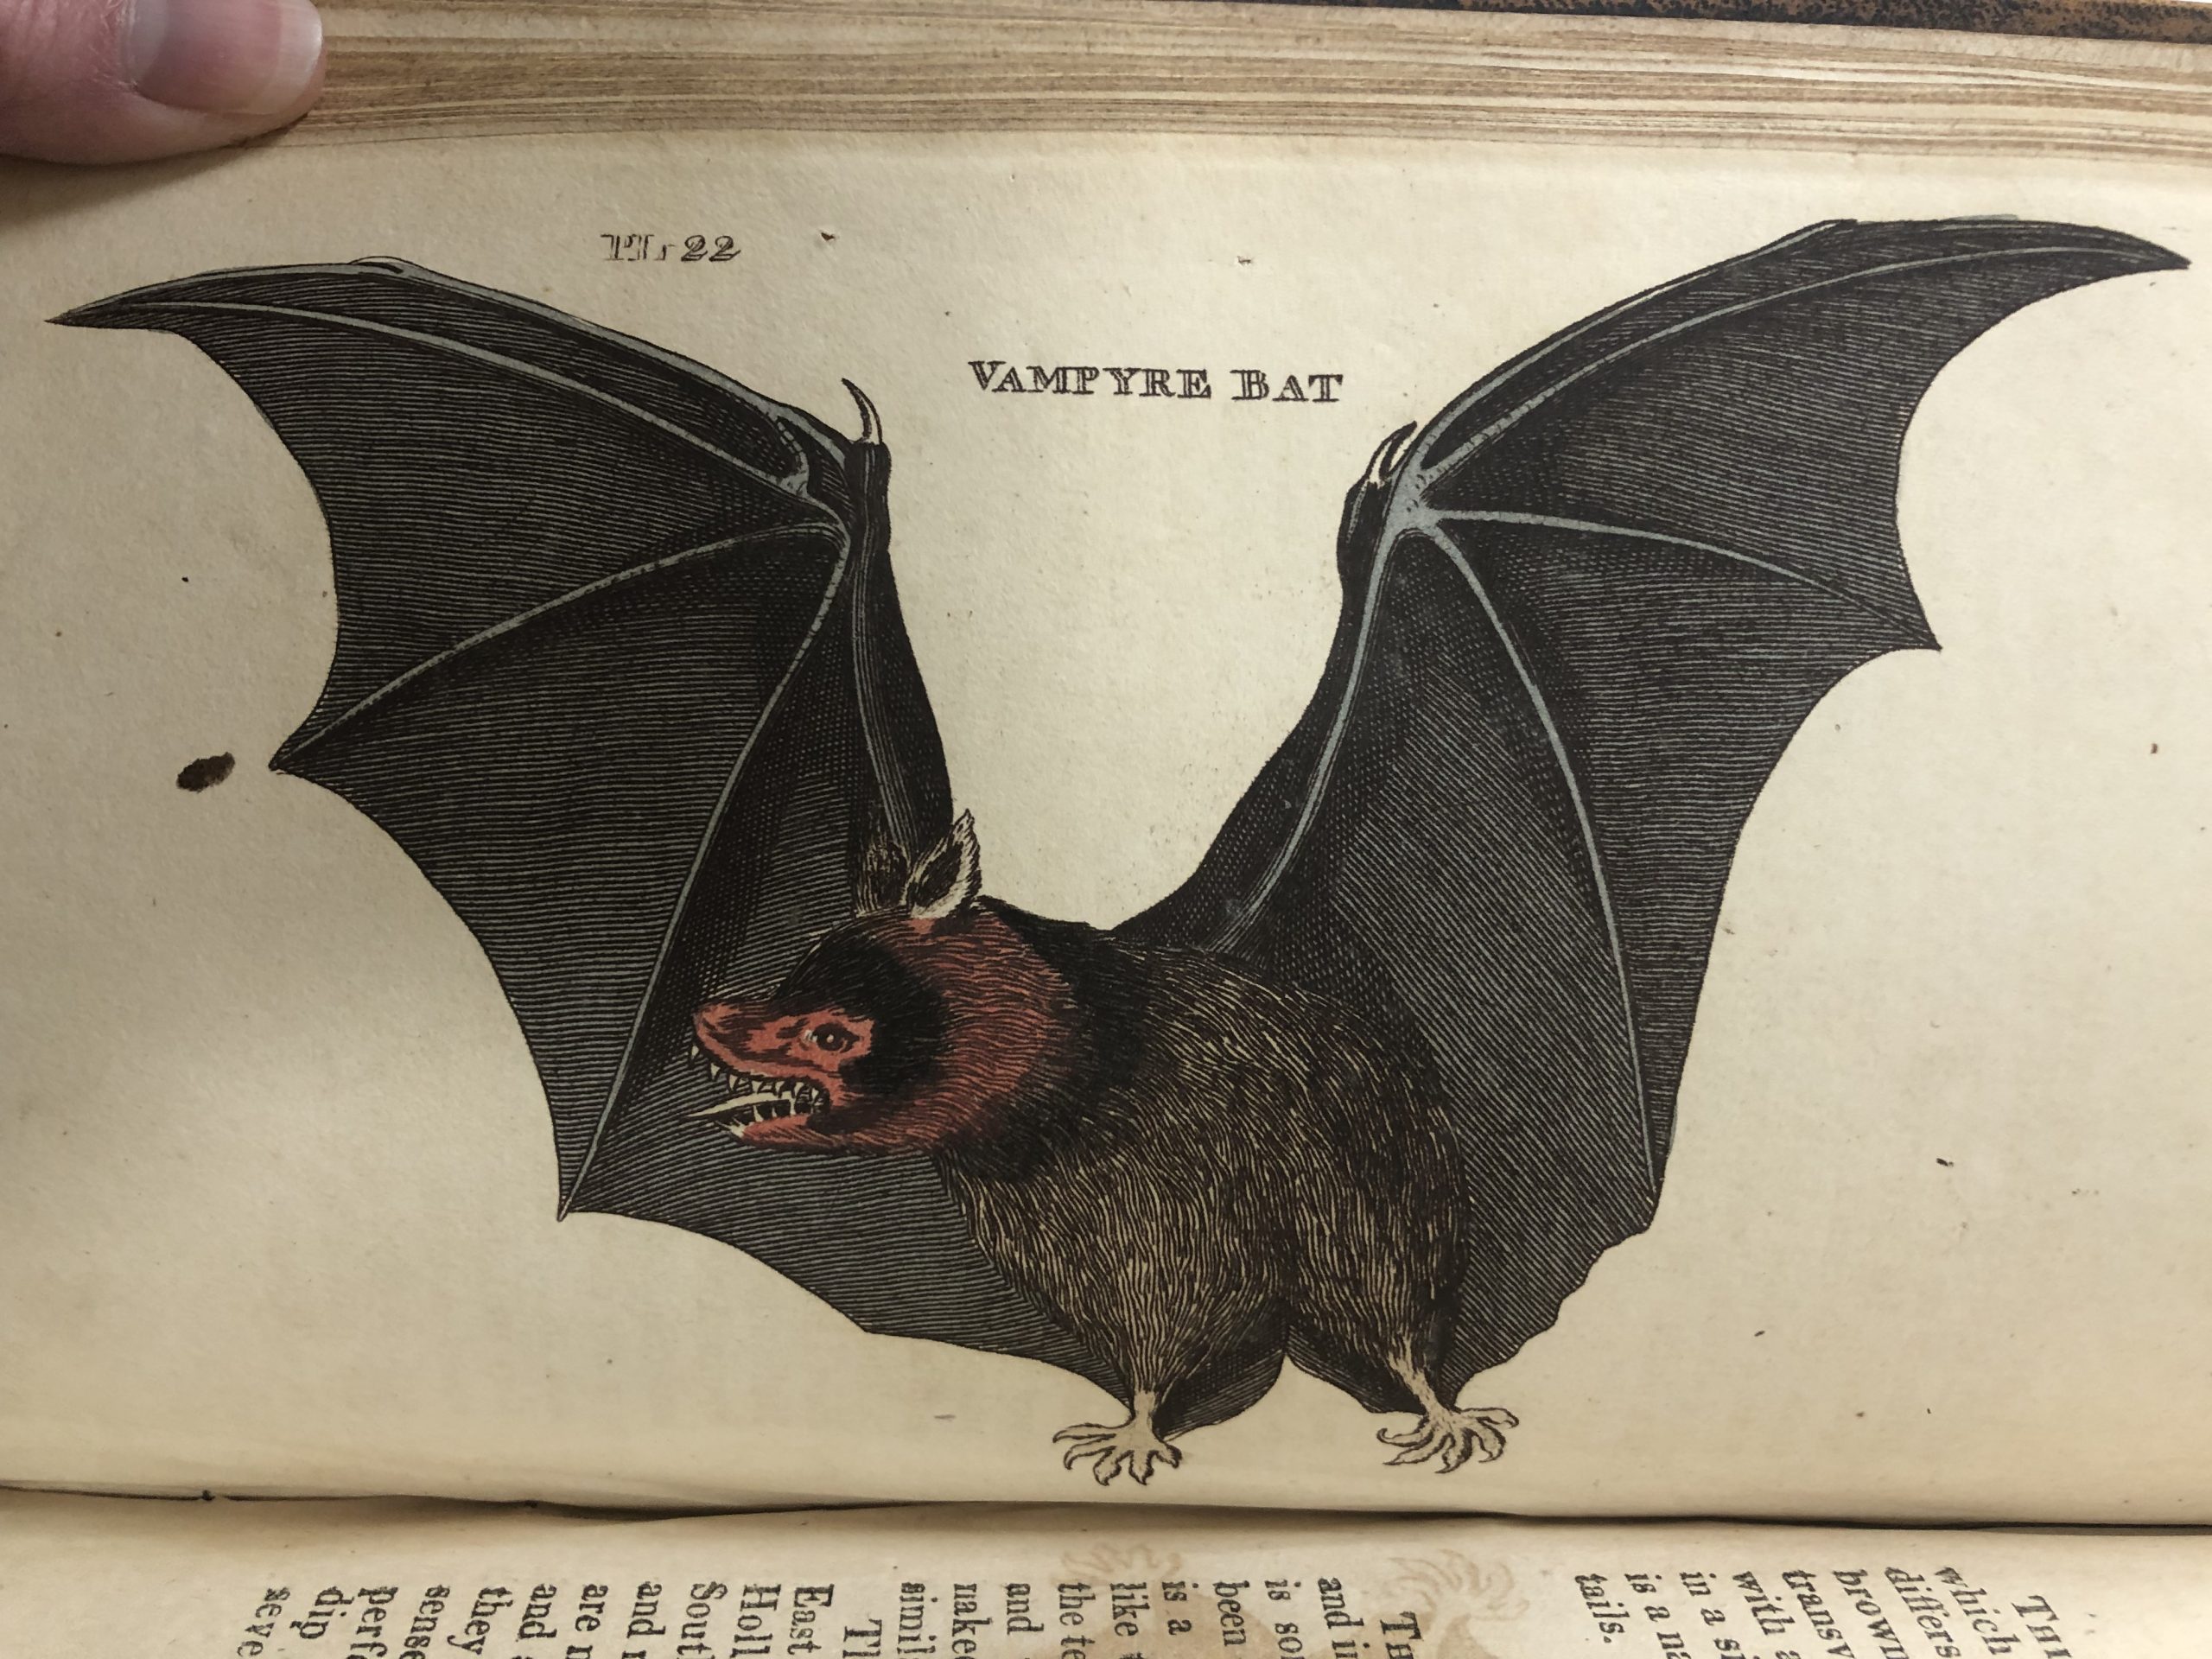
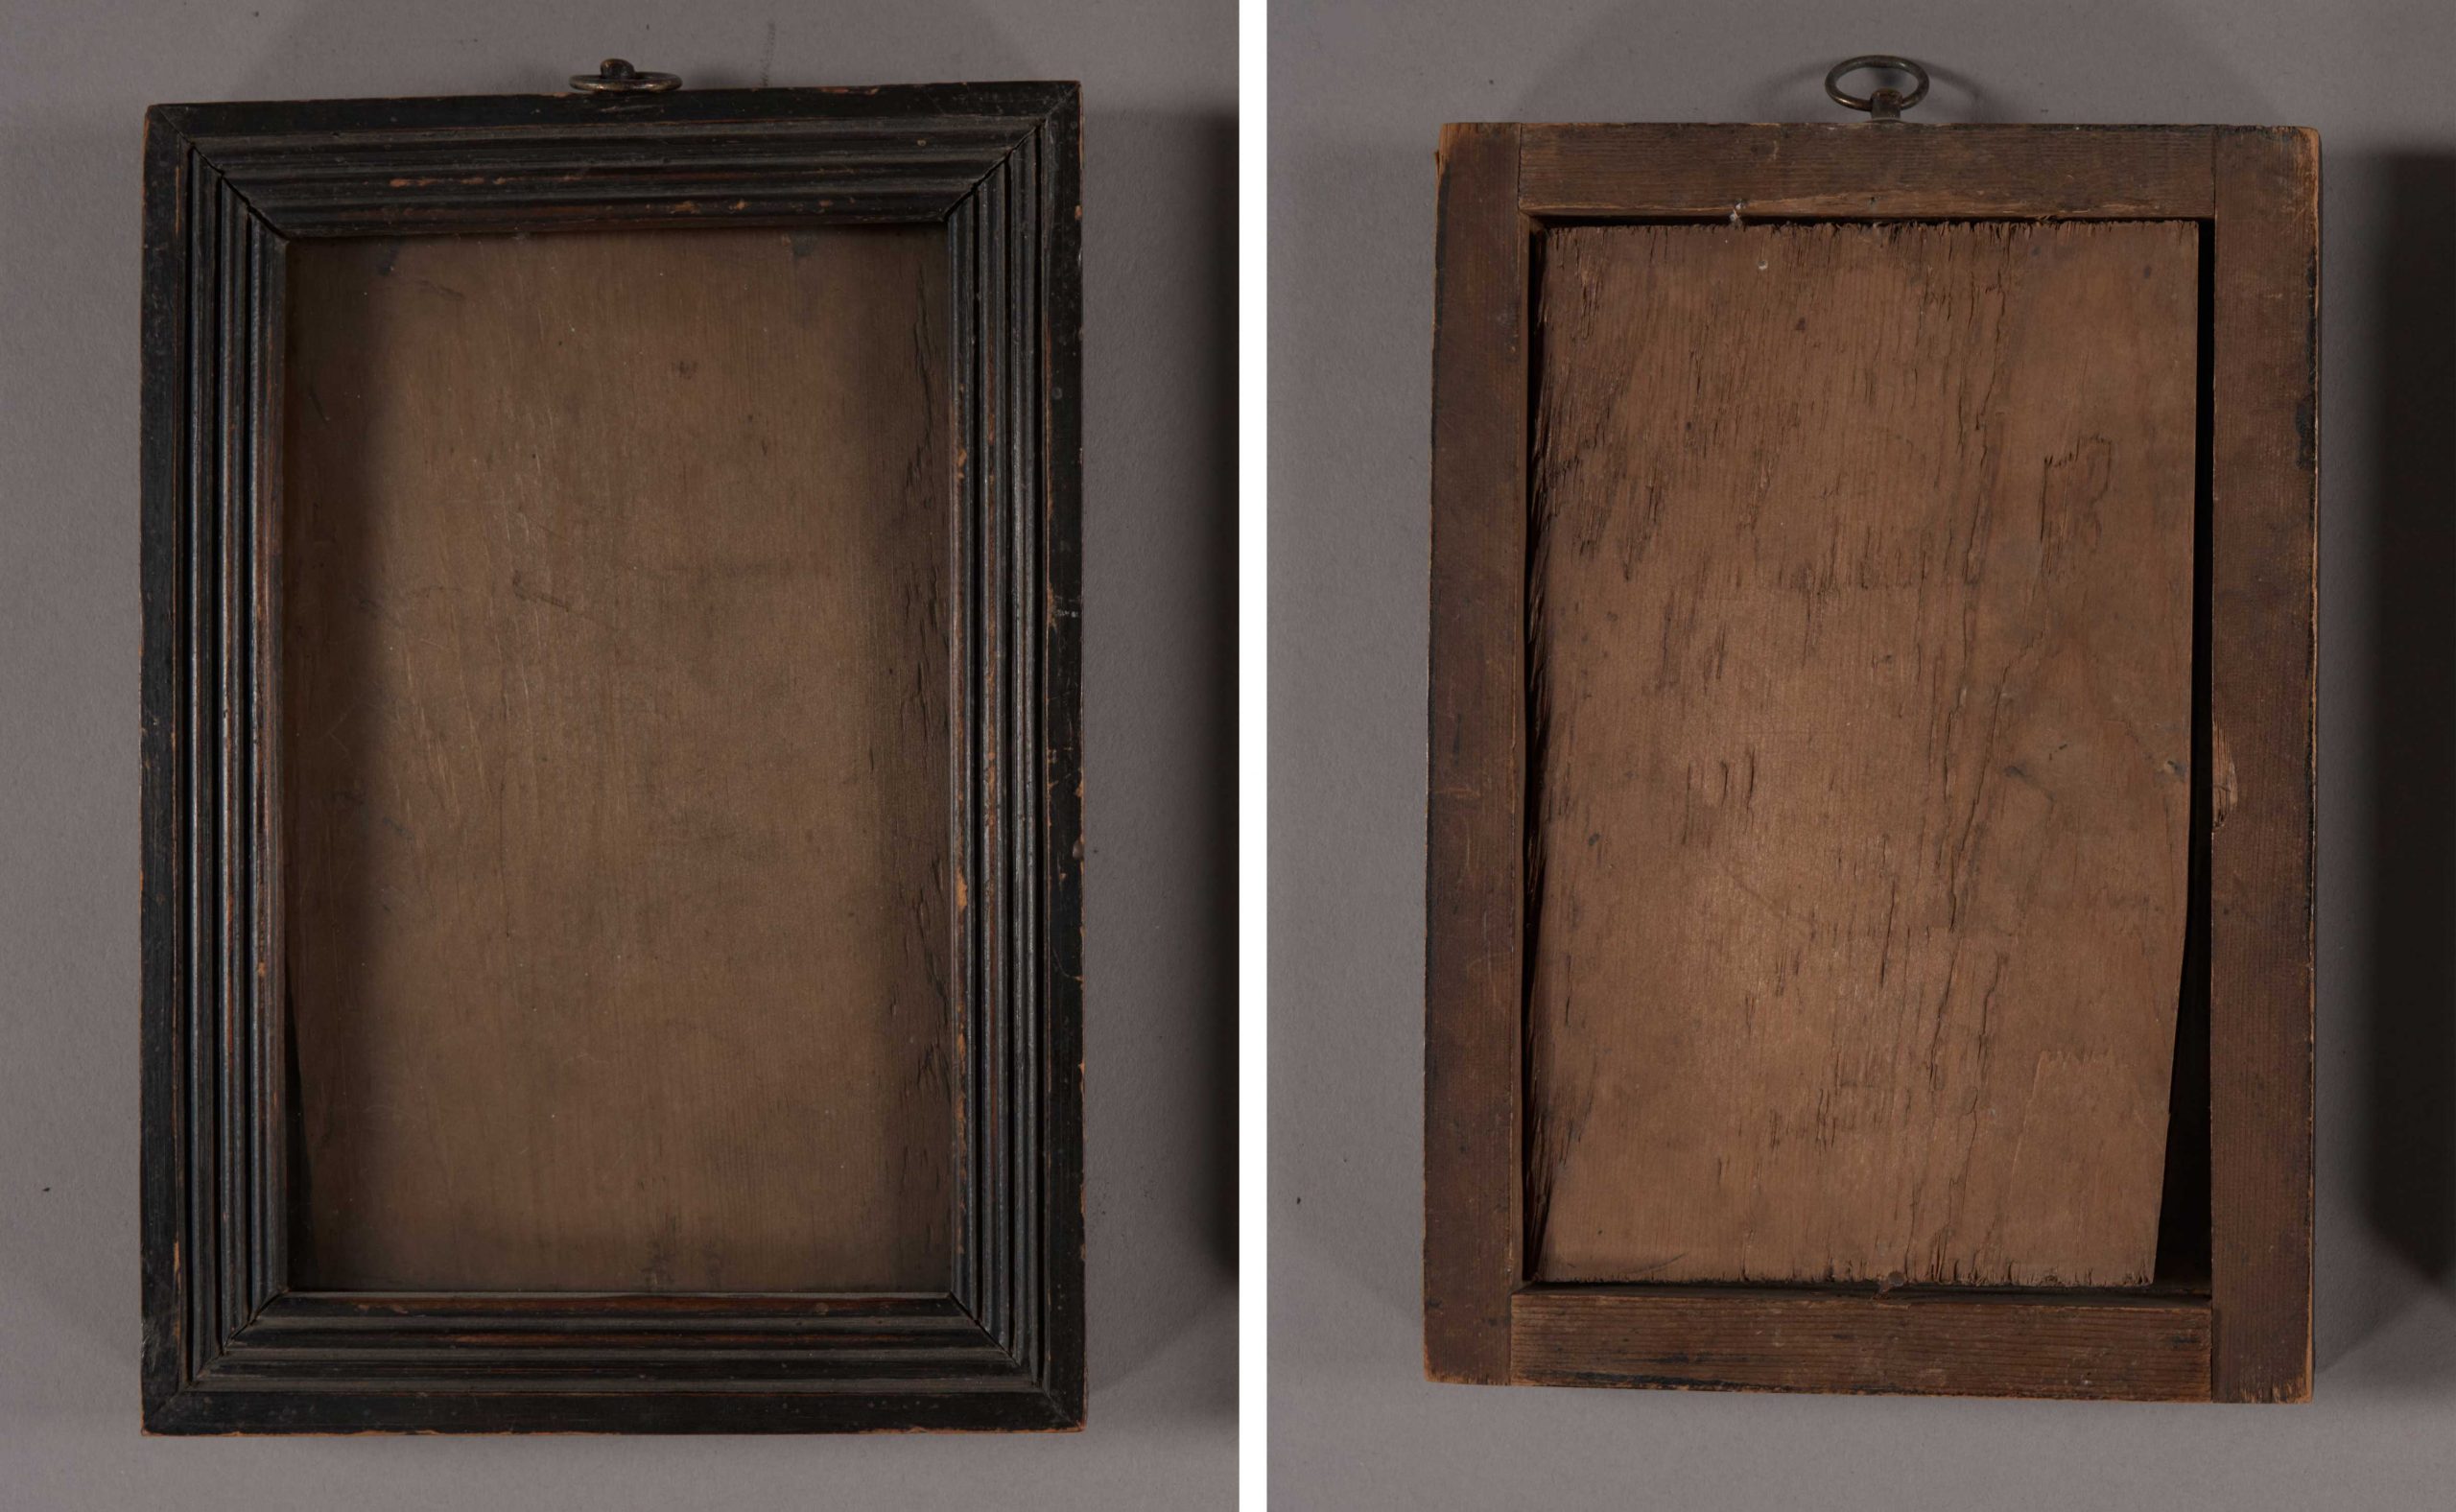
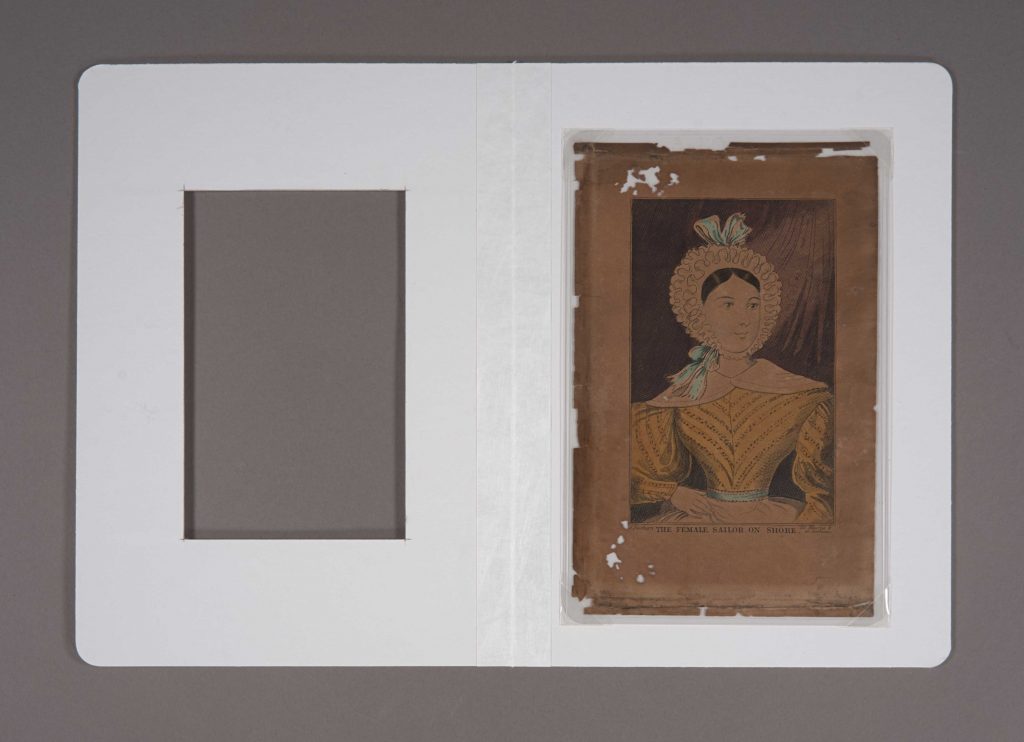
A set of early 19th century hand-colored engravings arrived here recently, featuring portraits of the same female sailor on land and at sea. The paper was quite brittle and showed some staining, surface soiling, and insect damage. The prints had been housed in matching wooden frames which were slightly too small. The edges of the prints had been folded around the backing boards to fit, and some of those folded edges had snapped off.
It was clear that the frames were not a safe place for the prints to live, but they are important to the history of the object and need to be housed together. Time to make some new outfits for these sailors.
After deframing, both frames and prints were cleaned to remove any surface dirt. The prints were humidified in a chamber and flattened to remove the creases around the edges. The loose fragments of the “shore” print were reattached using a thin Japanese paper with re-moistenable adhesive we make in-house.
The brittle paper requires some additional support for safe handling and the media isn’t flaking, so each print was fully encapsulated in clear polyester film. The prints and frames would need to live inside the same box without rattling around, so I cut window mats and assembled portfolios with tyvek tape for the hinge. Each print was mounted inside with polyethylene photo corners, so that it can be easily removed if a researcher wants to examine the verso.
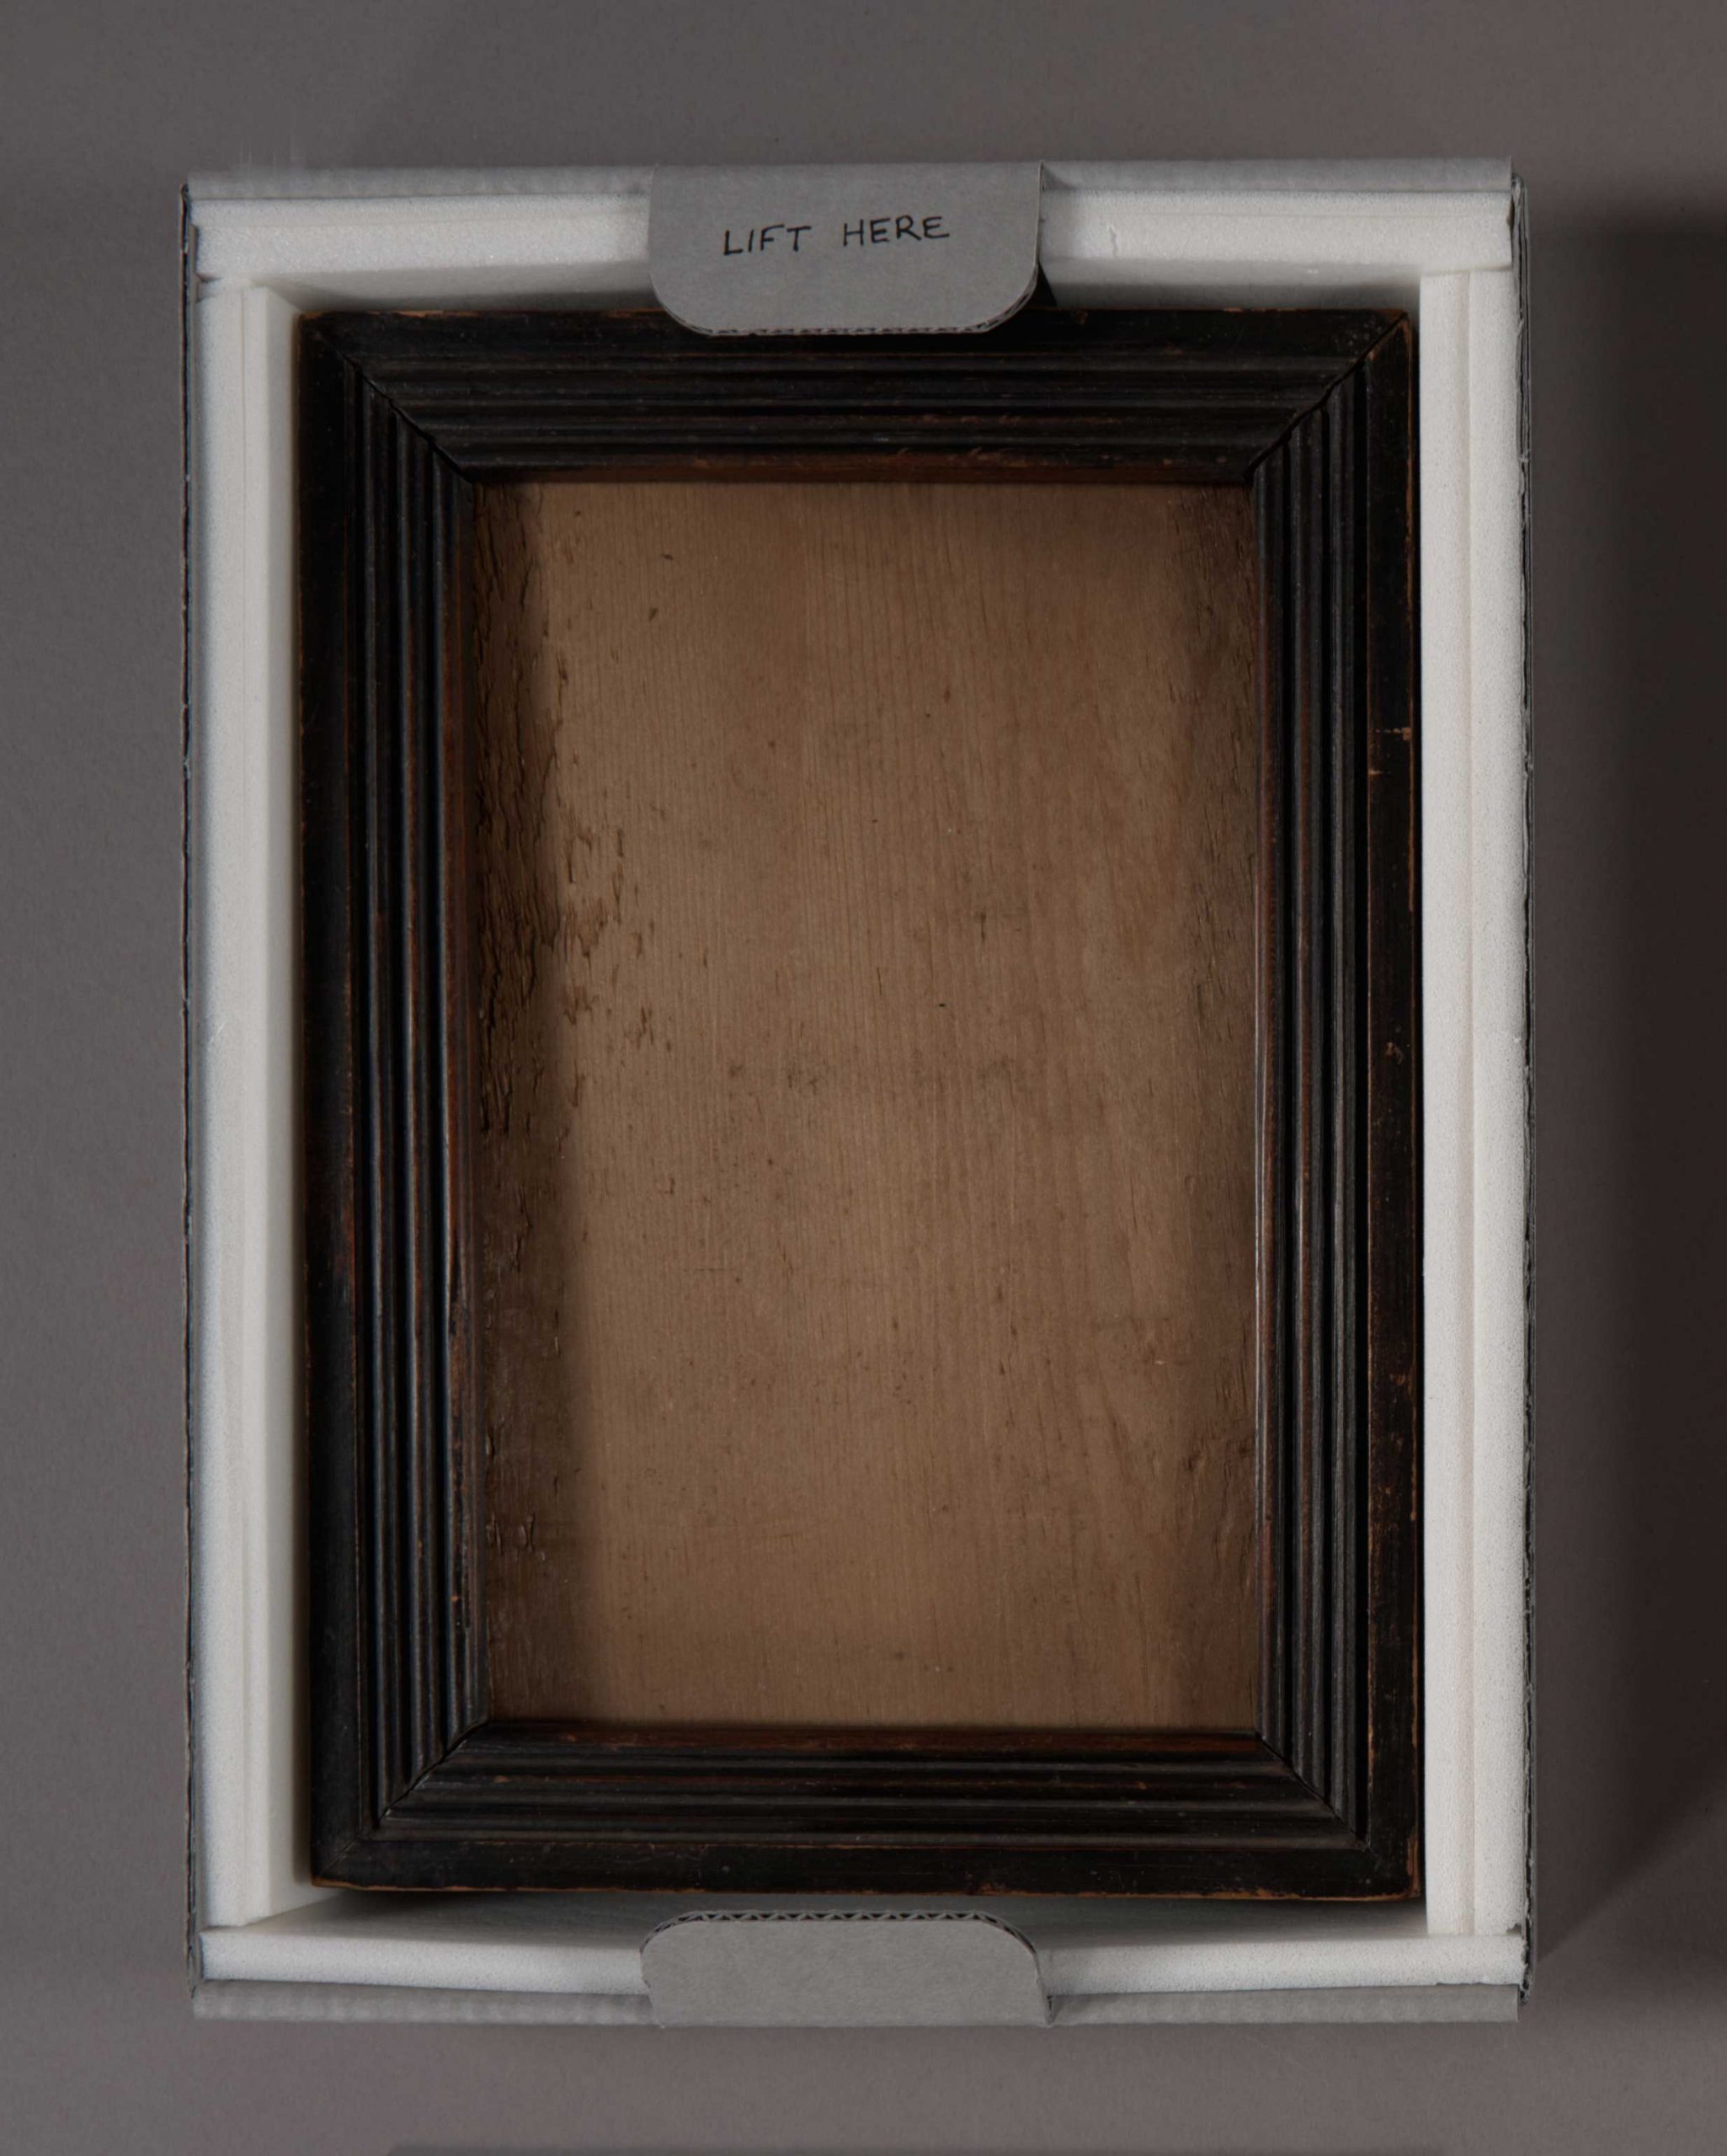
The frames also got some new housing in the form of a padded tray. Each tray features tabs at the head and tail so that they can be easily lifted out of the box. The foam is notched under the tab to accommodate the metal ring at the top of each frame, but also so that the frame can be safely tipped out of the tray.
The trays and mats were made to the same size so that they can be neatly stacked inside a clamshell box. Labels on the outside of the box indicate that it should be stored flat on the shelf and warn anyone retrieving the item that it contains glass.
I like to go back and check on rehoused items like this after they have received some use to ensure that the new enclosures are functioning well.
Regular readers of Preservation Underground know that we spend a lot of time thinking and talking about tools. The variety and sometimes repetitive nature of our work requires a great many of them and we regularly experiment with new designs or materials to find implements that are more effective or ergonomic. Tool collecting can also be a little addictive.
A bone folder was probably the first bookbinding tool I ever purchased and remains one of the most used items at my bench. I’ve acquired or made many folders over the years of different shapes, sizes, and materials (like Teflon, metal, or nylon) and was amused to read that Jony Ive included a bone folder in his list of top 12 tools. It’s also the only reasonably priced tool on that list.
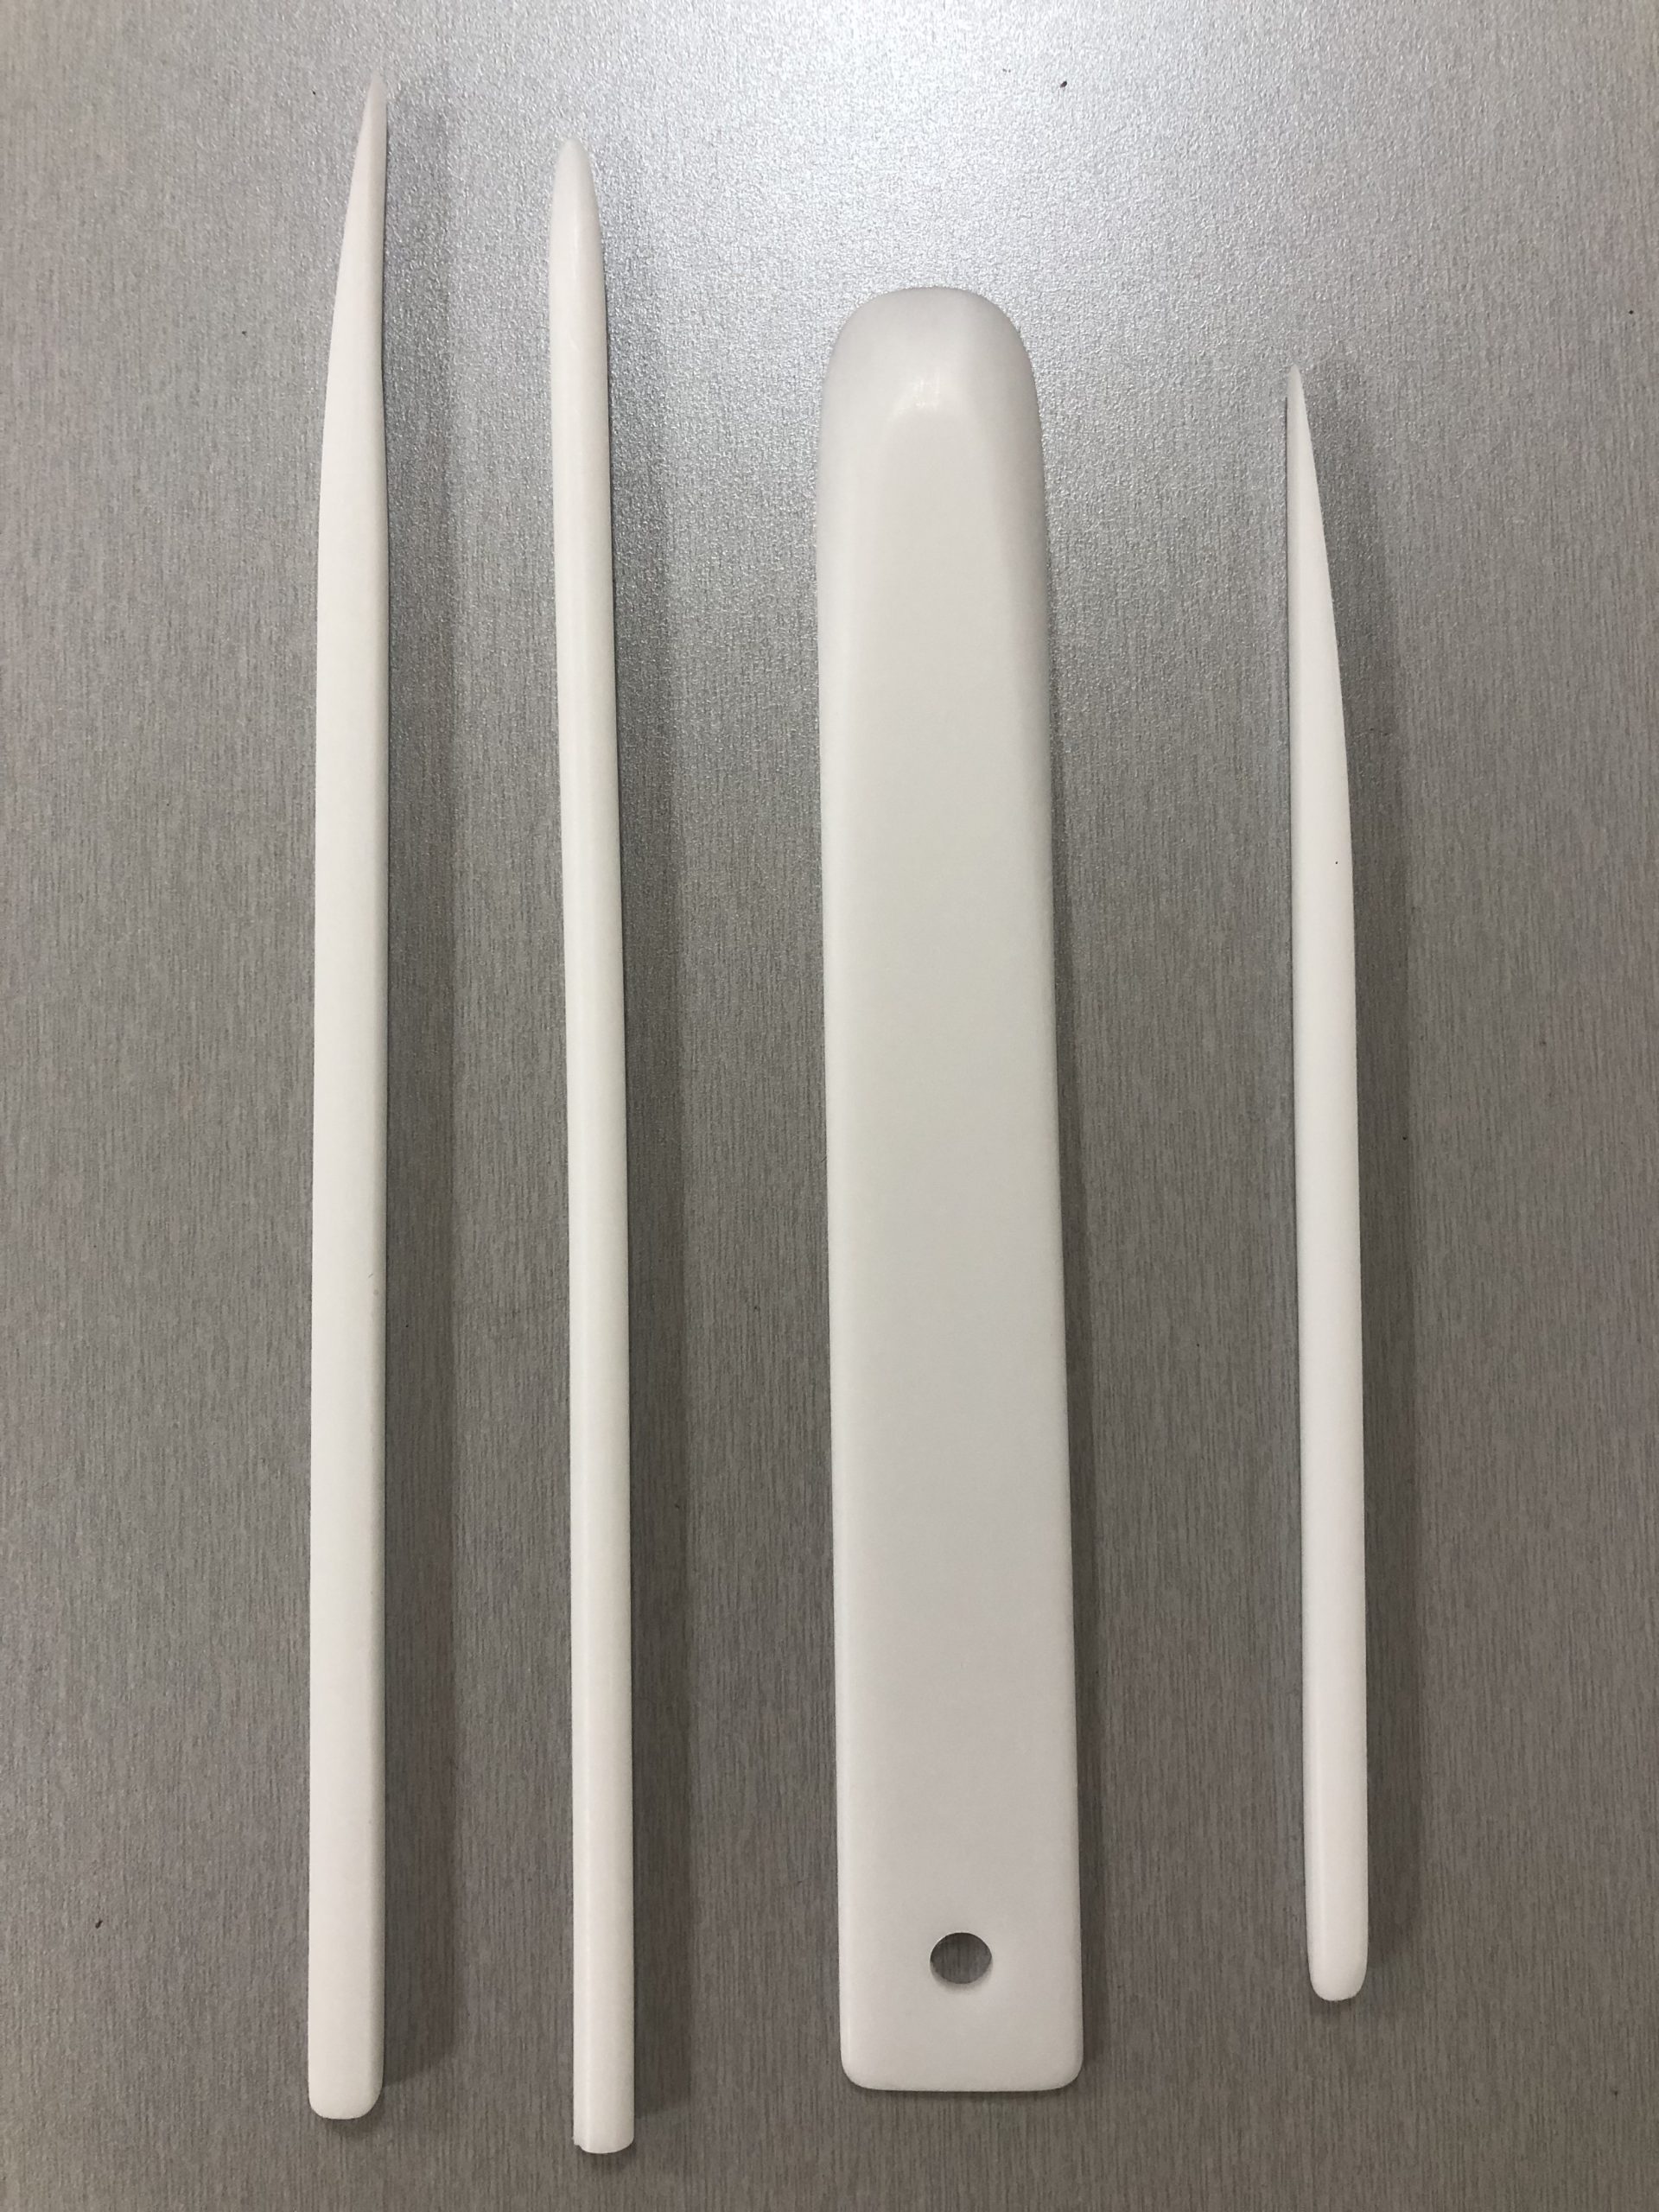
We have been using Delrin lifters in the lab for a few years now and Delrin folders have been growing in popularity in the bookbinding and conservation community, so I have been interested in making one. Luckily, during the pandemic, Rachel Penniman was able to attend a virtual workshop taught by Jeff Peachey on making Delrin and bamboo tools. We were able to set aside some time recently so that she could share what she learned in the workshop and we could all try making our own.
Delrin is a Dupont product that has a number of helpful properties for conservation work. It has a low coefficient of friction, but is stiffer than Teflon. It exhibits chemical and fatigue resistance and can also be very flexible when shaped to a thin tip. Peachey has written a great deal about the advantages of delrin folders and lifting tools.
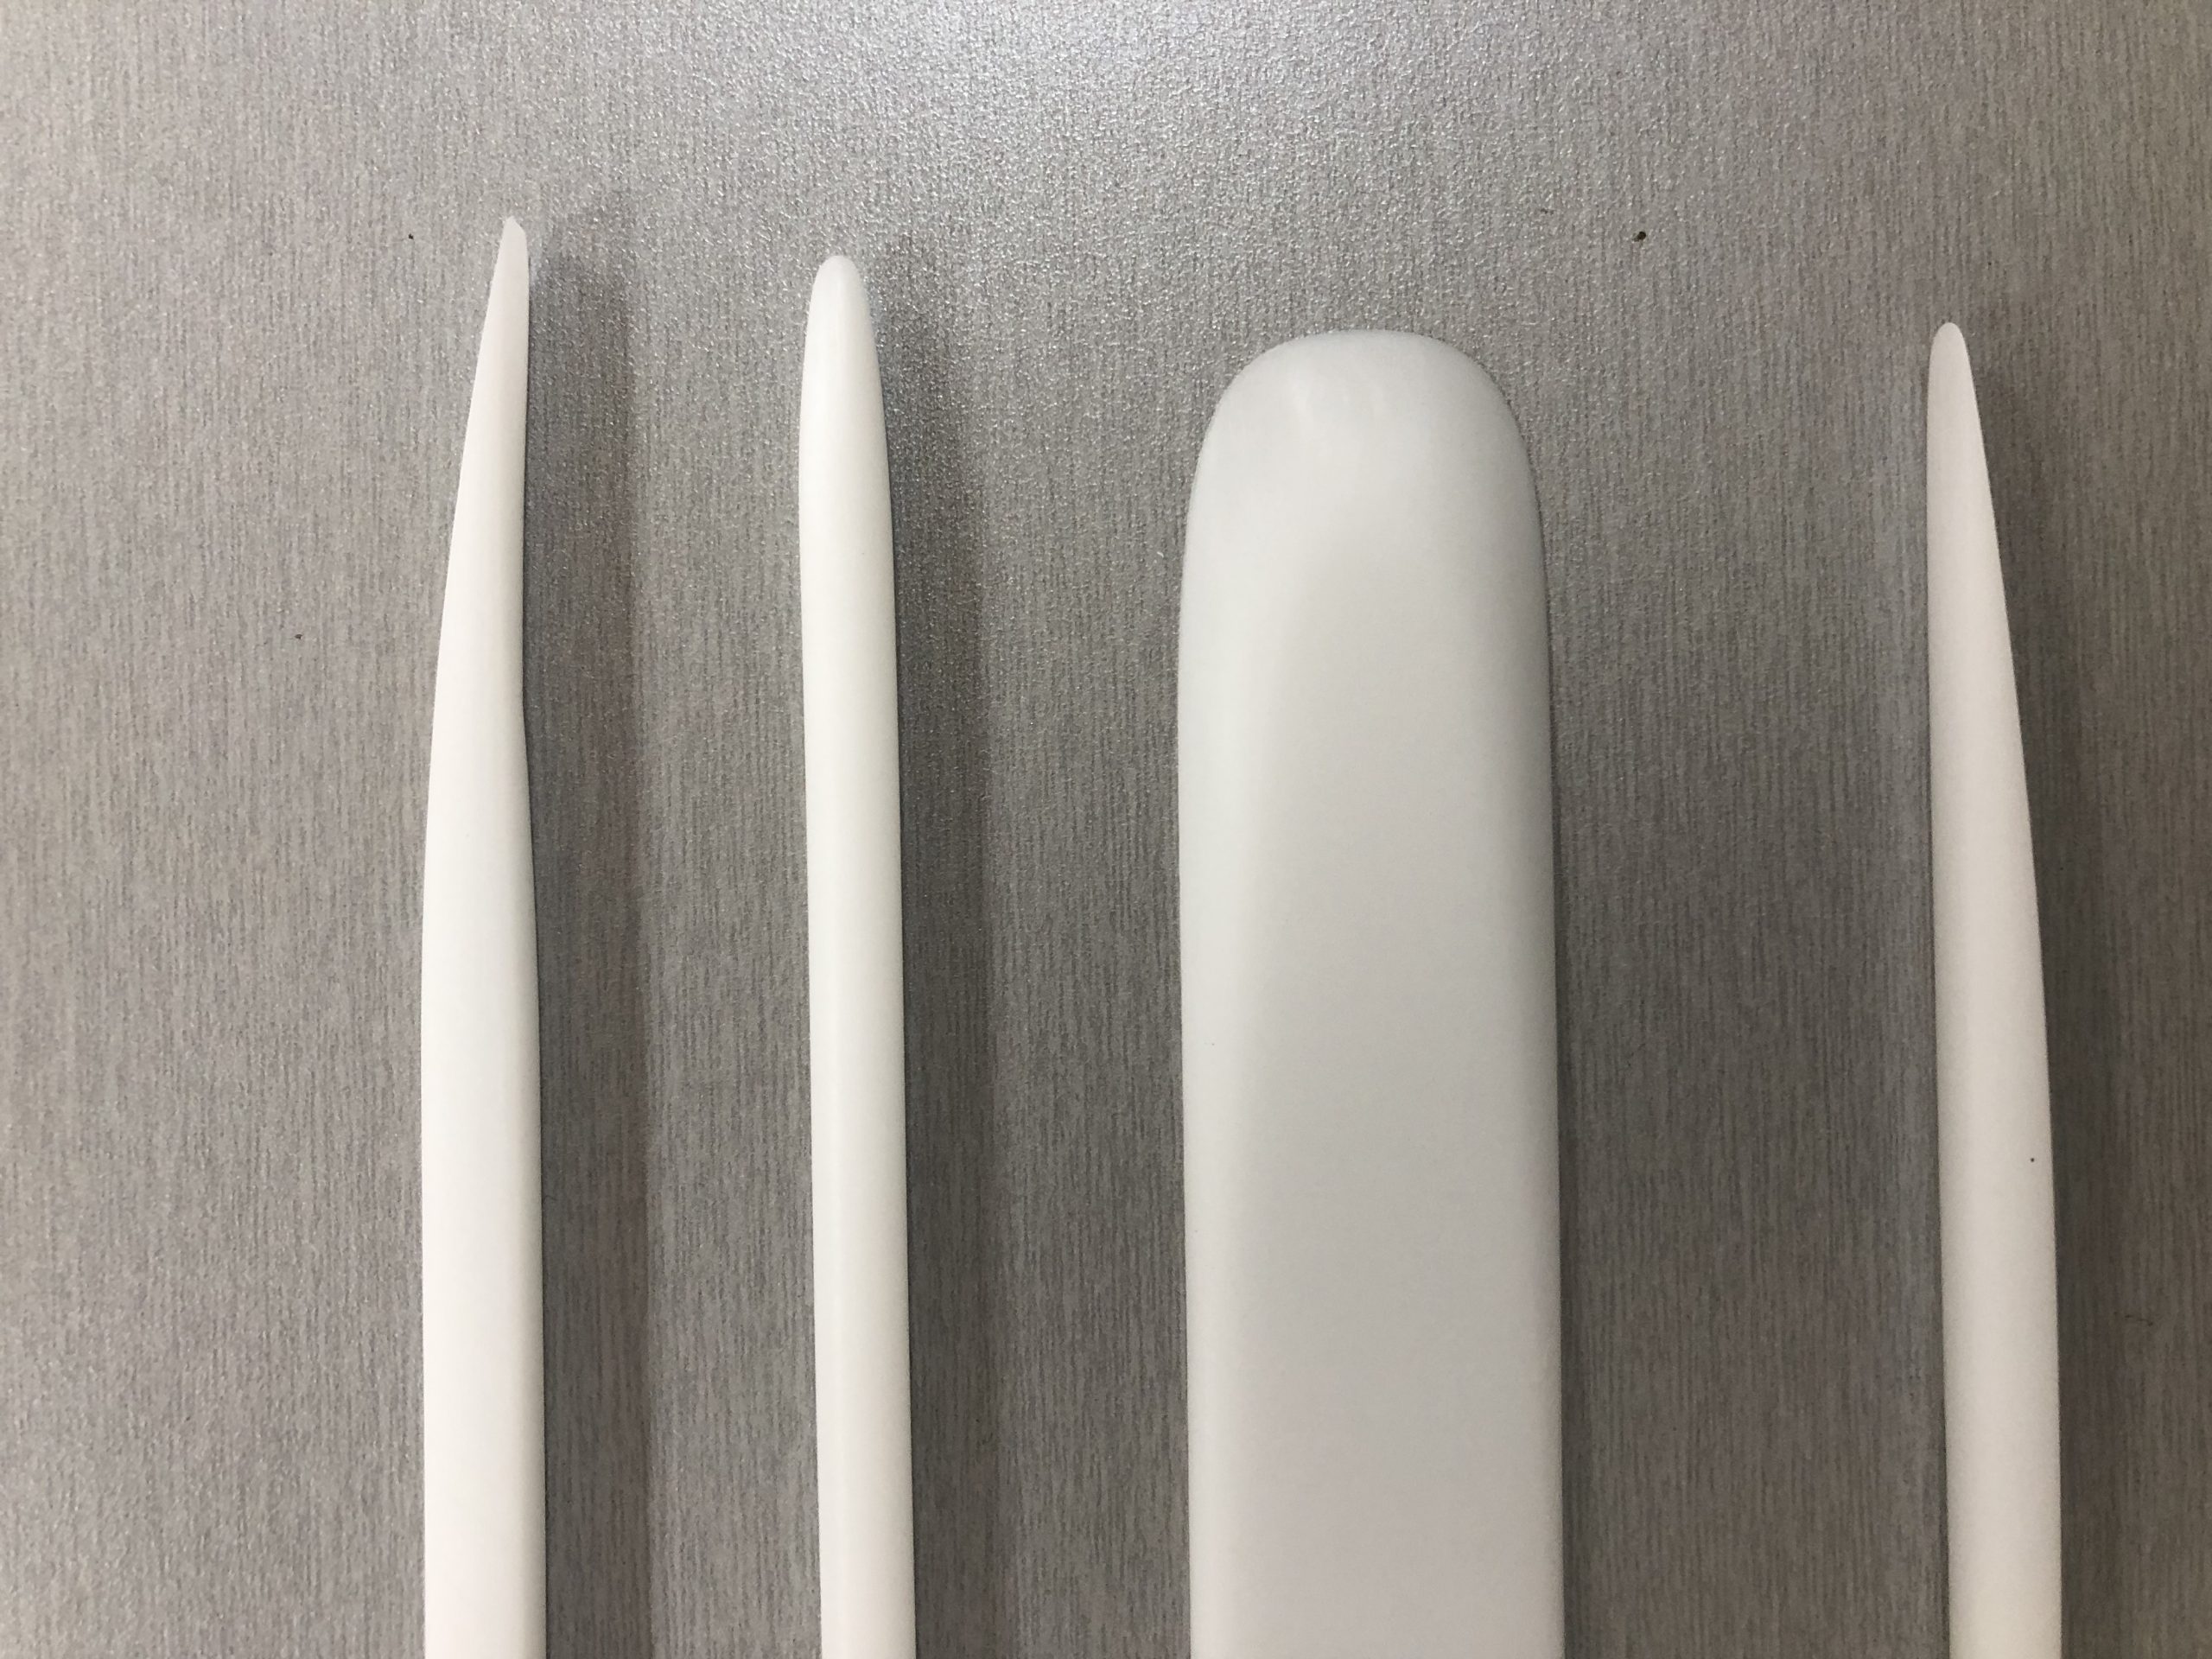
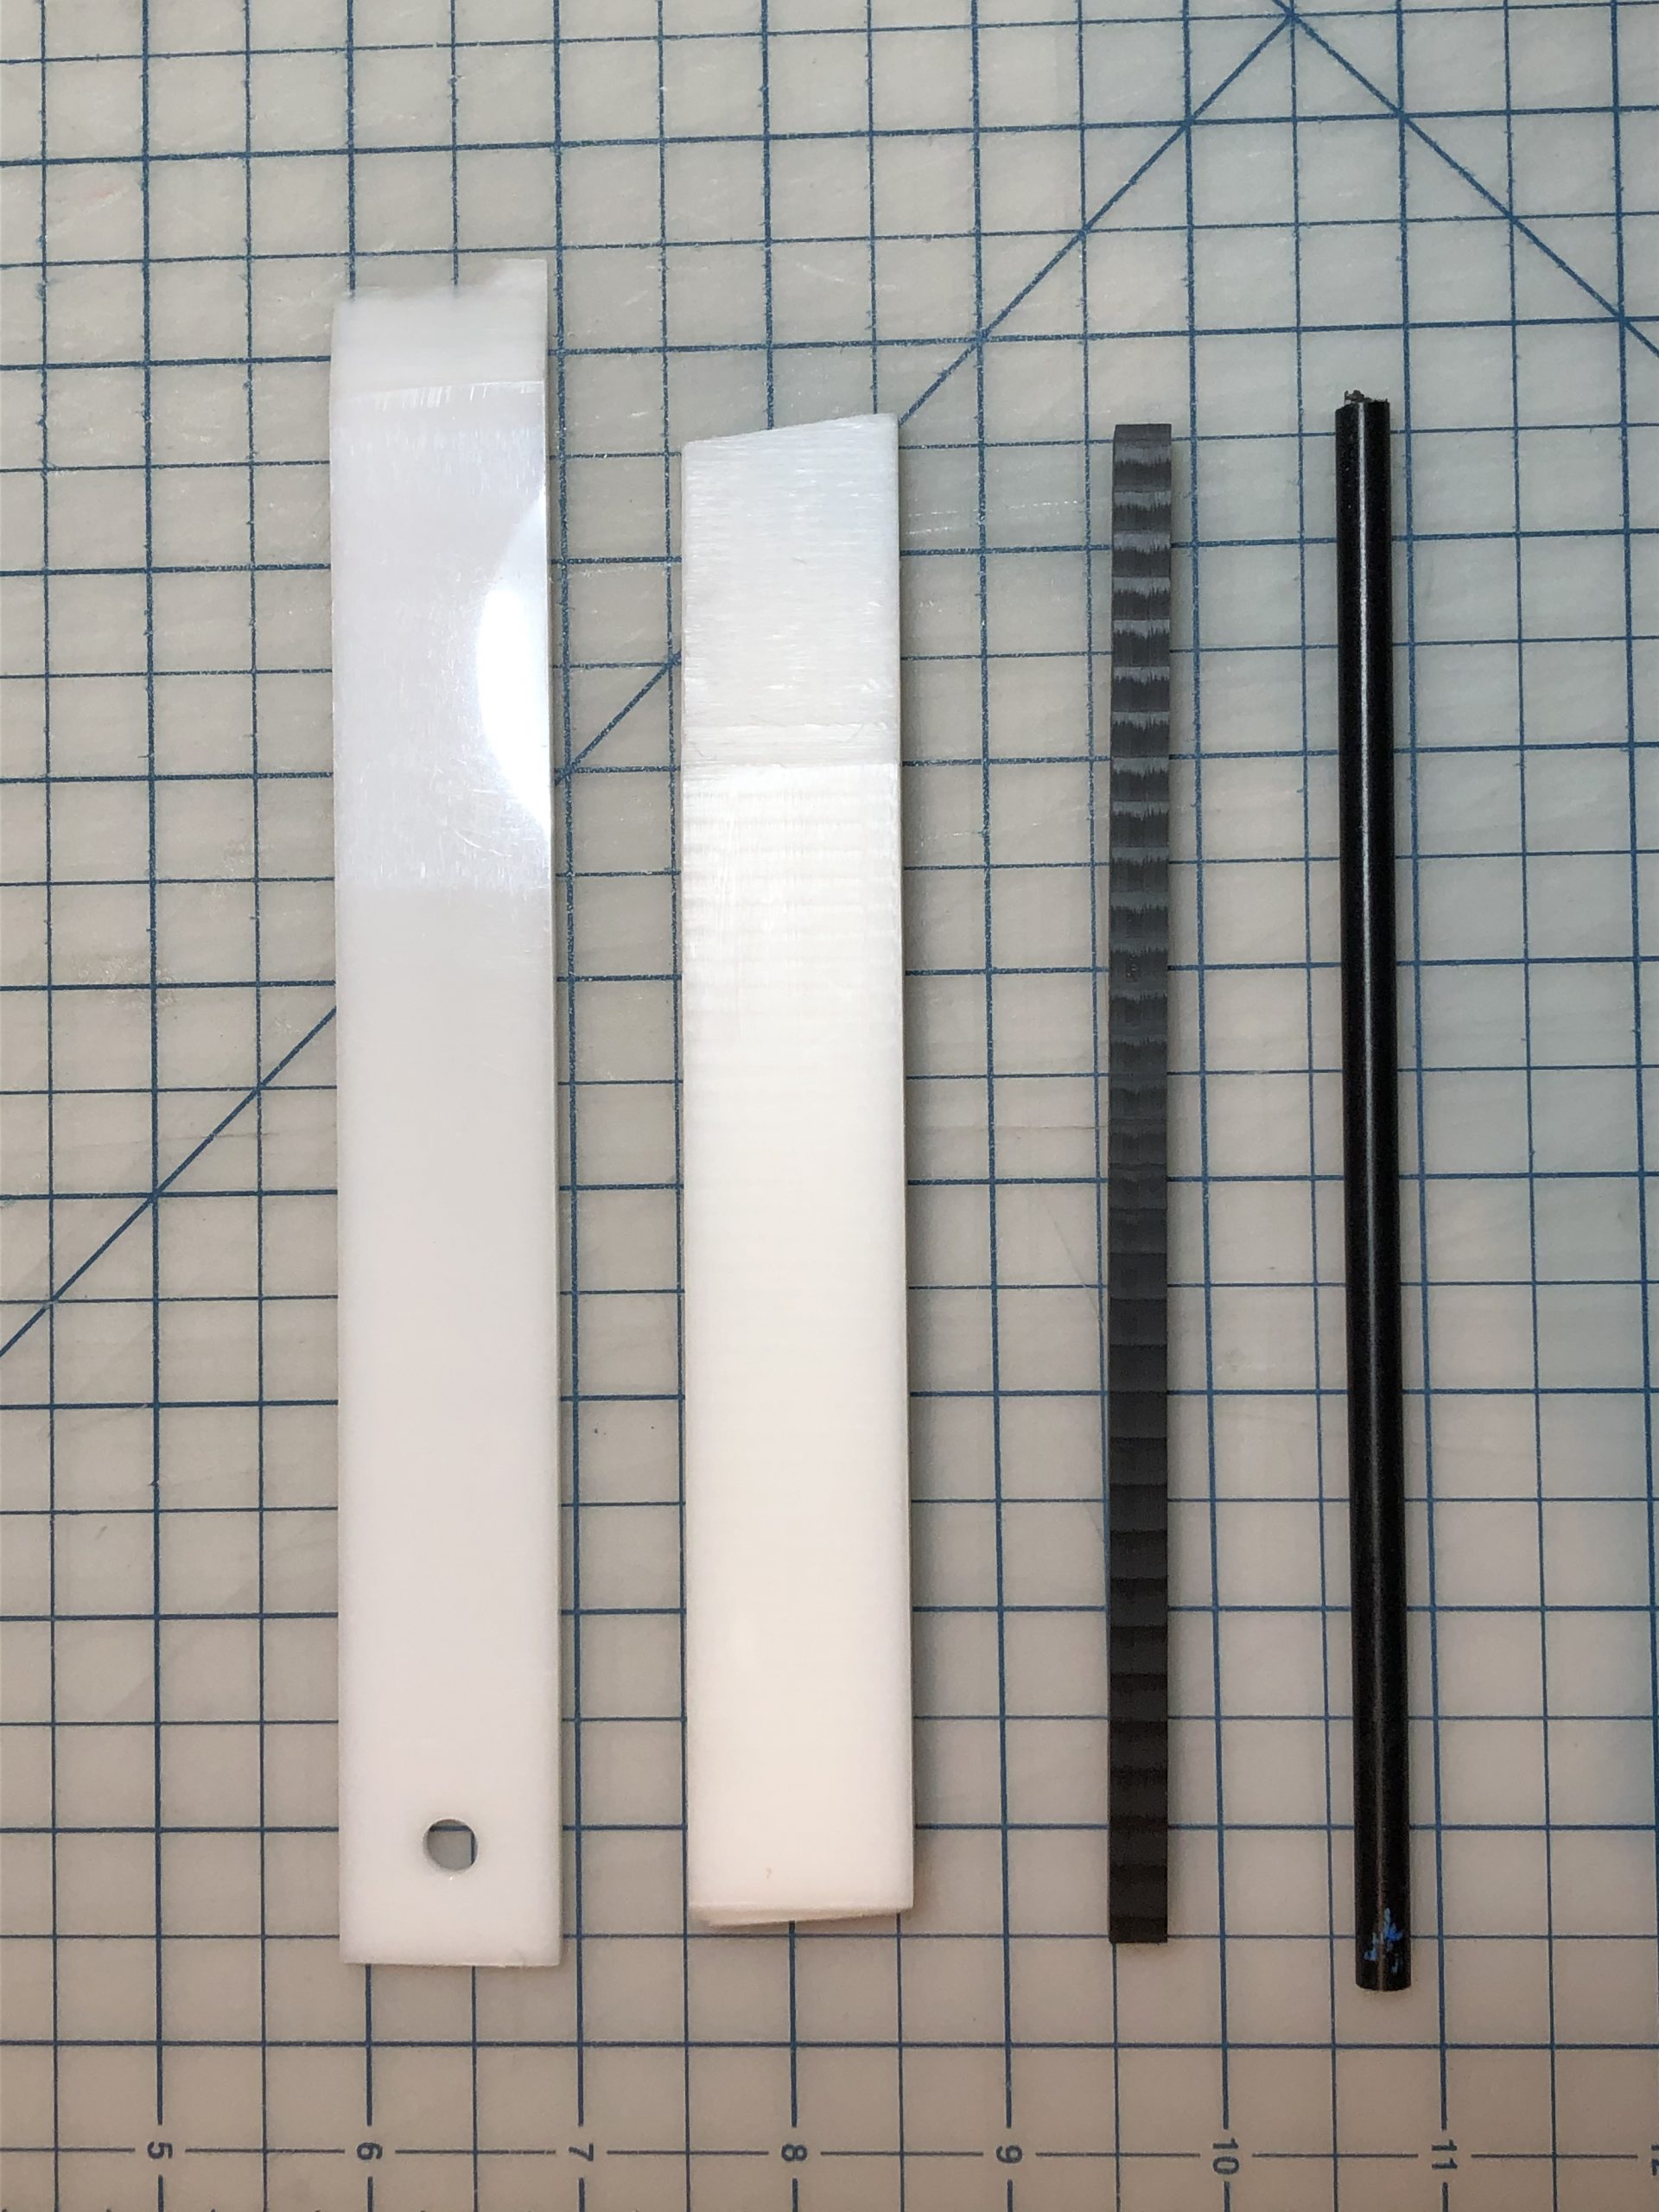
The material can be purchased in a variety of sheets and bars, so there are many options for creating tools of different shapes. We started the day by looking at existing tools from our personal collections to discuss the features that we like or don’t like and how we might be able to make a better version from the Delrin stock.
Some of our starting tool blanks.
Delrin is easily shaped with cutting tools or abrasives and doesn’t come with the same health risks as shaping Teflon. A facemask and proper ventilation should still be deployed to avoid inhaling the dust.
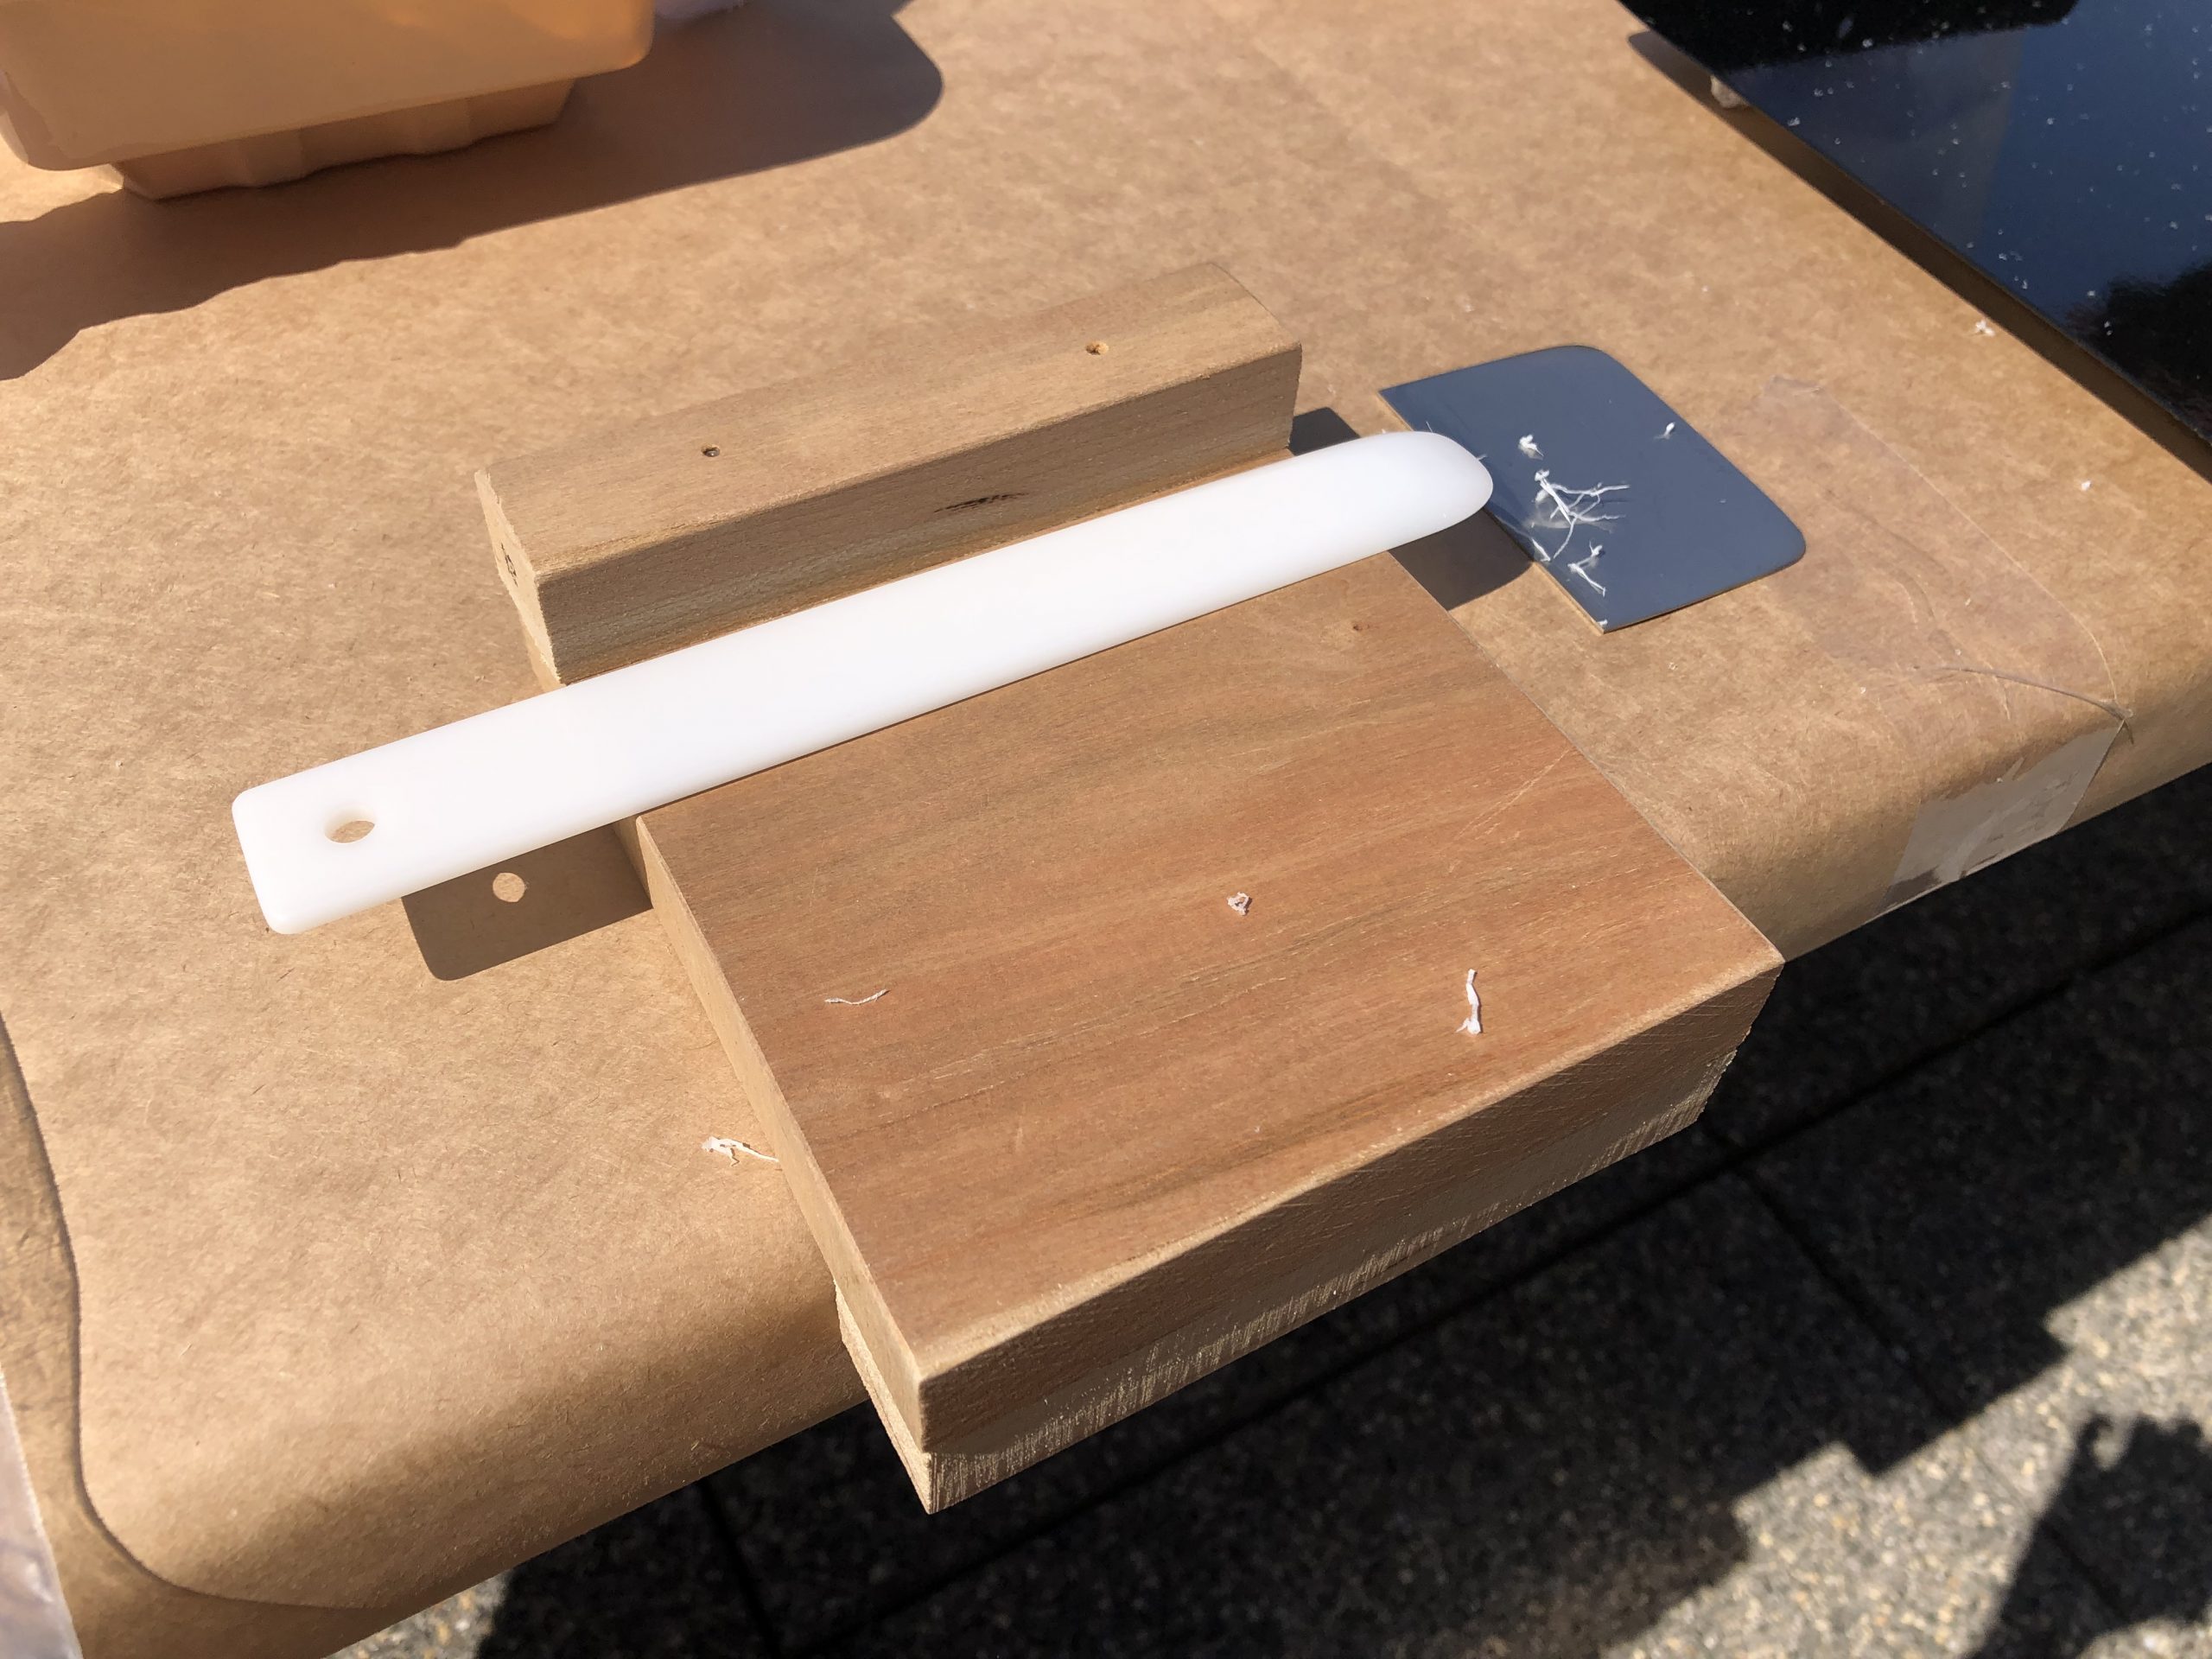
We were lucky to have good weather, so we set up an outside work space by the library loading dock. Views of the nearby Chapel were a bonus.
Shaping takes some time, so it was helpful to have clamps and wooden bench hooks on hand to support the work in progress.
Can we call this a Delrin “preform”?
After sawing, filing, scraping, and sanding for a few hours, we had produced a number of new tools. The nice thing about this material is that if you don’t like the shape you have produced, you can always shave it down some more or cut off the end and start again.
Now that I’ve gotten a feel for working with Delrin, I’m looking forward to experimenting with some larger, more rigid tools.
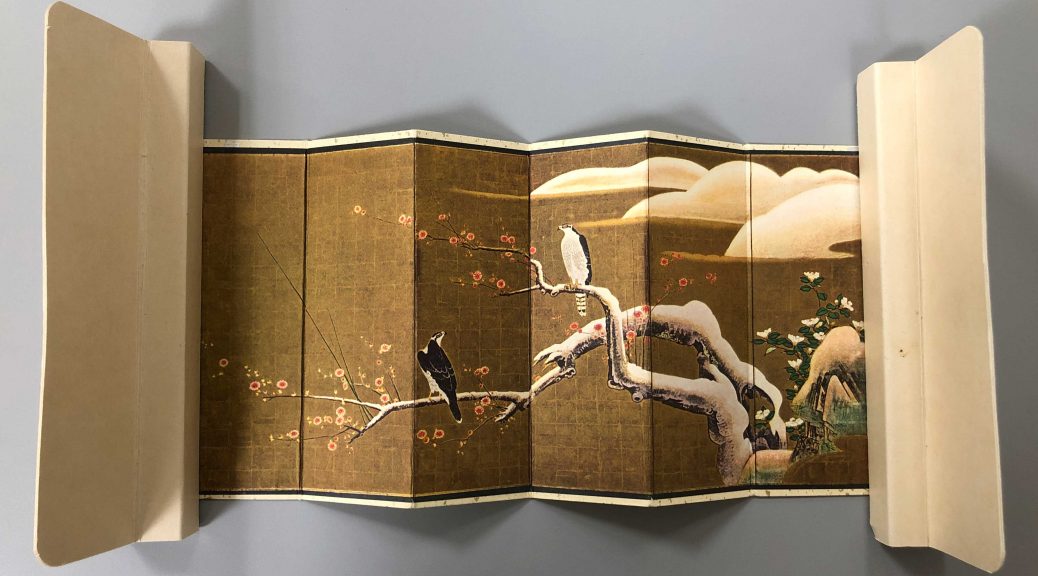
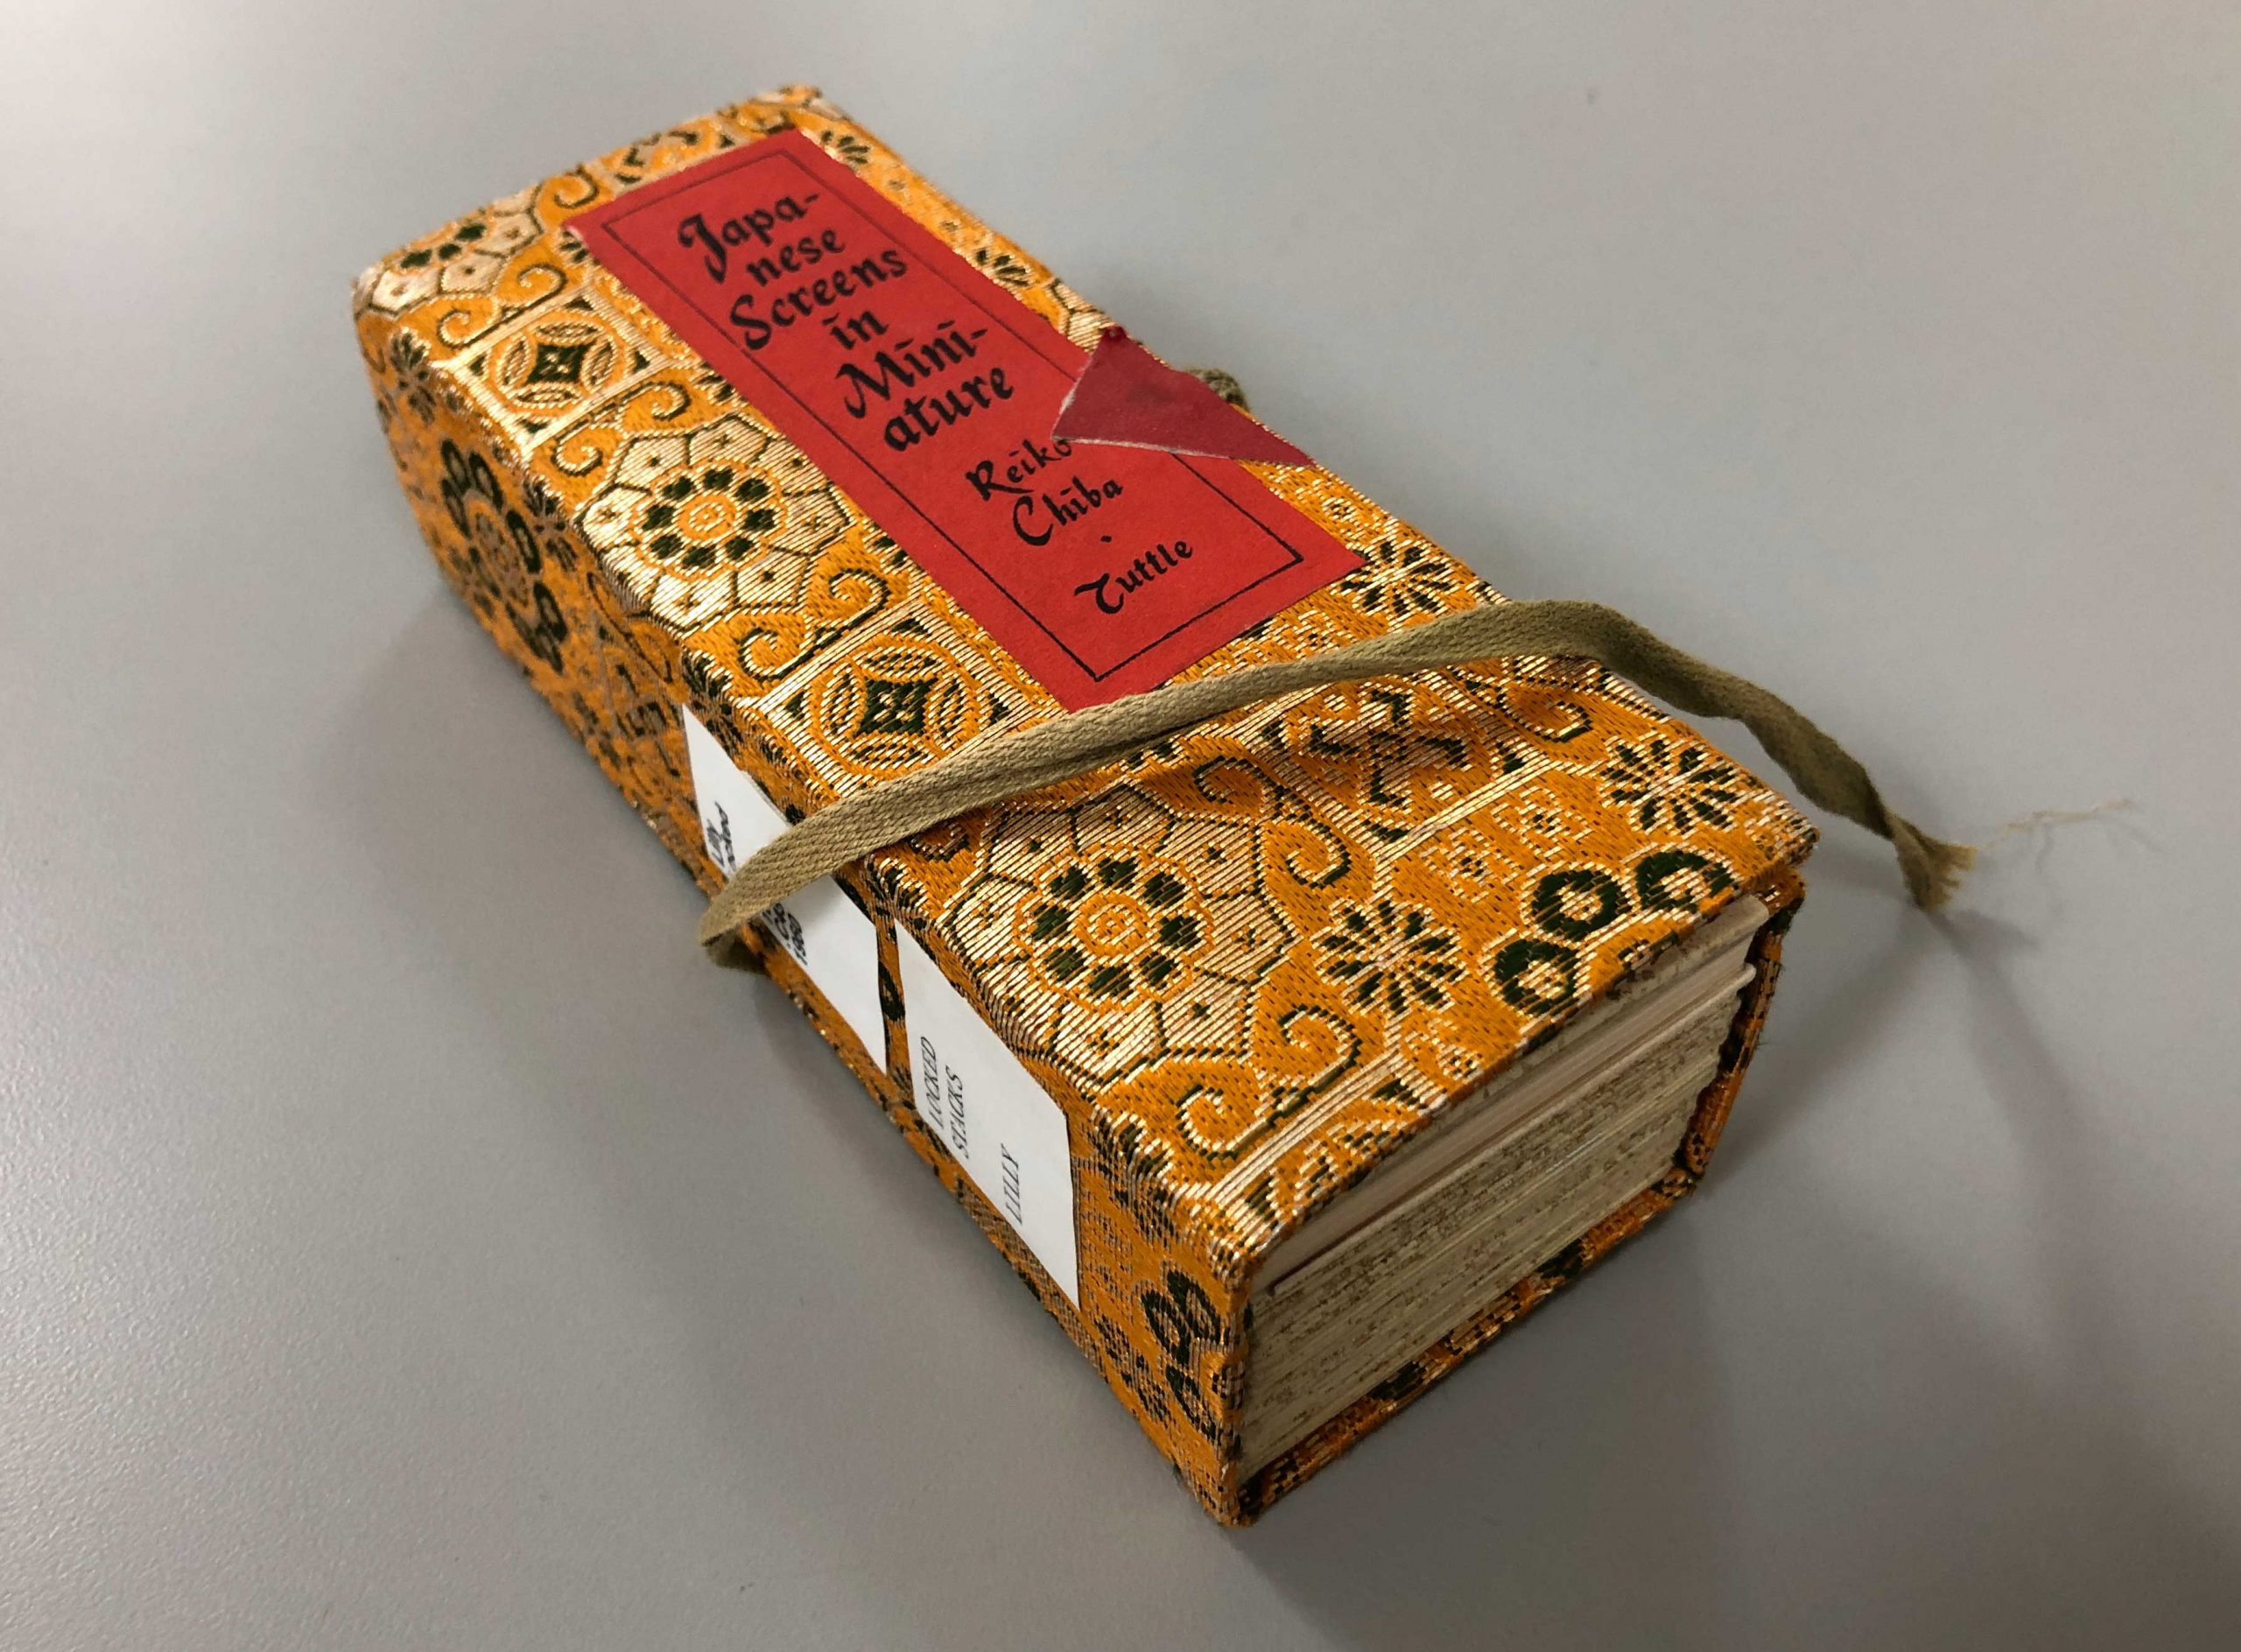
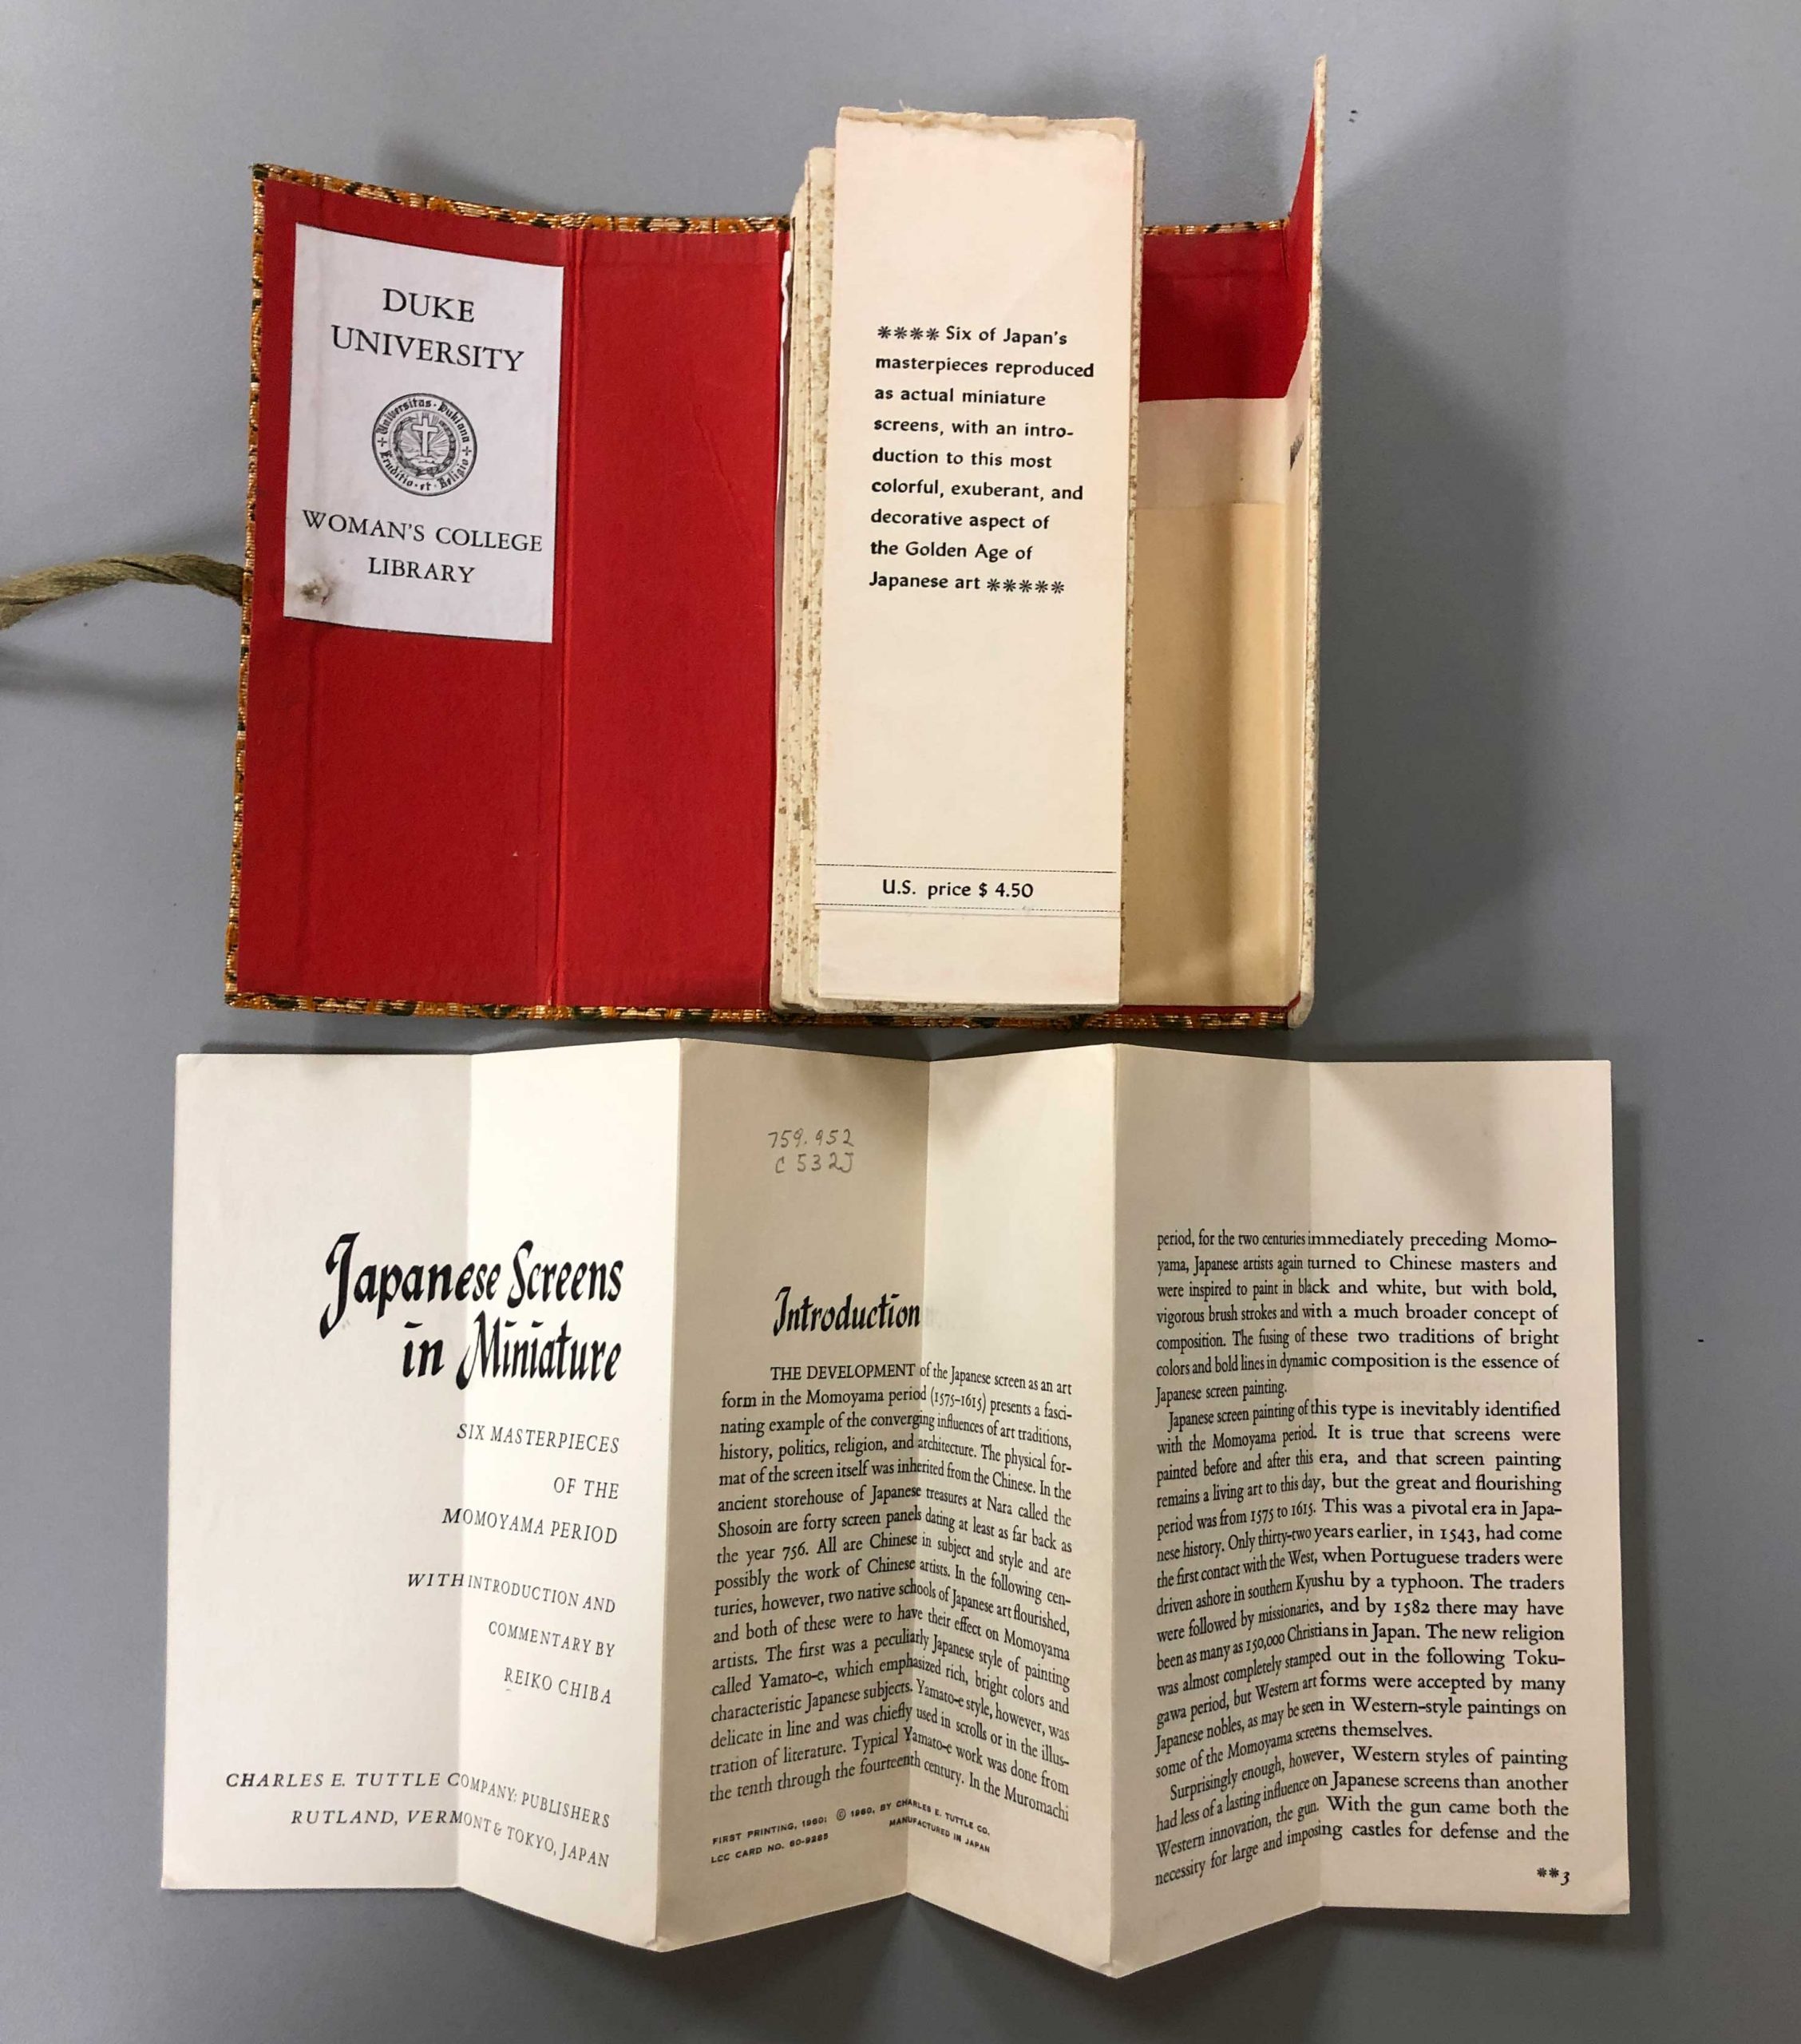
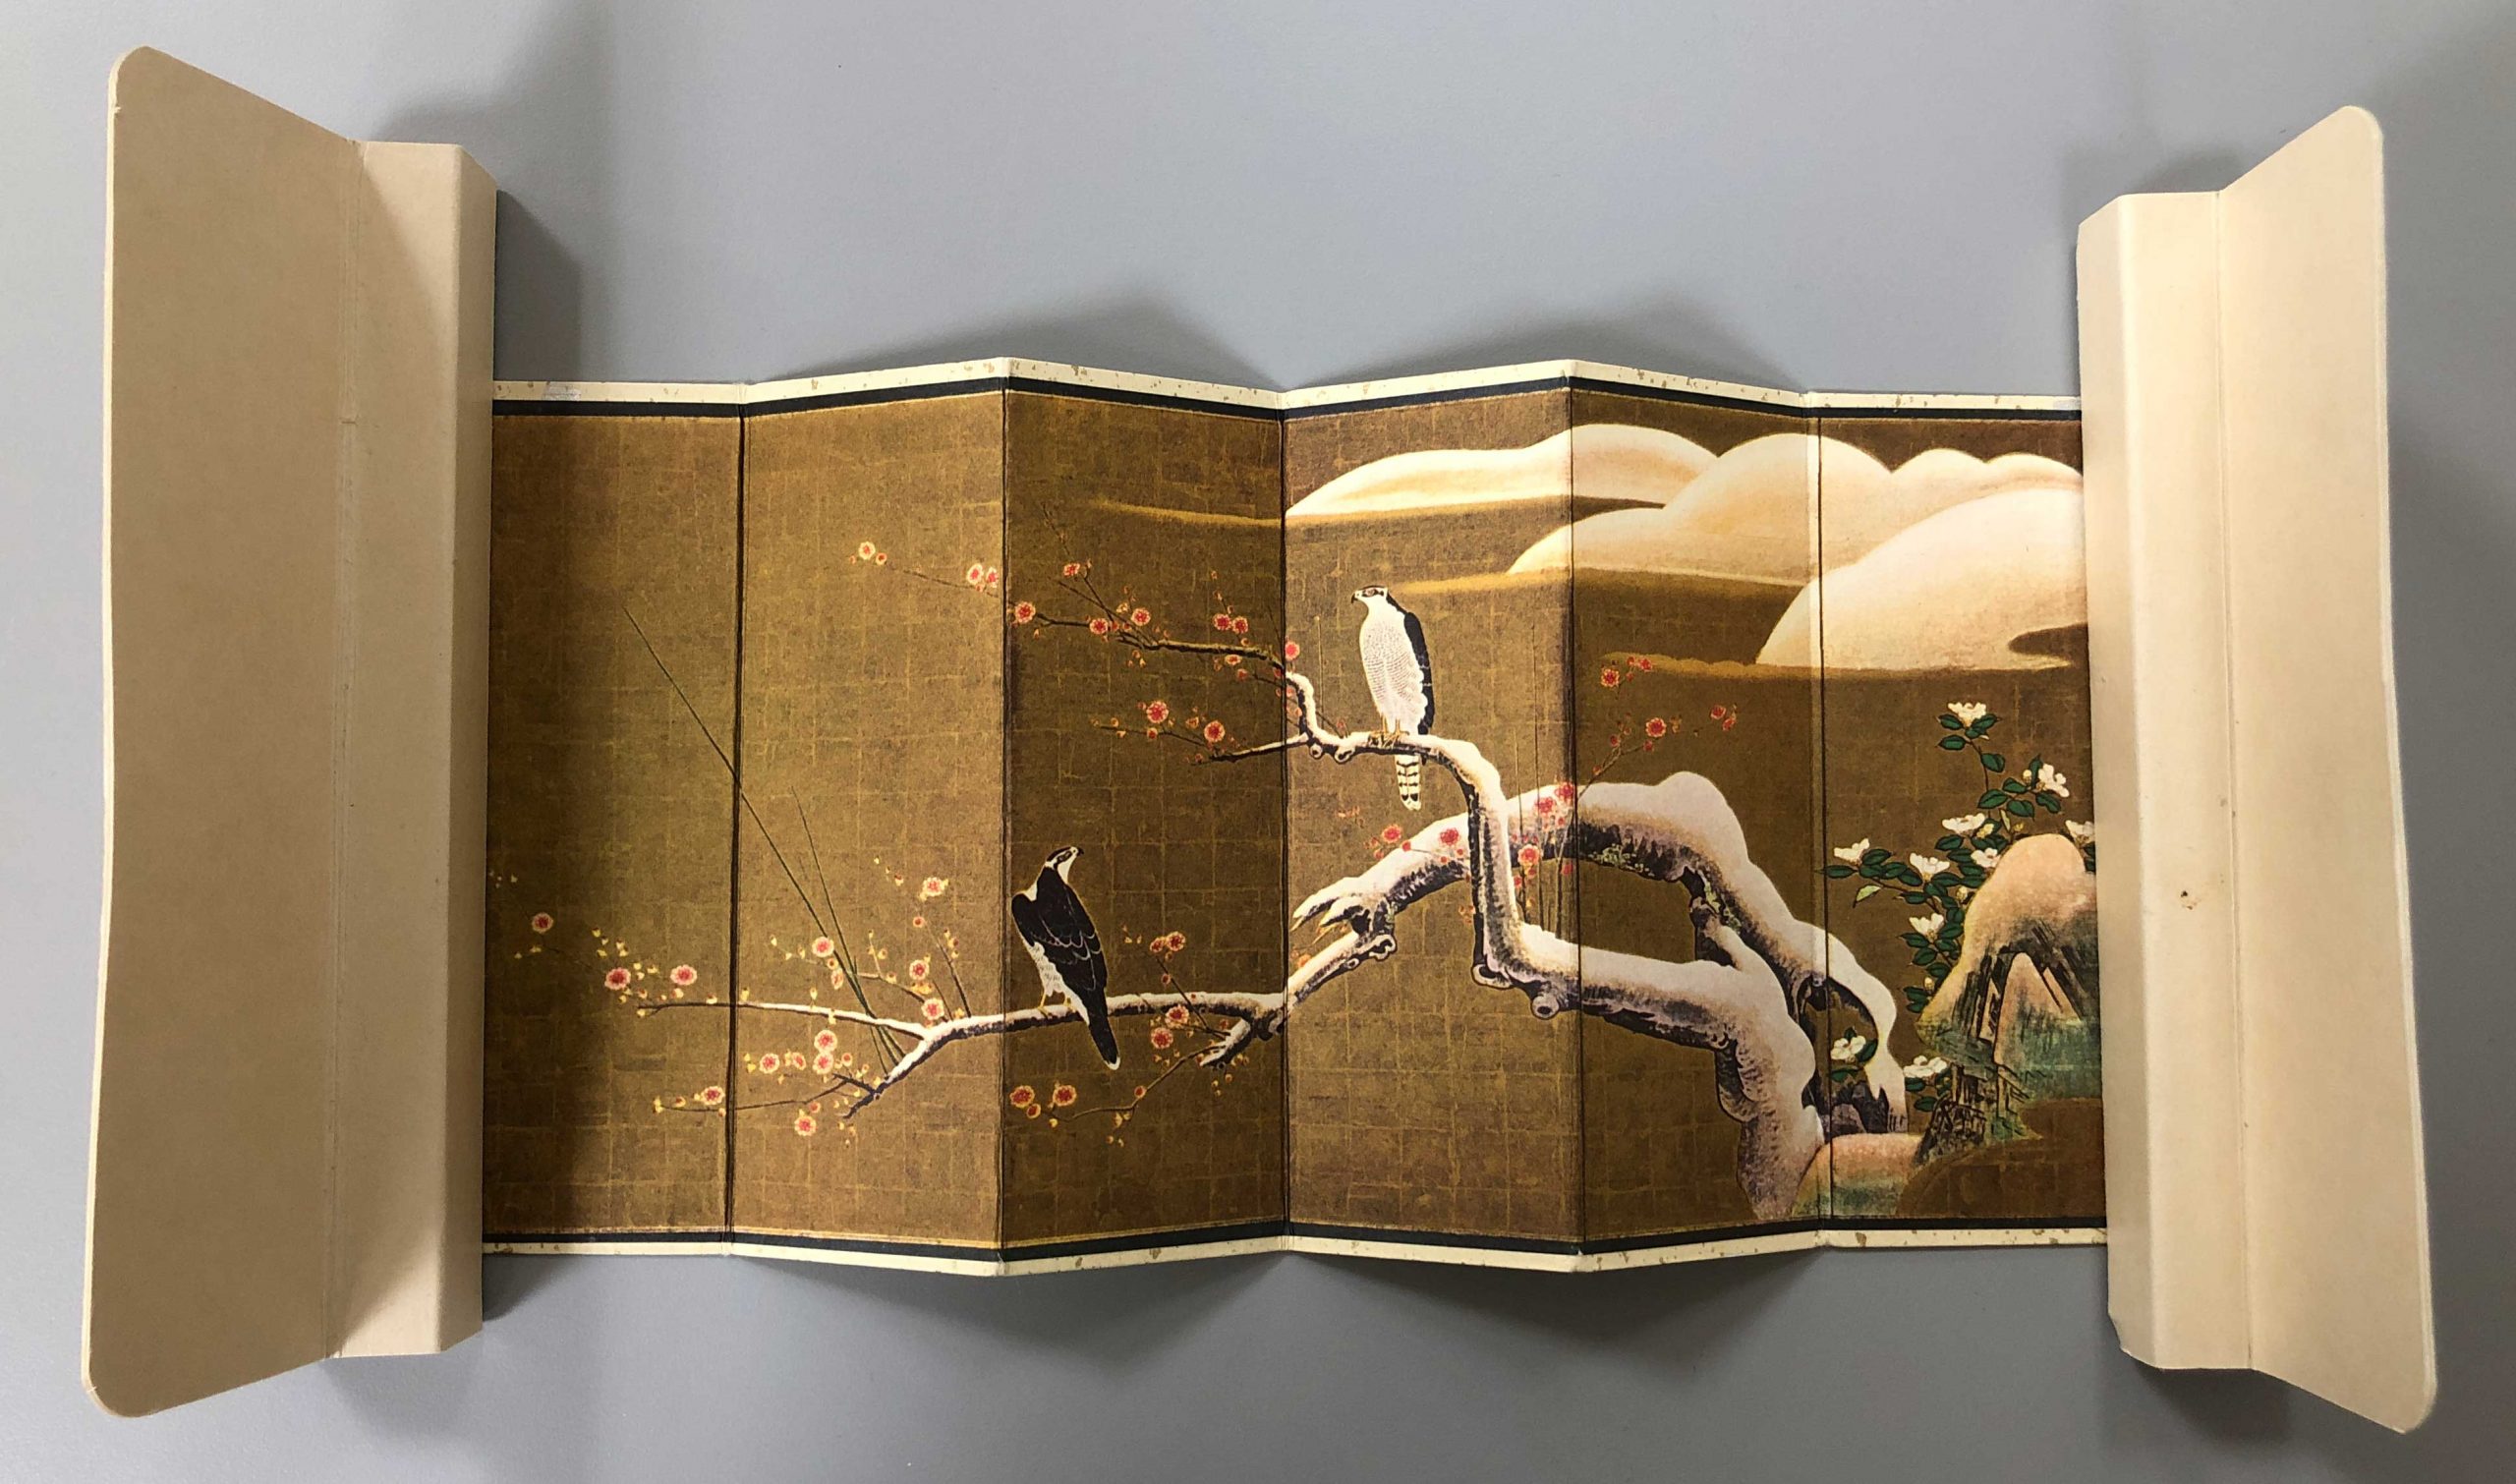
The Momoyama Period (1573–1615) was a time of great social change and constant warfare in Japan. A growing interest in the outside world and the introduction of European firearms contributed to new styles in both architecture and art. Large folding screens, covered in gold leaf and ornately painted, became an important decorative element inside the large fortresses built during this period.
The set of six small screens (~ 6″ tall) comes in a textile-covered wrapper and includes a short introduction with some historical context.
Each screen is six panels, mounted on board and folded in accordion style. A paper label with the title, artist, and date is adhered to the verso. The hinges are a little stiff, so I had to use some small weights to hold the screens open wide enough to image.
It is such a satisfying tactile experience to open each screen and unfold these delightful images. You just get the sense of how incredible the original objects must be, standing approximately 60″ tall with so much gilding.
We had the opportunity to order some additional brass type for our Kwikprint hot foil stamping machine recently, thanks in huge part to donors to our Adopt-a-Book program. The additional sizes of type will give us more options when we need to make labels for new bindings, rebacked spines, or enclosures.
Now that it’s in the machine and heated up, I will be spending the next hour looking around the lab for anything that I can stamp. The back of my Moleskine notebook was the first thing to go.
Now no one’s office supplies are safe! What should we stamp next?


 The frames also got some new housing in the form of a padded tray. Each tray features tabs at the head and tail so that they can be easily lifted out of the box. The foam is notched under the tab to accommodate the metal ring at the top of each frame, but also so that the frame can be safely tipped out of the tray.