Go Faster, Do More, Integrate Everything, and Make it Good

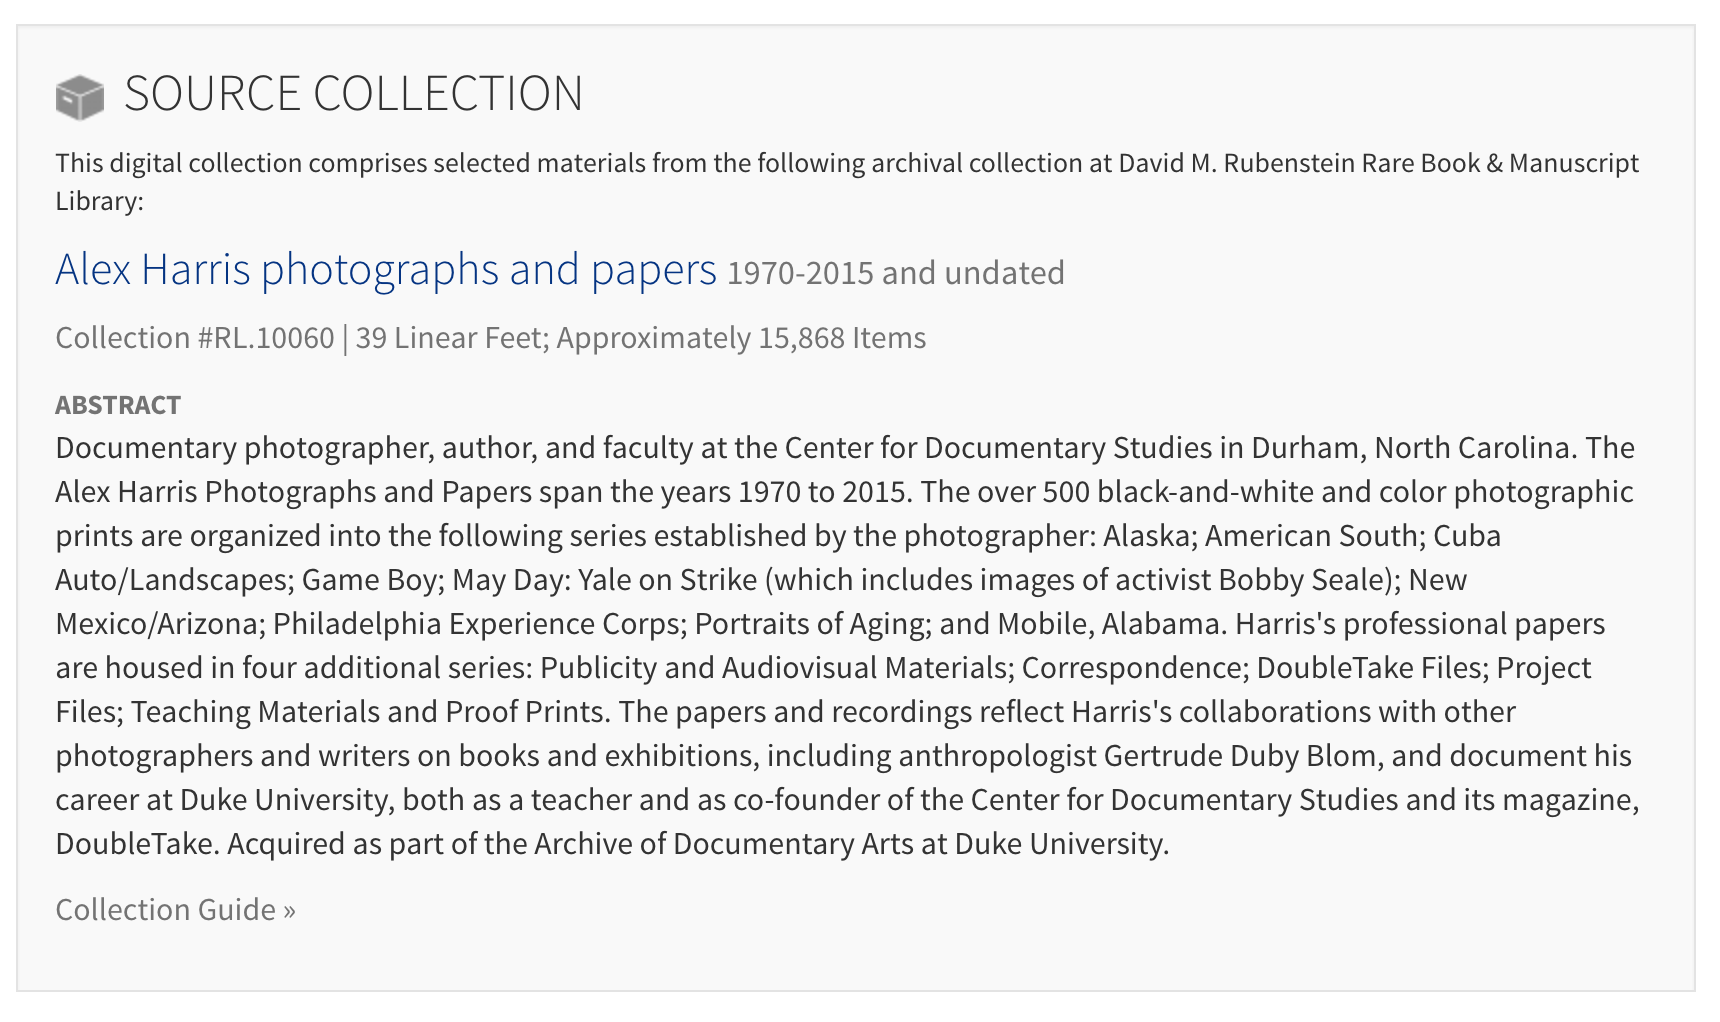
We’re excited to have released nine digitized collections online this week in the Duke Digital Repository (see the list below ). Some are brand new, and the others have been migrated from older platforms. This brings our tally up to 27 digitized collections in the DDR, and 11,705 items. That’s still just a few drops in what’ll eventually be a triumphantly sloshing bucket, but the development and outreach we completed for this batch is noteworthy. It changes the game for our ability to put digital materials online faster going forward.

Let’s have a look at the new features, and review briefly how and why we ended up here.

Collection Portals: No Developers Needed

Mangum Photos Collection
The Hugh Mangum Photographs collection portal, configured to feature selected images.

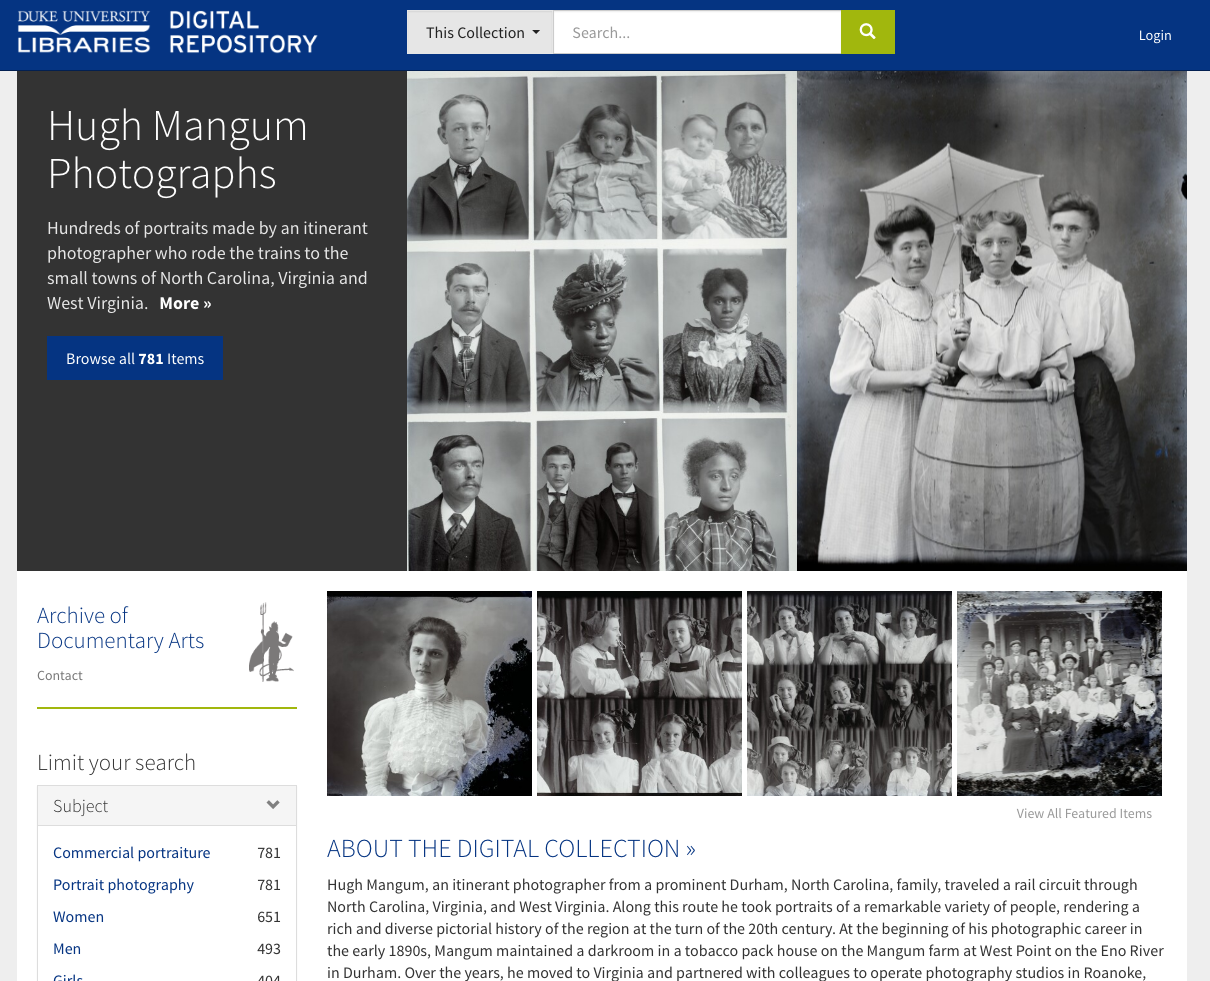
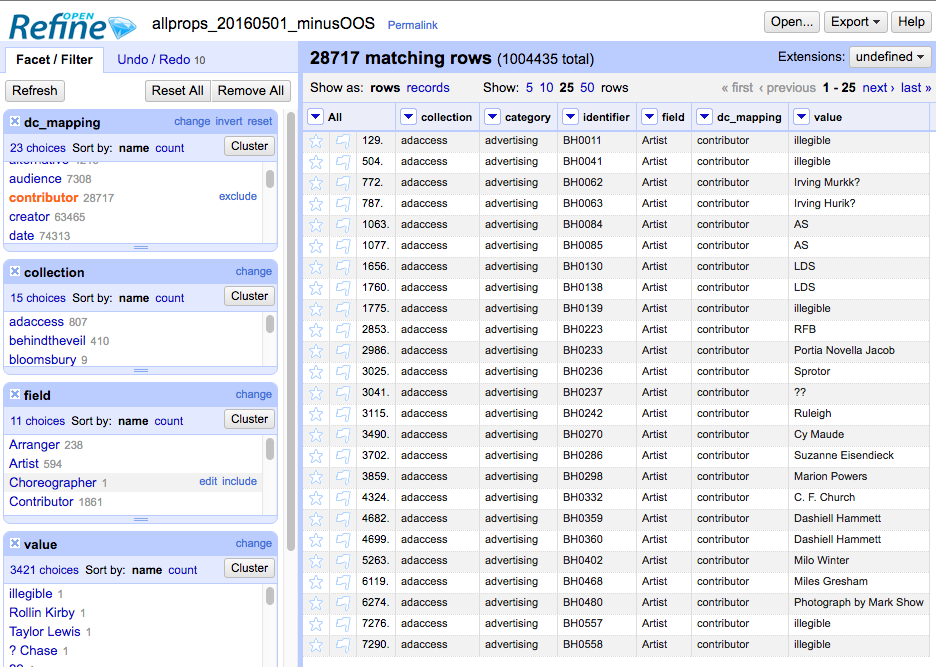
Before this week, each digital collection in the DDR required a developer to create some configuration files in order to get a nice-looking, made-to-order portal to the collection. These configs set featured items and their layout, a collection thumbnail, custom rules for metadata fields and facets, blog feeds, and more.


Duke Chapel Recordings Portal
The Duke Chapel Recordings collection portal, configured with customized facets, a blog feed, and images external to the DDR.

It’s helpful to have this kind of flexibility. It can enhance the usability of collections that have distinctive characteristics and unique needs. It gives us a way to show off photos and other digitized images that’d otherwise look underwhelming. But on the other hand, it takes time and coordination that isn’t always warranted for a collection.

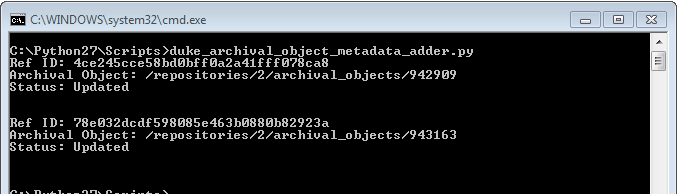
We now have an optimized default portal display for any digital collection we add, so we don’t need custom configuration files for everything. A collection portal is not as fancy unconfigured, but it’s similar and the essential pieces are present. The upshot is: the digital collections team can now take more items through the full workflow quickly–from start to finish–putting collections online without us developers getting in the way.

Whitener Collection Portal
A new “unconfigured” collection portal requiring no additional work by developers to launch. Emphasis on archival source collection info in lieu of a digital collection description.

Folder Items

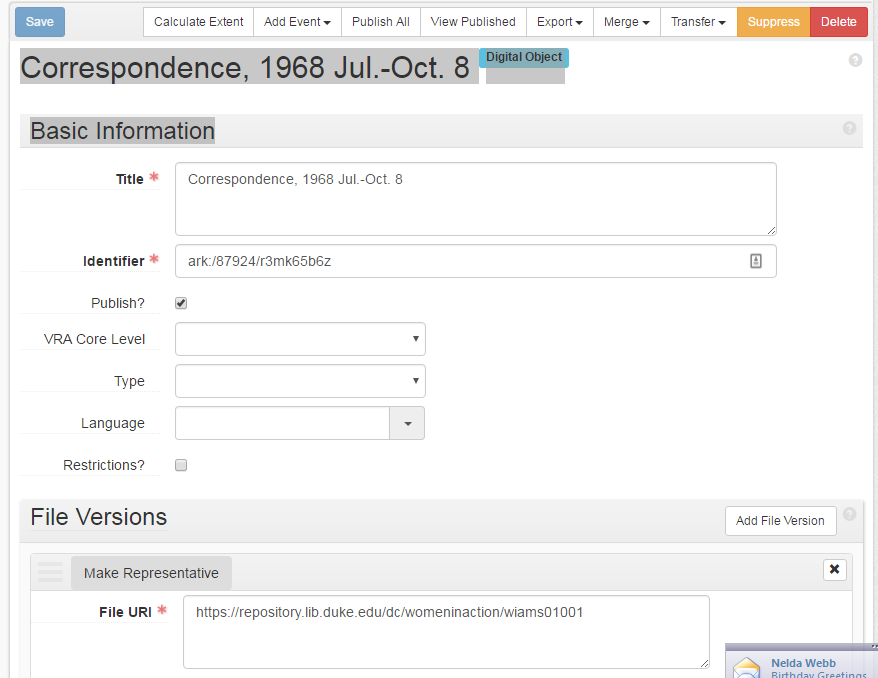
To better accommodate our manuscript collections, we added more distinction in the interface between different kinds of image items. A digitized archival folder of loose manuscript material now includes some visual cues to reinforce that it’s a folder and not, e.g., a bound album, a single photograph, or a two-page letter.

Folder items
Folder items have a small folder icon superimposed on their thumbnail image.
Folder item view
Above the image viewer is a folder icon with an image count; the item info header below changes to “Folder Info”

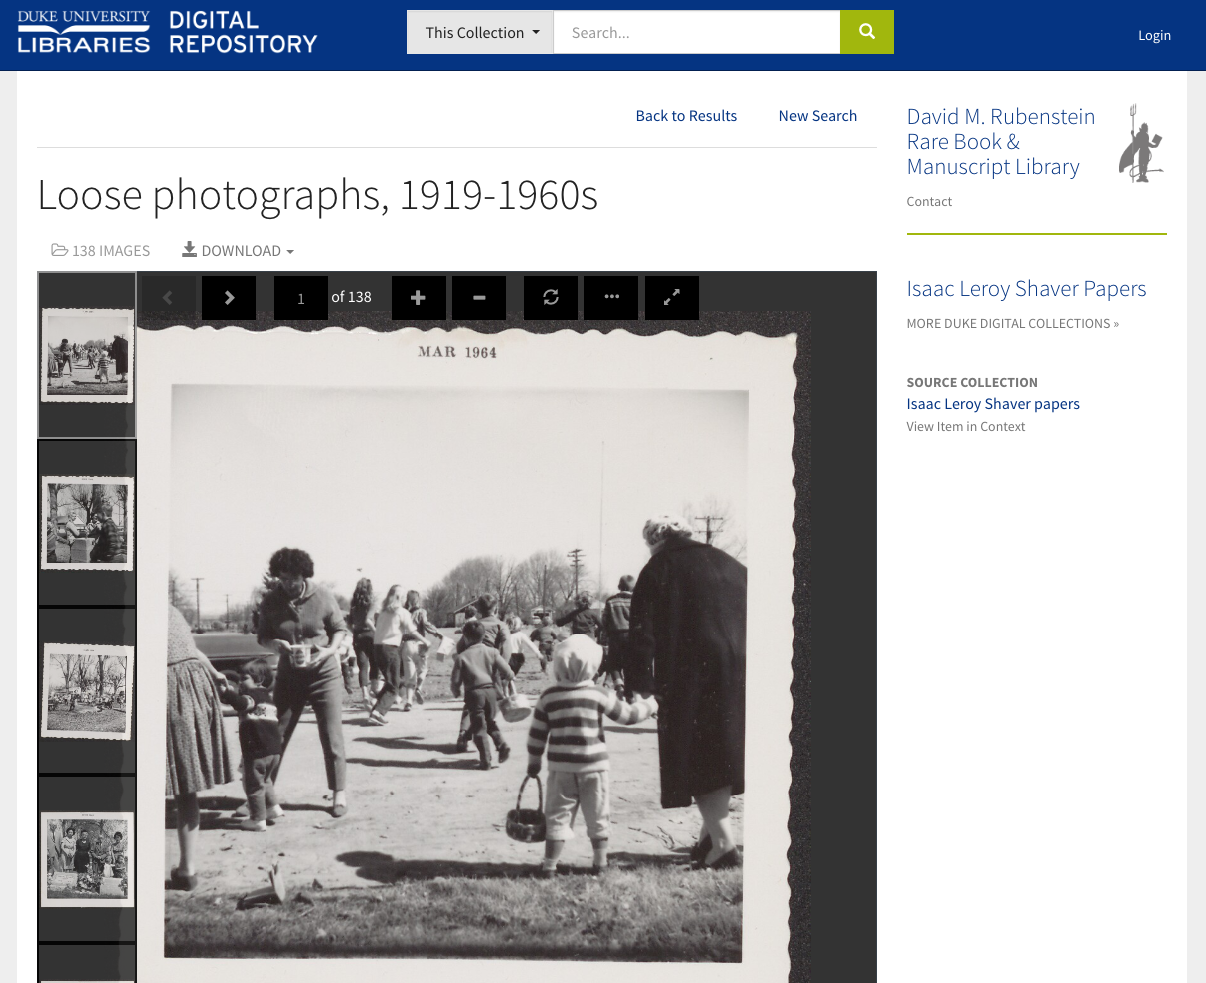
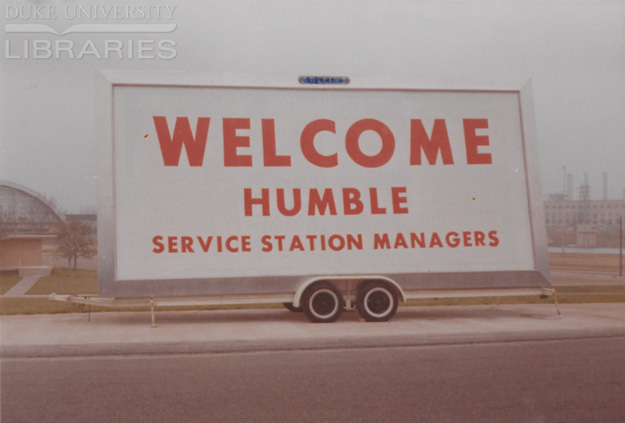
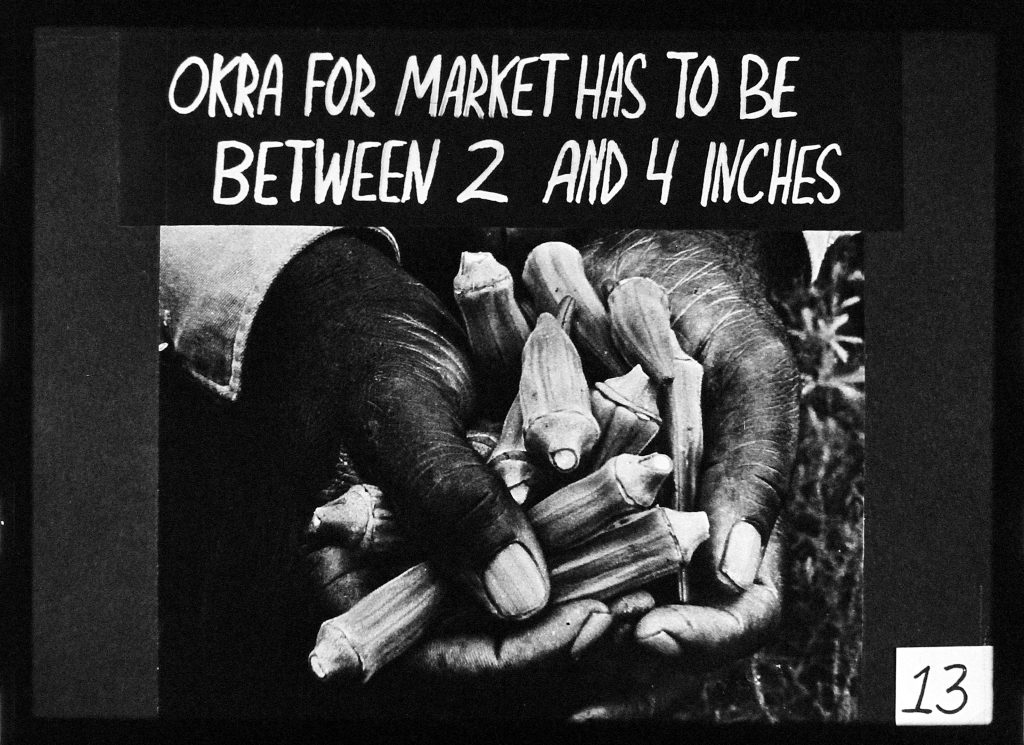
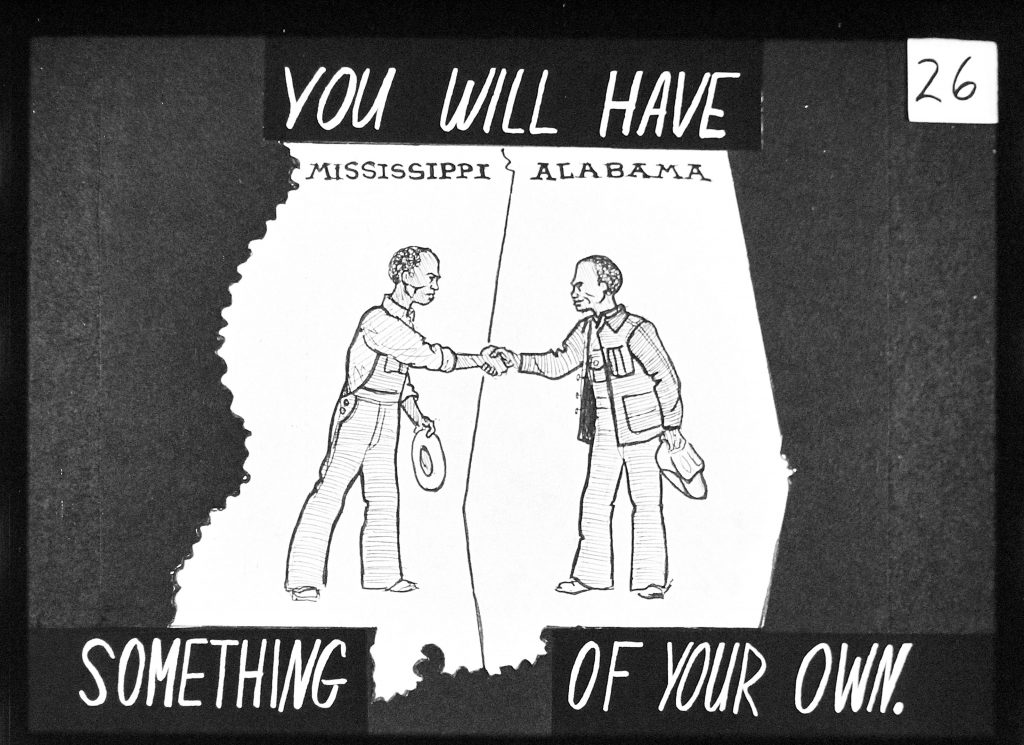
We completed a fair amount of folder-level digitization in recent years, especially between 2011-2014 as part of a collaborative TRLN Large-Scale Digitization IMLS grant project.  That initiative allowed us to experiment with shifting gears to get more digitized content online efficiently. We succeeded in that goal, however, those objects unfortunately never became accessible or discoverable outside of their lengthy, text-heavy archival collection guides (finding aids). They also lacked useful features such as zooming, downloading, linking, and syndication to other sites like DPLA. They were digital collections, but you couldn’t find or view them when searching and browsing digital collections.

Many of this week’s newly launched collections are composed of these digitized folders that were previously siloed off in finding aids. Now they’re finally fully integrated for preservation, discovery, and access alongside our other digital collections in the DDR. They remain viewable from within the finding aids and we link between the interfaces to provide proper context.

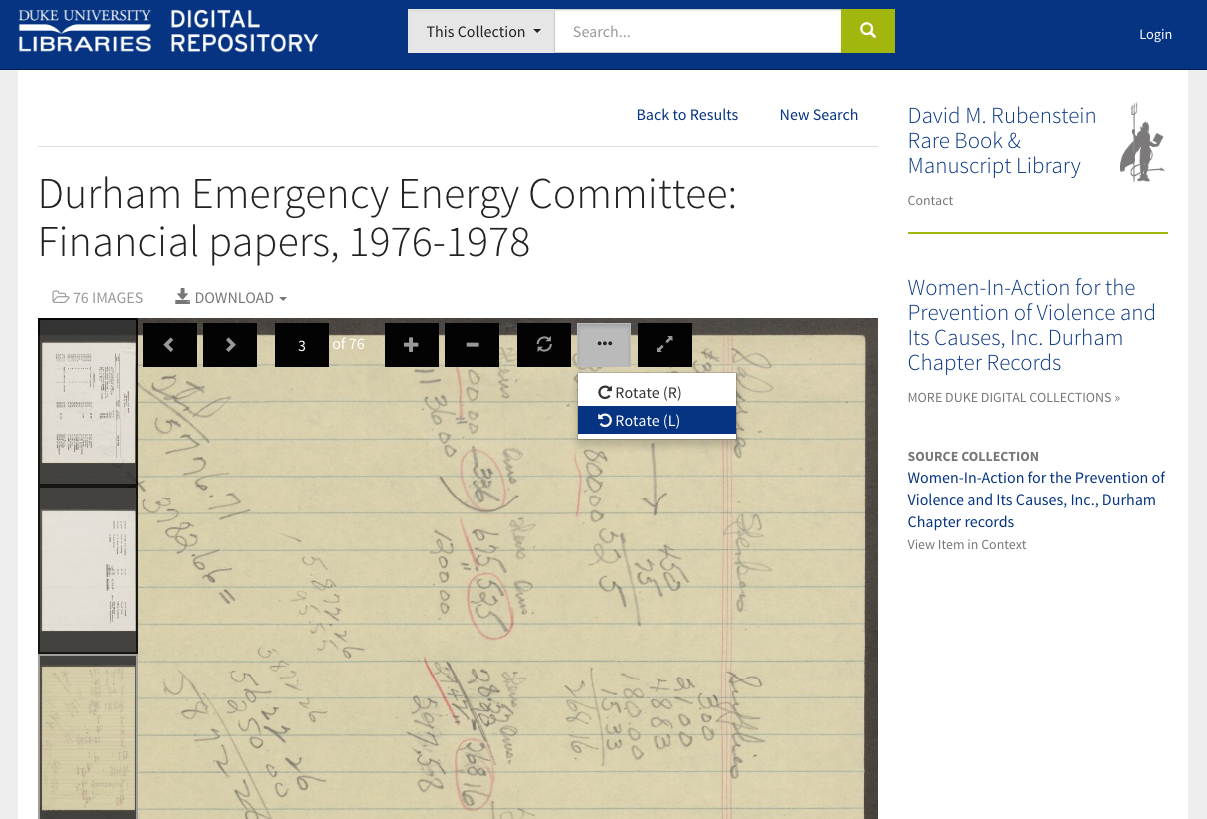
Keyboard Nav & Rotation

Two things are bound to increase when digitizing manuscripts en masse at the folder level: 1) the number of images present in any given “item” (folder); 2) the chance that something of interest within those pages ends up oriented sideways or upside-down. We’ve improved the UI a bit for these cases by adding full keyboard navigation and rotation options.

Rotate Image Feature
Rotation options in the image viewer. Navigate pages by keyboard (Page Up/Page Down on Windows, Fn+Up/Down on Mac).

Conclusion

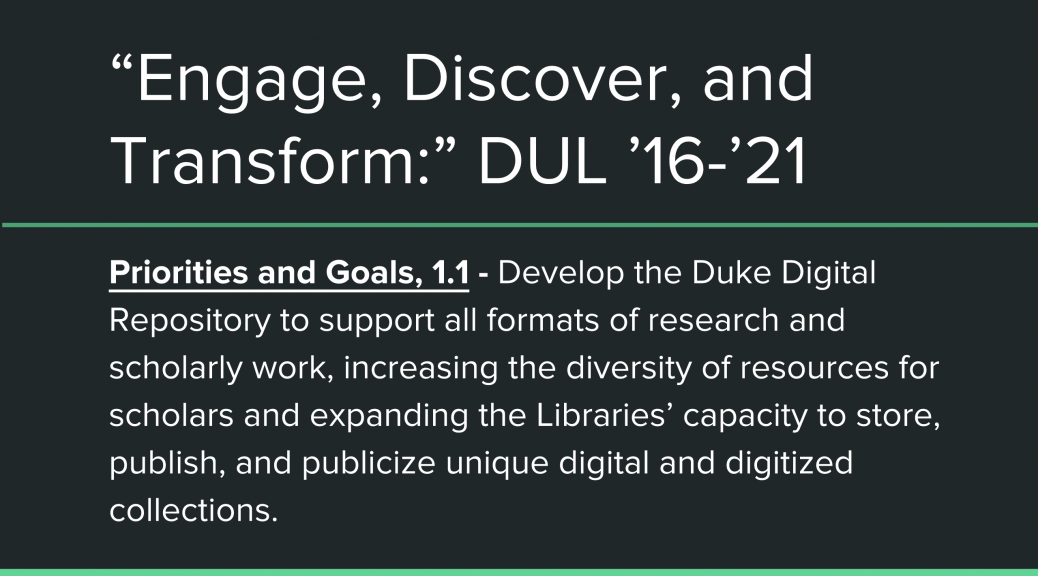
Duke Libraries’ digitization objectives are ambitious. Especially given both the quality and quantity of distinctive, world-class collections in the David M. Rubenstein Library, there’s a constant push to: 1) Go Faster, 2) Do More, 3) Integrate Everything, and 4) Make Everything Good. These needs are often impossibly paradoxical. But we won’t stop trying our best. Our team’s accomplishments this week feel like a positive step in the right direction.

Newly Available DDR Collections in Sept 2016

Getting Things Done in ArchivesSpace, or, Fun with APIs

aspace_iconMy work involves a lot of problem-solving and problem solving often requires learning new skills. It’s one of the things I like most about my job. Over the past year, I’ve spent most of my time helping Duke’s Rubenstein Library implement ArchivesSpace, an open source web application for managing information about archival collections.

As an archivist and metadata librarian by training (translation: not a programmer), I’ve been working mostly on data mapping and migration tasks, but part of my deep-dive into ArchivesSpace has been learning about the ArchivesSpace API, or, really, learning about APIs in general–how they work, and how to take advantage of them. In particular, I’ve been trying to find ways we can use the ArchivesSpace API to work smarter and not harder as the saying goes.

Why use the ArchivesSpace API?

Quite simply, the ArchivesSpace API lets you do things you can’t do in the staff interface of the application, especially batch operations.

So what is the ArchivesSpace API? In very simple terms, it is a way to interact with the ArchivesSpace backend without using the application interface. To learn more, you should check out this excellent post from the University of Michigan’s Bentley Historical Library: The ArchivesSpace API.

aspace_api_doc_example
Screenshot of ArchivesSpace API documentation showing how to form a GET request for an archival object record using the “find_by_id” endpoint

Working with the ArchivesSpace API: Other stuff you might need to know

As with any new technology, it’s hard to learn about APIs in isolation. Figuring out how to work with the ArchivesSpace API has introduced me to a suite of other technologies–the Python programming language, data structure standards like JSON, something called cURL, and even GitHub.  These are all technologies I’ve wanted to learn at some point in time, but I’ve always found it difficult to block out time to explore them without having a concrete problem to solve.

Fortunately (I guess?), ArchivesSpace gave me some concrete problems–lots of them.  These problems usually surface when a colleague asks me to perform some kind of batch operation in ArchivesSpace (e.g. export a batch of EAD, update a bunch of URLs, or add a note to a batch of records).

Below are examples of some of the requests I’ve received and some links to scripts and other tools (on Github) that I developed for solving these problems using the ArchivesSpace API.

ArchivesSpace API examples:

“Can you re-publish these 12 finding aids again because I fixed some typos?”

Problem:

I get this request all the time. To publish finding aids at Duke, we export EAD from ArchivesSpace and post it to a webserver where various stylesheets and scripts help render the XML in our public finding aid interface. Exporting EAD from the ArchivesSpace staff interface is fairly labor intensive. It involves logging into the application, finding the collection record (resource record in ASpace-speak) you want to export, opening the record, making sure the resource record and all of its components are marked “published,” clicking the export button, and then specifying the export options, filename, and file path where you want to save the XML.

In addition to this long list of steps, the ArchivesSpace EAD export service is really slow, with large finding aids often taking 5-10 minutes to export completely. If you need to post several EADs at once, this entire process could take hours–exporting the record, waiting for the export to finish, and then following the steps again.  A few weeks after we went into production with ArchivesSpace I found that I was spending WAY TOO MUCH TIME exporting and re-exporting EAD from ArchivesSpace. There had to be a better way…

Solution:

asEADpublish_and_export_eadid_input.py – A Python script that batch exports EAD from the ArchivesSpace API based on EADID input. Run from the command line, the script prompts for a list of EADID values separated with commas and checks to see if a resource record’s finding aid status is set to ‘published’. If so, it exports the EAD to a specified location using the EADID as the filename. If it’s not set to ‘published,’ the script updates the finding aid status to ‘published’ and then publishes the resource record and all its components. Then, it exports the modified EAD. See comments in the script for more details.

Below is a screenshot of the script in action. It even prints out some useful information to the terminal (filename | collection number | ASpace record URI | last person to modify | last modified date | export confirmation)

EAD Batch Export Script
Terminal output from EAD batch export script

[Note that there are some other nice solutions for batch exporting EAD from ArchivesSpace, namely the ArchivesSpace-Export-Service plugin.]

“Can you update the URLs for all the digital objects in this collection?”

Problem:

We’re migrating most of our digitized content to the new Duke Digital Repository (DDR) and in the process our digital objects are getting new (and hopefully more persistent) URIs. To avoid broken links in our finding aids to digital objects stored in the DDR, we need to update several thousand digital object URLs in ArchivesSpace that point to old locations. Changing the URLs one at a time in the ArchivesSpace staff interface would take, you guessed it, WAY TOO MUCH TIME.  While there are probably other ways to change the URLs in batch (SQL updates?), I decided the safest way was to, of course, use the ArchivesSpace API.

Digital Object Screenshot
Screenshot of a Digital Object record in ArchivesSpace. The asUpdateDAOs.py script will batch update identifiers and file version URIs based on an input CSV
Solution:

asUpdateDAOs.py – A Python script that will batch update Digital Object identifiers and file version URIs in ArchivesSpace based on an input CSV file that contains refIDs for the the linked Archival Object records. The input is a five column CSV file (without column headers) that includes: [old file version use statement], [old file version URI], [new file version URI], [ASpace ref_id], [ark identifier in DDR (e.g. ark:/87924/r34j0b091)].

[WARNING: The script above only works for ArchivesSpace version 1.5.0 and later because it uses the new “find_by_id” endpoint. The script is also highly customized for our environment, but could easily be modified to make other batch changes to digital object records based on CSV input. I’d recommend testing this in a development environment before using in production].

“Can you add a note to these 300 records?”

Problem:

We often need to add a note or some other bit of metadata to a set of resource records or component records in ArchivesSpace. As you’ve probably learned, making these kinds of batch updates isn’t really possible through the ArchivesSpace staff interface, but you can do it using the ArchivesSpace API!

Solution:

duke_archival_object_metadata_adder.py –  A Python script that reads a CSV input file and batch adds ‘repository processing notes’ to archival object records in ArchivesSpace. The input is a simple two-column CSV file (without column headers) where the first column contains the archival object’s ref_ID and the second column contains the text of the note you want to add. You could easily modify this script to batch add metadata to other fields.

duke_archival_object_metadata_adder
Terminal output of duke_archival_object_metadata_adder.py script

[WARNING: Script only works in ArchivesSpace version 1.5.0 and higher].

Conclusion

The ArchivesSpace API is a really powerful tool for getting stuff done in ArchivesSpace. Having an open API is one of the real benefits of an open-source tool like ArchivesSpace. The API enables the community of ArchivesSpace users to develop their own solutions to local problems without having to rely on a central developer or development team.

There is already a healthy ecosystem of ArchivesSpace users who have shared their API tips and tricks with the community. I’d like to thank all of them for sharing their expertise, and more importantly, their example scripts and documentation.

Here are more resources for exploring the ArchivesSpace API:

Research at Duke and the future of the DDR

The Duke Digital Repository (DDR) is a growing service, and the Libraries are growing to support it. As I post this entry, our jobs page shows three new positions comprising five separate openings that will support the DDR. One is a DevOps position which we have re-envisioned from a salary line that opened with a staff member’s departure. The other four consist of two new positions, with two openings for each, created to meet specific, emerging needs for supporting research data at Duke.

Last fall at Duke, the Vice Provosts for Research and the Vice President for Information Technology convened a Digital Research Faculty Working Group. It included a number of faculty members from around campus, as well as several IT administrators, the latter of whom served in an ex-officio capacity. The Libraries were represented by our Associate University Librarian for Information Technology, Tim McGeary (who happens to be my supervisor).

Membership of the Digital Research Faculty Group. This image and others in the post are slides taken from a presentation I gave to the Libraries’ all-staff meeting in August.

Continue reading Research at Duke and the future of the DDR

Developing the Duke Digital Repository is Messy Business

Let me tell you something people: Coordinating development of the Duke Digital Repository (DDR) is a crazy logistical affair that involves much ado about… well, everything!

My last post, What is a Repository?, discussed at a high level, what exactly a digital repository is intended to be and the purpose it plays in the Libraries’ digital ecosystem.  If we take a step down from that, we can categorize the DDR as two distinct efforts, 1) a massive software development project and 2) a complex service suite.  Both require significant project management and leadership, and necessitate tools to help in coordinating the effort.

There are many, many details that require documenting and tracking through the life cycle of a software development project.  Initially we start with requirements- meaning what the tools need to do to meet the end-users needs.  Requirements must be properly documented and must essentially detail a project management plan that can result in a successful product (the software) and the project (the process, and everything that supports success of the product itself).  From this we manage a ‘backlog’ of requirements, and pull from the backlog to structure our work.  Requirements evolve into tasks that are handed off to developers.  Tasks themselves become conversations as the development team determines the best possible approach to getting the work done.  In addition to this, there are bugs to track, changes to document, and new requirements evolving all of the time… you can imagine that managing all of this in a simple ‘To Do’ list could get a bit unwieldy.

overwhelmed-stickynotes-manager

We realized that our ability to keep all of these many plates spinning necessitated a really solid project management tool.  So we embarked on a mission to find just the right one!  I’ll share our approach here, in case you and your team have a similar need and could benefit from our experiences.

STEP 1: Establish your business case:  Finding the right tool will take effort, and getting buy-in from your team and organization will take even more!  Get started early with justifying to your team and your org why a PM tool is necessary to support the work.

STEP 2: Perform a needs assessment: You and your team should get around a table and brainstorm.  Ask yourselves what you need this tool to do, what features are critical, what your budget is, etc.  Create a matrix where you fully define all of these characteristics to drive your investigation.

STEP 3: Do an environmental scan: What is out there on the market?  Do your research and whittle down a list of tools that have potential.  Also build on the skills of your team- if you have existing competencies in a given tool, then fully flesh out its features to see if it fits the bill.

STEP 4:  Put them through the paces: Choose a select list of tools and see how they match up to you needs assessment.  Task a group of people to test-drive the tools, and report out on the experience.

STEP 5: Share your findings: Discuss the findings with your team.  Capture the highs and the lows and present the material in a digestible fashion.  If it’s possible to get consensus, make a recommendation.

STEP 6: Get buy-in: This is the MOST critical part!  Get buy-in from your team to implement the tool.  A PM tool can only benefit the team if it is used thoroughly, consistently, and in a team fashion.  You don’t want to deal with adverse reactions to the tool after the fact…

project-management

No matter what tool you choose, you’ll need to follow some simple guidelines to ensure successful adoption:

  • Once again… Get TEAM buy-in!
  • Define ownership, or an Admin, of the tool (ideally the Project Manager)
  • Define basic parameters for use and team expectations
  • PROVIDE TRAINING
  • Consider your ecosystem of tools and simplify where appropriate
  • The more robust the tool, the more support and structure will be required

Trust me when I say that this exercise will not let you down, and will likely yield a wealth of information about the tools that you use, the projects that you manage, your team’s preferences for coordinating the work, and much more!

The Return of the Filmstrip

The Student Nonviolent Coordinating Committee worked on the cutting edge. In the fight for Black political and economic power, SNCC employed a wide array of technology and tactics to do the work. SNCC bought its own WATS (Wide Area Telephone Service) lines, allowing staff to make long-distance phone calls for a flat rate. It developed its own research department, communications department, photography department, transportation bureau, and had network of supporters that spanned the globe. SNCC’s publishing arm printed tens of thousands of copies of The Student Voice weekly to hold mass media accountable to the facts and keep the public informed. And so, when SNCC discovered they could create an informational organizing tool at 10¢ a pop that showed how people were empowering themselves, they did just that.

SomethingOfOurOwnPartOne009

SNCC activist Maria Varela was one of the first to work on this experimental project to develop filmstrips. Varela had come into SNCC’s photography department through her interest in creating adult literacy material that was accessible, making her well-positioned for this type of work. On 35mm split-frame film, Varela and other SNCC photographers pieced together positives that told a story, could be wound up into a small metal canister, stuffed into a cloth drawstring, and attached to an accompanying script. Thousands of these were mailed out all across the South, where communities could feed them into a local school’s projector and have a meeting to learn about something like the Delano Grape Strike or the West Batesville Farmers Cooperative.

SomethingOfOurOwnPartOne014

Fifty years later, Varela, a SNCC Digital Gateway Visiting Documentarian, is working with us to digitize some of these filmstrips for publication on our website. Figuring out the proper way to digitize these strips took some doing. Some potential options required cutting the film so that it could be mounted. Others wouldn’t capture the slides in their entirety. We had to take into account the limitations of certain equipment, the need to preserve the original filmstrips, and the desire to make these images accessible to a larger public.

Ultimately, we partnered with Skip Elsheimer of A/V Geeks in Raleigh, who has done some exceptional work with the film. Elsheimer, a well-known name in the field, came into his line of work through his interest in collecting old 16mm film reels. As collection, equipment, and network expanded, Elsheimer turned to this work full-time, putting together and A/V archive of over 25,000 films in the back of his former residence.

SomethingOfOurOwnPartOne027

We’re very excited to incorporate these filmstrips into the SNCC Digital Gateway. The slides really speak for themselves and act as a window into the organizing tools of the day. They educated communities about each other and helped knit a network of solidarity between movements working to bring power to the people.  Stay tuned to witness this on snccdigital.org when our site debuts.

Nobody Wants a Slow Repository

As we’ve been adding features and refining the public interface to Duke’s Digital Repository, the application has become increasingly slow. Don’t worry, the very slowest versions were never deployed beyond our development servers. This blog post is about how I approached addressing the application’s performance problems before they made their way to our production site.

14729168562_ecc30e44d8_b
A modern web application, like the public interface to Duke’s Digital Repository, is a complex beast, relying on layers of software and services just to deliver a bunch of HTML, CSS, and JavaScript to your web browser. A page like this, the front page to the Alex Harris collection takes a lot to build — code to read configuration files, methods that assemble information needed to build the page, requests to Solr to find the images to display, requests to a separate administrative application service that provides contact information for the collection, another request to fetch related blog posts, and requests to our finding aid application to deliver information about the physical collection. All of these requests take time and all of them have to finish before anything gets delivered to your browser.

My main suspects for the slowness: HTTP requests to external services, such as the ones mentioned above; and repeated calls to slow methods in the application. But identifying precisely which HTTP requests are slow and what code needs to be optimized takes a bit of sleuthing.

The first thing I wanted to know was: how slow is this thing, really? Turns out it was getting getting really slow. Too slow. There’s old research (1960s old) about computer system performance and its impact on user perception and task performance that still applies today. This also old (1993 old) article from the Nielsen Norman Group summarizes the issue nicely.

To determine just how slow things were getting I used Chrome’s developer tools. The “Network” tab in Chrome’s developer tools is where the hard truth comes to light about just how bloated and slow your web application is. Or, as my high school teachers used to say when handing back test results: “read ’em and weep.”

network-panel-dev-tools

By using the Network tab in Browser Tools I was able to see that the browser was having to wait 15 or more seconds for anything to come back from the server. This is too slow.

The next thing I wanted to know was how many HTTP requests were being made to external services and which ones were being made repeatedly or were taking a long time. For this dose of reality I used the httplog gem, which logs useful information about every HTTP request, including how long the application has to wait for a response.

When added to the project’s Gemfile, httplog starts printing out useful information to the log about HTTP requests, such as this set of entries about the request to fetch finding aid information. I can see that the application is waiting over half a second to get a response back from the finding aid service:


D, [2016-08-06T12:51:09.531076 #2529] DEBUG -- : [httplog] Connecting: library.duke.edu:80
D, [2016-08-06T12:51:09.854003 #2529] DEBUG -- : [httplog] Sending: GET http://library.duke.edu:80/rubenstein/findingaids/harrisalex.xml
D, [2016-08-06T12:51:09.855387 #2529] DEBUG -- : [httplog] Data:
D, [2016-08-06T12:51:10.376456 #2529] DEBUG -- : [httplog] Status: 200
D, [2016-08-06T12:51:10.377061 #2529] DEBUG -- : [httplog] Benchmark: 0.520600972 seconds

As I expected, this request and many others were contributing significantly to the application’s slowness.

It was a bit harder to determine which parts of the code and which methods were also making the application slow. For this, I mainly used two approaches. The first was to look at the application logs which tracks how long different views take to assemble. This helped narrow down which parts of the code were especially slow (and also confirmed what I was seeing with httplog). For instance in the log I can see different partials that make up the whole page and how long each of them takes to assemble. From the log:


12:51:09 INFO: Rendered digital_collections/_home_featured_collections.html.erb (0.8ms)
12:51:09 INFO: Rendered digital_collections/_home_highlights.html.erb (1.3ms)
12:51:10 INFO: Rendered catalog/_show_finding_aid_full.html.erb (953.4ms)
12:51:11 INFO: Rendered catalog/_show_blog_post_feature.html.erb (0.9ms)
12:51:11 INFO: Rendered catalog/_show_blog_posts.html.erb (914.5ms)

(The finding aid and blog posts are slow due to the aforementioned HTTP requests.)

widget2

One particular area of concern was extremely slow searches. To identify the problem I turned to yet another tool. Rack-mini-profiler is a gem that when added to your project’s Gemfile adds an expandable tab on every page of the site. When you visit pages of the application in a browser it displays a detailed report of how long it takes to build each section of the page. This made it possible to narrow down areas of the application that were too slow.

search_results

What I found was that the thumbnail section of the page — which can appear up to twenty times or more on a search result page was very slow. And it wasn’t loading the images that was slow but running the code to select the correct thumbnail image took a long time to run. (Thumbnail selection is complicated in the repository because there are various types and sources for thumbnails.)

Having identified several contributors to the site’s poor performance (expensive thumbnail selection, and frequent and costly HTTP requests to various services) I could now work to address each of the issues.

I used three different approaches to improving the application’s performance: fragment caching, memoization, and code optimization.

Caching

finding_aid

I decided to use fragment caching to address the slow loading of finding aid information. The benefit of caching is that it’s really fast. Once Rails has the snippet of HTML cached (either in memory or on disk, depending on how it’s configured) it can use that fragment of cached markup, bypassing a lot of code and, in this case, that slow HTTP request. One downside to caching is that if something in the finding aid changes the application won’t reflect the change until the cache is cleared or expires (after 7 days in this case).


<% cache("finding_aid_brief_#{document.ead_id}", expires_in: 7.days) do %>
<%= source_collection({ :document => document, :placement => 'left' }) %>
<% end %>

Memoization

Memoization is similar to caching in that you’re storing information to be used repeatedly rather then recalculated every time. This can be a useful technique to use with expensive (slow) methods that get called frequently. The parent_collection_count method returns the total number of collections in a portal in the repository (such as the Digital Collections portal). This method is somewhat expensive because it first has to run a query to get information about all of the collections and then count them. Since this gets used more than once, I’m using Ruby’s conditional assignment operator (||=) to tell Ruby not to recalculate the value of @parent_collection_count every time the method is called. With memoization, if the value is already stored Ruby just reuses the previously calculated value. (There are some gotchas with this technique, but it’s very useful in the right circumstances.)


def parent_collections_count
@parent_collections_count ||= response(parent_collections_search).total
end

Code Optimization

One of the reasons thumbnails were slow to load in search results is that some items in the repository have hundreds of images. The method used to find the thumbnail path was loading image path information for all the item’s images rather than just the first one. To address this I wrote a new method that fetches just the item’s first image to use as the item’s thumbnail.

Combined, these changes made a significant improvement to the site’s performance. Overall application speed and performance will remain one of our priorities as we add features to the Duke Digital Repository.

What is a Repository?

We’ve been talking a lot about the Repository of late, so I thought it might be time to come full circle and make sure we’re all on the same page here…. What exactly is a Repository?

A Repository is essentially a digital shelf.  A really, really smart shelf!

It’s the place to safely and securely store digital assets of a wide variety of types for preservation, discovery, and use, though not all materials in the repository may be discoverable or accessible by everyone.  So, it’s like a shelf.  Except that this shelf is designed to help us preserve these materials and try to ensure they’ll be usable for decades.  

bookshelf-organization

This shelf tells us if the materials on it have changed in any way.  They tell us when the materials don’t conform to the format specification that describes exactly how a file format is to be represented.  These shelves have very specific permissions, a well thought out backup procedure to several corners of the country, a built-in versioning system to allow us to migrate endangered or extinct formats to new, shiny formats, and a bunch of other neat stuff.

The repository is the manifestation of a conviction about the importance of an enduring scholarly record and open and free access to Duke scholarship.  It is where we do our best to carve our knowledge in stone for future generations.  

Why? is perhaps the most important question of all.  There are several approaches to Why?  National funding agencies (NIH, NSF, NEH, etc) recognize that science is precariously balanced on shoddy data management practices and increasingly require researchers to deposit their data with a reputable repository.  Scholars would like to preserve their work, make it accessible to everyone (not just those who can afford outrageously priced journal subscriptions), and want to increase the reach and impact of their work by providing stable and citable DOIs.  

Students want to be able to cite their own thesis, dissertations, and capstone papers and to have others discover and cite them.  The Library wants to safeguard its investment in digitization of Special Collections.  Archives needs a place to securely store university records.

huge.6.33561

A Repository, specifically our Duke Digital Repository, is the place to preserve our valuable scholarly output for many years to come.  It ensures disaster recovery, facilitates access to knowledge, and connects you with an ecosystem of knowledge.

Pretty cool, huh?!

Lessons Learned from the Duke Chapel Recordings Project

Although we launched the Duke Chapel Recordings Digital Collection in April, work on the project has not stopped.  This week I finally had time to pull together all our launch notes into a post mortem report, and several of the project contributors shared our experience at the Triangle Research Libraries Network (TRLN) Annual meeting.  So today I am going to share some of the biggest lessons learned that fueled our presentation, and provide some information and updates about the continuing project work.  

Chapel Recordings Digital Collection landing page

Just to remind you, the Chapel Recordings digital collection features recordings of services and sermons given in the chapel dating back to the mid 1950s.  The collection also includes a set of written versions of the sermons that were prepared prior to the service dating back to the mid 1940s.

What is Unique about the Duke Chapel Recordings Project?

All of our digital collections projects are unique, but the Chapel Recordings had some special challenges that raised the level of complexity of the project overall.   All of our usual digital collections tasks (digitization, metadata, interface development) were turned up to 11 (in the Spinal Tap sense) for all the reasons listed below.

  • More stakeholders:  Usually there is one person in the library who champions a digital collection, but in this case we also had stakeholders from both the Chapel and the Divinity School who applied for the grant to get funding to digitize.  The ultimate goal for the collection is to use the recordings of sermons as a homiletics teaching tool.  As such they continue to create metadata for the sermons, and use it as a resource for their homiletics communities both at Duke and beyond.
  • More formats and data:  we digitized close to 1000 audio items, around 480 video items and 1300 written sermons.  That is a lot of material to digitize!  At the end of the project we had created 58 TB of data!!  The data was also complex; we had some sermons with just a written version, some with written, audio, and video versions and every possible combination in between.  Following digitization we had to match all the recordings and writings together as well as clean up metadata and file identifiers.  It was a difficult, time-consuming, and confusing process.
  • More vendors:  given the scope of digitization for this project we outsourced the work to two vendors.  We also decided to contract with a  vendor for transcription and closed captioning.  Although this allowed our Digital Production Center to keep other projects and digitization pipelines moving, it was still a lot of work to ship batches of material, review files, and keep in touch throughout the process.
  • More changes in direction:  during the implementation phase of the project we made 2 key decisions which elevated the complexity of our project.  First, we decided to launch the new material in the new Digital Repository platform.  This meant we basically started from scratch in terms of A/V interfaces, and representing complex metadata.  Sean, one of our digital projects developers, talked about that in a past blog post and our TRLN presentation. Second, in Spring of 2015 colleagues in the library started thinking deeply about how we could make historic A/V like the Chapel Recordings more accessible through closed captions and transcriptions.  After many conversations both in the library and with our colleagues in the Chapel and Divinity, we decided that the Chapel Recordings would be a good test case for working with closed captioning tools and vendors.  The Divinity School graciously diverted funds from their Lilly Endowment grant to make this possible.  This work is still in the early phases, and we hope to share more information about the process in an upcoming blog post.


Duke Chapel Recordings project was made possible by a grant from the Lilly Endowment.

Lessons learned and re-learned

As with any big project that utilizes new methods and technology, the implementation team learned a lot.  Below are our key takeaways.

  • More formal RFP / MOU:  we had invoices, simple agreements, and were in constant communication with the digitization vendors, but we could have used a more detailed MOU defining vendor practices at a more detailed level.  Not every project requires this kind of documentation, but a project of this scale with so many batches of materials going back and forth would have benefitted from a more detailed agreement.
  • Interns are the best:  University Archives was able to redirect intern funding to digital collections, and we would not have finished this project (or the Chronicle) with any sanity left if not for our intern.  We have had field experience students, and student workers, but it was much more effective to have someone dedicated to the project throughout the entire digitization and launch process. From now on, we will include interns in any similar grant funded project.
  • Review first – digitize 2nd:  this is definitely a lesson we re-learned for this project.  Prior to digitization, the collection was itemized and processed and we thought we were ready to roll.  However there were errors that would have been easier to resolve had we found them prior to digitization.  We also could have gotten a head start on normalizing data, and curating the collection had we spent more time with the inventory prior to digitization.
  • Modeling and prototypes:  For the last few years we have been able to roll out new digital collections through an interface that was well known, and very flexible.  However we developed Chapel Recordings in our new interface, and it was a difficult and at times confusing process. Next time around, we plan to be more proactive with our modeling and prototyping the interface before we implement it.  This would have saved both the team and our project stakeholders time, and would have made for less surprises at the end of the launch process.

Post Launch work

The Pop Up Archive editing interface.

As I mentioned at the top of this blog post, Chapel Recordings work continues.  We are working with Pop Up Archive to transcribe the Chapel Recordings, and there is a small group of people at the Divinity School who are currently in the process of cleaning up transcripts specifically for the sermons themselves.  Eventually these transcriptions will be made available in the Chapel Recordings collection as closed captions or time synced transcripts or in some other way.  We have until December 2019 to plan and implement these features.

The Divinity School is also creating specialized metadata that will help make the the collection a more effective homiletics teaching tool.  They are capturing specific information from the sermons (liturgical season, bible chapter and verse quoted), but also applying subject terms from a controlled list they are creating with the help of their stakeholders and our metadata architect.  These terms are incredibly diverse and range from LCSH terms, to very specific theological terms (ex, God’s Love), to current events (ex, Black Lives Matter), to demographic-related terms (ex, LGBTQ) and more.  Both the transcription and enhanced metadata work is still in the early phases, and both will be integrated into the collection sometime before December 2019.  

The team here at Duke has been both challenged and amazed by working with the Duke Chapel Recordings.  Working with the Divinity School and the Chapel has been a fantastic partnership, and we look forward to bringing the transcriptions and metadata into the collection.  Stay tuned to find out what we learn next!

Typography (and the Web)

This summer I’ve been working, or at least thinking about working, on a couple of website design refresh projects. And along those lines, I’ve been thinking a lot about typography. I think it’s fair to say that the overwhelming majority of content that is consumed across the Web is text-based (despite the ever-increasing rise of infographics and multimedia). As such, typography should be considered one of the most important design elements that users will experience when interacting with a website.

CIT Site
An early mockup of the soon-to-be-released CIT design refresh

Early on, Web designers were restricted to using certain ‘stacks’ of web-safe fonts that would hunt through the list of those available on a user’s computer until it found something compatible. Or worst-case, the page would default to using the most basic system ‘sans’ or ‘serif.’ So type design back then wasn’t very flexible and could certainly not be relied upon to render consistently across browsers or platforms. Which essentially resulted in most website text looking more or less the same. In 2004, some very smart people released sIFR which was a flashed-based font replacement technique. It ushered in a bit of a typography renaissance and allowed designers to include almost any typeface they desired into their work with the confidence that the overwhelming majority of users would see the same thing, thanks largely to the prevalence of the (now maligned) Flash plugin.

Right before Steve Jobs fired the initial shot that would ultimately lead to the demise flash, an additional font replacement technique, named Cufon, was released to the world. This approach used Scalable Vector Graphics and Javascript (instead of flash) and was almost universally compatible across browsers. Designers and developers were now very happy as they could use non-standard type faces in their work without relying on Flash.

More or less in parallel with the release of Cufon came the widespread adoption across browsers for the @font-face rule. This allowed developers to load fonts from a web server and have them render on a page, instead of relying on the local fonts a user had installed. In mid to late 2009, services like Typekit, League of Moveable Type, and Font Squirrel began to appear. Instead of outrightly selling licenses to fonts, Typekit worked on a subscription model and made various sets of fonts available for use both locally with design programs and for web publishing, depending on your membership type. [Adobe purchased Typekit in late 2011 and includes access to the service via their Creative Cloud platform.] LoMT and Font Squirrel curate freeware fonts and makes it easy to download the appropriate files and CSS code to integrate them into your site.  Google released their font service in 2010 and it continues to get better and better. They launched an updated version a few weeks ago along with this promo video:

There are also many type foundries that make their work available for use on the web. A few of my favorite font retailers are FontShop, Emigre, and Monotype. The fonts available from these ‘premium’ shops typically involve a higher degree of sophistication, more variations of weight, and extra attention to detail — especially with regard to things like kerning, hinting, and ligatures. There are also many interesting features available in OpenType (a more modern file format for fonts) and they can be especially useful for adding diversity to the look of brush/script fonts. The premium typefaces usually incorporate them, whereas free fonts may not.

Modern web conventions are still struggling with some aspects of typography, especially when it comes to responsive design. There are many great arguments about which units we should be using (viewport, rem/em, px) and how they should be applied. There are calculators and libraries for adjusting things like size, line length, ratios, and so on. There are techniques to improve kerning. But I think we have yet to find a standard, all-in-one solution — there always seems to be something new and interesting available to explore, which pretty much underscores the state of Web development in general.

Here are some other excellent resources to check out:

I’ll conclude with one last recommendation — the Introduction to Typography class on Coursera. I took it for fun a few months ago. It seemed to me that the course is aimed at those who may not have much of a design background, so it’s easily digestible. The videos are informative, not overly complex, and concise. The projects were fun to work on and you end up getting to provide feedback on the work of your fellow classmates, which I think is always fun. If you have an hour or two available for four weeks in a row, check it out!

Notes from the Duke University Libraries Digital Projects Team