All posts by Mike Adamo

A simple tool with a lot of power: Project Estimates

It takes a lot to build and publish digital collections as you can see from the variety and scope of the blog posts here on Bitstreams.  We all have our internal workflows and tools we use to make our jobs easier and more efficient.  The number and scale of activities going on behind the scenes is mind-boggling and we would never be able to do as much as we do if we didn’t continually refine our workflows and create tools and systems that help manage our data and work.  Some of these tools are big, like the Duke Digital Repository (DDR), with its public, staff and backend interface used to preserve, secure, and provide access to digital resources, while others are small, like scripts built to transform ArchiveSpace output into a starter digitization guides.  In the Digital Production Center (DPC) we use a homegrown tool that not only tracks production statistics but is also used to do project projections and to help isolate problems that occur during the digitization process.  This tool is a relational database that is affectionately named the Daily Work Report and has collected over 9 years of data on nearly every project in that time.

A long time ago, in a newly minted DPC, supervisors and other Library staff often asked me, “How long will that take?”, “How many students will we need to digitize this collection?”, “What will the data foot print of this project be?”, “How fast does this scanner go?”, “How many scans did we do last year?”, “How many items is that?”.  While I used to provide general information and anecdotal evidence to answer all of these questions, along with some manual hunting down of this information, it became more and more difficult to answer these questions as the number of projects multiplied, our services grew, the number of capture devices multiplied and the types of projects grew to include preservation projects, donor requests, patron request and exhibits.  Answering these seemingly simple questions became more complicated and time consuming as the department grew.  I thought to myself, I need a simple way to track the work being done on these projects that would help me answer these recurring common questions.

We were already using a FileMaker Pro database with a GUI interface as a checkout system to assign students batches of material to scan, but it was only tracking what student worked on what material.  I decided I could build out this concept to include all of the data points needed to answer the questions above.  I decided to use Microsoft Access because it was a common tool installed on every workstation in the department, I had used it before, and classes and instructional videos abound if I wanted to do anything fancy.

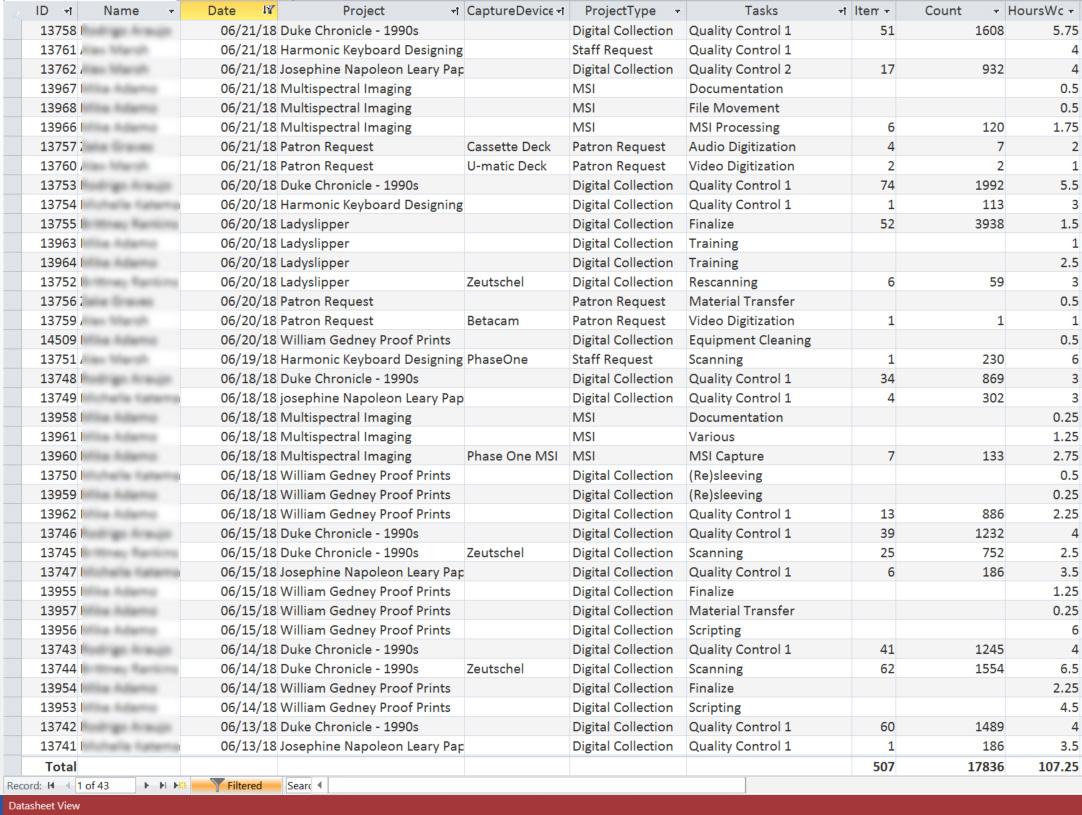
Enter the Daily Work Report (DWR).  I created a number of discrete tables to hold various types of data: project names, digitization tasks, employee names and so on.  These fields are connected to a datasheet represented as a form, which allowed for dropdown lists and auto filling for rapid and consistent entry of information. 

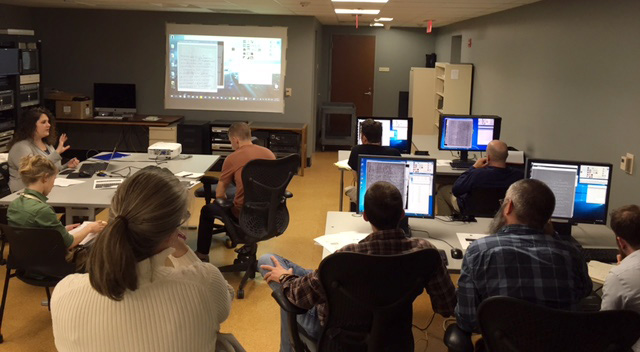
At the end of each shift students and professionals alike fill out the DWR for each task they performed on each project and how long they worked on each task.  These range from the obvious tasks of scanning and quality control to more minute tasks of derivative creation, equipment cleaning, calibration, documentation, material transfer, file movement, file renaming, ingest prep, and ingest.

Some of these tasks may seem minor and possibly too insignificant to record but they add up.  They add up to ~30% of the time it takes to complete a project.   When projecting the time it will take to complete a project we collect Scanning and Quality Control data from a similar project, calculate the time and add 30%.

Common Digitization Tasks

Task
Hours Overall % of project
Scanning 406.5 57.9
Quality Control 1 133 19
Running Scripts 24.5 3.5
Collection Analysis 21 3
Derivative Creation 20.5 2.9
File Renaming 15.5 2.2
Material Transfer 14 2
Testing 12.5 1.8
Documentation 10 1.4
File Movement 9.75 1.4
Digitization Guide 7 1
Quality Control 2 6.75 1
Training 6 0.9
Quality Control 3 5.5 0.9
Stitching 3 0.4
Rescanning 1.5 0.2
Finalize 1.5 0.2
Troubleshooting 1.5 0.2
Conservation Consultation 1 0.1
Total 701 100

New Project Estimates

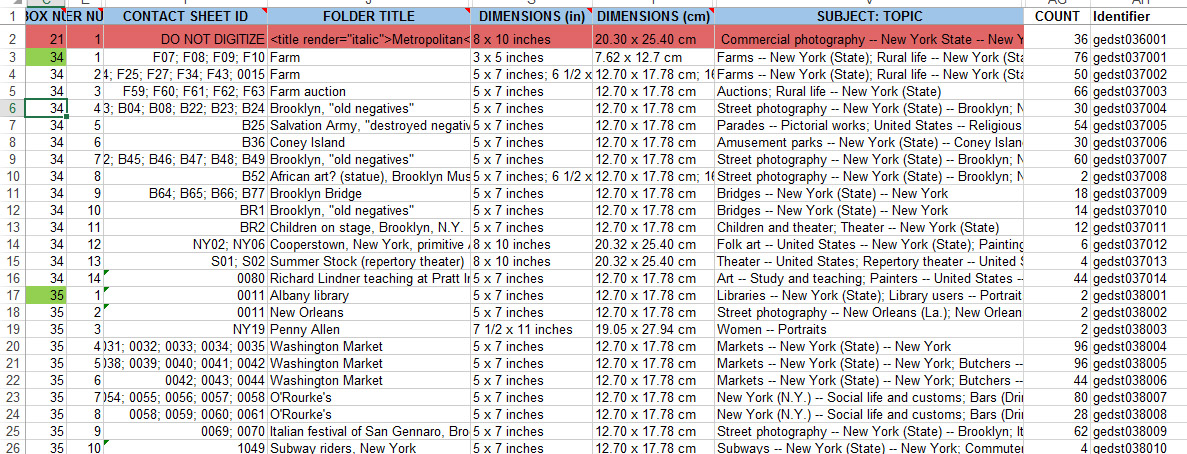
Using the Daily Work Report’s Datasheet View, the database can be filtered by project, then by the “Scanning” task to get the total number of scans and the hours worked to complete those scans.  The same can be done for the Quality Control task.  With this information the average number of scans per hour can be calculated for the project and applied to the new project estimate.

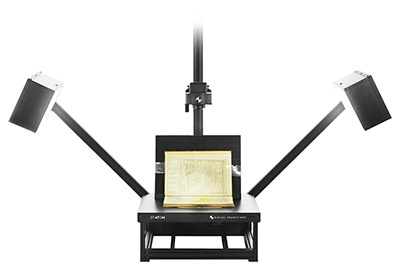
Gather information from an existing project that is most similar to the project you are creating the estimate for.  For example, if you need to develop an estimate for a collection of bound volumes that will be captured on the Zeutschel you should find a similar collection in the DWR to run your numbers.

Gather data from an existing project:

Scanning

  • Number of scans = 3,473
  • Number of hours = 78.5
  • 3,473/78.5 = 2/hr

Quality Control

  • Number of scans = 3,473
  • Number of hours = 52.75
  • 3,473/52.75 = 8/hr

Apply the per hour rates to the new project:

Estimated number of scans: 7,800

  • Scanning: 7,800 / 44.2/hr = 176.5 hrs
  • QC: 7,800 / 68.8/hr = 113.4 hrs
  • Total: 290 hrs
  • + 30%: 87 hrs
  • Grand Total: 377 hrs

Rolling Production Rate

When an update is required for an ongoing project the Daily Work Report can be used to see how much has been done and calculate how much longer it will take.  The number of images scanned in a collection can be found by filtering by project then by the “Scanning” Task.  That number can then be subtracted from the total number of scans in the project.  Then, using a similar project to the one above you can calculate the production rate for the project and estimate the number of hours it will take to complete the project.

Scanning

  • Number of scans in the project = 7,800
  • Number of scans completed = 4,951
  • Number of scans left to do = 7,800 – 4,951 = 2,849

Scanning time to completion

  • Number of scans left = 2,849
  • 2,849/42.4/hr = 2 hrs

Quality Control

  • Number of files to QC in the project = 7,800
  • Number of files completed = 3,712
  • Number of files left to do = 7,800 – 3,712 = 4,088

QC hours to completion

  • Number of scans left to scan = 4,088
  • 4,088/68.8 = 4 hrs

The amount of time left to complete the project

  • Scanning – 67.2 hrs
  • Quality Control – 59.4 hrs
  • Total = 126.2 hrs
  • + 30% = 38
  • Grand Total = 164.2 hrs

Isolate an error

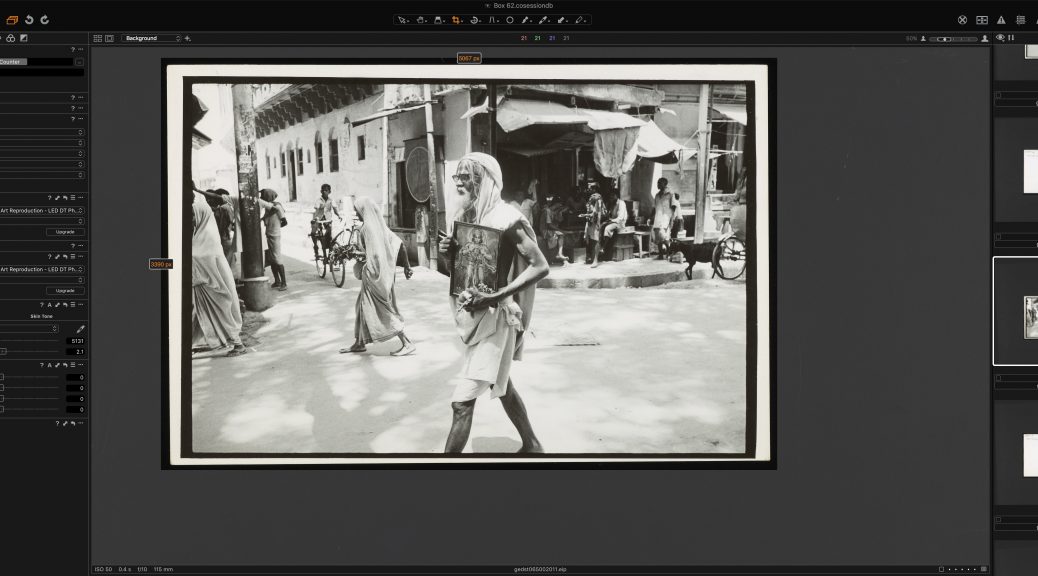
Errors inevitably occur during most digitization projects.  The DWR can be used to identify how widespread the error is by using a combination of filtering, the digitization guide (which is an inventory of images captured along with other metadata about the capture process), and inspecting the images.  As an example, a set of files may be found to have no color profile.  The digitization guide can be used to identify the day the erroneous images were created and who created them. The DWR can be used to filter by the scanner operator and date to see if the error is isolated to a particular person, a particular machine or a particular day.  This information can then be used to filter by the same variables across collections to see if the error exists elsewhere.  The result of this search can facilitate retraining, recalibrating of capture devices and also identify groups of images that need to be rescanned without having to comb through an entire collection.

While I’ve only touched on the uses of the Daily Work Report, we have used this database in many different ways over the years.  It has continued to answer those recurring questions that come up year after year.  How many scans did we do last year?  How many students worked on that multiyear project?  How many patron requests did we complete last quarter?  This database has helped us do our estimates, isolate problems and provide accurate updates over the years.  For such a simple tool it sure does come in handy.

Digitization Details: The Process of Digitizing a Collection

About four and a half years ago I wrote a blog post here on Bitstreams titled: “Digitization Details: Before We Push the “Scan” Button” in which I wrote about how we use color calibration, device profiling and modified viewing environments to produce “consistent results of a measurable quality” in our digital images.  About two and a half years ago, I wrote a blog post adjacent to that subject titled “The FADGI Still Image standard: It isn’t just about file specs” about the details of the FADGI standard and how its guidelines go beyond ppi and bit depth to include information about UV light, vacuum tables, translucent material, oversized material and more.  I’m surprised that I have never shared the actual process of digitizing a collection because that is what we do in the Digital Production Center.

Building digital collections is a complex endeavor that requires a cross-departmental team that analyzes project proposals, performs feasibility assessments, gathers project requirements, develops project plans, and documents workflows and guidelines in order to produce a consistent and scalable outcome in an efficient manner.  We call our cross-departmental team the Digital Collections Implementation Team (DCIT) which includes representatives from the Conservation staff, Technical Services, Digital Production, Metadata Architects and Digital Collections UI developers, among others.  By having representatives from each department participate, we are able to consider all perspectives including the sticking points, technical limitations and time constraints of each department. Over time, our understanding of each other’s workflows and sticking points has enabled us to refine our approach to efficiently hand off a project between departments.

I will not be going into the details of all the work other departments contribute to building digital collections (you can read just about any post on the blog for that). I will just dip my toe into what goes on in the Digital Production Center to digitize a collection.

Digitization

Once the specifics of a project are nailed down, the scope of the project has been finalized, the material has been organized by Technical Services, Conservation has prepared the material for digitization, the material has been transferred to the Digital Production Center and an Assessment Checklist is filled out describing the type, condition, size and number of items in a collection, we are ready to begin the digitization process.

Digitization Guide
A starter digitization guide is created using output from ArchivesSpace and the DPC adds 16-20 fields to capture technical metadata during the digitization process. The digitization guide is an itemized list representing each item in a collection and is centrally stored for ease of access. 

Setup
Cameras and monitors are calibrated with a spectrometer.  A color profile is built for each capture device along with job settings in the capture software. This will produce consistent results from each capture device and produce an accurate representation of any items captured which in turn removes subjective evaluation from the scanning process.

Training
Instructions are developed describing the scanning, quality control, and handling procedures for the project and students are trained.

Scanning
Following instructions developed for each collection, the scanner operator will use the appropriate equipment, settings and digitization guide to digitize the collection.  Benchmark tests are performed and evaluated periodically during the project. During the capture process the images are monitored for color fidelity and file naming errors. The images are saved in a structured way on the local drive and the digitization guide is updated to reflect the completion of an item.   At the end of each shift the files are moved to a production server.

Quality Control 1
The Quality Control process is different depending on the device with which an item was captured and the nature of the material.  All images are inspected for:  correct file name, skew, clipping, banding, blocking, color fidelity, uniform crop, and color profile.  The digitization guide is updated to reflect the completion of an item.

Quality Control 2
Images are cropped (leaving no background) and saved as JPEGs for online display.  During the second pass of quality control each image is inspected for: image consistency from operator to operator and image to image, skew and other anomalies.

Finalize
During this phase we compare the digitization guide against the item and file counts of the archival and derivative images on our production server.   Discrepancies such as missing files, misnamed files and missing line items in the digitization guide and are resolved.

Create Checksums and dark storage
We then create a SHA1 checksum for each image file in the collection and push the collection into a staging area for ingest into the repository.

Sometimes this process is referred to simply as “scanning”.

Not only is this process in active motion for multiple projects at the same time, the Digital Production Center also participates in remediation of legacy projects for ingest into the Duke Digital Repository, multispectral imaging, audio digitization and video digitization for, preservation, patron and staff requests… it is quite a juggling act with lots of little details but we love our work!

Time to get back to it so I can get to a comfortable stopping point before the Thanksgiving break!

Woman: The World Over

An amazing collection of lantern slides depicting women from nations around the world. At first glance, the women in these portraits seem like other portraits of the time, generally nondescript portraits of people at some random moment in time.  But upon closer inspection, and with the use of an accompanying lecture booklet, a much deeper picture is painted of the lives of these women.

Women: The World Over is a commercially-produced set of slides created by the European firm Riley Brothers in Bradford, England in 1901 that boasts a catalogue of 1,500 slide sets for sale or hire with lecture-format captions. These slides include women of different classes, working in agricultural, service, and industrial settings with lecture notes that refer to problematic social conditions for women, particularly regarding marriage, and changing social norms as the 20th century begins.

These lantern slides are part of the Lisa Unger Baskin Collection, a large collection with a common thread of revealing the often hidden role of women working and being productive throughout history.  The slides  will be a part of the exhibition, 500 Years of Women’s Work: the Lisa Unger Baskin Collection on display from March 5-June 15, 2019 in the Biddle Rare Book Room, Stone Family Gallery, and History of Medicine Room.

Included with the images below are transcriptions from the lecture booklet that accompanies this set of slides and contain views of the time and the author’s opinion.

“Arab women. Here we have some city Arab women coming from the well. These women are always veiled in public, the long black veil extending from their eyes down to their waist, and sometimes to their feet. Between their eyes, and stretching upwards to their foreheads, is a curious brass ornament resembling three stout thimbles, one on top of another. This serves a double purpose­ to act as an ornament, and to still further conceal the features. The rest of the figure is enveloped in a long gown with very wide sleeves. No one can fail to be struck with the upright walk of the women in Egypt, and some say it is due to their habit of carrying heavy weights on their heads, which renders it necessary to walk very erect and firmly.”
“Market Women, Madeira. We are now in sunny Madeira, where a group of market women await our notice. The streets of Funchal are always bright and busy. Sledges laden with sugar cane, barrels of wine or luggage, and drawn by oxen, dispute the road with hammock bearers and porters of all descriptions. But the gaily dressed women and girls who hasten about with heavy loads upon their backs, and with bright coloured handkerchiefs upon their heads, are the most interesting sight. Baskets of fruit and vegetables are their commonest burdens, and very picturesque the groups look, whether they are standing at the street corner discussing the rise and fall in prices, or seated upon the ground as in the present instance, or walking slowly homewards in the cool of the day. They are a pleasant folk, and live a life of comparative freedom and pleasure.”
“Hulling Rice in the Philippines. Here we have come across some Philippine women engaged in hulling rice. There are immense rice fields in all parts of the island which give employment to thousands of people. Rice is their staple food and the home product is not yet sufficient for the home consumption. A family of five persons will consume about 250 lbs. of rice per month. No rice husking or winnowing machines are in use, save small ones for domestic purposes The grain is usually husked in a large hard-wood mortar, where it is beaten with a pestle, several women, and sometimes men working over one mortar.”
“Haymaking in Russian. Then we all know that woman from the earliest recorded times has been employed in harvest operations, and has been at home in the field of peace. This seems fitting work for women, and work which she seems always willing to undertake.
The picture introduces us to a Russian haymaker, whose garment is of the most striking colours, and whose frame is built for hard work. The Russian peasantry of her class are a cheerful and contented folk, courteous to strangers, but not too friendly to soap the water.”

All 48 slides and the accompanying booklet will be published on the Digital Collections website later this year, included in the exhibit mentioned above and will also be traveling to the Grolier Club in New York city in December of 2019.  Keep an eye out for them!


Catalog Record: https://search.library.duke.edu/search?id=DUKE008113723

Finding Aid: https://library.duke.edu/rubenstein/findingaids/womantheworldover/

Hugh Mangum, Family and 100 years

What could me growing up in South West Virginia have to do with an itinerant photographer from Durham who was born in 1877?  His name was Hugh Mangum and he had a knack for bringing out the personalities of his subjects when, at the time, most photographs depict stiff and stoic people similar to the photograph below.

Hugh Mangum N475

We all have that family photo, taken with siblings, cousins or friends, that captures a specific time in our life or a specific feeling where you think to yourself “look at us” and just shake your head in amazement.  These photographs trigger memories that trigger other memories.  The photo below is that for me.  These are my siblings and cousins at my grandparents’ house in the early 90’s.  My siblings and I grew up on the same street as my grandparents and my cousins in the town of Blacksburg Virginia.  It seemed like we were always together but oddly there are very few pictures of all of us in one shot.

Adamo siblings and cousins circa 1990.

Even though this photograph was taken only a few decades ago a lot has changed in the lives of everyone in this photograph and also in the world of photography.  This picture was taken using ‘traditional’ film where, after taking the picture, you had to rewind the film, drop it off at the Fotomat to get your film processed and prints made before you could even see the images! We never knew if we had a “good” shot until days, sometimes weeks after an event.

Here is where my path intersects with Hugh Mangum.  We recently digitized some additional glass plate negatives from the Hugh Mangum collection.  Hugh was an itinerant photographer that traveled throughout North Carolina, Virginia and West Virginia.  In Virginia he traveled to Christiansburg, Radford and Roanoke.  These cities surround my hometown on three sides (respectively 8, 15 and 38 miles away).  These images were taken from 1890 to 1922.  This would put him in the area about 100 years before the family photo above.  I wonder if he passed through Blacksburg?

Hugh Mangum negatives N574, N576, N650.

Fast forward to 2018.  We carry computers in our pockets that have cameras that can capture every aspect of our lives.  We have social media sites where we post, share, tag, comment and record our lives.  I bet that even though we can now take thousands of photographs a year there are still the keepers.  The ones that rise to the top.  The ones that capture a moment in such a way that the younger generations might just say to themselves one day “look at us” and shaking their heads.


William Gedney: Connect to the photographs

A while back, I wrote a blog post about my enjoyment in digitizing the William Gedney Photograph collection and how it was inspiring me to build a darkroom in my garage.  I wish I could say that the darkroom is up and running but so far all I’ve installed is the sink.  However, as Molly announced in her last Bitstreams post, we have launched the Gedney collection which includes series two series that are complete (Finished Prints and Contact Sheets) and more to come.

The newly launched site brings together this amazing body of work in a seamless way. The site allows you to browse the collection, use the search box to find something specific or use the facets to filter by series, location, subject, year and format.  If that isn’t enough, we have not only related prints from the same contact sheet but also related prints of the same image.  For example, you can browse the collection and click on an image of Virgil Thomson, an American composer, smoothly zoom in and out of the image, then scroll to the bottom of the page to find a thumbnail of the contact sheet from which the negative comes.  When you click through the thumbnial you can zoom into the contact sheet and see additional shots that Gedney took.  You even can see which frames he highlighted for closer inspection. If you scroll to the bottom of this contact sheet page you will find that 2 of those highlighted frames have corresponding finished prints.  Wow!  I am telling you, checkout the site, it is super cool!

What you do not see [yet], because I am in the middle of digitizing this series, is all of the proof prints Gedney produced of Virgil Thomson, 36 in all.  Here are a few below.

Once the proof prints are digitized and ingested into the Repository you will be able to experience Gedney’s photographs from many different angles, vantage points and perspectives.

Stay tuned!

Infrastructure and Multispectral Imaging in the Library

As we continue to work on our “standard” full color digitization projects such as Section A and the William Gedney Photograph Collection, both of which are multiyear projects, we are still hard at work with a variety of things related to Multispectral Imaging (MSI).  We have been writing documentation and posting it to our Knowledgebase, building tools to track MSI requests and establishing a dedicated storage space for MSI image stacks.  Below are some high-level details about these things and the kinks we are ironing out of the MSI process.  As with any new venture, it can be messy in the beginning and tedious to put all the details in order but in the end it’s worth it.

MSI Knowledge Base

We established a knowledge base for documents related to MSI that cover a wide variety of subjects:  How-To articles, to do lists, templates, notes taken during imaging sessions, technical support issues and more.  These documents will help us develop sound guidelines and workflows which in turn will make our work in this area more consistent, efficient and productive.

Dedicated storage space

Working with other IT staff, a new server space has been established specifically for MSI.  This is such a relief because, as we began testing the system in the early days, we didn’t have a dedicated space for storing the MSI image stacks and most of our established spaces were permissions restricted, preventing our large MSI group from using it.  On top of this we didn’t have any file management strategies in place for MSI.  This made for some messy file management. From our first demo, initial testing and eventual purchase of the system, we used a variety of storage spaces and a number of folder structures as we learned the system.  We used our shared Library server, the Digital Production Center’s production server, Box and Google Drive.  Files were all over the place!  What a mess!  In our new dedicated space, we have established standard folder structures and file management strategies and store all of our MSI image stacks in one place now.  Whew!

The Request Queue

In the beginning, once the MSI system was up and running, our group had a brainstorming session to identify a variety of material that we could use to test with and hone our skills in using the new system.  Initially this queue was a bulleted list in Basecamp identifying an item.  As we worked through the list it would sometimes be confusing as to what had already been done and what item was next.  This process became more cumbersome because multiple people were working through the list at the same time, both on capture and processing, with no specific reporting mechanism to track who was doing what.  We have recently built an MSI Request Queue that tracks items to be captured in a more straightforward, clear manner.  We have included title, barcode and item information along with the research question to be answered, it priority level, due date, requester information and internal contact information.  The MSI group will use this queue for a few weeks then tweak it as necessary.  No more confusion.

The Processing Queue

As described in a previous post, capturing with MSI produces lots of image stacks that contain lots of files.  On average, capturing one page can produce 6 image stacks totaling 364 images.  There are 6 different stages of conversion/processing that the image stack goes through before it might be considered “done”, and the fact that everyone on the MSI team has other job responsibilities makes it difficult to carve out a large enough block of time to convert and process the image stacks through all of the stages.  This made it difficult to know what items had been completely processed or not.  We have recently built an MSI Processing Queue that tracks what stage of processing each item is in.  We have included root file names, flat field information, PPI and a column for each phase of processing to indicate whether or not an image stack has passed through a phase.  As with the Request Queue, the MSI group will use this queue for a few weeks then tweak it as necessary.  No more confusion.

Duke University East Campus Progress Picture #27

As with most blog posts, the progress described above has been boiled down and simplified as to not bore you to death, but this is a fair amount of work nonetheless.  Having dedicated storage and a standardized folder structure simplifies the management of lots of files and puts them in a predictable structure.  Streamlining the Request Queue establishes a clear path of work and provides enough information about the request in order to move forward with a clear goal in mind.  Developing a Processing Queue that provides a snapshot of the state of processing across multiple requests and provides enough information so that any staff member familiar with our MSI process can complete a request.  Establishing a knowledge base to document our workflows and guidelines ties everything together in an organized and searchable manner making it easier to find information about established procedures and troubleshoot technical problems.

It is important to put this infrastructure in place and build a strong foundation for Multispectral Imaging at the Library so it will scale in the future.  This is only the beginning!

_______________________

Want to learn even more about MSI at DUL?


Multispectral Imaging Through Collaboration

I am sure you have all been following the Library’s exploration into Multispectral Imaging (MSI) here on Bitstreams, Preservation Underground and the News & Observer.  Previous posts have detailed our collaboration with R.B. Toth Associates and the Duke Eye Center, the basic process and equipment, and the wide range of departments that could benefit from MSI.  In early December of last year (that sounds like it was so long ago!), we finished readying the room for MSI capture, installed the equipment, and went to MSI boot camp.

Obligatory before and after shot. In the bottom image, the new MSI system is in the background on the left with the full spectrum system that we have been using for years on the right. Other additions to the room are blackout curtains, neutral gray walls and black ceiling tiles all to control light spill between the two camera systems. Full spectrum overhead lighting and a new tile floor were installed which is standard for an imaging lab in the Library.

Well, boot camp came to us. Meghan Wilson, an independent contractor who has worked with R.B. Toth Associates for many years, started our training with an overview of the equipment and the basic science behind it. She covered the different lighting schemes and when they should be used.  She explained MSI applications for identifying resins, adhesives and pigments and how to use UV lighting and filters to expose obscured text.   We quickly went from talking to doing.  As with any training session worth its salt, things went awry right off the bat (not Meghan’s fault).  We had powered up the equipment but the camera would not communicate with the software and the lights would not fire when the shutter was triggered.  This was actually a good experience because we had to troubleshoot on the spot and figure out what was going on together as a team.  It turns out that there are six different pieces of equipment that have to be powered-up in a specific sequence in order for the system to communicate properly (tee up Apollo 13 soundtrack). Once we got the system up and running we took turns driving the software and hardware to capture a number of items that we had pre-selected.  This is an involved process that produces a bunch of files that eventually produce an image stack that can be manipulated using specialized software.  When it’s all said and done, files have been converted, cleaned, flattened, manipulated and variations produced that are somewhere in the neighborhood of 300 files. Whoa!

This is not your parents’ point and shoot—not the room, the lights, the curtains, the hardware, the software, the pricetag, none of it. But it is different in another more important way too. This process is team-driven and interdisciplinary. Our R&D working group is diverse and includes representatives from the following library departments.

  • The Digital Production Center (DPC) has expertise in high-end, full spectrum imaging for cultural heritage institutions along with a deep knowledge of the camera and lighting systems involved in MSI, file storage, naming and management of large sets of files with complex relationships.
  • The Duke Collaboratory for Classics Computing (DC3) offers a scholarly and research perspective on papyri, manuscripts, etc., as well as  experience with MSI and other imaging modalities
  • The Conservation Lab brings expertise in the Libraries’ collections and a deep understanding of the materiality and history of the objects we are imaging.
  • Duke Libraries’ Data Visualization Services (DVS) has expertise in the processing and display of complex data.
  • The Rubenstein Library’s Collection Development brings a deep understanding of the collections, provenance and history of materials, and valuable contacts with researchers near and far.

To get the most out of MSI we need all of those skills and perspectives. What MSI really offers is the ability to ask—and we hope answer—strings of good questions. Is there ink beneath that paste-down or paint? Is this a palimpsest? What text is obscured by that stain or fire-damage or water damage? Can we recover it without having to intervene physically? What does the ‘invisible’ text say and what if anything does this tell us about the object’s history? Is the reflectance signature of the ink compatible with the proposed date or provenance of the object? That’s just for starters. But you can see how even framing the right question requires a range of perspectives; we have to understand what kinds of properties MSI is likely to illuminate, what kinds of questions the material objects themselves suggest or demand, what the historical and scholarly stakes are, what the wider implications for our and others’ collections are, and how best to facilitate human interface with the data that we collect. No single person on the team commands all of this.

Working in any large group can be a challenge. But when it all comes together, it is worth it. Below is a page from Jantz 723, one processed as a black and white image and the other a Principal Component Analysis produced by the MSI capture and processed using ImageJ and a set of tools created by Bill Christens-Barry of R.B. Toth Associates with false color applied using Photoshop. Using MSI we were able to better reveal this watermark which had previously been obscured.

Jantz 723

I think we feel like 16-year-old kids with newly minted drivers’ licenses who have never driven a car on the highway or out of town. A whole new world has just opened up to us, and we are really excited and a little apprehensive!

What now?

Practice, experiment, document, refine. Over the next 12 (16? 18) months we will work together to hone our collective skills, driving the system, deepening our understanding of the scholarly, conservation, and curatorial use-cases for the technology, optimizing workflow, documenting best practices, getting a firm grip on scale, pace, and cost of what we can do. The team will assemble monthly, practice what we have learned, and lean on each other’s expertise to develop a solid workflow that includes the right expertise at the right time.  We will select a wide variety of materials so that we can develop a feel for how far we can push the system and what we can expect day to day. During all of this practice, workflows, guidelines, policies and expectations will come into sharper focus.

As you can tell from the above, we are going to learn a lot over the coming months.  We plan to share what we learn via regular posts here and elsewhere.  Although we are not prepared yet to offer MSI as a standard library service, we are interested to hear your suggestions for Duke Library collection items that may benefit from MSI imaging.  We have a long queue of items that we would like to shoot, and are excited to add more research questions, use cases, and new opportunities to push our skills forward.   To suggest materials, contact Molly Bragg, Digital Collections Program Manager (molly.bragg at Duke.edu), Joshua Sosin, Associate Professor in Classical Studies & History (jds15 at Duke.edu) or Curator of Collections (andrew.armacost at Duke.edu).

Want to learn even more about MSI at DUL?

Ducks, Stars, t’s and i’s: The path to MSI

Back in March I wrote a blog post about the Library exploring Multispectral Imaging (MSI) to see if it was feasible to bring this capability to the Library.  It seems that all the stars have aligned, all the ducks have been put in order, the t’s crossed and the i’s dotted because over the past few days/weeks we have been receiving shipments of MSI equipment, scheduling the painting of walls and installation of tile floors and finalizing equipment installation and training dates (thanks Molly!).  A lot of time and energy went into bringing MSI to the Library and I’m sure I speak for everyone involved along the way that WE ARE REALLY EXCITED!

I won’t get too technical but I feel like geeking out on this a little… like I said… I’m excited!

Lights, Cameras and Digital Backs: To maximize the usefulness of this equipment and the space it will consume we will capture both MSI and full color images with (mostly) the same equipment.  MSI and full color capture require different light sources, digital backs and software.   In order to capture full color images, we will be using the Atom Lighting and copy stand system and a Phase One IQ180 80MP digital back from Digital Transitions.  To capture  MSI we will be using narrowband multispectral EurekaLight panels with a Phase One IQ260 Achromatic, 60MP digital back.  These two setups will use the same camera body, lens and copy stand.  The hope is to set the equipment up in a way that we can “easily” switch between the two setups.

partners1

The computer that drives the system: Bill Christianson of R. B. Toth Associates has been working with Library IT to build a work station that will drive both the MSI and full color systems. We opted for a dual boot system because the Capture One software that drives the Phase One digital back for capturing full-color images has been more stable in a Mac environment and MSI capture requires software that only runs on a Windows system. Complicated, but I’m sure they will work out all the technical details. atom-transparent-hero-take2

The Equipment (Geek out):

  • Phase One IQ260 Achromatic, 60MP Digital Back
  • Phase One IQ180, 80MP Digital Back
  • Phase One iXR Camera Body
  • Phase One 120mm LS Lens
  • DT Atom Digitization Bench -Motorized Column (received)
  • DT Photon LED 20″ Light Banks (received)
  • Narrowband multispectral EurekaLight panels
  • Fluorescence filters and control
  • Workstation (in progress)
  • Software
  • Blackout curtains and track (received)

The space: We are moving our current Phase One system and the MSI system into the same room. While full-color capture is pretty straightforward in terms of environment (overhead lights off, continuous light source for exposing material, neutral wall color and no windows), the MSI environment requires total darkness during capture. In order to have both systems in the same room we will be using blackout curtains between the two systems so the MSI system will be able to capture in total darkness and the full-color system will be able to use a continuous light source. While the blackout curtains are a significant upgrade, the overall space needs some minor remodeling. We will be upgrading to full spectrum overhead lighting, gray walls and a tile floor to match the existing lab environment.

img_0548

As shown above… we have begun to receive MSI equipment, installation and training dates have been finalized, the work station is being built and configured as I write this and the room that will house both Phase One systems has been cleared out and is ready for a makeover…  It is actually happening!

What a team effort!

I look forward to future blog posts about the discoveries we will make using our new MSI system!

______


The FADGI Still Image standard: It isn’t just about file specs

In previous posts I have referred to the FADGI standard for still image capture when describing still image creation in the Digital Production Center in support of our Digital Collections Program.  We follow this standard in order to create archival files for preservation, long-term retention and access to our materials online.  These guidelines help us create digital content in a consistent, scalable and efficient way.  The most common cited part of the standard is the PPI guidelines for capturing various types of material.  It is a collection of charts that contain various material types, physical dimensions and recommended capture specifications.  The charts are very useful and relatively easy to read and understand.  But this standard includes 93 “exciting” pages of all things still image capture including file specifications, color encoding, data storage, physical environment, backup strategies, metadata and workflows.  Below I will boil down the first 50 or so pages.

The FADGI standard was built using the NARA Technical Guideline for Digitizing Archival Materials for Electronic Access: Creation of Production Master Files – Raster Images which was established in 2004.  The FADGI standard for still image capture is meant to be a set of best practices for cultural heritage institutions and has been recently updated to include new advances in the field of still image capture and contains more approachable language than its predecessor. FADGI1

Full disclosure. Perkins Library and our digitization program didn’t start with any part of these guidelines in place.  In fact, these guidelines didn’t exist at the time of our first attempt at in-house digitization in 1993.  We didn’t even have an official digitization lab until early 2005.  We started with one Epson flatbed scanner and one high end CRT monitor.  As our Digital Collections Program has matured, we have been able to add equipment and implement more of the standard starting with scanner and monitor calibration and benchmark testing of capture equipment before purchase.  We then established more consistent workflows and technical metadata capture, developed a more robust file naming scheme, file movement and data storage strategies.  We now work hard to synchronize our efforts between all of the departments involved in our Digital Collections Program.  We are always refining our workflows and processes to become more efficient at publishing and preserving Digital Collections.epson

Dive Deep.  For those of you who would like to take a deep dive into image capture for cultural heritage institutions, here is the full standard.  For those of you who don’t fall into this category, I’ve boiled down the standard below.  I believe that it’s necessary to use the whole standard in order for a program to become stable and mature.  As we did, this can be implemented over time. dive

Boil It Down. The FADGI standard provides a tiered approach for still image capture, from 1 to 4 stars, with four stars being the highest.  The 1 and 2 star tiers are used when imaging for access and tiers 3 and 4 are used for archival imaging and preservation at the focus.

The physical environment: The environment should be color neutral.   Walls should be painted a neutral gray to minimize color shifts and flare that might come from a wall color that is not neutral.  Monitors should be positioned to avoid glare on the screens (This is why most professional monitors have hoods).  Overhead lighting should be around 5000K (Tungsten, florescent and other bulbs can have yellow, magenta and green color shifts which can affect the perception of the color of an image).  Each capture device should be separated so that light spillover doesn’t affect another capture device.

Monitors and Light boxes and viewing of originals: Overhead light or a viewing booth should be set up for viewing of originals and should be a neutral 5000K.  A light box used for viewing transmissive material should also be 5000K.

Digital images should be viewed in the colorspace they were captured in and the monitor should be able to display that colorspace.  Most monitors display in the sRGB colorspace. However, professional monitors use the AdobeRGB colorspace which is commonly used in cultural heritage image capture.  The color temperature of your monitor should be set to the Kelvin temperature that most closely matches the viewing environment.  If the overhead lights are 5000K, then the monitor’s color temperature should also be set to 5000K.

Calibrating packages that consist of hardware and software that read and evaluate color is an essential piece of equipment.  These packages normalize the luminosity, color temperature and color balance of a monitor and create an ICC display profile that is used by the computer’s operating system to display colors correctly so that accurate color assessment can be made. gedT013

Capture Devices: The market is flooded with capture devices of varying quality.  It is important to do research on any new capture device.  I recommend skipping the marketing schemes that tout all the bells and whistles and just stick to talking to institutions that have established digital collections programs.  This will help to focus research on the few contenders that will produce the files that you need.  They will help you slog through how many megapixels are necessary, what lens are best for which application, what scanner driver is easiest to use while balanced with getting the best color out of your scanner.  Beyond the capture device, other things that come into play are effective scanner drivers that produce the most accurate and consistent results, upgrade paths for your equipment and service packages that help maintain your equipment.

Capture Specifications: I’ll keep this part short because there are a wide variety of charts covering many formats, capture specifications and their corresponding tiers.  Below I have simplified the information from the charts.  These specification hover between tier 3 and 4 mostly leaning toward 4.

Always use a FADGI compliant reference target at the beginning of a session to ensure the capture device is within acceptable deviation.  The target values differ depending on which reference targets are used.  Most targets come with a chart representing numerical value of each swatch in the target.  Our lab uses a classic Gretagmacbeth target and our acceptable color deviation is +/- 5 units of color.

Our general technical specs for reflective material including books, documents, photographs and maps are:

  • Master File Format: TIFF
  • Resolution: 300 ppi
  • Bit Depth: 8
  • Color Depth: 24 bit RGB
  • Color Space: Adobe 1998

These specifications generally follow the standard.  If the materials being scanned are smaller than 5×7 inches we increase the PPI to 400 or 600 depending on the font size and dimensions of the object.

Our general technical specs for transmissive material including acetate, nitrate and glass plate negatives, slides and other positive transmissive material are:

  • Master File Format: TIFF
  • Resolution: 3000 – 4000 ppi
  • Bit Depth: 16
  • Color Depth: 24 bit RGB
  • Color Space: Adobe 1998

These specifications generally follow the standard.  If the transmissive materials being scanned are larger than 4×5 we decrease the PPI to 1500 or 2000 depending on negative size and condition.

Recommended capture devices: The standard goes into detail on what capture devices to use and not to use when digitizing different types of material.  It describes when to use manually operated planetary scanners as opposed to a digital scan back, when to use a digital scan back instead of a flatbed scanner,   when and when not to use a sheet fed scanner.  Not every device can capture every type of material.  In our lab we have 6 different devices to capture a wide variety of material in different states of fragility.  We work with our Conservation Department when making decisions on what capture device to use.

General Guidelines for still image capture

  • Do not apply pressure with a glass platen or otherwise unless approved by a paper conservator.
  • Do not use vacuum boards or high UV light sources unless approved by a paper conservator.
  • Do not use auto page turning devices unless approved by a paper conservator.
  • For master files, pages, documents and photographs should be imaged to include the entire area of the page, document or photograph.
  • For bound items the digital image should capture as far into the gutter as practical but must include all of the content that is visible to the eye.
  • If a backing sheet is used on a translucent piece of paper to increase contrast and readability, it must extend beyond the edge of the page to the end of the image on all open sides of the page.
  • For master files, documents should be imaged to include the entire area and a small amount beyond to define the area.
  • Do not use lighting systems that raise the surface temperature of the original more than 6 degrees F(3 degrees C)in the total imaging process.
  • When capturing oversized material, if the sections of a multiple scan item are compiled into a single image, the separate images should be retained for archival and printing purposes.
  • The use of glass or other materials to hold photographic images flat during capture is allowed, but only when the original will not be harmed by doing so. Care must be taken to assure that flattening a photograph will not result in emulsion cracking, or the base material being damaged.  Tightly curled materials must not be forced to lay flat.
  • For original color transparencies, the tonal scale and color balance of the digital image should match the original transparency being scanned to provide accurate representation of the image.
  • When scanning  negatives,  for  master  files  the  tonal  orientation  may be  inverted  to produce a positive    The  resulting image  will  need  to  be  adjusted  to  produce  a  visually-pleasing representation. Digitizing negatives is very analogous to printing negatives in a darkroom and it is very dependent on the  photographer’s/ technician’s  skill  and  visual  literacy  to  produce  a  good  image. There are few objective metrics for evaluating the overall representation of digital images produced from negatives.
  • The lack of dynamic range in a film scanning system will result in poor highlight and shadow detail and poor color reproduction.
  • No image retouching is permitted to master files.

These details were pulled directly from the standard.  They cover a lot of ground but there are always decisions to be made that are uniquely related to the material to be digitized.  There are 50 or so more pages of this standard related to workflow, color management, data storage, file naming and technical metadata.  I’ll have to cover that in my next blog post.

The FADGI standard for still image capture is very thorough but also leaves room to adapt.  While we don’t follow everything outlined in the standard we do follow the majority.  This standard, years of experience and a lot of trial and error have helped make our program more sound, consistent and scalable.

Multispectral Imaging in the Library

MSI setup
Bill Christens-Barry and Mike Adamo test the MSI system


Over the past 6 months or so the Digital Production Center has been collaborating with Duke Collaboratory for Classics Computing (DC3) and the Conservation Services Department to investigate multispectral imaging capabilities for the Library. Multispectral imaging (MSI) is a mode of image capture that uses a series of narrow band lights of specific frequencies along with a series of filters to illuminate an object.  Highly tailored hardware and software are used in a controlled environment to capture artifacts with the goal of revealing information not seen by the human eye. This type of capture system in the Library would benefit many departments and researchers alike. Our primary focus for this collaboration are the needs of the Papyri community, Conservation Services along with additional capacity for the Digital Production Center.

Josh Sosin of DC3 was already in contact with Mike Toth of R. B. Toth Associates, a company that is at the leading edge of MSI for Cultural Heritage and research communities, on a joint effort between DC3, Conservation Services and the Duke Eye Center to use Optical Coherence Tomography (OCT) to hopefully reveal hidden layers of mummy masks made of papyri. The DPC has a long standing relationship with Digital Transitions, a reseller of the Phase One digital back, which happens to be the same digital back used in the Toth MSI system. And the Conservation lab was already involved in the OCT collaboration so it was only natural to invite R. B. Toth Associates to the Library to show us their MSI system.

After observing the OCT work done at the Eye Center we made our way to the Library to setup the MSI system. Bill Christens-Barry of R. B. Toth Associates walked me through some very high-level physics related to MSI, we setup the system and got ready to capture selected material which included Ashkar-Gilson manuscripts, various papyri and other material that might benefit from MSI. By the time we started capturing images we had a full house. Crammed into the room were members of DC3, DPC, Conservation, Digital Transitions and Toth Associates all of whom had a stake in this collaboration. After long hours of sitting in the dark (necessary for MSI image capture) we emerged from the room blurry eyed and full of hope that something previously unseen would be revealed.

Ashkar-Gilson
The text of this manuscript was revealed primarily with the IR narrowband light at 940 nm, which Bill enhanced.

The resulting captures are as ‘stack’ or ‘block’ of monochromatic images captured using different wavelengths of light and ultraviolet and infrared filters. Using software developed by Bill Christens-Barry to process and manipulate the images will reveal information if it is there by combining, removing or enhancing images in the stack. One of the first items we processed was Ashkar-GilsonMS14 Deuteronomy 4.2-4.23 seen below. This really blew us away.

This item went from nearly unreadable to almost entirely readable! Bill assured me that he had only done minimal processing and that he should be able to uncover more of the text in the darker areas with some fine tuning. The text of this manuscript was revealed primarily through the use of the IR filter and was not necessarily the direct product of exposing the manuscript to individual bands of light but the result is no less spectacular. Because the capture process is so time consuming and time was limited no other Ashkar-Gilson manuscript was digitized at this time.

We digitized the image on the left in 2010 and ever since then, when asked, ‘What is the most exciting thing you have digitized’ I often answer, “The Ashkar-Gilson manuscripts. Manuscripts from ca. 7th to 8th Century C.E. Some of them still have fur on the back and a number of them are unreadable… but you can feel the history.” Now my admiration for these manuscripts is renewed and maybe Josh can tell me what it says.

It is our hope that we can bring this technology to Duke University so we can explore our material in greater depth and reveal information that has not been seen for a very, very long time.

Beth Doyle, Head of Conservation Services, wrote a blog post for Preservation Underground about her experience with MSI. Check it out!

group
Mike Toth, Mike Adamo, Bill Christens-Barry, Beth Doyle, Josh Sosin and Michael Chan

Also, check out this article from the New & Observer.

________

Want to learn even more about MSI at DUL?