
About four and a half years ago I wrote a blog post here on Bitstreams titled: “Digitization Details: Before We Push the “Scan” Button” in which I wrote about how we use color calibration, device profiling and modified viewing environments to produce “consistent results of a measurable quality” in our digital images. About two and a half years ago, I wrote a blog post adjacent to that subject titled “The FADGI Still Image standard: It isn’t just about file specs” about the details of the FADGI standard and how its guidelines go beyond ppi and bit depth to include information about UV light, vacuum tables, translucent material, oversized material and more. I’m surprised that I have never shared the actual process of digitizing a collection because that is what we do in the Digital Production Center.
Building digital collections is a complex endeavor that requires a cross-departmental team that analyzes project proposals, performs feasibility assessments, gathers project requirements, develops project plans, and documents workflows and guidelines in order to produce a consistent and scalable outcome in an efficient manner. We call our cross-departmental team the Digital Collections Implementation Team (DCIT) which includes representatives from the Conservation staff, Technical Services, Digital Production, Metadata Architects and Digital Collections UI developers, among others. By having representatives from each department participate, we are able to consider all perspectives including the sticking points, technical limitations and time constraints of each department. Over time, our understanding of each other’s workflows and sticking points has enabled us to refine our approach to efficiently hand off a project between departments.


I will not be going into the details of all the work other departments contribute to building digital collections (you can read just about any post on the blog for that). I will just dip my toe into what goes on in the Digital Production Center to digitize a collection.
Digitization
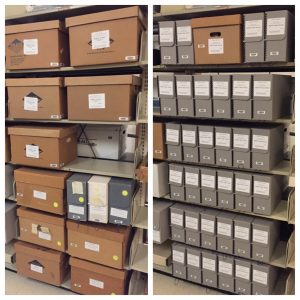
Once the specifics of a project are nailed down, the scope of the project has been finalized, the material has been organized by Technical Services, Conservation has prepared the material for digitization, the material has been transferred to the Digital Production Center and an Assessment Checklist is filled out describing the type, condition, size and number of items in a collection, we are ready to begin the digitization process.
Digitization Guide
A starter digitization guide is created using output from ArchivesSpace and the DPC adds 16-20 fields to capture technical metadata during the digitization process. The digitization guide is an itemized list representing each item in a collection and is centrally stored for ease of access. 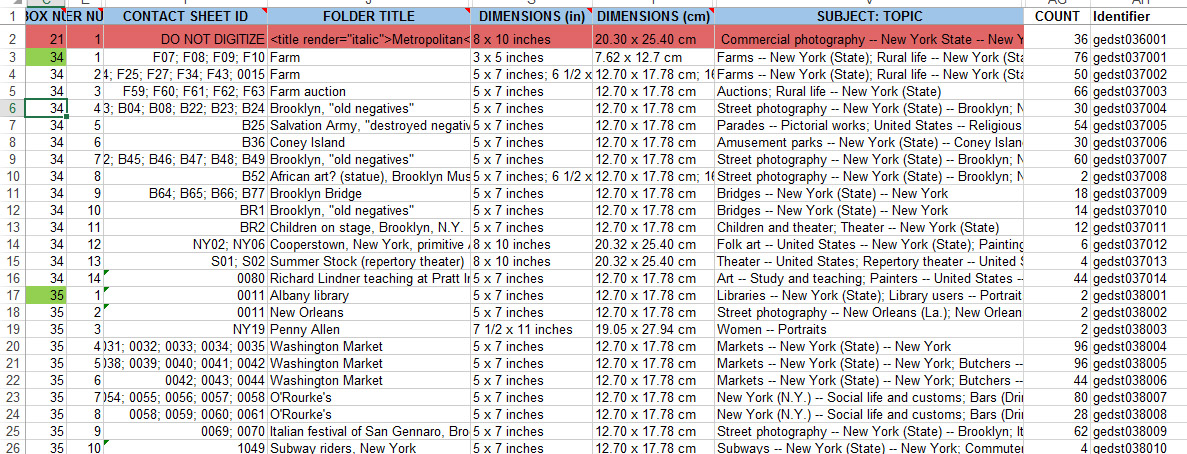
Setup
Cameras and monitors are calibrated with a spectrometer. A color profile is built for each capture device along with job settings in the capture software. This will produce consistent results from each capture device and produce an accurate representation of any items captured which in turn removes subjective evaluation from the scanning process.
Training
Instructions are developed describing the scanning, quality control, and handling procedures for the project and students are trained.
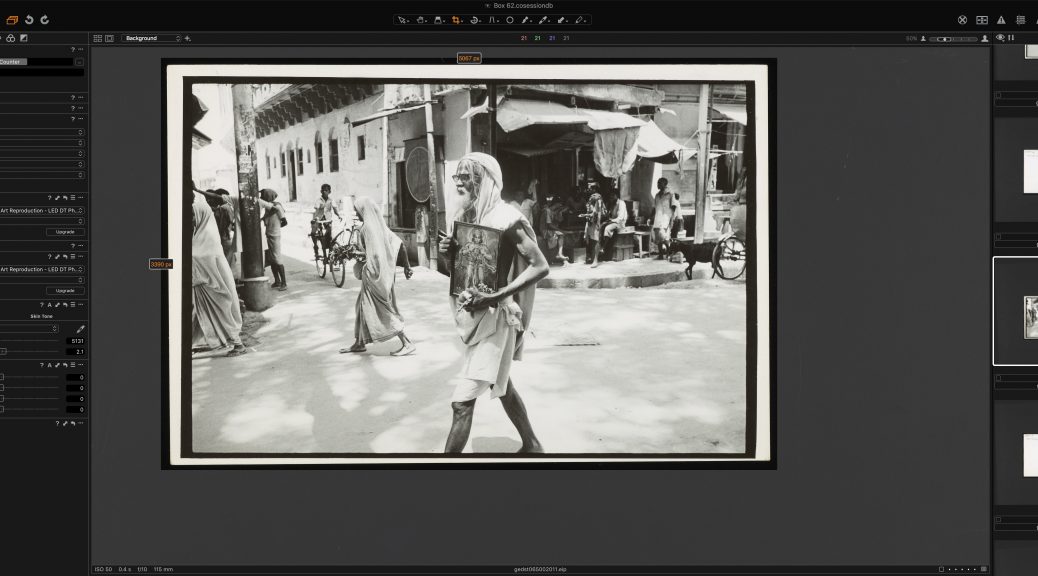
Scanning
Following instructions developed for each collection, the scanner operator will use the appropriate equipment, settings and digitization guide to digitize the collection. Benchmark tests are performed and evaluated periodically during the project. During the capture process the images are monitored for color fidelity and file naming errors. The images are saved in a structured way on the local drive and the digitization guide is updated to reflect the completion of an item. At the end of each shift the files are moved to a production server.
Quality Control 1
The Quality Control process is different depending on the device with which an item was captured and the nature of the material. All images are inspected for: correct file name, skew, clipping, banding, blocking, color fidelity, uniform crop, and color profile. The digitization guide is updated to reflect the completion of an item.
Quality Control 2
Images are cropped (leaving no background) and saved as JPEGs for online display. During the second pass of quality control each image is inspected for: image consistency from operator to operator and image to image, skew and other anomalies.
Finalize
During this phase we compare the digitization guide against the item and file counts of the archival and derivative images on our production server. Discrepancies such as missing files, misnamed files and missing line items in the digitization guide and are resolved.
Create Checksums and dark storage
We then create a SHA1 checksum for each image file in the collection and push the collection into a staging area for ingest into the repository.
Sometimes this process is referred to simply as “scanning”.
Not only is this process in active motion for multiple projects at the same time, the Digital Production Center also participates in remediation of legacy projects for ingest into the Duke Digital Repository, multispectral imaging, audio digitization and video digitization for, preservation, patron and staff requests… it is quite a juggling act with lots of little details but we love our work!
Time to get back to it so I can get to a comfortable stopping point before the Thanksgiving break!